


pytest是python的当下最流行的单元测试框架,与python自带的unittest测试框架
类似,但是比unittest框架使用起来更加简洁,效率更高。根据pytest的官网介绍
他具有如下特点
a、非常容易上手,入门简单,文档丰富,文档中有很多实例可以参考
b、能够支持简单的单元测试和复杂的功能测试
c、支持参数化parameterize比unittest的ddt更简单
d、执行测试过程中可以将木屑测试案例skip跳过,或者对某些预期失败的case
标记为failed
e、强大的fixture自定义功能,这个是框架核心的亮点功能
f、pytest-rerunfailures,失败案例重复执行
g、pytest-html完美的html测试报告生成,失败截图展示
h、allure2漂亮的html报告展示
i、方便的和jenkins持续集成工具集成
j、可以运行有nose unittest、doctest框架编写的case
k、可以用做web和app的自动化
快速开始
一、写一个简单的函数的例子
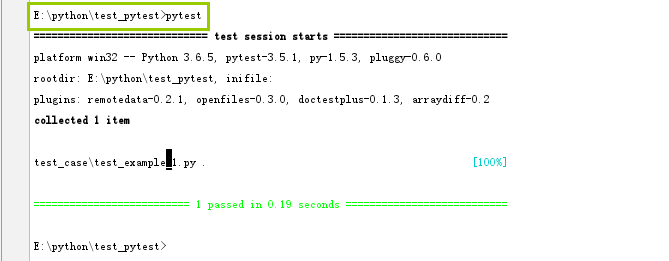
1、写一个成功的case
#Auther Bob
#--*--conding:utf-8 --*--
def fun(x):
    return x + 1


def test_case_0001():
    assert fun(2) == 3
执行。这里直接使用pytest执行
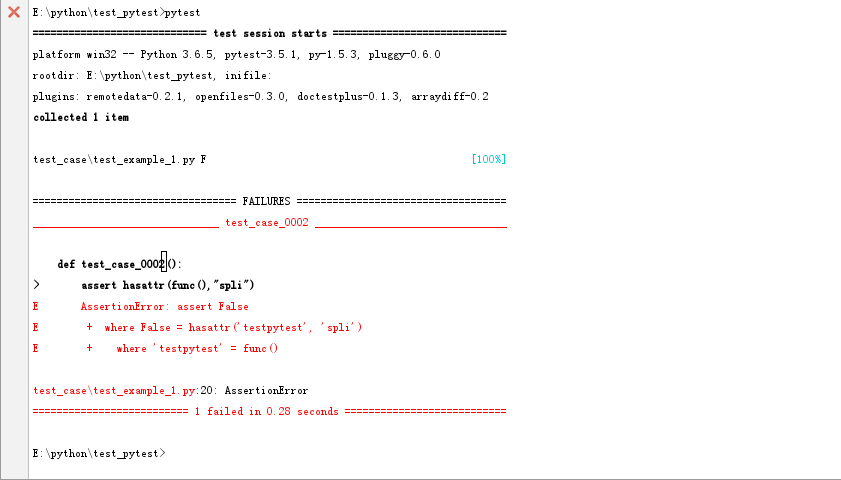
2、写一个failed的case
def func():
    return "testpytest"

def test_case_0002():
    assert hasattr(func(),"spli")
执行,这里使用pytest命令直接执行
3、我们看到上面我们只是定义了函数,但是并没有执行,这里大家就会有疑问,我的pytest框架是如何执行案例的,那么请看下面
查找当前目录或者子目录下,所有的test_*.py文件和*_test.py文件,在文件中到以test开头的函数,然后执行该函数
二、写一个简单的类的例子
前面的例子是一个以test开头的函数的例子,但是如果用例很多的时候,写函数就不那么合适了,这时就可以把多个测试用例放到一个测试类中
这里要非常注意,这个类不能定义构造方法__init__
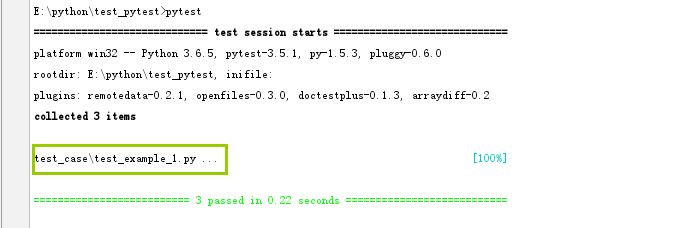
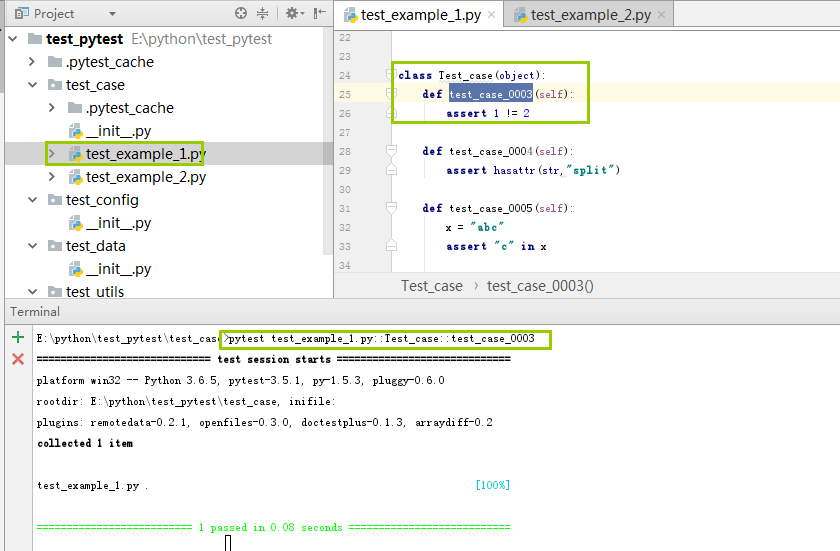
1、看下下面的例子
class Test_case(object):
    def test_case_0003(self):
        assert 1 != 2

    def test_case_0004(self):
        assert hasattr(str,"split")

    def test_case_0005(self):
        x = "abc"
        assert "c" in x
使用pytest执行,这里要注意,这里有3个点,说明执行通过3个案例
三、执行单个文件
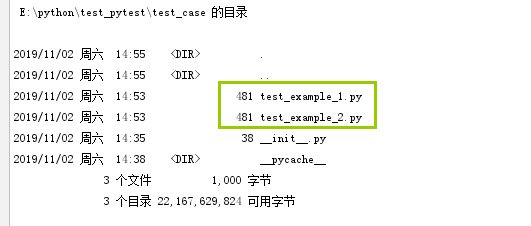
我们上面已经讲过,如果执行的目录下有多个满足条件的py文件,那么pytest就会都去执行,那么如果我们想只执行某个文件该怎么办
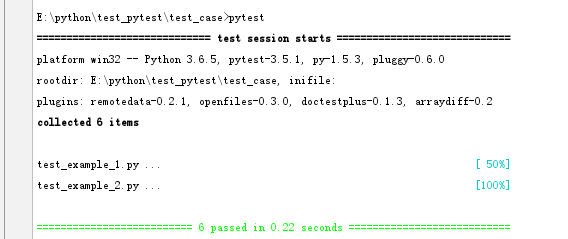
1、当前目录下有2个满足条件的py文件
2、直接使用pytest的默认参数执行
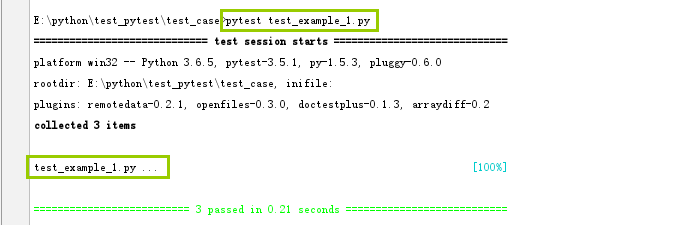
3、指定执行某个文件下的案例
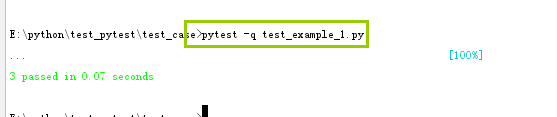
4、可以使用-q参数,只显示简单结果
四、整体梳理pytest的执行规则
1、测试文件要以test_开头或者_test结尾
2、测试类要以Test开头,且不能有构造方法__init__
3、测试函数以test_开头
4、断言使用assert
五、执行用例的方法
1、pytest
2、py.test
3、python -m pytest
六、执行规则
1、执行某个目录下所有文件
pytest dirname/
2、执行某个文件的案例
pytest xxx.py
3、执行当前目录及其子目录的所有文件
pytest
4、执行某个模块的某个函数
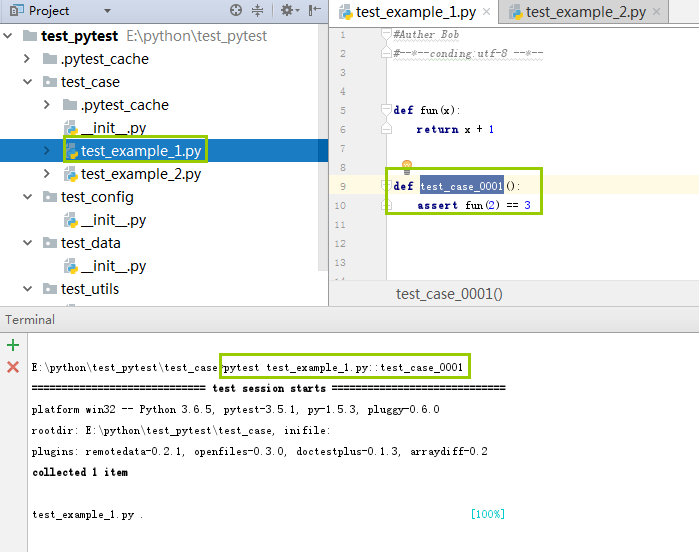
5、执行某个文件的测试类中的某个测试方法
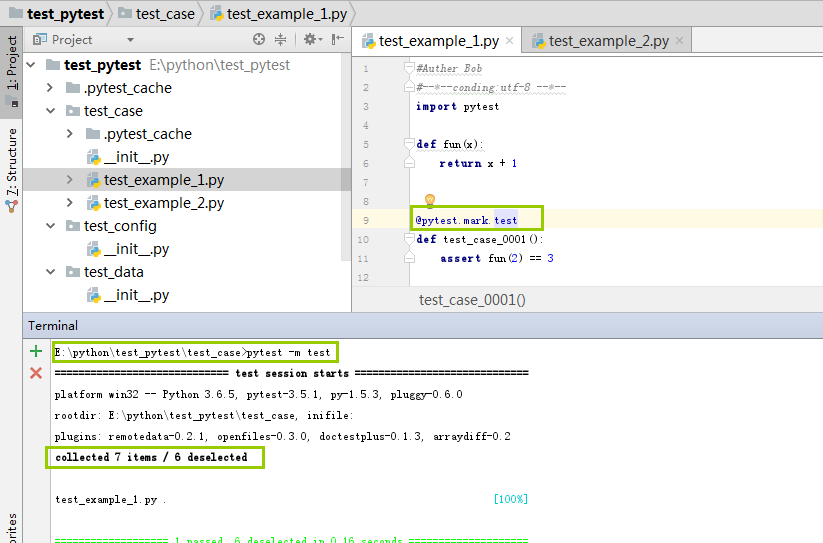
6、标记表达式,只执行被某个装饰器装饰的函数
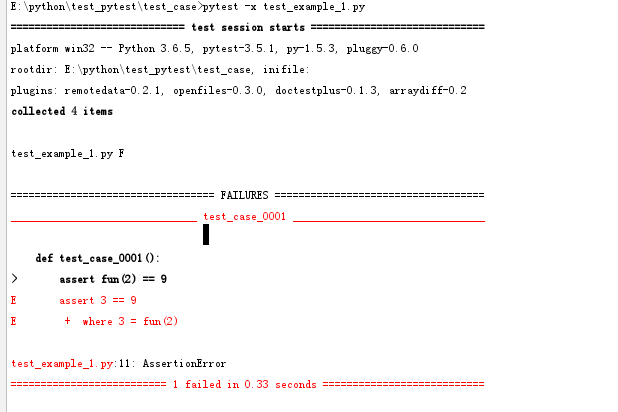
7、遇到错误停止执行pytest -x
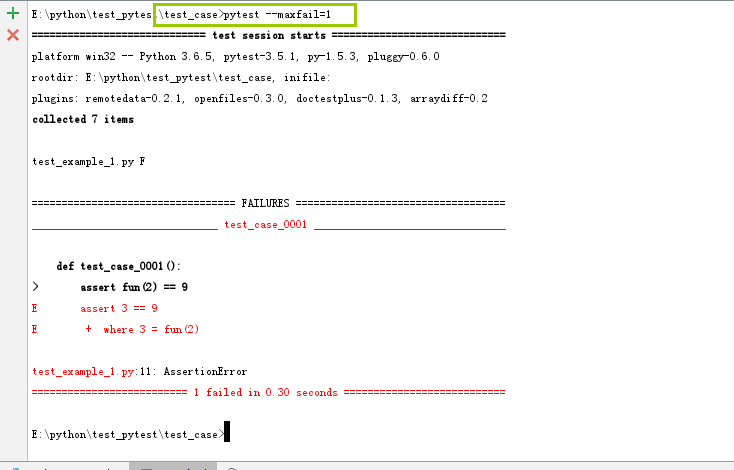
8、当失败几个案例就不在继续执行,pytest --maxfail=1
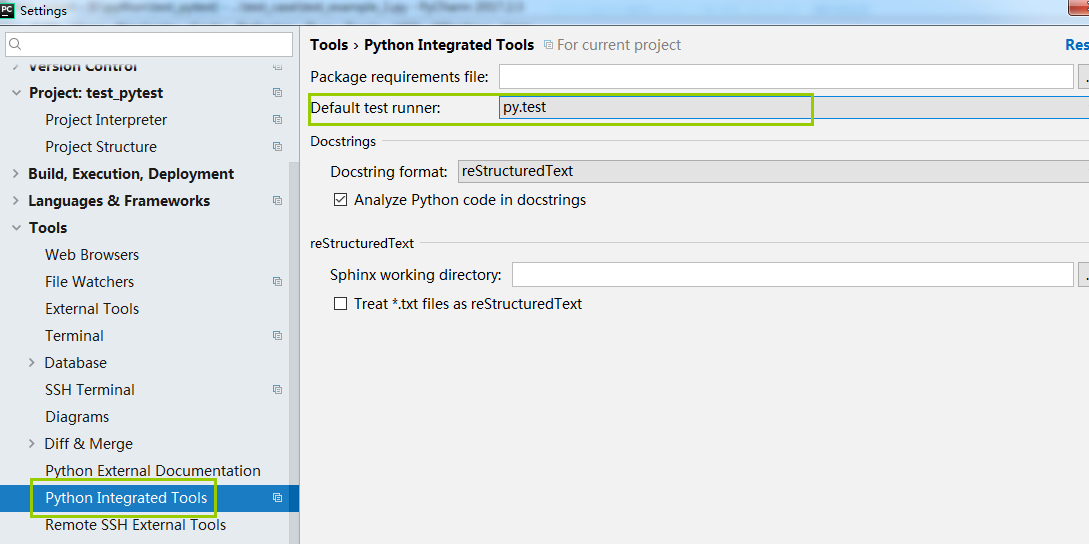
9、设置pycharm使用pytest执行用例
七、测试用例的setup和teardown
学过uniitest的人都知道里面有setup和teardown可以作为一个用例的前置条件和后置条件,同样也有setupClass和teardownClass,同样在pytest框架中也有类似的语法,而且更加丰富
1、模块级别,作用与模块的始末,setup_module/teardown_module
2、函数级别,作用于函数的始末,setup_function/teardown_function
3、类级别,作用于类的始末,setup_class/teardown_class
4、方法级别,作用于方法的始末,setup_method/teardown_method
5、类里面的,setup/teardown,运行在调用方法前后
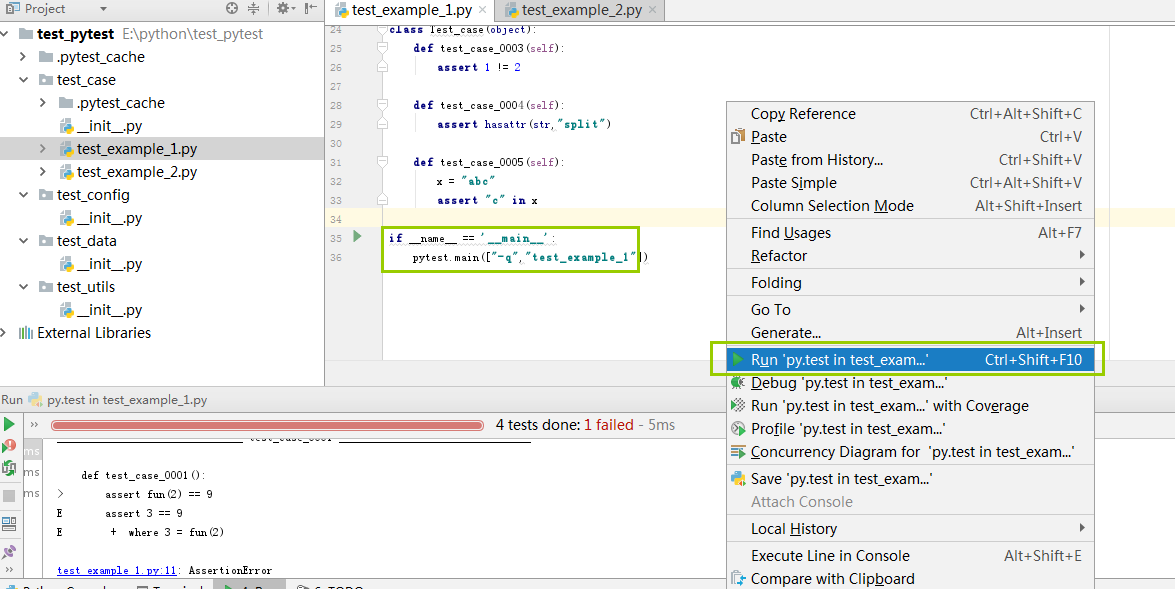
1、先看函数级别,我这个例子中有4个testcase需要执行,但是有3个testcase在类中定义的,有一个testcase是定义在函数中
import pytest

def fun(x):
    return x + 1


def setup_function():
    print("函数级别的前置条件")

def teardown_function():
    print("函数级别的后置条件")

def test_case_0001():
    assert fun(2) == 3


"""
def func():
    return "testpytest"

def test_case_0002():
    assert hasattr(func(),"spli")
"""


class Test_case(object):
    def test_case_0003(self):
        assert 1 != 2

    def test_case_0004(self):
        assert hasattr(str,"split")

    def test_case_0005(self):
        x = "abc"
        assert "c" in x

if __name__ == '__main__':
    pytest.main(["-vv","test_example_1"])
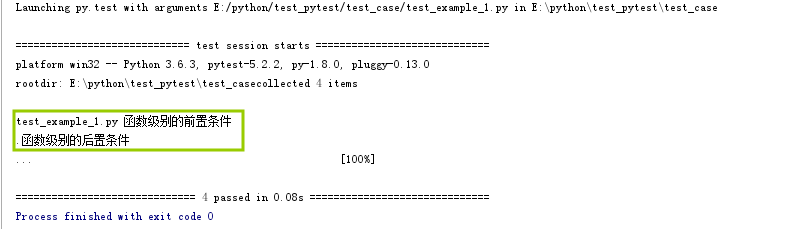
看下执行结果,通过结果我们可以看到setup_function和teardown_function只执行了一次
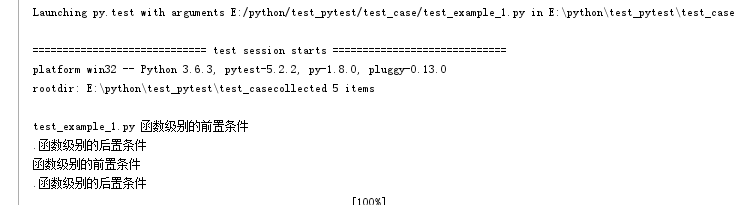
我们在上面的例子中在加一个testcase。该testcase是使用函数定义的
import pytest

def fun(x):
    return x + 1


def setup_function():
    print("函数级别的前置条件")

def teardown_function():
    print("函数级别的后置条件")

def test_case_0001():
    assert fun(2) == 3

def test_case_0002():
    assert fun(2) == 3

"""
def func():
    return "testpytest"

def test_case_0002():
    assert hasattr(func(),"spli")
"""


class Test_case(object):
    def test_case_0003(self):
        assert 1 != 2

    def test_case_0004(self):
        assert hasattr(str,"split")

    def test_case_0005(self):
        x = "abc"
        assert "c" in x

if __name__ == '__main__':
    pytest.main(["-vv","test_example_1"])
看下结果,通过结果可以看到,setup_function和teardown_function执行了2次
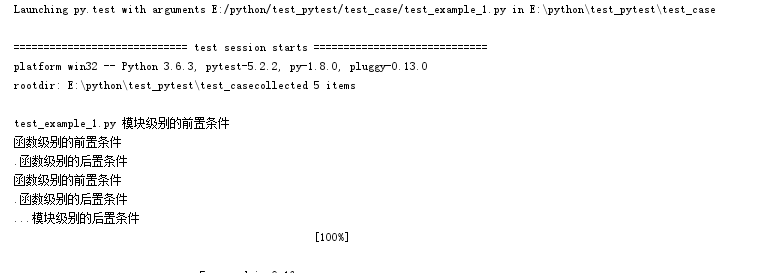
2、再看模块级别的setup_module和teardown_module,执行py文件的前置条件和后置条件
import pytest

def fun(x):
    return x + 1


def setup_function():
    print("函数级别的前置条件")

def teardown_function():
    print("函数级别的后置条件")

def setup_module():
    print("模块级别的前置条件")


def teardown_module():
    print("模块级别的后置条件")


def test_case_0001():
    assert fun(2) == 3

def test_case_0002():
    assert fun(2) == 3

"""
def func():
    return "testpytest"

def test_case_0002():
    assert hasattr(func(),"spli")
"""


class Test_case(object):
    def test_case_0003(self):
        assert 1 != 2

    def test_case_0004(self):
        assert hasattr(str,"split")

    def test_case_0005(self):
        x = "abc"
        assert "c" in x

if __name__ == '__main__':
    pytest.main(["-vv","test_example_1"])
执行结果
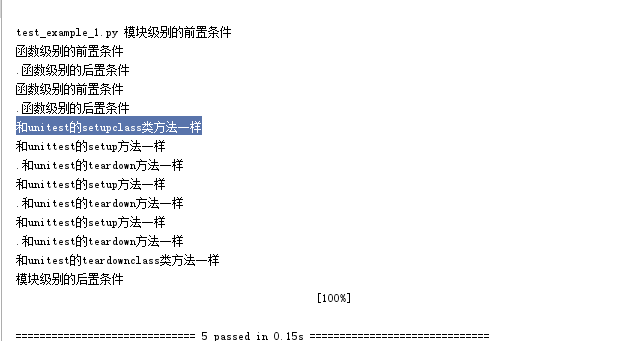
3、类和方法,这个和unitest单元测试框架中的teardown、setup、setupclass、teardownclass的作用是一样的
import pytest

def fun(x):
    return x + 1


def setup_function():
    print("函数级别的前置条件")

def teardown_function():
    print("函数级别的后置条件")

def setup_module():
    print("模块级别的前置条件")


def teardown_module():
    print("模块级别的后置条件")


def test_case_0001():
    assert fun(2) == 3

def test_case_0002():
    assert fun(2) == 3

"""
def func():
    return "testpytest"

def test_case_0002():
    assert hasattr(func(),"spli")
"""


class Test_case(object):
    def setup(self):
        print("和unittest的setup方法一样")

    def teardown(self):
        print("和unitest的teardown方法一样")

    def setup_class(self):
        print("和unitest的setupclass类方法一样")

    def teardown_class(self):
        print("和unitest的teardownclass类方法一样")

    def test_case_0003(self):
        assert 1 != 2

    def test_case_0004(self):
        assert hasattr(str,"split")

    def test_case_0005(self):
        x = "abc"
        assert "c" in x

if __name__ == '__main__':
    pytest.main(["-vv","test_example_1"])
结果如下,先执行模块级别的前置条件,在执行类级别的前置条件,在执行方法级别的前置条件
4、方法级别 setup_method,teardown_method
import pytest

def fun(x):
    return x + 1


def setup_function():
    print("函数级别的前置条件")

def teardown_function():
    print("函数级别的后置条件")

def setup_module():
    print("模块级别的前置条件")


def teardown_module():
    print("模块级别的后置条件")


def test_case_0001():
    assert fun(2) == 3

def test_case_0002():
    assert fun(2) == 3

"""
def func():
    return "testpytest"

def test_case_0002():
    assert hasattr(func(),"spli")
"""


class Test_case(object):
    def setup(self):
        print("和unittest的setup方法一样")

    def teardown(self):
        print("和unitest的teardown方法一样")

    def setup_class(self):
        print("和unitest的setupclass类方法一样")

    def teardown_class(self):
        print("和unitest的teardownclass类方法一样")

    def setup_method(self):
        print("每个用例执行前执行")

    def teardown_method(self):
        print("每个用例执行后执行")

    def test_case_0003(self):
        assert 1 != 2

    def test_case_0004(self):
        assert hasattr(str,"split")

    def test_case_0005(self):
        x = "abc"
        assert "c" in x

if __name__ == '__main__':
    pytest.main(["-vv","test_example_1"])
执行结果如下,关注执行顺序

通过上面可以知道,最先执行setup_modeul,在执行setup_class ,然后执行setup_method,最后执行setup
八、fixture之conftest.py
前面的例子,实现的效果是所有用例的前置条件都是一样,那么如果我们的案例前置条件是不一样的,那用前面的方法就无法使用了,我们该怎么办,下面就进入自定义前置条件的学习
fixture的相比setup和teardown的优势
1、命名方式灵活,不需要拘泥于teardown和setup等命名方式
2、conftest.py可以实现配置共享,不需要导入就可以共享同样一份配置
3、scope=“module”就可以实现多个py文件共享配置
4、scope=“session”就可以实现多个py文件使用一个session来完成多个用例
fixture(scope=“function”,params=None,autouse=False,ids=None,name=None)
scope:有4个级别的参数,function是默认的参数,class,module,session
params:一个可选的参数列表,他将导致多个参数调用fixture功能和所有的测试使用它


 浙公网安备 33010602011771号