selenium不同浏览器处理证书(SSL Certificate)的方法
在线英文版webdriverAPI
https://www.w3.org/TR/webdriver/#proxy
1.Firefox
- 创建一个新的profile,命名为certificateIssue
(创建方法参照:http://blog.csdn.net/qiyueqinglian/article/details/43053531) - 用刚才创建的profile打开ffx浏览器
- 访问报SSL certificate error的URL,通过点击 I Understnad the Risks -> Add Exception button,引进证书,这样就不报错了.
- 在代码里配置通过刚才创建的profile打开ffx
代码如下 -
ProfilesIni firProfiles = new ProfilesIni();
FirefoxProfile wbdrverprofile = firProfiles.getProfile("certificateIssue");
//是不是设置了下面两行,其实就不用手动创建profile,并认证,然后手动引进证书。
wbdrverprofile.setAcceptUntrustedCertificates(true);
wbdrverprofile.setAssumeUntrustedCertificateIssuer(false);
WebDriver Driver = new FirefoxDriver(wbdrverprofile);
Driver.get("site URL where certificate error");
firefox 新建firefoxDriver(profile)就报错的解决办法,根本原因是在selenium3.6中不支持此构造方法:

以下这个例子是亲测通过的。
   File driverpath = new File("src/test/java/cn/com/jit/driver/geckodriver.exe");
    System.setProperty("webdriver.gecko.driver",driverpath.getAbsolutePath()); //第1、2行设置webdriver路径
    ProfilesIni pi = new ProfilesIni();
    FirefoxProfile profile = pi.getProfile("default"); //第3、4行设置系统现在使用的默认 profile
    FirefoxOptions options = new FirefoxOptions().setProfile(profile); //使参数转化为options,再new的时候当参数传入
    WebDriver driver = new FirefoxDriver(options);
2.Chrome
//Set chrome browser's capabilities to to accept SSL certificate on runtime.
DesiredCapabilities capability = DesiredCapabilities.chrome();
capability.setCapability(CapabilityType.ACCEPT_SSL_CERTS, true);
System.setProperty("webdriver.chrome.driver", "D:\\chromedriver_win32\\chromedriver.exe");

WebDriver driver = new ChromeDriver(capability);
driver.manage().timeouts().implicitlyWait(10, TimeUnit.SECONDS);

//Enter the URL of site where you facing SSL error.
driver.get("Enter site URL");
3.IE
IE需要通过js来解决。在你遇到证书错误的页面点击F12,就会看到继续访问该页面的ID是”overridelink”。
点击这个就可以继续访问了。
// Set path of IEDriverServer.exe
 System.setProperty("webdriver.ie.driver", "D://IEDriverServer.exe");
  WebDriver driver = new InternetExplorerDriver();
  driver.manage().timeouts().implicitlyWait(15, TimeUnit.SECONDS);
  driver.get("URL of SSL error site");

  //To click on "Continue to this website (not recommended)." link to load original website.
  driver.navigate().to("javascript:document.getElementById('overridelink').click()");
Chrome Options参数收集---------------------------
-
0 --purge-memory-button 在Chrome的任务管理器中增加内存清理功能
序号 参数 说明
1 --allow-outdated-plugins 不停用过期的插件。
2 --allow-running-insecure-content 默认情况下,https 页面不允许从 http 链接引用 javascript/css/plug-ins。添加这一参数会放行这些内容。
3 --allow-scripting-gallery 允许拓展脚本在官方应用中心生效。默认情况下,出于安全因素考虑这些脚本都会被阻止。
4 --disable-accelerated-video 停用 GPU 加速视频。
5 --disable-dart 停用 Dart。
6 --disable-desktop-notifications 禁用桌面通知,在 Windows 中桌面通知默认是启用的。
7 --disable-extensions 禁用拓展。
8 --disable-file-system 停用 FileSystem API。
9 --disable-preconnect 停用 TCP/IP 预连接。
10 --disable-remote-fonts 关闭远程字体支持。SVG 中字体不受此参数影响。
11 --disable-speech-input 停用语音输入。
12 --disable-web-security 不遵守同源策略。
13 --disk-cache-dir 将缓存设置在给定的路径。
14 --disk-cache-size 设置缓存大小上限,以字节为单位。
15 --dns-prefetch-disable 停用DNS预读。
16 --enable-print-preview 启用打印预览。
17 --extensions-update-frequency 设定拓展自动更新频率,以秒为单位。
18 --incognito 让浏览器直接以隐身模式启动。
19 --keep-alive-for-test 最后一个标签关闭后仍保持浏览器进程。(某种意义上可以提高热启动速度,不过你最好得有充足的内存)
20 --kiosk 启用kiosk模式。(一种类似于全屏的浏览模式)
21 --lang 使用指定的语言。
22 --no-displaying-insecure-content 默认情况下,https 页面允许从 http 链接引用图片/字体/框架。添加这一参数会阻止这些内容。
23 --no-first-run 跳过 Chromium 首次运行检查。
24 --no-referrers 不发送 Http-Referer 头。
25 --no-sandbox 彻底停用沙箱。
26 --no-startup-window 启动时不建立窗口。
27 --proxy-pac-url 使用给定 URL 的 pac 代理脚本。(也可以使用本地文件,如 --proxy-pac-url="file:\\\c:\proxy.pac")
28 --proxy-server 使用给定的代理服务器,这个参数只对 http 和 https 有效。(例如 --proxy-server=127.0.0.1:8087 )
29 --single-process 以单进程模式运行 Chromium。(启动时浏览器会给出不安全警告)
30 --start-maximized 启动时最大化。
31 --user-agent 使用给定的 User-Agent 字符串
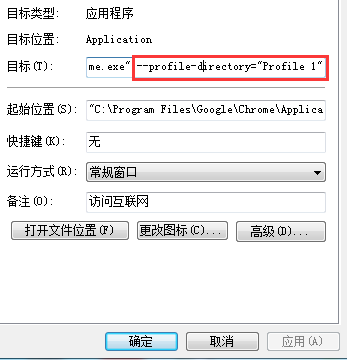
参数:--user-data-dir=UserDataDir
用途:自订使用者帐户资料夹(如:–user-data-dir="D:\temp\Chrome User Data")
参数:--process-per-tab
用途:每个分页使用单独进程
参数:--process-per-site
用途:每个站点使用单独进程
参数:--in-process-plugins
用途:插件不启用单独进程
参数:--disable-popup-blocking
用途:禁用弹出拦截
参数:--disable-javascript
用途:禁用JavaScript
参数:--disable-java
用途:禁用Java
参数:--disable-plugins
用途:禁用插件
参数:–disable-images
用途:禁用图像
参数:--omnibox-popup-count=”num”
用途:将网址列弹出的提示选单数量改为num个
参数:--enable-vertical-tabs
用途:调整chrome游览器标签存放在左边,非顶部
如何使用这些参数
可以参考 Chromium 团队的这个说明(英文) http://www.chromium.org/developers/how-tos/run-chromium-with-flags
对于 Windows 系统,简单来说就是: 1. 在快捷方式上右键,选择属性。 1. 选择“快捷方式”标签。 1. 在“目标”一行的末尾,添加上启动参数。 1. 最终效果应该像这样: ……\chrome.exe --first-switch --second-switch
Chromium命令行启动参数
说明
这个页面列出了一些常用的命令行启动参数以及对它们的简要说明。说明中括号里的内容为译者注。 为此页+1
对于选项页 ( chrome://settings/ ) 或实验页 ( chrome://flags/ ) 已明确给出可视选项的参数,本列表不再包含。
英文500个参数
https://peter.sh/experiments/chromium-command-line-switches/
https://cs.chromium.org/chromium/src/chrome/common/chrome_switches.cc

 浙公网安备 33010602011771号