Spring MVC实现RESTful风格
一、什么是Restful风格?
Restful风格指的是网络应用中就是资源定位和资源操作的风格。不是标准也不是协议。
Rest即Representational State Transfer的缩写,可译为"表现层状态转化”。Restful风格最大的特点为:资源、统一接口、URI和无状态。
这种风格设计的软件,可以更简洁,更有层次,更易于实现缓存等机制。
二、RESTful风格示例
以用户(User)的增删改查为例,我们可以设计出一下接口形式:每列分别对应,(请求类型:请求地址:功能描述)
- get : /user/list :获取所有用户信息
- post:/user:创建用户信息
- put:/user:更新用户信息
- get:/user/1:获取资源标识(id)为1的用户信息
- delete:/user/1:删除资源标识(id)为1的用户信息
三、Spring MVC实现RESTful步骤
1. 通过@RequestMapping 注解的路径设置
当请求中携带的参数是通过请求路径传递到服务器中时,可以在 @RequestMapping 注解的 value 属性中通过占位符 {xxx} 来表示传递的参数,示例代码如下。
@RequestMapping("/product/{action}/{productId}")
注意:value 属性中占位符的位置应当与请求 URL 中参数的位置保持一致,否则会出现传错参数的情况。
2. 通过 @PathVariable 注解绑定参数
可以在控制器方法的形参位置通过 @PathVariable 注解,将占位符 {xxx} 所表示的参数赋值给指定的形参。
@RequestMapping("/product/{action}/{productId}")
    public String testFindProductById(@PathVariable("action") String action,@PathVariable("productId")Integer productId, Model model){
        //根据商品id查询出来商品信息对象
        Product product = productService.findProductById(productId);

        //往前台传数据,可以传对象,可以传List,前台通过表达式 ${}可以获取到
        model.addAttribute("product", product);
        //根据参数 action 判断跳转到商品详细信息页面还是商品修改页面
        if(action.equals("get")){
            return "product";
        }else{
            return "product_update";
        }
    }
3. 通过 HiddenHttpMethodFilter 对请求进行过滤
浏览器默认只支持发送 GET 和 POST 方法的请求,因此需要在 web.xml (要放在编码过滤器之下,不然会出现中文编码错误)中使用 Spring MVC 提供的 HiddenHttpMethodFilter 对请求进行过滤。这个过滤器可以帮助我们将 POST 请求转换为 PUT 或 DELETE 请求,其具体配置内容如下。
<!--来处理 PUT 和 DELETE 请求的过滤器-->
<filter>
    <filter-name>HiddenHttpMethodFilter</filter-name>
    <filter-class>org.springframework.web.filter.HiddenHttpMethodFilter</filter-class>
</filter>
<filter-mapping>
    <filter-name>HiddenHttpMethodFilter</filter-name>
    <url-pattern>/*</url-pattern>
</filter-mapping>
HiddenHttpMethodFilter 处理 PUT 和 DELETE 请求时,必须满足以下 2 个条件:
- 当前请求的请求方式必须为 POST;
- 当前请求必须传输请求参数 _method。
在满足了以上条件后,HiddenHttpMethodFilter 过滤器就会将当前请求的请求方式转换为请求参数 _method 的值,即请求参数 _method 的值才是最终的请求方式,因此我们需要在 POST 请求中携带一个名为 _method 的参数,参数值为 DELETE 或 PUT。
注意:若 web.xml 中同时存在 CharacterEncodingFilter 和 HiddenHttpMethodFilter 两个过滤器,必须先注册 CharacterEncodingFilter,再注册 HiddenHttpMethodFilter。
四、案例实现
实现用户登录后,展示商品信息,同时在页面中可以实现对于产品信息的增、删、改、查
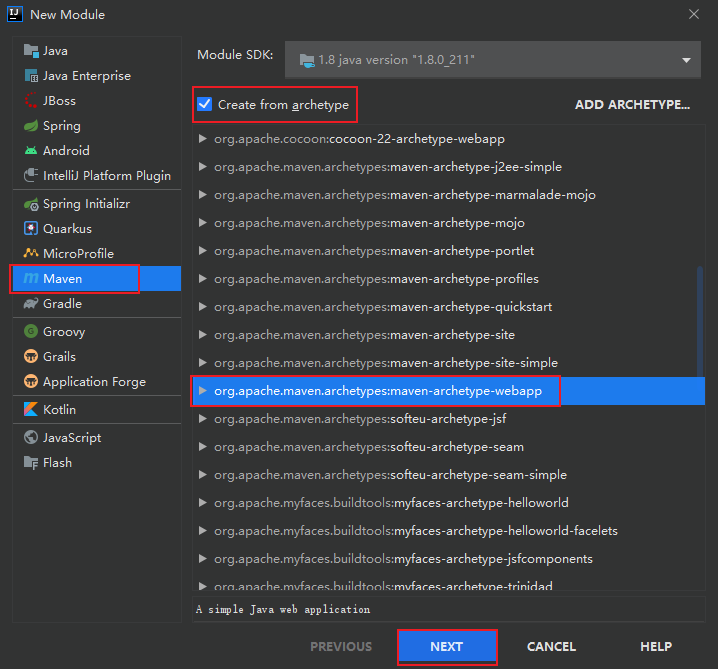
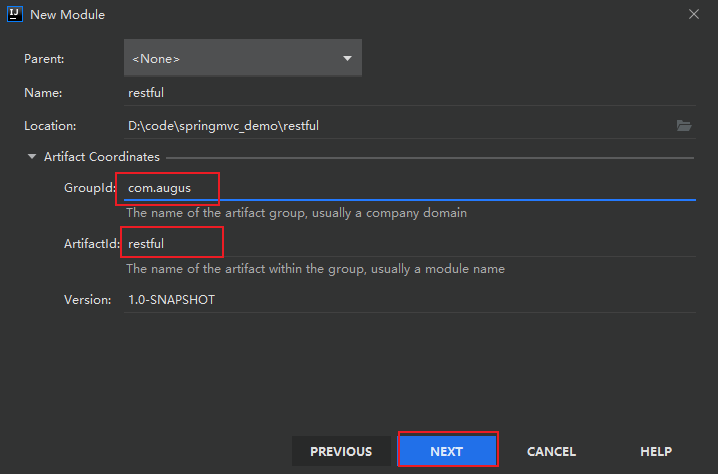
4.1创建项目
4.2.项目初始化\在pom.xml.添加依赖
  <dependencies>
    <!-- spring核心容器包 -->
    <dependency>
      <groupId>org.springframework</groupId>
      <artifactId>spring-context</artifactId>
      <version>5.3.18</version>
    </dependency>

    <!-- spring切面  -->
    <dependency>
      <groupId>org.springframework</groupId>
      <artifactId>spring-aspects</artifactId>
      <version>5.3.18</version>
    </dependency>

    <!--aop联盟包-->
    <dependency>
      <groupId>aopalliance</groupId>
      <artifactId>aopalliance</artifactId>
      <version>1.0</version>
    </dependency>

    <!-- 德鲁伊连接池 -->
    <dependency>
      <groupId>com.alibaba</groupId>
      <artifactId>druid</artifactId>
      <version>1.2.8</version>
    </dependency>

    <!--MySQL驱动 -->
    <dependency>
      <groupId>mysql</groupId>
      <artifactId>mysql-connector-java</artifactId>
      <version>8.0.28</version>
    </dependency>

    <!-- spring jdbc -->
    <dependency>
      <groupId>org.springframework</groupId>
      <artifactId>spring-jdbc</artifactId>
      <version>5.3.20</version>
    </dependency>

    <!-- MySQL事务包 -->
    <dependency>
      <groupId>org.springframework</groupId>
      <artifactId>spring-tx</artifactId>
      <version>5.3.18</version>
    </dependency>

    <!-- spring-orm映射依赖 -->
    <dependency>
      <groupId>org.springframework</groupId>
      <artifactId>spring-orm</artifactId>
      <version>5.3.18</version>
    </dependency>

    <!-- Apache Commons日志包 -->
    <dependency>
      <groupId>commons-logging</groupId>
      <artifactId>commons-logging</artifactId>
      <version>1.2</version>
    </dependency>

    <!-- log4j2 日志 -->
    <dependency>
      <groupId>org.apache.logging.log4j</groupId>
      <artifactId>log4j-slf4j-impl</artifactId>
      <version>2.17.1</version>
      <scope>test</scope>
    </dependency>

    <!-- lombok包 -->
    <dependency>
      <groupId>org.projectlombok</groupId>
      <artifactId>lombok</artifactId>
      <version>1.18.12</version>
      <scope>provided</scope>
    </dependency>

    <!-- spring test测试支持包 -->
    <dependency>
      <groupId>org.springframework</groupId>
      <artifactId>spring-test</artifactId>
      <version>5.3.18</version>
      <scope>test</scope>
    </dependency>

    <!-- junit5单元测试 -->
    <dependency>
      <groupId>org.junit.jupiter</groupId>
      <artifactId>junit-jupiter-api</artifactId>
      <version>5.8.2</version>
      <scope>test</scope>
    </dependency>

    <!-- springMVC支持包 -->
    <dependency>
      <groupId>org.springframework</groupId>
      <artifactId>spring-web</artifactId>
      <version>5.3.20</version>
    </dependency>
    <!-- https://mvnrepository.com/artifact/org.springframework/spring-webmvc -->
    <dependency>
      <groupId>org.springframework</groupId>
      <artifactId>spring-webmvc</artifactId>
      <version>5.3.20</version>
    </dependency>

    <!-- JSON支持 -->
    <dependency>
      <groupId>com.fasterxml.jackson.core</groupId>
      <artifactId>jackson-databind</artifactId>
      <version>2.13.3</version>
    </dependency>

    <!-- mybatis核心 jar包 -->
    <dependency>
      <groupId>org.mybatis</groupId>
      <artifactId>mybatis</artifactId>
      <version>3.5.6</version>
    </dependency>

    <!-- mybatis-spring整合包 -->
    <dependency>
      <groupId>org.mybatis</groupId>
      <artifactId>mybatis-spring</artifactId>
      <version>2.0.6</version>
    </dependency>

    <!--jsp 和Servlet  可选-->
    <dependency>
      <groupId>javax.servlet</groupId>
      <artifactId>javax.servlet-api</artifactId>
      <version>4.0.1</version>
      <scope>provided</scope>
    </dependency>
    <dependency>
      <groupId>javax.servlet.jsp</groupId>
      <artifactId>javax.servlet.jsp-api</artifactId>
      <version>2.3.3</version>
      <scope>provided</scope>
    </dependency>

    <!-- https://mvnrepository.com/artifact/org.thymeleaf/thymeleaf-spring5 -->
    <dependency>
      <groupId>org.thymeleaf</groupId>
      <artifactId>thymeleaf-spring5</artifactId>
      <version>3.1.0.M2</version>
    </dependency>

  </dependencies>
  <build>
    <resources>
      <resource>
        <directory>src/main/java</directory>
        <includes>
          <include>**/*.xml</include>
        </includes>
      </resource>
      <resource>
        <directory>src/main/resources</directory>
        <includes>
          <include>**/*.xml</include>
          <include>**/*.properties</include>
        </includes>
      </resource>
    </resources>
    <plugins>
      <plugin>
        <groupId>org.apache.maven.plugins</groupId>
        <artifactId>maven-compiler-plugin</artifactId>
        <configuration>
          <source>8</source>
          <target>8</target>
        </configuration>
      </plugin>
    </plugins>
  </build>
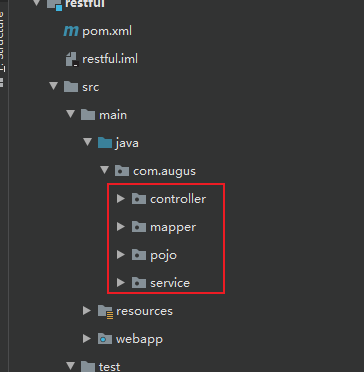
4.3.补充项目结构,准备好MVC模式下的主要目录
注意:要通过 Mark Directory as 将补充的目录进行设置,选择的参数说明:
- Sources Root:告诉idea这个文件夹及其子文件夹中包含源代码,是需要编译构建的一部分
- Test Sources Root:测试源文件夹允许您将与测试相关的代码与生产代码分开。通常,源和测试源的编译结果被放置在不同的文件夹中。
- Resources Root:用于应用程序中的资源文件(图像、各种配置XML和属性文件等)。
- 在构建过程中,资源文件夹的所有内容都复制到输出文件夹中,如下所示。
- 类似于源,您可以指定生成资源。您还可以指定输出文件夹中的文件夹,您的资源应该复制到
- Test Resources Root:测试的资源文件
- Exclued:不包括、排除

4.4.更新web.xml 文件,内容如下
<?xml version="1.0" encoding="UTF-8"?>
<web-app xmlns="http://xmlns.jcp.org/xml/ns/javaee"
         xmlns:xsi="http://www.w3.org/2001/XMLSchema-instance"
         xsi:schemaLocation="http://xmlns.jcp.org/xml/ns/javaee http://xmlns.jcp.org/xml/ns/javaee/web-app_4_0.xsd"
         version="4.0">
  <!--spring核心配置文件-->
  <context-param>
    <param-name>contextConfigLocation</param-name>
    <param-value>classpath:applicationContext.xml</param-value>
  </context-param>
  <!--
   ContextLoaderListener监听器
   (1)ContextLoaderListener监听器的作用就是启动Web容器时,自动装配ApplicationContext的配置信息。因为它实现了ServletContextListener这个接口,在web.xml配置这个监听器,启动容器时,就会默认执行它实现的方法。
   (2)在ContextLoaderListener中关联了ContextLoader这个类,所以整个加载配置过程由ContextLoader来完成。
   -->
  <listener>
    <listener-class>org.springframework.web.context.ContextLoaderListener</listener-class>
  </listener>
  <!--请求和响应的字符串过滤器-->
  <filter>
    <filter-name>CharacterEncodingFilter</filter-name>
    <filter-class>org.springframework.web.filter.CharacterEncodingFilter</filter-class>
    <!--设置请求的编码-->
    <init-param>
      <param-name>encoding</param-name>
      <param-value>UTF-8</param-value>
    </init-param>
    <!--设置响应的编码,这里我们可以省略-->
    <init-param>
      <param-name>forceResponseEncoding</param-name>
      <param-value>true</param-value>
    </init-param>
  </filter>
  <filter-mapping>
    <filter-name>CharacterEncodingFilter</filter-name>
    <url-pattern>/*</url-pattern>
  </filter-mapping>


  <!--来处理 PUT 和 DELETE 请求的过滤器-->
  <filter>
    <filter-name>HiddenHttpMethodFilter</filter-name>
    <filter-class>org.springframework.web.filter.HiddenHttpMethodFilter</filter-class>
  </filter>
  <filter-mapping>
    <filter-name>HiddenHttpMethodFilter</filter-name>
    <url-pattern>/*</url-pattern>
  </filter-mapping>

  <!--配置springMvc前端控制器,对浏览器发送的请求统一处理-->
  <servlet>
    <servlet-name>dispatcherServlet</servlet-name>
    <servlet-class>org.springframework.web.servlet.DispatcherServlet</servlet-class>
    <!--配置DispatcherServlet的一个初始化参数:spring mvc配置文件的位置和名称-->
    <init-param>
      <param-name>contextConfigLocation</param-name>
      <param-value>classpath:springmvc.xml</param-value>
    </init-param>
    <load-on-startup>1</load-on-startup>
  </servlet>

  <servlet-mapping>
    <servlet-name>dispatcherServlet</servlet-name>
    <!--设置springmvc的核心控制器所能处理的请求路径 /所匹配的请求可以是 /login 或者 .html 或者.js或者css请求路径
    但是/不能匹配.jsp请求的路径的请求
    -->
    <url-pattern>/</url-pattern>
  </servlet-mapping>


</web-app>
4.5.在resource目录下准备配置文件
4.5.1.创建 log4j2.xml 内容如下
<?xml version="1.0" encoding="UTF-8"?>
<Configuration status="DEBUG">
    <Appenders>
        <Console name="Console" target="SYSTEM_ERR">
            <PatternLayout pattern="%d{YYYY-MM-dd HH:mm:ss} [%t] %-5p %c{1}:%L - %Augus%n" />
        </Console>
    </Appenders>
    <Loggers>
        <Root level="DEBUG">
            <AppenderRef ref="Console" />
        </Root>
    </Loggers>
</Configuration>
4.5.2.创建 jdbc.properties内容如下
jdbc_driver=com.mysql.cj.jdbc.Driver
jdbc_url=jdbc:mysql://127.0.0.1:3306/mydb?useSSL=false&useUnicode=true&characterEncoding=UTF-8&serverTimezone=Asia/Shanghai
jdbc_username=root
jdbc_password=123456
4.5.3.创建 springmvc.xml 内容如下
<?xml version="1.0" encoding="UTF-8"?>
<beans xmlns="http://www.springframework.org/schema/beans"
       xmlns:xsi="http://www.w3.org/2001/XMLSchema-instance"
       xmlns:context="http://www.springframework.org/schema/context"
       xmlns:mvc="http://www.springframework.org/schema/mvc"
       xsi:schemaLocation="http://www.springframework.org/schema/beans
       http://www.springframework.org/schema/beans/spring-beans.xsd
       http://www.springframework.org/schema/context
       https://www.springframework.org/schema/context/spring-context.xsd http://www.springframework.org/schema/mvc https://www.springframework.org/schema/mvc/spring-mvc.xsd">
    <!--开启组件扫描-->
    <context:component-scan base-package="com.augus.controller"></context:component-scan>

    <mvc:annotation-driven></mvc:annotation-driven>

    <!-- 配置 Thymeleaf 视图解析器 -->
    <bean id="viewResolver"
          class="org.thymeleaf.spring5.view.ThymeleafViewResolver">
        <property name="order" value="1"/>
        <property name="characterEncoding" value="UTF-8"/>
        <property name="templateEngine">
            <bean class="org.thymeleaf.spring5.SpringTemplateEngine">
                <property name="templateResolver">
                    <bean class="org.thymeleaf.spring5.templateresolver.SpringResourceTemplateResolver">
                        <!-- 视图前缀 -->
                        <property name="prefix" value="/WEB-INF/templates/"/>
                        <!-- 视图后缀 -->
                        <property name="suffix" value=".html"/>
                        <property name="templateMode" value="HTML5"/>
                        <property name="characterEncoding" value="UTF-8"/>
                    </bean>
                </property>
            </bean>
        </property>
    </bean>

    <!--配置静态资源放行-->
    <mvc:resources mapping="/js/**" location="/WEB-INF/js/"></mvc:resources>
    <mvc:resources mapping="/upload/**" location="/upload/"></mvc:resources>

</beans>
4.5.4.创建 applicationContext.xml 内容如下
<?xml version="1.0" encoding="UTF-8"?>
<beans xmlns="http://www.springframework.org/schema/beans"
       xmlns:xsi="http://www.w3.org/2001/XMLSchema-instance"
       xmlns:p="http://www.springframework.org/schema/p"
       xmlns:c="http://www.springframework.org/schema/c"
       xmlns:util="http://www.springframework.org/schema/util"
       xmlns:context="http://www.springframework.org/schema/context"
       xmlns:aop="http://www.springframework.org/schema/aop"
       xmlns:tx="http://www.springframework.org/schema/tx"
       xmlns:mvc="http://www.springframework.org/schema/mvc"
       xsi:schemaLocation="
       http://www.springframework.org/schema/beans
       http://www.springframework.org/schema/beans/spring-beans.xsd
       http://www.springframework.org/schema/util
       http://www.springframework.org/schema/util/spring-util.xsd
       http://www.springframework.org/schema/context
       http://www.springframework.org/schema/context/spring-context.xsd
       http://www.springframework.org/schema/aop
       http://www.springframework.org/schema/aop/spring-aop.xsd
       http://www.springframework.org/schema/tx
       http://www.springframework.org/schema/tx/spring-tx.xsd
       http://www.springframework.org/schema/mvc
       http://www.springframework.org/schema/mvc/spring-mvc.xsd
">
    <!--加载外部属性文件 -->
    <context:property-placeholder location="classpath:jdbc.properties"></context:property-placeholder>

    <!--扫描service层-->
    <context:component-scan base-package="com.augus.service"></context:component-scan>

    <!--配置德鲁伊连接池-->
    <bean id="druidDataSource" class="com.alibaba.druid.pool.DruidDataSource">
        <property name="username" value="${jdbc_username}"></property>
        <property name="password" value="${jdbc_password}"></property>
        <property name="url" value="${jdbc_url}"></property>
        <property name="driverClassName" value="${jdbc_driver}"></property>
    </bean>

    <!--
    SqlSessionFactoryBean能在Spring IoC容器中以SqlSessionFactory的类型保存并被获取。就是继承了FactoryBean这个接口了,这是个支持泛型的接口:
    当实现了这个接口的Bean在配置为被Spring接管时,存入IoC容器中的实例类型将会是实例化泛型的那个类型,从IoC容器中获取时也是实例化泛型的那个类型,
    这种情况下,Spring 将会在应用启动时为你创建SqlSessionFactory对象,然后将它以 SqlSessionFactory为名来存储。当把这个bean注入到Spring中去了以后,IoC容器中的其他类型就可以拿到SqlSession实例了,就可以进行相关的SQL执行任务了。
    -->
    <bean id="sessionFactoryBean" class="org.mybatis.spring.SqlSessionFactoryBean">
        <!--获取上面的数据源-->
        <property name="dataSource" ref="druidDataSource"></property>
        <property name="typeAliasesPackage" value="com.augus.pojo"></property>
    </bean>

    <!--
    配置MapperScanner 扫描mapper.xml接口
    -->
    <bean class="org.mybatis.spring.mapper.MapperScannerConfigurer">
        <!--配置SQLSessionFactory-->
        <property name="sqlSessionFactoryBeanName" value="sessionFactoryBean"></property>
        <!--配置mapper扫描-->
        <property name="basePackage" value="com.augus.mapper"></property>
    </bean>

    <!--配置事务管理器-->
    <bean id="dataSourceTransactionManager" class="org.springframework.jdbc.datasource.DataSourceTransactionManager">
        <property name="dataSource" ref="druidDataSource"></property>
    </bean>

    <!--开启事务注解-->
    <tx:annotation-driven transaction-manager="dataSourceTransactionManager"></tx:annotation-driven>
</beans>
4.6.在数据库中创建表
- user表
CREATE TABLE `user` (
  `uid` int(255) NOT NULL AUTO_INCREMENT,
  `username` varchar(255) DEFAULT NULL,
  `password` varchar(255) DEFAULT NULL,
  PRIMARY KEY (`uid`)
)
- product表
CREATE TABLE `product` (
  `productid` int(11) NOT NULL AUTO_INCREMENT,
  `productname` varchar(255) DEFAULT NULL,
  `price` double DEFAULT NULL,
  `storage` int(255) DEFAULT NULL,
  PRIMARY KEY (`productid`)
)
4.7.在WEB-INF/templates下前端页面
- user.html:登录页面
<!DOCTYPE html>
<html lang="en">
<head>
    <meta charset="UTF-8">
    <title>欢迎来到ssm登录页面</title>
</head>
<body>
<form action="login" method="post">
    <table style="margin: auto;">
        <tr>
            <td colspan="2" align="center">
                <!--
                th:if="${not #strings.isEmpty(msg)}" 判断优先级高,先判断后生成(判断msg中是否为空)
                不为空,通过th:text="${msg}"取值显示
                -->
                <p style="color: red;margin: auto" th:text="${msg}" th:if="${not #strings.isEmpty(msg)}"></p>
            </td>
        </tr>
        <tr>
            <td>用户名:</td>
            <td><input type="text" name="username" required><br></td>
        </tr>
        <tr>
            <td>密码:</td>
            <td><input type="text" name="password" required><br></td>
        </tr>
        <tr>
            <td colspan="2">
                <input type="submit" value="提交" style="margin: auto;">
                <input type="reset" value="重置">
            </td>
        </tr>
    </table>
</form>
</body>
</html>
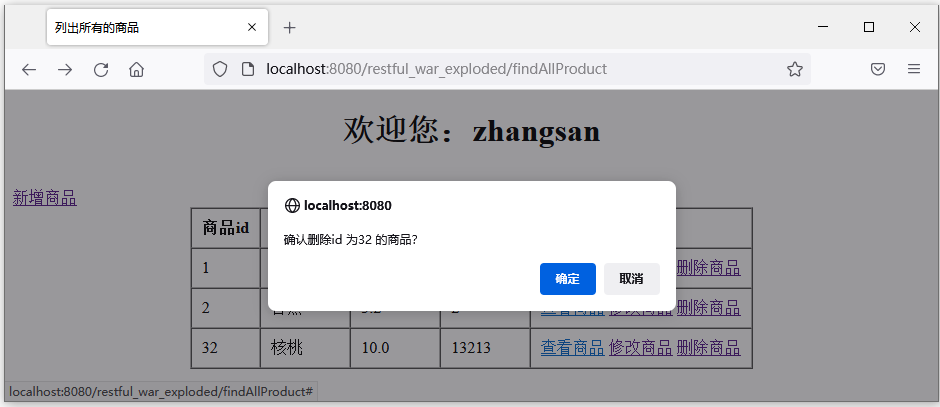
- productList.html:登录后页面展示商品信息
<!DOCTYPE html> <html lang="en"> <head> <meta charset="UTF-8"> <title>列出所有的商品</title> <script src="https://cdn.staticfile.org/jquery/1.10.2/jquery.min.js" type="text/javascript"></script> <script type="text/javaScript"> function testJson1(productId) { var b = confirm("确认删除id 为" + productId + " 的商品?"); if (b) { var delete_form = $("#delete_form"); //给id为#form-id的元素设置一个value属性值为productId $("#form-id").val(productId); delete_form.submit(); } } </script> </head> <body> <!-- session.loginUser.getUsername() 获取在登录验证通过后,通过session域传递过来的user2对象,并且获取用户名 --> <h1 th:text="'欢迎您:'+${session.loginUser.getUsername()}" style="text-align:center;"></h1> <table th:border="1" th:cellspacing="0" th:cellpadding="10" style="margin: auto;"> <thead> <th>商品id</th> <th>商品名称</th> <th>商品价格</th> <th>商品库存</th> <th>操作</th> </thead> <tbody> <!-- Thymleaf使用th:each遍历表格 --> <tr th:each="product:${productList}"> <!-- 如果是需要从model中取值的话 写法为th:text="${model的name}" --> <td th:text="${product.getProductId()}"></td> <td th:text="${product.getProductName()}"></td> <td th:text="${product.getPrice()}"></td> <td th:text="${product.getStorage()}"></td> <td> <a th:href="@{|/product/get/${product.getProductId()}|}">查看商品</a> <a th:href="@{|/product/update/${product.getProductId()}|}">修改商品</a> <a href="#" th:onclick="testJson1([[${product.getProductId()}]]);">删除商品</a> </td> </tr> </tbody> <br> <a th:href="@{/addPage}">新增商品</a> <!-- <!– 作用:通过超链接控制表单的提交,将post请求转换为delete请求 –>--> <form id="delete_form" method="post" th:action="@{/product}"> <!-- HiddenHttpMethodFilter要求:必须传输_method请求参数,并且值为最终的请求方式 --> <input type="hidden" name="_method" value="delete"/> <input type="hidden" name="productId" id="form-id"/> </form> </table> </body> </html>
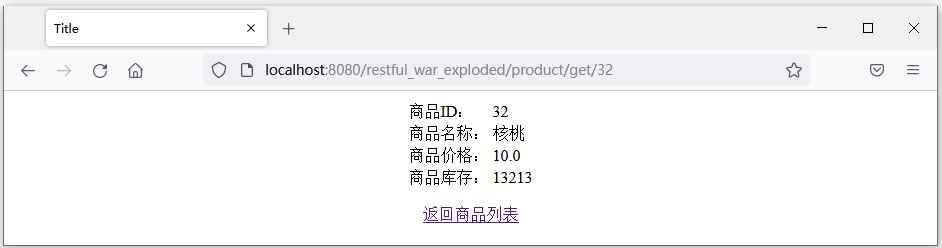
- product.html:展示商品详情页
<!DOCTYPE html>
<html lang="en">
<head>
    <meta charset="UTF-8">
    <title>Title</title>
</head>
<body>
<!DOCTYPE html>
<html lang="en" xmlns:th="http://www.thymeleaf.org">
<head>
    <meta charset="UTF-8">
    <title>商品信息展示</title>
</head>
<body>
<table style="margin: auto;">
    <tr>
        <td> 商品ID:</td>
        <td th:text="${product.getProductId()}"></td>
    </tr>
    <tr>
        <td>商品名称:</td>
        <td th:text="${product.getProductName()}"></td>
    </tr>
    <tr>
        <td>商品价格:</td>
        <td th:text="${product.getPrice()}"></td>
    </tr>
    <tr>
        <td>商品库存:</td>
        <td th:text="${product.getStorage()}"></td>
    </tr>
</table>
<p style="text-align: center"><a th:href="@{/findAllProduct}">返回商品列表</a></p>
</body>
</html>
</body>
</html>
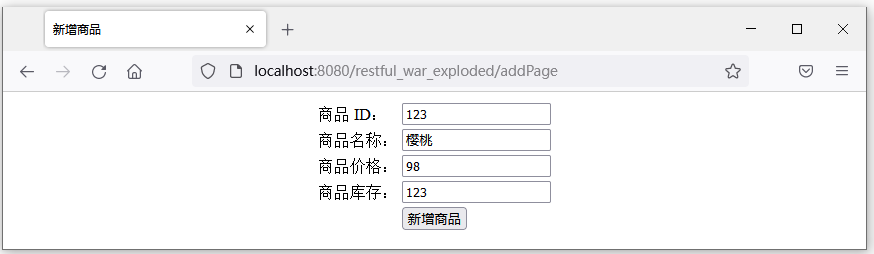
- product_add.html:新增商品页面
<!DOCTYPE html>
<html lang="en">
<head>
    <meta charset="UTF-8">
    <title>新增商品</title>
</head>
<body>
<form th:action="@{/product}" method="post">
    <table style="margin: auto">
        <tr>
            <td>商品 ID:</td>
            <td><input type="text" name="productId" required></td>
        </tr>
        <tr>
            <td>商品名称:</td>
            <td><input type="text" name="productName" required></td>
        </tr>
        <tr>
            <td>商品价格:</td>
            <td><input type="text" name="price" required></td>
        </tr>
        <tr>
            <td>商品库存:</td>
            <td><input type="text" name="storage" required></td>
        </tr>
        <tr>
            <td colspan="2" align="center"><input type="submit" value="新增商品"></td>
        </tr>
    </table>
</form>
</body>
</html>
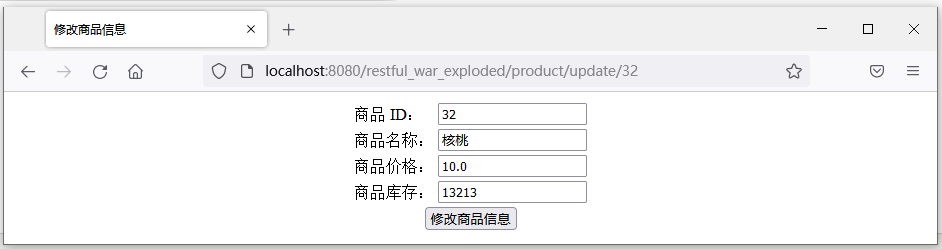
- product_update.html:修改商品信息
<!DOCTYPE html>
<html lang="en">
<head>
    <meta charset="UTF-8">
    <title>修改商品信息</title>
</head>
<body>
<form th:action="@{/product}" method="post">
    <input type="hidden" name="_method" value="put">
    <table style="margin: auto">
        <tr>
            <td>商品 ID:</td>
            <td><input type="text" name="productId" th:value="${product.getProductId()}" readonly></td>
        </tr>
        <tr>
            <td>商品名称:</td>
            <td><input type="text" name="productName" th:value="${product.getProductName()}" required></td>
        </tr>
        <tr>
            <td>商品价格:</td>
            <td><input type="text" name="price" th:value="${product.getPrice()}" required></td>
        </tr>
        <tr>
            <td>商品库存:</td>
            <td><input type="text" name="storage" th:value="${product.getStorage()}" required></td>
        </tr>
        <tr>
            <td colspan="2" align="center"><input type="submit" value="修改商品信息"></td>
        </tr>
    </table>
</form>
</body>
</html>
4.8.在java下创建包com.augusu,在分别创建四个包,如下
4.8.1.新建pojo包
在下面创建 User、Product实体类,代码如下
- User
package com.augus.pojo;

import lombok.AllArgsConstructor;
import lombok.Data;
import lombok.NoArgsConstructor;

import java.io.Serializable;

@AllArgsConstructor
@NoArgsConstructor
@Data
public class User implements Serializable {
    private Integer uid;
    private String username;
    private String password;
}
- Product
package com.augus.pojo;

import lombok.AllArgsConstructor;
import lombok.Data;
import lombok.NoArgsConstructor;

import java.io.Serializable;

@AllArgsConstructor
@NoArgsConstructor
@Data
public class Product implements Serializable{
    private Integer productId;
    private String productName;
    private Double price;
    private Integer storage;
}
4.8.2.新建mapper包(作为持久层)
- 在创建 UserMapper、UserMapper.xml
package com.augus.mapper;

import com.augus.pojo.User;
import org.apache.ibatis.annotations.Param;

public interface UserMapper {
    User findByUserName(@Param("name") String username);
}
<?xml version="1.0" encoding="UTF-8" ?>
<!DOCTYPE mapper
        PUBLIC "-//mybatis.org//DTD Mapper 3.0//EN"
        "http://mybatis.org/dtd/mybatis-3-mapper.dtd">
<mapper namespace="com.augus.mapper.UserMapper">
    <!--User findUser(String uname, String password);-->
    <select id="findByUserName" resultType="user">
        select * from user where username = #{name}
    </select>
</mapper>
- 在创建ProductMapper、ProductMapper.xml
package com.augus.mapper;

import com.augus.pojo.Product;
import org.apache.ibatis.annotations.Param;

import java.util.List;

public interface ProductMapper {
    List<Product> findAllProduct();

    Product findProductById(@Param("productId") Integer productId);

    int addProduct(Product product);

    int updateProduct(Product product);


    int deleteProduct(Integer productId);
}
<?xml version="1.0" encoding="UTF-8" ?>
<!DOCTYPE mapper
        PUBLIC "-//mybatis.org//DTD Mapper 3.0//EN"
        "http://mybatis.org/dtd/mybatis-3-mapper.dtd">
<mapper namespace="com.augus.mapper.ProductMapper">

    <select id="findAllProduct" resultType="product">
        select * from product
    </select>

    <!--根据编号查询产品信息-->
    <select id="findProductById" resultType="product" parameterType="int">
        select * from product where productid = #{productId}
    </select>

    <!--新增产品信息-->
    <insert id="addProduct">
        insert into product values(DEFAULT , #{productName}, #{price}, #{storage})
    </insert>

    <!--修改产品信息-->
    <update id="updateProduct">
        update product set productname=#{productName},price=#{price},storage=#{storage} where productid=#{productId}
    </update>

    <!--根据编号删除商品信息-->
    <delete id="deleteProduct">
        delete from product where productid=#{productId}
    </delete>

</mapper>
4.8.3.新建service包
在下面创建 接口UserService、ProductService,同时在创建impl包里面创建 UserServiceImpl、ProductServiceImpl实现类
- UserService
package com.augus.service;

import com.augus.pojo.User;

public interface UserService {
    User findByUserName(String uname);
}
- UserServiceImpl
package com.augus.service.impl;

import com.augus.mapper.ProductMapper;
import com.augus.pojo.Product;
import com.augus.service.ProductService;
import org.springframework.beans.factory.annotation.Autowired;
import org.springframework.stereotype.Service;

import java.util.List;

@Service
public class ProductServiceImpl implements ProductService {
    @Autowired
    private ProductMapper productMapper;

    @Override
    public Product findProductById(Integer productId) {
        return productMapper.findProductById(productId);
    }

    @Override
    public List<Product> findAllProduct() {
        return productMapper.findAllProduct();
    }

    @Override
    public int addProduct(Product product) {
        return productMapper.addProduct(product);
    }

    @Override
    public int updateProduct(Product product) {
        return productMapper.updateProduct(product);
    }

    @Override
    public int deleteProduct(Integer productId) {
        return productMapper.deleteProduct(productId);
    }
}
- ProductService
package com.augus.service;

import com.augus.pojo.Product;

import java.util.List;

public interface ProductService {
    Product findProductById(Integer productId);

    List<Product> findAllProduct();

    int addProduct(Product product);

    int updateProduct(Product product);

    int deleteProduct(Integer productId);
}
- ProductServiceImpl
package com.augus.service.impl;

import com.augus.mapper.ProductMapper;
import com.augus.pojo.Product;
import com.augus.service.ProductService;
import org.springframework.beans.factory.annotation.Autowired;
import org.springframework.stereotype.Service;

import java.util.List;

@Service
public class ProductServiceImpl implements ProductService {
    @Autowired
    private ProductMapper productMapper;

    @Override
    public Product findProductById(Integer productId) {
        return productMapper.findProductById(productId);
    }

    @Override
    public List<Product> findAllProduct() {
        return productMapper.findAllProduct();
    }

    @Override
    public int addProduct(Product product) {
        return productMapper.addProduct(product);
    }

    @Override
    public int updateProduct(Product product) {
        return productMapper.updateProduct(product);
    }

    @Override
    public int deleteProduct(Integer productId) {
        return productMapper.deleteProduct(productId);
    }
}
4.8.4.新建controller包
- 在下面创建 LoginController类,代码如下
package com.augus.controller;

import com.augus.pojo.User;
import com.augus.service.UserService;
import org.springframework.beans.factory.annotation.Autowired;
import org.springframework.stereotype.Controller;
import org.springframework.web.bind.annotation.RequestMapping;

import javax.annotation.Resource;
import javax.servlet.http.HttpServletRequest;
import javax.servlet.http.HttpSession;

@Controller
public class LoginController {
    @Autowired
    private UserService userService;

    @RequestMapping("/user")
    public String testUser(){
        return "user";
    }

    @RequestMapping("/login")
    public String login(User user, HttpServletRequest request){
        //获取根据用户名 查询到的user对象
        User user2 = userService.findByUserName(user.getUsername());
        if(user2 != null && user2.getPassword().equals(user.getPassword())){
            //如果byUserName不为空,输入的密码和数据库中保存的密码保持一致,则表示登录成功,就写出产品信息
            HttpSession session = request.getSession();
            //将当前登录的user2对象放到session域中
            session.setAttribute("loginUser", user2);
            return "redirect:/findAllProduct";
        }
        request.setAttribute("msg","账户或者密码错误!!!");
        return "user";
    }
}
- 在下面创建ProductController 类,代码如下
package com.augus.controller;

import com.augus.pojo.Product;
import com.augus.service.ProductService;
import org.springframework.beans.factory.annotation.Autowired;
import org.springframework.stereotype.Controller;
import org.springframework.ui.Model;
import org.springframework.web.bind.annotation.PathVariable;
import org.springframework.web.bind.annotation.RequestMapping;
import org.springframework.web.bind.annotation.RequestMethod;
import org.springframework.web.servlet.ModelAndView;
import java.util.List;

@Controller
public class ProductController {

    @Autowired
    private ProductService productService;

    @RequestMapping("/findAllProduct")
    public ModelAndView testFindAllProduct(){

        ModelAndView modelAndView = new ModelAndView();
        //设置逻辑视图名,视图解析器会根据该名字解析到具体的视图页面
        modelAndView.setViewName("productList");

        //获取所有的产品信息,存放到list集合中
        List<Product> productList = productService.findAllProduct();
        //添加模型数据 可以是任意的POJO对象也可以是任何java类型
        modelAndView.addObject(productList);

        return modelAndView;
    }

    /**
     * 查看或回显商品信息,get:查看商品信息  update:为修改页回显的商品信息
     * @param action
     * @param productId
     * @param model
     * @return
     */
    @RequestMapping("/product/{action}/{productId}")
    public String testFindProductById(@PathVariable("action") String action,@PathVariable("productId")Integer productId, Model model){
        //根据商品id查询出来商品信息对象
        Product product = productService.findProductById(productId);

        //往前台传数据,可以传对象,可以传List,前台通过表达式 ${}可以获取到
        model.addAttribute("product", product);
        //根据参数 action 判断跳转到商品详细信息页面还是商品修改页面
        if(action.equals("get")){
            return "product";
        }else{
            return "product_update";
        }
    }

    /**
     * 打开新增页面
     */
    @RequestMapping("/addPage")
    public String testAddPage(){
        return "product_add";
    }

    /**
     * 新增商品
     * @param product
     * @return
     */
    @RequestMapping(value = "/product", method = RequestMethod.POST)
    public String addProduct(Product product){
        productService.addProduct(product);
        //新增成功后,跳转到列出所有商品的页面
        return "redirect:/findAllProduct";
    }


    /**
     * 修改商品信息
     * @param product
     * @return
     */
    @RequestMapping(value = "/product", method = RequestMethod.PUT)
    public String updateProduct(Product product){
        productService.updateProduct(product);
        return "redirect:/findAllProduct";
    }

    /**
     * 删除商品
     * @param productId
     * @return
     */
    @RequestMapping(value = "product",method = RequestMethod.DELETE)
    public String deleteProduct(Integer productId){
        productService.deleteProduct(productId);
        return "redirect:/findAllProduct";
    }
}
4.9.重新部署项目
访问:http://localhost:8080/ssm01_war_exploded/user 如下:
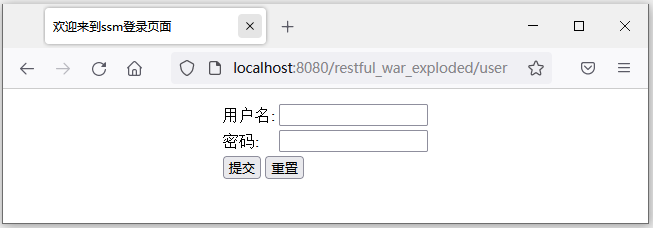
输入用户名和密码登录后,即可进入商品列表页面

点击新增商品即可进入到新增商品页面
点击 修改商品,即可进入商品信息修改页面,可对商品信息进行修改
点击 删除商品,即可对该商品进行删除
点击 查看商品,即可查看该商品的详细信息

 浙公网安备 33010602011771号