android: netstedscrollview跳转到指定位置
一,代码:
activity xml
<?xml version="1.0" encoding="utf-8"?>
<androidx.constraintlayout.widget.ConstraintLayout xmlns:android="http://schemas.android.com/apk/res/android"
    xmlns:app="http://schemas.android.com/apk/res-auto"
    xmlns:tools="http://schemas.android.com/tools"
    android:id="@+id/main"
    android:layout_width="match_parent"
    android:layout_height="match_parent"
    tools:context=".activity.Scroll2Activity">


    <androidx.core.widget.NestedScrollView
        android:layout_width="match_parent"
        android:id="@+id/houseNestedScrollView"
        app:layout_behavior="@string/appbar_scrolling_view_behavior"
        android:fillViewport="true"
        android:layout_height="match_parent">
        <!--
           <ScrollView
               android:layout_width="match_parent"
               android:layout_height="match_parent">
   -->


        <LinearLayout
            android:layout_width="match_parent"
            android:layout_height="wrap_content"
            android:orientation="vertical">
            <Button
                android:id="@+id/buttonGo"
                android:layout_width="wrap_content"
                android:layout_height="wrap_content"
                android:text="跳转"
                />
            <TextView
                android:layout_width="match_parent"
                android:layout_height="300dp"
                android:background="#ffff00"
                android:text="这是ScrollView的内容部分。" />


            <androidx.viewpager2.widget.ViewPager2
                android:id="@+id/houseCateViewPager"
                android:layout_width="match_parent"
                android:background="#ff00ff"
                android:layout_height="match_parent"
                />


            <!-- 这里可以添加更多的内容 -->

            <TextView
                android:id="@+id/lastText"
                android:layout_width="match_parent"
                android:layout_height="300dp"
                android:background="#00ffff"
                android:text="这是最后一行文本。" />


        </LinearLayout>

    </androidx.core.widget.NestedScrollView>

    <!--
       </ScrollView> -->
</androidx.constraintlayout.widget.ConstraintLayout>
activity java
package com.example.okdemo1.activity;

import android.animation.ObjectAnimator;
import android.content.Intent;
import android.os.Bundle;
import android.view.View;
import android.widget.Button;

import androidx.activity.EdgeToEdge;
import androidx.appcompat.app.AppCompatActivity;
import androidx.core.graphics.Insets;
import androidx.core.view.ViewCompat;
import androidx.core.view.WindowInsetsCompat;
import androidx.core.widget.NestedScrollView;
import androidx.fragment.app.Fragment;
import androidx.fragment.app.FragmentActivity;
import androidx.viewpager2.widget.ViewPager2;

import com.example.okdemo1.MainActivity;
import com.example.okdemo1.R;
import com.example.okdemo1.adapter.HouseFragAdapter;
import com.example.okdemo1.fragment.House1Fragment;
import com.example.okdemo1.fragment.House2Fragment;
import com.example.okdemo1.fragment.House3Fragment;

import java.util.ArrayList;
import java.util.List;

public class Scroll2Activity extends AppCompatActivity {

    private List<Fragment> fragmentList = new ArrayList<>();  //fragment的列表
    private ViewPager2 vp_house;            //viewpager2

    private NestedScrollView nestedScrollView;

    @Override
    protected void onCreate(Bundle savedInstanceState) {
        super.onCreate(savedInstanceState);
        EdgeToEdge.enable(this);
        setContentView(R.layout.activity_scroll2);

        nestedScrollView = findViewById(R.id.houseNestedScrollView);

        //添加fragment到列表
        fragmentList.add(new House1Fragment());
        fragmentList.add(new House2Fragment());
        fragmentList.add(new House3Fragment());
        //创建adapter
        HouseFragAdapter viewPagerAdapter=new HouseFragAdapter(this,fragmentList);//创建适配器对象

        //得到viewpager,并为它设置adapter
        vp_house = findViewById(R.id.houseCateViewPager);
        vp_house.setAdapter(viewPagerAdapter); // 设置翻页视图的适配器
        vp_house.setCurrentItem(0);

        vp_house.registerOnPageChangeCallback(new ViewPager2.OnPageChangeCallback() {
            @Override
            public void onPageScrolled(int position, float positionOffset, int positionOffsetPixels) {
                super.onPageScrolled(position, positionOffset, positionOffsetPixels);
                // 处理滚动冲突
                nestedScrollView.requestDisallowInterceptTouchEvent(true);
            }
        });

        //给按钮增加点击事件,跳转到指定位置
        Button button2 = findViewById(R.id.buttonGo);
        button2.setOnClickListener(new View.OnClickListener() {
            @Override
            public void onClick(View v) {
               // 假设targetView是你想要滚动到的视图
                View targetView = findViewById(R.id.lastText);

                // 获取目标视图在NestedScrollView中的位置
                int[] location = new int[2];
                targetView.getLocationInWindow(location);

               // 由于NestedScrollView的坐标起点可能与屏幕顶部不一致,需要调整
                int y = location[1] - nestedScrollView.getPaddingTop();

                // 使用scrollTo滚动到指定位置
                //nestedScrollView.scrollTo(0, y);
                // 使用scrollTo滚动到指定位置,平滑
                //nestedScrollView.smoothScrollTo(0, y);
                //指定时长
                ObjectAnimator animator = ObjectAnimator.ofInt(nestedScrollView, "scrollY", nestedScrollView.getScrollY(), y);
                animator.setDuration(1000); // 设置滚动时长为1000毫秒
                animator.start();
            }
        });
    }
}
fragment xml
<?xml version="1.0" encoding="utf-8"?>
<FrameLayout xmlns:android="http://schemas.android.com/apk/res/android"
    xmlns:tools="http://schemas.android.com/tools"
    android:layout_width="match_parent"
    android:layout_height="match_parent"
    tools:context=".fragment.House1Fragment">

    <LinearLayout
        android:layout_width="match_parent"
        android:layout_height="match_parent"
        android:background="#ff8888"
        android:orientation="vertical">

        <androidx.recyclerview.widget.RecyclerView
            android:id="@+id/recyclerView"
            android:layout_width="match_parent"
            android:layout_weight="1"
            android:layout_height="0dp"/>

    </LinearLayout>
</FrameLayout>
fragment java
package com.example.okdemo1.fragment;

import android.os.Bundle;

import androidx.annotation.NonNull;
import androidx.annotation.Nullable;
import androidx.fragment.app.Fragment;
import androidx.fragment.app.FragmentActivity;
import androidx.recyclerview.widget.LinearLayoutManager;
import androidx.recyclerview.widget.RecyclerView;

import android.util.Log;
import android.view.LayoutInflater;
import android.view.View;
import android.view.ViewGroup;

import com.example.okdemo1.R;
import com.example.okdemo1.activity.Bottom3Activity;
import com.example.okdemo1.activity.Scroll2Activity;
import com.example.okdemo1.adapter.HouseFragAdapter;
import com.example.okdemo1.adapter.StringRecycleAdapter;

import java.util.ArrayList;
import java.util.List;

/**
 * A simple {@link Fragment} subclass.
 * Use the {@link House1Fragment#newInstance} factory method to
 * create an instance of this fragment.
 */
public class House1Fragment extends Fragment {

    // TODO: Rename parameter arguments, choose names that match
    // the fragment initialization parameters, e.g. ARG_ITEM_NUMBER
    private static final String ARG_PARAM1 = "param1";
    private static final String ARG_PARAM2 = "param2";

    // TODO: Rename and change types of parameters
    private String mParam1;
    private String mParam2;


    private RecyclerView recyclerView;
    private StringRecycleAdapter adapter;
    private List<String> stringList;

    public House1Fragment() {
        // Required empty public constructor
    }

    /**
     * Use this factory method to create a new instance of
     * this fragment using the provided parameters.
     *
     * @param param1 Parameter 1.
     * @param param2 Parameter 2.
     * @return A new instance of fragment House1Fragment.
     */
    // TODO: Rename and change types and number of parameters
    public static House1Fragment newInstance(String param1, String param2) {
        House1Fragment fragment = new House1Fragment();
        Bundle args = new Bundle();
        args.putString(ARG_PARAM1, param1);
        args.putString(ARG_PARAM2, param2);
        fragment.setArguments(args);
        return fragment;
    }

    @Override
    public void onCreate(Bundle savedInstanceState) {
        super.onCreate(savedInstanceState);
        if (getArguments() != null) {
            mParam1 = getArguments().getString(ARG_PARAM1);
            mParam2 = getArguments().getString(ARG_PARAM2);
        }
    }

    @Override
    public View onCreateView(LayoutInflater inflater, ViewGroup container,
                             Bundle savedInstanceState) {
        // Inflate the layout for this fragment
        return inflater.inflate(R.layout.fragment_house1, container, false);
    }

    @Override
    public void onViewCreated(@NonNull View view, @Nullable Bundle savedInstanceState) {
        super.onViewCreated(view, savedInstanceState);

        recyclerView = view.findViewById(R.id.recyclerView);
        stringList = new ArrayList<>();

        // 添加测试数据
        for (int i = 1; i <= 20; i++) {
            stringList.add("第 " + i + " 项");
        }

        Scroll2Activity activity = (Scroll2Activity) getActivity();

        adapter = new StringRecycleAdapter(activity,stringList);
        recyclerView.setLayoutManager(new LinearLayoutManager(activity)); // 垂直列表
        recyclerView.setAdapter(adapter);

    }
}
adapter
package com.example.okdemo1.adapter;

import androidx.fragment.app.Fragment;
import androidx.fragment.app.FragmentActivity;
import androidx.viewpager2.adapter.FragmentStateAdapter;

import java.util.List;

public class HouseFragAdapter extends FragmentStateAdapter {

    private List<Fragment> mFragments;

    public HouseFragAdapter(FragmentActivity fa, List<Fragment> fragments) {
        super(fa);
        mFragments=fragments;
    }

    @Override
    public Fragment createFragment(int position) {
        return  mFragments.get(position);
    }

    @Override
    public int getItemCount() {
        return  mFragments.size();
    }

}
item xml
<TextView xmlns:android="http://schemas.android.com/apk/res/android"
android:id="@+id/textItem"
android:layout_width="match_parent"
android:layout_height="100dp"
android:gravity="center_vertical"
android:background="#dddddd"
android:padding="16dp"
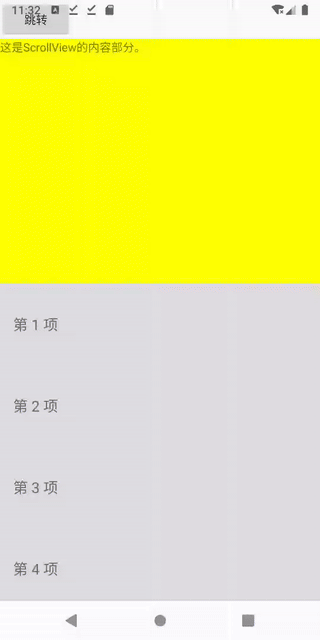
android:textSize="18sp"/>二,测试效果:

 浙公网安备 33010602011771号