linux(ubuntu20.10):用apt方式安装php7.4.9
一,安装nginx:
1,apt方式安装nginx
root@ku:~# apt-get install nginx
2,安装完成后可以看到nginx已经启动运行:
root@ku:/var/www/html# systemctl status nginx
● nginx.service - A high performance web server and a reverse proxy server
     Loaded: loaded (/lib/systemd/system/nginx.service; enabled; vendor preset: enabled)
     Active: active (running) since Wed 2020-11-18 16:19:26 CST; 31min ago
       Docs: man:nginx(8)
   Main PID: 17111 (nginx)
      Tasks: 3 (limit: 4615)
     Memory: 4.5M
     CGroup: /system.slice/nginx.service
             ├─17111 nginx: master process /usr/sbin/nginx -g daemon on; master_process on;
             ├─17112 nginx: worker process
             └─17113 nginx: worker process

11月 18 16:19:26 ku systemd[1]: Starting A high performance web server and a reverse proxy server...
11月 18 16:19:26 ku systemd[1]: Started A high performance web server and a reverse proxy server.
用ss查看端口:
root@ku:/var/www/html# ss -lntp
State   Recv-Q  Send-Q  Local Address:Port      Peer Address:Port  Process
LISTEN  0       70      127.0.0.1:33060          0.0.0.0:*      users:(("mysqld",pid=6024,fd=32))
LISTEN  0       151     127.0.0.1:3306           0.0.0.0:*      users:(("mysqld",pid=6024,fd=34))
LISTEN  0       511     0.0.0.0:80             0.0.0.0:*      users:(("nginx",pid=17113,fd=6),("nginx",pid=17112,fd=6),("nginx",pid=17111,fd=6))
...
3,查看默认的配置文件:
ubuntu上默认的站点配置文件位于:/etc/nginx/sites-enabled
查看配置:
root@ku:/etc/nginx/sites-enabled# more default
可以看到默认站点的相关信息:
server {
    listen 80 default_server;
    listen [::]:80 default_server;

    root /var/www/html;

    server_name _;

    location / {
        try_files $uri $uri/ =404;
    }
}
主要内容如上,document root 目录在 /var/www/html
4,测试在/var/www/html目录下添加一张图片并访问:
root@ku:/etc/nginx/sites-enabled# cp /home/liuhongdi/图片/1370-macos-big-sur-wallpaper.png /var/www/html/a.png
从浏览器查看访问效果:

说明:刘宏缔的架构森林是一个专注架构的博客,
网站:https://blog.imgtouch.com
本文: https://blog.imgtouch.com/index.php/2023/05/26/linux-ubuntu20-10-yong-apt-fang-shi-an-zhuang-php7-4-9/
对应的源码可以访问这里获取: https://github.com/liuhongdi/
说明:作者:刘宏缔 邮箱: 371125307@qq.com
二,安装php-fpm
1,用apt安装:
root@ku:/etc/nginx/sites-enabled# apt-get install php-fpm
安装完成后查看php的版本:
root@ku:/var/www/html# php --version
PHP 7.4.9 (cli) (built: Oct 26 2020 15:17:14) ( NTS )
Copyright (c) The PHP Group
Zend Engine v3.4.0, Copyright (c) Zend Technologies
    with Zend OPcache v7.4.9, Copyright (c), by Zend Technologies
2,查看php-fpm安装后是否启动运行?(默认安装完成后会自动启动)
root@ku:/var/www/html# systemctl status php7.4-fpm
● php7.4-fpm.service - The PHP 7.4 FastCGI Process Manager
     Loaded: loaded (/lib/systemd/system/php7.4-fpm.service; enabled; vendor preset: enabled)
     Active: active (running) since Wed 2020-11-18 16:15:47 CST; 13min ago
       Docs: man:php-fpm7.4(8)
    Process: 16977 ExecStartPost=/usr/lib/php/php-fpm-socket-helper install /run/php/php-fpm.sock
              /etc/php/7.4/fpm/pool.d/www.conf 74 (code=exited, status=0/>
   Main PID: 16974 (php-fpm7.4)
     Status: "Processes active: 0, idle: 2, Requests: 1, slow: 0, Traffic: 0req/sec"
      Tasks: 3 (limit: 4615)
     Memory: 9.6M
     CGroup: /system.slice/php7.4-fpm.service
             ├─16974 php-fpm: master process (/etc/php/7.4/fpm/php-fpm.conf)
             ├─16975 php-fpm: pool www
             └─16976 php-fpm: pool www

11月 18 16:15:47 ku systemd[1]: Starting The PHP 7.4 FastCGI Process Manager...
11月 18 16:15:47 ku systemd[1]: Started The PHP 7.4 FastCGI Process Manager.
可见php-fpm已经运行
三,在nginx配置中添加对php的支持:
1,在站点配置文件中添加对php的支持
root@ku:/etc/nginx/sites-enabled# ls
default
root@ku:/etc/nginx/sites-enabled# vi default
把以下内容取消注释:效果如下:
    location ~ \.php$ {
        include snippets/fastcgi-php.conf;
        fastcgi_pass unix:/run/php/php7.4-fpm.sock;
    }
重启nginx
root@ku:/etc/nginx/sites-enabled# systemctl restart nginx
2,测试php程序能否正常执行:
root@ku:/etc/nginx/sites-enabled# cd /var/www/html/
root@ku:/var/www/html# vi info.php
代码为:
root@ku:/var/www/html# more info.php
<?php
  phpinfo();
?>
从浏览器查看:访问以下地址:
http://127.0.0.1/info.php
效果如图:
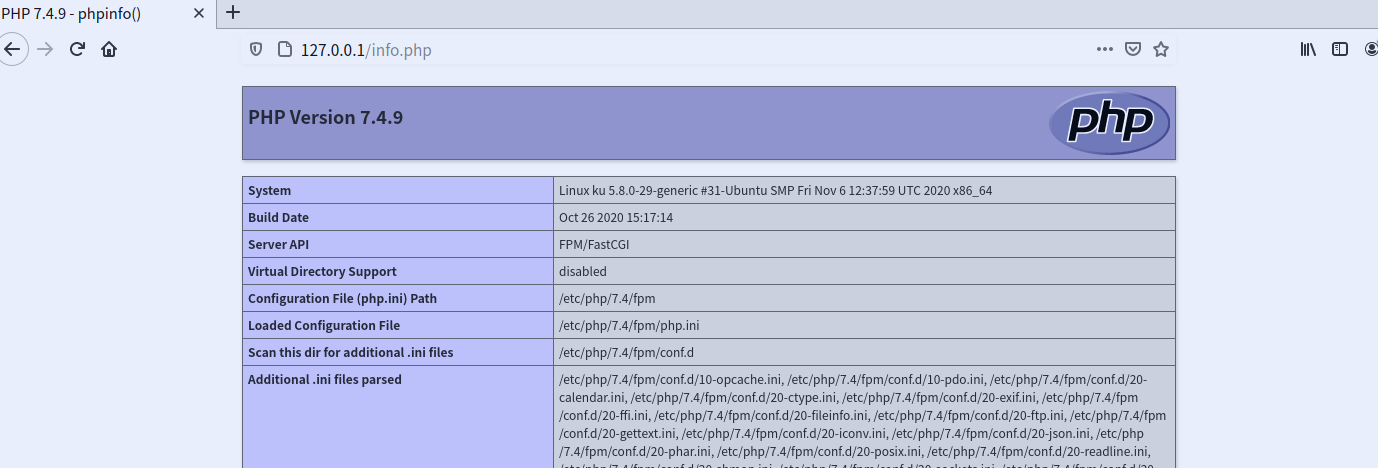
从phpinfo的输出中可以发现还缺少mysql/gd等较常用的扩展,
四,安装php的常用扩展:
1,安装
root@ku:/var/www/html# apt-get install php7.4-mysql php-gd
root@ku:/var/www/html# apt-get install php7.4-mbstring
2,重启php-fpm服务:
root@ku:/var/www/html# systemctl restart php7.4-fpm
3,再次从浏览器访问phpinfo,可以发现已经包含了这几个扩展
五,查看linux的版本
root@ku:~# more /etc/os-release
NAME="Ubuntu Kylin"
VERSION="20.10 (Groovy Gorilla)"
ID=ubuntu
ID_LIKE=debian
PRETTY_NAME="Ubuntu 20.10"
VERSION_ID="20.10"
HOME_URL="https://www.ubuntu.com/"
SUPPORT_URL="https://help.ubuntu.com/"
BUG_REPORT_URL="https://bugs.launchpad.net/ubuntu/"
PRIVACY_POLICY_URL="https://www.ubuntu.com/legal/terms-and-policies/privacy-policy"
VERSION_CODENAME=groovy
UBUNTU_CODENAME=groovy

root@ku:~# uname -r
5.8.0-29-generic

 浙公网安备 33010602011771号