


使用caddy搭建github ipv6 proxy
搭建方法和代理资源支持参考:https://danwin1210.de/github-ipv6-proxy.php
Recently I had to clone a git repository on GitHub via an IPv6 only server that I rented at my favourite hosting provider Hetzner. Unfortunately I realized that GitHub still does not support IPv6.
Those wanting to use the proxy more permanently and/or talk directly to GitHub, without me re-encrypting your traffic, should add the following to /etc/hosts:
2a01:4f8:c010:d56::2 github.com
2a01:4f8:c010:d56::3 api.github.com
2a01:4f8:c010:d56::4 codeload.github.com
2a01:4f8:c010:d56::6 ghcr.io
2a01:4f8:c010:d56::7 pkg.github.com npm.pkg.github.com maven.pkg.github.com nuget.pkg.github.com rubygems.pkg.github.com
2a01:4f8:c010:d56::8 uploads.github.com
2606:50c0:8000::133 objects.githubusercontent.com www.objects.githubusercontent.com release-assets.githubusercontent.com gist.githubusercontent.com repository-images.githubusercontent.com camo.githubusercontent.com private-user-images.githubusercontent.com avatars0.githubusercontent.com avatars1.githubusercontent.com avatars2.githubusercontent.com avatars3.githubusercontent.com cloud.githubusercontent.com desktop.githubusercontent.com support.github.com
2606:50c0:8000::154 support-assets.githubassets.com github.githubassets.com opengraph.githubassets.com github-registry-files.githubusercontent.com github-cloud.githubusercontent.com

# 新增的
2602:f92a:220:249::109 raw.githubusercontent.com
如果你对搭建感兴趣,可以阅读剩余部分
最后那条是我用自己的香港主机做的中转,流量有限。
中转使用caddy搭建
如何搭建?
1. 需要安装 caddy-l4 第三方模块
danwin 使用 nginx stream 方案,这个方案基于L4(传输层)
恰好 caddy 中有同样的模块,虽然不是官方维护,但开源好用。
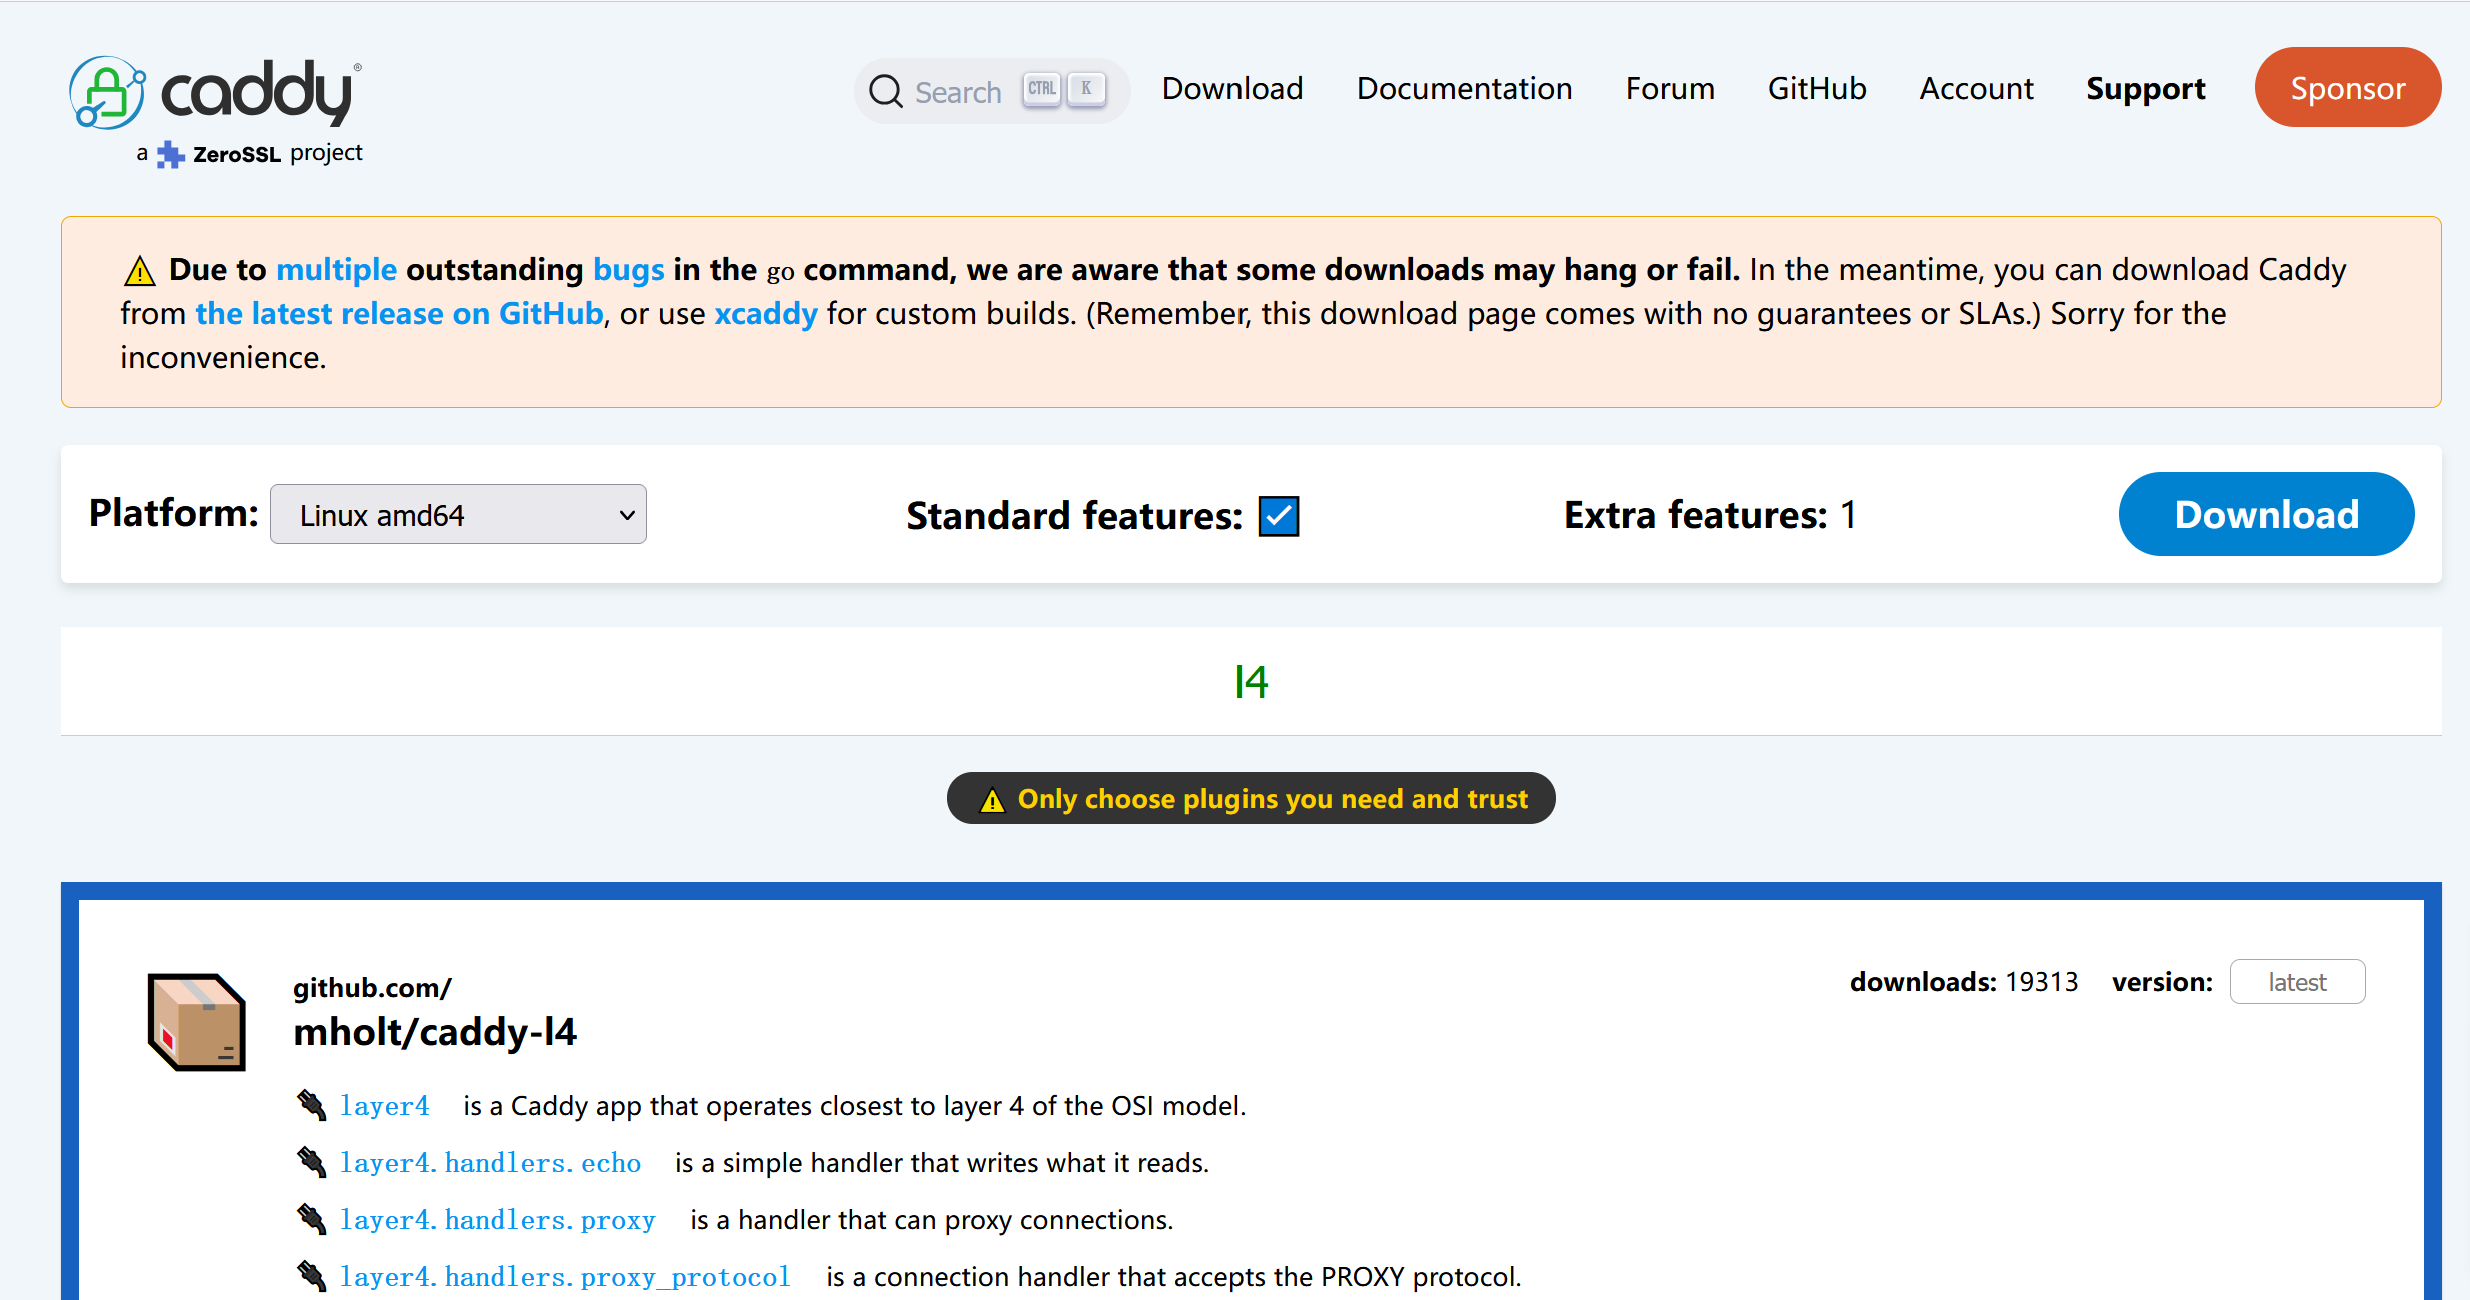
访问 https://caddyserver.com/download 地址,按照下图进行选择。模块搜索 l4,按图选择,点击 download 下载
2. 将下载的文件传到 vps 上
3. 安装
安装文档均可在官方找到。此处同样列出一份
Some installation methods automatically set up Caddy to run as a service. If you chose a method that did not, you may follow these instructions to do so:
Requirements:
caddy binary that you downloaded or built from source
systemctl --version 232 or newer
sudo privileges
Move the caddy binary into your $PATH, for example:
sudo mv caddy /usr/bin/
Test that it worked:
caddy version
Create a group named caddy:
sudo groupadd --system caddy
Create a user named caddy with a writeable home directory:
sudo useradd --system \
    --gid caddy \
    --create-home \
    --home-dir /var/lib/caddy \
    --shell /usr/sbin/nologin \
    --comment "Caddy web server" \
    caddy
If using a config file, be sure it is readable by the caddy user you just created.
Next, choose a systemd unit file based on your use case.
我使用 ubuntu 24.04,因此采用这个:
由于官方提供的demo在运行时会报权限不足的错误,因此将最后一句话做了修改。
下面是修改后的结果:
# caddy.service
#
# For using Caddy with a config file.
#
# Make sure the ExecStart and ExecReload commands are correct
# for your installation.
#
# See https://caddyserver.com/docs/install for instructions.
#
# WARNING: This service does not use the --resume flag, so if you
# use the API to make changes, they will be overwritten by the
# Caddyfile next time the service is restarted. If you intend to
# use Caddy's API to configure it, add the --resume flag to the
# `caddy run` command or use the caddy-api.service file instead.

[Unit]
Description=Caddy
Documentation=https://caddyserver.com/docs/
After=network.target network-online.target
Requires=network-online.target

[Service]
Type=notify
User=caddy
Group=caddy
ExecStart=/usr/bin/caddy run --environ --config /etc/caddy/Caddyfile
ExecReload=/usr/bin/caddy reload --config /etc/caddy/Caddyfile --force
TimeoutStopSec=5s
LimitNOFILE=1048576
PrivateTmp=true
ProtectSystem=full
#AmbientCapabilities=CAP_NET_ADMIN CAP_NET_BIND_SERVICE
AmbientCapabilities=CAP_NET_BIND_SERVICE
CapabilityBoundingSet=CAP_NET_BIND_SERVICE

[Install]
WantedBy=multi-user.target
Double-check the ExecStart and ExecReload directives. Make sure the binary's location and command line arguments are correct for your installation! For example: if using a config file, change your --config path if it is different from the defaults.
The usual place to save the service file is: /etc/systemd/system/caddy.service
After saving your service file, you can start the service for the first time with the usual systemctl dance:
sudo systemctl daemon-reload
sudo systemctl enable --now caddy
Verify that it is running:
systemctl status caddy
Now you're ready to use the service!
也许这个时候可能会遇到证书相关的权限错误。部分错误文本:
logger":"pki.ca.local","msg":"failed to install root certificate","error":"failed to execute sudo
这时需要执行:
sudo caddy trust
之后再重启就好了
Caddyfile
mkdir /etc/caddy
nano /etc/caddy/Caddyfile
放在 /etc/caddy/Caddyfile
{
    layer4 {
        [2602:f92a:220:249::109]:443 {
            route {
                proxy {
                    upstream raw.githubusercontent.com:443
                }
            }
        }
    }
}
本文来自博客园,作者:aptxyou,转载请注明原文链接:https://www.cnblogs.com/aptxyou/p/19272305/github-ipv6-proxy-with-caddy


 浙公网安备 33010602011771号