
三、Kubernetes搭建环境初始化
⛳环境配置
VMWare NET模式

一、初始化环境
☑️ 设置主机名:hostnamectl set-hostname anyu967master1 && bash
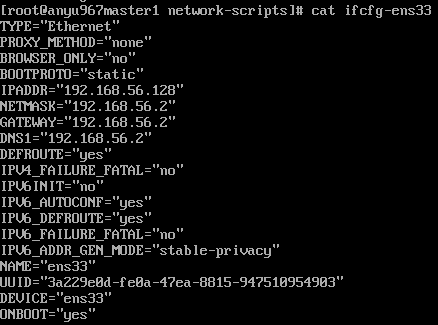
☑️ VMware克隆改UUID:uuidgen 命令; nmcli connection show; nmcli device show ens33
☑️ 域名解析:vim /etc/hosts
☑️ 配置免密登录:ssh-keygen ssh-copy-id -i ~/.ssh/id_rsa.pub hostname 或者 user@ip
☑️ 关闭swap:swapoff -a vim /etc/fstab 克隆的虚拟机需删除UUID
☑️ 修改内核参数:
-
modprobe br_netfilterlsmod |grep br_netfilter -
vim /etc/sysctl.d/k8s.confcat > /etc/sysctl.d/k8s.conf <<EOF net.bridge.bridge-nf-call-ip6tables = 1 net.bridge.bridge-nf-call-iptables = 1 net.ipv4.ip_forward = 1 EOF sysctl -p /etc/sysctl.d/k8s.conf
☑️ 配置防火墙:
systemctl stop firewalld && systemctl disable firewalld
sed -i 's/SELINUX=enforcing/SELINUX=disabled/' /etc/selinux/config
☑️ 配置yum源:
# CentOS-Base.repo
wget -O /etc/yum.repos.d/CentOS-Base.repo https://mirrors.aliyun.com/repo/Centos-7.repo

# epel.repo
wget -O /etc/yum.repos.d/epel.repo https://mirrors.aliyun.com/repo/epel-7.repo

# docker-ce.repo
sudo yum install -y yum-utils device-mapper-persistent-data lvm2
sudo yum-config-manager --add-repo https://mirrors.aliyun.com/docker-ce/linux/centos/docker-ce.repo

# install
sudo yum -y install wget net-tools nfs-utils lrzsz gcc gcc-c++ make cmake libxml2-devel openssl-devel curl curl-devel unzip sudo ntp libaio-devel wget vim ncurses-devel autoconf automake zlib-devel python-devel epel-release openssh-server socat ipvsadm conntrack ntpdate yum-utils device-mapper-persistent-data lvm2

# kubernetes.repo
cat <<EOF > /etc/yum.repos.d/kubernetes.repo
[kubernetes]
name=Kubernetes
baseurl=https://mirrors.aliyun.com/kubernetes/yum/repos/kubernetes-el7-x86_64/
enabled=1
gpgcheck=1
repo_gpgcheck=1
gpgkey=https://mirrors.aliyun.com/kubernetes/yum/doc/yum-key.gpg https://mirrors.aliyun.com/kubernetes/yum/doc/rpm-package-key.gpg
EOF

setenforce 0
yum install -y kubelet kubeadm kubectl
systemctl enable kubelet && systemctl start kubelet
☑️ 时间同步:yum install ntpdate -y; ntpdate cn.pool.ntp.org; * */1 * * * /usr/sbin/ntpdate cn.pool.ntp.org
☑️ 开启ipvs(IP Virtual Server):
# IPVS基本上是一种高效的Layer-4交换机,它提供负载平衡的功能。
# https://www.cnblogs.com/hongdada/p/9758939.html
# ipvs 和 iptables 基于netfilter实现的,ipvs采用hash
  # 1、ipvs为大型集群提供了更好的可扩展性和性能;
  # 2、ipvs 支持比 iptables更复杂的负载均衡算法(rr-轮询调度、lc-最小连接数、dh-目标哈希、sh-源哈希、sed-最短期望延迟、nq-不排队调度)
  # 3、ipvs 支持服务器健康检查和连接重试等

/etc/sysconfig/modules
#!/bin/sh
ipvs_mdules="ip_vs ip_vs_lc ip_vs_wlc ip_vs_rr ip_vs_wrr ip_vs_lblc ip_vs_lblcr ip_vs_dh ip_vs_sh ip_vs_nq ip_vs_sed ip_vs_ftp nf_conntrack"
for kernel_module in ${ipvs_modules}; do
    /sbin/modinfo -F filename ${kernel_module} >/dev/null 2>&1
    if [ 0 -eq 0 ]; then
        /sbin/modprobe ${kernel_module}
    fi
done
☑️ 安装iptables:yum install iptables-services -y systemctl stop iptables && systemctl disable iptables iptables -F
☑️ 安装docker 服务: Docker
本文来自博客园,作者:anyu967,转载请注明原文链接:https://www.cnblogs.com/anyu967/articles/17331784.html

 浙公网安备 33010602011771号