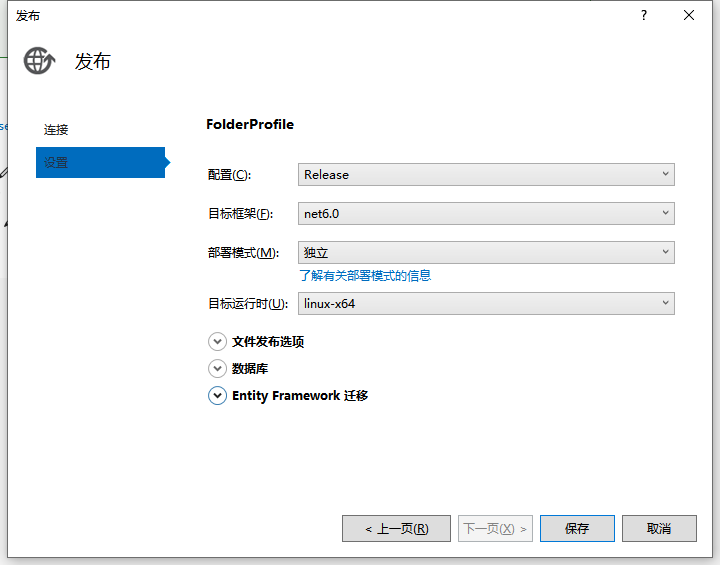
Linux下部署.Net 应用程序和Web应用程序

上传应用程序,进入发布的文件,压缩文件,在地址栏运行命令行(cmd),使用scp 上传文件到对应的服务器。
scp publish.zip root@xxx.xxx.xxx.xxx:/var/wwwroot
解压缩文件
unzip publish.zip

sudo yum install zip unzip   #安装zip解压工具
创建站点启动文件,也就是运行Kestrel 服务器,.net 程序在linux上是使用Kestrel服务器控制运行的,是 .NET WebAPI 应用的内置 Web 服务器,负责处理 HTTP 请求。默认情况下,Kestrel 服务器会在 http://localhost:5000 上运行。
创建一个 systemd 服务文件,如 /etc/systemd/system/mywebapi.service:
[Unit]
Description=My .NET 6 WebAPI
After=network.target

[Service]
WorkingDirectory=/var/wwwroot/mywebapi
ExecStart=/usr/bin/dotnet /var/wwwroot/mywebapi/MyWebApi.dll
Restart=always
User=root
Environment=ASPNETCORE_ENVIRONMENT=Production
Environment=DOTNET_PRINT_TELEMETRY_MESSAGE=false

[Install]
WantedBy=multi-user.target
也可以指定对应的端口
ExecStart=/usr/bin/dotnet /var/www/mywebapi/MyWebApi.dll --urls "http://localhost:5002;https://localhost:5003"
这里简单说明下,Kestrel 可以单独运行,也可以与像 Nginx、Apache 这样的反向代理服务器结合使用,后者处理一些复杂的任务,如负载均衡、SSL 终止、静态文件托管等。
通常我们使用nginx作为反向代理服务器与 Kestrel 配合工作,处理外部请求、SSL 加密/解密、负载均衡等,然后将请求转发给 Kestrel。
- Nginx 作为反向代理服务器,监听外部端口(如 80 和 443)。
- 它将来自外部的请求(例如,
http://site1.com)转发到 Kestrel(例如,localhost:5000)。
启动并启用服务:
sudo systemctl start mywebapi
sudo systemctl enable mywebapi
这样,WebAPI 就会在后台运行,并在系统启动时自动启动。
sudo systemctl daemon-reload  #重新加载 systemd 的配置文件
sudo systemctl start mywebapi.service   #启动webapi站点
sudo systemctl status mywebapi.service   #查看webapi站点运行状态
sudo systemctl enable mywebapi.service   #添加到系统启动运行
sudo systemctl stop mywebapi.service     #停止webapi站点
sudo systemctl reload mywebapi.service  #重启webapi站点
配置nginx反向代理服务进行监听转发到Kestrel 服务器的指定站点
我们使用每个站点一个独立的配置文件,方便后续管理
打开 Nginx 的配置文件(通常是 /etc/nginx/nginx.conf 或者 /usr/local/nginx/conf/nginx.conf,取决于你的安装路径),后着一般是手动编译源码安装的路径。
!!!一定要仔细检查路径,否则很容易无法访问
sudo vim /etc/nginx/nginx.conf
修改主配置文件
# user  nginx;  # 可以根据需要调整用户和组
worker_processes  1;  # 调整为合适的工作进程数
pid /var/run/nginx.pid;

# 日志设置
access_log /var/log/nginx/access.log;
error_log /var/log/nginx/error.log;

events {
    worker_connections 1024;
}

http {
    include       mime.types;
    default_type  application/octet-stream;

    # 启用 Gzip 压缩
    gzip on;
    gzip_disable "msie6";

    # 包含站点的配置文件
    include /etc/nginx/sites-enabled/*;  # 这一行会引入 /etc/nginx/sites-enabled/ 下的所有配置文件

    # 配置基本的缓存和性能优化(视需要启用)
    server_tokens off;  # 隐藏 Nginx 版本号
    client_max_body_size 10M;  # 设置上传文件最大值
}
为了方便后续的维护和管理 所有的站点配置都使用这个目录下 /etc/nginx/sites-enabled/的文件,一般是快捷方式
站点配置:/etc/nginx/sites-available/mywebapi.conf
sudo vim /etc/nginx/sites-available/mywebapi.conf
编辑配置,这里将所有的http重定向到https
# HTTP 配置(端口 80)
server {
    listen 80; #这里是监听的端口
    server_name mywebapi.com www.mywebapi.com;  #换成你的域名或者服务器ip地址

    # HTTP 到 HTTPS 重定向
    return 301 https://$host$request_uri;
}

# HTTPS 配置(端口 443)
server {
    listen 443 ssl;
    server_name mywebapi.com www.mywebapi.com;

    # SSL 证书路径(根据你的证书调整)
    ssl_certificate /etc/nginx/ssl/site1.com.crt;
    ssl_certificate_key /etc/nginx/ssl/site1.com.key;

    ssl_protocols TLSv1.2 TLSv1.3;
    ssl_ciphers 'ECDHE-ECDSA-AES256-GCM-SHA384:ECDHE-RSA-AES256-GCM-SHA384:...';

    location / {
        proxy_pass http://localhost:5000;  # Kestrel HTTP 端口(确保 Kestrel 监听该端口)
        proxy_set_header Host $host;
        proxy_set_header X-Real-IP $remote_addr;
        proxy_set_header X-Forwarded-For $proxy_add_x_forwarded_for;
        proxy_set_header X-Forwarded-Proto $scheme;
    }
}
如果不需要配置https 可以删除去掉证书部分的配置 修改端口即可
server {
    listen 80;
    server_name localhost;

    location / {
        proxy_pass http://localhost:5000;
        proxy_http_version 1.1;
        proxy_set_header Upgrade $http_upgrade;
        proxy_set_header Connection keep-alive;
        proxy_set_header Host $host;
        proxy_cache_bypass $http_upgrade;
        proxy_set_header X-Forwarded-For $proxy_add_x_forwarded_for;
        proxy_set_header X-Forwarded-Proto $scheme;
    }
}
创建链接到 sites-enabled文件夹,后续不想使用这个站点文件直接删除就可以了,原始配置保留在 sites-available文件夹中
sudo ln -s /etc/nginx/sites-available/mywebapi.conf /etc/nginx/sites-enabled/
站点配置已经设置完成了。
在重新加载 Nginx 配置之前,请先检查语法是否正确:如果不能识别nginx 就是没有加到环境变量中,可以找到安装目录 运行检测
sudo nginx -t
如果没有语法错误,输出类似如下:
nginx: configuration file /etc/nginx/nginx.conf test is successful
下面为命令不能识别切换到安装目录 运行检测 /usr/local/nginx/sbin
sudo ./nginx -t
nginx: the configuration file /usr/local/nginx/conf/nginx.conf syntax is ok
nginx: configuration file /usr/local/nginx/conf/nginx.conf test is successful
重新加载nginx ,
sudo systemctl reload nginx
通过浏览器访问你的站点。
备注上面的nginx 主配置文件和 站点的配置文件特别要注意里面的目录。有的nginx 是手动编译源码安装的,一般路径会在 /usr/local/nginx


 浙公网安备 33010602011771号