

linux服务器安装anaconda,然后远程使用jupyter
linux服务器安装anaconda:
1.1 下载安装脚本:
wget https://repo.anaconda.com/archive/Anaconda3-5.2.0-Linux-x86_64.sh
1.2 运行安装向导:
bash Anaconda3-5.2.0-Linux-x86_64.sh
1.3 确认是否安装成功:
conda --version
linux服务器配置juypter,然后远程使用jupyter:
1. 进入环境ipython, 在ipython环境下输入:
from notebook.auth import passwd
passwd()
# 输入方便你记的密码,连续输;两次..输完密码后,会输出一个字符串,形如: ’sha1:9e7a5c5e0a29:8cbdvsv2344d141c92beab1c5bc6e9avsdvdsvsv’
# 将其保存下来, 完成以上操作后,通过exit()推出ipython环境
2. 进入到安装目录:cd /home/lhc/anaconda3/etc/jupyter, 执行 :
jupyter notebook --generate-config
#(命令会产生文件:home/lhc/.jupyter/jupyter_notebook_config.py)
3. 编辑配置文件,编辑此文件,写入
c.NotebookApp.ip = '*' # 允许访问此服务器的 IP,星号表示任意 IP
c.NotebookApp.password = u'sha1:xxx:xxx' # 之前生成的密码 hash 字串
c.NotebookApp.open_browser = False # 运行时不打开本机浏览器
c.NotebookApp.port = 12035 # 使用的端口,随意设置
c.NotebookApp.enable_mathjax = True # 启用 MathJax
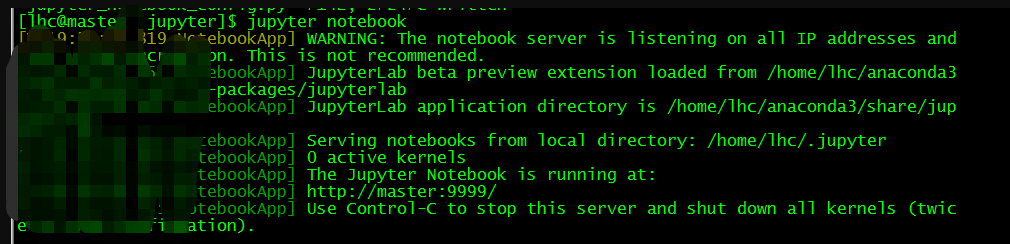
4. 启动服务
Jupyter notebook
成功:
sudo start jupyter # 启动 jupyter
sudo stop/restart jupyter # 停止/重启 jupyter
sudo status jupyter # 查看 jupyter 的状态
================================================================================================
最近遇到一个问题,一天在服务器上,安装好后,发现环境变量没有生效,Python后还是2.7版本。。用以下方法解决了。
# 将anaconda的bin目录加入PATH,根据版本不同,也可能是~/anaconda3/bin
echo 'export PATH="~/anaconda2/bin:$PATH"' >> ~/.bashrc
# 更新bashrc以立即生效
source ~/.bashrc
echo 'export PATH="/usr/local/anaconda3/bin:$PATH"' >> /etc/profile
source /etc/profile
conda --version


 浙公网安备 33010602011771号