vue3使用高德地图生成点标记和信息窗体
新建map.ts文件
declare const AMap: any;
export const MapLoader = () => {
    return new Promise((resolve, reject) => {
        if (AMap) {
            resolve(AMap);
        }
        // window.initAMap = () => {
        //     resolve(AMap);
        // };
    });
}

interface IThrottle {
    <T = unknown>(fn: (args?: T) => void, delay?: number): (args?: T) => void;
}

// 节流
export const throttle: IThrottle = (fn, delay = 500) => {
    let timer = -2;
    return (args) => {
        // 立即调用一次
        if (timer === -2) {
            fn(args);
            timer = -1;
        }
        if (timer === -1) {
            timer = window.setTimeout(() => {
                timer = -1;
                fn(args);
            }, delay);
        }
    }
}
使用地图的界面使用地图
先引入
import { MapLoader} from "@/utils/map";
定义变量
// 地图实例
const mapObj = ref();
// 标集合
const marksList = ref<any>()
// 信息窗体实例
const infoWindow: any = ref()
初始化地图
// 将接口数据传入getMap方法
const getMap = (latlogList: any) => {
    MapLoader().then((AMap: any) => {
    // 设置地图中心点,取的第一个数据
        let location: any = []
        const {clockLatitude, clockLongitude} = latlogList[0]
        location.push(Number(clockLongitude), Number(clockLatitude))
        // 创建地图
        mapObj.value = new AMap.Map("signleMap", {
            zoom: 12,
            center: location
        });

        // 添加标记点
        const markList: any = []
        for (let i = 0; i < latlogList.length; i++) {
            let marker = new AMap.Marker({
                position: [latlogList[i].clockLongitude, latlogList[i].clockLatitude],
                title: '打卡信息'
            })
            // 信息窗体

            // 创建 infoWindow 实例
            infoWindow.value = new AMap.InfoWindow({
                anchor: "top-left",
                offset: new AMap.Pixel(0, -30)
            });
            const content =
                `<div style="margin-left: 5px">
                <div>打卡坐标:(${latlogList[i].clockLatitude} ,${latlogList[i].clockLongitude})</div>
                <div>打卡时间:${dayjs(latlogList[i].clockDate).format('YYYY-MM-DD')}      ${latlogList[i].clockTime}</div>
                <div>地址:<span  style="color: #409EFF">${latlogList[i].clockAddress}</span></div>
                </div>
                 `
            marker.content = content
      // 绑定方法
            marker.on('click', clickMapPoint)
            markList.push( marker)
        }
     // 拿到所有的点
        marksList.value = markList
     // 地图里添加标记点
        mapObj.value.add(marksList.value)
    // 自动适应显示想显示的范围区域
        mapObj.value.setFitView()
    });
};
展示信息窗体方法
// 点击点标记
const clickMapPoint = (e: any) => {
    infoWindow.value.setContent(e.target.content);
    infoWindow.value.open(mapObj.value, e.target.getPosition());
}
2. 外部点击展示点位并打开该点位的信息窗体
需求:点击右侧图片,定位到对应的点上,然后打开信息窗体
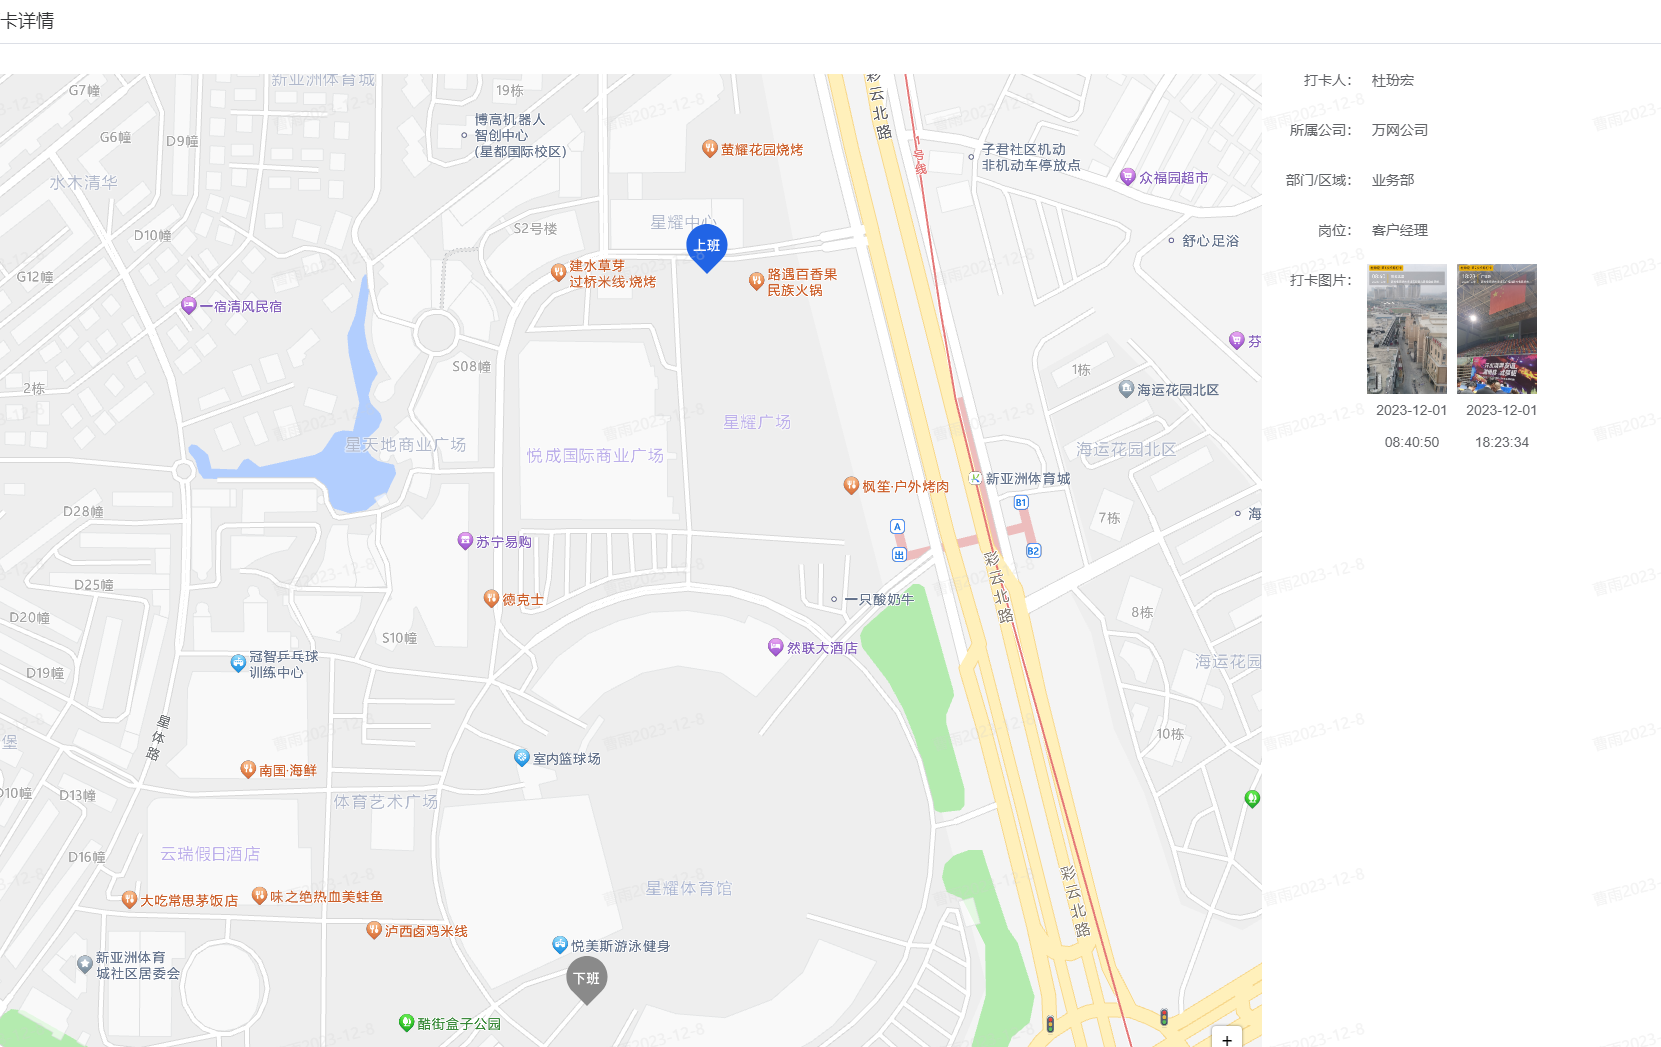
// 点击图片
const showPoint = (item: any) => {
    let location: any = []
    location.push(Number(item.longitude), Number(item.latitude))
    // 设置中心点
    mapObj.value.setCenter( location)
    // 展开信息窗体
    const content =
        `<div style=" width: 100%;">
                    <img src="${item.pictureAddress}"  style="width: 400px; height: 620px"/>
                    <div style="margin-left: 10px; display: flex; flex-direction: column; justify-content: space-between">
                        <div>打卡人:${formData.value.userName}</div>
                        <div>打卡坐标:(${item.longitude}, ${item.latitude} )</div>
                        <div>打卡时间:${item.clockDateTime}</div>
                        <div>地址:<span  style="color: #409EFF">${item.address || '----'}</span></div>
                    </div>
                </div>
                 `
    infoWindow.value = new AMap.InfoWindow({
        anchor: "bottom-right",
        offset:  new AMap.Pixel(20, 0),
        content:  content //使用默认信息窗体框样式,显示信息内容
    });
    const  position = new AMap.LngLat(Number(item.longitude), Number(item.latitude));
    infoWindow.value.open(mapObj.value, position)
}
点击图片时,拿到对应的数据,然后用setCenter设置中心点, 然后再创建一个infoWindow实例,再打开就可以了

 浙公网安备 33010602011771号