1. AspNetCore 实现JWT(使用Microsoft.AspNetCore.Authentication.JwtBearer)
概述
在AspNetCore 中实现Jwt比较简单,使用Microsoft.AspNetCore.Authentication.JwtBearer 库,再加几行代码即可.
步骤(2.x/3.x通用)
1.新建一个AspNetCore WebApi项目.
2.创建获取token的方法
    public static class JwtHelper
    {
        public  static string GeneratorToken(string username)
        {
            // 服务端密钥 一般16bit 以上
            var secret = "1234567890123456";

            var secretKey = new SymmetricSecurityKey(Encoding.UTF8.GetBytes(secret));
            // 加密算法
            var credentials = new SigningCredentials(secretKey, SecurityAlgorithms.HmacSha256);
            // 自定义claims
            var claims = new[]
            {
                new Claim(JwtRegisteredClaimNames.Jti,Guid.NewGuid().ToString()),
                new Claim(ClaimTypes.Name,username)
            };
            var token = new JwtSecurityToken(
                "issuer", // 发行者
                "audience", // 使用者
                claims,
                expires: DateTime.Now.AddMinutes(60),
                signingCredentials: credentials
                );
            return new JwtSecurityTokenHandler().WriteToken(token);

        }
    }
- 新建一个token控制器
    public class TokenRequest
    {
        public string UserName { get; set; }
        public string Password { get; set; }
    }


    [ApiController]
    [Route("[controller]")]
    public class TokenController:ControllerBase
    {
        [HttpPost("")]
        public async Task<IActionResult> GetToken([FromBody]TokenRequest request)
        {
            // 验证用户名密码
            var token = JwtHelper.GeneratorToken(request.UserName);
            return Ok(token);
        }
    }
- Startup 注册和启用中间件
        public void ConfigureServices(IServiceCollection services)
        {
            services.AddControllers();
            services.AddAuthentication(
                JwtBearerDefaults.AuthenticationScheme)
                .AddJwtBearer(options =>
                {
                    options.Events = new JwtBearerEvents()
                    {
                        OnMessageReceived = context =>
                        {
                            context.Token = context.Request.Cookies["access_token"];
                            return Task.CompletedTask;
                        }
                    };
                    options.TokenValidationParameters = new TokenValidationParameters
                    {
                        ValidateIssuer = true,
                        ValidateAudience = true,
                        ValidateLifetime = true,
                        ValidateIssuerSigningKey = true,
                        ValidIssuer = "issuer",
                        ValidAudience = "audience",
                        IssuerSigningKey = new SymmetricSecurityKey(Encoding.UTF8.GetBytes("1234567890123456"))
                    };

                });
        }


        public void Configure(IApplicationBuilder app, IWebHostEnvironment env)
        {
            if (env.IsDevelopment())
            {
                app.UseDeveloperExceptionPage();
            }

            app.UseRouting();
            app.UseAuthentication();

            app.UseAuthorization();

            app.UseEndpoints(endpoints =>
            {
                endpoints.MapControllers();
            });
        }
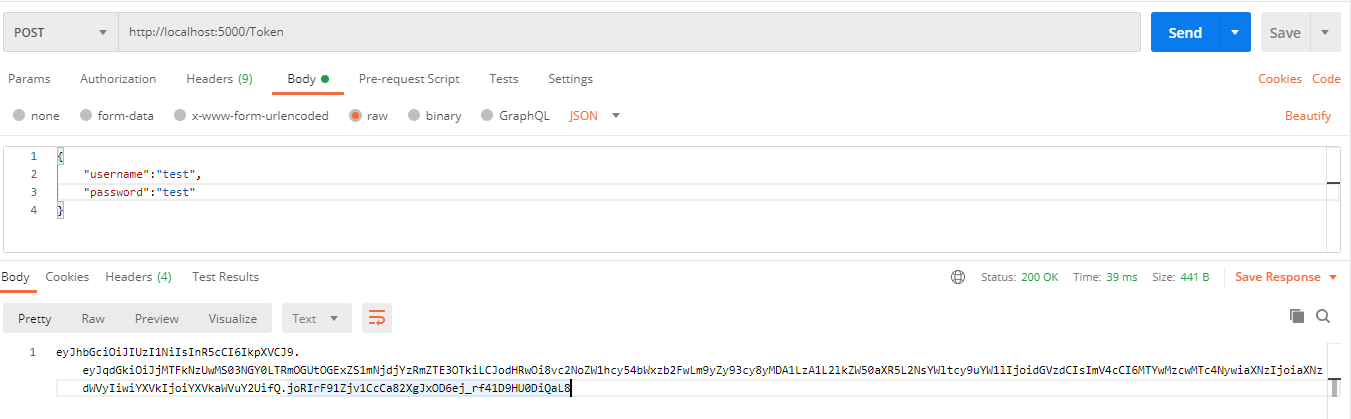
- 验证获取token
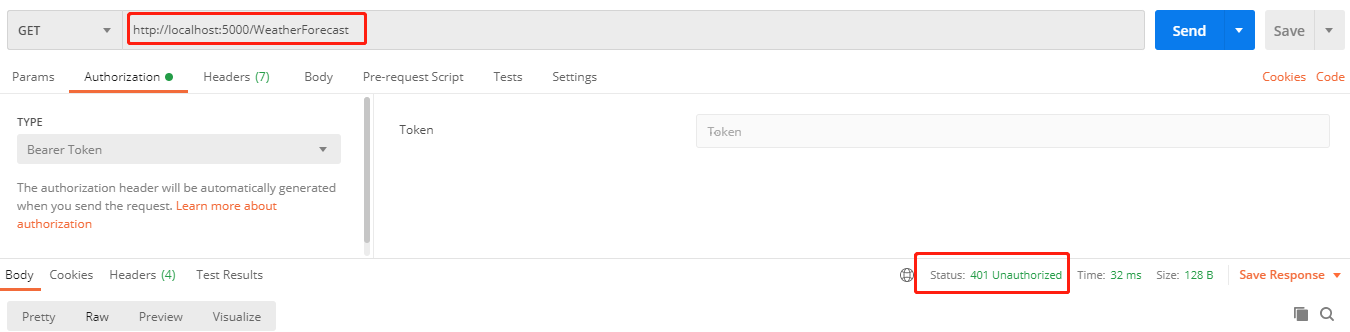
6.验证api(使用Authorize过滤器)
-
没有token时
![]()
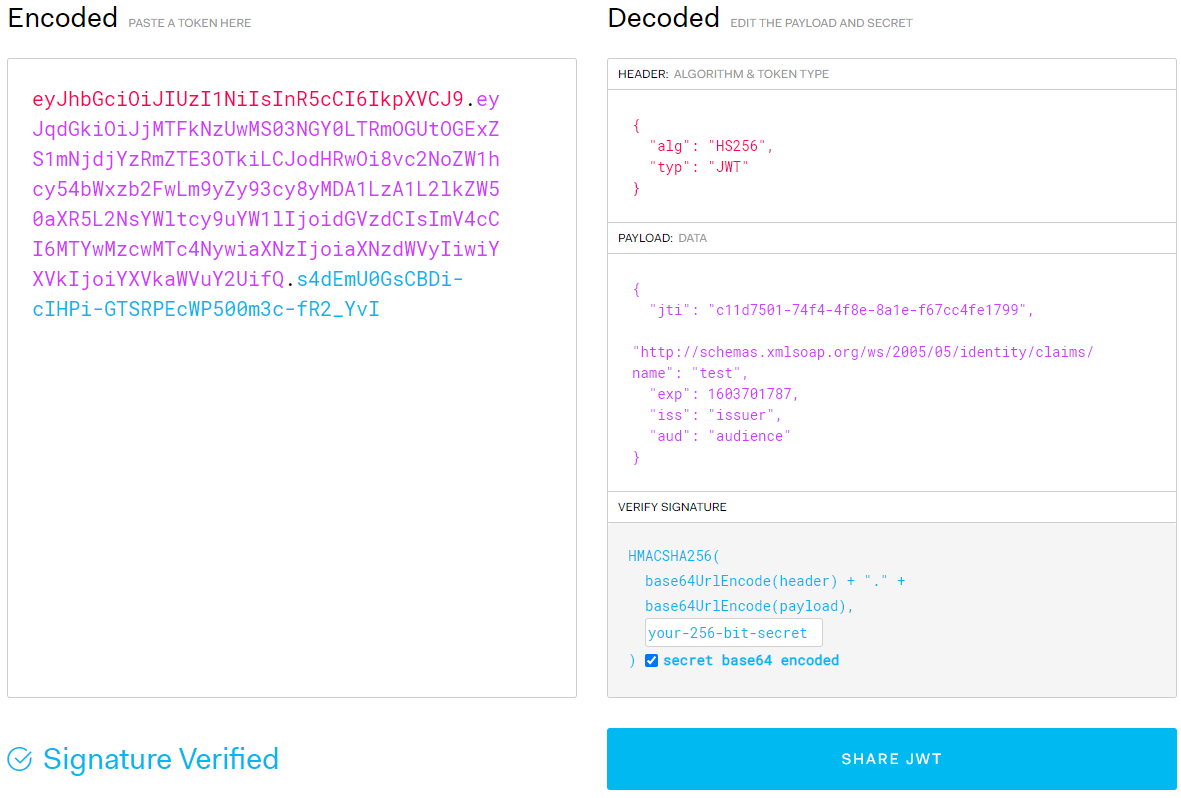
-
带上token时
![]()


 浙公网安备 33010602011771号