Python Qt 图形界面
Qt 图形界面
参考:
https://blog.csdn.net/zzx188891020/article/details/106060232
教程地址:
https://www.byhy.net/py/qt/qt_03_1/#_1
Demo
from PySide6.QtWidgets import QApplication, QMainWindow, QPushButton,  QPlainTextEdit

app = QApplication()

window = QMainWindow()
window.resize(500, 400)
window.move(300, 310)
window.setWindowTitle('薪资统计')

textEdit = QPlainTextEdit(window)
textEdit.setPlaceholderText("请输入薪资表")
textEdit.move(10,25)
textEdit.resize(300,350)

button = QPushButton('统计', window)
button.move(380,80)

window.show()

app.exec() # PySide6 是 exec 而不是 exec_
QApplication 提供了整个图形界面程序的底层管理功能,比如:
- 初始化,程序入口参数处理
- 用户事件(对界面的点击、输入、拖拽)分发给各个对应的控件
因为 QApplication 要做如此重要的初始化操作,所以,我们必须在任何界面空间对象创建前,先创建它
QMainWindow、QPlainTextEdit、QPushButton 是3个控件类,分别对应界面的主窗口、文本框、按钮
他们都是控件基类对象QWidget的子类。要在界面上 创建一个控件 ,就需要在程序代码中 创建 这个 控件对应类 的一个 实例对象。
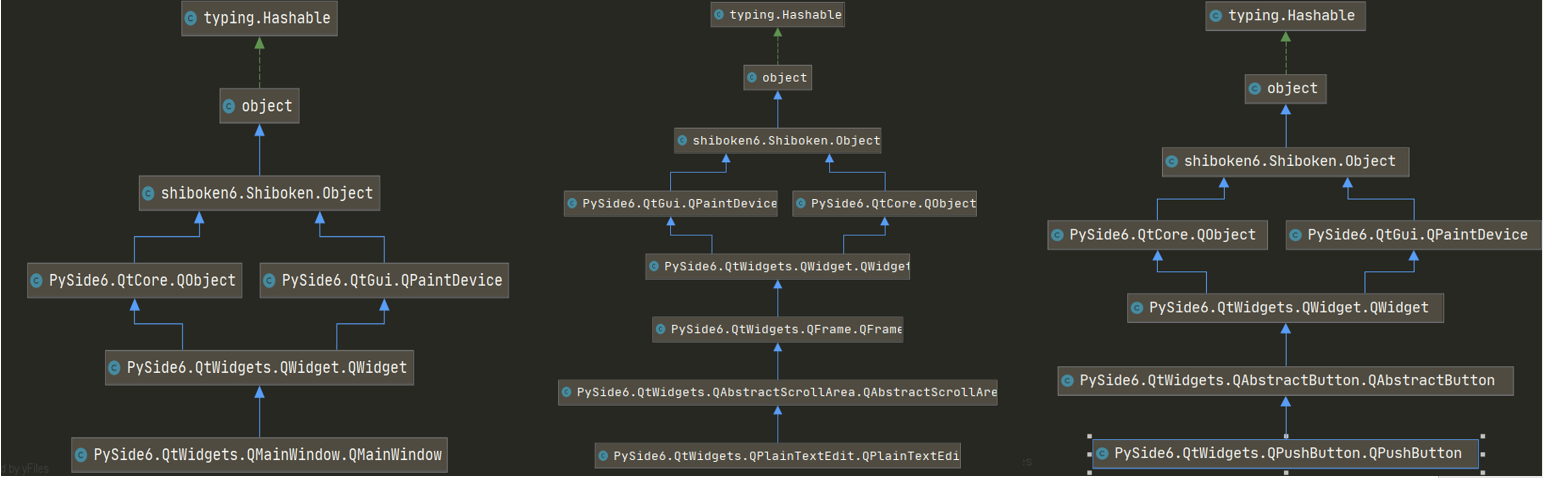
在 Qt 系统中,控件(widget)是 层层嵌套 的,除了最顶层的控件,其他的控件都有父控件。
QPlainTextEdit、QPushButton 实例化时,都有一个参数window,如下

QPlainTextEdit(window)
QPushButton('统计', window)
就是指定它的父控件对象 是 window 对应的QMainWindow 主窗口。
而 实例化 QMainWindow 主窗口时,却没有指定 父控件, 因为它就是最上层的控件了。
move:控件位置(有父组件就是相对于父组件的位置,否则就是相对于屏幕左上角的位置)
- window.move(300, 310) 就决定了 主窗口的 左上角坐标在 相对屏幕的左上角 的X横坐标300像素, Y纵坐标310像素这个位置。
- textEdit.move(10,25) 就决定了文本框的 左上角坐标在 相对父窗口的左上角 的X横坐标10像素, Y纵坐标25像素这个位置。
resize:空间显示的大小
- window.resize(500, 400) 就决定了 主窗口的 宽度为500像素,高度为400像素。
- textEdit.resize(300,350) 就决定了文本框的 宽度为300像素,高度为350像素。
window.show()
放在主窗口的控件,要能全部显示在界面上
事件处理循环
# 进入QApplication的事件处理循环,接收用户的输入事件(),并且分配给相应的对象去处理。
app.exec()
界面动作处理(signal 和 slot)
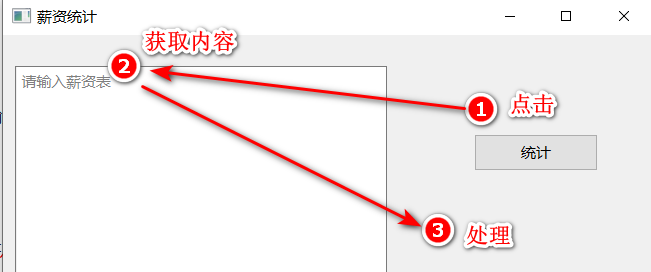
当用户点击 统计 按钮时, 从界面控件 QPlainTextEdit 里面获取 用户输入的字符串内容,进行处理。
在 Qt 系统中, 当界面上一个控件被操作时,比如 被点击、被输入文本、被鼠标拖拽等, 就会发出 信号 ,英文叫 signal 。
就是表明一个事件(比如被点击、被输入文本)发生了。
我们可以预先在代码中指定 处理这个 signal 的函数,这个处理 signal 的函数 叫做 slot 。
比如,我们可以像下面这样定义一个函数
def handleCalc():
    print('统计按钮被点击了')
1. 点击
指定 如果 发生了button 按钮被点击 的事情,需要让 handleCalc 来处理,像这样
# 让 handleCalc 来 处理 button 被 点击的操作
button.clicked.connect(handleCalc)

2. 查询、计算
from PySide6.QtWidgets import QApplication, QMainWindow, QPushButton, QPlainTextEdit,QMessageBox
def handleCalc():
info = textEdit.toPlainText()
# 薪资20000 以上 和 以下 的人员名单
salary_above_20k = ''
salary_below_20k = ''
for line in info.splitlines():
if not line.strip():
continue
parts = line.split(' ')
# 去掉列表中的空字符串内容
parts = [p for p in parts if p]
name,salary,age = parts
if int(salary) >= 20000:
salary_above_20k += name + '\n'
else:
salary_below_20k += name + '\n'
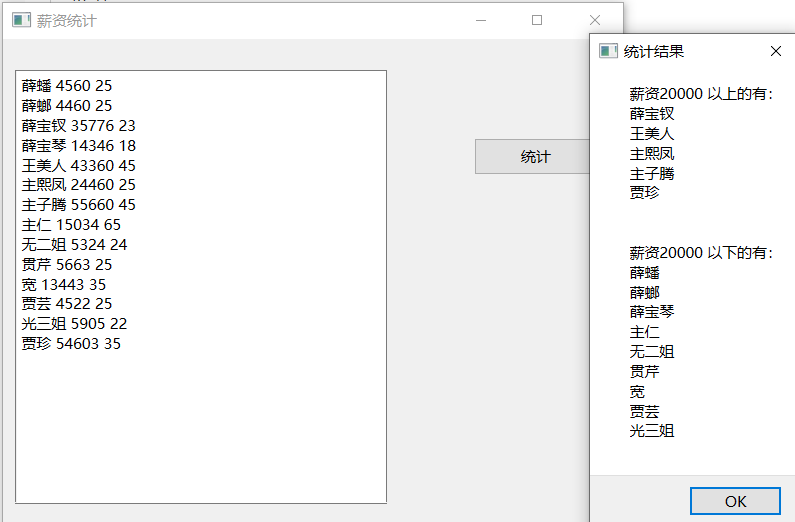
QMessageBox.about(window,
'统计结果',
f'''薪资20000 以上的有:\n{salary_above_20k}
\n薪资20000 以下的有:\n{salary_below_20k}'''
)
app = QApplication()
window = QMainWindow()
window.resize(500, 400)
window.move(300, 300)
window.setWindowTitle('薪资统计')
textEdit = QPlainTextEdit(window)
textEdit.setPlaceholderText("请输入薪资表")
textEdit.move(10,25)
textEdit.resize(300,350)
button = QPushButton('统计', window)
button.move(380,80)
button.clicked.connect(handleCalc)
window.show()
app.exec()
薛蟠 4560 25
薛螂 4460 25
薛宝钗 35776 23
薛宝琴 14346 18
王美人 43360 45
主熙凤 24460 25
主子腾 55660 45
主仁 15034 65
无二姐 5324 24
贯芹 5663 25
宽 13443 35
贾芸 4522 25
光三姐 5905 22
贾珍 54603 35
封装到类中
from PySide6.QtWidgets import QApplication, QMainWindow, QPushButton,  QPlainTextEdit,QMessageBox

class Stats:
    def __init__(self):
        self.window = QMainWindow()
        self.window.resize(500, 400)
        self.window.move(300, 300)
        self.window.setWindowTitle('薪资统计')

        self.textEdit = QPlainTextEdit(self.window)
        self.textEdit.setPlaceholderText("请输入薪资表")
        self.textEdit.move(10, 25)
        self.textEdit.resize(300, 350)

        self.button = QPushButton('统计', self.window)
        self.button.move(380, 80)

        self.button.clicked.connect(self.handleCalc)


    def handleCalc(self):
        info = self.textEdit.toPlainText()

        # 薪资20000 以上 和 以下 的人员名单
        salary_above_20k = ''
        salary_below_20k = ''
        for line in info.splitlines():
            if not line.strip():
                continue
            parts = line.split(' ')
            # 去掉列表中的空字符串内容
            parts = [p for p in parts if p]
            name,salary,age = parts
            if int(salary) >= 20000:
                salary_above_20k += name + '\n'
            else:
                salary_below_20k += name + '\n'

        QMessageBox.about(self.window,
                    '统计结果',
                    f'''薪资20000 以上的有:\n{salary_above_20k}
                    \n薪资20000 以下的有:\n{salary_below_20k}'''
                    )

app = QApplication()
stats = Stats()
stats.window.show()
app.exec()
界面设计和布局1
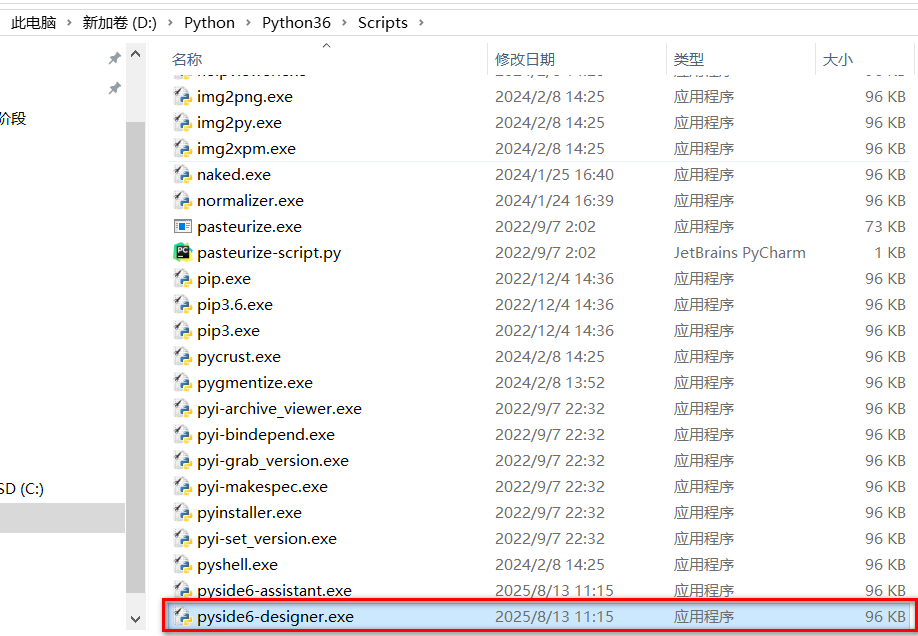
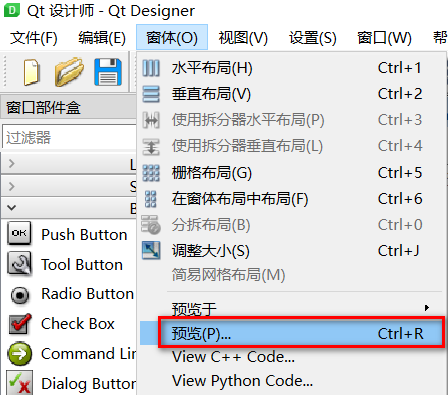
我们可以用QT界面生成器 Qt Designer ,拖拖拽拽就可以直观的创建出程序大体的界面
Windows下,运行 Python安装目录下 Scripts\pyside6-designer.exe 这个可执行文件
D:\Python\Python36\Scripts
选择需要的控件直接拖过来即可:
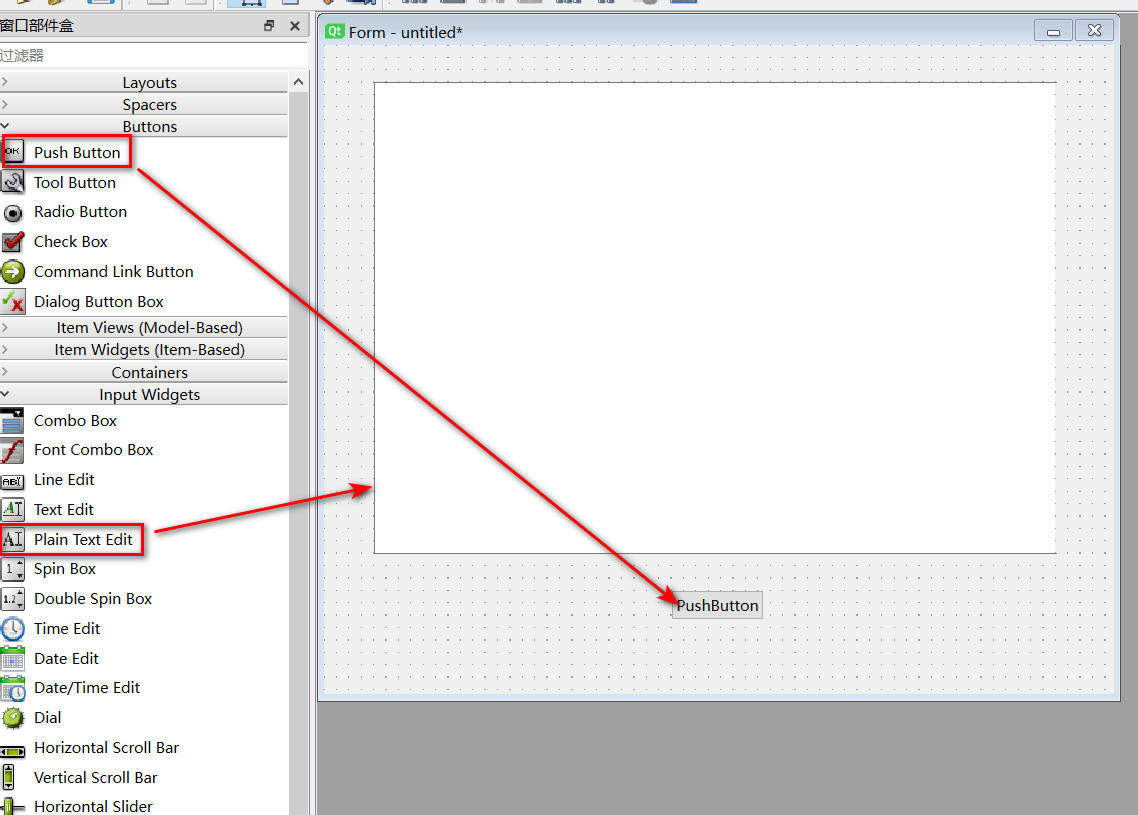
输入窗口的提示信息(根据 python 代码)
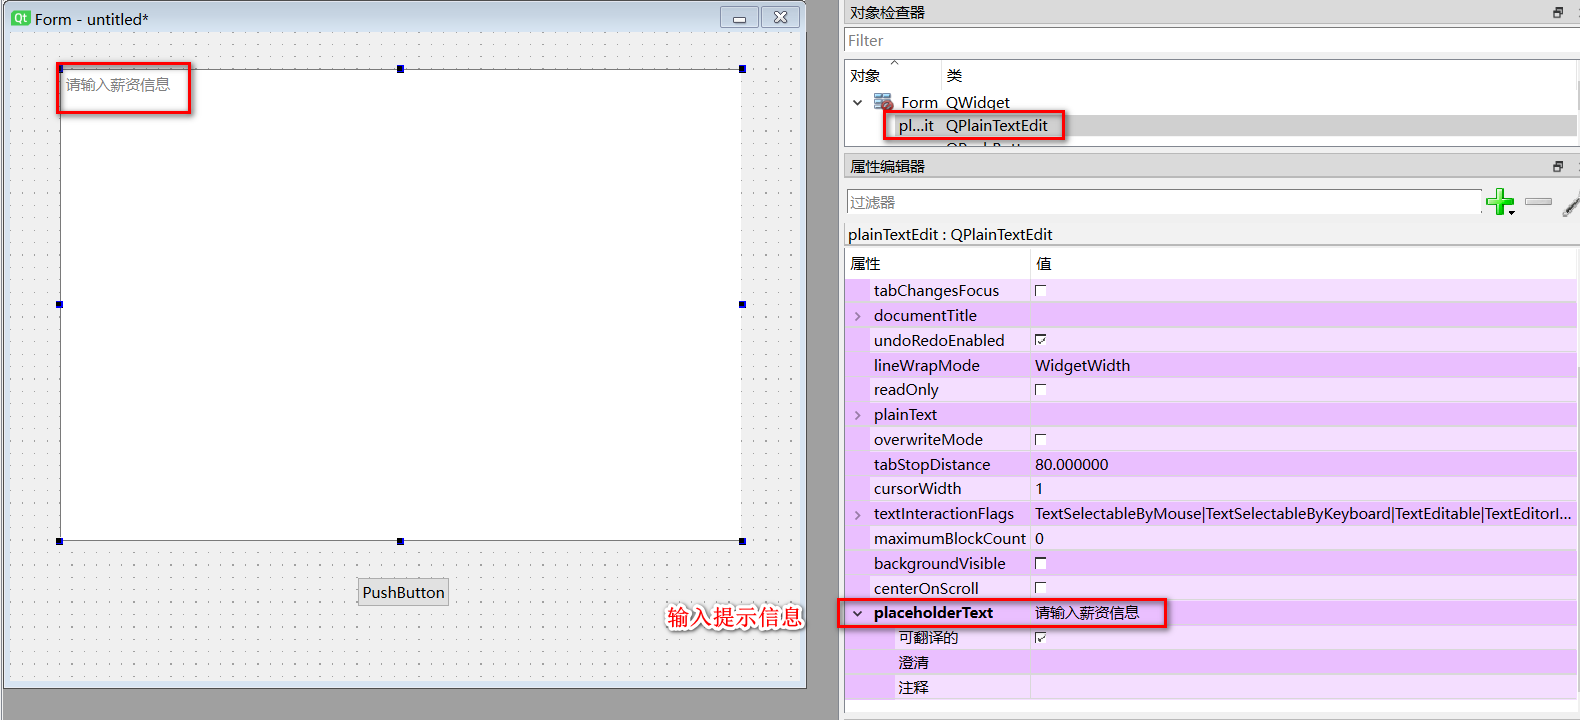
双击变量重命名(可以有多个按钮、文本框)
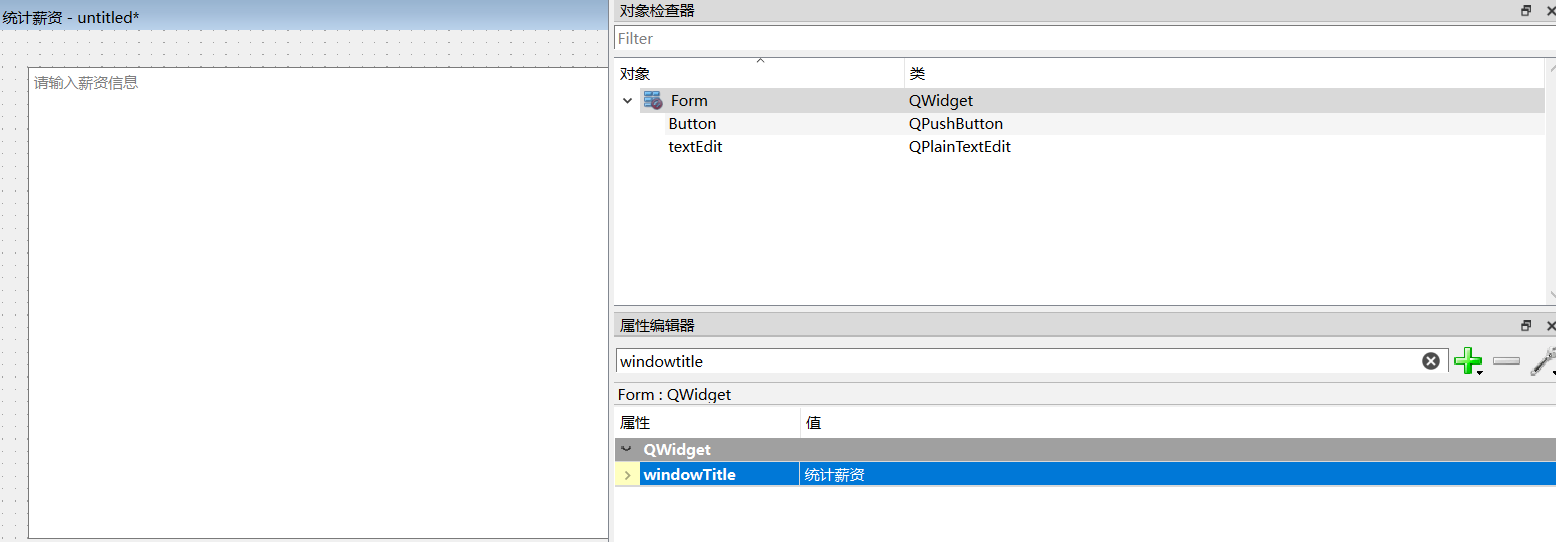
预览:
保存后生成的是 .ui 文件

使用 nodePad 打开
<?xml version="1.0" encoding="UTF-8"?>
<ui version="4.0">
 <class>Form</class>
 <widget class="QWidget" name="Form">
  <property name="geometry">
   <rect>
    <x>0</x>
    <y>0</y>
    <width>637</width>
    <height>524</height>
   </rect>
  </property>
  <property name="windowTitle">
   <string>统计薪资</string>
  </property>
  <widget class="QPlainTextEdit" name="textEdit">
   <property name="geometry">
    <rect>
     <x>40</x>
     <y>30</y>
     <width>551</width>
     <height>381</height>
    </rect>
   </property>
   <property name="placeholderText">
    <string>请输入薪资信息</string>
   </property>
  </widget>
  <widget class="QPushButton" name="Button">
   <property name="geometry">
    <rect>
     <x>280</x>
     <y>440</y>
     <width>75</width>
     <height>24</height>
    </rect>
   </property>
   <property name="text">
    <string>PushButton</string>
   </property>
  </widget>
 </widget>
 <resources/>
 <connections/>
</ui>
注意:新增的控件的 key 也会变成 ui 的属性,编程时保持名称一致

练习:仿制 postman

import sys
import requests
from PySide6 import QtWidgets, QtCore, QtUiTools
import xml.etree.ElementTree as ET
def get_toolbutton_names(ui_path):
"""解析 .ui 文件,找出所有 QToolButton 的 objectName"""
tree = ET.parse(ui_path)
root = tree.getroot()
buttons = []
for widget in root.iter("widget"):
if widget.attrib.get("class") == "QToolButton":
buttons.append(widget.attrib.get("name"))
return buttons
class MyApp(QtWidgets.QMainWindow):
def __init__(self, ui_path):
super().__init__()
# 1. 加载 UI
loader = QtUiTools.QUiLoader()
ui_file = QtCore.QFile(ui_path)
ui_file.open(QtCore.QFile.ReadOnly)
self.ui = loader.load(ui_file, self)
ui_file.close()
# 2. 初始化 tableWidget
self.ui.tableWidget.setColumnCount(2)
self.ui.tableWidget.setHorizontalHeaderLabels(["Header 名", "Header 值"])
self.ui.tableWidget.horizontalHeader().setStretchLastSection(True)
# 3. 找到 QToolButton
toolbuttons = get_toolbutton_names(ui_path)
if len(toolbuttons) >= 2:
getattr(self.ui, toolbuttons[0]).clicked.connect(self.add_header_row)
getattr(self.ui, toolbuttons[1]).clicked.connect(self.remove_header_row)
print(f"已绑定: {toolbuttons[0]} -> 添加行, {toolbuttons[1]} -> 删除行")
else:
print("⚠ 没找到足够的 QToolButton,请检查 UI 文件。")
# 4. pushButton 绑定发送
self.ui.pushButton.clicked.connect(self.send_message)
# 显示 UI
self.setCentralWidget(self.ui)
def add_header_row(self):
"""增加一行空的 header"""
row_count = self.ui.tableWidget.rowCount()
self.ui.tableWidget.insertRow(row_count)
self.ui.tableWidget.setItem(row_count, 0, QtWidgets.QTableWidgetItem(""))
self.ui.tableWidget.setItem(row_count, 1, QtWidgets.QTableWidgetItem(""))
def remove_header_row(self):
"""删除选中的 header 行"""
selected_rows = set()
row_count = self.ui.tableWidget.rowCount()
for index in self.ui.tableWidget.selectionModel().selectedIndexes():
selected_rows.add(index.row())
for row in sorted(selected_rows, reverse=True):
self.ui.tableWidget.removeRow(row)
if len(selected_rows) == 0 and row_count >= 1:
self.ui.tableWidget.removeRow(row_count - 1)
def send_message(self):
"""收集 UI 数据并显示"""
method = self.ui.comboBox.currentText().strip().upper()
url = self.ui.plainTextEdit.toPlainText().strip()
headers = {}
proxies = {
"http": "http://127.0.0.1:7890",
"https": "http://127.0.0.1:7890"
}
# 收集 header
for row in range(self.ui.tableWidget.rowCount()):
key_item = self.ui.tableWidget.item(row, 0)
value_item = self.ui.tableWidget.item(row, 1)
if key_item and value_item and key_item.text().strip():
headers[key_item.text()] = value_item.text()
# 收集选中单元格作为消息体
selected_indexes = self.ui.tableWidget.selectionModel().selectedIndexes()
body = "\n".join(
self.ui.tableWidget.item(i.row(), i.column()).text()
for i in selected_indexes if self.ui.tableWidget.item(i.row(), i.column())
)
try:
# 发请求
if method == "GET":
resp = requests.get(url, headers=headers, proxies=proxies)
else:
# POST 请求用 body
resp = requests.post(url, headers=headers, data=body.encode("utf-8"), proxies=proxies)
# 构造请求部分
request_info = f"{method} {url}\n"
for k, v in headers.items():
request_info += f"{k}:{v}\n"
if body:
request_info += f"Content-Length:{len(body.encode('utf-8'))}\n{body}\n"
# 构造响应部分
status_line = f"HTTP/{resp.raw.version / 10:.1f} {resp.status_code}\n"
response_headers = ""
for k, v in resp.headers.items():
response_headers += f"{k}: {v}\n"
response_body = resp.text
# 拼接到 textEdit
self.ui.textEdit.setPlainText(
request_info
+ status_line
+ response_headers
+ response_body
)
except Exception as e:
self.ui.textEdit.setPlainText(f"请求失败: {e}")
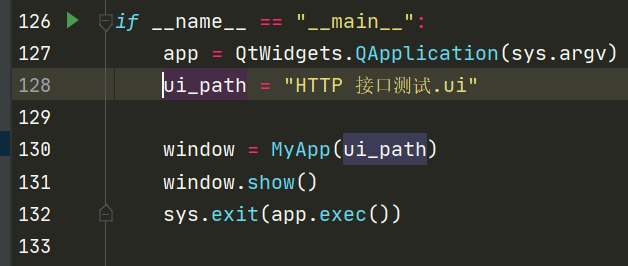
if __name__ == "__main__":
app = QtWidgets.QApplication(sys.argv)
ui_path = "HTTP 接口测试.ui"
window = MyApp(ui_path)
window.show()
sys.exit(app.exec())
发布程序(打包成 exe 文件)PyInstaller
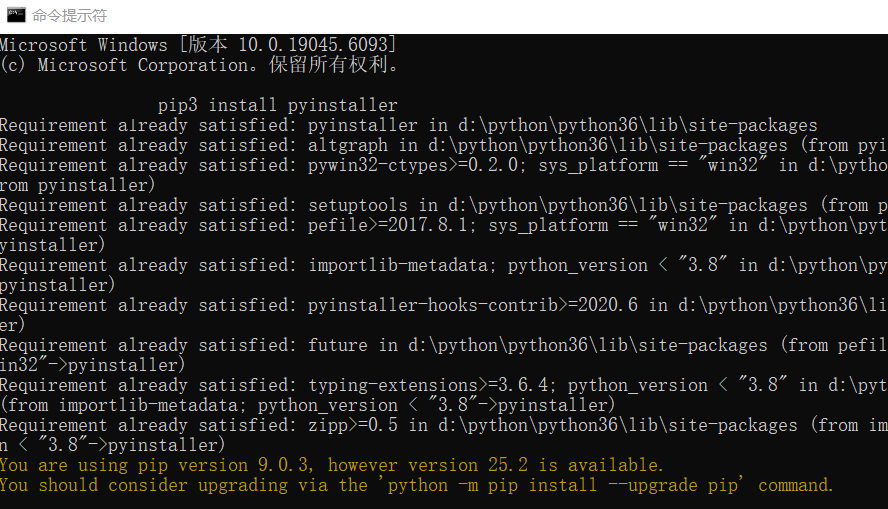
pyinstaller parseHttp.py --noconsole --hidden-import PySide6.QtXml
发现报错:
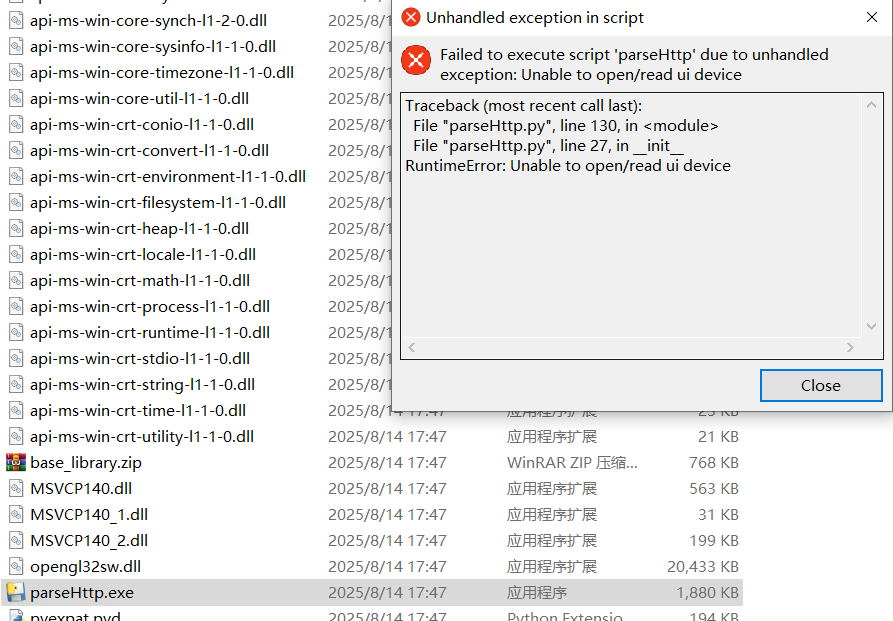
定位到代码行数:
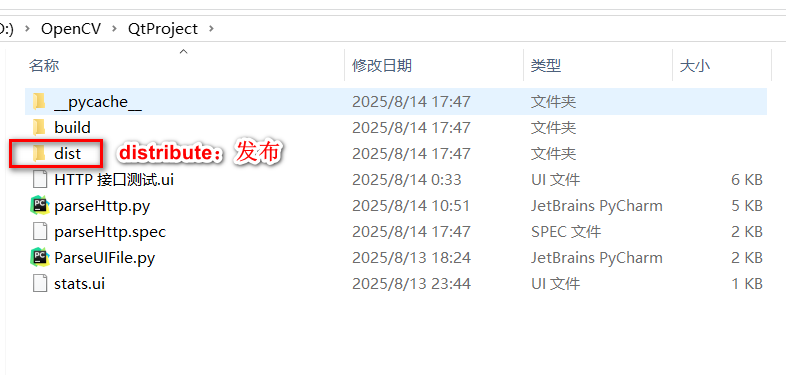
最后,别忘了,把程序所需要的ui文件拷贝到打包目录中。
因为PyInstaller只能分析出需要哪些代码文件。 而你的程序动态打开的资源文件,比如 图片、excel、ui这些,它是不会帮你打包的。
我们的 示例代码 需要 从 httpclient.ui 中加载界面,手动拷贝到 dist/httpclient 目录中。


 浙公网安备 33010602011771号