


安卓自定义控件快速了解
自定义控件,自定义视图方式,
假设我们写好一个视图,就以这个视图封装起来做成一个组件,这个自定义的控件就想当方便以后相同功能时直接调用
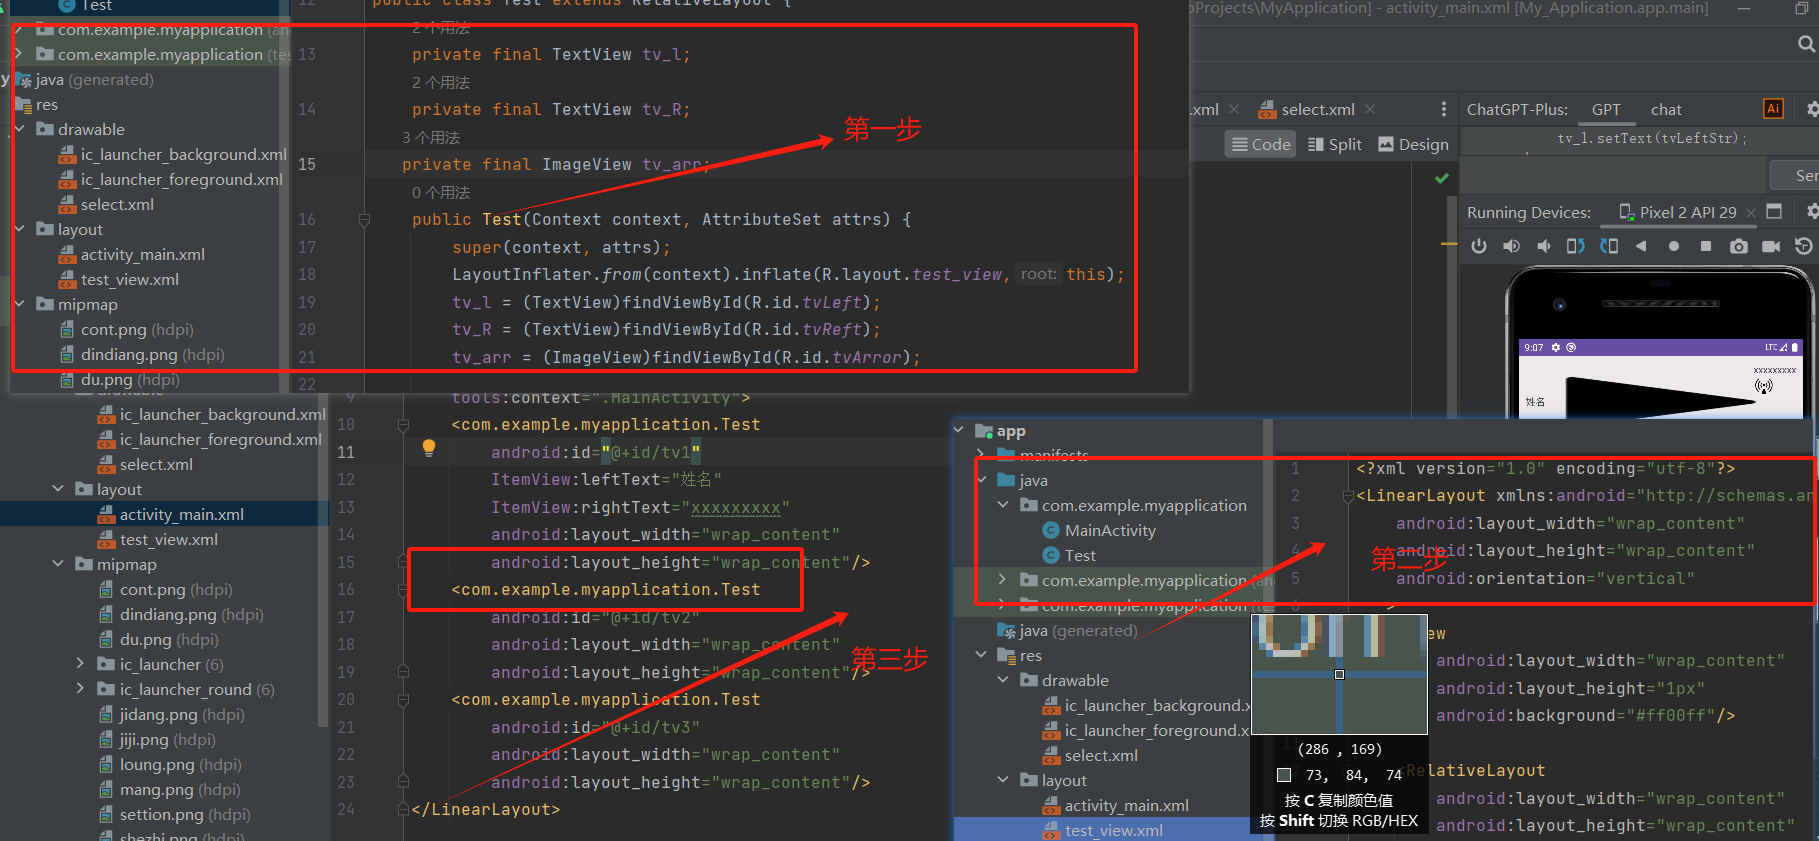
这个核心分为三步,第一步编写一个类继一个视图,这个继承的视图比如RelativeLayout,除了 RelativeLayout以外,Android 还提供了其他一些常用的布局类,如:
-
LinearLayout: 用于在水平或垂直方向上排列子视图。 -
FrameLayout: 以相对位置的方式定位单个子视图。 -
ConstraintLayout: 通过使用约束条件在更复杂的布局中定位子视图。
当选择继承哪个布局类时,您可以根据您的布局需求和设计选择最适合的父类。在更高级的自定义视图的时候,如果是绘制还可以继承view 然后用canvas 来绘制控件
第二步,给这个类编写一个视图xml 文件,只是如果是RelativeLayout上绑定响就要可以在组件上增加属性。android:clickable="true" 否则点击没有反应。最后在需要使用这个组件的时候,引用类路径的方法使用控件就完成,
但是是自定义控件,我们就要会动态设置值,如果值写就没有意义了,关于动态设置值,第一步在自定义组件中,先用id 获取资源,然后编写一个函数设置值,最后在主函数调用方法传入值,
自定义控件中这义如下:
  public Test(Context context, AttributeSet attrs) {
        super(context, attrs);
        LayoutInflater.from(context).inflate(R.layout.test_view,this);
        tv_l = (TextView)findViewById(R.id.tvLeft);
        tv_R = (TextView)findViewById(R.id.tvReft);
        tv_arr = (ImageView)findViewById(R.id.tvArror);
    }
    public void setView(String tvLeftStr, String tvRight, boolean isShowArr){
        if(tvLeftStr != null){
            tv_l.setText(tvLeftStr);
        }
        if(tvRight != null){
            tv_R.setText(tvRight);
        }
        if(isShowArr){
            tv_arr.setVisibility(View.VISIBLE);
        }else{
            tv_arr.setVisibility(View.GONE);
        }
    }
主函数中就可以调接设置值
public class MainActivity extends AppCompatActivity {
    @Override
    protected void onCreate(Bundle savedInstanceState) {
        super.onCreate(savedInstanceState);
        setContentView(R.layout.activity_main);
       Test tv1 = (Test) findViewById(R.id.tv1);
       Test tv2 = (Test) findViewById(R.id.tv2);
       Test tv3 = (Test) findViewById(R.id.tv3);
        tv2.setView("555","444",true);
        tv3.setView("6666","66",false);
        tv1.setView("ddd","ddd",true);
、、、、、、、、、、、、、、、、、、、、、、、、、、、、、、、、、、、、、、、、、、、、、、、
当然也可以通过配置文件传值,通过自定义属,步聚分为三步,第一步编写一个arrts 自定义属生文件,第二步是在使用自定义控件引用的地方增加自定属性的值,第三步在自定义控件的文件中获取配置文件的属生和和值,以下是详细步聚
第一步编写attas文件,位于res 资源目录values目录下面,和colors,string。xml同级
<resources>
    <declare-styleable name="ItemView">
        <attr name="leftText" format="string" />
        <attr name="rightText" format="string" />
        <attr name="showArrow" format="boolean" />
    </declare-styleable>
</resources>
第二步在引用的地方配置值,这儿会提法增加命名空间,否则不识别
<?xml version="1.0" encoding="utf-8"?>
<LinearLayout xmlns:android="http://schemas.android.com/apk/res/android"
    xmlns:app="http://schemas.android.com/apk/res-auto"
    xmlns:tools="http://schemas.android.com/tools"
    android:layout_width="wrap_content"
    android:layout_height="wrap_content"
    xmlns:ItemView="http://schemas.android.com/apk/res-auto"
    android:orientation="vertical"
    tools:context=".MainActivity">
    <com.example.myapplication.Test
        android:id="@+id/tv1"
        ItemView:leftText="姓名"
        ItemView:rightText="xxxxxxxxx"
        android:layout_width="wrap_content"
        android:layout_height="wrap_content"/>
    <com.example.myapplication.Test
        android:id="@+id/tv2"
        android:layout_width="wrap_content"
        android:layout_height="wrap_content"/>
    <com.example.myapplication.Test
第三步,在自定义控件的代码中增加获取和配置
package com.example.myapplication;

import android.content.Context;
import android.content.res.TypedArray;
import android.util.AttributeSet;
import android.view.LayoutInflater;
import android.view.View;
import android.widget.ImageView;
import android.widget.RelativeLayout;
import android.widget.TextView;

public class Test extends RelativeLayout {
    private final TextView tv_l;
    private final TextView tv_R;
   private final ImageView tv_arr;
    public Test(Context context, AttributeSet attrs) {
        super(context, attrs);
        LayoutInflater.from(context).inflate(R.layout.test_view,this);
        tv_l = (TextView)findViewById(R.id.tvLeft);
        tv_R = (TextView)findViewById(R.id.tvReft);
        tv_arr = (ImageView)findViewById(R.id.tvArror);
d        //获取资源名,第二个参数itemView是自定义属生那儿设置的
        TypedArray a = context.obtainStyledAttributes(attrs,R.styleable.ItemView);
         String l = a.getString(R.styleable.ItemView_leftText);
         String r = a.getString(R.styleable.ItemView_rightText);
         boolean showArr = a.getBoolean(R.styleable.ItemView_showArrow,true);
         setView(l,r,showArr);

    }
    public void setView(String tvLeftStr, String tvRight, boolean isShowArr){
        if(tvLeftStr != null){
            tv_l.setText(tvLeftStr);
        }
        if(tvRight != null){
            tv_R.setText(tvRight);
        }
        if(isShowArr){
            tv_arr.setVisibility(View.VISIBLE);
        }else{
            tv_arr.setVisibility(View.GONE);
        }
    }

这个编辑又跳不出去了,真晕
最后自定义事件
自定义事件是写在自定义的控件中,写一个方法,由外界调用,通常我以下代码示例:
public void setOnItemViewClickListener(OnClickListener l){
     rrr.setOnClickListener(l);
}
这儿RRR是xml的获取id ,setOnItemViewClickListener自定义方法。这个方法传了一个参数,参数上系统事件


package com.example.myapplication;

import android.content.Context;
import android.content.res.TypedArray;
import android.util.AttributeSet;
import android.view.LayoutInflater;
import android.view.View;
import android.widget.ImageView;
import android.widget.RelativeLayout;
import android.widget.TextView;

public class Test extends RelativeLayout {
    private final TextView tv_l;
    private final TextView tv_R;
   private final ImageView tv_arr;
    private final RelativeLayout rrr;

    public Test(Context context, AttributeSet attrs) {
        super(context, attrs);
        LayoutInflater.from(context).inflate(R.layout.test_view,this);
        tv_l = (TextView)findViewById(R.id.tvLeft);
        tv_R = (TextView)findViewById(R.id.tvReft);
        tv_arr = (ImageView)findViewById(R.id.tvArror);
        rrr = findViewById(R.id.rrr);

        TypedArray a = context.obtainStyledAttributes(attrs,R.styleable.ItemView);
         String l = a.getString(R.styleable.ItemView_leftText);
         String r = a.getString(R.styleable.ItemView_rightText);
         boolean showArr = a.getBoolean(R.styleable.ItemView_showArrow,true);
         setView(l,r,showArr);
    }
    public void setView(String tvLeftStr, String tvRight, boolean isShowArr){
        if(tvLeftStr != null){
            tv_l.setText(tvLeftStr);
        }
        if(tvRight != null){
            tv_R.setText(tvRight);
        }
        if(isShowArr){
            tv_arr.setVisibility(View.VISIBLE);
        }else{
            tv_arr.setVisibility(View.GONE);
        }
    }
   public void setOnItemViewClickListener(OnClickListener l){
        rrr.setOnClickListener(l);
   }

   public String getLeftTest(){
        return tv_l.getText().toString();
   }


}
引用的地方,就可以直接调组件定义的方法,
package com.example.myapplication;

import androidx.appcompat.app.AppCompatActivity;
import androidx.appcompat.view.menu.MenuView;

import android.os.Bundle;
import android.util.Log;
import android.view.View;
import android.widget.Toast;

public class MainActivity extends AppCompatActivity {

    @Override
    protected void onCreate(Bundle savedInstanceState) {
        super.onCreate(savedInstanceState);
        setContentView(R.layout.activity_main);
       Test tv1 = (Test) findViewById(R.id.tv1);
       Test tv2 = (Test) findViewById(R.id.tv2);
       Test tv3 = (Test) findViewById(R.id.tv3);
        tv2.setView("555","444",true);
        tv3.setView("6666","66",false);
        tv1.setView("ddd","ddd",true);
        tv1.setOnItemViewClickListener(new View.OnClickListener() {
            @Override
            public void onClick(View v) {
                Log.d("xsy","fffffffffffffffffffffffffffffffffffffffffffffffff");
                Toast.makeText(MainActivity.this, tv1.getLeftTest(), Toast.LENGTH_LONG).show();
            }
        });
    }
}


 浙公网安备 33010602011771号