What is rendering?
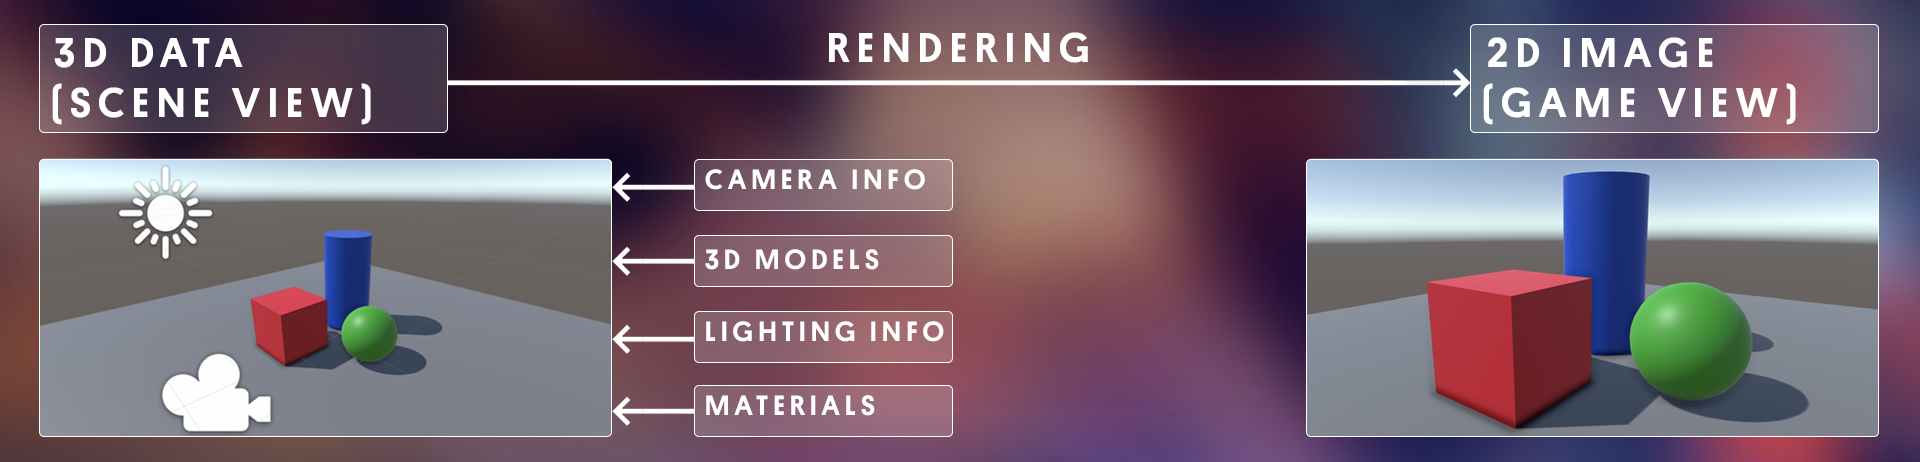
Rendering is the process of taking three-dimensional (3D) data and using it to generate a two-dimensional (2D) image for a screen.

Let’s break it down even further:
In Unity, you can position 3D models, apply materials to those models, and point a virtual camera at them. Rendering is taking in all that data (object geometry, position, colors, lighting, and much more) and producing an image from the perspective of a camera.
So now that you know what rendering is, let’s move on to the second word: pipelines.
What are render pipelines?
If rendering is the process of getting from point A to point B (3D data to a 2D image), then you can think of render pipelines as the different ways of getting there.
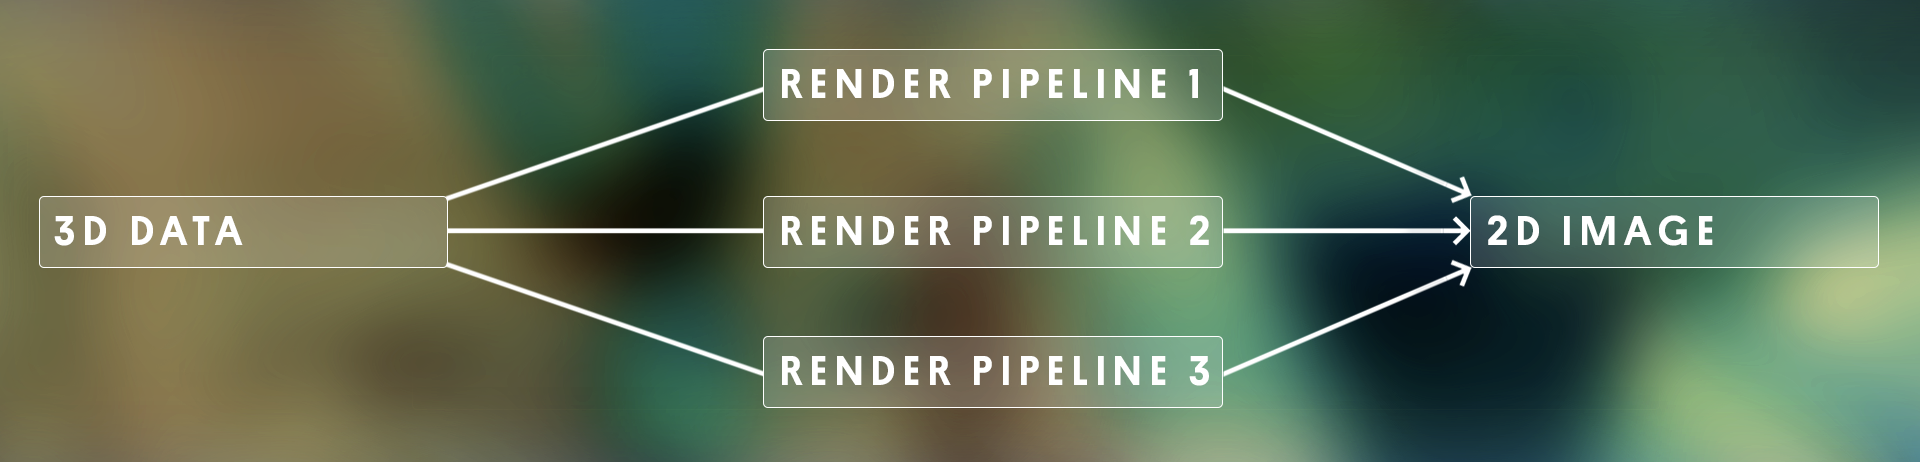
Since each render pipeline uses different techniques and calculations to produce a 2D image, the results can vary, depending on which pipeline you choose.
Choosing a render pipeline for your project is just like choosing whether to walk, cycle, or drive to your destination; no one option is inherently better or worse than the other – it just depends on your goals!
And just as walking, cycling, and driving have advantages and disadvantages, so too do different render pipelines. One is fastest, one might be easiest, and sometimes,
one won’t work at all for where you’re trying to go! That’s why it’s important to choose the render pipeline that best suits your goals for the project.
3、Choose a render pipeline
What are the options?
Let’s revisit the template options you looked at in the Hub in a bit more detail, including their advantages and disadvantages:
-
Unity’s Built-In Render Pipeline works on all platforms and is pretty reliable. It’s easy to use, but it is built-in to Unity, so it’s not very customizable. It isn’t the most efficient, either.
-
The Universal Render Pipeline (URP) is ideal for mobile, web, and VR projects, since it is highly optimized for performance. It’s a bit more complex to configure, but it is more customizable than the Built-In Render Pipeline. It can produce pretty decent graphics.
-
The High Definition Render Pipeline (HDRP) is designed to produce high-quality graphics for high-end platforms, like consoles or gaming computers, where there is plenty of processing power. It is very complex to configure, so should only be used by people with lots of graphics experience.
URP and HDRP are both Scriptable Render Pipelines (SRPs). SRPs are highly customizable and can even be written from scratch. Since writing a render pipeline is a big task, Unity provides these two SRPs as templates, which will handle most projects.
Make the decision
So, which one should you choose?
Let’s immediately rule out HDRP, since we’re not targeting extremely high end machines and because it requires a lot of graphics expertise.
But how should you choose between the Built-In Render Pipeline and URP? Well the whole point of this pathway is for you to learn and experiment with the core features of Unity’s creative systems, including lighting, materials, post-processing, and visual effects. So here are some reasons to choose URP over the Built-In Render Pipeline:
-
URP is more customizable than the Built-In Renderer Pipeline, allowing you to experiment more.
-
Some really powerful new editor features like Shader Graph and VFX Graph are only compatible with URP and not the Built-In Render Pipeline.
-
URP projects are optimized for performance on whichever platform you want to target (web, desktop, mobile, or VR).
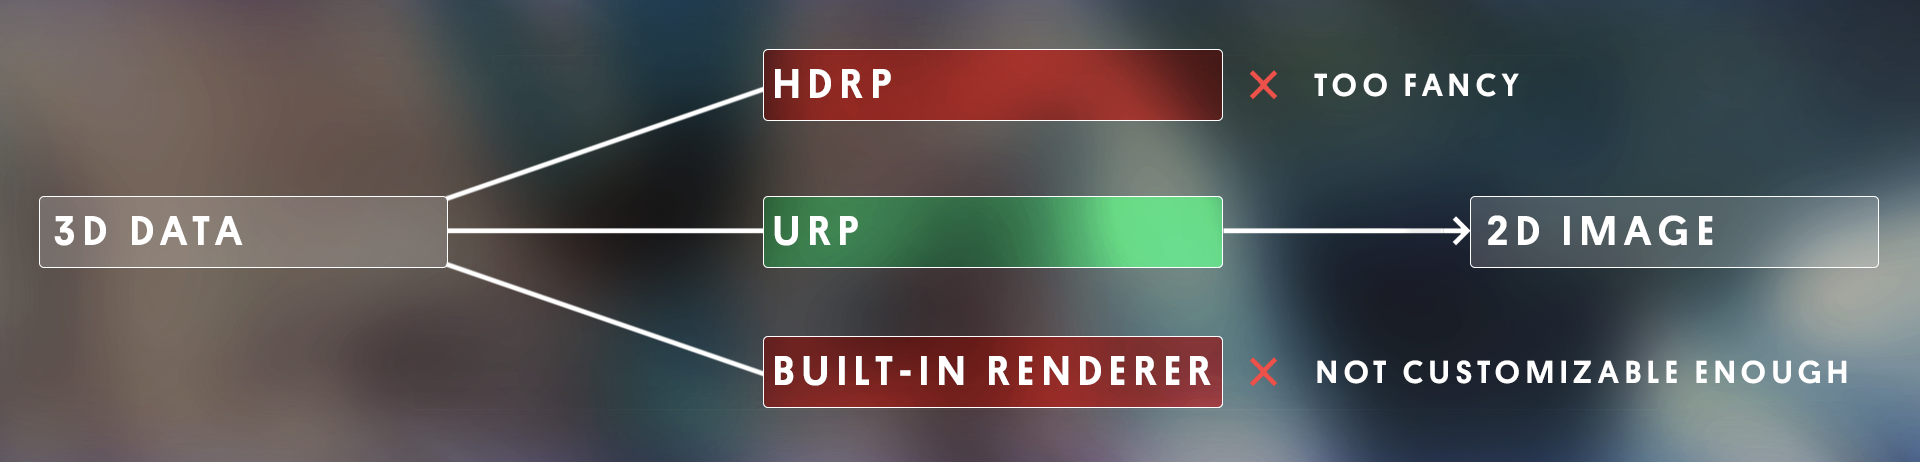
To sum up: HDRP is too fancy, and the Built-In Render Pipeline isn’t quite customizable enough for what we want to do – so we’ll use URP throughout this pathway.
If you want a more in-depth look at the decision-making process that might go into selecting a render pipeline, take a look at this decision flow-chart.


 浙公网安备 33010602011771号