


Spring Boot入门
2019-03-13 14:45 雄风狂飙 阅读(102) 评论(0) 收藏 举报1.1. helloWorld
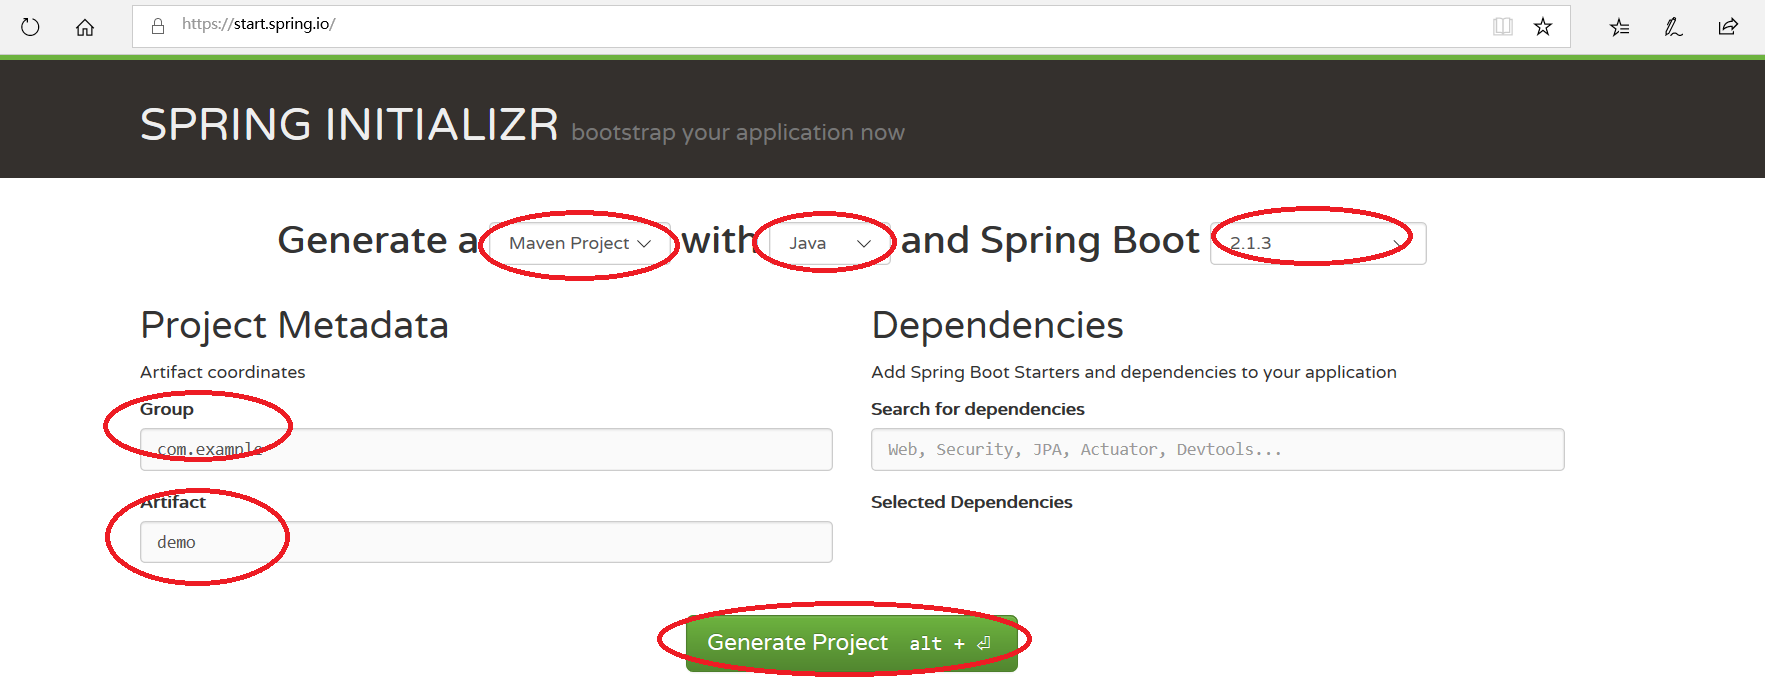
1. 登陆地址:https://start.spring.io/
2. 选择相应组建,下载文件
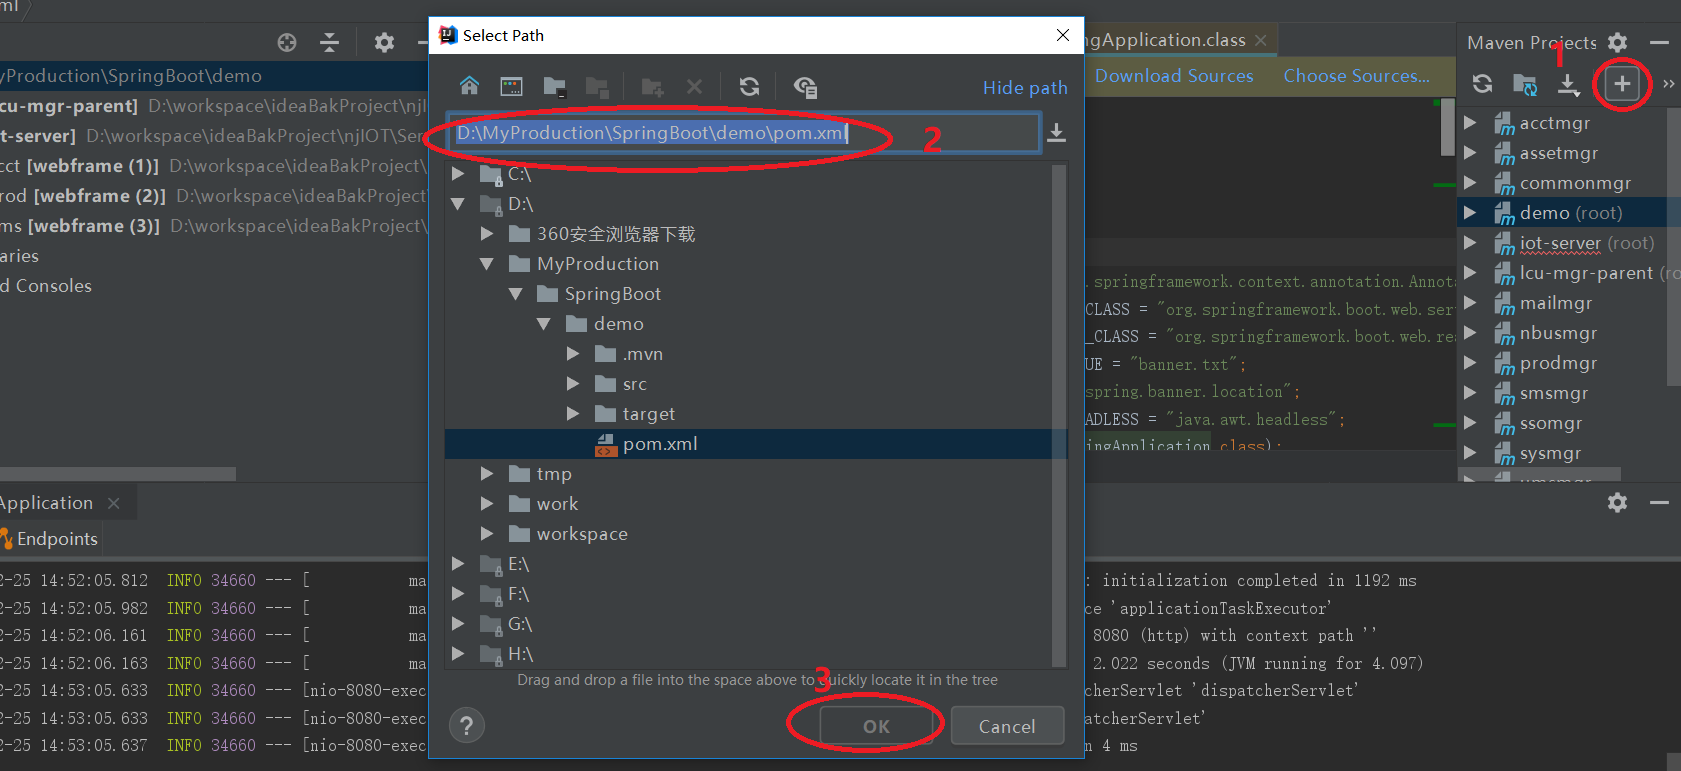
3. 然后导入ideal中
4. 开发hello world
创建包com.example.demo.controller
在包com.example.demo.controller下面新建HelloWorldController.java
@RestController
public class HelloWorldController {
@RequestMapping("/hello")
public String index()
{
return "Hellow World!";
}
}
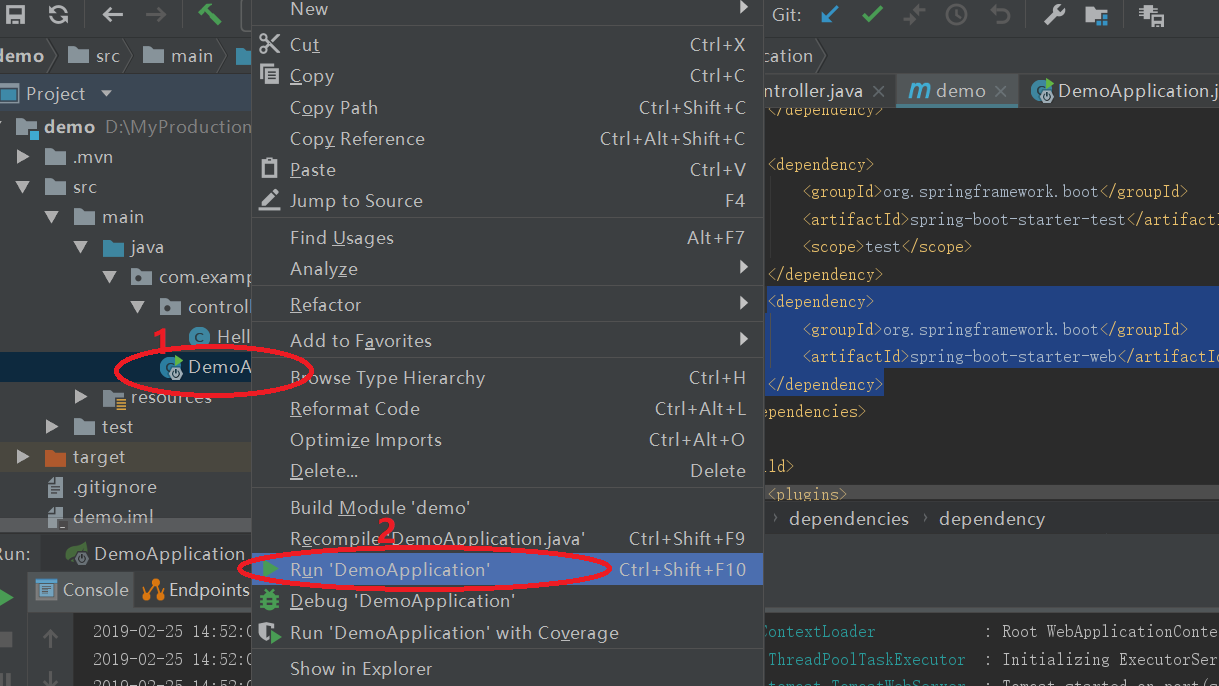
这时候发现不识别注解@RestController,按照ideal提示点击以后,会在pom.xml中新增以下内容:
<dependency>
<groupId>org.springframework.boot</groupId>
<artifactId>spring-boot-starter-web</artifactId>
</dependency>
5. 启动程序
从浏览器端访问http://127.0.0.1:8080/hello

6. 手动启动
手动构建:mvn dependency:tree //在pom.xml目录下
手动启动: mvn spring-boot:run
7. 打包发布
确认在pox.xml中包含:
<build>
<plugins>
<plugin>
<groupId>org.springframework.boot</groupId>
<artifactId>spring-boot-maven-plugin</artifactId>
</plugin>
</plugins>
</build>
打jar包:mvn package //在pom.xml目录下
打包启动:$javar -jar ./target/demo-0.0.1-SNAPSHOT.jar
debug启动:$ java -jar myproject-0.0.1-SNAPSHOT.jar --debug
1.2. 推荐目录结构
com
+- example
+- myapplication
+- Application.java
|
+- customer
| +- Customer.java
| +- CustomerController.java
| +- CustomerService.java
| +- CustomerRepository.java
|
+- order
+- Order.java
+- OrderController.java
+- OrderService.java
+- OrderRepository.java
1.3. Spring Bean和Dependent Injection
For simplicity, we often find that using @ComponentScan (to find your beans) and using @Autowired (to do constructor injection) works well.
If you structure your code as suggested above (locating your application class in a root package), you can add @ComponentScan without any arguments. All of your application components (@Component, @Service, @Repository, @Controller etc.) are automatically registered as Spring Beans
1.4. 静态页面目录
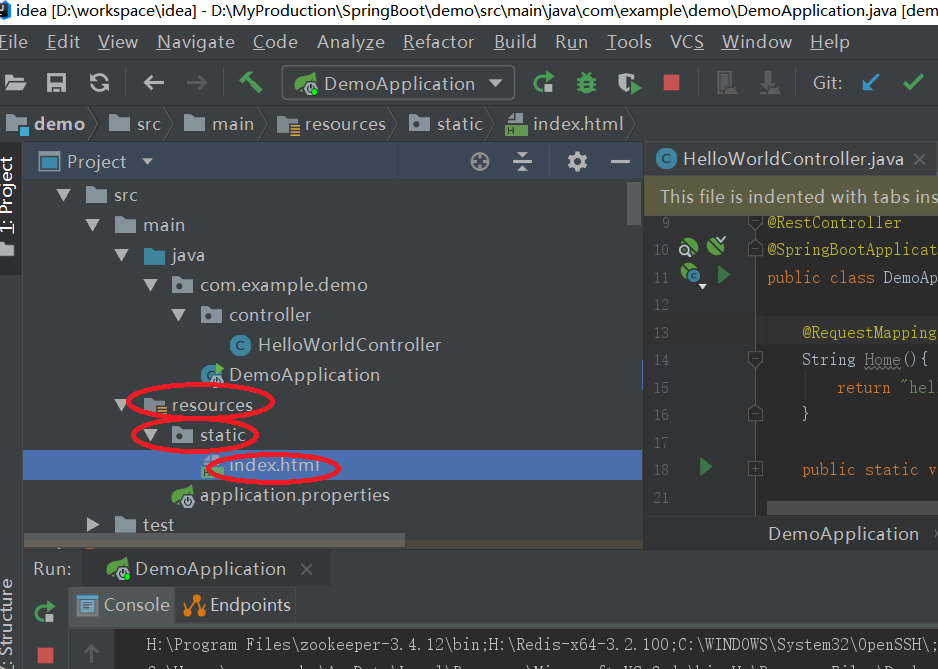
点击浏览器,访问:http://127.0.0.1:8080/index.html,访问成功。
错误页面目录:
src/
+- main/
+- java/
| + <source code>
+- resources/
+- static/
+- error/
| +- 404.html
+- index.html
点击浏览器,访问:http://127.0.0.1:8080/index2.html,index2是一个不存在的资源。访问后会弹出404.html成功。
1.5. 内置tomcat端口配置
server.port=8089

 浙公网安备 33010602011771号