脑部CT中线截断
任务描述
- 与之前脑部MRI中线截断类似,处理根据每一层图像手工标注的点拟合的直线,截断超出脑部以外的线段,提供给模型训练
示例
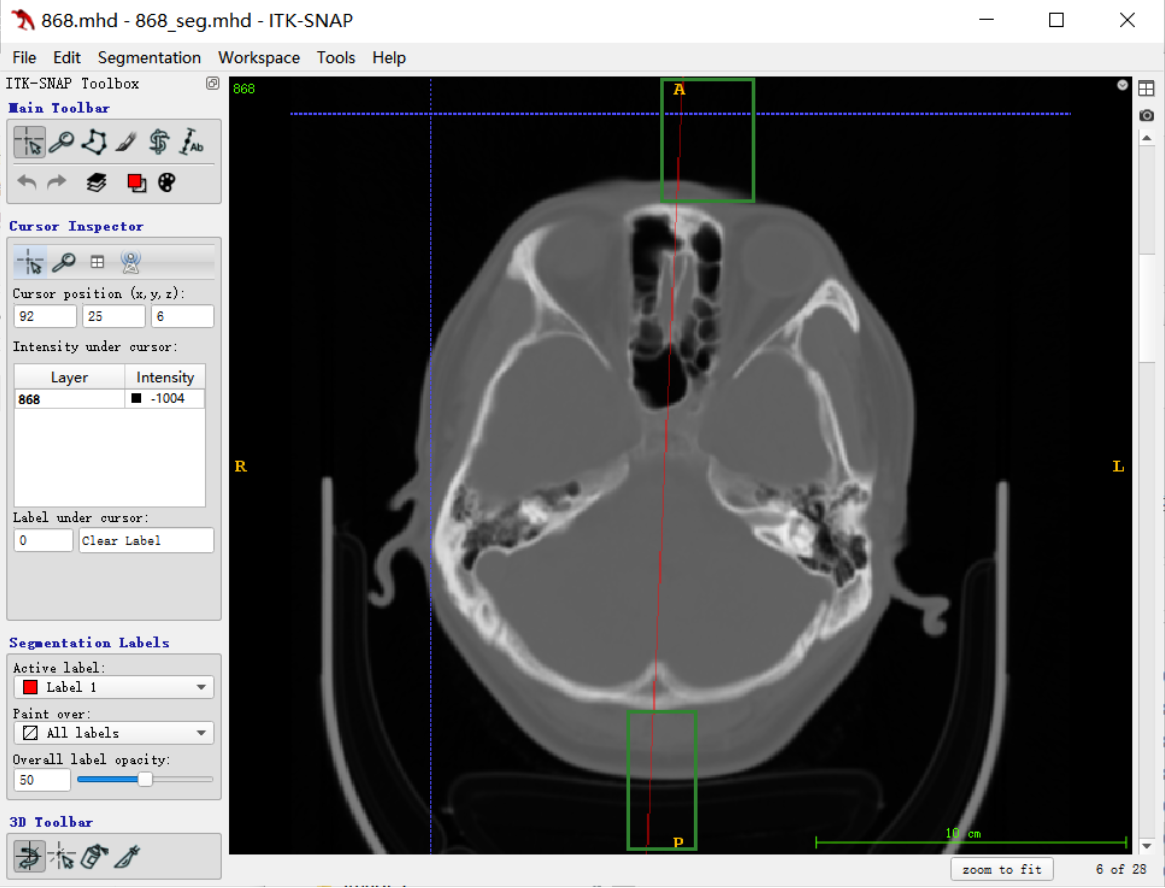
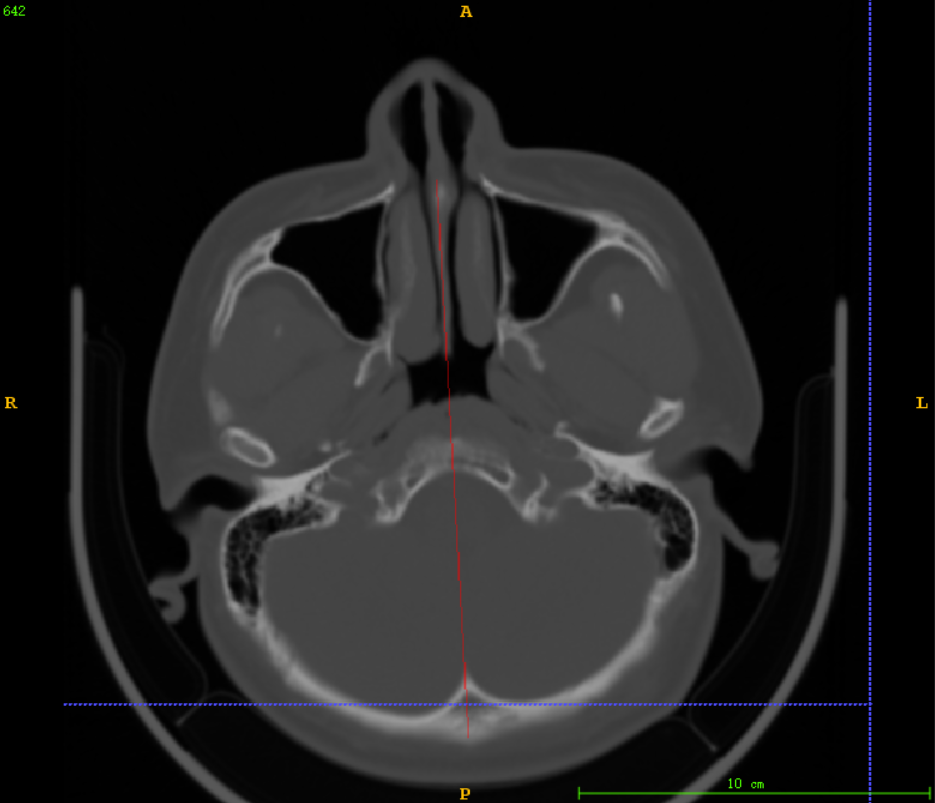
如上图中,红色是根据手工标注的点拟合出来的直线(mask),框出的直线就是需要截断的,由于MRI是没有颅骨的,为了后期可能需要根据这个中心点求CT与MRI的公共区域
所以前期主要是考虑比较好的截断效果应该是保证保留下来的mask在颅骨以内
目的
- 现在做这个处理的目的是:处理用于模型训练的训练集,使得模型预测新数据的中线在脑部以内,根据脑中线,后续利用预测出来的脑中线,拟合成中平面,根据中平面的参数和中心点用于后面头部的旋转
- 另外,现在的考虑是找到中心点后可以对于MRI和CT公共区域的判断,CT与MRI的层数不一致(拍摄范围不同,CT拍摄可能包含了下巴区域,MRI没有),对于项目中的配准任务来说找到公共区域非常必要
实验
测试算法1
在上周对MRI中线截断的实验基础上,先尝试使用了以下的简单的流程
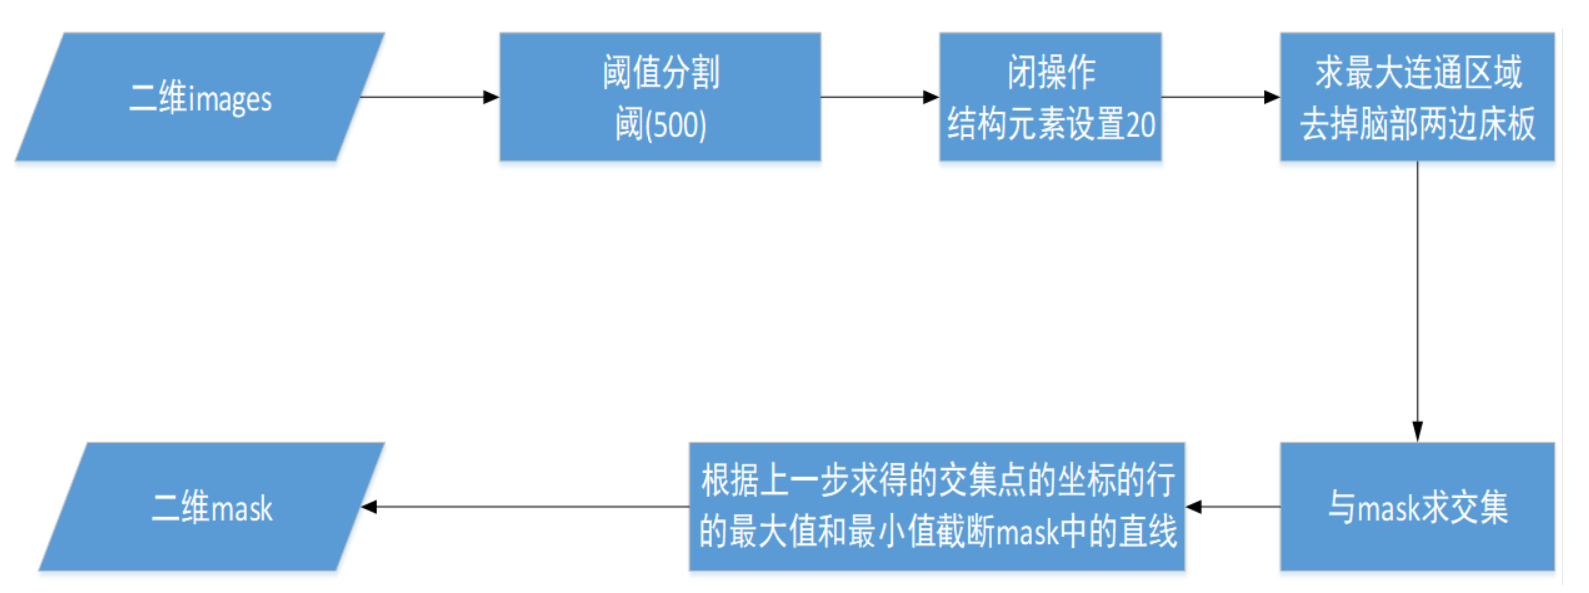
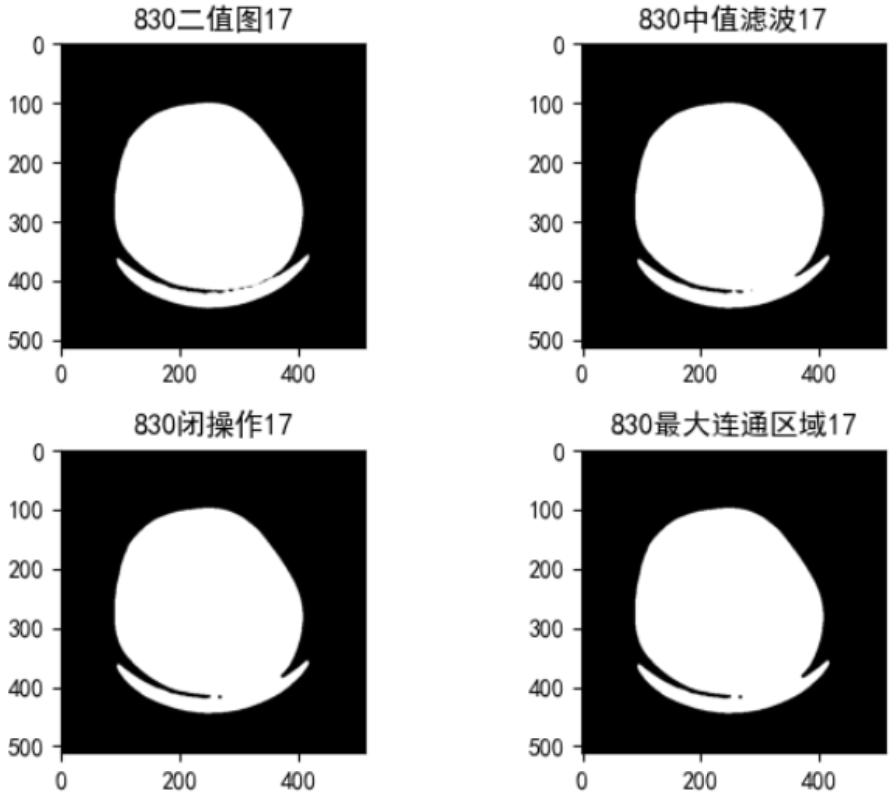
- 首先对每一层的images(原图)进行阈值分割,设置的阈值为500左右,这里使用的是OTSU类间方差来求阈值,但是由于CT图像中检查床的像素值比脑部除颅骨以外的区域都高很多,根据检查部分数据,发现检查床大多数灰度值都是500以下,所以我选择在500-1000中使用OTSU求合适的阈值,但是由于CT数据中负值比较多,这这个范围内没有包含OTSU计算出的合适的范围,导致传给二值化函数的阈值一直都是最小值500
- 然后再闭操作,由于脑部CT颅骨区域比较分散,分割出来的不是一个完整的区域,考虑到后续需要求最大连通区域,容易把分散的骨头丢失,因此在求最大连通区域之前先进行闭操作,将零散的骨头空缺先补上
- 求最大连通区域是为了将阈值分割时检查床灰度值在500以上的数据,没有除去检查床的数据,在求连通区域以后可以去除
- 最后,再利用分割出来的区域与mask求交集,利用交集中的两个端点截取mask上的直线
实验效果:
这里只对此算法不适用的典型数据的分割结果进行了记录分析
- 检查床像素值过高未完全去除的情况
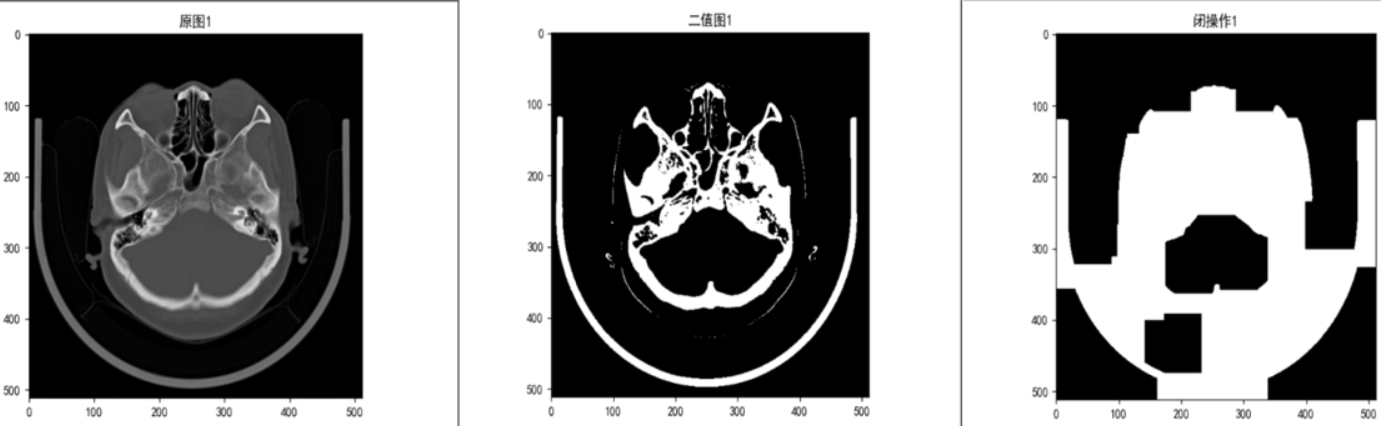
由于检查床的的灰度值高于我设置的阈值500,使得阈值分割后,检查床区域还被完整保留,闭操作之后,就会将脑部区域和检查床连接起来,如上图中最右边的图
- 脑部颅骨像素值过低,使用阈值分割,分割出来的颅骨有缺口,导致在使用交集求截取端点,只能截到上边界

像这种图像,设置阈值过低无法去除检查床区域,设置阈值过高分割出来的脑部区域不是一个完整的区域
在算法1的基础上也尝试了将阈值调低一点(测试值使用300),目的是为了首先保证颅骨以内区域都被完全分割出来,然后再使用最大连通区域过滤的时候,就能去掉检查床的影响
然而,此种尝试对于前几层颅骨分布比较稀疏的区域,会丢失部分颅骨
测试算法2
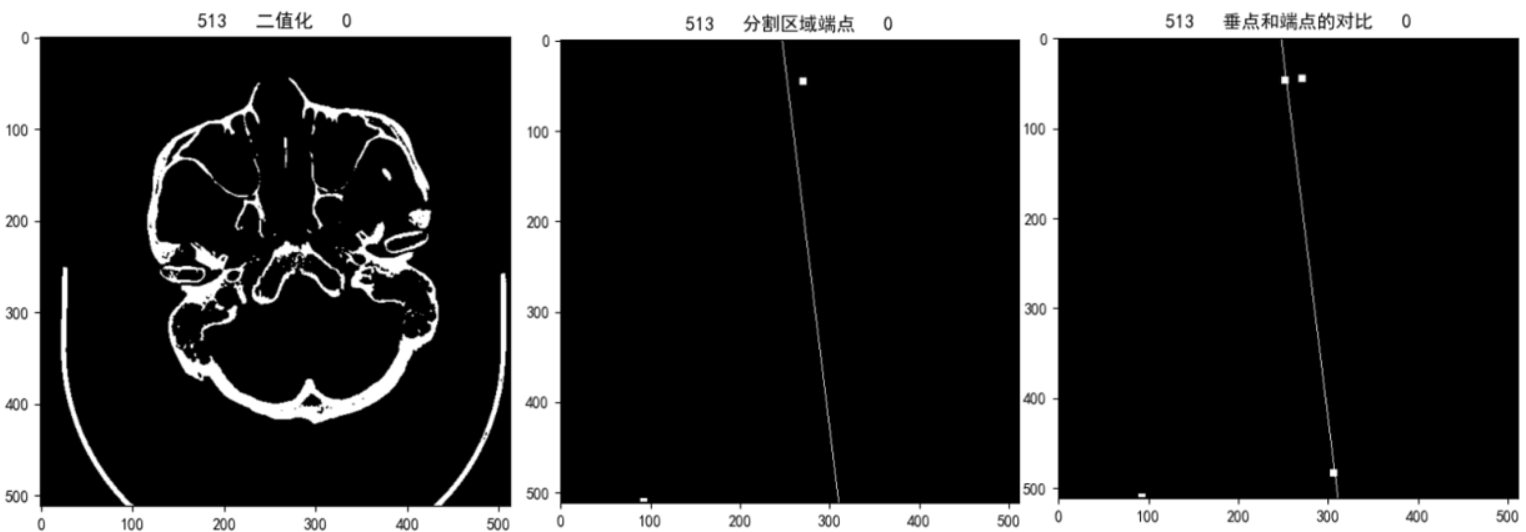
针对算法1的情况,对于截断端点的求取不使用交集的方法寻找,而是直接根据分割结果直接求取映射到mask上的截断端点
算法流程:

由于我们现在的数据,病人拍摄的图像,脑部都有一定的偏角,如果只是单纯根据分割出来的区域上下端点直接截取,会产生以下的误差

上图中,椭圆型代表分割出来的脑部区域,false代表直接将分割出来的区域求的上下端点,然后根据行号(最小值和最大值)以水平的方式从mask上截断直线(图中的两条水平直线);然而实际截断的点应该是与法向量垂直的两个点(图中的true)用于截断;现在已知的是拟合的这条直线与根据分割区域求得的上下端点,通过求垂点的方式(图中的now)可以保证线段保持在脑部区域以内
但是和实际需要截断的端点还是有一定的误差,但是这点误差还是在我们后续求取中心的接受范围内
这是由于在我们的实际数据倾斜角没有图中这么大,并且实际数据中待分割的区域也没有像图中规整
实验效果:
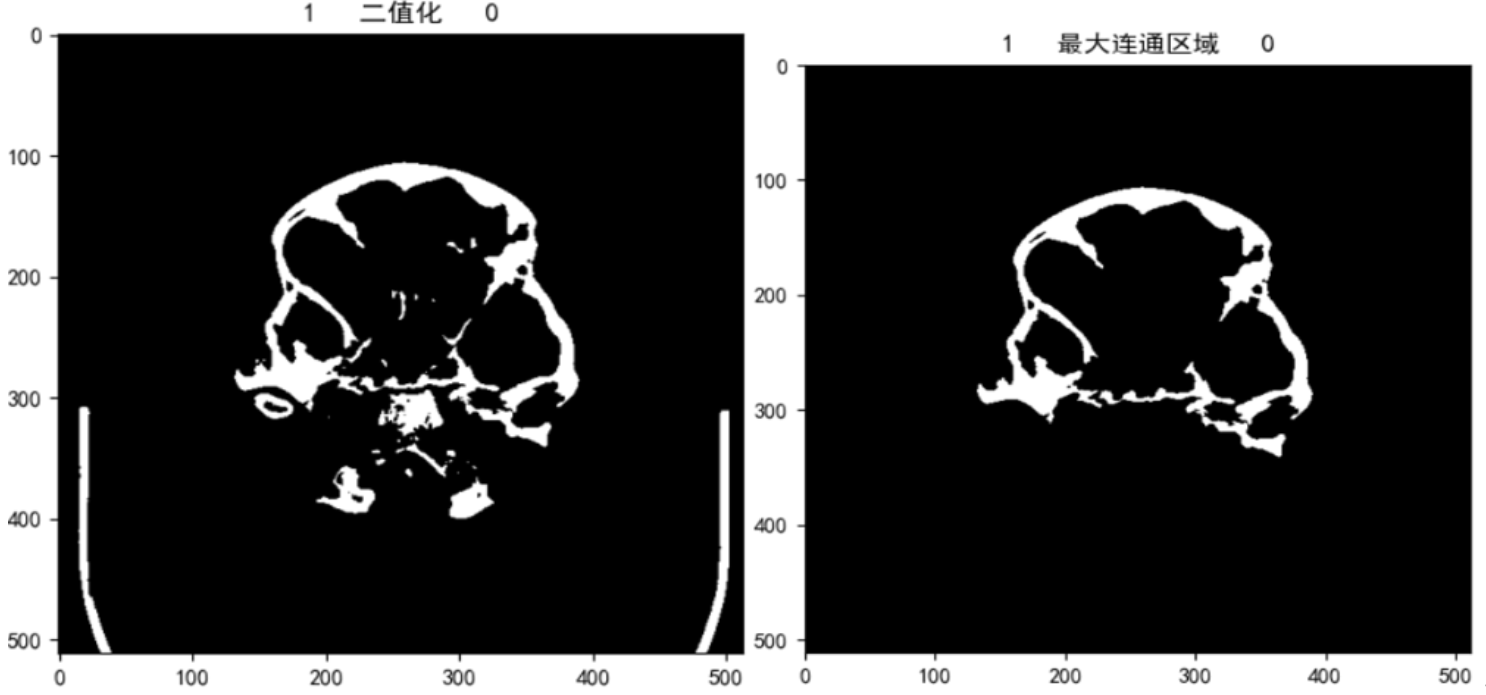
与算法1中存在类似的问题,阈值分割时阈值选取如果不太好,导致无法将检查床完全去除,导致求得的下端点不在分割区域上而在检查床边缘
上图是将求得的端点和垂点都你扩充了4邻域用于显示的效果,由中间的图可以看出,由于阈值分割时将检查床一起分割出来了导致求取下端点时求的是检查床上的端点
根据最右边的图,可以看出,由于数据的的倾斜度,垂点还是比原端点上移了一部分,产生了些许误差
此前设置此实验的阈值是根据随机抽取的数据进行实验得到的结果,只考虑了一般情况
测试算法3
针对算法2的问题,主要还是考虑需要先将床板除掉, 所以先使用低阈值将整个头部(包括颅骨外围的组织也分割进来),这样可以使用求取最大连通区域的办法将床板除去,然后再将算法2分割出来的区域与算法3求的连通区域求一个交集,最后使用算法2中的流程处理

实验效果:
大多数据都能像上图中的截断效果一样,有效地保证将颅骨区域分割出来用于截断,但是对于部分数据前几层(如下图),由于颅骨灰度值并不高,导致使用算法2时分割出来的区域比实际区域短了一截(当时在算法2实验结果后,随机抽取没有检查到这类数据)
测试算法4
基于对算法3中存在的问题的考虑,先分割整个脑部(包含颅骨以外的组织)
使用OTSU阈值分割,求取的阈值大致在-300到-400左右,可以较好地将整个脑部区域完整分割出来,再使用中值滤波,去掉阈值分割后的噪点,求取最大连通区域去掉检查床的影响,然后使用开操作断开脑部边缘耳朵等组织、检查床设备的细小连接,再与mask上拟合的直线求交集,最后利用行最大和最小进行截断
实验效果:
由上图可以看出,对于外部有其他连接的数据能根据开操作成功断开
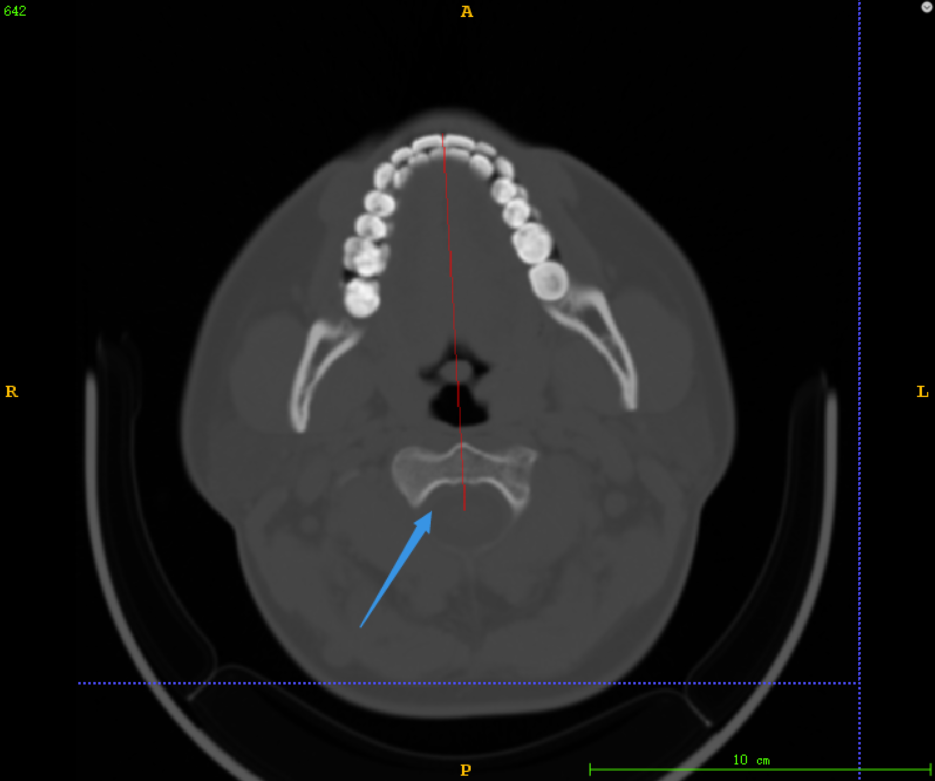
然而对于鼻腔组织比较不规则的数据,操作会导致鼻腔组织丢失,如下图

另外对于此类数据来说,检查床设备本身就和脑部区域粘连,在只是求取二值图时,就已经粘连在一起
这类数据考虑过使用开操作来断开连接,但是开操作的kernel大小难以设置,设置大了,对于上面的问题来说雪上加霜,kernel太小对于这类数据根据无法去除

此方法目前存在的两种问题数据,相互制约,并且这两类数据都在中间层以上和中间层以下都有分布,不是很好分情况来讨论
测试算法5
以上的几种方法处理的数据,始终还是会由于脑部分割效果不太好(主要为了避免检查床的床板的影响造成的),后续再与mask求交集时,造成获取的端点有误差,从而造成截断的线段存在误差
由于这是用于模型训练的训练集,为了不影响模型训练,应尽量减少目前存在的误差
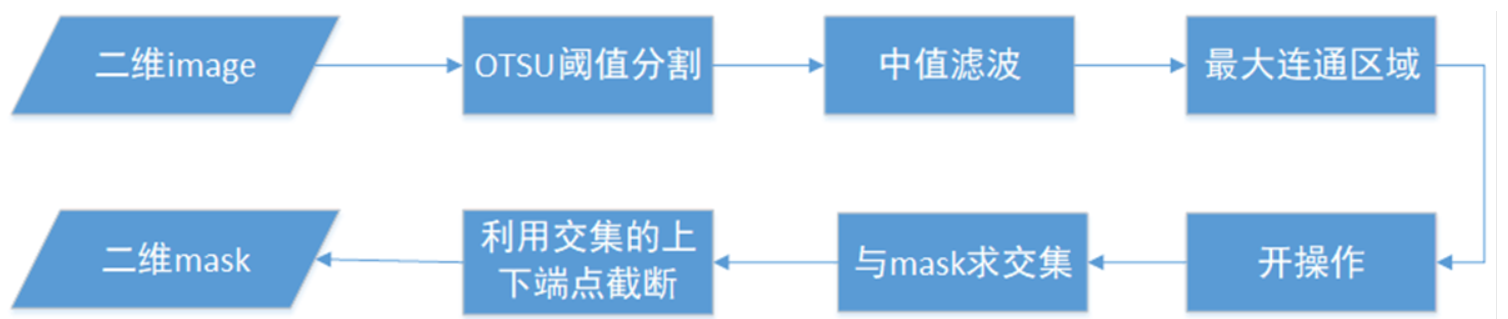
所以在上述实验的基础上,还是选择将脑部的整个区域分割出来,再进行一个kennel较小的闭操作,然后求最大连通区域,求此连通区域的外轮廓(这里求的是外轮廓,避免内部的一些孔洞存在对后续的端点搜索造成影响)。将外轮廓画到另一个矩阵image_fill上并填充,沿着mask的中点在image_fill上下搜索端点(mask上直线点的坐标与在image上的位置是相互对应的),定义停止搜索的条件,以搜索到的端点用于截断
实验效果:
优化前存在的问题:鼻腔组织不规则,如下图中上端比较细长的组织,加之头部有些偏,拟合的直线画到了背景区域,根据我定义的停止搜索条件(由白到黑)可能过于严苛,导致截断的直线比实际短了一截

优化方案:放宽上端点停止搜索条件——当前点是背景,并且它的8邻域灰度值之后小于1 ,上端避免脑部外部未清除的噪声影响,在满足以上两个条件时加上上端点的坐标限制(搜索的点的行 >= 上端交点的行号)
比较好的解决了,造成截断后线段偏下的问题
未解决的问题:
有几个数据,检查设备完全与头部贴合,针对这几种方法都没办法解决,考虑使用itk-snap手工去除(此类不多)

最终选择
根据对以上5种实验的尝试,考虑整体效果,最终选择算法5来处理。另外的几种方法主要还是由于检查床无法完全去除,造成的误差。主要是在算法3和算法5中存在问题对后续实验结果的影像中,综合考虑,还是使用算法5的算法来处理了这些数据
以下是算法3和算法5的代码:
算法3代码
import os
import glob
import cv2 as cv
import SimpleITK as sitk
import numpy as np
import matplotlib.pyplot as plt
from skimage.measure import label


def read_mhd(file_name):
    '''
    根据文件路径读取mhd文件,并返回其内容array、origin、spacing
    '''
    itkimage = sitk.ReadImage(file_name, sitk.sitkFloat32)  # 读mhd使用Float32类型
    image_array = sitk.GetArrayFromImage(itkimage)
    origin = itkimage.GetOrigin()
    spacing = itkimage.GetSpacing()
    return image_array, origin, spacing


def OTSU_enhance(img_gray, th_begin, th_end, th_step=1):
    '''
    根据最大类间方差求最适合的阈值
    在th_begin、th_end中寻找合适的阈值
    '''
    assert img_gray.ndim == 2, "must input a gary_img"
    max_g = 0
    suitable_th = 0
    for threshold in range(th_begin, th_end, th_step):  # 前闭后开区间
        bin_img = img_gray > threshold
        bin_img_inv = img_gray <= threshold
        fore_pix = np.sum(bin_img)
        back_pix = np.sum(bin_img_inv)
        if 0 == fore_pix:
            break
        if 0 == back_pix:
            continue
        w0 = float(fore_pix) / img_gray.size
        u0 = float(np.sum(img_gray * bin_img)) / fore_pix
        w1 = float(back_pix) / img_gray.size
        u1 = float(np.sum(img_gray * bin_img_inv)) / back_pix
        # 类间方差公式
        g = w0 * w1 * (u0 - u1) * (u0 - u1)
        if g > max_g:
            max_g = g
            suitable_th = threshold
    return suitable_th


def get_point_mapping(row, col, top, bottom):
    '''
    根据mask上的两点坐标求出拟合的直线方程, 再根据行最大和最小求得的两个端点,求出到拟合直线的垂点
    '''
    row_min = min(row)  # 行最小
    row_max = max(row)  # 行最大
    # 找到行标对应的索引
    row_min_index = row.tolist().index(row_min)
    row_max_index = row.tolist().index(row_max)
    # 根据行标求列号
    row_min_col = col[row_min_index]
    row_max_col = col[row_max_index]
    # top(row_min,row_min_col), bottom(row_max, row_max_col)
    #根据这两点使用截距式求出垂直mask上的直线
    if row_min_col - row_max_col != 0 and row_min - row_max != 0:# 限制分子不为0 k不为0
        # 行对应y,列对应x
        k = (row_min - row_max) / (row_min_col - row_max_col) # k = (y1 - y2) / (x1 - x2)
        b = row_min - k * row_min_col  # b = y1 - k * x1

        k1 = -(1.0 / k)  # k * k1=-1
        b1 = top[0] - k1 * top[1]  # b1 = y - k * x

        k2 = -(1.0 / k)
        b2 = bottom[0] - k2 * bottom[1]

        # 取整
        x_top = int((b - b1) / (k1 - k)) # x = (b2 - b1) / (k1 - k2)
        y_top = int(x_top * k1 + b1)  # y = k * x + b

        x_bottom = int((b - b2) / (k2 - k))
        y_bottom = int(x_bottom * k2 + b2)

        top_point = (y_top, x_top)
        bottom_point = (y_bottom, x_bottom)
    else:  # 否则就返回处理之前的点
        top_point = top
        bottom_point = bottom
    return top_point, bottom_point

def close_demo(image, structure_size):
    '''
    闭操作:补全细小连接
    '''
    # 定义结构元素的形状和大小
    kenerl = cv.getStructuringElement(cv.MORPH_RECT, (structure_size, structure_size))
    # dst_1 = cv.dilate(image, kenerl)  # 先膨胀
    # dst = cv.erode(dst_1, kenerl)  # 腐蚀操作
    dst = cv.morphologyEx(image, cv.MORPH_CLOSE, kenerl)  # 闭操作,与分开使用膨胀和腐蚀效果相同
    return dst


def largestConnectComponent(bw_img):
    '''
    求bw_img中的最大联通区域
    :param bw_img: 二值图
    :return: 最大连通区域
    '''
    # 取连通区域,connectivity=2表示8领域
    labeled_img, num = label(bw_img, connectivity=2, background=0, return_num=True)
    max_label = 0
    max_num = 0
    for i in range(1, num + 1):  # lable的编号从1开始,防止将背景设置为最大连通域
        if np.sum(labeled_img == i) > max_num:
            max_num = np.sum(labeled_img == i)
            max_label = i
    lcc = (labeled_img == max_label)  # 只留下最大连通区域,其他区域置0
    return lcc


def seg_line(img, mask):
    '''
    传入二维image mask,返回截断处理后的mask
    '''
    for i in range(img.shape[0]):

        # 先去掉床板
        # 二值化,阈值使用-100避免将脑部外部区域(检查设备等)被分到连通区域
        _, binary = cv.threshold(img[i], -100, 255, cv.THRESH_BINARY)

        binary = binary.astype( np.uint8 )
        # 中值滤波
        blur = cv.medianBlur(binary, 7)  # 中值滤波去噪,设置滤波器大小为7,去掉周围噪点

        img_max_region = largestConnectComponent(blur)  # 求最大连通区域

        # 使用500的阈值避免将头皮的边缘像素分割出来
        _, binary_2 = cv.threshold(img[i], 500, 255, cv.THRESH_BINARY)  # 二值化

        #  先转成bool值后再求交集
        bregion = img_max_region > 0
        binary_2 = binary_2 > 0

        intersection = bregion & binary_2

        intersection = intersection > 0
        row, col = np.where(intersection)
        if len(row) != 0:  # 如果交集不空
            row_max = max(row)
            row_min = min(row)
            row_list = row.tolist()  # 将np.array转list,方便取索引
            row_min_index = row_list.index(row_min)  # 取行的最小值的索引
            row_max_index = row_list.index(row_max)  # 取行的最大值的索引

            top_point = (row_min, col[row_min_index])  # 上端点
            bottom_point = (row_max, col[row_max_index])  # 下端点

            # 求出mask[i]上拟合直线上的两个端点,如果mask上本来就没有直线,就不用管
            row, col = np.where(mask[i] > 0)
            if len(row) != 0:  # mask不空
                top_point, bottom_point = get_point_mapping(row, col, top_point,                         bottom_point)  # 求得这两端点对应在拟合直线上的垂点
                # 用这两个垂点去截断mask
                mask[i, :top_point[0], :] = 0
                mask[i, bottom_point[0]:, :] = 0
        else:  # 若交集为空直接将mask清空
            mask[i, :, :] = 0

    return mask
算法5代码
import os
import glob
import cv2 as cv
import SimpleITK as sitk
import numpy as np
import matplotlib.pyplot as plt
from skimage.measure import label


def read_mhd(file_name):
    '''
    根据文件路径读取mhd文件,并返回其内容array、origin、spacing
    '''
    itkimage = sitk.ReadImage(file_name, sitk.sitkFloat32)  # 读mhd使用Float32类型为了后续的二值化等操作需要的类型转换
    image_array = sitk.GetArrayFromImage(itkimage)
    origin = itkimage.GetOrigin()
    spacing = itkimage.GetSpacing()
    return image_array, origin, spacing


def OTSU_enhance(img_gray, th_begin, th_end, th_step=1):
    '''
    根据最大类间方差求最适合的阈值
    在th_begin、th_end中寻找合适的阈值
    '''
    assert img_gray.ndim == 2, "must input a gary_img"
    max_g = 0
    suitable_th = 0
    for threshold in range(th_begin, th_end, th_step):  # 前闭后开区间
        bin_img = img_gray > threshold
        bin_img_inv = img_gray <= threshold
        fore_pix = np.sum(bin_img)
        back_pix = np.sum(bin_img_inv)
        if 0 == fore_pix:
            break
        if 0 == back_pix:
            continue
        w0 = float(fore_pix) / img_gray.size
        u0 = float(np.sum(img_gray * bin_img)) / fore_pix
        w1 = float(back_pix) / img_gray.size
        u1 = float(np.sum(img_gray * bin_img_inv)) / back_pix
        # 类间方差公式
        g = w0 * w1 * (u0 - u1) * (u0 - u1)
        if g > max_g:
            max_g = g
            suitable_th = threshold
    return suitable_th


def close_demo(image, structure_size):
    '''
    闭操作:补全细小连接
    '''
    kenerl = cv.getStructuringElement(cv.MORPH_RECT, (structure_size, structure_size))  # 定义结构元素的形状和大小
    # dst_1 = cv.dilate(image, kenerl)  # 先膨胀
    # dst = cv.erode(dst_1, kenerl)  # 腐蚀操作
    dst = cv.morphologyEx(image, cv.MORPH_CLOSE, kenerl)  # 闭操作,与分开使用膨胀和腐蚀效果相同
    return dst


def largestConnectComponent(bw_img):
    '''
    求bw_img中的最大连通区域
    :param bw_img: 二值图
    :return: 最大连通区域
    '''

    labeled_img, num = label(bw_img, connectivity=2, background=0, return_num=True)  # 取连通区域,connectivity=2表示8领域
    max_label = 0
    max_num = 0
    for i in range(1, num + 1):  # lable的编号从1开始,防止将背景设置为最大连通域
        if np.sum(labeled_img == i) > max_num:
            max_num = np.sum(labeled_img == i)
            max_label = i
    lcc = (labeled_img == max_label)  # 只留下最大连通区域,其他区域置0
    return lcc


def get_neighbors_sum(image, row, col):
    '''
    求图像上当前点8邻域的灰度值之和
    '''
    Neighbors = [(1, 1), (1, -1), (1, 0), (-1, 0), (-1, 1), (-1, -1), (0, 1), (0, -1)]  # 8邻域坐标
    sum_neighbors = 0
    for neighbor in Neighbors:
        dr, dc = neighbor
        try:
            sum_neighbors += image[row + dr][col + dc]
        except IndexError:
            pass
    return sum_neighbors


def seg_line(img, mask, image_file_id):
    '''
    根据image上分割区域的上下端点截断mask上的直线
    image_file_id:用于中间结果保存后期方便检查
    '''
    for i in range(img.shape[0]):
        row, col = np.where(mask[i] > 0)
        if len(row) != 0:  # mask上有拟合的直线才做处理
            #  使用OTSU求阈值时,CT数据一般在-300 ~ -400之间
            binary_threshold = OTSU_enhance(img[i], -600, 300, 1)  # 使用类间方差来计算合适的阈值

            # print('image_file_id:  ', image_file_id, ' i:   ', i, '      binary_threshold:   ', binary_threshold)

            _, binary = cv.threshold(img[i], binary_threshold, 255, cv.THRESH_BINARY)  # 二值化

            binary = binary.astype(np.uint8)  # 将数据类型由np.float32 转为 np.uint8

            blur = cv.medianBlur(binary, 7)  # 中值滤波去噪

            img_close = close_demo(blur, 5)  # 设置一个小kenel的闭操作将鼻腔部位补上连接

            img_max_region = largestConnectComponent(img_close)  # 求最大连通区域,img_max_region的数据类型是bool

            # 将bool类型先转为np.uint8才能使用findContours
            img_max_region = img_max_region.astype(np.uint8)

            # 求外轮廓,这里只求外轮廓,避免中间的孔洞被保留
            contours, hierarchy = cv.findContours(img_max_region, cv.RETR_EXTERNAL, cv.CHAIN_APPROX_NONE)

            new_image = np.zeros(img[i].shape, np.uint8) * 255  # 创建黑色幕布
            cv.drawContours(new_image, contours, -1, (255, 255, 255), 3)  # contours是轮廓,-1表示全画,然后轮廓线使用白色,厚度3
            new_image_fill = np.copy(new_image)

            cv.fillPoly(new_image_fill, contours, (255, 255, 255))  # 填充外轮廓孔洞

            row_min = min(row)
            row_max = max(row)
            row_mean = int((row_min + row_max) / 2)  # 根据两个row_max和row_min的均值求一个大致的行号中心

            # 使用4个数组用于存放上下部分的点的坐标
            top_row = []
            top_col = []
            bottom_row = []
            bottom_col = []

            for p in range(len(row)):
                if row[p] < row_mean:  # 中点以上的坐标值放到top_row、top_col中
                    top_row.append(row[p])
                    top_col.append(col[p])
                else:  # 中点以下的点放到bottom_row、bottom_col中
                    bottom_row.append(row[p])
                    bottom_col.append(col[p])
            # 转成np.array类型
            top_row = np.array(top_row)
            top_col = np.array(bottom_col)
            bottom_row = np.array(bottom_row)
            bottom_col = np.array(bottom_col)

            # 求分割出来的区域和mask上的直线的交集
            bimg = new_image_fill > 0
            bmask = mask[i] > 0
            intersection = bimg & bmask
            row_img, col_img = np.where(intersection > 0)

            # 上部分从中心点反向遍历
            t = len(top_row) - 1  # 索引为length-1
            top_cur_point = [top_row[t], top_col[t]]  # cur_point
            while t - 1 >= 0:
                top_cur_point = [top_row[t], top_col[t]]
                top_pre_point = [top_row[t - 1], top_col[t - 1]]  # pre_point
                # 下一个点的8邻域的像素值求和小于1并且下一个点的像素值为0,
                if get_neighbors_sum(new_image_fill, top_pre_point[0], top_pre_point[1]) < 1 and new_image_fill[
                    top_pre_point[0], top_pre_point[1]] == 0:
                    # if new_image_fill[pos_top1[0], pos_top1[1]] == 255 and new_image_fill[pos_top2[0], pos_top2[1]] == 0:
                    if top_cur_point[0] <= min(row_img):  # 并且当前这个点已经等于分割交集的上端点,遍历结束可以停止搜索
                        break
                t -= 1
            # 循环结束后的top_cur_point[0], top_cur_point[1]就是要找的上端点

                # 下部分从中点正向遍历

                bottom_cur_point = [bottom_row[0], bottom_col[0]]
                for b in range(len(bottom_row)-1):
                    bottom_cur_point = [bottom_row[b], bottom_col[b]]
                    bottom_next_point = [bottom_row[b + 1], bottom_col[b + 1]]
                    if new_image_fill[bottom_cur_point[0], bottom_cur_point[1]] == 255 and new_image_fill[
                        bottom_next_point[0], bottom_next_point[1]] == 0:
                        break  # 上一个点是白,下一个是黑,停止查找
            mask[i, :top_cur_point[0], :] = 0
            mask[i, bottom_cur_point[0]:, :] = 0

            # plt.figure()
            # plt.rcParams['font.sans-serif'] = ['SimHei']
            # plt.rcParams['axes.unicode_minus'] = False
            # plt.subplot(241)
            # plt.title(str(image_file_id) + '_binary_' + str(i))
            # plt.imshow(binary, 'gray')
            #
            # plt.subplot(242)
            # plt.title(str(image_file_id) + '_median_' + str(i))
            # plt.imshow(blur, 'gray')
            #
            # plt.subplot(243)
            # plt.title(str(image_file_id) + '_close_' + str(i))
            # plt.imshow(img_close, 'gray')
            #
            # plt.subplot(244)
            # plt.title(str(image_file_id) + '_maxRgeion_' + str(i))
            # plt.imshow(img_max_region, 'gray')
            #
            # plt.subplot(245)
            # plt.title(str(image_file_id) + '_contours_' + str(i))
            # plt.imshow(new_image, 'gray')
            #
            # plt.subplot(246)
            # plt.title(str(image_file_id) + '_fill_' + str(i))
            # plt.imshow(new_image_fill, 'gray')
            #
            # plt.subplot(247)
            # plt.title(str(image_file_id) + '_unite_' + str(i))
            # plt.imshow(intersection, 'gray')
            #
            # plt.subplot(248)
            # plt.title(str(image_file_id) + '_mask_' + str(i))
            # plt.imshow(mask[i], 'gray')
            #
            # pic_name = '/mnt/data2/wx/data/pic/' + str(image_file_id) + '_' + str(i)
            # plt.savefig('%s.jpg' % pic_name)
            #plt.show()  # 在保存图像之后调用

        else:
            pass  # mask上没有直线不用管
    return mask


if __name__ == "__main__":
    images_dir = ''  # 原图路径
    masks_dir = ''   # mask路径
    new_masks_save_dir = ''  # 截断线段后的mask的保存路径
    images_paths = glob.glob(images_dir + '/*.mhd')
    masks_paths = images_paths.copy()
    for i in range(len(images_paths)):
        masks_paths[i] = masks_paths[i].replace(images_dir, masks_dir)
        masks_paths[i] = masks_paths[i].replace('.mhd', '_seg.mhd')
        img, _, _ = read_mhd(images_paths[i])  # Z,Y,X,float32
        mask, _, _ = read_mhd(masks_paths[i])  # Z,Y,X,float32
        image_file_id = os.path.relpath(images_paths[i], images_dir).split('.')[0]  # 取出images的文件的序号
        print('image_file_id:       ', image_file_id)
        new_mask = seg_line(img, mask, image_file_id)
        mask = sitk.GetImageFromArray(new_mask)
        maskSavePath = os.path.join(new_masks_save_dir, '{}_seg.mhd'.format(image_file_id))  # 拼接mask的绝对路径
        sitk.WriteImage(mask, maskSavePath)  # 将新的mask保存成mhd文件

 浙公网安备 33010602011771号