
20172319 实验一《线性结构》实验报告
20172319 2018.09.30-10.07
实验一《线性结构》 实验报告
课程名称:《程序设计与数据结构》
学生班级:1723班
学生姓名:唐才铭
学生学号:20172319
实验教师:王志强老师
课程助教:张师瑜学姐、张之睿学长
实验时间:2018年09月30日——2018年10月08日
必修/选修:必修
目录
实验内容
- 链表练习,要求实现以下功能: 通过键盘输入一些整数,建立一个链表;这些数是你学号中依次取出的两位数,再加上今天的时间;打印所有链表元素, 并输出元素的总数。
- 链表练习,要求实现下列功能: 实现节点插入、删除、输出操作;继续你上一个程序, 扩展它的功能,每做完一个新功能,或者写了超过10行新代码,就签入代码,提交到源代码服务器。
- 链表练习,要求实现下列功能: 使用冒泡排序法或者选择排序法根据数值大小对链表进行排序。
- 数组练习,要求实现下列功能: 通过键盘输入一些整数,建立一个链表;这些数是你学号中依次取出的两位数,再加上今天的时间;打印所有数组元素, 并输出元素的总数;实现节点插入、删除、输出操作;继续你上一个程序, 扩展它的功能,每做完一个新功能,或者写了超过10行新代码,就签入代码,提交到源代码服务器。
- 数组练习,要求实现下列功能: 使用冒泡排序法或者选择排序法根据数值大小对数组进行排序。
实验要求
- 完成蓝墨云上与实验一《线性结构》相关的活动,及时提交代码运行截图和码云Git链接,截图要有学号水印,否则会扣分。
- 完成实验、撰写实验报告,实验报告以博客方式发表在博客园,注意实验报告重点是运行结果,遇到的问题(工具查找,安装,使用,程序的编辑,调试,运行等)、解决办法(空洞的方法如“查网络”、“问同学”、“看书”等一律得0分)以及分析(从中可以得到什么启示,有什么收获,教训等)。报告可以参考范飞龙老师的指导。
- 严禁抄袭,有该行为者实验成绩归零,并附加其他惩罚措施。
实验步骤
- 链表练习,要求实现以下功能:
通过键盘输入一些整数,建立一个链表(1分);
这些数是你学号中依次取出的两位数。 再加上今天的时间。
例如你的学号是 20172301
今天时间是 2018/10/1, 16:23:49秒
数字就是
20, 17,23,1, 20, 18,10,1,16,23,49
打印所有链表元素, 并输出元素的总数。
在你的程序中,请用一个特殊变量名来纪录元素的总数,变量名就是你的名字。 例如你叫 张三, 那么这个变量名就是
int nZhangSan = 0; //初始化为 0.
做完这一步,把你的程序签入源代码控制(git push)。 - 链表练习,要求实现以下功能:
实现节点插入、删除、输出操作(2分,3个知识点根据实际情况酌情扣分);
继续你上一个程序, 扩展它的功能,每做完一个新功能,或者写了超过10行新代码,就签入代码,提交到源代码服务器;
从磁盘读取一个文件, 这个文件有两个数字。
从文件中读入数字1, 插入到链表第 5 位,并打印所有数字,和元素的总数。 保留这个链表,继续下面的操作。
从文件中读入数字2, 插入到链表第 0 位,并打印所有数字,和元素的总数。 保留这个链表,并继续下面的操作。
从链表中删除刚才的数字1. 并打印所有数字和元素的总数。
签入所有代码。 - 链表练习,要求实现以下功能:
使用冒泡排序法或者选择排序法根据数值大小对链表进行排序(2分);
如果你学号是单数, 选择冒泡排序, 否则选择选择排序。
在排序的每一个轮次中, 打印元素的总数,和目前链表的所有元素。
在(2)得到的程序中继续扩展, 用同一个程序文件,写不同的函数来实现这个功能。 仍然用 nZhangSan (你的名字)来表示元素的总数。 - 数组练习,要求实现下列功能:
通过键盘输入一些整数,建立一个链表(1分);
这些数是你学号中依次取出的两位数。 再加上今天的时间。
例如你的学号是 20172301
今天时间是 2018/10/1, 16:23:49秒
数字就是
20, 17,23,1, 20, 18,10,1,16,23,49
打印所有数组元素, 并输出元素的总数。
在你的程序中,请用一个特殊变量名来纪录元素的总数,变量名就是你的名字。 例如你叫 张三, 那么这个变量名就是
int nZhangSan = 0; //初始化为 0.
做完这一步,把你的程序签入源代码控制(git push)。
实现节点插入、删除、输出操作(2分,3个知识点根据实际情况酌情扣分);
继续你上一个程序, 扩展它的功能,每做完一个新功能,或者写了超过10行新代码,就签入代码,提交到源代码服务器;
从磁盘读取一个文件, 这个文件有两个数字。
从文件中读入数字1, 插入到数组第 5 位,并打印所有数字,和元素的总数。 保留这个数组,继续下面的操作。
从文件中读入数字2, 插入到数组第 0 位,并打印所有数字,和元素的总数。 保留这个数组,并继续下面的操作。
从数组中删除刚才的数字1. 并打印所有数字和元素的总数。
签入所有代码。 - 数组练习,要求实现下列功能:
使用冒泡排序法或者选择排序法根据数值大小对数组进行排序(2分);
如果你学号是单数, 选择选择排序, 否则选择冒泡排序。
在排序的每一个轮次中, 打印元素的总数,和目前数组的所有元素。
在(2)得到的程序中继续扩展, 用同一个程序文件,写不同的函数来实现这个功能。 仍然用 nZhangSan (你的名字)来表示元素的总数。
前期准备:
- 预先下载安装好IDEA 。
需求分析:
- 需要分清数组与链表的区别;
- 需要理解数组及链表实现相关线性表操作的原理及需要注意的地方;
- 需要熟练运用数组去实现相关线性表;
- 需要熟练运用链表去实现相关线性表。
代码实现及解释
本次实验一共分为五个提交点:
 public void add(int number){
        Linked_list_node Node = new Linked_list_node(number);

        if (this.head==null){
            this.head = Node;
        }
        else {
            this.head.addLinked_list_node(Node);
        }
    }
- 具体的代码实现:
        System.out.println("实验的第一部分:");
        System.out.print("Enter some integers and create a linked list :   ");
        Scanner scanner = new Scanner(System.in);
        String input = scanner.nextLine();
        String[] strings = input.split(" ");

        Stack<String> Break_up = new Stack<String>();
        for (int i = strings.length; i > 0 ; i--){
            Break_up.push(strings[i-1]);
        }
        System.out.print("The contents of the stack are :   ");
        System.out.println(Break_up);
        Linked_list linked_list = new Linked_list();
        linked_list.add(0);
        while (!Break_up.empty()) {
            int tempelement = Integer.parseInt(Break_up.pop());
            linked_list.add(tempelement);
        }
        int ntangcaiming = 0;
        ntangcaiming = linked_list.getCount();
        System.out.print("The contents of the queue are :   ");
        System.out.println(linked_list);
        System.out.print("The number of linked elements is :   ");
        System.out.println(ntangcaiming);
-
运行结果截图:
![]()
-
线性结构之链表(2)
-
根据需要,我们需要写插入和删除的方法:
-
为了更好地实现需求,我们在链表前端放入了一个取值为0的节点
linked_list.add(0);,以便于在任何地方都能实现插入删除,而打印时将其隐藏。

public void insert(int index,Linked_list_node node){
        if(index < 1||index > getCount() + 1){
            System.out.println("Wrong position, cannot insert");
            return;
        }
        int length = 1;
        Linked_list_node temp = head;
        while(head.next != null)
        {
            if(index == length++){
                node.next = temp.next;
                temp.next = node;
                return;
            }
            temp = temp.next;
        }
    }

    public void delete(int index){
        if(index < 1 || index > getCount()){
            System.out.println("Wrong position, cannot be deleted");
            return;
        }
        int length=1;
        Linked_list_node temp = head;
        while(temp.next != null){
            if(index == length++){
                temp.next = temp.next.next;
                return;
            }
            temp = temp.next;
        }
    }
- 根据以前所写IO进行文件的创建及读取;
- 本次提交点相关代码如下:
        System.out.println("实验的第二部分:");
        try {
            File file = new File("D:\\huawei\\Javawindows文件","EXP1-First semester of sophomore.txt");

            InputStreamReader reader = new InputStreamReader(new FileInputStream(file));
            BufferedReader bufferedReader = new BufferedReader(reader);
            int[] file_word_temp = new int[2];
            String[] file_word = bufferedReader.readLine().split(" ");
            file_word_temp[0] = Integer.parseInt(file_word[0]);
            file_word_temp[1] = Integer.parseInt(file_word[1]);

            Linked_list_node Node_insert1 = new Linked_list_node(file_word_temp[0]);
            Linked_list_node Node_insert2 = new Linked_list_node(file_word_temp[1]);

            linked_list.insert(5,Node_insert1);
            System.out.print("The list after inserting 1 at the fifth position is :   ");
            System.out.println(linked_list);
            System.out.print("The number of linked elements is :   ");
            ntangcaiming = linked_list.getCount();
            System.out.println(ntangcaiming);
            linked_list.insert(1,Node_insert2);
            System.out.print("The list after inserting 2 at the first position is :   ");
            System.out.println(linked_list);
            ntangcaiming = linked_list.getCount();
            System.out.print("The number of linked elements is :   ");
            System.out.println(ntangcaiming);
            System.out.print("The list after deleting the inserted number 1 is :   ");
            linked_list.delete(6);
            System.out.println(linked_list);
            ntangcaiming = linked_list.getCount();
            System.out.print("The number of linked elements is :   ");
            System.out.println(ntangcaiming);
-
运行结果截图:
![]()
-
线性结构之链表(2)
-
根据要求,我们所选择的是冒泡排序法,依据要求打印排序过程(这里只打印元素交换的时候):
-
冒泡代码实现如下(有删减):

public void Bubble_sort(Linked_list_node Head,Linked_list linked_list){


        Linked_list_node temp = null, tail = null;

        temp = head;

        int count=1;
        while(temp.next != tail){
            while(temp.next != tail){
                if(temp.number > temp.next.number){
                    int temp_number = temp.number;
                    temp.number = temp.next.number;
                    temp.next.number = temp_number;
                    System.out.print("The list sorted by the "+ count + " truly bubbling sort is :  ");
                    System.out.println(linked_list);
                    System.out.print("The number of linked elements is :  " + linked_list.getCount() + "\n" );

                    count++;
                }
                temp = temp.next;

            }
            tail = temp;
            temp = head;
        }
    }
- 相关提交点的代码:
            System.out.println("实验的第三部分:");
            System.out.println("Print only the rounds that have implemented the element exchange:");

            linked_list.Bubble_sort(linked_list.head,linked_list);
    }
        catch (IOException E){
        System.out.println("错误,指定路径不存在");
    }
-
运行结果截图(仅仅展示部分截图):
![]()
-
线性结构之数组(4)
-
根据需要编写自己的数组类
-
本次提交点相关代码如下:

 System.out.println("实验的第一部分:");
        System.out.print("Enter some integers and create a linked list:");
        Scanner scanner = new Scanner(System.in);
        String input = scanner.nextLine();

        int ntangcaiming = 0 ;
        String[] temp_MyArray = input.split(" ");
        Array MyArray = new Array(temp_MyArray);

        System.out.print("The elements in the array are:   ");
        System.out.println(MyArray);
        System.out.print("The number of elements in the array is:  ");
        ntangcaiming = MyArray.size();
        System.out.println(ntangcaiming);

        System.out.println("实验的第二部分:");
        try {
            File file = new File("D:\\huawei\\Javawindows文件","EXP1-First semester of sophomore.txt");
            InputStreamReader reader = new InputStreamReader(new FileInputStream(file));
            BufferedReader bufferedReader = new BufferedReader(reader);
            int[] file_word_temp = new int[2];
            String[] file_word = bufferedReader.readLine().split(" ");
            file_word_temp[0] = Integer.parseInt(file_word[0]);
            file_word_temp[1] = Integer.parseInt(file_word[1]);


            System.out.print("The array after 1 is inserted in position 5 is :   ");
            Array MyArray1 = new Array(MyArray.Array_Insert(4, String.valueOf(file_word_temp[0]))) ;
            System.out.println(MyArray1);
            System.out.print("The number of elements in the array is:  ");
            ntangcaiming = MyArray1.size();
            System.out.println(ntangcaiming);


            System.out.print("The list after inserting 2 at the first position is :   ");

            Array MyArray2 = new Array(MyArray1.Array_Insert(0, String.valueOf(file_word_temp[1])));
            System.out.println(MyArray2);
            System.out.print("The number of elements in the array is:  ");
            ntangcaiming = MyArray2.size();
            System.out.println(ntangcaiming);

            System.out.print("The array after deleting the inserted number 1 is :   ");

            Array MyArray3 = new Array(MyArray2.Array_Delete(5));
            System.out.println(MyArray3);
            System.out.print("The number of elements in the array is:  ");
            ntangcaiming = MyArray3.size();
            System.out.println(ntangcaiming);
- 运行结果截图:

- 线性结构之数组(5)
- 按照要求,我选择的是选择排序法:
- 相关代码如下:
 public String Array_Selection_sort() {
        int[] temp_MyArray = new int[MyArray.length];
        for (int i = 0 ; i < MyArray.length; i ++){
            temp_MyArray[i] = Integer.parseInt(MyArray[i]);
        }

        String result = "";
        for (int i = 0; i < temp_MyArray.length - 1 ; i++){
            for (int j = i + 1;j < temp_MyArray.length; j++ ){
                if (temp_MyArray[i]<temp_MyArray[j]){
                    int temp = temp_MyArray[i];
                    temp_MyArray[i] = temp_MyArray[j];
                    temp_MyArray[j] = temp;
                    String every = "";
                    for (int data : temp_MyArray){
                        every += data + " ";
                    }
                    result += "The list sorted by the SelectSorting is :  " + every + "\n" +
                            "The number of elements in the array is:  :" + MyArray.length + "\n";
                }
            }
        }
        return result;
    }
- 本次提交点的相关代码(有删减):
            System.out.println("实验的第三部分:");
            System.out.print(MyArray3.Array_Selection_sort());
- 运行结果截图(仅部分)
![]()

测试过程及遇到的问题
-
问题1:Git至码云
-
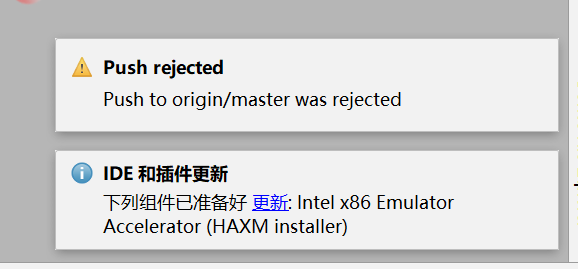
解决:起初,在网络上找了个教程(张昊然同学也发过,但没注意看......),按着教程走,结果:
![]()
![]()
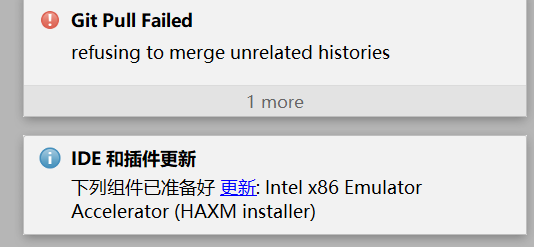
然后针对他们疯狂地找解决方法例如:git pull origin master --allow-unrelated-histories
但依旧无效,这鬼东西整了我一个星期,最后,张昊然同学说可能是创建的项目的原因,然后删了项目重建,
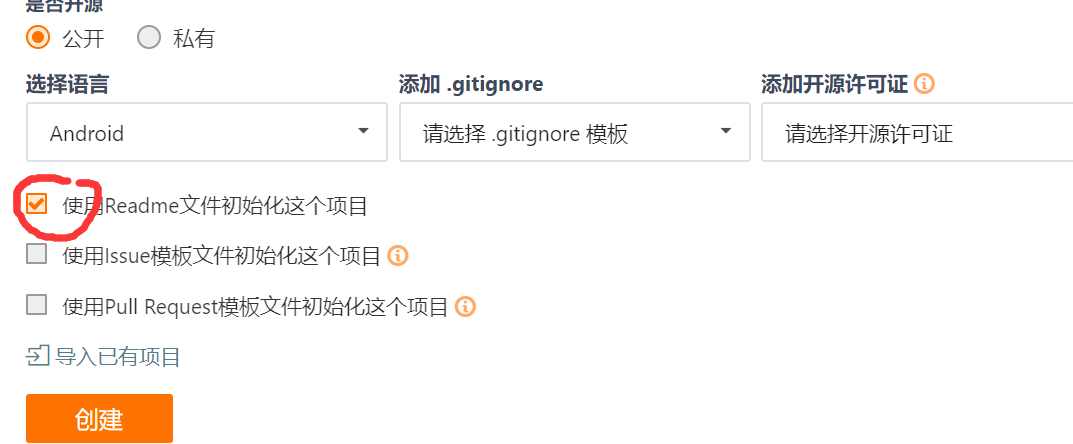
![]()
语言依旧是Android,其他两个无所谓,但别勾选使用remade初始化项目,最终得到了:
![]()
-
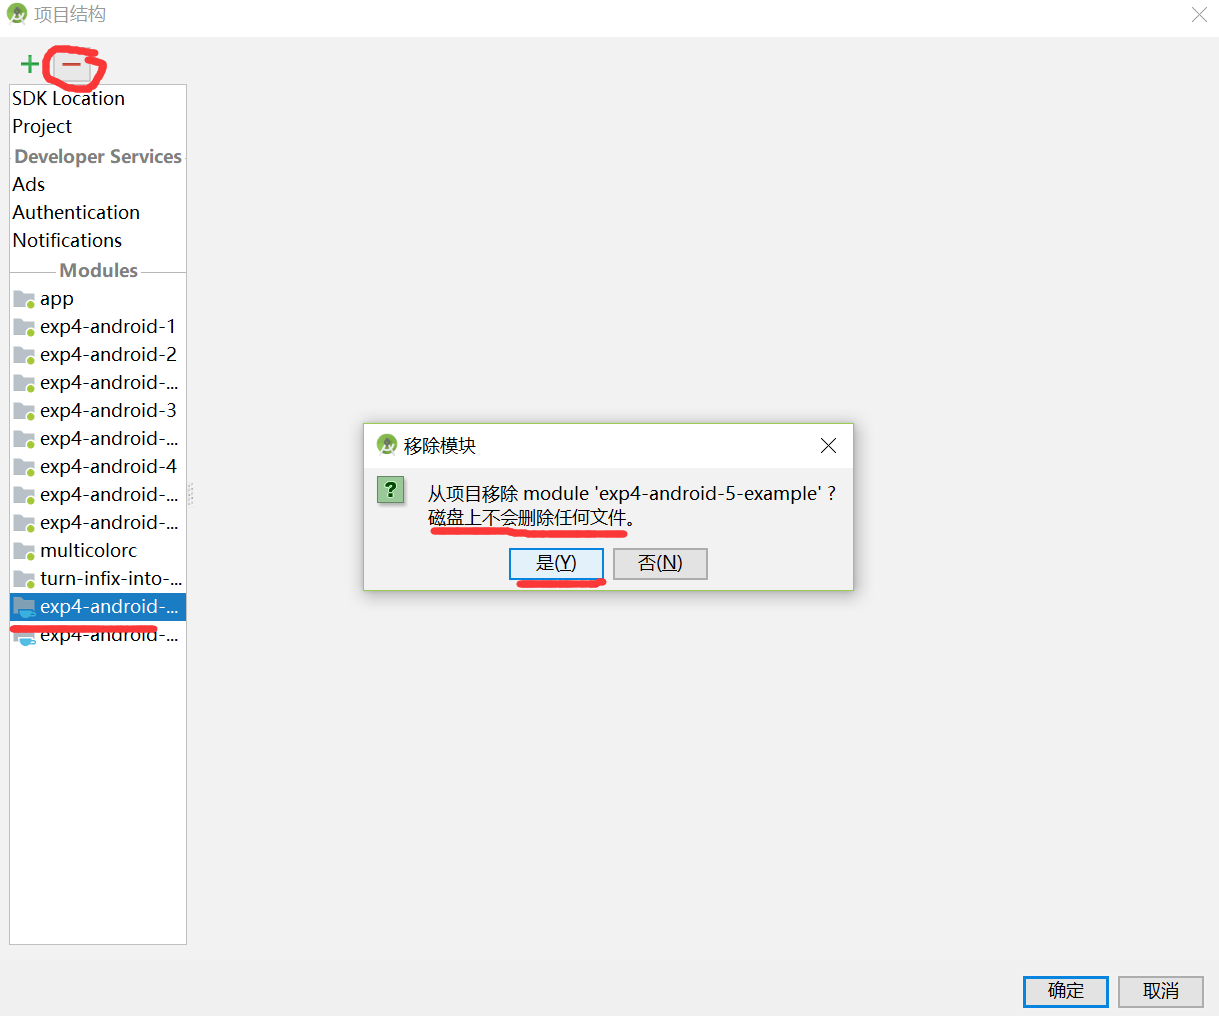
问题2:删除APP
-
解决:如果我的APP被我整得Android studio都认不出来了(n!的问题,多到无法一一解决),我想删掉怎么办?
-
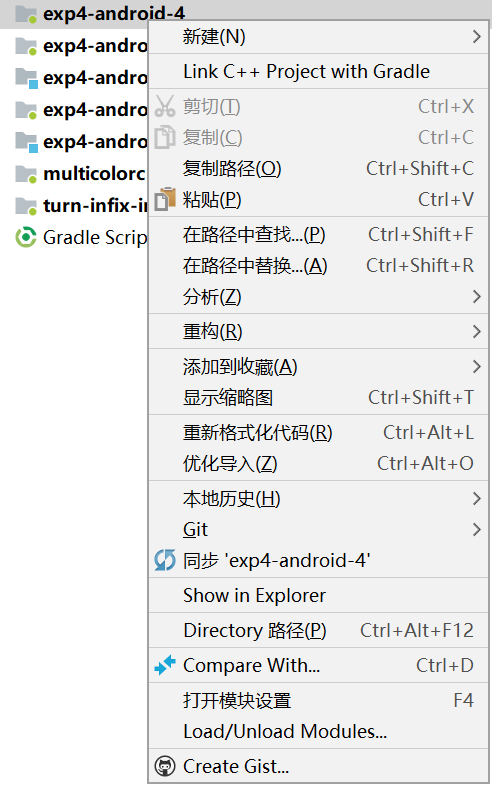
然而它并不能简单地通过右键删除:
![]()
通过了解知道:这是一种对于APP的保护机制,要想删除,只能通过:
![]()
![]()
然而,这仅仅是删除在Android studio上的,要想彻底删除,还需去相应文件存储的硬盘里删掉相应文件。


分析总结
- 这是一个全新的内容,与我们原来所学的相关,且更深一层并更接近了我们的生活,虽然项目的开发过程的某些代码的含义还不能完全明白,但在以后的过程中会逐一认识、了解并掌握。
代码托管
参考资料
Intellj IDEA 简易教程
Android开发简易教程
Android studio项目上传至oschina(码云)教程

 浙公网安备 33010602011771号