odoo12 修行基础篇之 记录批处理 (七)
客户需求总是不断啊...
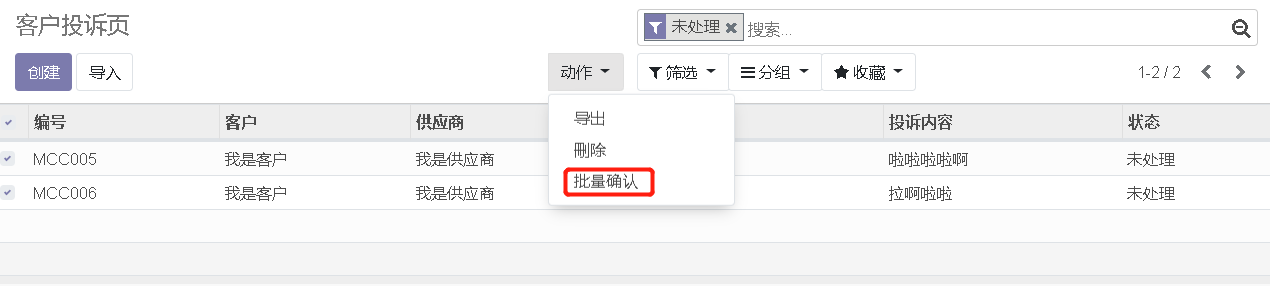
批处理我们得先有个按钮啊,加吧,加的过程中就加上了批量处理方式了。
在加按钮之前还要说下odoo中常用的三类模型,因为,一种我们没见过的模型即将登场...
基本模型:model.Model,储存数据记录的模型,不会定期删除
瞬态模型:model.TransientModel,瞬态模型,数据会被定期删除,常用于与用户的临时交互
抽象模型:model.AbstractModel,抽象模型,不会存数据(还得研究研究,这里我尝试用了以下,一直报错,没咋搞懂,希望多交流)
这里我们用到了瞬态模型
1、创建my_customer_complain_transient.py文件,再init.py中引入。
方法内容先不管。
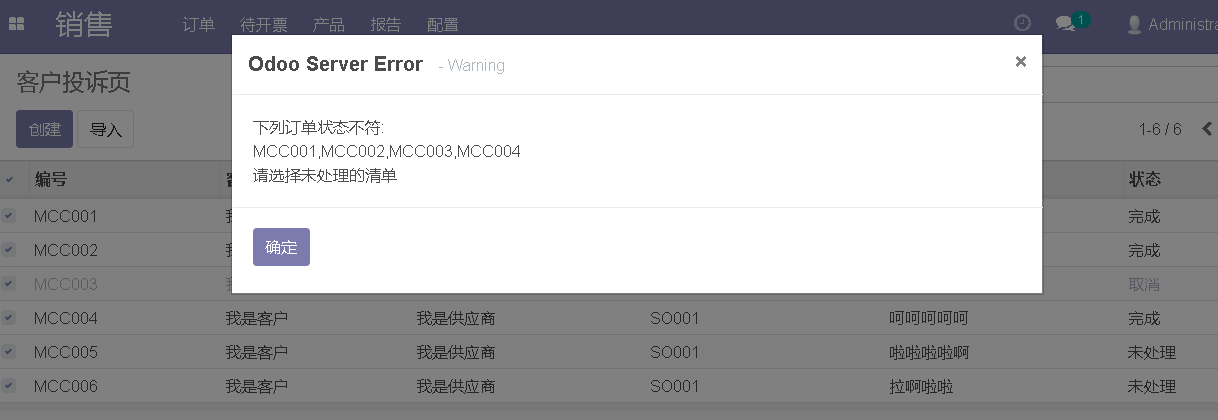
# -*- coding:utf-8 -*-

from odoo import models, api
from odoo.exceptions import UserError


class MyCustomerComplainTransient(models.TransientModel):
    _name = 'my.customer.complain.transient'
    _description = '批量确认'

    # 预处理方法
    @api.model
    def default_get(self, fields_list):
        records = self._get_all_complains(self._context['active_ids'])
        records_undraft_names = records.filtered(lambda r: r.state != 'draft').mapped('name')
        if records_undraft_names:
            raise UserError('下列订单状态不符: \n%s\n请选择未处理的清单' % ','.join(records_undraft_names))
        return super().default_get(fields_list)

    def action_confirm(self):
        records = self._get_all_complains(self._context['active_ids'])
        records.write({'state': 'done'})

    def _get_all_complains(self, record_ids):
        return self.env['my.customer.complain'].search([('id', 'in', record_ids)])
简单说下:default_get是预处理方法,会在form页面弹出前调用。action_confirm是在form页面弹出后点击确认时调用。
self._context['active_ids']
上述代码可以获取选择记录的id列表,根据这个列表可以获取记录。
2、创建my_customer_complain_transient.xml,在__manifest__.py中引入。
<?xml version="1.0" encoding="UTF-8"?>
<odoo>
    <record id="view_my_customer_complain_transient" model="ir.ui.view">
        <field name="name">view.my.customer.complain.transient</field>
        <field name="model">my.customer.complain.transient</field>
        <field name="arch" type="xml">
            <form string="提示">
                <group>
                    <p>
                        即将进行批量确认,是否继续?
                    </p>
                </group>
                <footer>
                    <button name="action_confirm" string="确认" type="object" class="btn-primary"/>
                    <button string="取消" class="btn-secondary" special="cancel" />
                </footer>
            </form>
        </field>
    </record>
</odoo>
3、在my_customer_complain.xml中增加如下内容,把之前context分组的条件去掉:
<!-- 批量确认 -->
<act_window id="action_my_customer_complain_multi_confirm"
            name="批量确认"
            src_model="my.customer.complain"
            res_model="my.customer.complain.transient"
            view_mode="form"
            key2="client_action_multi"/>
id: 唯一标记
src_model: 批量确认按钮添加的模型
res_model: 调用的模型
view_mode: 弹出框的类型,默认是列表,这里填form,为了和用户更好的交互
key2: 固定写法,不加没有按钮
按照上述定义完后,升级下,按钮就会出现在页面中。点击通过预处理方法判断后,就会调用预先定义的form进行展示。
有其它状态的记录时会提示:
没有状态不符的记录,就弹出form:
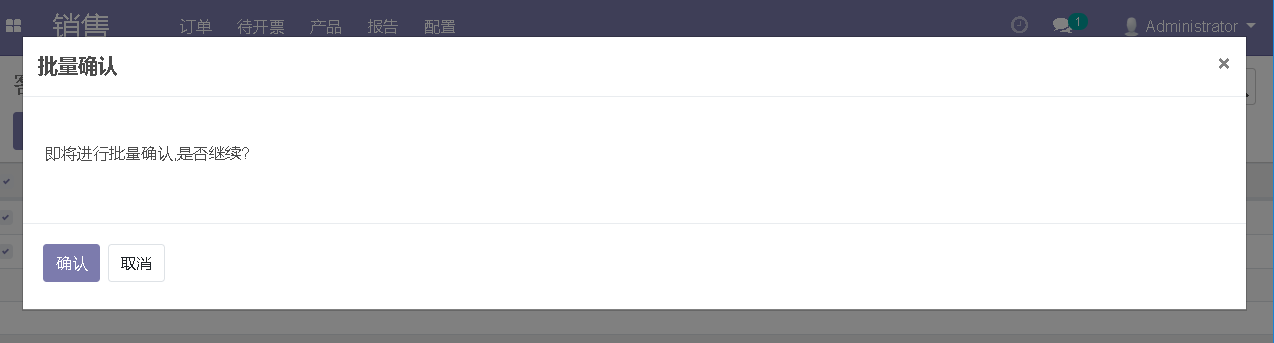
确认就批量完成记录了。
这样列表基本上就搞的差不多了,后面我们搞下kanban吧。
项目git地址:https://github.com/SamNicole1809/odoo12_my_pro,带目录

 浙公网安备 33010602011771号