
odoo12 修行基础篇之 添加工作流和操作记录 (四)
这一篇我们先说下如何添加操作记录。

其实就是一个固定的流程:
1、在my_customer_complain.py中继承三个类
_inherit = ['portal.mixin', 'mail.thread', 'mail.activity.mixin']
2、在my_customer_complain.xml中引入字段,就是增加了div中的内容
1 <form string="Customer Complain">
2     <header...>
3     <sheet...>
4     <div class="oe_chatter">
5         <field name="message_follower_ids" widget="mail_followers"/>
6         <field name="activity_ids" widget="mail_activity"/>
7         <field name="message_ids" widget="mail_thread"/>
8     </div>
9 </form>
这个时候升级下模块,再创建记录时就会在form表单下面显示操作记录了,以便于追溯。
下面说下工作流的添加:
1、在my_customer_complain.py中增加字段,并修改方法如下:
# 状态
state = fields.Selection(
    [('draft', '未处理'), ('done', '完成'), ('cancel', '取消')],
    string='状态', readonly=True, default='draft', track_visibility='onchange'
)

@api.multi
def action_cancel(self):
    self.ensure_one()
    self.state = 'cancel'

@api.multi
def action_comfirm(self):
    self.ensure_one()
    self.state = 'done'
说明:
增加了一个状态字段,定义了三个状态,默认是未处理。
注意track_visibility='onchange'这个属性,意味着这个字段值的变化,会在记录中进行记录。
增加了一个确认方法,修改了取消方法,即对状态的值进行修改。
2、修改my_customer_complain.xml中header中的内容:
<header>
    <button name="action_comfirm" string="确认" type="object"/>
    <button name="action_cancel" string="取消" type="object" confirm="确认取消?"/>
    <field name="state" widget="statusbar" statusbar_visible="draft,done,cancel"/>
</header>
说明:
增加了确认按钮和工作流。
可以看到工作流的添加很简单,就是添加一个字段,指定widget,statusbar_visible就是哪些状态显示工作流。
升级一下,看看效果吧。
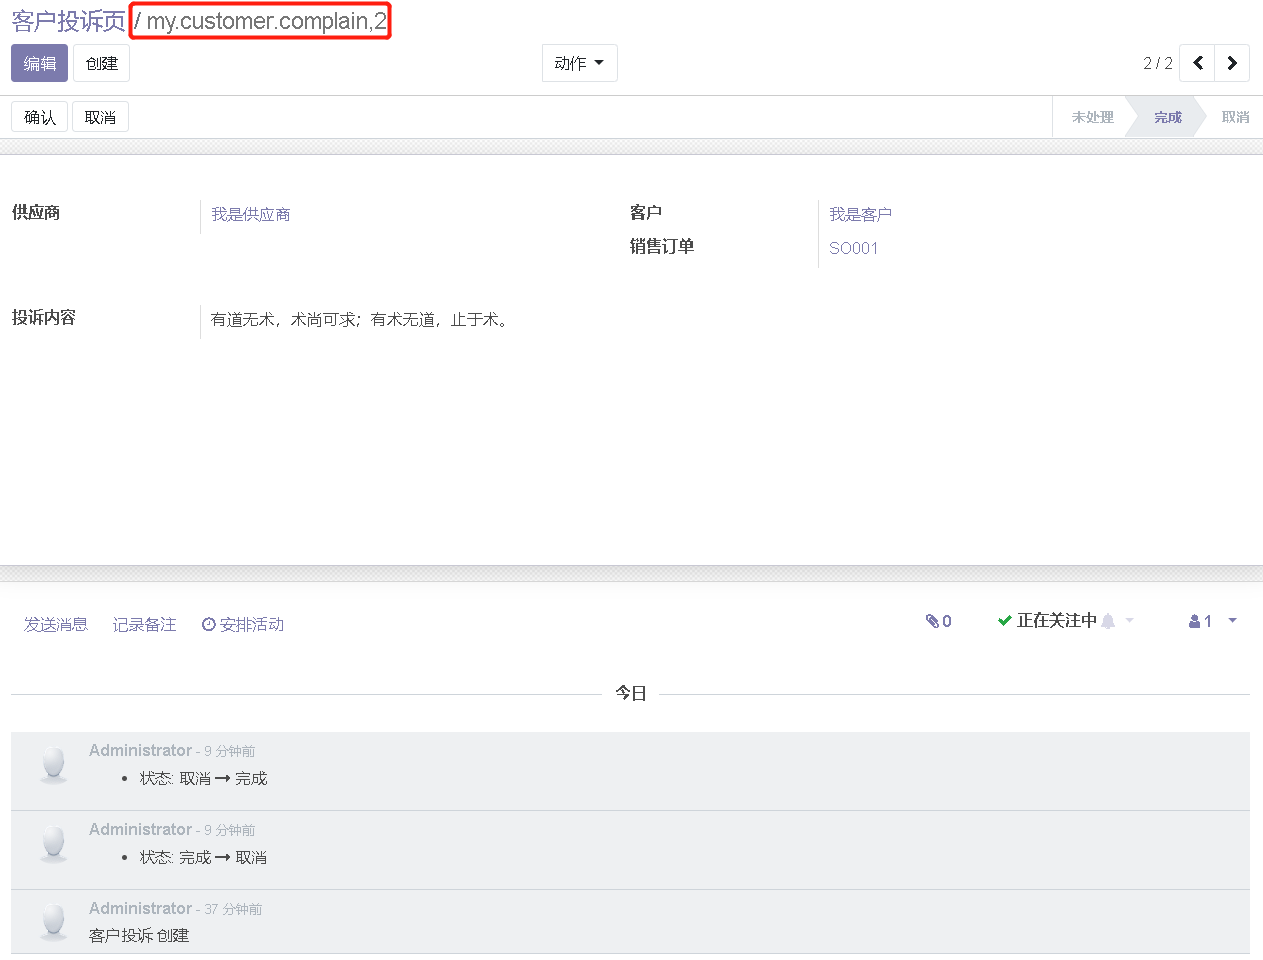
可以看到,图片中红框位置怎么把对象打出来,很难看,下一篇我们就把这个给改喽。
项目git地址:https://github.com/SamNicole1809/odoo12_my_pro,带目录
知止而后有定;定而后能静;静而后能安;安而后能虑;虑而后能得。

 浙公网安备 33010602011771号