【Liunx】MySQL安装
Liunx系统 MySQL5.7安装
Linux查看当前操作系统版本信息
cat /proc/version
root@debian:/home/xiatian# cat /proc/version
Linux version 6.1.0-32-amd64 (debian-kernel@lists.debian.org) (gcc-12 (Debian 12.2.0-14) 12.2.0, GNU ld (GNU Binutils for Debian) 2.40) #1 SMP PREEMPT_DYNAMIC Debian 6.1.129-1 (2025-03-06)
检测系统是否自带安装
MySQL和mariadb
对于基于 Debian 的系统(如 Ubuntu),使用:
sudo apt update
sudo apt install mysql-server

对于基于 RHEL 的系统(如 CentOS),使用:
sudo yum update
sudo yum install mysql-server

对于 Fedora,使用:
sudo dnf install mysql-server

rpm -qa | grep mysql
rpm -qa | grep mariadb

卸载
rpm -e mysql-libs-5.1.52-1.el6_0.1.x86_64  // 普通删除模式
rpm -e --nodeps mysql-libs-5.1.52-1.el6_0.1.x86_64  // 强力删除模式,如果使用上面命令删除时,提示有依赖的其它文件,则用该命令可以对其进行强力删除
rpm -e --nodeps mariadb-libs-5.5.56-2.el7.x86_64
1、从MySQL官网下载TAR 安装包
下载地址:https://dev.mysql.com/downloads/mysql/5.7.html#downloads
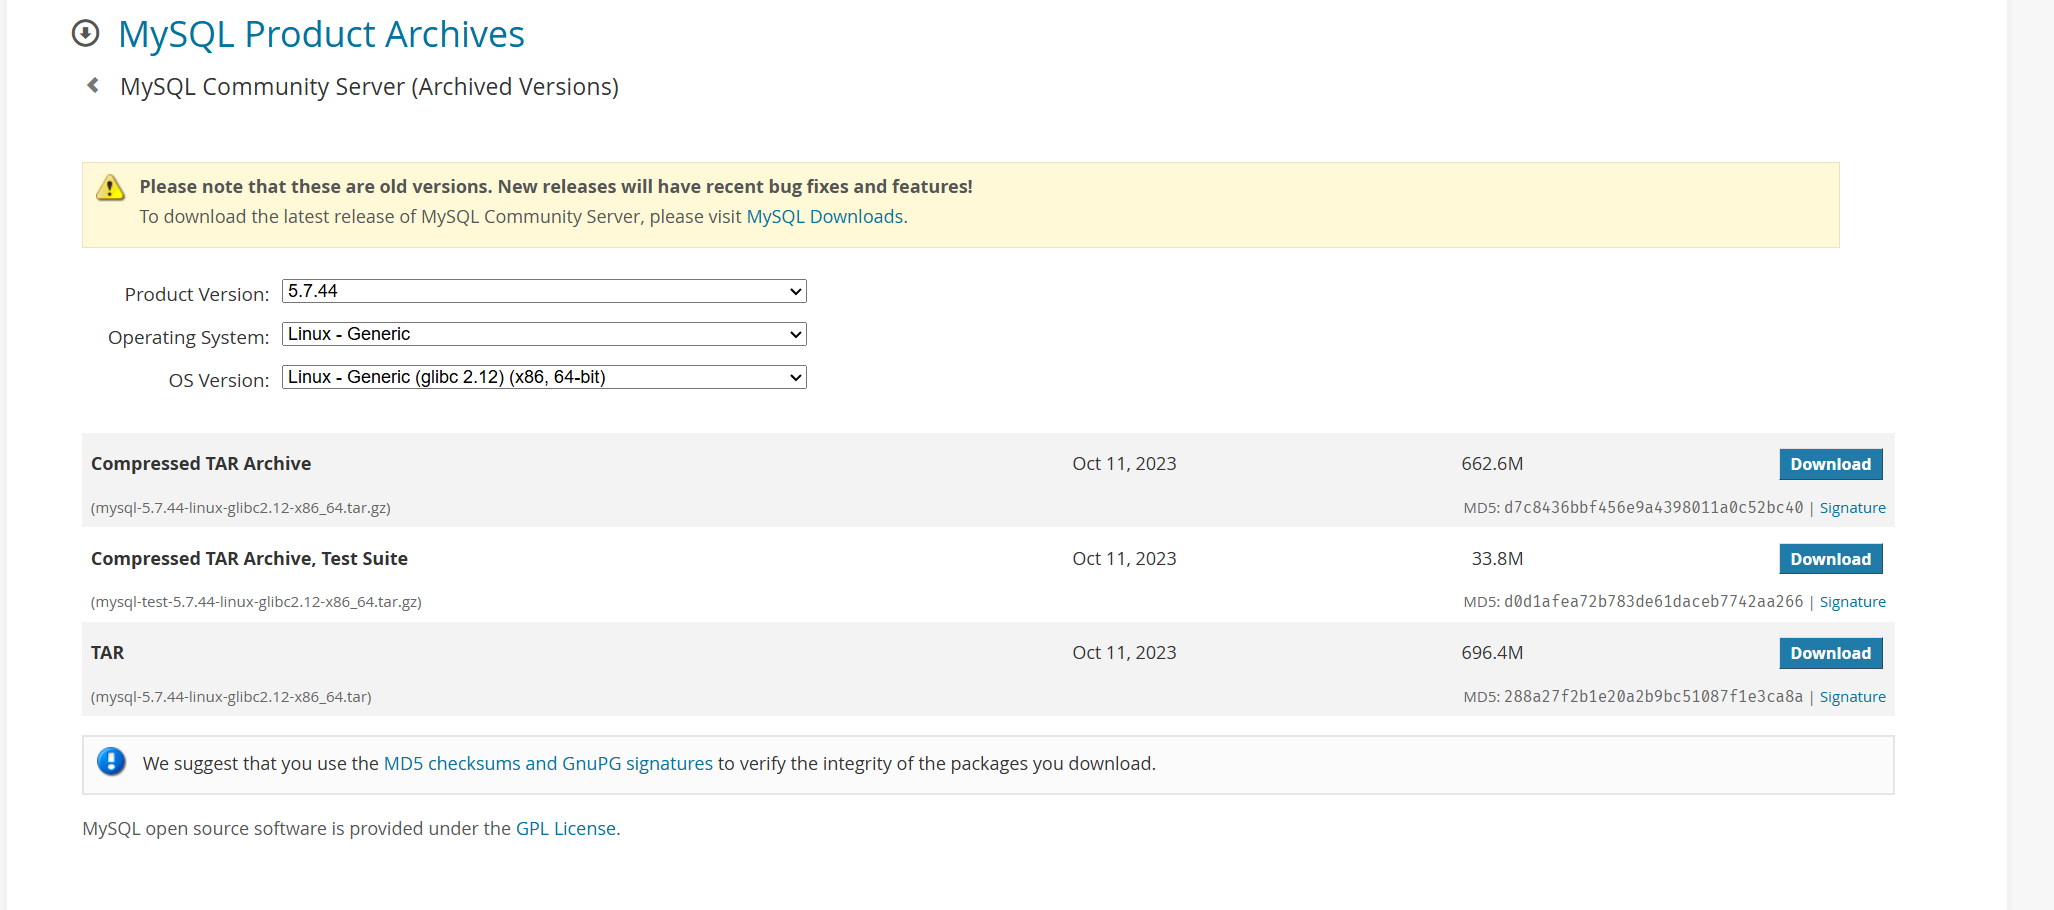
服务器下载
root@debian:/home# wget https://downloads.mysql.com/archives/get/p/23/file/mysql-5.7.44-linux-glibc2.12-x86_64.tar
--2025-07-08 21:11:37--  https://downloads.mysql.com/archives/get/p/23/file/mysql-5.7.44-linux-glibc2.12-x86_64.tar
正在解析主机 downloads.mysql.com (downloads.mysql.com)... 184.87.103.166
正在连接 downloads.mysql.com (downloads.mysql.com)|184.87.103.166|:443... 已连接。
已发出 HTTP 请求,正在等待回应... 302 Moved Temporarily
位置:https://cdn.mysql.com/archives/mysql-5.7/mysql-5.7.44-linux-glibc2.12-x86_64.tar [跟随至新的 URL]
--2025-07-08 21:11:50--  https://cdn.mysql.com/archives/mysql-5.7/mysql-5.7.44-linux-glibc2.12-x86_64.tar
正在解析主机 cdn.mysql.com (cdn.mysql.com)... 173.223.95.232, 2600:1417:4400:8b6::1d68, 2600:1417:4400:8ae::1d68
正在连接 cdn.mysql.com (cdn.mysql.com)|173.223.95.232|:443... 已连接。
已发出 HTTP 请求,正在等待回应... 200 OK
长度:730244608 (696M) [application/x-tar]
正在保存至: “mysql-5.7.44-linux-glibc2.12-x86_64.tar”

mysql-5.7.44-linux-glibc2.12-x86_64.tar                100%[============================================================================================================================>] 696.42M  64.1MB/s  用时 11s

2025-07-08 21:12:06 (62.1 MB/s) - 已保存 “mysql-5.7.44-linux-glibc2.12-x86_64.tar” [730244608/730244608])
2、MySQL5.7安装
解压安装包
root@debian:/home# tar -xvf mysql-5.7.44-linux-glibc2.12-x86_64.tar
mysql-test-5.7.44-linux-glibc2.12-x86_64.tar.gz
mysql-5.7.44-linux-glibc2.12-x86_64.tar.gz

# 解压非test的压缩包
root@debian:/home# tar -xvf mysql-5.7.44-linux-glibc2.12-x86_64.tar.gz
mysql-5.7.44-linux-glibc2.12-x86_64/bin/myisam_ftdump
mysql-5.7.44-linux-glibc2.12-x86_64/bin/myisamchk
……
重命名目录/移动目录
把解压后的文件夹移动到 /usr/local/mysql
cd /usr/local
root@debian:/home# mv /home/mysql-5.7.44-linux-glibc2.12-x86_64 /usr/local/mysql
创建mysql用户组和用户
必须创建mysql用户,因为mysql的初始化需要。
root@debian:/home# groupadd mysql
root@debian:/home# useradd -r -g mysql mysql
创建数据目录并赋予权限
通常都会将数据存放目录外置到别的目录,这样子升级mysql不会影响历历史数据。
#创建目录
root@debian:/home# mkdir -p /data/mysql
#赋予权限
root@debian:/home# chown mysql:mysql -R /data/mysql
修改配置文件
把默认的内容注释掉后者删掉,推荐最好是注释掉,如果你要删掉,最好拷贝一下做一下备份。改为下面的内容即可。
mysql有一个配置文件叫做my.cnf,/etc/my.cnf 我们会在配置文件中指定端口,数据存放目录,以及编码格式。
# 创建配置文件 vim 或者 vi
root@debian:/etc# vi /etc/my.cnf
/etc/my.cnf
[mysqld]
bind-address=0.0.0.0
port=3306
user=mysql
basedir=/usr/local/mysql
datadir=/data/mysql
socket=/tmp/mysql.sock
log-error=/data/mysql/mysql.err
pid-file=/data/mysql/mysql.pid
default-time-zone="+08:00"
character-set-server=utf8mb4
default_authentication_plugin=mysql_native_password
#character config
symbolic-links=0
explicit_defaults_for_timestamp=true
sql_mode=NO_ENGINE_SUBSTITUTION,STRICT_TRANS_TABLES
[client]
default-character-set=utf8
[mysql]
default-character-set=utf8
3、初始化数据库
进入MySQL的bin目录。
cd /usr/local/mysql/bin/
初始化。输入如下命令:这里要指定; defaults-file 配置文件,--basedir 根目录,--datadir 数据文件,--user 用户。
root@debian:/usr/local/mysql/bin# ./mysqld --defaults-file=/etc/my.cnf --basedir=/usr/local/mysql/ --datadir=/data/mysql/ --user=mysql --initialize
./mysqld: error while loading shared libraries: libaio.so.1: cannot open shared object file: No such file or directory
系统缺少必要的共享库文件, 确认是否安装了
libaio
# 对于基于 Debian 的系统(如 Ubuntu):
sudo apt-get update
sudo apt-get install libaio1

# 对于基于 RHEL 的系统(如 CentOS、Fedora):
sudo yum install libaio
root@debian:/usr/local/mysql/bin# sudo apt-get update
Ign:1 https://download.docker.com/linux/debian bookworm InRelease
……
root@debian:/usr/local/mysql/bin# sudo apt-get install libaio1
Reading package lists... Done
……
查看root用户密码
1.注意此时仍然在bin目录下,输入如下命令:
初始化完成后,默认会生成一个root用户的密码,最后一行,如下位置。这里要记住,后面登录的时候需要使用。
root@debian:/usr/local/mysql/bin# cat /data/mysql/mysql.err
2025-07-08T13:37:53.674486Z 0 [Warning] 'NO_ZERO_DATE', 'NO_ZERO_IN_DATE' and 'ERROR_FOR_DIVISION_BY_ZERO' sql modes should be used with strict mode. They will be merged with strict mode in a future release.
2025-07-08T13:37:53.674527Z 0 [Warning] 'NO_AUTO_CREATE_USER' sql mode was not set.
2025-07-08T13:37:53.788109Z 0 [Warning] InnoDB: New log files created, LSN=45790
2025-07-08T13:37:53.800697Z 0 [Warning] InnoDB: Creating foreign key constraint system tables.
2025-07-08T13:37:53.852656Z 0 [Warning] No existing UUID has been found, so we assume that this is the first time that this server has been started. Generating a new UUID: bff1a8f4-5c00-11f0-bcb5-000c29aa2407.
2025-07-08T13:37:53.853090Z 0 [Warning] Gtid table is not ready to be used. Table 'mysql.gtid_executed' cannot be opened.
2025-07-08T13:37:54.206090Z 0 [Warning] A deprecated TLS version TLSv1 is enabled. Please use TLSv1.2 or higher.
2025-07-08T13:37:54.206096Z 0 [Warning] A deprecated TLS version TLSv1.1 is enabled. Please use TLSv1.2 or higher.
2025-07-08T13:37:54.207289Z 0 [Warning] CA certificate ca.pem is self signed.
2025-07-08T13:37:54.393682Z 1 [Note] A temporary password is generated for root@localhost: q0WoooT(.7k.
root@debian:/usr/local/mysql/bin#
A temporary password is generated for root@localhost: q0WoooT(.7k.
启动mysql服务
# 1.先将mysql.server放置到/etc/init.d/mysql中
cp /usr/local/mysql/support-files/mysql.server /etc/init.d/mysql


# 启动服务 方式一
root@debian:/# systemctl start mysql
root@debian:/cd /# systemctl status mysql # 查看服务状态

# 启动服务 方式二
service mysql start
service mysql status # 查看服务状态

Active: active (running)
到这里说明MySQL已经安装成功了。
4、修改默认密码
每次执行mysql命令,都需要进入mysql的bin目录,这样有点麻烦不方便。如果不希望每次进到bin目录下使用mysql命令,则执行一下命令
ln -s /usr/local/mysql/bin/mysql /usr/bin
登陆MySQL
root@debian:/# mysql -u root -p
mysql: error while loading shared libraries: libncurses.so.5: cannot open shared object file: No such file or directory
这类系统默认使用 libncurses.so.6,而有些老版本的 MySQL 仍然依赖 libncurses.so.5,所以你需要单独安装兼容包。
1. 确认是否安装了 ncurses 库
首先,你需要确认是否已经安装了 ncurses 库。在终端中运行以下命令来检查是否安装了 ncurses:
dpkg -l | grep libncurses

或者如果你使用的是基于 RPM 的系统(如 Fedora、CentOS 等),可以使用:
rpm -q libncurses

2. 安装或重新安装 ncurses 库
对于基于 Debian 的系统(如 Ubuntu):

sudo apt-get update
sudo apt-get install libncurses5

# 对于基于 RHEL 的系统(如 CentOS、Fedora):
sudo yum install ncurses-libs
或者
yum install -y ncurses-compat-libs
重新登陆MYSQL
root@debian:/# mysql -u root -p
Enter password: #这里输入密码,不会显示,正常输入即可,敲击回车完成输入
Welcome to the MySQL monitor.  Commands end with ; or \g.
Your MySQL connection id is 2
Server version: 5.7.44
将密码修改一下将其修改成:123456
依次执行下面三条命令,这里密码设置为123456,生产数据库上要符合密码规范。
mysql> SET PASSWORD = PASSWORD('123456');
Query OK, 0 rows affected, 1 warning (0.00 sec)

mysql> ALTER USER 'root'@'localhost' PASSWORD EXPIRE NEVER;
Query OK, 0 rows affected (0.00 sec)

mysql> FLUSH PRIVILEGES;
Query OK, 0 rows affected (0.01 sec)
5、远程连接
防火墙开放 3306 端口 ; iptables或firewalld
liunx防火墙开放端口
使用iptables
查看当前的iptables规则:
sudo iptables -L

开放特定端口(例如开放端口80):
sudo iptables -I INPUT -p tcp --dport 80 -j ACCEPT

保存iptables规则(根据你的发行版,保存方法可能不同):
在Debian/Ubuntu上,你可以使用iptables-persistent包:

sudo apt-get install iptables-persistent
sudo netfilter-persistent save

在CentOS/RHEL上,你可以使用service命令:
service iptables save

在Fedora上,通常不需要手动保存,因为iptables服务会在重启后自动加载规则。
使用firewalld

查看当前的firewalld区域:
sudo firewall-cmd --list-all

开放特定端口(例如开放端口80):
sudo firewall-cmd --zone=public --add-port=80/tcp --permanent

重新加载firewalld以应用更改:
sudo firewall-cmd --reload

使用UFW(Uncomplicated Firewall)
查看当前的UFW规则:
sudo ufw status

开放特定端口(例如开放端口80):
sudo ufw allow 80/tcp

重新加载UFW以应用更改:
sudo ufw reload
MYSQL root用户默认只能够本机本地访问
use mysql #访问mysql库
update user set host = '%' where user = 'root'; #使root能再任何host访问
FLUSH PRIVILEGES;

#访问mysql库
mysql> use mysql
Reading table information for completion of table and column names
You can turn off this feature to get a quicker startup with -A

Database changed

#使root能再任何host访问
mysql> update user set host = '%' where user = 'root';
Query OK, 1 row affected (0.00 sec)
Rows matched: 1  Changed: 1  Warnings: 0

# 刷新
mysql> FLUSH PRIVILEGES;
Query OK, 0 rows affected (0.00 sec)
测试远程访问

 浙公网安备 33010602011771号