
ASP.NET MVC - 使用Post, Redirect, Get (PRG)模式
原文地址:ASP.NET MVC - Using Post, Redirect, Get Pattern
原文作者:matthaw
本文地址:ASP.NET MVC - 使用Post, Redirect, Get (PRG)模式
译者:Q.Lee.lulu

ASP.NET MVC模式通过重新引进已经丢失的,或者至少已经没有使用很多年的模式,使其本身趋向更简单和“真实”的 HTTP体验(原文:The ASP.NET MVC pattern tends to lead itself into a more simplified and "true" HTTP experience by re-introducing patterns that have been lost, or at least, not followed in many years)。其中的一种模式是Post,Redirect,Get(PRG)模式,它可以"避免二次提交和允许web应用程序使用浏览器书签和reload按钮来更直观的表现"(Wikipedia).
一个普通的ASP.NET Web Form生命周期具有下述的模式:
1. HTTP GET of "Create.aspx"
2. HTTP POST of "Create.aspx"
3. Validation Fails, "Create.aspx" is Re-Rendered
4. HTTP POST of "Create.aspx"
5. Item is created, "Create.aspx" is Re-Rendered with confirmation message
这种Postback模式的主要问题是,在第3步或者第5步点击浏览器的刷新按钮的时候,将会重新Post你已经提交的数据。第5步还存在的一个问题是它甚至可能会重新提交已经创建了的数据(译注:即二次提交,创建了两条相同的数据)。当然,你可以在以上的步骤中处理这些问题,但默认情况下ASP.NET Web Form是这样对待它的。
将这同样的情况放到ASP.NET MVC中,可以通过呈现一个来自你的POST action的"Create"视图来实现同样的方式。例如:
1. HTTP GET of "/products/create", "Create" view is rendered
2. HTTP POST to "/products/submit"
3. Validation Fails, "Create" view is rendered
4. HTTP POST to "/products/submit"
5. Item is created, "Confirm" view is rendered
就和你注意到的一样,ASP.NET Web Form存在的问题,在ASP.NET MVC中也存在同样的问题。真正漂亮的选择是,ASP.NET MVC给予我们更多的"自由"来处理这个流程。如果我们在ASP.NET MVC中严格的按照PRG模式,它看起来应该像:
1. HTTP GET of "/products/create", "Create" view is rendered
2. HTTP POST to "/products/submit"
3. Validation Fails, redirect to "/products/create", "Create" view is rendered
4. HTTP POST to "/products/submit"
5. Item is created, redirect to "/products/confirm", "Confirm" view is rendered
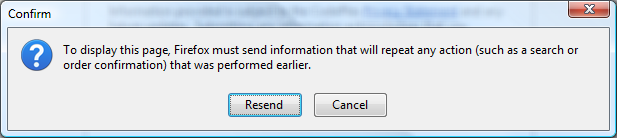
如你所见,我们之前会出现问题的第3步和第5步,不会再存在问题。如果一个用户以上的任何一个步骤按下刷新按钮,他们不会看到如下图所示的可爱的“Would you like to resubmit the form data”的确认信息,而页面只是重新加载了。
要实现这个,你需要1个Controller,3个Action方法,和2个views。跟随下面的步骤实现这个模式:
using System.Web.Mvc;

public class ProductsController : Controller
{
  public ActionResult Create() { ... }
  public ActionResult Submit() { ... }
  public ActionResult Confirm() { ... }
}
当你实现你的 Create action,你要记住的是验证可能是失败的而你可能要重新显示这个表单。TempData是最适合在这种情况下使用的,它如下实现:
public ActionResult Create()
{
  if (TempData["ErrorMessage"] != null)
  {
    ViewData["ErrorMessage"] = TempData["ErrorMessage"];
    ViewData["Name"] = TempData["Name"];
    ViewData["Price"] = TempData["Price"];
    ViewData["Quantity"] = TempData["Quantity"];
  }
  return RenderView();
}
接下来你要实现你的 Submit action。这里将会处理用户输入数据的验证,如果验证通过则保存数据并重定向到 Confirm action。如果验证失败将会把表单数据保存到TempData中并重定向到 Create action。我们模拟的这个方式在验证失败的情况下也会维持视图数据。
public ActionResult Submit()
{
  string error = null;
  string name = Request.Form["Name"];
  if (string.IsNullOrEmpty(name))
  {
    error = "Name is empty. ";
  }
  decimal price;
  if (!decimal.TryParse(Request.Form["Price"], out price))
  {
    error += "Price is invalid. ";
  }
  int quantity;
  if (!int.TryParse(Request.Form["Quantity"], out quantity))
  {
    error += "Quantity is invalid.";
  }

  if (!string.IsNullOrEmpty(error))
  {
    TempData["ErrorMessage"] = error;
    TempData["Name"] = Request.Form["Name"];
    TempData["Price"] = Request.Form["Price"];
    TempData["Quantity"] = Request.Form["Quantity"];
    return RedirectToAction("Create");
  }
  else
  {
    return RedirectToAction("Confirm");
  }
}
这里注意上面的示例中一些很重要的东西是,尽管我把form中所有的数据放入到本地变量中,可能Price或者Quantity其中任何一个转换失败,而我将TempData用上面的本地变量(译注:指上面的红色部分)赋值...我将丢失用户输入的数据。所以,从Form中取得数据并直接存入到TempData中始终是一个聪明的主意。最后,需要实现 Confrim action :
public ActionResult Confirm()
{
  return RenderView(); //译注:参数为空时将呈现和action同名的view
}
现在,是时候来创建我们的视图了:
~/Views/Products/Create.aspx
<%@ Page Language="C#" AutoEventWireup="true" CodeFile="Create.aspx.cs" Inherits="Views_Products_Create" %>
<html xmlns="http://www.w3.org/1999/xhtml">
  <head runat="server">
    <title>Create Product</title>
  </head>
  <body>
    <% using (Html.Form<ProductsController>(c => c.Submit())) { %>
      <% if (!string.IsNullOrEmpty((string) ViewData["ErrorMessage"])) { %>
    <div style="color:Red;">
      <%= ViewData["ErrorMessage"] %>
    </div>
    <% } %>
    Name: <%= Html.TextBox("Name", ViewData["Name"]) %><br />
    Price: <%= Html.TextBox("Price", ViewData["Price"]) %><br />
    Quantity: <%= Html.TextBox("Quantity", ViewData["Quantity"]) %><br />
    <%= Html.SubmitButton("submitButton", "Save") %>
    <% } %>
  </body>
</html>
~/Views/Products/Confirm.aspx
<%@ Page Language="C#" AutoEventWireup="true" CodeFile="Confirm.aspx.cs" Inherits="Views_Products_Confirm" %>
<html xmlns="http://www.w3.org/1999/xhtml">
  <head id="Head1" runat="server">
    <title>Confirm Create Product</title>
  </head>
  <body>
    Thanks for creating your product.
    <%= Html.ActionLink<ProductsController>(c => c.Create(), "Click here") %> to create a new one.
  </body>
</html>
就是这样。你可以从这里获取这个模式的示例程序的代码。


出处:http://QLeelulu.cnblogs.com/
本文版权归作者和博客园共有,欢迎转载,但未经作者同意必须保留此段声明,且在文章页面明显位置给出原文连接,否则保留追究法律责任的权利

 浙公网安备 33010602011771号