

一个注册、登陆系统的实现
学习笔记
git源码链接:https://github.com/littleredhatli/web
目录:
目标一、使用Git上传代码
在任务开始时,我首先进行了用git上传代码的相关操作的学习
1)进入要上传的仓库,右键git bash here,添加远程地址
$ git init
$ git remote add origin git@github.com:littleredhatli(git名)/web(版本库名).git
git init后文件目录中出现一个隐藏的.git文件
2)添加文件名和评论
$ git add file

$ git commit -m "上传的评论"
3)上传到github
$ git push origin master
git push命令会将本地仓库推送到远程服务器。完成文件上传。
目标二、静态网页的制作
实现一个注册、登陆系统,首先完成注册、登陆静态页面的制作
制作网页使用的软件:Hbuilder
1.html制作基本的网页内容
1.注册页面
 1 <body>
 2     <div id="in">
 3         <h1>注册</h1>
 4             <form method="post" action="register.php">
 5                 <input type="text" required="required" placeholder="用户名" name="id"/>
 6                 <input type="text" required="required" placeholder="手机号" name="telephone"/>
 7                 <input type="text" required="required" placeholder="帐号" name="user"/>
 8                 <input type="password" required="required" placeholder="密码" name="password"/>
 9                 <button class="submit" type="button" onclick="http://127.0.0.1:8020/hello%20world/index.html">提交</button>
10             </form>
12     </div>
13     <img src="http://desk.fd.zol-img.com.cn/t_s960x600c5/g5/M00/0F/09/ChMkJlauzYiIIU3UAFNltyuxFDQAAH9GAKkOzMAU2XP642.jpg" width="1400" height="700">
14 </body>
没有添加CSS样式时注册网页的界面:

在没有添加css样式时,文本框这些版块显得非常朴素
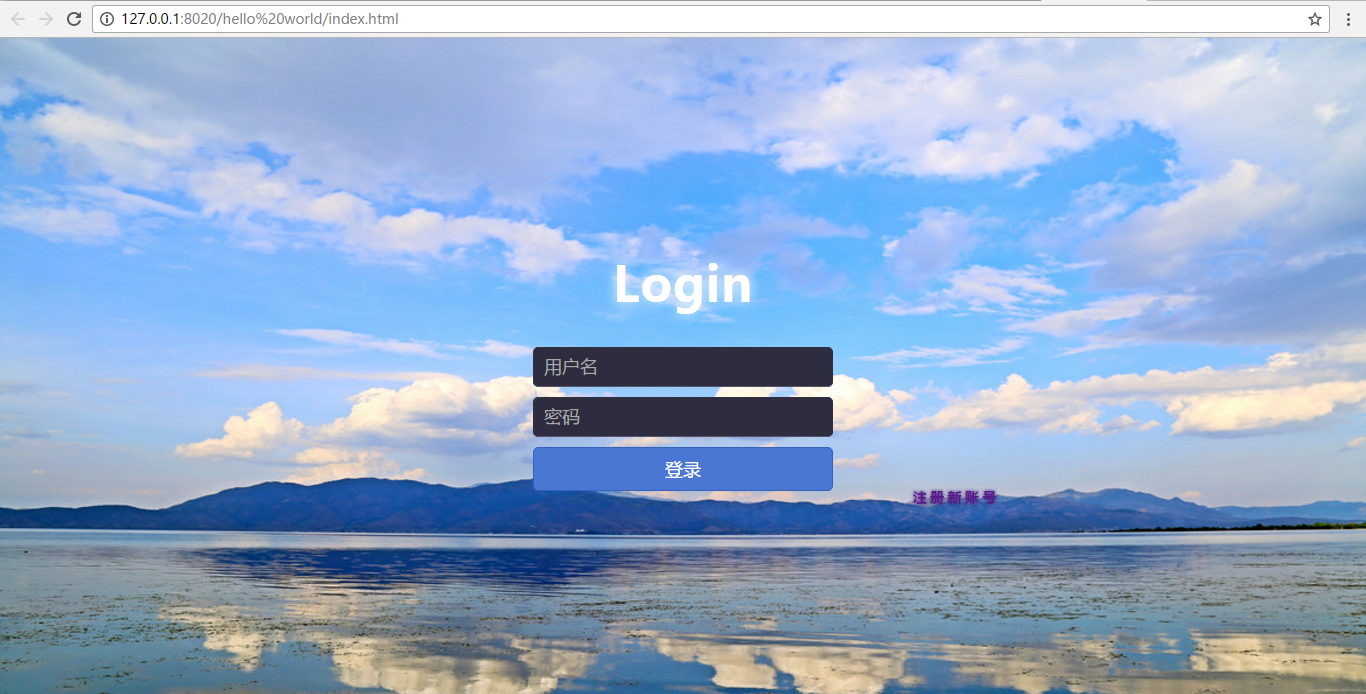
2.登录页面
 1 <body>
 2     <div id="login">
 3         <h1>Login</h1>
 4         <form method="post" action="register.php">
 5             <input type="text" required="required" placeholder="用户名" name="id"/>
 6             <input type="password" required="required" placeholder="密码" name="password"/>
 7             <button class="submit" type="submit">登录</button>
 8         </form>
 9     </div>
10     <div id="new">
11         <h3><a href="http://www.baidu.com" style="text-decoration:none">注册新账号</a></h3>
12     </div>
13     <img src="http://desk.fd.zol-img.com.cn/t_s960x600c5/g5/M00/0F/09/ChMkJlauzYiIIU3UAFNltyuxFDQAAH9GAKkOzMAU2XP642.jpg" width="1400" height="700">
14 </body>
没有css样式的登陆页面和上图的注册页面形式类似
3.html标签
在body标签中输入网页上显示的内容
- <div>:<div>标签的作用相当于一个容器,可以把一些独立的逻辑部分(页面上相互关联的一组元素)划分出来
<div id="版块名字”>···</div>
在div中使用id给一个版块起一个名字,方便后面对版块进行css操作
- <form>:表单标签,进行与用户的交互
<form method="传送方式(get/post)" action="浏览者输入的数据被传送到的地方,比如一个PHP页面(save.php)">···</form>
-
添加文本框
<input type="text/password" name="名称"/>
当type="text"时,输入框为文本输入框;当type="password"时,输入框为密码输入框,自动进行加密
用name为文本框命名,用于后台操作
required 属性用于规定必需在提交之前填写输入字段
<注> placeholder属性用于描述可输入内容的提示信息,提示会在输入信息为空时显示,在字段获得焦点时消失。placeholder使用起来比在文本框前直接添加描述信息好看许多,我觉得非常的实用
- <img>:为网页插入图片
<img src="图片地址">
width、height可用来根据实际情况调节图片大小
-
<a>:在网页中插入超链接
<a href="url" target="_blank"(新建窗口打开) style="text-decoration:none"(去掉超链接下划线)>链接显示的文本</a>
2.在html网页中添加css样式
在用html写完网页的内容后,为其添加css样式改变网页效果
1.注册页面
 1 html{
 2     width: 100%;
 3     height: 100%;
 4     overflow: hidden;
 5     font-style:sans-serif;
 6 }
 7 body{
 8     width: 100%;
 9     height: 100%;
10     font-family: 'Open Sans',sans-serif;
11     margin: 0;
12 }
13 #in{
14     position: absolute;
15     top: 40%;
16     left:50%;
17     margin: -150px 0 0 -150px;
18     width: 300px;
19     height: 300px;
20 }
21 #in h1{
22     color: white;
23     text-shadow:0 0 20px;
24     letter-spacing: 1px;
25     text-align: center;
26 }
27 h1{
28     font-size: 3em;
29     margin: 0.67em 0;
30 }
31 input{
32     width: 278px;
33     height: 18px;
34     margin-bottom: 10px;
35     outline: none;
36     padding: 10px;
37     font-size: 18px;
38     color: #fff;
39
40     border-top: 1px solid #312E3D;
41     border-left: 1px solid #312E3D;
42     border-right: 1px solid #312E3D;
43     border-bottom: 1px solid #56536A;
44     border-radius: 5px;
45     background-color: #2D2D3F;
46 }
47 .submit{
48     width: 300px;
49     min-height: 20px;
50     display: block;
51     background-color: #4a77d4;
52     border: 1px solid #3762bc;
53     color: #fff;
54     padding: 9px 14px;
55     font-size: 20px;
56     line-height: normal;
57     border-radius: 5px;
58     margin: 0;
59 }
60 #in a:link{
61     color:#FFFFFF;
62 }
63 #in a:hover{
64     color:#FFFFFF;
65 }
66 #in a:active{
67     color:blue;
68 }

2.登陆页面(css样式与注册页面相同)


 1 html{
 2     width: 100%;
 3     height: 100%;
 4     overflow: hidden;
 5     font-style:sans-serif;
 6 }
 7 body{
 8     width: 100%;
 9     height: 100%;
10     font-family: 'Open Sans',sans-serif;
11     margin: 0;
12     background-color: #4A374A;
13 }
14 #login{
15     position: absolute;
16     top: 50%;
17     left:50%;
18     margin: -150px 0 0 -150px;
19     width: 300px;
20     height: 300px;
21 }
22 #login h1{
23     color: white;
24     text-shadow:0 0 20px;
25     letter-spacing: 1px;
26     text-align: center;
27 }
28 h1{
29     font-size: 3em;
30     margin: 0.67em 0;
31 }
32 input{
33     width: 278px;
34     height: 18px;
35     margin-bottom: 10px;
36     outline: none;
37     padding: 10px;
38     font-size: 18px;
39     color: #fff;
40
41     border-top: 1px solid #312E3D;
42     border-left: 1px solid #312E3D;
43     border-right: 1px solid #312E3D;
44     border-bottom: 1px solid #56536A;
45     border-radius: 5px;
46     background-color: #2D2D3F;
47 }
48 .submit{
49     width: 300px;
50     min-height: 20px;
51     display: block;
52     background-color: #4a77d4;
53     border: 1px solid #3762bc;
54     color: #fff;
55     padding: 9px 14px;
56     font-size: 18px;
57     line-height: normal;
58     border-radius: 5px;
59     margin: 0;
60 }
61
62 #new{
63     position: absolute;
64     top: 90%;
65     left:70%;
66     margin: -150px 0 0 -150px;
67     width: 300px;
68     height: 300px;
69 }
70 #new  h3{
71     color: white;
72     text-shadow:0 0 5px;
73     letter-spacing: 3px;
74     text-align: center;
75 }
76 h3{
77     font-size: 0.9em;
78     margin: 0.2em 0;
79 }
80 #new a:link{
81     color:#FFFFFF;
82 }
83 #new a:hover{
84     color:mediumpurple;
85 }
86 #new a:active{
87     color:blue;
88 }
3.css样式
由于做网页的知识还非常有限,所以在网页中只用到了一些非常简单的css样式,来调节字体效果和版块位置。在以后的学习中希望自己能更加熟练的运用css来完成更酷炫的网页效果。下面对我在网页中用到的和目前掌握的css样式做一些总结。
-
字体属性:(font)
大小     font-size:      单位:px、em等
样式     font-style:     italic(斜体) normal(正常)等
行间距   line-height:     单位:px、em等
粗细     font-weight:     bold(粗体) lighter(细体) normal(正常)
字间距   letter-spacing:  单位:px等
对齐     text-align:      justify(两端对齐) left(左对齐) right(右对齐)center(居中)
- 边框属性:(border)
边框样式  border-style: dotted;(点线) dashed;(虚线) solid;(实线)
边框宽度  border-width:
边框颜色  border-color:#;
- 背景属性(background)
色彩 background-color: #FFFFFF;
-
<注>css常用代码
文字:
font-family : 宋体,sans-serif; /*文字字体*/
font-size : 9px; /*文字大小*/
font-style:itelic; /*文字斜体*/
letter-spacing : 1em; /*字间距离*/
line-height : 100%; /*设置行高*/
text-align:right; /*文字右对齐*/
text-align:left; /*文字左对齐*/
text-align:center; /*文字居中对齐*/
边框留白:(内边距)
padding-top:10px; /*上边框留空白*/
padding-right:10px; /*右边框留空白*/
padding-bottom:10px; /*下边框留空白*/
padding-left:10px; /*左边框留空白
设置边界:(外边距)
margin-top:10px; /*上边界*/
margin-right:10px; /*右边界值*/
margin-bottom:10px; /*下边界值*/
margin-left:10px; /*左边界值*/
定位:
Position: absolute; /*定位*/
样式:
display:block;/*块*/
overflow:hiden/*隐藏溢出*/
超链接样式:
a:link /*未被访问时超链接文字格式*/
a:visited /*浏览过的链接文字样式*/
a:active /*按下链接时超链接的样式*/
a:hover /*鼠标悬浮在超链接上的样式*/
目标三、将静态网页与后端联系
由于还没有接触过数据库及相关的概念和知识,在这次任务中没有完成将静态网页与数据库相连、输出注册用户信息的功能。因为没有实现,所以只能说一些我尝试过程中的一些挫折和收获(由于后端基础为零,下面的观点内容可能会存在一些错误,望大家见谅且指出~)。
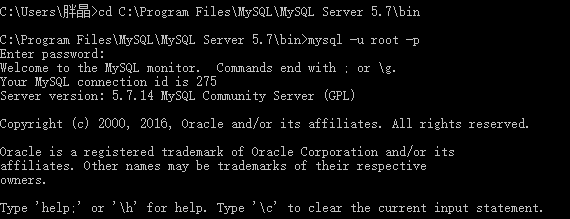
1.下载mysql
首先打开打开DOS窗口,cd +路径进入到mysql bin目录
命令:
1:查看服务器上当前存在什么数据库:
mysql> SHOW DATABASES;
2:创建一个数据库user
mysql> Create DATABASE user;
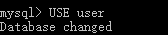
3:选择你所创建的数据库
mysql> USE user; (按回车键出现Database changed 时说明操作成功)

4:查看现在的数据库中存在什么表
mysql> SHOW TABLES;
5:创建一个数据库表(与上面的注册信息联系)
mysql> Create TABLE MYTABLE (id INT(15), telephone INT(11),user INT(15),password INT(20));
6:显示表的结构:
mysql> DESCRIBE user;

7:往表中加入记录
mysql> insert into MYTABLE values ("2333","1397063348","001","123456");

8:用文本方式将数据装入数据库表中(例如D:/mysql.txt)
mysql> LOAD DATA LOCAL INFILE "D:/mysql.txt" INTO TABLE MYTABLE;
9:导入.sql文件命令(未实现)
2.下载WAMP服务器
尝试使用WAMP服务器下的phpadmin使Hbuilder中的php文件与mysql联系起来

phpadmin中的user数据库存入了刚刚在mysql中输入的用户信息
思路:任务应完成在注册页面输入的用户信息直接写入数据库的功能,我在尝试过程中为了先简化难度,打算在数据库中直接存好一位用户的信息,使这个用户可以登录,但最终由于后端知识缺乏也没能够实现,停在了上图所示的步骤···
总结:
虽然最终没有实现一个完整的用户注册、登陆系统,但我在这次任务中收获颇多···在前端方面,我做出了自己的第一个网页;在后端方面,我从对后台处理的一无所知开始慢慢接触并了解。学习使人充实。我希望在以后的学习中我能够掌握做一个完整系统的知识,然后再回来更好更完整的完成这个任务。

 浙公网安备 33010602011771号