Spring-Boot
1、什么是Spring-Boot
SpringBoot基于Spring4.0设计,不仅继承了Spring框架原有的优秀特性,而且还通过简化配置,来进一步简化了Spring应用的整体搭建和开发过程。另外SpringBoot通过集成大量的框架使得依赖包得版本冲突,以及引用得不稳定性等问题得到了很好得解决
2、Spring-Boot的优点
(1)可以创建独立得Spring应用程序,并且基于Maven或Gradle插件,可以创建可执行的JARs和WARs;
(2)内嵌Tomcat或Jetty等Servlet容器;
(3)提供自动配置得starter项目对象模型(POMS)以简化Maven配置;
(4)尽可能自动配置Spring容器
(5)提供准备好的特性,如指标、健康检查、外部化配置;
(6)绝对没有代码生成,不需要XML配置。
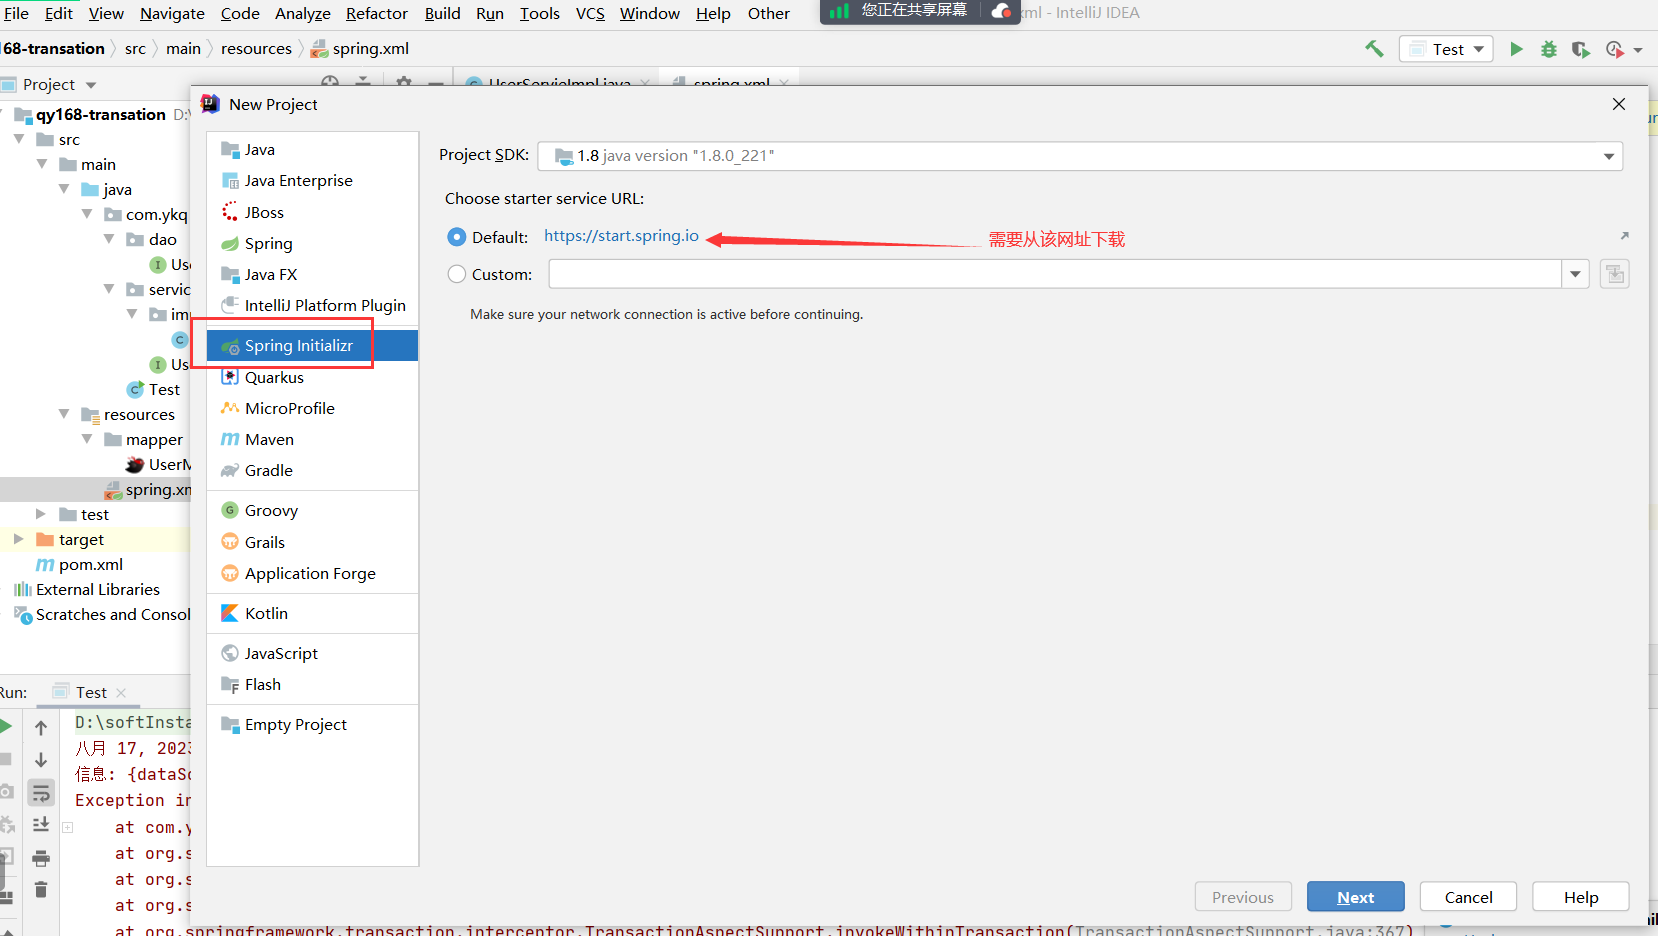
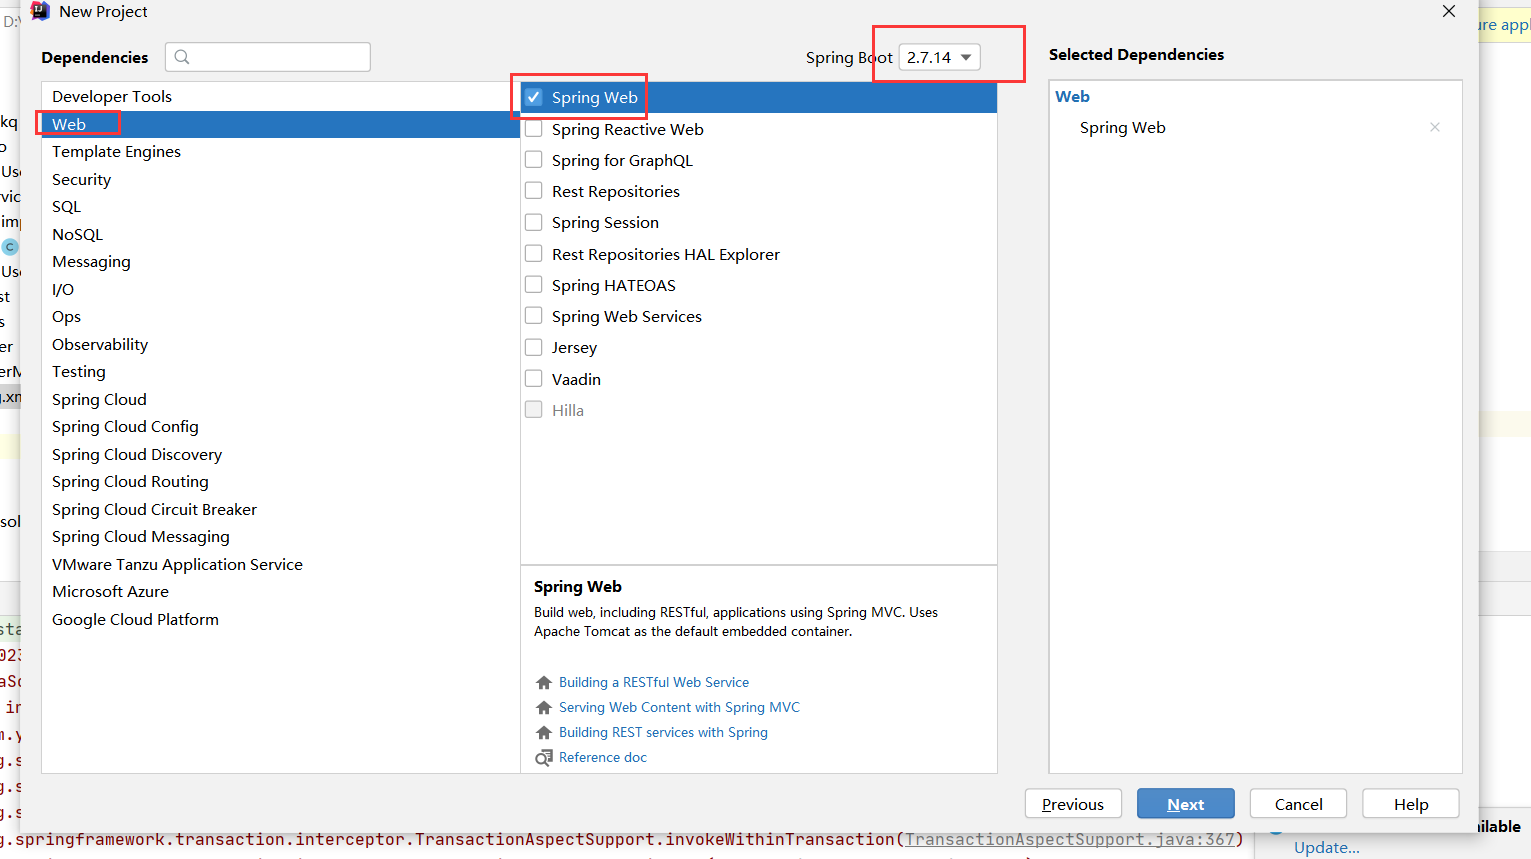
3、快速搭建Spring-Boot工程 --必须联网

4、Maven搭建Spring-Boot搭建工程
(1)创建一个mevan工程
(2)pom中添加相关依赖
<?xml version="1.0" encoding="UTF-8"?>
<project xmlns="http://maven.apache.org/POM/4.0.0"
         xmlns:xsi="http://www.w3.org/2001/XMLSchema-instance"
         xsi:schemaLocation="http://maven.apache.org/POM/4.0.0 http://maven.apache.org/xsd/maven-4.0.0.xsd">
    <modelVersion>4.0.0</modelVersion>
    <!--继承父工程-->
    <parent>
         <artifactId>spring-boot-starter-parent</artifactId>
        <groupId>org.springframework.boot</groupId>
        <version>2.7.5</version>
    </parent>
    <groupId>com.ykq</groupId>
    <artifactId>qy168-springboot02</artifactId>
    <version>1.0-SNAPSHOT</version>

    <!--引入web启动依赖-->
    <dependencies>
        <dependency>
            <groupId>org.springframework.boot</groupId>
            <artifactId>spring-boot-starter-web</artifactId>
        </dependency>
    </dependencies>

</project>
(3)创建一个Spring-Boot配置文件--application
(4)创建主启动类
@SpringBootApplication
public class SpringBootApp {
    public static void main(String[] args) {
        SpringApplication.run(SpringBootApp.class,args);
    }
}
5、java读取Spring-Boot配置文件中得内容
Spring-Boot提供了两种格式得配置文件,内容格式不同。
(1)第一种:属性文件 后缀:properties
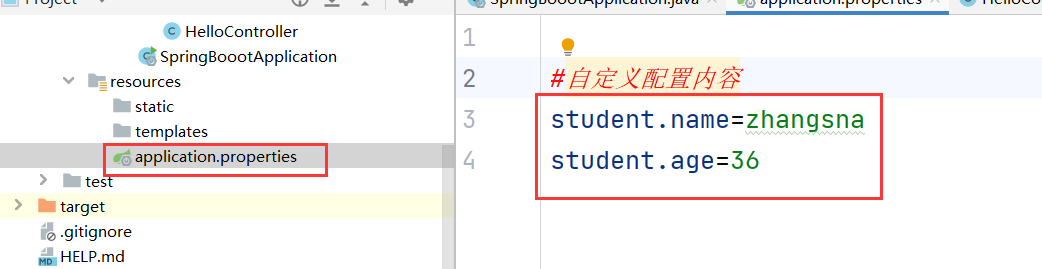
(2)第二种:yaml文件 后缀:yml

如果properties配置文件和yml配置文件内容相同;会先以properties配置文件为主,如果上面配置文件得内容不同:都能用。
6、Spring-Boot中提供了两种方式读取:
第一种:@Value
@Value("${student.name}")
public String name;
@Value("${student.age}")
public String age;
@GetMapping("/student")
public String index2(){
   return "名字是:"+name+"年龄是:"+age;
}
第二种:@ConfigurationProperties
测试:
@Autowired
private Student student;
@GetMapping("getStudent")
public Student getStudent(){
    return student;
}
实体类:
@Data
@Component//有容器帮你创建Student类对象
@ConfigurationProperties(prefix = "student")
public class Student {
    private String name;
    private Integer age;
}
7、Spring-Boot注册web组件
serivet:
(1)定义一个Serivet类
(2)重写doGet和doPost方法
(3)把定义的serlvet注册到web.xml文件
@Configuration//等价于spring配置文件
public class MyConfiguration {
    @Bean//相当于spring配置文件中<bean class=""> 把该方法返回的对象交于spring容器来管理了
    public ServletRegistrationBean<Servlet> registrationBean(){
        ServletRegistrationBean<Servlet> servletServletRegistrationBean = new ServletRegistrationBean<>();
        servletServletRegistrationBean.setServlet(new MySerivet());
        servletServletRegistrationBean.setName("my");
        servletServletRegistrationBean.addUrlMappings("/my");
        return servletServletRegistrationBean;
    }
filter:
(1) 定义一个filter类
(2)dofilter方法
(3)把自定义得过滤器注册到web.xml
@Bean
public FilterRegistrationBean<Filter> filterFilterRegistrationBean(){
FilterRegistrationBean<Filter> filterFilterRegistrationBean = new FilterRegistrationBean<>();
filterFilterRegistrationBean.setFilter(new MyFilter());
filterFilterRegistrationBean.setName("myFilter");
filterFilterRegistrationBean.addUrlPatterns("/*");
return filterFilterRegistrationBean;
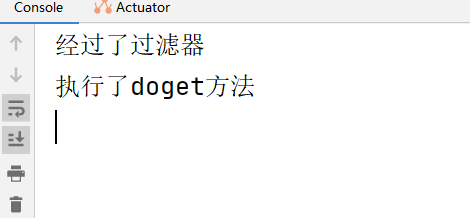
}public class MyFilter implements Filter {
@Override
public void doFilter(ServletRequest servletRequest, ServletResponse servletResponse, FilterChain filterChain) throws IOException, ServletException {
System.out.println("经过了过滤器");
//代码放行
filterChain.doFilter(servletRequest,servletResponse);
}测试:
8、Spring-Boot自动装配原理
我们在使用spring-boot时,并没有像之前项目加我们的前端控制DispatcherServlet,也没有写编码过滤器。但是springboot可以完成请求以及编码的设置。

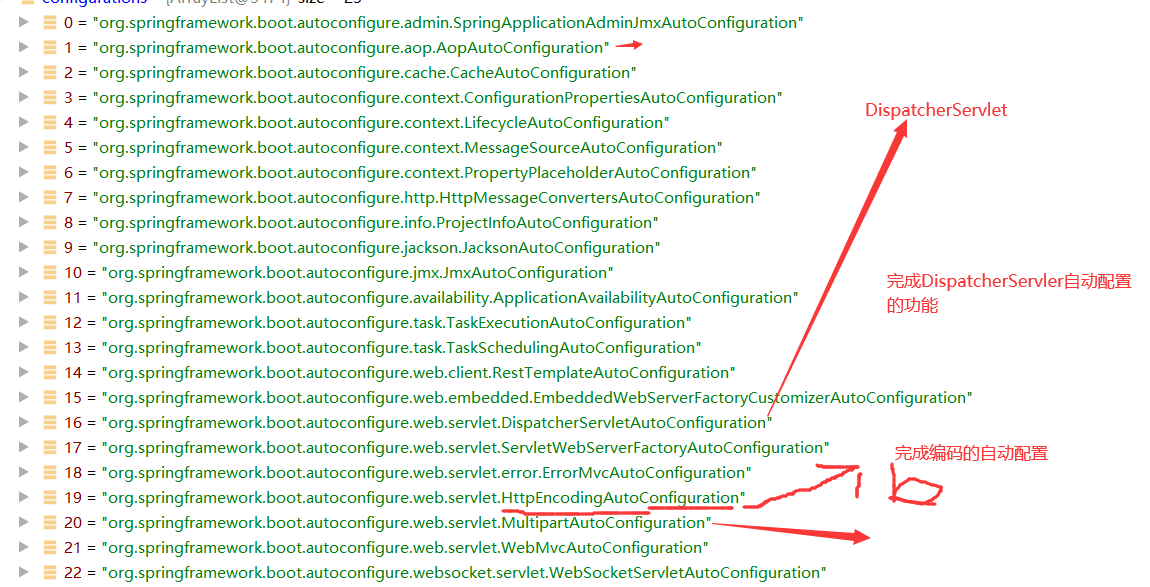
原理: 主启动类上的@SpringBootApplication注解上,而该注解是一个复合组件,而在复合注解中存在@EnableAutoConfiguration, 这个@EnableAutoConfiguration注解也是一个复合注解,包含@Import---而@Import注解导入一个AutoConfigurationImportSelector 【自动配置选择器】,在该类中存在一个方法getAutoConfigurationEntry --作用:得到自动配置类的实体。而这些自动配置类会完成相应的自动装配。
9、Spring-Boot整合数据源--连接数据库
连接数据库 ----druid数据源--默认的数据源
(1)引用相关的依赖 pom.xml:
<dependency>
            <groupId>org.springframework.boot</groupId>
            <artifactId>spring-boot-starter-jdbc</artifactId>
        </dependency>
        <dependency>
            <groupId>mysql</groupId>
            <artifactId>mysql-connector-java</artifactId>
        </dependency>
Springboot自动配置会加载jdbc的自动配置类--读取Spring-boot配置文件中数据源的信息,从而完成数据源的自动配置。
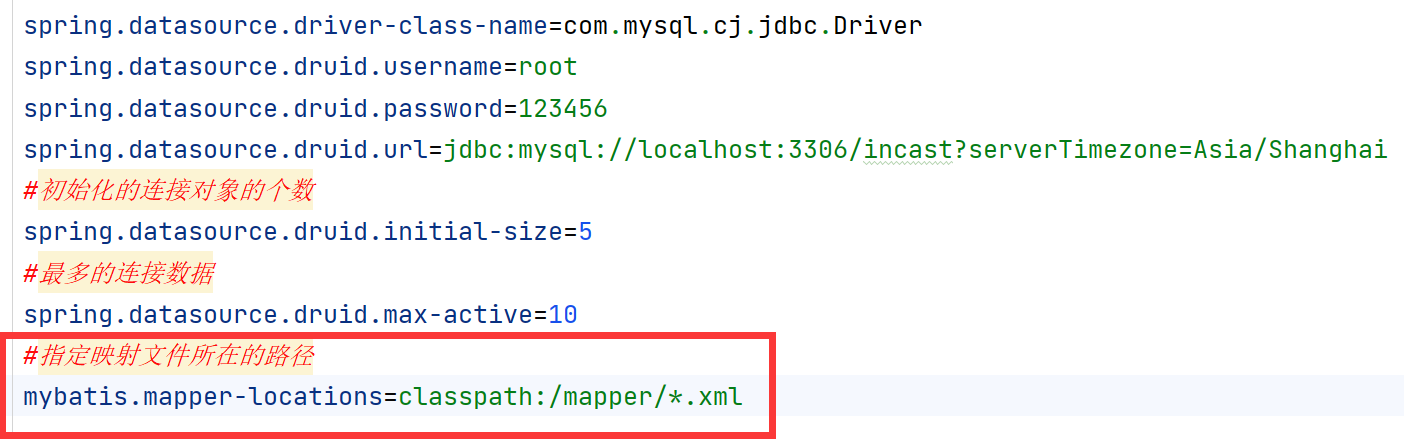
(2) application配置文件中配置数据源。
spring.datasource.driver-class-name=com.mysql.cj.jdbc.Driver
spring.datasource.druid.username=root
spring.datasource.druid.password=123456
spring.datasource.druid.url=jdbc:mysql://localhost:3306/incast?serverTimezone=Asia/Shanghai
#初始化的连接对象的个数
spring.datasource.druid.initial-size=5
#最多的连接数据
spring.datasource.druid.max-active=10
测试:

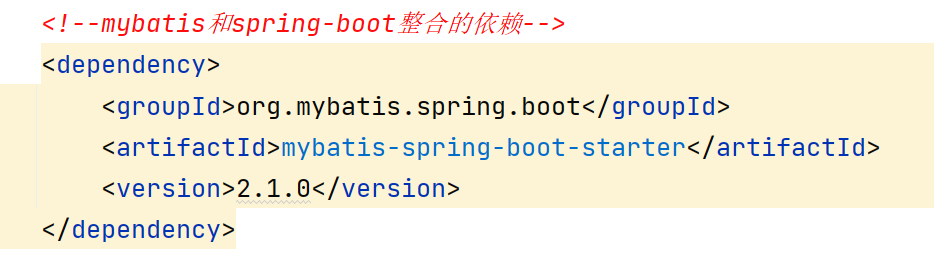
10、Spring- boot整合mybatis框架
spring框架需要配置
SqlSesssionFactoryBean对象,还有配置DAO接口的代理实现类
springboot会自动配置SqlSesssionFactoryBean对象,必须引用starter依赖
(1)依赖:
(2) 创建实体类:
@Data
@NoArgsConstructor
@AllArgsConstructor
public class TblStudent {
private int id;
private String sname;
private String sex;
private int cid;
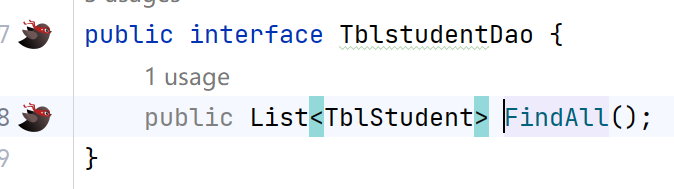
}(3)dao接口:
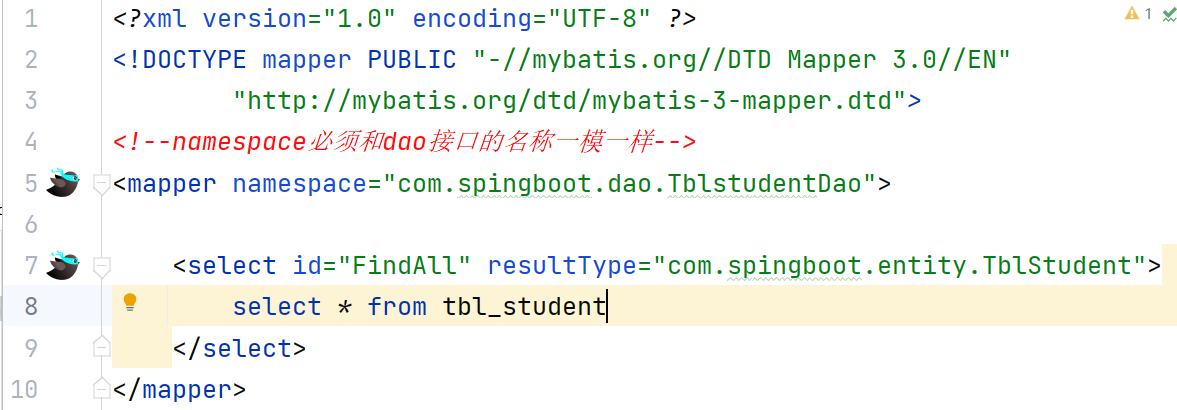
(4) mapper映射文件:
(5) 修改配置文件的内容:
(6)在主启动类上dao接口的扫描配置

(7)测试:
(8)运行结果:
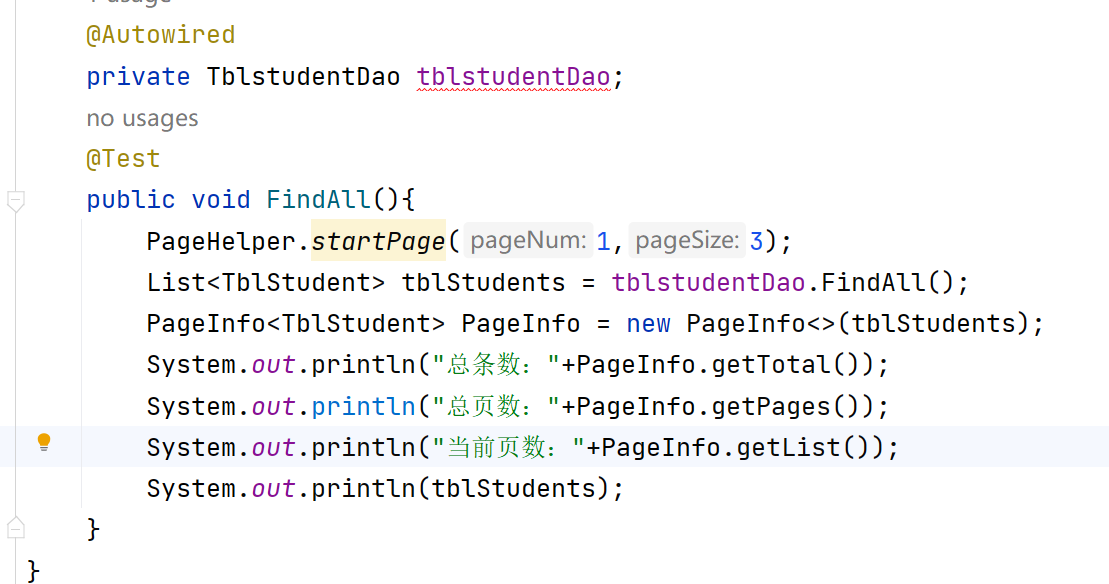
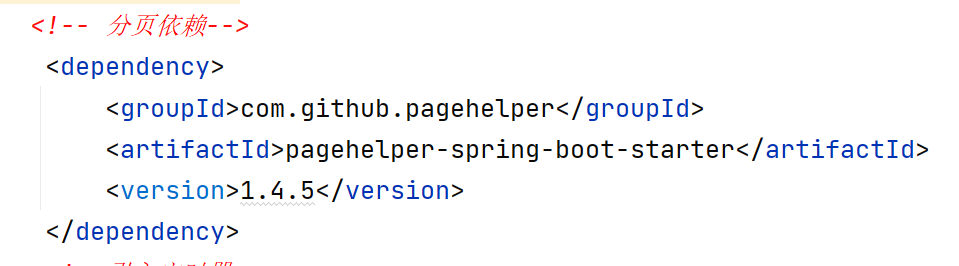
11、springboot整合pageHelper分页插件
添加依赖:
测试:
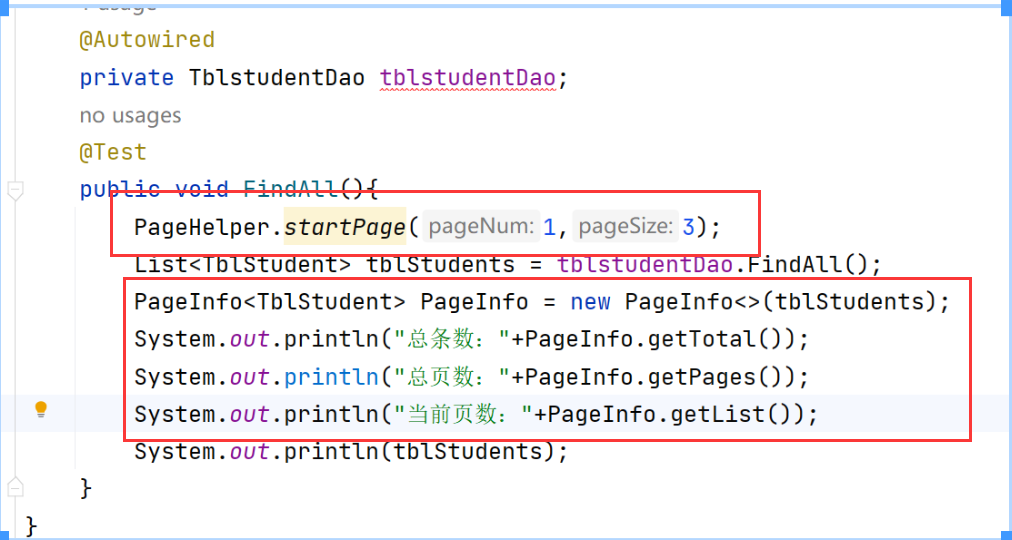
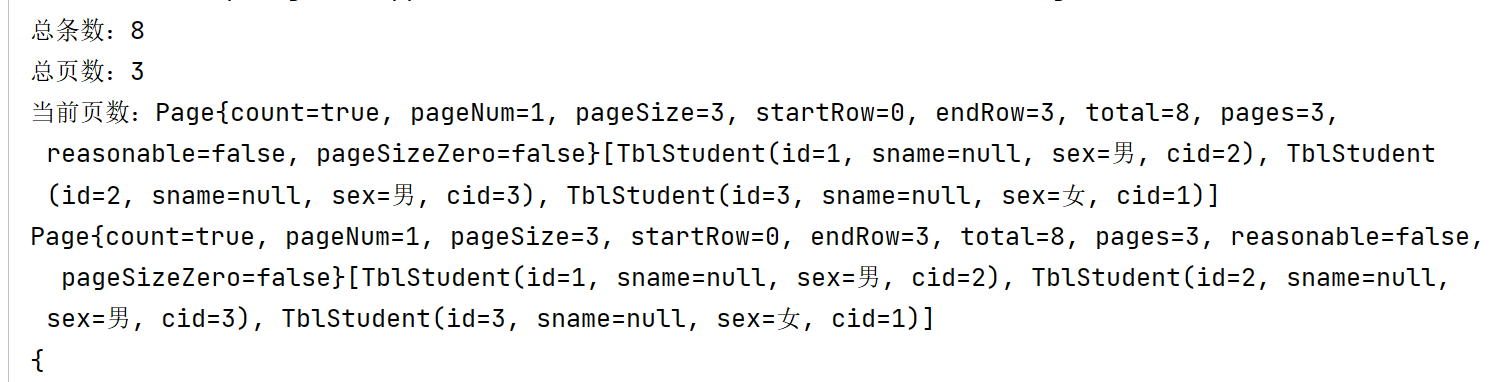
运行结果:
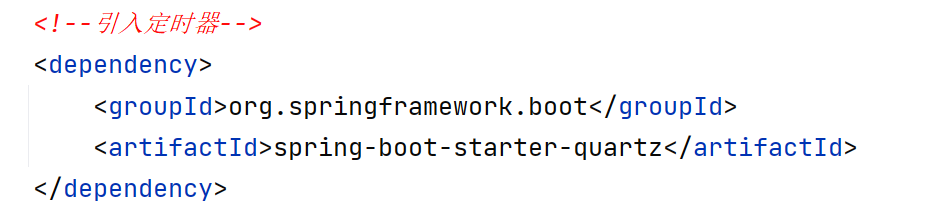
12、springboot整合定时器
可以在规定的时间内执行相应的代码
引用定时器依赖:
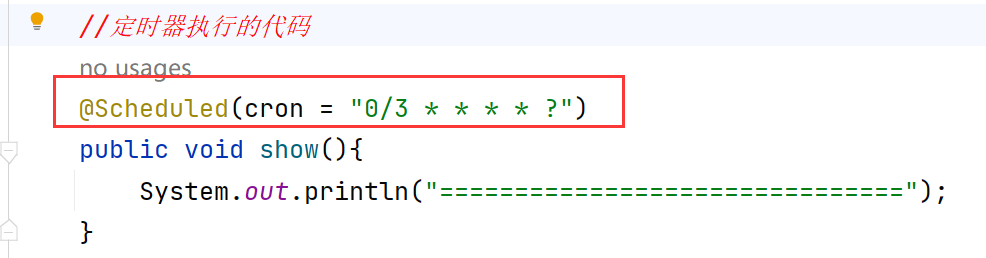
编写定义的业务层代码:
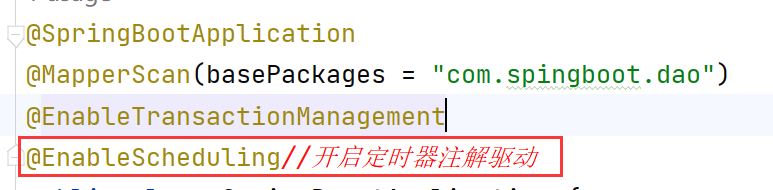
开启定时器的注解驱动:

 浙公网安备 33010602011771号