zmq通信模式(上)
介绍
消息队列作为高并发系统的核心组件之一,能够帮助业务系统解构提升开发效率和系统稳定性。最近学习了libzmq,此库是基于C++编写的,同时也有根据其他语言实现的用例。
目前主流的MQ主要是RocketMQ、kafka、RabbitMQ,ActiveMQ,muduo,ACE等。
我们先来看下ZeroMQ官网的解释:
The ZeroMQ lightweight messaging kernel is a library which extends the standard socket interfaces with features traditionally provided by specialised messaging middleware products. ZeroMQ sockets provide an abstraction of asynchronous message queues, multiple messaging patterns, message filtering (subscriptions), seamless access to multiple transport protocols and more.
中文意思(仅供参考):ZeroMQ即轻量级的消息传递内核是一个库,它扩展了标准套接字接口,具有传统上由专门的消息中间件产品提供的功能。ZeroMQ 套接字提供了异步消息队列、多种消息传递模式、消息过滤(订阅)、对多种传输协议的无缝访问等问题的抽象。
简单来说就是ZeroMQ更方便使用。
- 传统网络通信的模型
![image]()
- 自己封装通信一般要处理的问题:
阻塞IO(blocking IO)
非阻塞IO(non-blocking IO)
多路复用IO(multiplexing IO)
信号驱动式IO (signal-driven IO)
异步IO(asynchronous IO)
- 传统网络通信自己封装的编程遇到的问题
1.调用的socket接口较多
2.TCP是一对一的连接
3.编程需要关注很多socket细节问题
4.不支持跨平台编程
5.需要自行处理分包、组包问题
6.流式传输时需要处理粘包、半包的问题
7.需自行处理网络异常,比如连接异常中断、重连等
8.服务端和客户端启动有先后
9.自行处理IO模型
10.自行实现消息的缓存
11.自行实现对消息的加密
ZeroMQ官网地址:ZeroMQ
项目地址:libzmq
Linux版本:Ubuntu64 20.04.20(我的系统版本)
下载安装步骤
- 首先下载GitHub上的源码的release版本,我用的是最新版本,libzmq-release,不然随便下载的版本可能问题很多,就意味着正在修正的版本,不是稳定版。
下载
wget https://github.com/zeromq/libzmq/releases/download/v4.3.4/zeromq-4.3.4.tar.gz
解压
tar xzvf zeromq-4.3.4.tar.gz
此处要注意,一般大型的正规的项目都会有README.md文件,上面都有使用的方法,直接百度的方法可能会有滞后性,建议直接阅读英文。
README.md里面提醒了如何使用:

好了,我们来看具体安装步骤:
1.If you clone the Git repository then you should start by running the
command `./autogen.sh`. This is not necessary if you get the source
packages.
执行 “./autogen.sh”命令;
- 遇到的问题:
autogen.sh: error: could not find libtool. libtool is required to run autogen.sh. 表示这个库没有安装!
解决方法:“sudo apt-get install libtool”
2.`cd' to the directory containing the package's source code and type
`./configure' to configure the package for your system.
 Running `configure' might take a while.  While running,
 it prints some messages telling which features it is checking for.
 执行 “./configure”命令;
- 遇到的问题:
- 1.
error: Something went wrong bootstrapping makefile fragments for automatic dependency tracking. Try re-running configure with the '--disable-dependency-tracking' option to at least be able to build the package (albeit without support for automatic dependency tracking).
解决方法:“./configure --disable-dependency-tracking” - 2.
checking for gcc...
no checking for cc...
no checking for cl.exe...
解决方法:“没有安装g++,安装命令 sudo apt-get g++”
3.Type `make' to compile the package.
执行 “make”命令;
- 遇到的问题:
- 1.
Command 'make' not found!
解决方法:“sudo apt-get install make” - 2.
E: Could not get lock /var/lib/dpkg/lock-frontend. It is held by process 64011 (unattended-upgr)
解决方法: 1,直接删除掉进程“ps afx|grep apt”“sudo kill 进程ID”
2,直接删除掉文件“rm -rf /var/lib/dpkg/lock-frontend”
4.执行 “sudo make install”命令,别忘了!!!
使用libzmq库
当我们安装好了libzmq之后,我们需要先做一些操作,保证使用的时候可以链接到此库
1,用此命令 “ls /usr/local/lib/libzmq”,查看确实有安装。

2,由于测试代码有模拟客户端和服务器,固有两个可执行文件“responser和requester”。
我的编译使用命令“ g++ -o requester requester.cpp -lzmq”,
“g++ -o responser responser.cpp -lzmq”,
当我执行“./requester”或“./responser”后,出现以下错误即刚安装的库找不到

解决方法:
执行“ldd responser”(responser/requester 是我的可执行文件,你以自己的为准),可以看到如下结果

执行“vim /etc/ld.so.conf”,查看config文件存储路径,
执行“ls /etc/ld.so.conf.d/”
执行“cat /etc/ld.so.conf.d/libc.conf”,查看libc默认的配置路径,发现路径没错,
就是“/usr/local/lib”,说明我们安装的lib库默认路径是对的,
那么,就直接执行此命令“sudo ldconfig”,神奇的事情发生了,
它可以自动找到我们添加的libzmq库了,这个命令所起的作用就是将配置相关的缓存刷新一下,
再看刷新后的效果:
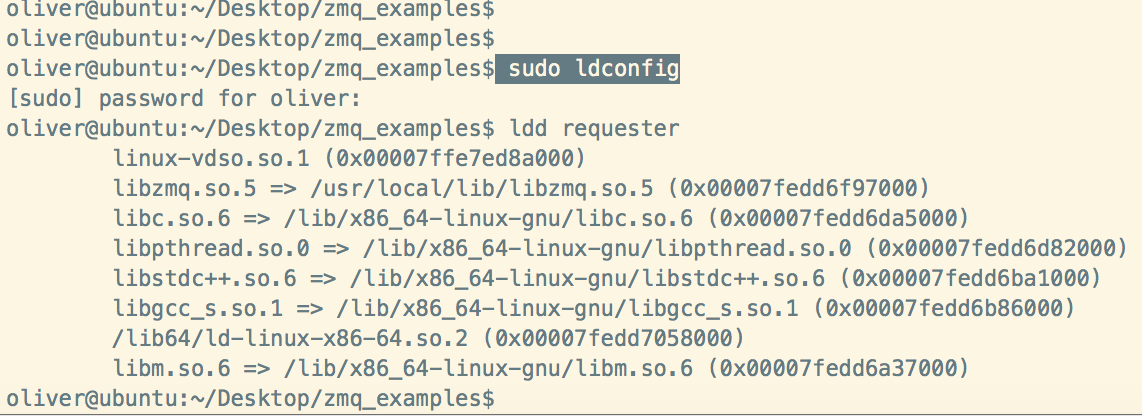
然后再执行就没问题了。
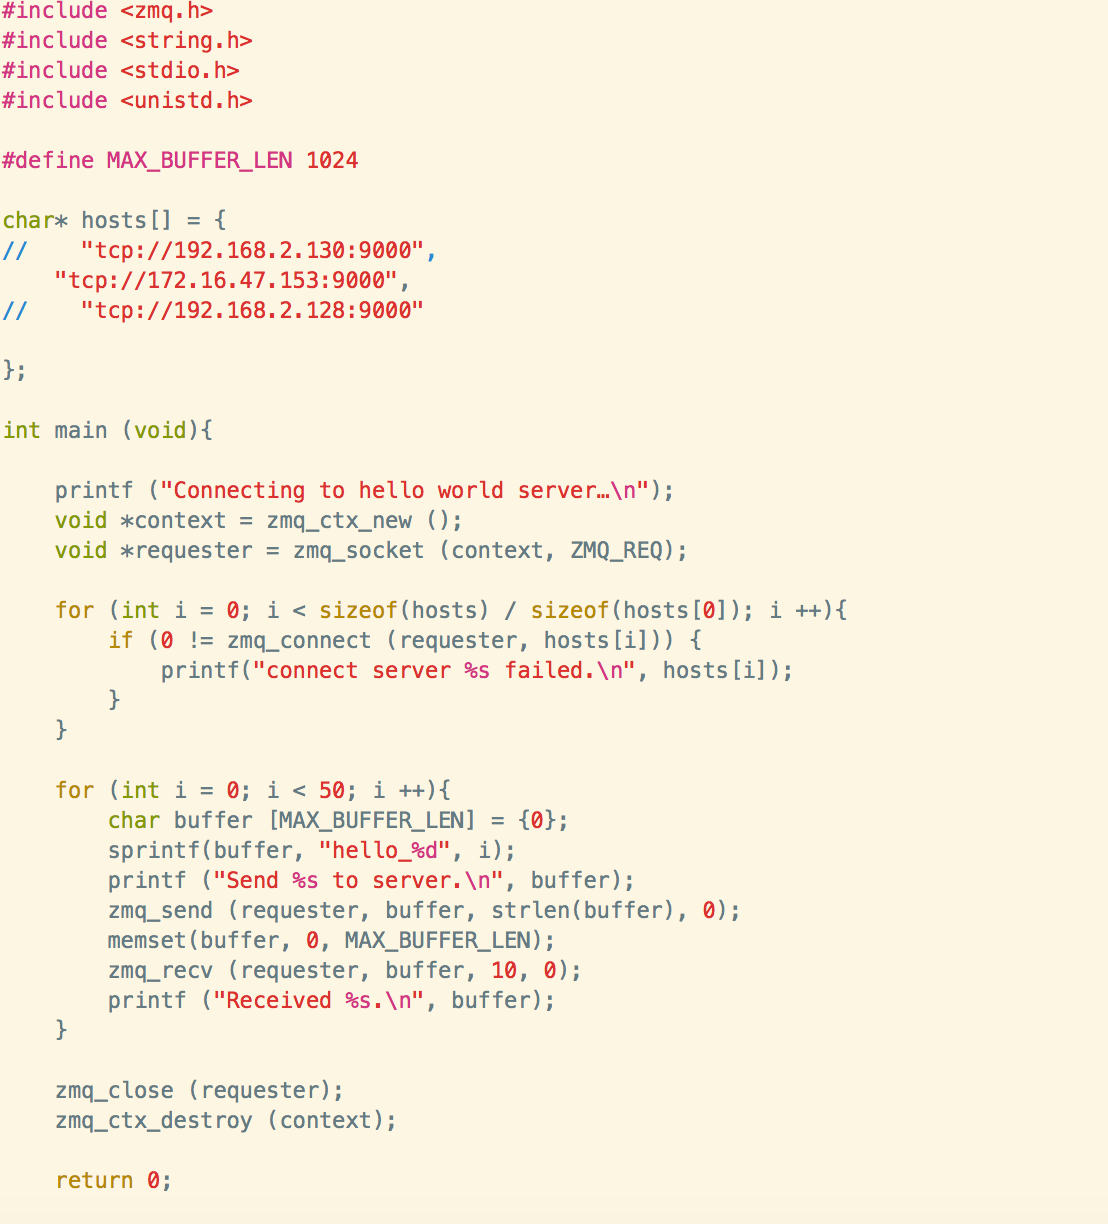
客户端测试代码
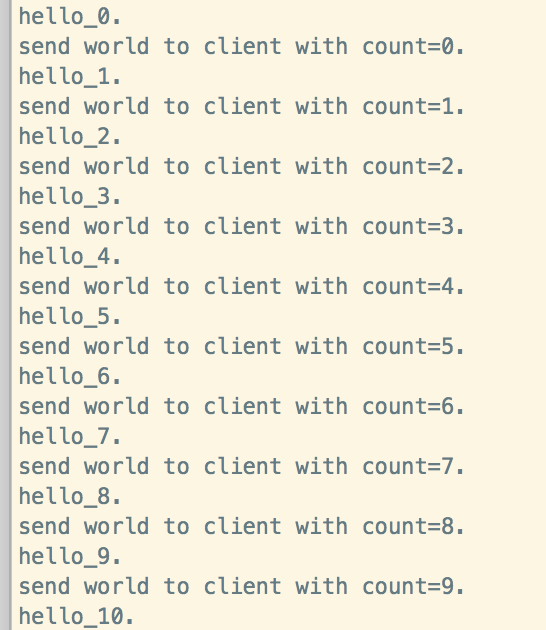
执行结果

服务端测试代码

执行结果
总结
- 1,当使用开源代码时,主要的难点在编译阶段,多看提供的readme文档,直接网上搜,不全且不是一手的资料。
- 2,会用只是开始,下面一篇文章我将介绍里面具体的技术点,自己也是边学习边提高。

 浙公网安备 33010602011771号