
CentOS7 单机版使用kubeadm安装K8S
准备一台干干净净的服务器
准备环境
-----------------------------------------------------------------------------------------
为了安全,先把SSH端口默认的22端口修改了
vi /etc/ssh/sshd_config
修改Port,在服务器的安全策略组中把修改后的端口加进去
重启SSHD服务
service sshd restart
----------------------------------------------------------------------------------------
修改主机名,并在hosts文件中加一行主机名的解析,重启服务器使配置生效
hostnamectl set-hostname master
hostnamectl status
vi /etc/hosts
reboot
-----------------------------------------------------------------------------------------
关闭防火墙、selinux、swap
systemctl stop firewalld
systemctl disable firewalld

sed -i 's/enforcing/disabled/' /etc/selinux/config
setenforce 0

swapoff -a
------------------------------------------------------------------------------------------
将桥接的IPv4流量传递到iptables的链:
cat > /etc/sysctl.d/k8s.conf << EOF
net.bridge.bridge-nf-call-ip6tables = 1
net.bridge.bridge-nf-call-iptables = 1
EOF

sysctl --system

yum update -y
------------------------------------------------------------------------------------------
安装Docker (不加版本号默认安装最新的,当下安装是20.10.17)
wget https://mirrors.aliyun.com/docker-ce/linux/centos/docker-ce.repo -O /etc/yum.repos.d/docker-ce.repo

yum -y install docker-ce

systemctl enable docker && systemctl start docker
------------------------------------------------------------------------------------------
安装K8s
先添加阿里云Yum的软件源地址
cat > /etc/yum.repos.d/kubernetes.repo << EOF
[kubernetes]
name=Kubernetes
baseurl=https://mirrors.aliyun.com/kubernetes/yum/repos/kubernetes-el7-x86_64
enabled=1
gpgcheck=1
repo_gpgcheck=1
gpgkey=https://mirrors.aliyun.com/kubernetes/yum/doc/yum-key.gpg https://mirrors.aliyun.com/kubernetes/yum/doc/rpm-package-key.gpg
EOF
------------------------------------------------------------------------------------------
安装Kubeadm、Kubelet、Kubectl
*注:由于版本更新很频繁,不加版本号的话默认安装最新,官方对于1.24版本声明如下:
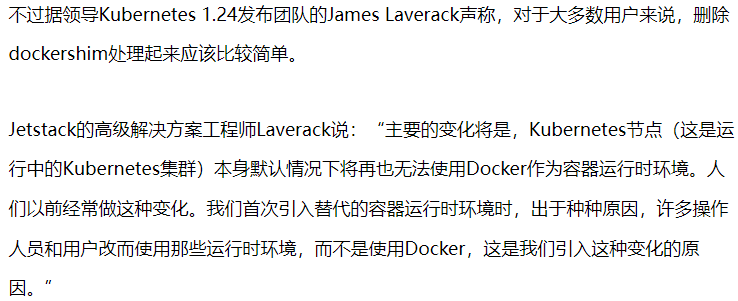
此处,咱使用的是1.23.6版本(主要是1.24.1后续问题太多了。。。。。)
yum install -y kubelet-1.23.6 kubeadm-1.23.6 kubectl-1.23.6

systemctl enable kubelet
kubeadm初始化
kubeadm init --apiserver-advertise-address=192.168.0.3 --image-repository registry.aliyuncs.com/google_containers --kubernetes-version v1.23.6 --service-cidr=10.1.0.0/16 --pod-network-cidr=10.244.0.0/16
到这一步跑着跑着可能就出现问题了。。错误日志如下
[kubelet-check] It seems like the kubelet isn't running or healthy.
[kubelet-check] The HTTP call equal to 'curl -sSL http://localhost:10248/healthz' failed with error: Get "http://localhost:10248/healthz": dial tcp 192.168.0.3:10248: connect: connection refused.
[kubelet-check] The HTTP call equal to 'curl -sSL http://localhost:10248/healthz' failed with error: Get "http://localhost:10248/healthz": dial tcp 192.168.0.3:10248: connect: connection refused.

        Unfortunately, an error has occurred:
                timed out waiting for the condition

        This error is likely caused by:
                - The kubelet is not running
                - The kubelet is unhealthy due to a misconfiguration of the node in some way (required cgroups disabled)

        If you are on a systemd-powered system, you can try to troubleshoot the error with the following commands:
                - 'systemctl status kubelet'
                - 'journalctl -xeu kubelet'

        Additionally, a control plane component may have crashed or exited when started by the container runtime.
        To troubleshoot, list all containers using your preferred container runtimes CLI.

        Here is one example how you may list all Kubernetes containers running in docker:
                - 'docker ps -a | grep kube | grep -v pause'
                Once you have found the failing container, you can inspect its logs with:
                - 'docker logs CONTAINERID'
------------------------------------------------------------------------------------------------------------------
重置
kubeadm reset
------------------------------------------------------------------------------------------------------------------
解决问题
问题原因: 因为docker和 kubelet 服务中的 cgroup 驱动不一致
解决方案:
1、修改docker配置
vi /etc/docker/daemon.json
加入这段
{
    "exec-opts": ["native.cgroupdriver=systemd"]
}
重启docker
systemctl daemon-reload

systemctl restart docker
2、修改kubelet配置
vi /etc/systemd/system/kubelet.service.d/10-kubeadm.conf
加入这段
Environment="KUBELET_KUBECONFIG_ARGS=--bootstrap-kubeconfig=/etc/kubernetes/bootstrap-kubelet.conf --kubeconfig=/etc/kubernetes/kubelet.conf --cgroup-driver=cgroupfs"
重启kubelet
systemctl daemon-reload

systemctl restart kubelet
再次执行上面的kubeadm init --XXXXXXXXXXXXXXX 就妥了~~~~~~
初始化成功
----------------------------------------------------------------------------------------------------------------------------
使用kubectl
mkdir -p $HOME/.kube

sudo cp -i /etc/kubernetes/admin.conf $HOME/.kube/config

sudo chown $(id -u):$(id -g) $HOME/.kube/config

kubectl get nodes

单机版的 k8s ,这个时候 master 节点是默认不允许调度 pod 的,需要执行以下命令将 master 标记为可调度(去除master的污点)
kubectl taint nodes --all node-role.kubernetes.io/master-
查看一下所有namespace的pods运行情况
kubectl get pods --all-namespaces -o wide

--------------------------------------------------------------------------------------------------------------------------------------
部署Dashboard
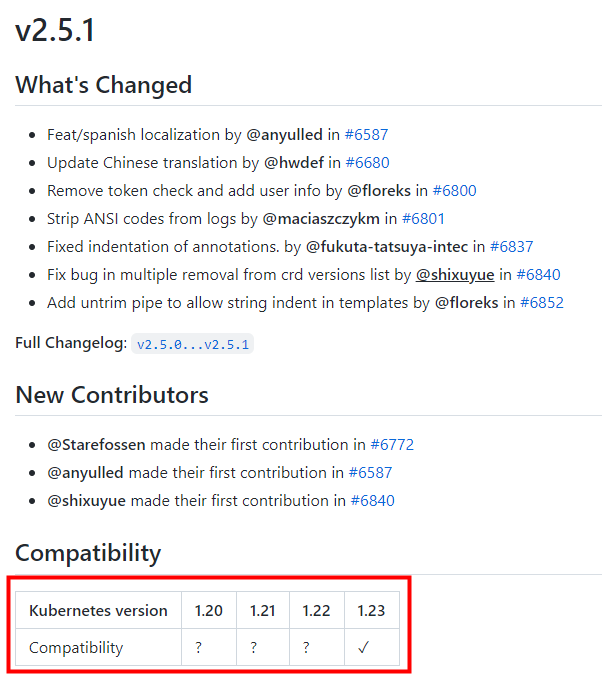
https://github.com/kubernetes/dashboard/releases 先去这里看一下安装的kubernetes的版本对应的dashboard版本
kubernetes 1.23.6 对应的 是dashborad 2.5.1的版本
获取资源配置文件
wget https://raw.githubusercontent.com/kubernetes/dashboard/v2.5.1/aio/deploy/recommended.yaml
默认Dashboard只能集群内部访问,修改Service为NodePort类型,暴露到外部(红色标注部分)
端口范围:30000-32767
kind: Service
apiVersion: v1
metadata:
  labels:
    k8s-app: kubernetes-dashboard
  name: kubernetes-dashboard
  namespace: kube-system
spec:
  type: NodePort
  ports:
    - port: 443
      targetPort: 8443
      nodePort: 32508
  selector:
    k8s-app: kubernetes-dashboard
部署dashboard的pod
kubectl apply -f recommended.yaml
再次查看pods列表

-----------------------------------------------------------------------------------------------------------------------------------------
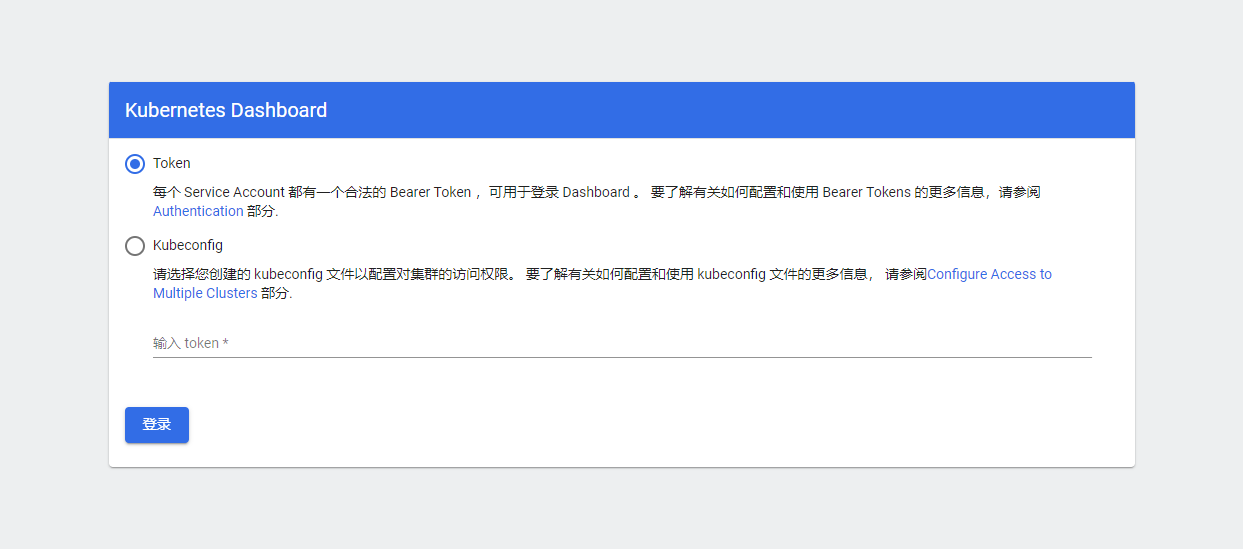
设置登录token
创建admin-user账户及授权的资源配置文件
创建示例
kubectl create -f dashboard-adminuser.yml
语句去获取token
kubectl -n kube-system describe secret $(kubectl -n kube-system get secret | grep admin-user | awk '{print $1}')
访问地址 https://IP:Port

 浙公网安备 33010602011771号