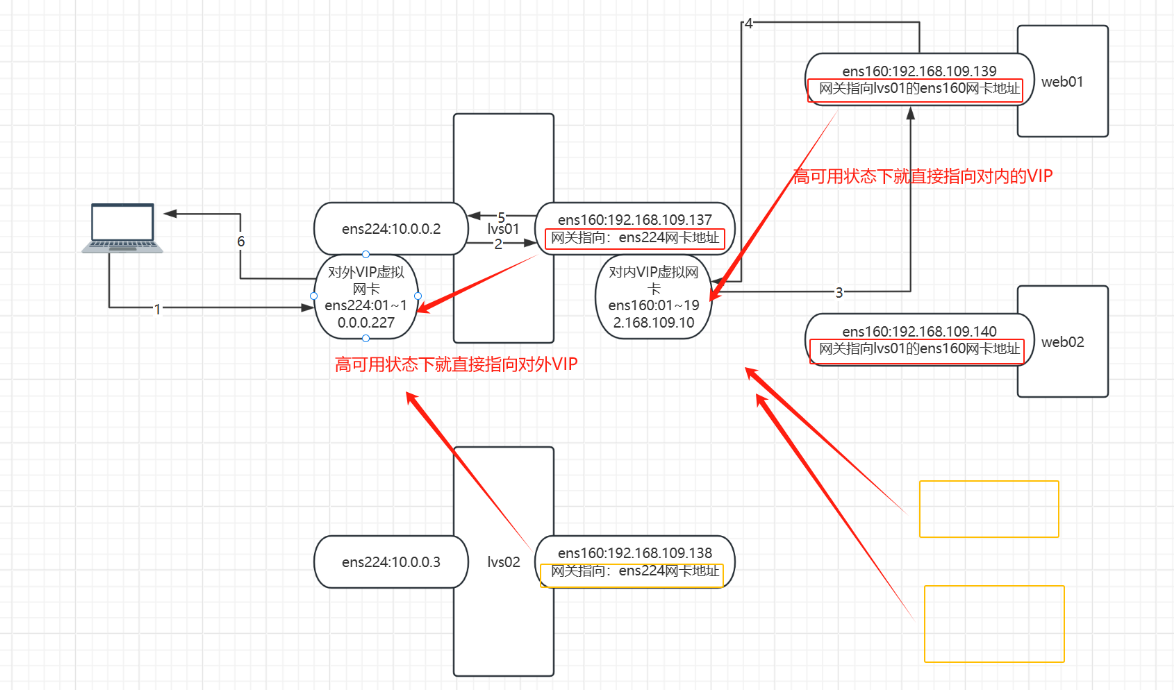
虚拟机演示 :LVS-NAT + keepalived 高可用架构

虚拟机设置:

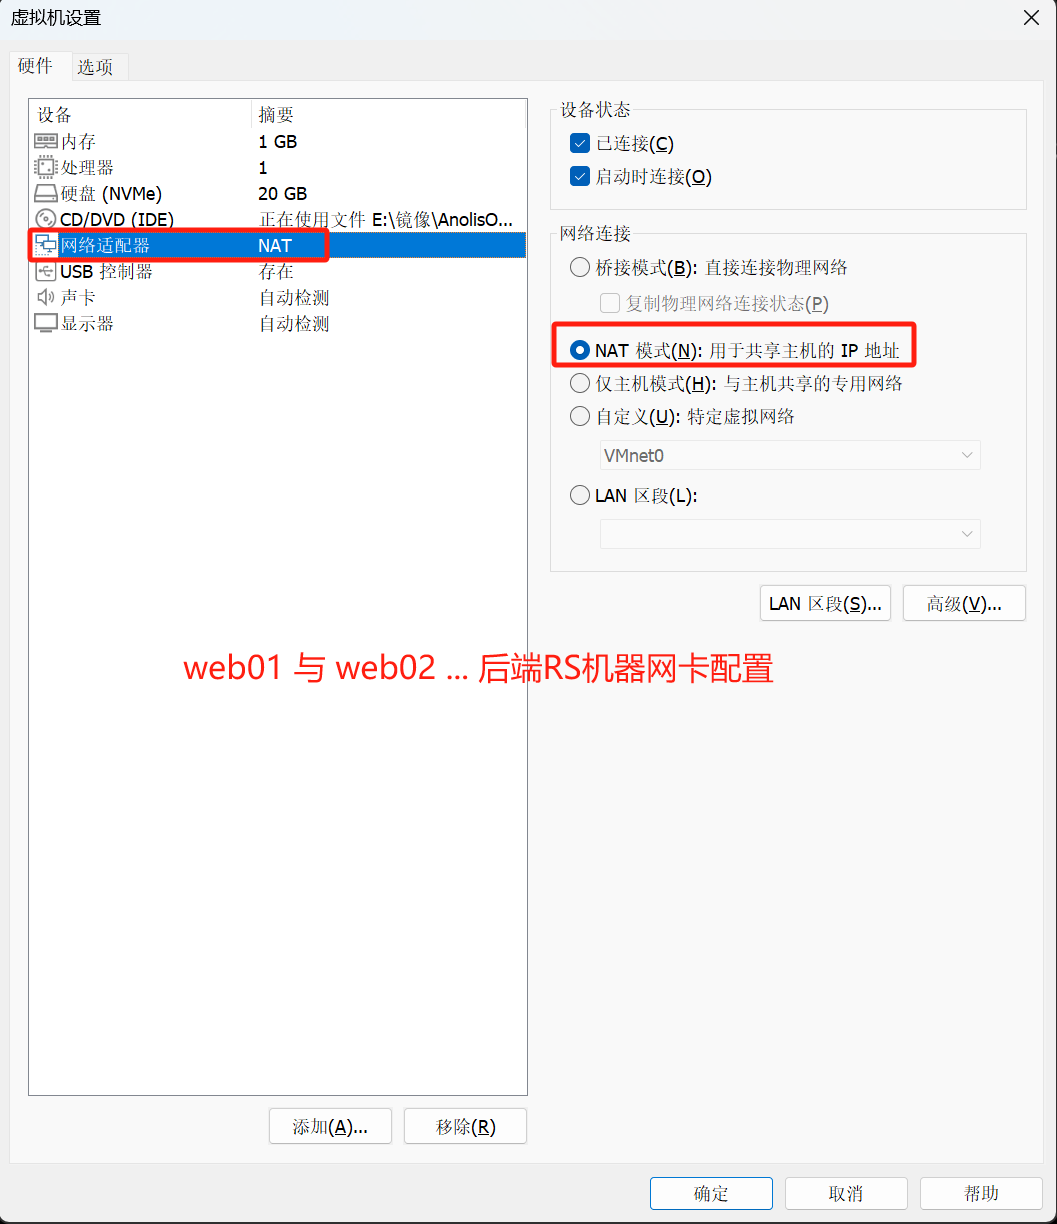
NAT模式采用192.168.109.0网段 作为内部网段(nat可连外网)
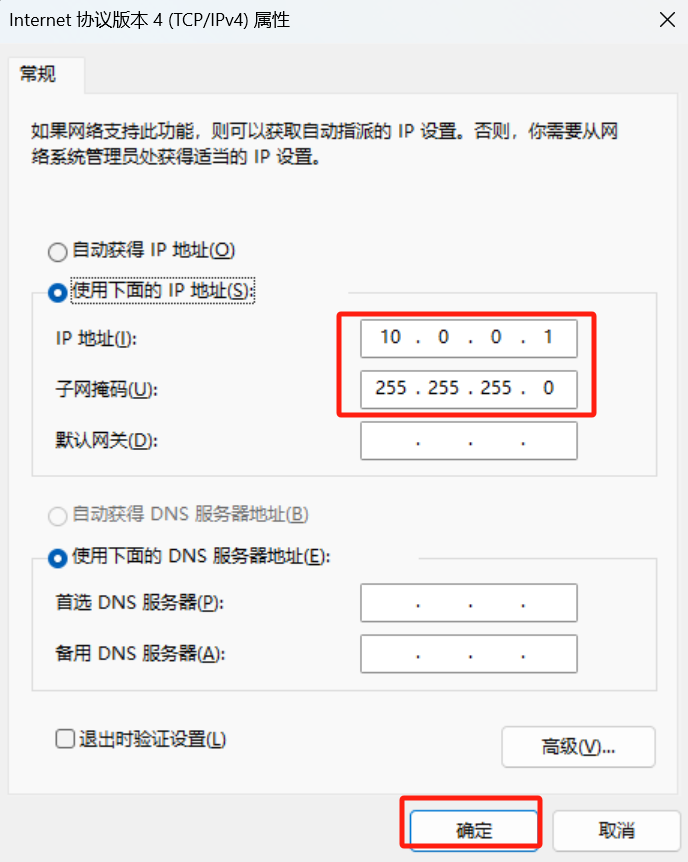
修改VMnet1:
打开电脑的设置,找到VMnet1虚拟网卡,设置 网络和internet > 高级网络设置
VMware Virtual Ethernet Adapter for VMnet1

设置LVS01与LVS02虚拟机,配置2块网卡:

设置web01与web02虚拟机,配置1块网卡:
开启虚拟机:
LVS01 与 LVS02 :
开启路由转发
vim /etc/sysctl.conf
net.ipv4.ip_forward = 1
生效:sysctl -p
加载ipvs模块
lsmod | grep ip_
modprobe ip_vs
cat /proc/net/ip_vs
yum install -y ipvsadm keepalived
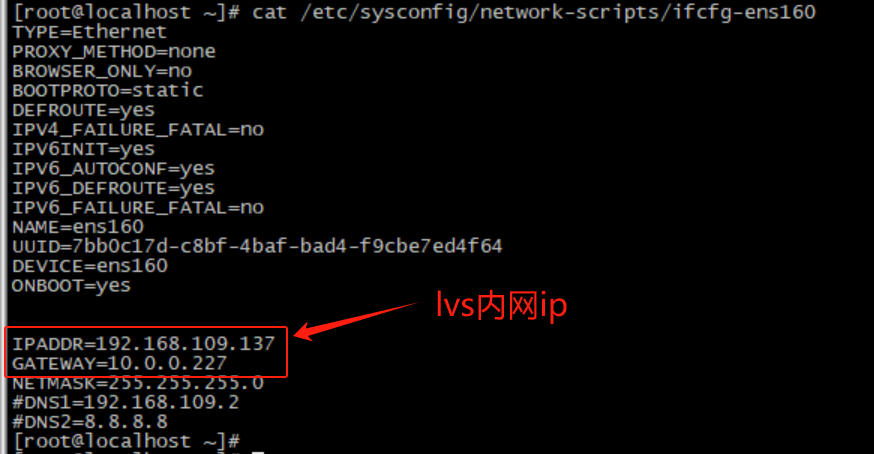
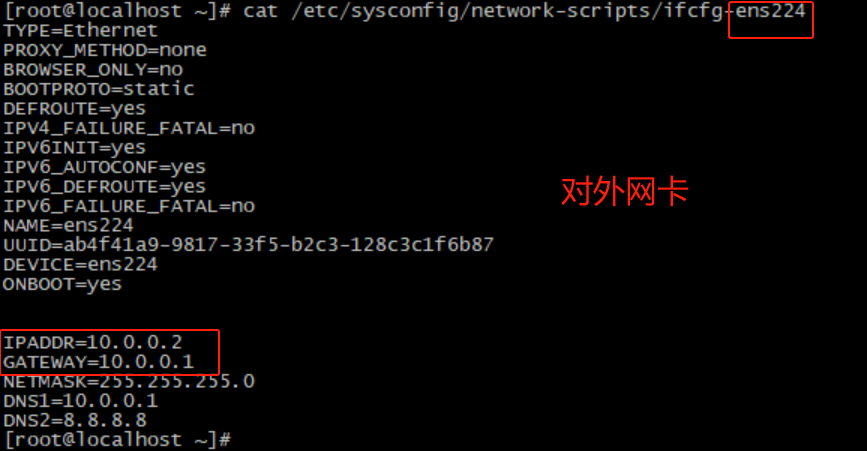
lvs01 网卡配置:
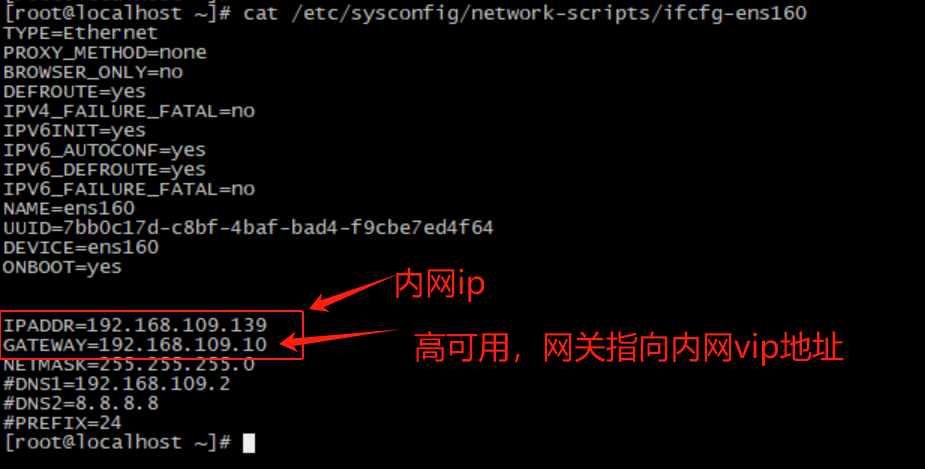
web01/web02 :
yum install -y nginx 并修改一下index.html页面内容区别开来~
并启动systemctl restart nginx
web01网卡配置如下:
lvs01 配置keepalived配置并启用:


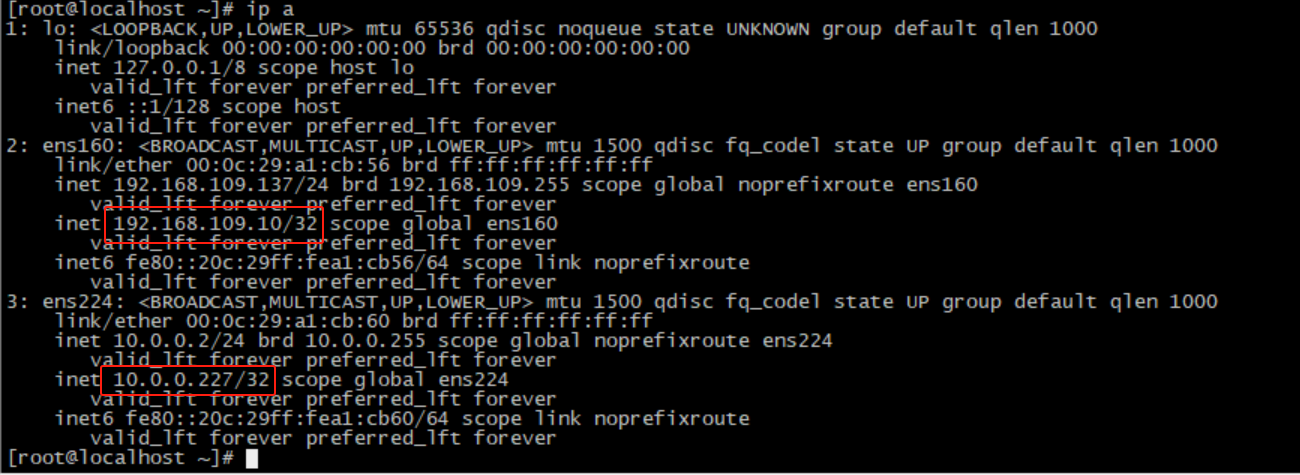
! Configuration File for keepalived

global_defs {
   notification_email {
     897807300@qq.com
   }
   notification_email_from keepalived@localhost
   smtp_server 127.0.0.1
   smtp_connect_timeout 30
   router_id waf_lvs_master
}


vrrp_instance VI_1 {
    state MASTER                #LVS_BACKUP上修改为BACKUP
    interface ens224
    virtual_router_id 227        #网卡名依据实际情况填写
    priority 100                #BACKUP上修改为80
    advert_int 5
    authentication {
        auth_type PASS
        auth_pass 1111
    }
    virtual_ipaddress {
        10.0.0.227/32
        }
}

vrrp_instance LAN_GATEWAY {
    state MASTER                   #LVS_BACKUP上修改为BACKUP
    interface ens160                #网卡名依据实际情况填写
    virtual_router_id 52
    priority 100                   #BACKUP上修改为80
    advert_int 1
    authentication {
        auth_type PASS
        auth_pass 1111
    }
    virtual_ipaddress {
        192.168.109.10
    }
}


virtual_server 10.0.0.227 8081 {
    delay_loop 6
    lb_algo rr
    lb_kind NAT
    protocol TCP

        real_server 192.168.109.139 8081 {
        weight 1

        TCP_CHECK {
                connect_timeout 3
                retry 3
                delay_before_retry 3
                connect_port 8081
        }
    }

        real_server 192.168.109.140 8081 {
        weight 1

        TCP_CHECK {
                connect_timeout 3
                retry 3
                delay_before_retry 3
                connect_port 8081
        }
    }
}
启动keepalived
systemctl restart keepalived

LVS02:略
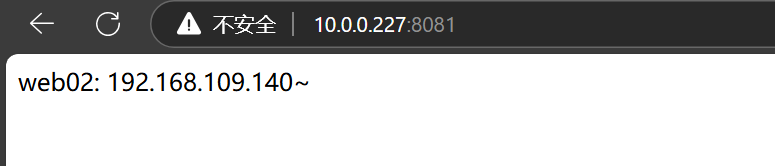
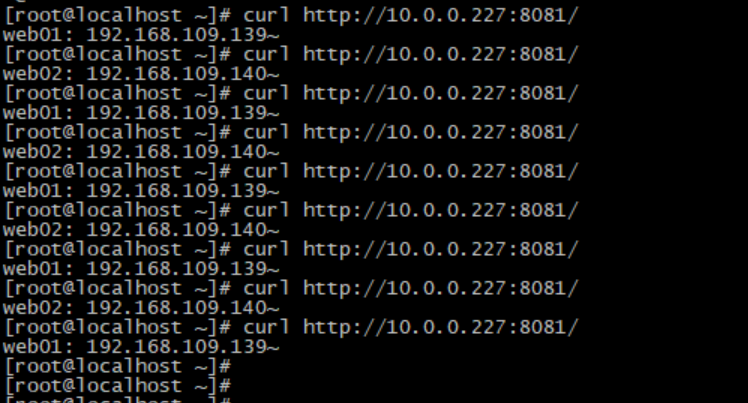
页面访问测试正常:http://10.0.0.227:8081

liunx客户端访问测试正常:
生产环境:服务器配置两个默认网关必须配置路由优先级


 浙公网安备 33010602011771号