
SpringSecurity整合SpringBoot集中式版
初步整合
首先创建springboot项目,并确保能够启动
编写一个处理器用于测试
import org.springframework.stereotype.Controller;
import org.springframework.web.bind.annotation.RequestMapping;
import org.springframework.web.bind.annotation.ResponseBody;

@Controller
@RequestMapping("/product")
public class ProductController {

    @RequestMapping
    @ResponseBody
    public String hello() {
        return "success";
    }
}
启动项目,访问对应的地址:
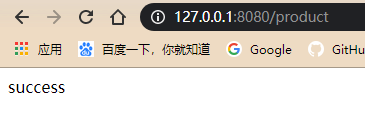
测试成功
加入SpringSecurity的依赖
在SpringBoot中使用SpringSecurity不再像在Spring中那么麻烦,并不需要配置文件,只需要导入SpringSecurity的依赖即可
<dependency>
    <groupId>org.springframework.boot</groupId>
    <artifactId>spring-boot-starter-security</artifactId>
</dependency>
导入后重启,再次访问就需要进行认证了,这表明SpringSecurity已经生效了
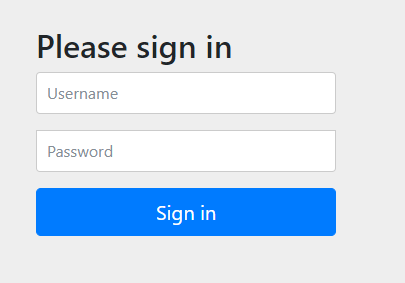
那么问题来了!此刻并没有连接数据库,也并未在内存中指定认证用户,如何认证呢?
其实SpringBoot已经提供了默认用户名user,密码在项目启动时随机生成,如图:

复制随机生成的密码,使用user用户名登录即可
加入jsp页面
SpringBoot官方是不推荐在SpringBoot中使用jsp的,那么到底可以使用吗?答案是肯定的!
不过需要导入tomcat插件启动项目,不能再用SpringBoot默认tomcat了。
导入SpringBoot的tomcat启动插件依赖
<dependency>
    <groupId>org.springframework.boot</groupId>
    <artifactId>spring-boot-starter-tomcat</artifactId>
</dependency>
<dependency>
    <groupId>org.apache.tomcat.embed</groupId>
    <artifactId>tomcat-embed-jasper</artifactId>
</dependency>
加入jsp页面等静态资源
想要加入jsp页面,第一个需要解决的问题就是jsp页面放在哪儿?以前的resources是不能够再用来放jsp页面,因此需要再src/main下面创建webapp目录
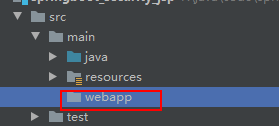
这时webapp目录并不能正常使用,因为只有web工程才有webapp目录,在pom文件中修改项目为web工程
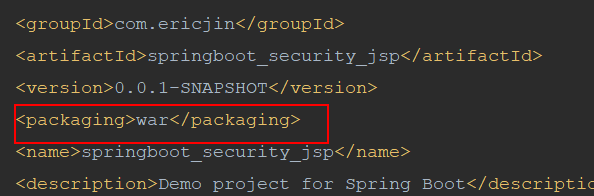
这时webapp目录,可以正常使用了!再导入自定义的jsp页面即可

修改相应的登录和退出地址


提供SpringSecurity配置类
以前想要SpringSecurity识别自己的登录页面需要去配置文件中配置,但是在SpringBoot这些配置都以配置类的形式存在,因此只需要创建配置类配置即可
import org.springframework.context.annotation.Configuration;
import org.springframework.security.config.annotation.authentication.builders.AuthenticationManagerBuilder;
import org.springframework.security.config.annotation.web.builders.HttpSecurity;
import org.springframework.security.config.annotation.web.configuration.EnableWebSecurity;
import org.springframework.security.config.annotation.web.configuration.WebSecurityConfigurerAdapter;

@Configuration
@EnableWebSecurity
public class SecurityConfig extends WebSecurityConfigurerAdapter {
    // 认证用户的来源【内存或者数据库】
    @Override
    public void configure(AuthenticationManagerBuilder auth) throws Exception {
        auth.inMemoryAuthentication()
                .withUser("user")
                .password("{noop}123")
                .roles("USER");
    }


    // 配置SpringSecurity相关信息
    @Override
    public void configure(HttpSecurity http) throws Exception {
        // 释放静态资源 指定资源拦截规则 指定自定义认证页面 指定退出认证配置 csrf配置
        http.authorizeRequests()
                .antMatchers("/login.jsp", "/failer.jsp", "/css/**", "/img/**", "/plugins/**").permitAll()
                .antMatchers("/**").hasAnyRole("USER", "ADMIN")   // 表示访问所有的页面都要USER或者ADMIN角色
                .anyRequest()
                .authenticated()    // 表明其他的资源只有通过认证后才能访问
                .and()          // 表示一个新的配置开始
                .formLogin()
                .loginPage("/login.jsp")
                .loginProcessingUrl("/login")    // 认证处理器
                .successForwardUrl("/index.jsp")
                .failureForwardUrl("/failer.jsp")
                .permitAll()      // 释放上面所有的资源,例如/login是需要释放的
                .and()
                .logout()
                .logoutUrl("/logout")
                .logoutSuccessUrl("/login.jsp")
                .invalidateHttpSession(true)      // 是否清空session
                .permitAll()
                .and()
                .csrf()
                .disable();      // 禁用csrf
    }
}
修改控制器
现在有了页面,就跳转到一个页面吧
@RequestMapping("/findAll")
public String findAll() {
    return "product-list";
}
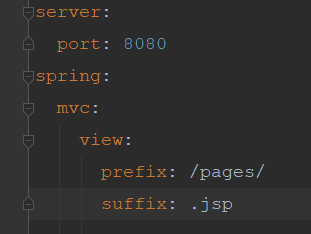
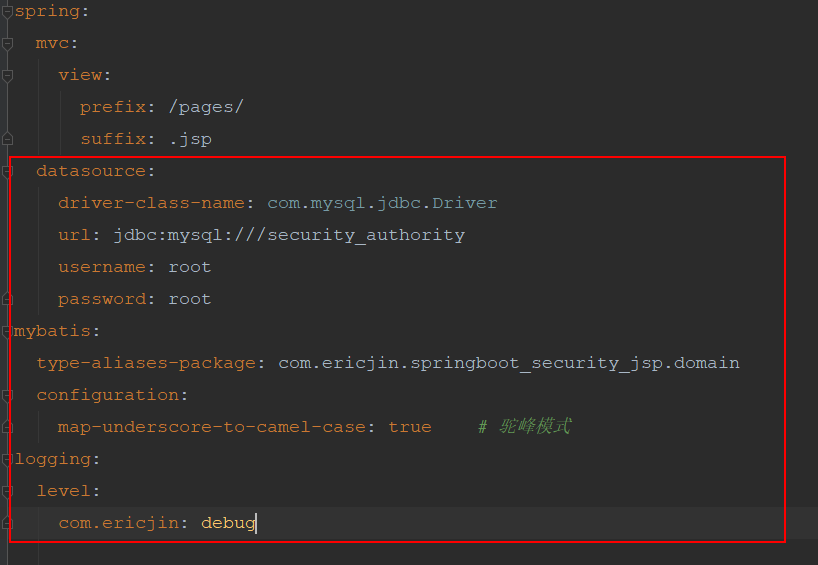
配置视图解析器
我们需要指定前后缀,去application.yml中即可
使用tomcat插件启动项目
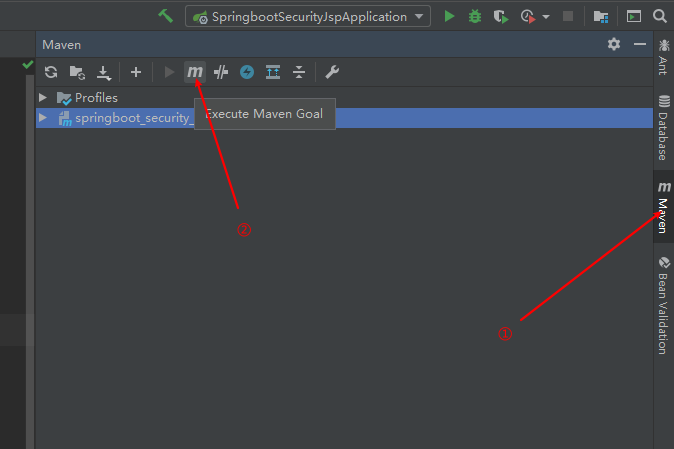
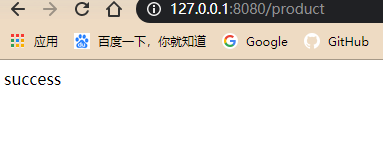
通过上面的方式启动页面。
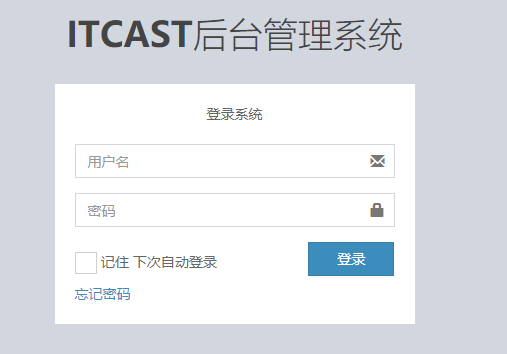
此时可以看到,SpringSecurity已经开始使用我们自己的页面了。
加入数据库
数据库文件在[]: https://www.cnblogs.com/Myarticles/articles/12795346.html
导入相关包
<dependency>
    <groupId>mysql</groupId>
    <artifactId>mysql-connector-java</artifactId>
    <version>5.1.47</version>
</dependency>
<dependency>
    <groupId>tk.mybatis</groupId>
    <artifactId>mapper-spring-boot-starter</artifactId>
    <version>2.1.5</version>
</dependency>
在配置文件中添加数据库操作相关配置
在启动类上添加扫描mapper接口包注解

创建pojo对象
用户
import com.fasterxml.jackson.annotation.JsonIgnore;
import lombok.Data;
import org.springframework.security.core.GrantedAuthority;
import org.springframework.security.core.userdetails.UserDetails;

import java.util.Collection;
import java.util.List;

@Data
public class SysUser implements UserDetails {
    private Integer id;
    private String username;
    private String password;
    private Integer status;
    private List<SysRole> roles;

    @JsonIgnore   // 标记此属性不做json处理
    @Override
    public Collection<? extends GrantedAuthority> getAuthorities() {
        return roles;
    }

    @Override
    public String getPassword() {
        return password;
    }

    @Override
    public String getUsername() {
        return username;
    }

    @JsonIgnore   // 标记此属性不做json处理
    @Override
    public boolean isAccountNonExpired() {
        return true;
    }

    @JsonIgnore   // 标记此属性不做json处理
    @Override
    public boolean isAccountNonLocked() {
        return true;
    }

    @JsonIgnore   // 标记此属性不做json处理
    @Override
    public boolean isCredentialsNonExpired() {
        return true;
    }

    @JsonIgnore   // 标记此属性不做json处理
    @Override
    public boolean isEnabled() {
        return true;
    }
}
角色
import com.fasterxml.jackson.annotation.JsonIgnore;
import lombok.Data;
import org.springframework.security.core.GrantedAuthority;

@Data
public class SysRole implements GrantedAuthority {
    private Integer id;
    private String roleName;
    private String roleDesc;

    @JsonIgnore   // 标记此属性不做json处理
    @Override
    public String getAuthority() {
        return roleName;
    }
}
提供mapper接口
用户
import com.ericjin.springboot_security_jsp.domain.SysUser;
import org.apache.ibatis.annotations.Many;
import org.apache.ibatis.annotations.Result;
import org.apache.ibatis.annotations.Results;
import org.apache.ibatis.annotations.Select;
import tk.mybatis.mapper.common.Mapper;

import java.util.List;

public interface UserMapper extends Mapper<SysUser> {

    @Select("select * from sys_user where username = #{username}")
    @Results({
            @Result(id = true, property = "id", column = "id"),
            @Result(property = "roles", column = "id", javaType = List.class,
                    many = @Many(select = "com.ericjin.springboot_security_jsp.mapper.RoleMapper.findByUserId"))
    })
    SysUser findByName(String username);
}
角色
import com.ericjin.springboot_security_jsp.domain.SysRole;
import org.apache.ibatis.annotations.Select;
import tk.mybatis.mapper.common.Mapper;

import java.util.List;

public interface RoleMapper extends Mapper<SysRole> {

    @Select("SELECT r.id, r.role_name roleName, r.role_desc roleDesc " +
            "FROM sys_role r, sys_user_role ur " +
            "WHERE r.id = ur.rid AND ur.uid = #{uid}")
    List<SysRole> findByUserId(Integer uid);
}
提供认证service接口
import org.springframework.security.core.userdetails.UserDetailsService;

public interface UserService extends UserDetailsService {
}
提供认证service实现类
import com.ericjin.springboot_security_jsp.mapper.UserMapper;
import com.ericjin.springboot_security_jsp.service.UserService;
import org.springframework.beans.factory.annotation.Autowired;
import org.springframework.security.core.userdetails.UserDetails;
import org.springframework.security.core.userdetails.UsernameNotFoundException;
import org.springframework.stereotype.Service;
import org.springframework.transaction.annotation.Transactional;

@Service
@Transactional
public class UserServiceImpl implements UserService {
    @Autowired
    private UserMapper userMapper;

    @Override
    public UserDetails loadUserByUsername(String s) throws UsernameNotFoundException {
        return userMapper.findByName(s);
    }
}
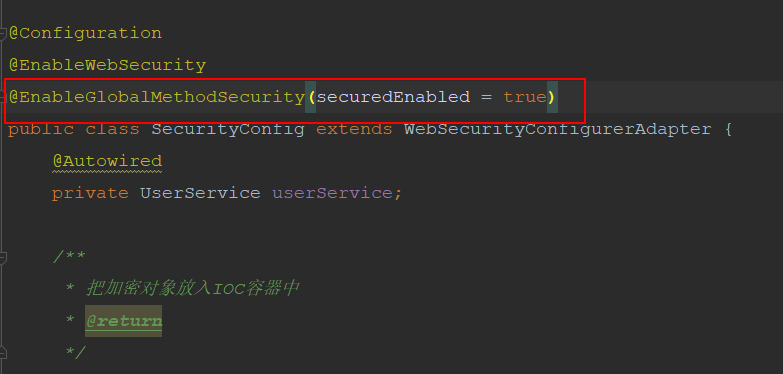
修改配置类
@Configuration
@EnableWebSecurity
public class SecurityConfig extends WebSecurityConfigurerAdapter {
    @Autowired
    private UserService userService;

    /**
     * 把加密对象放入IOC容器中
     * @return
     */
    @Bean
    public BCryptPasswordEncoder passwordEncoder() {
        return new BCryptPasswordEncoder();
    }

    // 认证用户的来源【内存或者数据库】
    @Override
    public void configure(AuthenticationManagerBuilder auth) throws Exception {
        auth.userDetailsService(userService).passwordEncoder(passwordEncoder());
    }
}
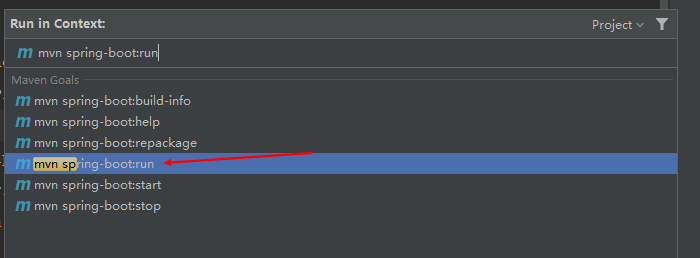
使用mvn springboot:run的方式启动项目即可。
此时,整个项目就使用了数据库进行认证!
实现授权功能
在配置类上添加开启方法级的授权注解
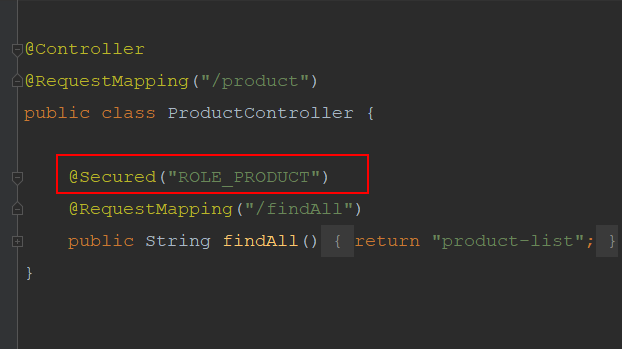
在产品处理器类上添加注解
要求访问该方法必须拥有ROLE_PRODUCT角色
重启测试

显示403没有权限
指定自定义异常页面
import org.springframework.security.access.AccessDeniedException;
import org.springframework.web.bind.annotation.ControllerAdvice;
import org.springframework.web.bind.annotation.ExceptionHandler;

@ControllerAdvice
public class HandlerControllerException {

    @ExceptionHandler(AccessDeniedException.class)
    public String handlerException403() {
        return "forward:/403.jsp";
    }

    @ExceptionHandler(RuntimeException.class)
    public String otherException() {
        return "forward:/500.jsp";
    }
}
再次测试就可以看到自定义异常页面了

到此,集中式环境中的整合就完成了!

 浙公网安备 33010602011771号