asp.net core系列 55 IS4结合Identity密码保护API
一.概述
OAuth 2.资源所有者密码授权允许客户端(Client项目)向令牌服务(IdentityServer项目)发送用户名和密码,并获取代表该用户的访问令牌。本篇将IS4结合asp.net core Identity实现密码保护API的简单示例。关于asp.net core Identity的了解实现,请查看之前章节介绍或官方文档。
开源地址:Github,这里演示与官方示例有点区别,是结合了asp.net core Identity。
本篇示例,还是三个项目,与上篇三个项目差不多。分别是IdentityServer令牌项目、 API资源项目、 Client访问项目。其中IdentityServer令牌项目换成了含有asp.net core Identity的MVC项目中。API资源项目没有变动,Client访问项目使用了用户名和密码访问受保护的API。
二. IdentityServer项目
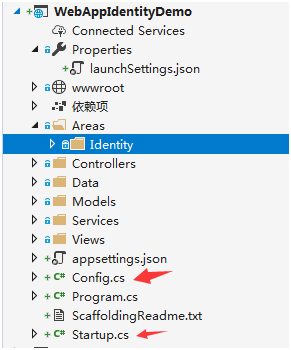
IdentityServer令牌项目是在基于asp.net core Identity功能下,添加了Config.cs类 和 在Startup.cs中加入了IdentityServer的配置。下面是含有asp.net core Identity的MVC项目目录结构:
(1) 添加用户
IdentityServer中自带TestUser类,该类代表测试用户及其声明。TestUser用于测试的内存(In-memory)用户对象。不打算为生产中的用户建模。通过在config.cs类中添加以下代码获取用户密码。
        /// <summary>
        /// 获取Identity的User表用户,条件是属于Administrator角色的用户,返回TestUser
        /// </summary>
        /// <param name="provider"></param>
        /// <returns></returns>
        public static List<TestUser> GetUsers(ServiceProvider provider)
        {
            var webAppIdentityDemoUser = provider.GetRequiredService<UserManager<WebAppIdentityDemoUser>>();
            IList<WebAppIdentityDemoUser> users = null;
            users = webAppIdentityDemoUser.GetUsersInRoleAsync("Administrator").Result;

            List<TestUser> testUserList = new List<TestUser>();
            foreach (WebAppIdentityDemoUser user in users)
            {
                testUserList.Add(new TestUser() { SubjectId = user.Id.ToString(), Username = user.UserName, Password = user.PasswordHash });
            }
            return testUserList;
        }
(2) 然后在Startup类的ConfigureServices方法中使用IdentityServer注入测试用户:
            ServiceProvider provider = services.BuildServiceProvider();

            var builder = services.AddIdentityServer()
                .AddInMemoryIdentityResources(Config.GetIdentityResources())
                .AddInMemoryApiResources(Config.GetApis())
                .AddInMemoryClients(Config.GetClients())
                .AddTestUsers(Config.GetUsers(provider));
(3) 定义客户端, 密码授予访问此API
在config.cs类中,定义客户端,通过修改AllowedGrantTypes枚举来简单地向现有客户端添加对授权类型的支持, 将以下代码添加到客户端配置中, 里面有二个Client实例,支持二种授权类型,分别是ClientCredentials使用凭证来访问令牌和ResourceOwnerPassword 使用密码来访问令牌。
      public static IEnumerable<Client> GetClients()
        {
            return new List<Client>
            {
                new Client
                {
                    ClientId = "client",

                    // no interactive user, use the clientid/secret for authentication
                    AllowedGrantTypes = GrantTypes.ClientCredentials,

                    // secret for authentication
                    ClientSecrets =
                    {
                        new Secret("secret".Sha256())
                    },

                    // scopes that client has access to
                    AllowedScopes = { "api1" }
                },
                // resource owner password grant client
                new Client
                {
                    ClientId = "ro.client",
                    AllowedGrantTypes = GrantTypes.ResourceOwnerPassword,

                    ClientSecrets =
                    {
                        new Secret("secret".Sha256())
                    },
                    AllowedScopes = { "api1" }
                }
            };
        }
三.Client项目
该Client项目类似于上篇介绍的Client项目,该项目名为ResourceOwnerClient, 该Client将收集用户名和密码,并在令牌请求期间将其发送到IdentityServer令牌服务(WebAppIdentityDemo项目)。
            // request token
            var tokenResponse = await client.RequestPasswordTokenAsync(new PasswordTokenRequest
            {
                Address = disco.TokenEndpoint,
                ClientId = "ro.client",
                ClientSecret = "secret",

                UserName = "924964690@qq.com",
                Password = "AQAAAAEAACcQAAAAEH4Xhui5BByq6d8VS5Z+S2o2SnlkyrP5pN9CmMpgJ4QiIVrt7lBLzDlEWa6AdlpxpA==",
                Scope = "api1"
            });

            if (tokenResponse.IsError)
            {
                Console.WriteLine(tokenResponse.Error);
                return;
            }

            Console.WriteLine(tokenResponse.Json);
            Console.WriteLine("\n\n");
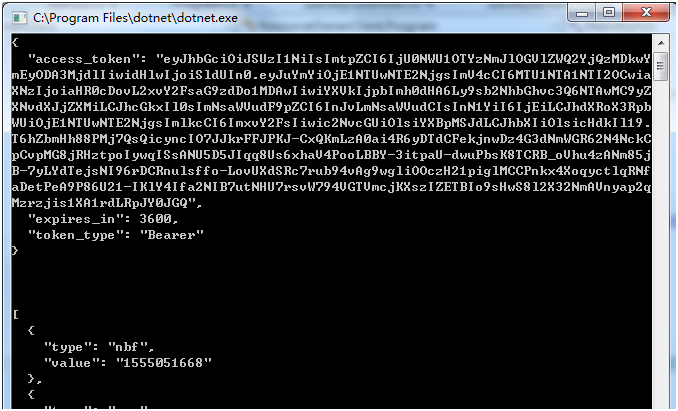
最后测试,先启动WebAppIdentityDemo项目程序,再启动API程序,最后启动Client客户端来访问API,通过下图可以了解到:(1)客户端请求使用 用户名和和密码 访问令牌(token)成功, (2) 客户端使用令牌(AccessToken)来访问受密码保护的API成功。
参考文献

 浙公网安备 33010602011771号