
企业级镜像仓库Harbor部署
一、简介
Habor是由VMWare公司开源的容器镜像仓库。事实上,Habor是在Docker Registry上进行了相应的企业级扩展,从而获得了更加广泛的应用,这些新的企业级特性包括:管理用户界面,基于角色的访问控制,AD/DALP集成以及审计日志等,足以满足基本企业需求。
|
容器 |
功能 |
|
harbor-core |
配置管理中心 |
|
harbor-db |
PG数据库 |
|
harbor-jobservice |
负责镜像复制 |
|
harbor-log |
记录操作日志 |
|
harbor-portal |
Web管理页面和API |
|
nginx |
前端代理,负责前端页面和镜像上传/下载转发 |
|
redis |
会话 |
|
registryctl |
镜像存储 |
二、部署要求
服务器硬件配置:
• 最低要求:CPU2核/内存4G/硬盘40GB
• 推荐:CPU4核/内存8G/硬盘160GB
软件:
• Docker CE 17.06版本+ (版本要求)
• Docker Compose 1.18版本+ (单机容器编排利器,python写的工具)
三、部署方式
Harbor安装有3种方式:
在线安装:从Docker Hub下载Harbor相关镜像,因此安装软件包非常小
离线安装:安装包包含部署的相关镜像,因此安装包比较大
OVA安装程序:当用户具有vCenter环境时,使用此安装程序,在部署OVA后启动Harbor
四、安装docker
参考docker安装:https://www.cnblogs.com/Mr-Ding/p/17729169.html
五、Harbor 部署HTTP
5.1、先安装Docker和Docker Compose 一个二进制工具,直接下载之后放在系统二进制目录下就能使用了。下载注意linux版本
[root@harbor ~]# ls
anaconda-ks.cfg              harbor-offline-installer-v2.9.0.tgz  original-ks.cfg
docker-compose-linux-x86_64  modify_hostname_and_ips_8.sh

[root@harbor ~]# mv docker-compose-linux-x86_64 /usr/bin/docker-compose

[root@harbor ~]# chmod +x /usr/bin/docker-compose
5.2、部署Harbor HTTP
#解压
[root@harbor ~]# tar xf harbor-offline-installer-v2.9.0.tgz

#进入harbor目录
[root@harbor ~]# cd harbor/

#查看
[root@harbor ~/harbor]# ls
common.sh  harbor.v2.9.0.tar.gz  harbor.yml.tmpl  install.sh  LICENSE  prepare
修改habor.yml,这里存储的都是镜像仓库的配置信息
#这里给了一个模板文件,可以拷贝该模板文件就行修改
[root@harbor ~/harbor]# cp harbor.yml.tmpl harbor.yml

[root@harbor ~/harbor]# vim harbor.yml

#定义怎么访问harbor,是使用ip还是使用域名,这里使用IP
hostname: reg.mydomain.com
修改为 hostname: 192.168.100.54

#这里先部署http将https的注释掉  先注释https相关配置
# https related config
#https:
  # https port for harbor, default is 443
#  port: 443
#  # The path of cert and key files for nginx
#  certificate: /your/certificate/path
#  private_key: /your/private/key/path

#这个是harbor默认登入的密码,记住这个密码,后面登入需要
harbor_admin_password: Harbor12345
prepare是一个shell脚本,做一些准备性的工作,包括拉取镜像,这个镜像从网络获取
[root@harbor ~/harbor]# ./prepare
prepare   base dir   is set to /root/harbor
WARNING:root:WARNING: HTTP protocol   is insecure. Harbor will deprecate http protocol   in the future. Please make sure to upgrade to https
Generated configuration file: /config/portal/nginx.conf
Generated configuration file: /config/log/logrotate.conf
Generated configuration file: /config/log/rsyslog_docker.conf
Generated configuration file: /config/nginx/nginx.conf
Generated configuration file: /config/core/env
Generated configuration file: /config/core/app.conf
Generated configuration file: /config/registry/config.yml
Generated configuration file: /config/registryctl/env
Generated configuration file: /config/registryctl/config.yml
Generated configuration file: /config/db/env
Generated configuration file: /config/jobservice/env
Generated configuration file: /config/jobservice/config.yml
Generated and saved secret to file: /data/secret/keys/secretkey
Successfully called func: create_root_cert
Generated configuration file: /compose_location/docker-compose.yml
Clean up the input dir
#这里会根据配置文件生成一些相关的yml文件
执行安装脚本,会将harbor镜像导入到本地,由之前的离线包将镜像导入到本地,然后使用导入的镜像去启动容器,那些输出的都是本地镜像只有prepare那次的镜像需要从网络获取(很多功能都解耦了,一个功能就是一个容器)
[root@harbor ~/harbor]# ./install.sh

[Step 0]: checking   if docker   is installed ...

Note: docker version: 24.0.6

[Step 1]: checking docker-compose   is installed ...

Note: Docker Compose version v2.21.0

[Step 2]: loading Harbor images ...
38478029bae1: Loading layer  7.869MB/7.869MB
b89fb6bfd54a: Loading layer  4.096kB/4.096kB
c2e56d8f648b: Loading layer  17.57MB/17.57MB
......
......
[Step 5]: starting Harbor ...
[+] Running 10/10
 ✔ Network harbor_harbor        Created                                                            0.2s
 ✔ Container harbor-log         Started                                                            0.0s
 ✔ Container harbor-db          Started                                                            0.0s
 ✔ Container redis              Started                                                            0.0s
 ✔ Container registry           Started                                                            0.0s
 ✔ Container harbor-portal      Started                                                            0.0s
 ✔ Container registryctl        Started                                                            0.0s
 ✔ Container harbor-core        Started                                                            0.0s
 ✔ Container harbor-jobservice  Started                                                            0.0s
 ✔ Container nginx              Started                                                            0.0s
✔ ----Harbor has been installed and started successfully.----
查看:
[root@harbor ~]# docker ps
CONTAINER ID   IMAGE                                COMMAND                   CREATED          STATUS                             PORTS                                   NAMES
11307f7d4316   goharbor/harbor-jobservice:v2.9.0      "/harbor/entrypoint.…" 12 seconds ago   Up 7 seconds (health: starting)                                            harbor-jobservice
fc612ca54d5d   goharbor/nginx-photon:v2.9.0           "nginx -g 'daemon of…" 12 seconds ago   Up 10 seconds (health: starting)   0.0.0.0:80->8080/tcp, :::80->8080/tcp   nginx
17c129226436   goharbor/harbor-core:v2.9.0            "/harbor/entrypoint.…" 13 seconds ago   Up 10 seconds (health: starting)                                           harbor-core
8874941c0346   goharbor/harbor-registryctl:v2.9.0     "/home/harbor/start.…" 13 seconds ago   Up 10 seconds (health: starting)                                           registryctl
842ad36cfd93   goharbor/redis-photon:v2.9.0           "redis-server /etc/r…" 13 seconds ago   Up 11 seconds (health: starting)                                           redis
9856227a9618   goharbor/registry-photon:v2.9.0        "/home/harbor/entryp…" 13 seconds ago   Up 11 seconds (health: starting)                                           registry
bf9530e96110   goharbor/harbor-portal:v2.9.0          "nginx -g 'daemon of…" 13 seconds ago   Up 11 seconds (health: starting)                                           harbor-portal
6d55275ce61a   goharbor/harbor-db:v2.9.0              "/docker-entrypoint.…" 13 seconds ago   Up 11 seconds (health: starting)                                           harbor-db
711e3bb722f2   goharbor/harbor-log:v2.9.0             "/bin/sh -c /usr/loc…" 13 seconds ago   Up 12 seconds (health: starting)   127.0.0.1:1514->10514/tcp               harbor-log
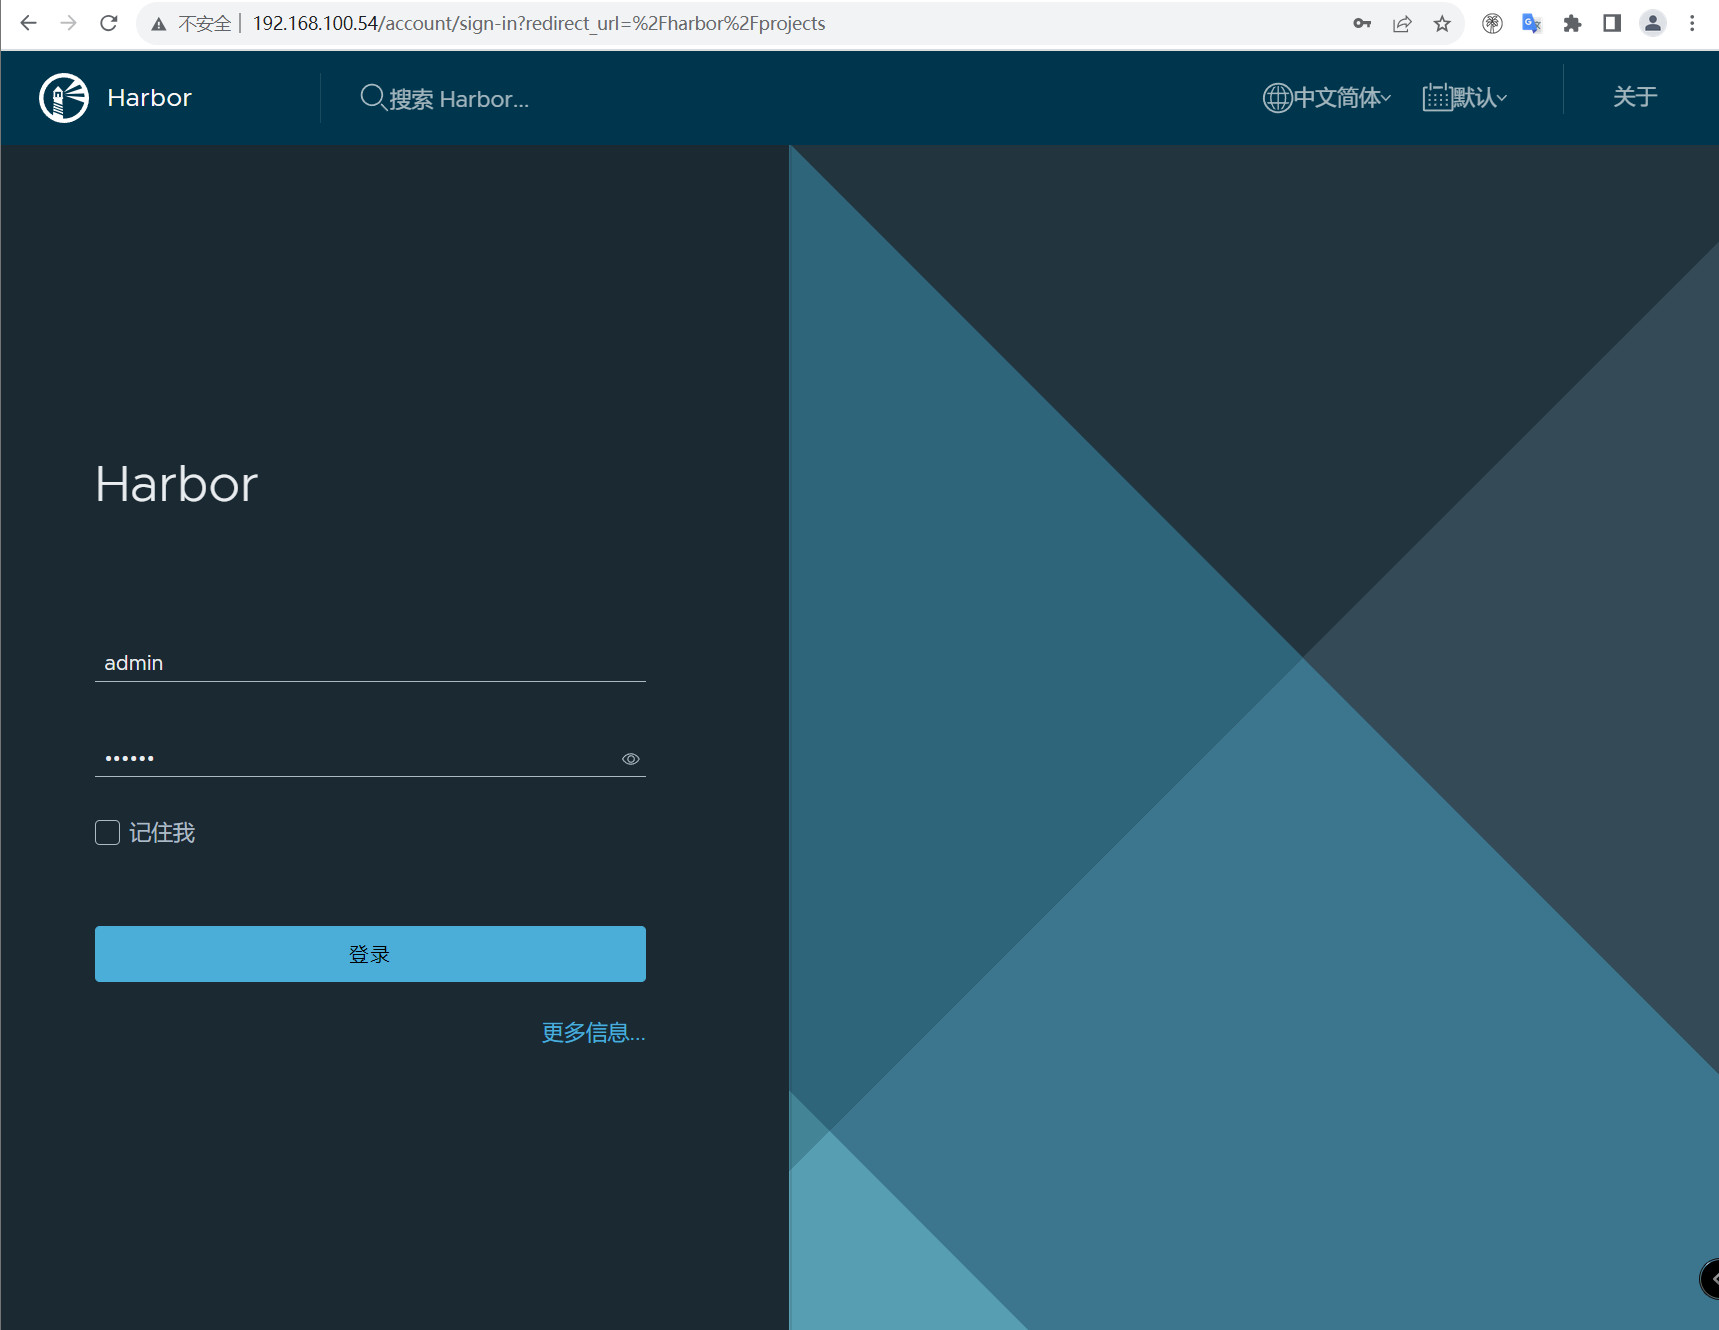
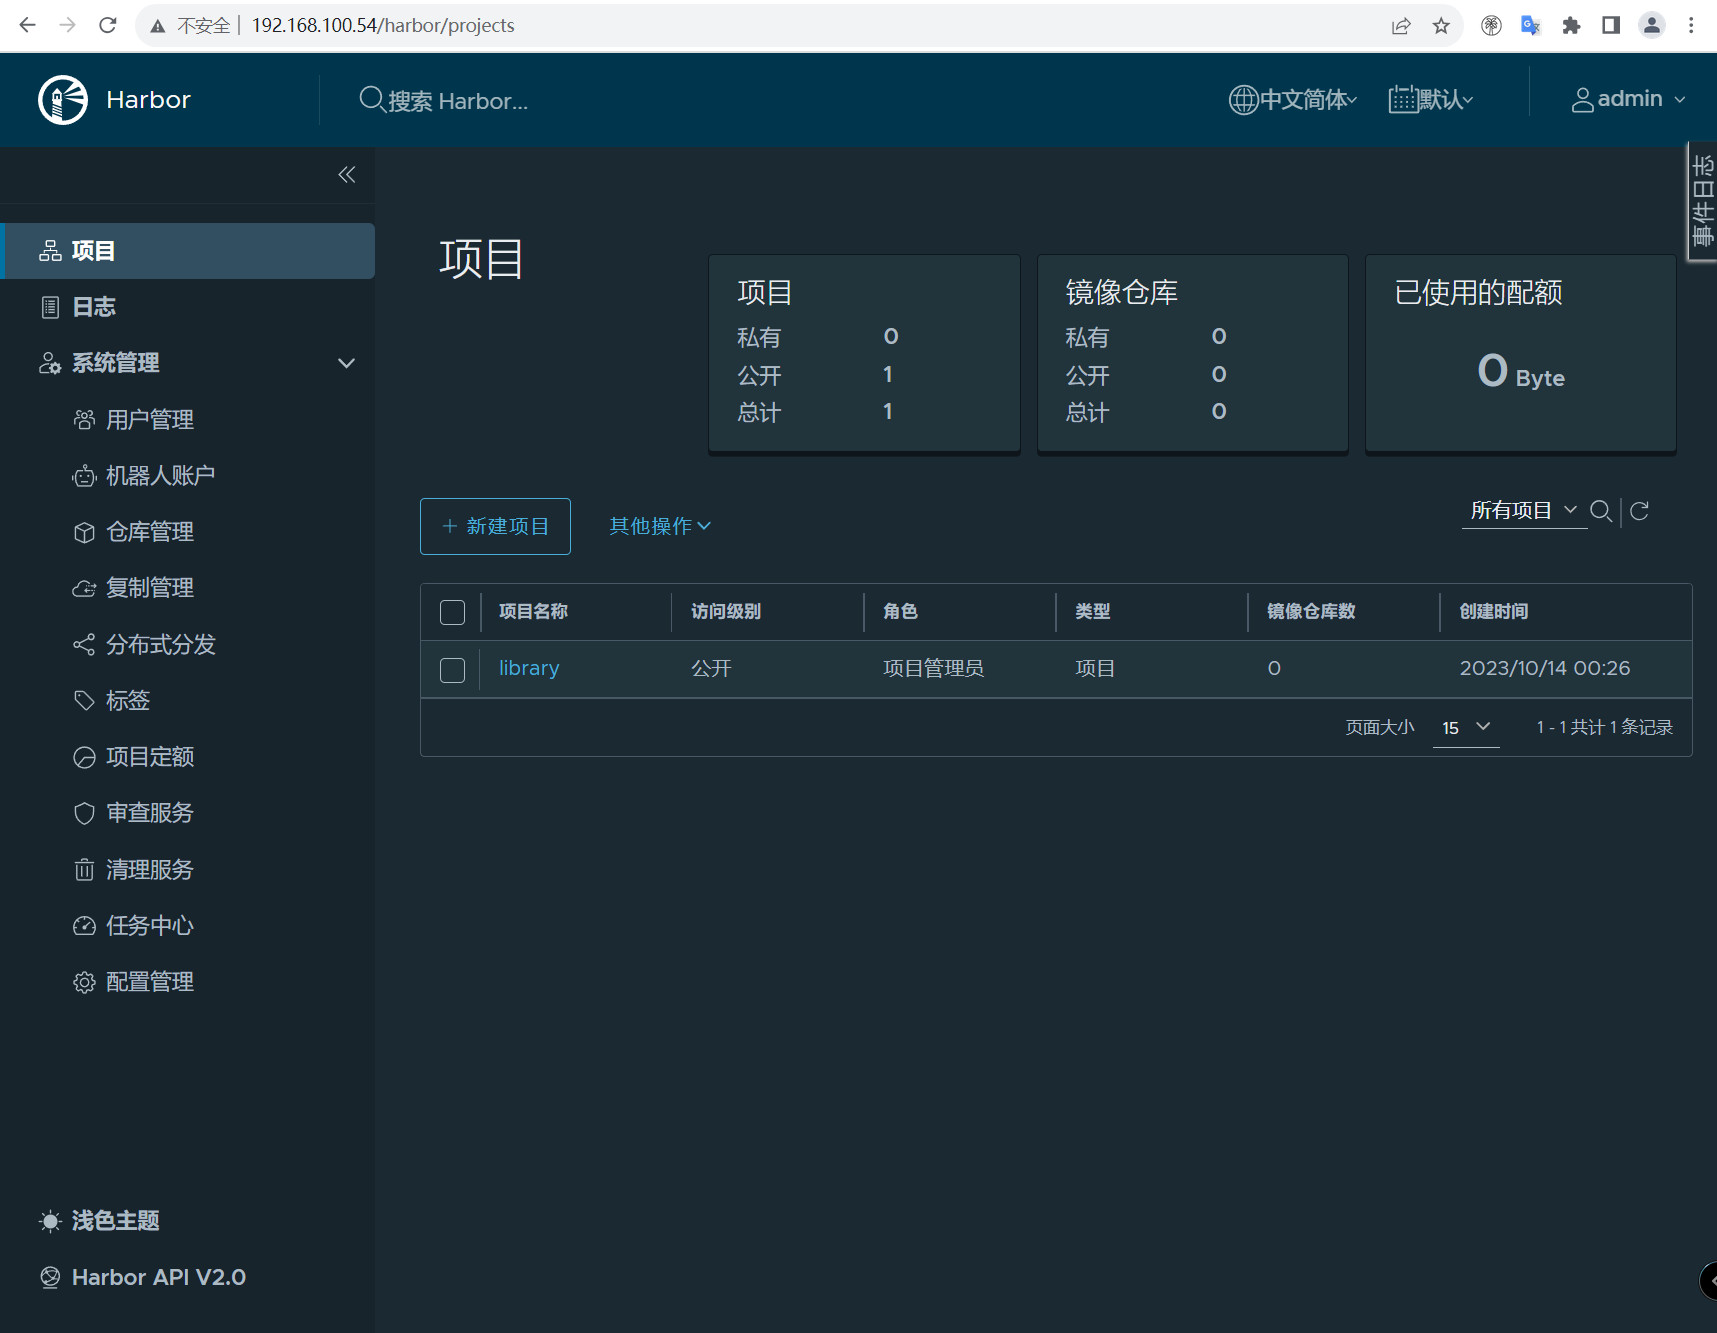
六、登录
用户名:admin 密码为yml文件中设置的密码,默认是:Harbor12345
这里没有提供https服务,docker默认是以https去连接镜像仓库的。如果要使用http要配置可信任,在docker的配置文件里面配置可信任。
vim /usr/lib/systemd/system/docker.service
在[Service]下添加
ExecStart=/usr/bin/dockerd -H fd:  // --containerd=/run/containerd/containerd.sock --insecure-registry=192.168.100.54

[root@harbor ~]# systemctl daemon-reload
[root@harbor ~]# systemctl restart docker
重启docker可能导致容器不能自启动(可以看到访问不了,因为docker重启有些容器退出了)
[root@harbor ~]# docker ps -a
CONTAINER ID   IMAGE                                COMMAND                   CREATED          STATUS                                  PORTS                                   NAMES
11307f7d4316   goharbor/harbor-jobservice:v2.9.0      "/harbor/entrypoint.…" 17 minutes ago   Restarting (2) Less than a second ago                                           harbor-jobservice
fc612ca54d5d   goharbor/nginx-photon:v2.9.0           "nginx -g 'daemon of…" 17 minutes ago   Exited (128) 2 minutes ago              0.0.0.0:80->8080/tcp, :::80->8080/tcp   nginx
17c129226436   goharbor/harbor-core:v2.9.0            "/harbor/entrypoint.…" 17 minutes ago   Up 3 seconds (health: starting)                                                 harbor-core
8874941c0346   goharbor/harbor-registryctl:v2.9.0     "/home/harbor/start.…" 17 minutes ago   Up 3 seconds (health: starting)                                                 registryctl
842ad36cfd93   goharbor/redis-photon:v2.9.0           "redis-server /etc/r…" 17 minutes ago   Exited (128) 2 minutes ago                                                      redis
9856227a9618   goharbor/registry-photon:v2.9.0        "/home/harbor/entryp…" 17 minutes ago   Up 3 seconds (health: starting)                                                 registry
bf9530e96110   goharbor/harbor-portal:v2.9.0          "nginx -g 'daemon of…" 17 minutes ago   Exited (128) 2 minutes ago                                                      harbor-portal
6d55275ce61a   goharbor/harbor-db:v2.9.0              "/docker-entrypoint.…" 17 minutes ago   Up 3 seconds (health: starting)                                                 harbor-db
711e3bb722f2   goharbor/harbor-log:v2.9.0             "/bin/sh -c /usr/loc…" 17 minutes ago   Up 3 seconds (health: starting)         127.0.0.1:1514->10514/tcp               harbor-log
使用docker-compose来重启容器
#将退出的容器拉起,如果要全部关闭使用docker-compose down,容器里面数据重启不会丢失因为做持久化了
[root@harbor ~/harbor]# docker-compose up -d
[+] Running 9/9
 ✔ Container harbor-log         Running                                                               0.0s
 ✔ Container redis              Started                                                               0.7s
 ✔ Container registry           Running                                                               0.0s
 ✔ Container harbor-portal      Started                                                               0.7s
 ✔ Container registryctl        Running                                                               0.0s
 ✔ Container harbor-db          Running                                                               0.0s
 ✔ Container harbor-core        Running                                                               0.0s
 ✔ Container nginx              Started                                                               1.0s
 ✔ Container harbor-jobservice  Started                                                               0.0s
使用终端进行登录:
[root@harbor ~/harbor]# docker login 192.168.100.54
Username: admin
Password:
WARNING! Your password will be stored unencrypted   in /root/.docker/config.json.
Configure a credential helper to remove   this warning. See
https:  //docs.docker.com/engine/reference/commandline/login/#credentials-store

Login Succeeded
查看日志:
[root@harbor ~/harbor]# tail -f /  var /log/harbor/core.log
Oct 14 00:49:20 172.18.0.1 core[6960]: 2023-10-13T16:49:20Z [INFO] [/core/main.go:256]: Fix empty subiss   for meta info data.
Oct 14 00:49:20 172.18.0.1 core[6960]: 2023-10-13T16:49:20Z [INFO] [/pkg/oidc/fix.go:37]: Not found any records with empty subiss, good to go.
Oct 14 00:49:20 172.18.0.1 core[6960]: 2023/10/13 16:49:20.216 #033[1;34m[I]#033[0m [server.go:281]  http server Running   on http:  //:8080
Oct 14 00:52:34 172.18.0.1 core[6960]: 2023-10-13T16:52:34Z [INFO] [/controller/registry/controller.go:222]: Start regular health check   for registries with interval 5m0s
Oct 14 00:53:22 172.18.0.1 core[6960]: 2023-10-13T16:53:22Z [INFO] [/controller/gc/callback.go:72]: received garbage collection task status update   event : task-3, status-Running
Oct 14 00:53:22 172.18.0.1 core[6960]: 2023-10-13T16:53:22Z [INFO] [/controller/gc/callback.go:72]: received garbage collection task status update   event : task-4, status-Running
七、Harbor https配置
7.1、创建CA证书
#创建证书存放目录
mkdir harbor/ssl

#进入ssl目录
cd harbor/ssl

#生成 CA 证书私钥
[root@harbor ~/harbor/ssl]# openssl genrsa -  out ca.key 4096
Generating RSA   private key, 4096 bit   long modulus (2 primes)
...............................++++
.++++
e   is 65537 (0x010001)
生成 CA 证书
假如你使用类似于yourdomain.com的FQDN(Fully Qualified Domain Name)方式来连接registry主机,则你必须使用yourdomain.com来作为CN(Common Name)。
否则,假如你使用IP地址来连接你的registry主机的话,CN可以指定为任何值。
公用名(Common Name)一般来讲就是填写你将要申请SSL证书的域名 (domain)或子域名(sub domain)。

例1:打算为“chinassl.net”申请SSL证 书,那这个公用名(Common Name)就要填写“chinassl.net”,而不能填写 “www.chinassl.net”,因为在申请SSL证书时发证机构认为“www.yourdomain.com”和 “yourdomain.com”是不同的两个域名;

例2:如将要为bill.chinassl.net申请SSL证书,那么这里公用名(Common Name)就 要填写“bill.chinassl.net”而不能填写“chinassl.net”或“www.chinassl.net”
openssl req -x509 -  new -nodes -sha512 -days 3650 \
-subj   "/C=CN/ST=Beijing/L=Beijing/O=example/OU=Personal/CN=192.168.100.54" \
-key ca.key \
-  out ca.crt

 #  req  产生证书签发申请命令
 # -x509 签发X.509格式证书命令。X.509是最通用的一种签名证书格式。
 # -new  生成证书请求
 # -key  指定私钥文件
 # -nodes 表示私钥不加密
 # -out   输出
 # -subj 指定用户信息
 # -days 有效期
生成Harbor服务器证书
证书通常包含一个.crt文件和一个.key文件,例如,yourdomain.com.crt和yourdomain.com.key.
生成私钥
[root@harbor ~/harbor/ssl]# openssl genrsa -  out 192.168.100.54.key 4096
Generating RSA   private key, 4096 bit   long modulus (2 primes)
.......................................................................................................................................................................................................................++++
........................................................................................................................++++
e   is 65537 (0x010001)
生成证书签名请求
openssl req -sha512 -  new \
    -subj   "/C=CN/ST=Beijing/L=Beijing/O=example/OU=Personal/CN=192.168.100.54" \
    -key 192.168.100.54.key \
    -  out 192.168.100.54.csr
生成 x509 v3 扩展文件。
无论你是使用 FQDN 还是 IP 地址来连接到你的 Harbor 主机,你都必须创建此文件,以便你可以为你的 Harbor 主机生成符合主题备用名称 (SAN) 和 x509 v3 的证书扩展要求。
替换DNS条目以反映你的域。
# 域名方式访问
# 需要替换下方DNS
cat > v3.ext <<-EOF
authorityKeyIdentifier=keyid,issuer
basicConstraints=CA:FALSE
keyUsage = digitalSignature, nonRepudiation, keyEncipherment, dataEncipherment
extendedKeyUsage = serverAuth
subjectAltName = @alt_names

[alt_names]
DNS.1=registry.harbor.com
DNS.2=registry.harbor
DNS.3=harbor
EOF


# IP方式访问
# 需要替换下方IP地址
cat > v3.ext <<-EOF
authorityKeyIdentifier=keyid,issuer
basicConstraints=CA:FALSE
keyUsage = digitalSignature, nonRepudiation, keyEncipherment, dataEncipherment
extendedKeyUsage = serverAuth
subjectAltName = IP:192.168.100.54
EOF


# 示例
cat > v3.ext <<-EOF
authorityKeyIdentifier=keyid,issuer
basicConstraints=CA:FALSE
keyUsage = digitalSignature, nonRepudiation, keyEncipherment, dataEncipherment
extendedKeyUsage = serverAuth
subjectAltName = @alt_names

[alt_names]
DNS.1=yourdomain.com
DNS.2=yourdomain
DNS.3=hostname
EOF
使用v3.ext文件为你的 Harbor 主机生成证书。
将CRS 和 CRT 文件名中的yourdomain.com 替换为 Harbor 主机名。
[root@harbor ~/harbor/ssl]# openssl x509 -req -sha512 -days 3650 \
    -extfile v3.ext \
    -CA ca.crt -CAkey ca.key -CAcreateserial \
    -  in 192.168.100.54.csr \
    -  out 192.168.100.54.crt

# x509  签发X.509格式证书命令。
# -req   表示证书输入请求。
# -days  表示有效天数
# -extensions 表示按OpenSSL配置文件v3_req项添加扩展。
# -CA   表示CA证书,这里为ca.crt
# -CAkey  表示CA证书密钥,这里为ca.key
# -CAcreateserial 表示创建CA证书序列号
# -extfile  指定文件
签发Docker 证书
**目的:**使用证书验证镜像仓库客户端

从Docker 1.13开始,在Linux上,所有根证书颁发机构都与系统默认值合并,包括作为主机的根CA设置。

在早期版本的Docker和适用于Windows Server的Docker Enterprise Edition上,仅当未配置自定义根证书时才使用系统默认证书。

如果存在多个证书,则按字母顺序尝试每个证书。如果出现4xx级或5xx级身份验证错误,则Docker继续尝试使用下一个证书。
转换yourdomain.com.crt为yourdomain.com.cert, 供 Docker 使用。
Docker 守护进程将.crt文件解释为 CA 证书,将.cert文件解释为客户端证书。
[root@harbor ~/harbor/ssl]# openssl x509 -inform PEM - in 192.168.100.54.crt - out 192.168.100.54.cert
查看证书
[root@harbor ~/harbor/ssl]# ll
总用量 32
-rw-r--r-- 1 root root 2074 10月 14 03:30 192.168.100.54.cert
-rw-r--r-- 1 root root 2074 10月 14 03:30 192.168.100.54.crt
-rw-r--r-- 1 root root 1708 10月 14 03:29 192.168.100.54.csr
-rw------- 1 root root 3247 10月 14 03:26 192.168.100.54.key
-rw-r--r-- 1 root root 2053 10月 14 03:26 ca.crt
-rw------- 1 root root 3243 10月 14 03:26 ca.key
-rw-r--r-- 1 root root   41 10月 14 03:30 ca.srl
-rw-r--r-- 1 root root  206 10月 14 03:29 v3.ext
拷贝证书
将服务器证书、密钥和 CA 文件复制到 Harbor 主机上的 Docker 证书文件夹中
说明:
# 如果如下目录不存在,请创建,如果有域名请按此格式依次创建
# ip方式
mkdir -p /etc/docker/certs.d/harbor_IP
# 域名方式
mkdir -p /etc/docker/certs.d/yourdomain.com

# 如果端口为443,则不需要指定。如果为自定义端口,请指定端口
# 域名方式
/etc/docker/certs.d/yourdomain.com:port
# ip方式
/etc/docker/certs.d/harbor_IP:port


本文配置如下:
#创建目录
mkdir -p /etc/docker/certs.d/192.168.100.54

#拷贝证书
[root@harbor ~/harbor/ssl]# cp 192.168.100.54.cert /etc/docker/certs.d/192.168.100.54
[root@harbor ~/harbor/ssl]# cp 192.168.100.54.key /etc/docker/certs.d/192.168.100.54
[root@harbor ~/harbor/ssl]# cp ca.crt /etc/docker/certs.d/192.168.100.54

#查看
[root@harbor /etc/docker/certs.d/192.168.100.54]# ll
总用量 12
-rw-r--r-- 1 root root 2074 10月 14 03:32 192.168.100.54.cert
-rw------- 1 root root 3247 10月 14 03:32 192.168.100.54.key
-rw-r--r-- 1 root root 2053 10月 14 03:32 ca.crt

#重启docker
systemctl restart docker
7.2、部署或重新配置Harbor
#修改配置文件如下:
[root@harbor ~/harbor]# cat harbor.yml
# Configuration file of Harbor

# The IP address or hostname to access admin UI and registry service.
# DO NOT use localhost or 127.0.0.1, because Harbor needs to be accessed by external clients.
hostname: 192.168.100.54

# http related config
http:
  # port for http, default is 80. If https enabled, this port will redirect to https port
  port: 80

# https related config
https:
  # https port for harbor, default is 443
  port: 443
  # The path of cert and key files for nginx
  certificate: /root/harbor/ssl/192.168.100.54.crt
  private_key: /root/harbor/ssl/192.168.100.54.key
7.3、如果Harbor正在运行,请停止并删除现有实例
[root@harbor ~/harbor]# docker-compose down -v
[+] Running 10/10
 ✔ Container nginx              Removed                                                              0.2s
 ✔ Container harbor-jobservice  Removed                                                              0.1s
 ✔ Container registryctl        Removed                                                              0.1s
 ✔ Container harbor-core        Removed                                                              0.2s
 ✔ Container harbor-portal      Removed                                                              0.2s
 ✔ Container redis              Removed                                                              0.3s
 ✔ Container harbor-db          Removed                                                              0.2s
 ✔ Container registry           Removed                                                              0.2s
 ✔ Container harbor-log         Removed                                                             10.1s
 ✔ Network harbor_harbor        Removed                                                              0.2s
7.4、运行prepare脚本以启用HTTPS
[root@harbor ~/harbor]# ./prepare
prepare   base dir   is set to /root/harbor
Clearing the configuration file: /config/portal/nginx.conf
Clearing the configuration file: /config/log/logrotate.conf
Clearing the configuration file: /config/log/rsyslog_docker.conf
Clearing the configuration file: /config/nginx/nginx.conf
Clearing the configuration file: /config/core/env
Clearing the configuration file: /config/core/app.conf
Clearing the configuration file: /config/registry/passwd
Clearing the configuration file: /config/registry/config.yml
Clearing the configuration file: /config/registry/root.crt
Clearing the configuration file: /config/registryctl/env
Clearing the configuration file: /config/registryctl/config.yml
Clearing the configuration file: /config/db/env
Clearing the configuration file: /config/jobservice/env
Clearing the configuration file: /config/jobservice/config.yml
Generated configuration file: /config/portal/nginx.conf
Generated configuration file: /config/log/logrotate.conf
Generated configuration file: /config/log/rsyslog_docker.conf
Generated configuration file: /config/nginx/nginx.conf
Generated configuration file: /config/core/env
Generated configuration file: /config/core/app.conf
Generated configuration file: /config/registry/config.yml
Generated configuration file: /config/registryctl/env
Generated configuration file: /config/registryctl/config.yml
Generated configuration file: /config/db/env
Generated configuration file: /config/jobservice/env
Generated configuration file: /config/jobservice/config.yml
loaded secret   from file: /data/secret/keys/secretkey
Generated configuration file: /compose_location/docker-compose.yml
Clean up the input dir
7.5、重启容器
[root@harbor ~/harbor]# docker-compose up -d
[+] Running 10/10
 ✔ Network harbor_harbor        Created                                                              0.2s
 ✔ Container harbor-log         Started                                                              0.4s
 ✔ Container registry           Started                                                              2.1s
 ✔ Container registryctl        Started                                                              2.2s
 ✔ Container harbor-db          Started                                                              2.1s
 ✔ Container redis              Started                                                              2.1s
 ✔ Container harbor-portal      Started                                                              2.1s
 ✔ Container harbor-core        Started                                                              2.4s
 ✔ Container nginx              Started                                                              3.1s
 ✔ Container harbor-jobservice  Started                                                              3.1s
7.6、验证HTTPS连接
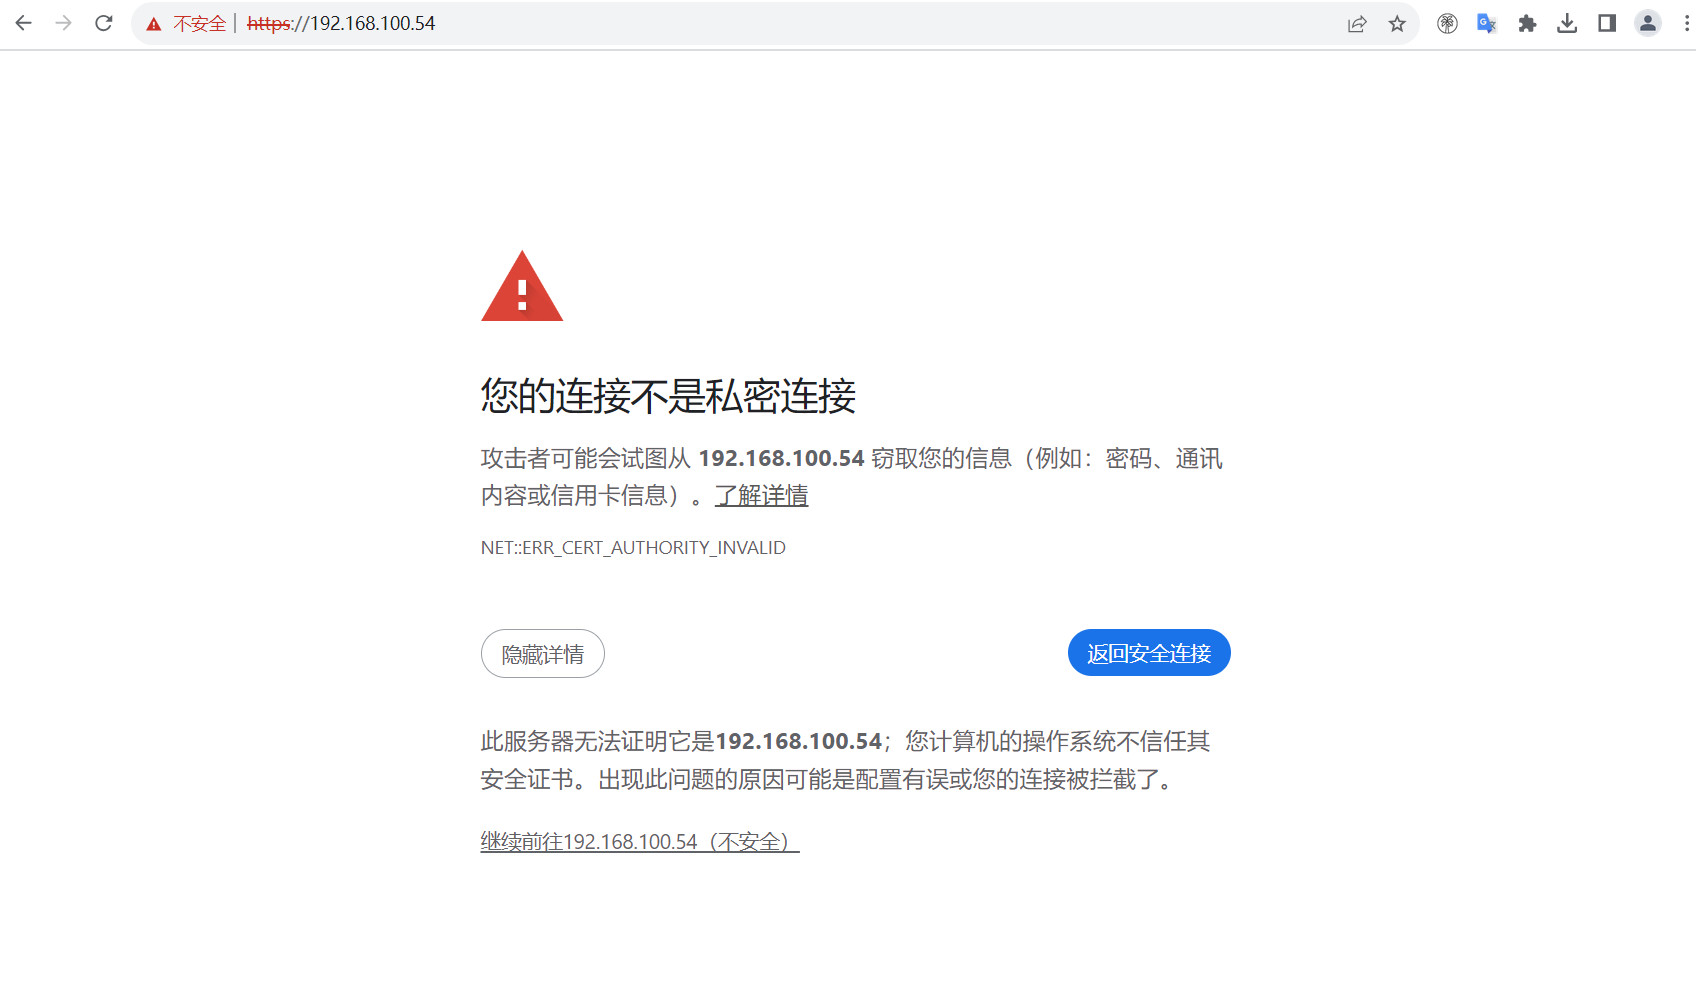
终端验证登录:
[root@harbor ~/harbor]# docker login 192.168.100.54
Authenticating with existing credentials...
WARNING! Your password will be stored unencrypted   in /root/.docker/config.json.
Configure a credential helper to remove   this warning. See
https:  //docs.docker.com/engine/reference/commandline/login/#credentials-store

Login Succeeded
八、Harbor仓库的使用
镜像推送命令:
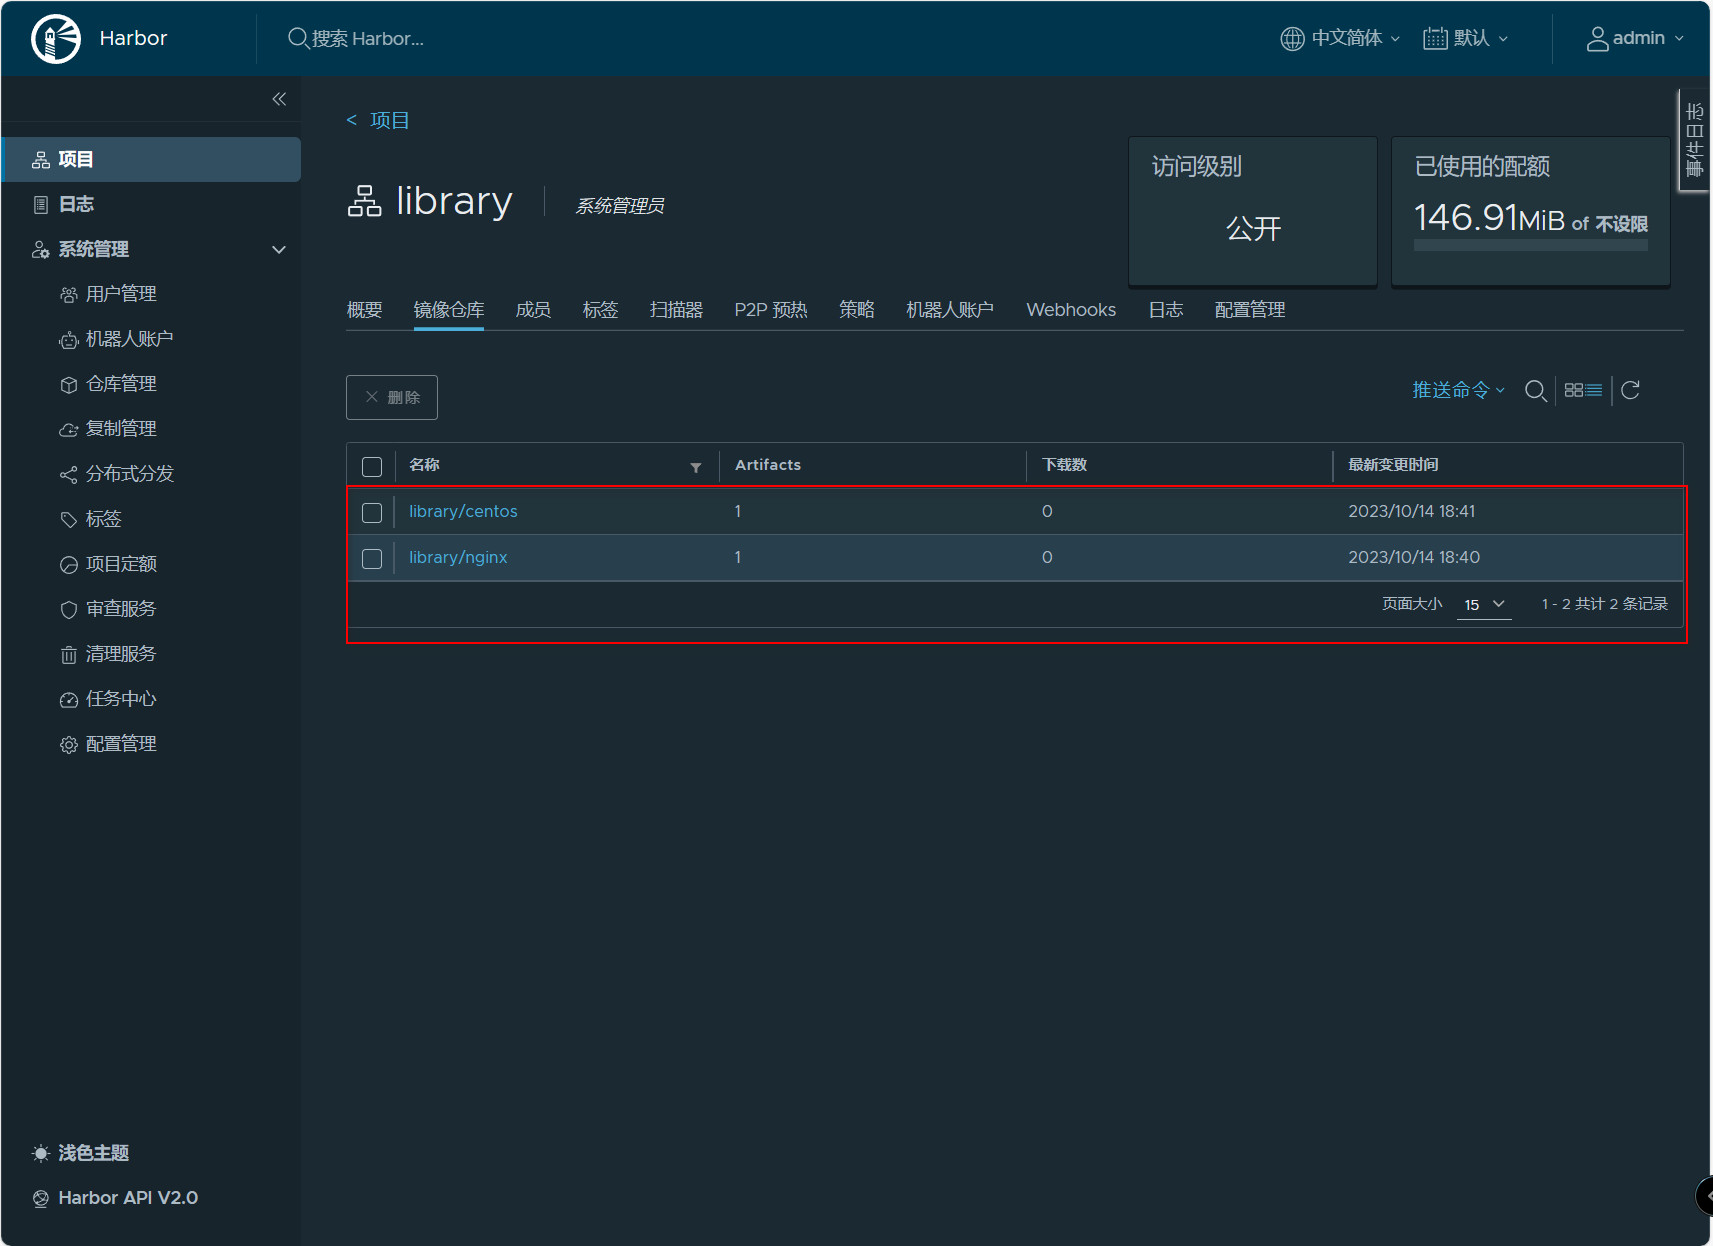
#查看镜像
[root@harbor ~]# docker images
REPOSITORY                      TAG       IMAGE ID       CREATED       SIZE
nginx                           latest    bc649bab30d1   2 days ago    187MB
goharbor/harbor-exporter        v2.9.0    206e5b26f947   6 weeks ago   105MB
goharbor/redis-photon           v2.9.0    a279b538d325   6 weeks ago   172MB
goharbor/trivy-adapter-photon   v2.9.0    180034d16a45   6 weeks ago   469MB
goharbor/harbor-registryctl     v2.9.0    cdba7b6cb4ba   6 weeks ago   148MB
goharbor/registry-photon        v2.9.0    a1098ef4ed59   6 weeks ago   83MB
goharbor/nginx-photon           v2.9.0    6ec6a5f54ed2   6 weeks ago   153MB
goharbor/harbor-log             v2.9.0    56f059c28d92   6 weeks ago   162MB
goharbor/harbor-jobservice      v2.9.0    086e9362c7f6   6 weeks ago   139MB
goharbor/harbor-core            v2.9.0    9a56b64c2b99   6 weeks ago   168MB
goharbor/harbor-portal          v2.9.0    634af3f22c06   6 weeks ago   161MB
goharbor/harbor-db              v2.9.0    a09baab468ac   6 weeks ago   287MB
goharbor/prepare                v2.9.0    bddaed80dd0b   6 weeks ago   216MB
centos                          latest    5d0da3dc9764   2 years ago   231MB


#给镜像打标签
[root@harbor ~]# docker tag nginx:latest 192.168.100.54/library/nginx:latest
[root@harbor ~]# docker tag centos:latest 192.168.100.54/library/centos:latest

#推送镜像
[root@harbor ~]# docker push 192.168.100.54/library/nginx:latest
The push refers to repository [192.168.100.54/library/nginx]
3c7f79e64c24: Pushed
ff24e13e73c7: Pushed
b0b61abb5846: Pushed
2187753852c0: Pushed
ad5d551c7fa1: Pushed
e53d016bbab1: Pushed
cb4596cc1454: Pushed
latest: digest: sha256:3a12fc354e3c4dd62196a809e52a5d2f8f385b52fcc62145b0efec5954bb8fa1 size: 1778

[root@harbor ~]# docker push 192.168.100.54/library/centos:latest
The push refers to repository [192.168.100.54/library/centos]
74ddd0ec08fa: Pushed
latest: digest: sha256:a1801b843b1bfaf77c501e7a6d3f709401a1e0c83863037fa3aab063a7fdb9dc size: 529
在镜像仓库查看
拉取镜像:
#拉取nginx镜像
[root@harbor ~]# docker pull 192.168.100.54/library/nginx:latest
latest: Pulling   from library/nginx
Digest: sha256:3a12fc354e3c4dd62196a809e52a5d2f8f385b52fcc62145b0efec5954bb8fa1
Status: Downloaded newer image   for 192.168.100.54/library/nginx:latest
192.168.100.54/library/nginx:latest

#拉取centos镜像
[root@harbor ~]# docker pull 192.168.100.54/library/centos:latest
latest: Pulling   from library/centos
Digest: sha256:a1801b843b1bfaf77c501e7a6d3f709401a1e0c83863037fa3aab063a7fdb9dc
Status: Downloaded newer image   for 192.168.100.54/library/centos:latest
192.168.100.54/library/centos:latest


说明:
拉取前可以先把192.168.100.54/library/nginx和192.168.100.54/library/centos删除再拉取
九、Harbor高可用
单机部署harbor显然无法满足在生产中需求,必须要保证应用的高可用性。目前有两种主流的方案来解决Harbor高可用问题:
- 双主复制
- 多harbor实例共享后端存储
9.1、 Harbor双主复制
- 主从同步
harbor官方默认提供主从复制的方案来解决镜像同步问题,通过复制方式,可以实时将测试环境harbor仓库的镜像同步到生产环境harbor,类似于如下流程:
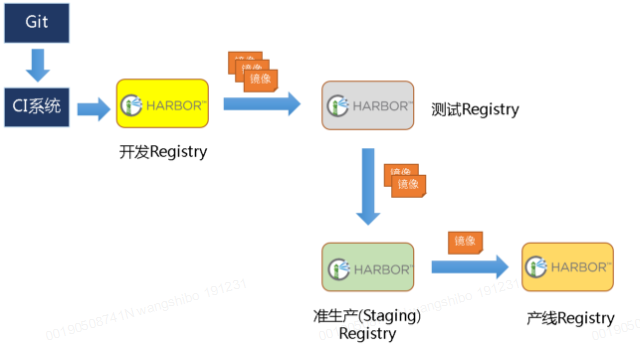
在实际生产运维的中,往往需要把镜像发布到几十或上百台集群节点上。这时,单个Registry已经无法满足大量节点的下载需求,因此要配置多个Registry实例做负载均衡。手工维护多个Registry实例上的镜像,将是十分繁琐的事情。Harbor可以支持一主多从的镜像发布模式,可以解决大规模镜像发布的难题。
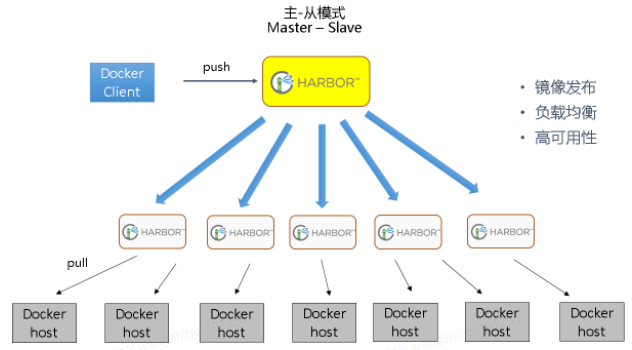
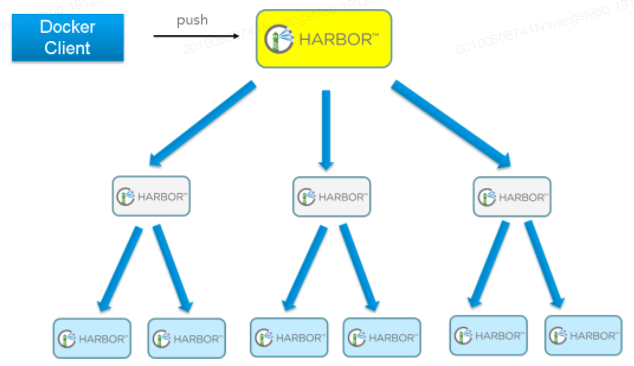
只要往一台Registry上发布,镜像就像"仙女散花"般地同步到多个Registry中,高效可靠。如果是地域分布较广的集群,还可以采用层次型发布方式,如从集团总部同步到省公司,从省公司再同步到市公司。
然而单靠主从同步方式仍然解决不了harbor主节点的单点问题。
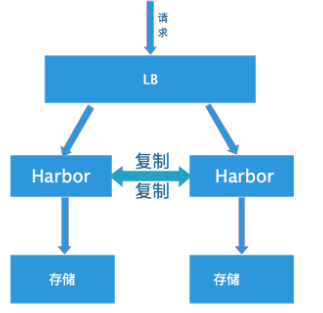
- 双主复制说明
所谓双主复制其实就是复用主从同步实现两个harbor节点之间的双向同步,来保证数据的一致性,然后在两台harbor前端配置一个负载均衡器将进来的请求分流到不同的实例中去,只要有一个实例中有了新的镜像,就是自动的同步复制到另外的的实例中去,这样实现了负载均衡,也避免了单点故障,在一定程度上实现了Harbor的高可用性。可以使用下面方案:Nginx+Keepalive+Harbor,VIP可以在LB上实现漂移。(或者VIP直接在Harbor之间漂移)。
创建harbor主主复制,可以在harbor的web界面里创建相互之间镜像同步关系,同步关系可以选择相同用户或不同用户之间。这样就保证了harbor双机热备关系。
1) "系统管理"->"仓库管理"->"新建目标", 填写对端harbor信息
2) "系统管理"->"同步管理"->"新建规则", 规则里会引用目的Registry,也就是上面一步创建的目标。同步模式有Push-based,Pull-based;触发模式有自动和定时。
不过这个方案有一个问题:就是有可能两个Harbor实例中的数据不一致。假设如果一个实例A挂掉了,这个时候有新的镜像进来,那么新的镜像就会在另外一个实例B中,后面即使恢复了挂掉的A实例,Harbor实例B也不会自动去同步镜像,这样只能手动的先关掉Harbor实例B的复制策略,然后再开启复制策略,才能让实例B数据同步,让两个实例的数据一致。所以,在实际生产使用中,主从复制十分的不靠谱。
9.2、多harbor实例共享后端存储
共享后端存储算是一种比较标准的方案,就是多个Harbor实例共享同一个后端存储,任何一个实例持久化到存储的镜像,都可被其他实例中读取。通过前置LB进来的请求,可以分流到不同的实例中去处理,这样就实现了负载均衡,也避免了单点故障。
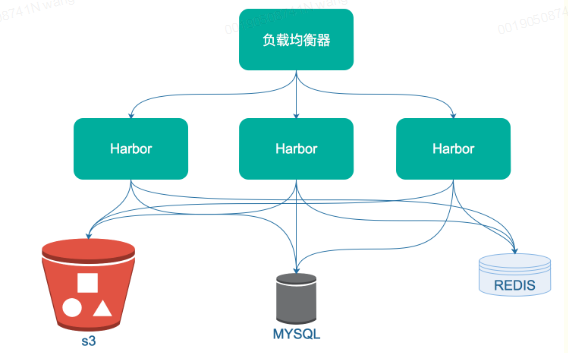
这个方案在实际生产环境中部署需要考虑三个问题:
1. 共享存储的选取,Harbor的后端存储目前支持AWS S3、Openstack Swift、Ceph等,[在实验环境里,可以直接使用nfs]
2. Session在不同的实例上共享,这个现在其实已经不是问题了,在最新的harbor中,默认session会存放在redis中,我们只需要将redis独立出来即可。可以通过redis sentinel或者redis cluster等方式来保证redis的可用性。[在实验环境里,仍然使用单台redis]
3. Harbor多实例数据库问题,这个只需要将harbor中的数据库拆出来独立部署即可。让多实例共用一个外部数据库,外部数据库可以通过Mysql 高可用方案保证高可用性。
十、Docker主机登录Harbor
其他Docker主机登录Harbor仓库提示:
[root@docker ~]# docker login  192.168.100.54
Username: admin
Password:
Error response from daemon: Get "https://192.168.100.54/v2/": tls: failed to verify certificate: x509: certificate signed by unknown authority
由于配置了https,其他docker主机无法登录Harbor,现在需要登录Harbor仓库的主机上作以下配置,使其可以登录:
#进入Harbor仓库主机

#切换到密钥存放目录
[root@harbor ~]# cd /etc/docker/

#将密钥拷贝到Docker主机上
[root@harbor /etc/docker]# scp -r certs.d  root@192.168.100.60:/etc/docker
The authenticity of host '192.168.100.60 (192.168.100.60)' can't be established.
ECDSA key fingerprint is SHA256:cmbEHTtVHPe0UKK9MeizC746qgHGmZow0h5o50ylsTc.
Are you sure you want to continue connecting (yes/no/[fingerprint])? yes
Warning: Permanently added '192.168.100.60' (ECDSA) to the list of known hosts.
root@192.168.100.60's password:
192.168.100.54.cert                                                  100% 2074     1.8MB/s   00:00
192.168.100.54.key                                                   100% 3247     3.3MB/s   00:00
ca.crt                                                               100% 2053     3.0MB/s   00:00

#重启Docker主机
[root@docker ~]# systemctl restart docker.service

#进行登录
[root@docker ~]# docker login 192.168.100.54
Username: admin
Password:
WARNING! Your password will be stored unencrypted in /root/.docker/config.json.
Configure a credential helper to remove this warning. See
https://docs.docker.com/engine/reference/commandline/login/#credentials-store

Login Succeeded

 浙公网安备 33010602011771号