【RT-Thread】基于RT-Thread Studio开发环境的RT-Thread多任务程序
一、简介
RT-Thread Studio 主要包括工程创建和管理,代码编辑,SDK管理,RT-Thread配置,构建配置,调试配置,程序下载和调试等功能,结合图形化配置系统以及软件包和组件资源,减少重复工作,提高开发效率。
- 社区版本永久免费
- 支持主流 C/C++ 语言开发
- 强大的代码编辑和重构功能
- SDK 管理器支持在线下载更新 RT-Thread 最新源码包
- 简单易用的工程创建向导,快速验证原型
- 全新图形化配置系统,同时支持架构图和树形图配置
- 软件包市场提供丰富的可用软件包资源
- 丰富的调试功能,快速查看和跟踪定位代码问题
二、工程创建
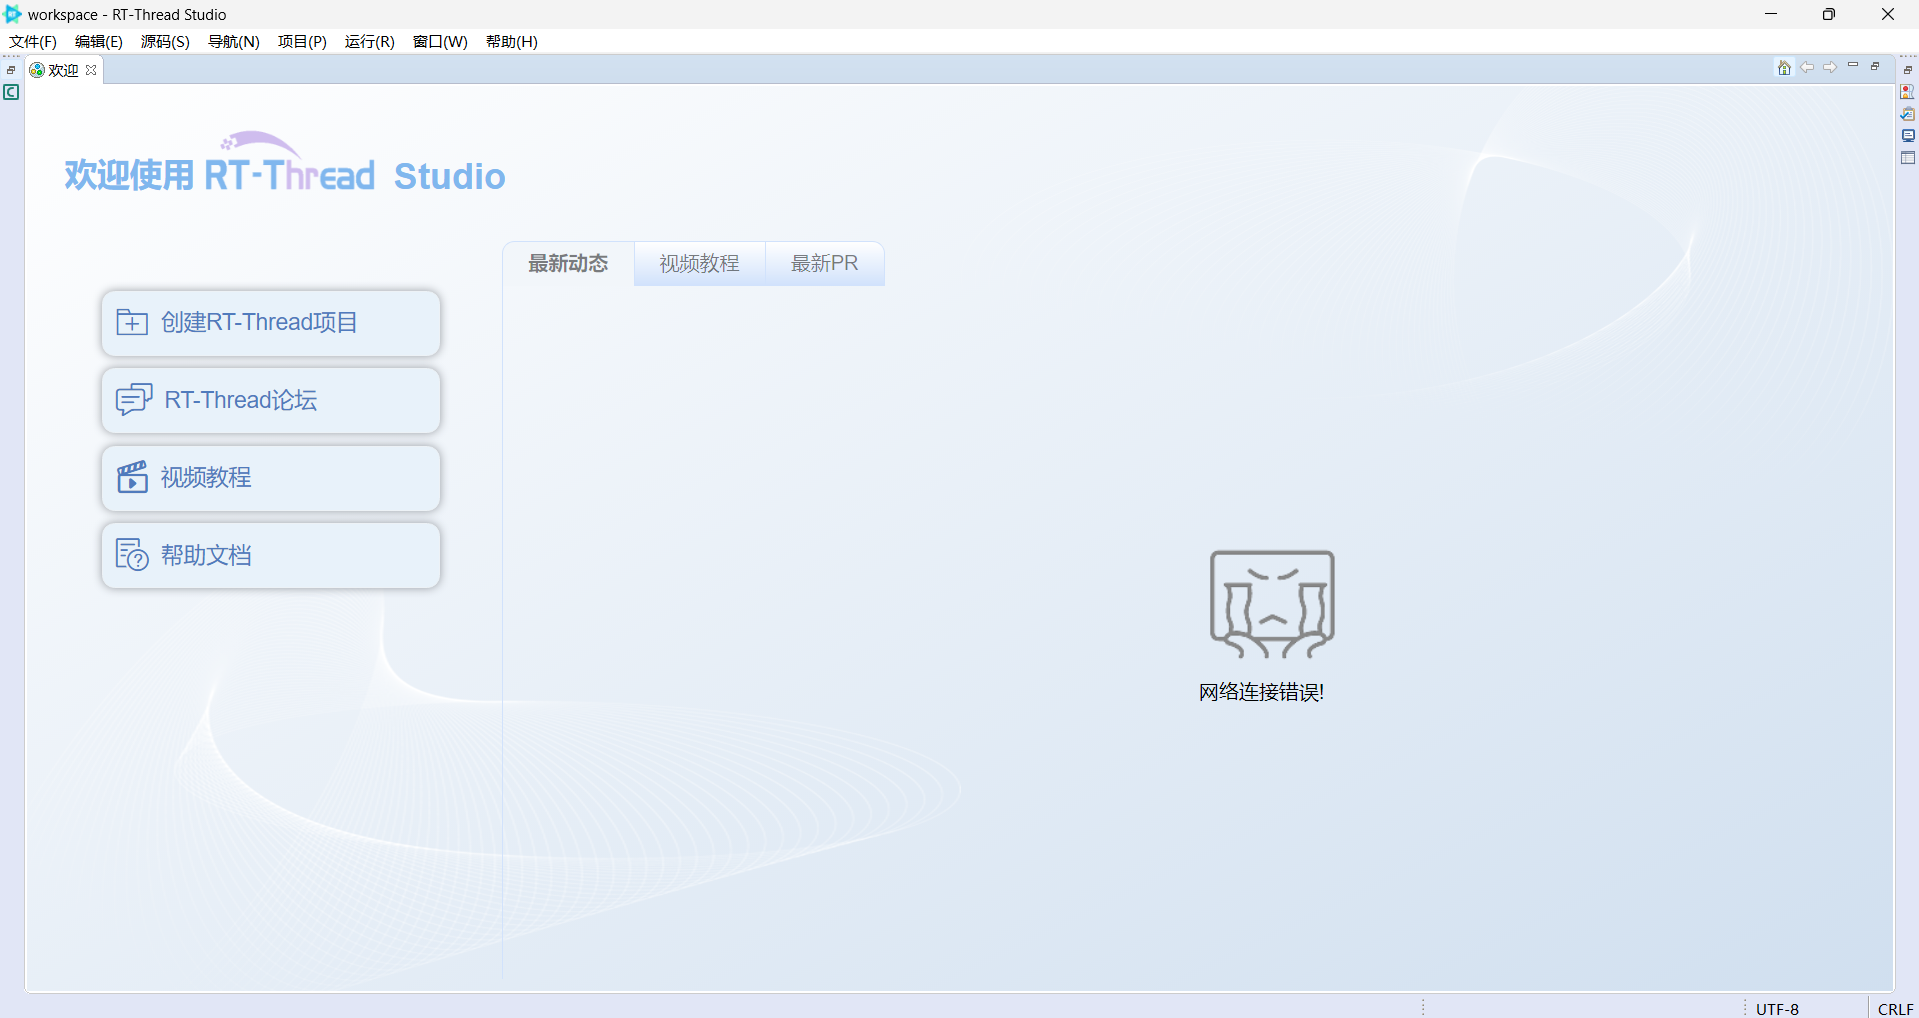
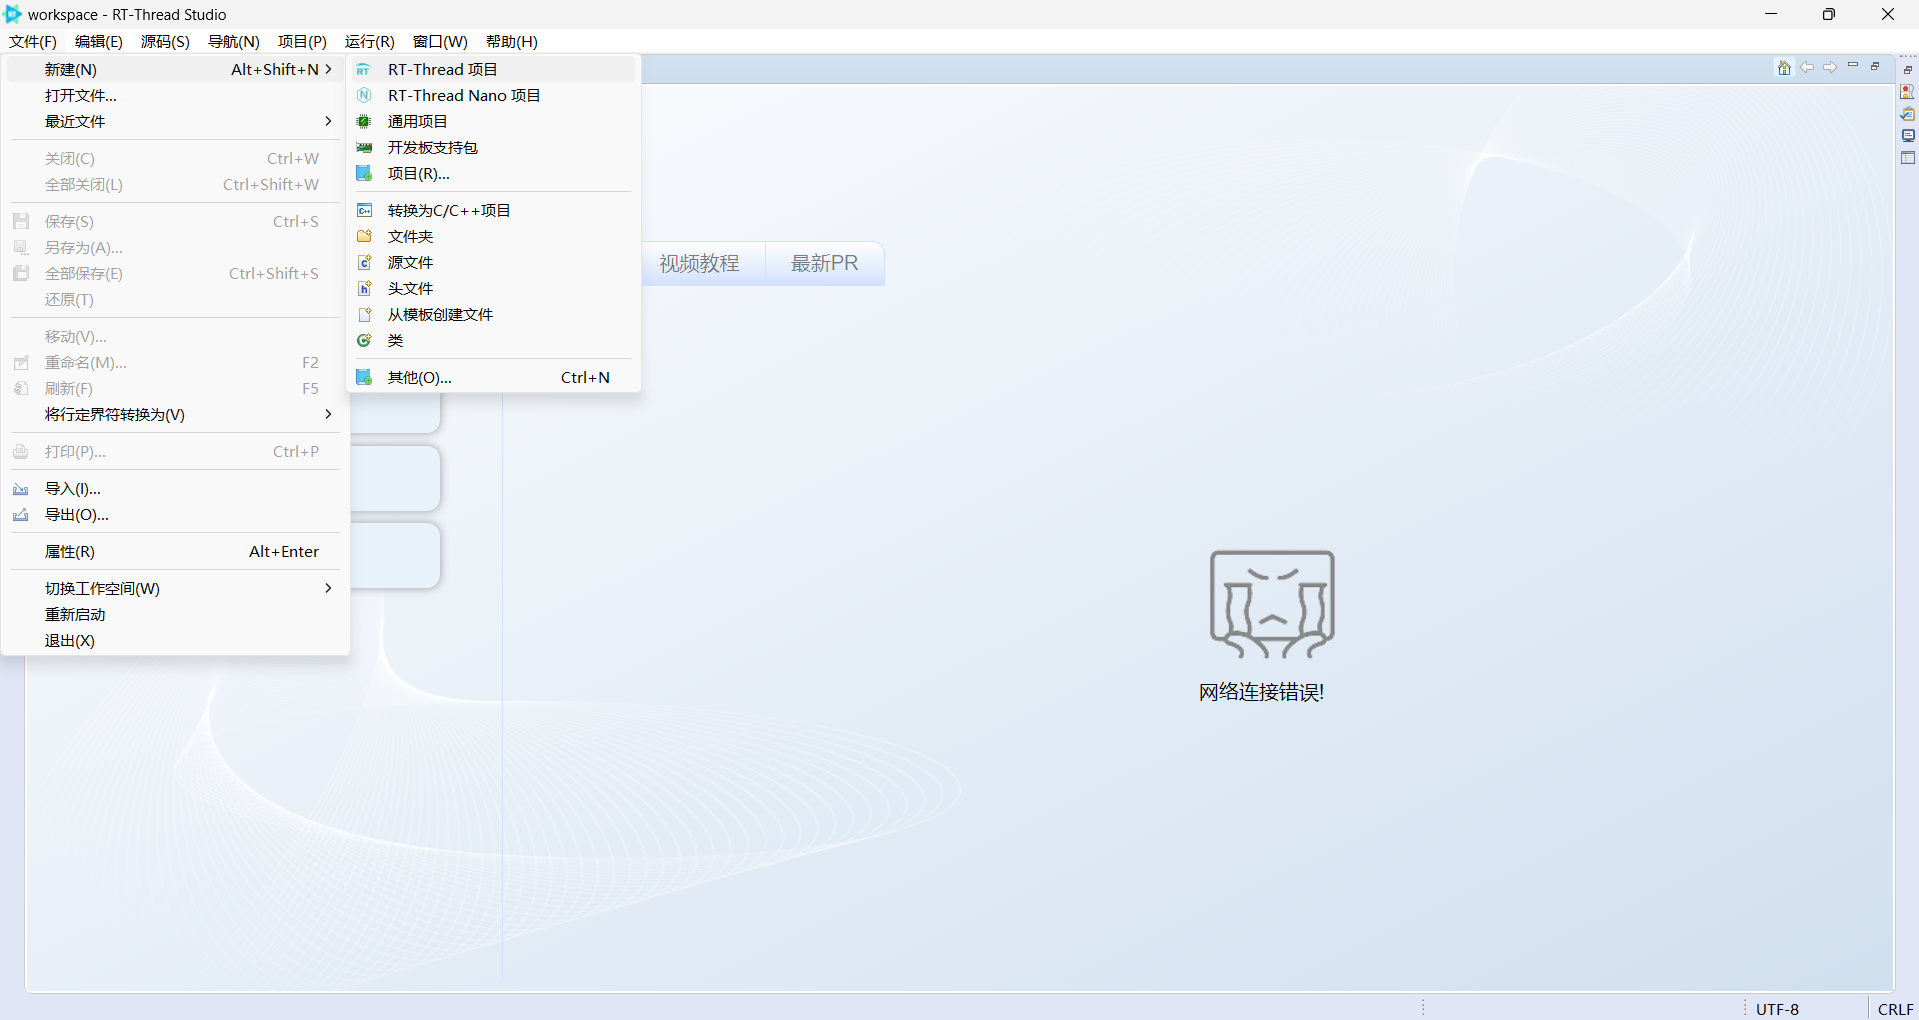
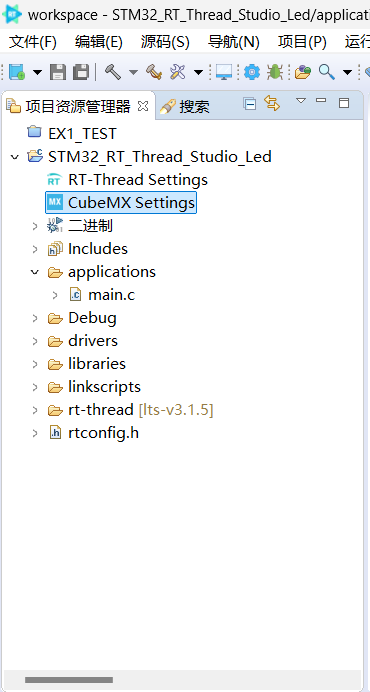
1.首先打开RT-Thread Studio点击左上角的文件选项新建一个RT-Thread项目
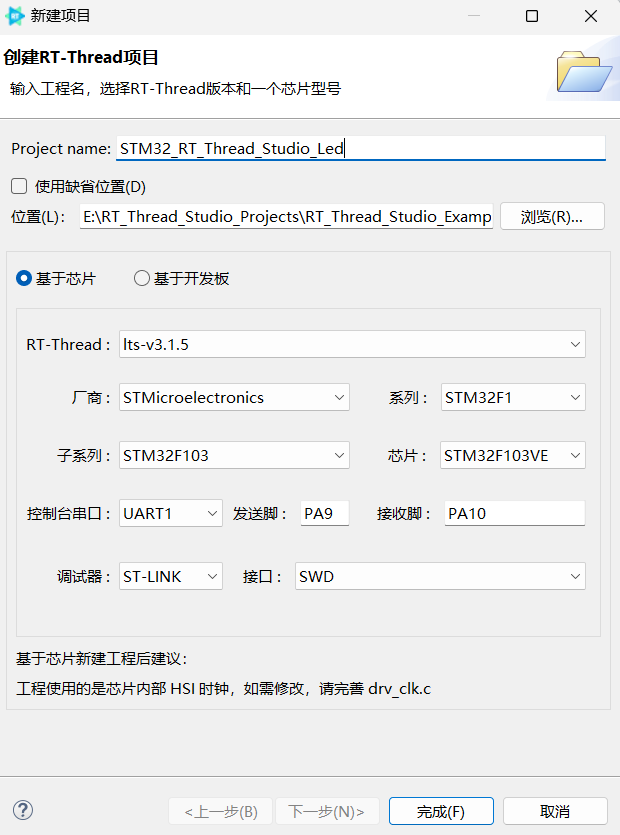
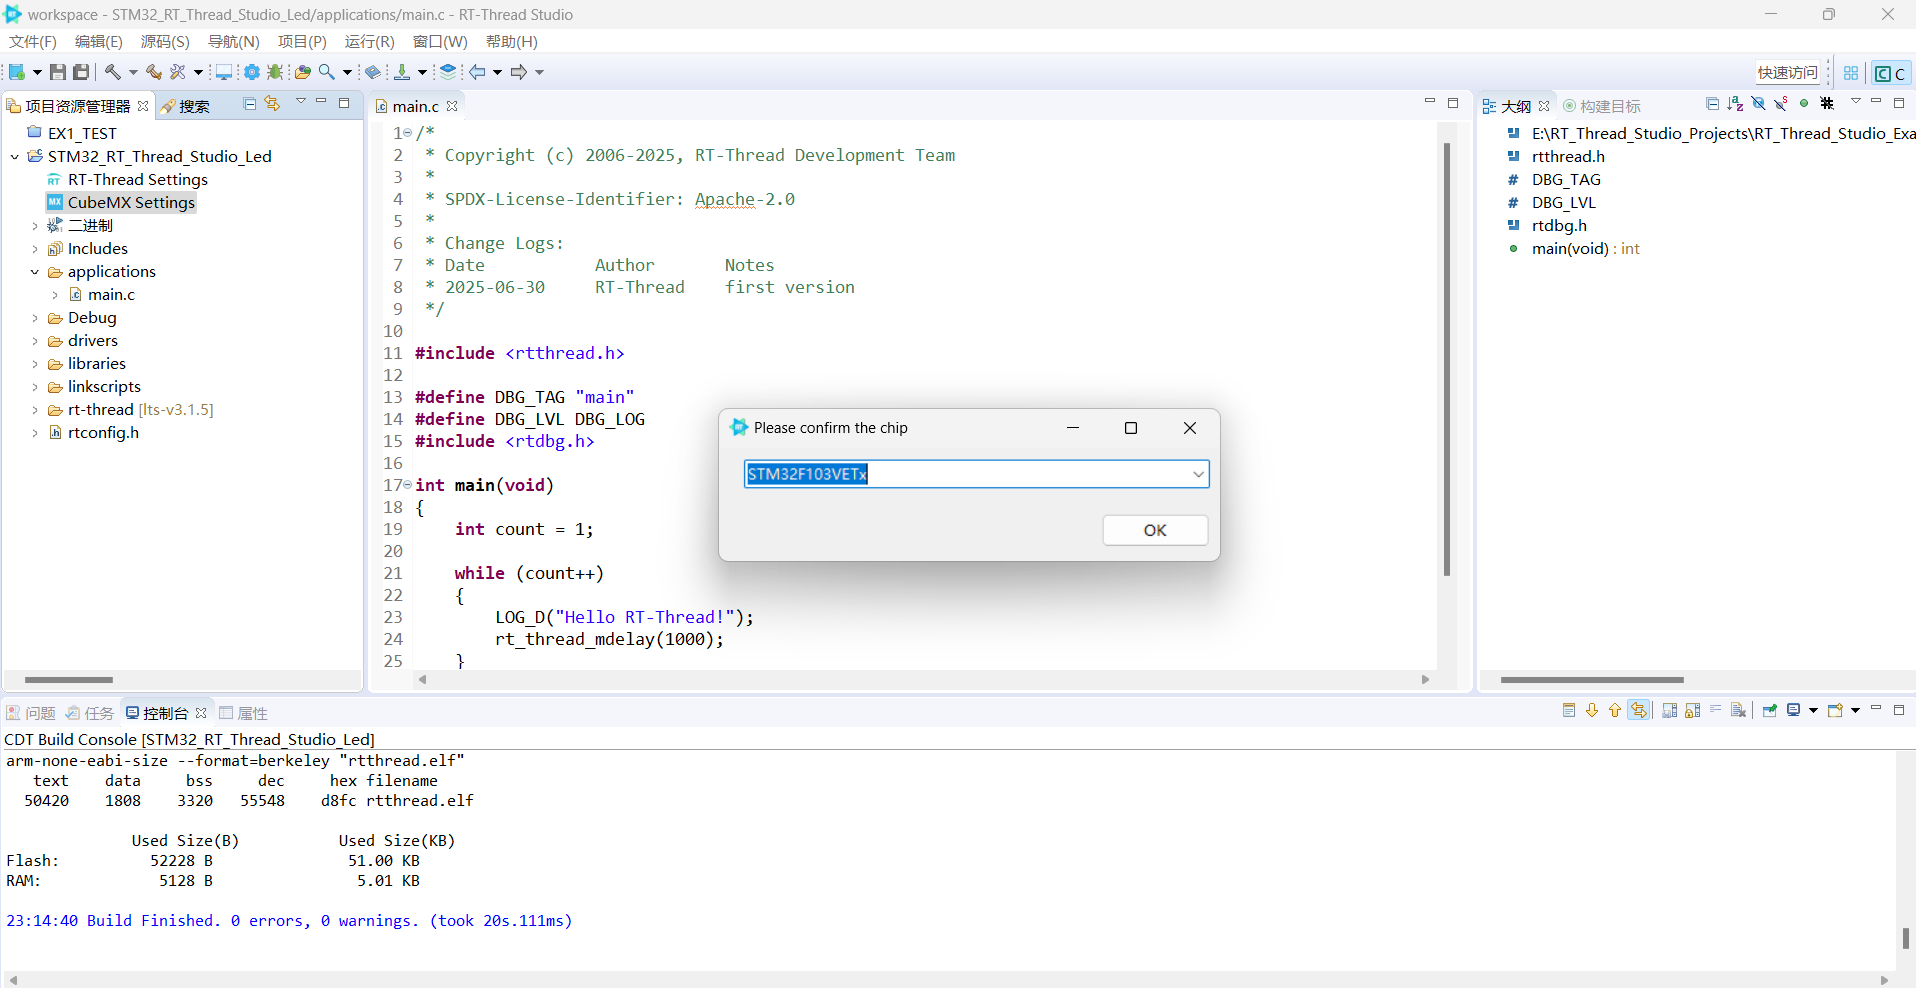
2. 对应自己的实际硬件配置
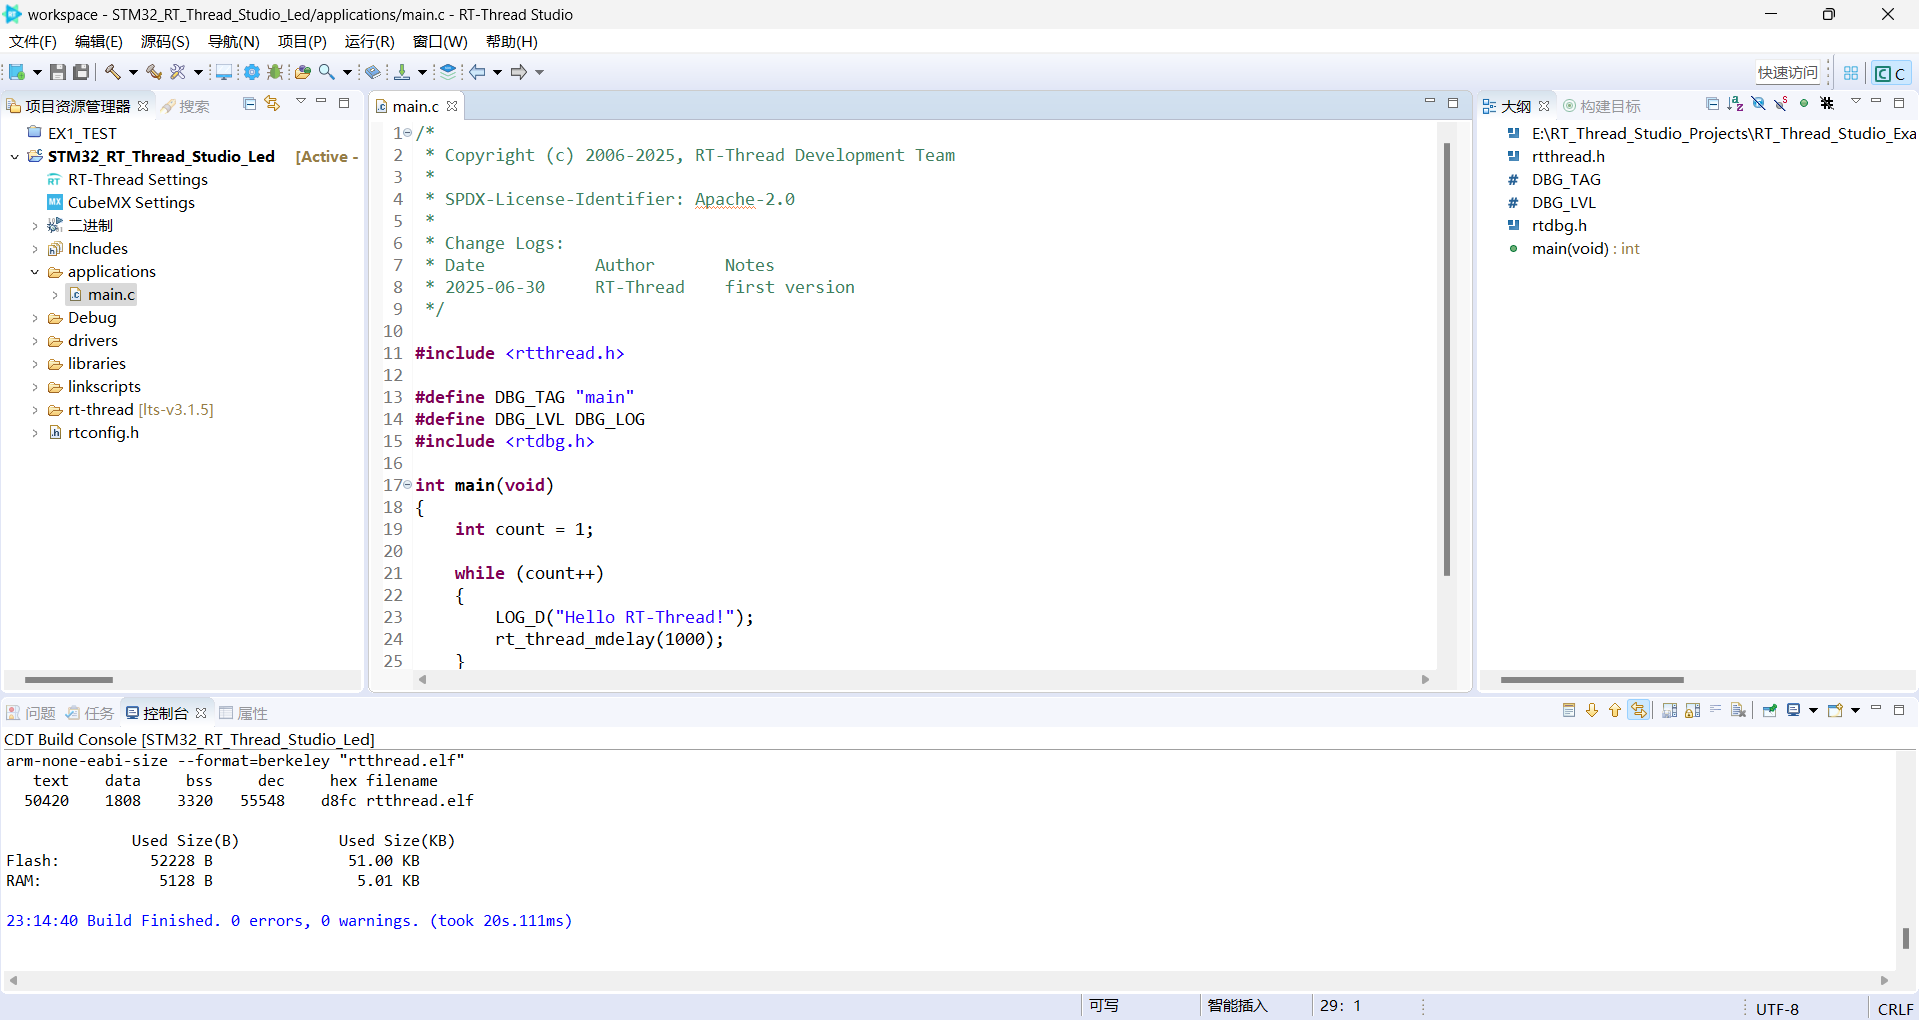
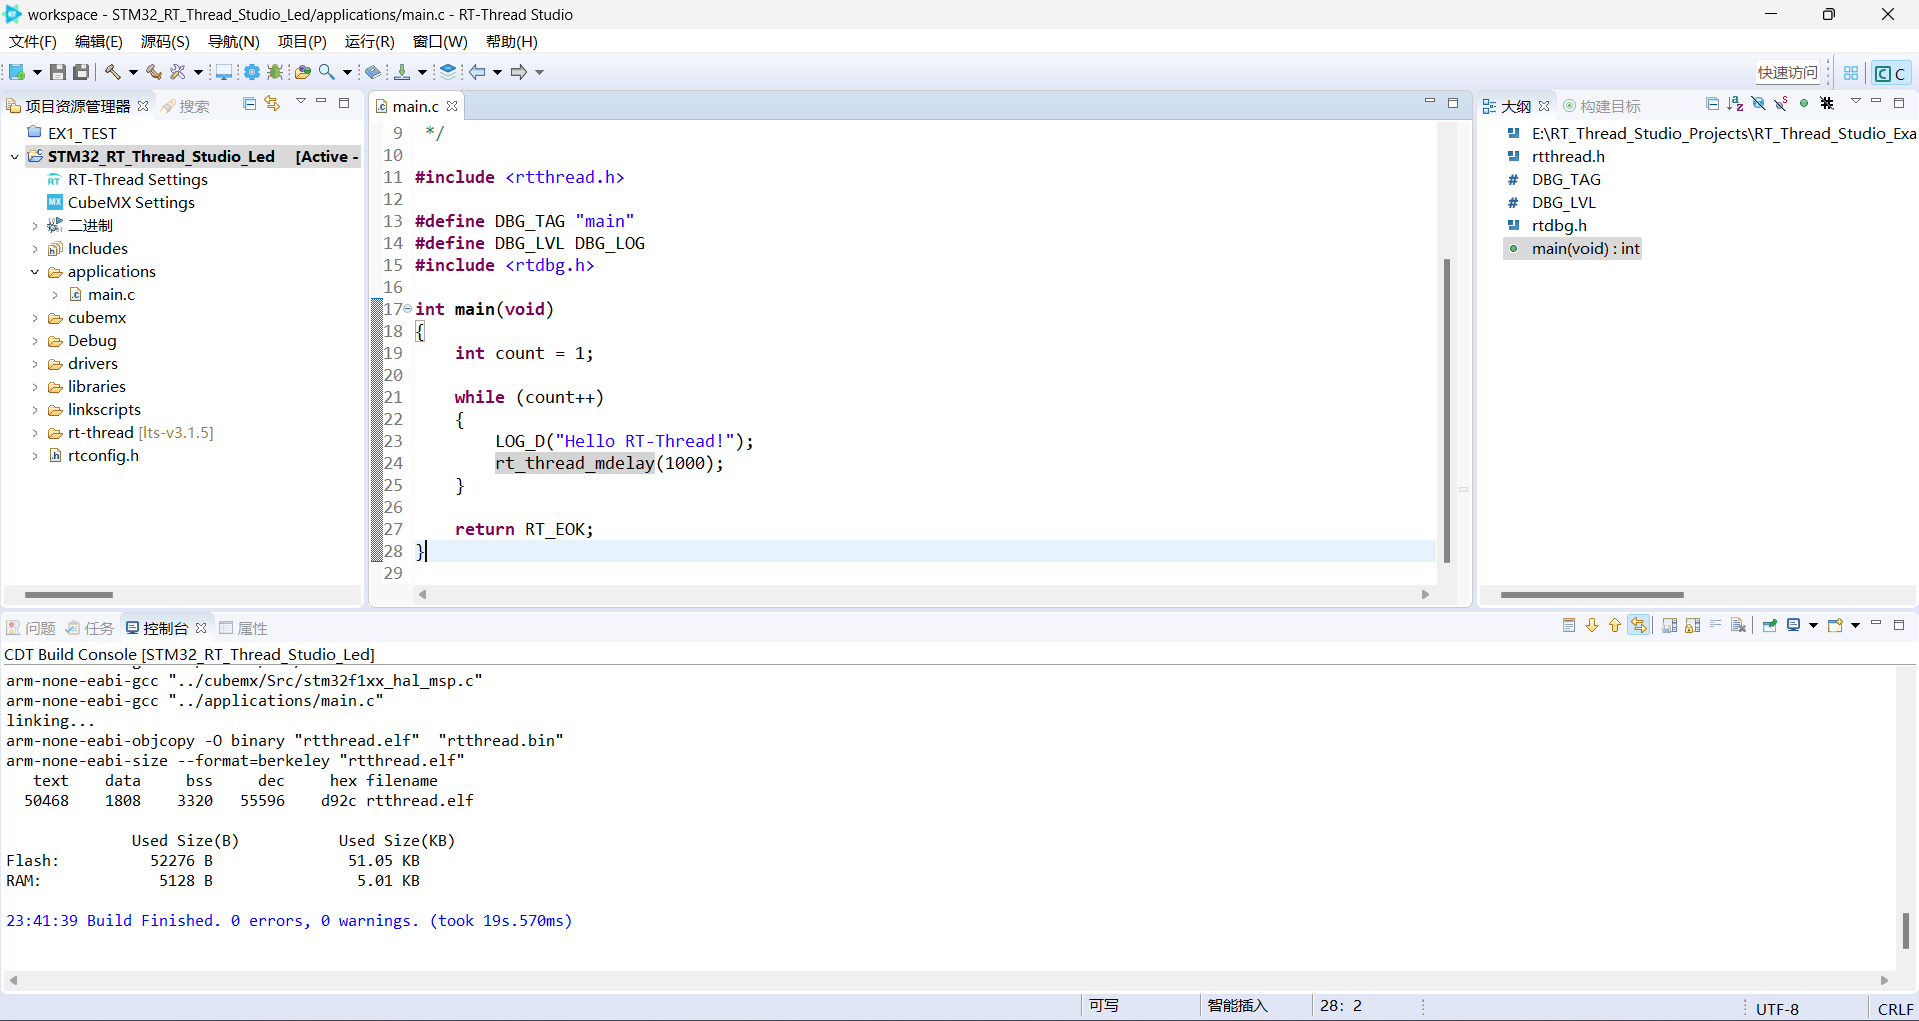
3.生成后编译一下
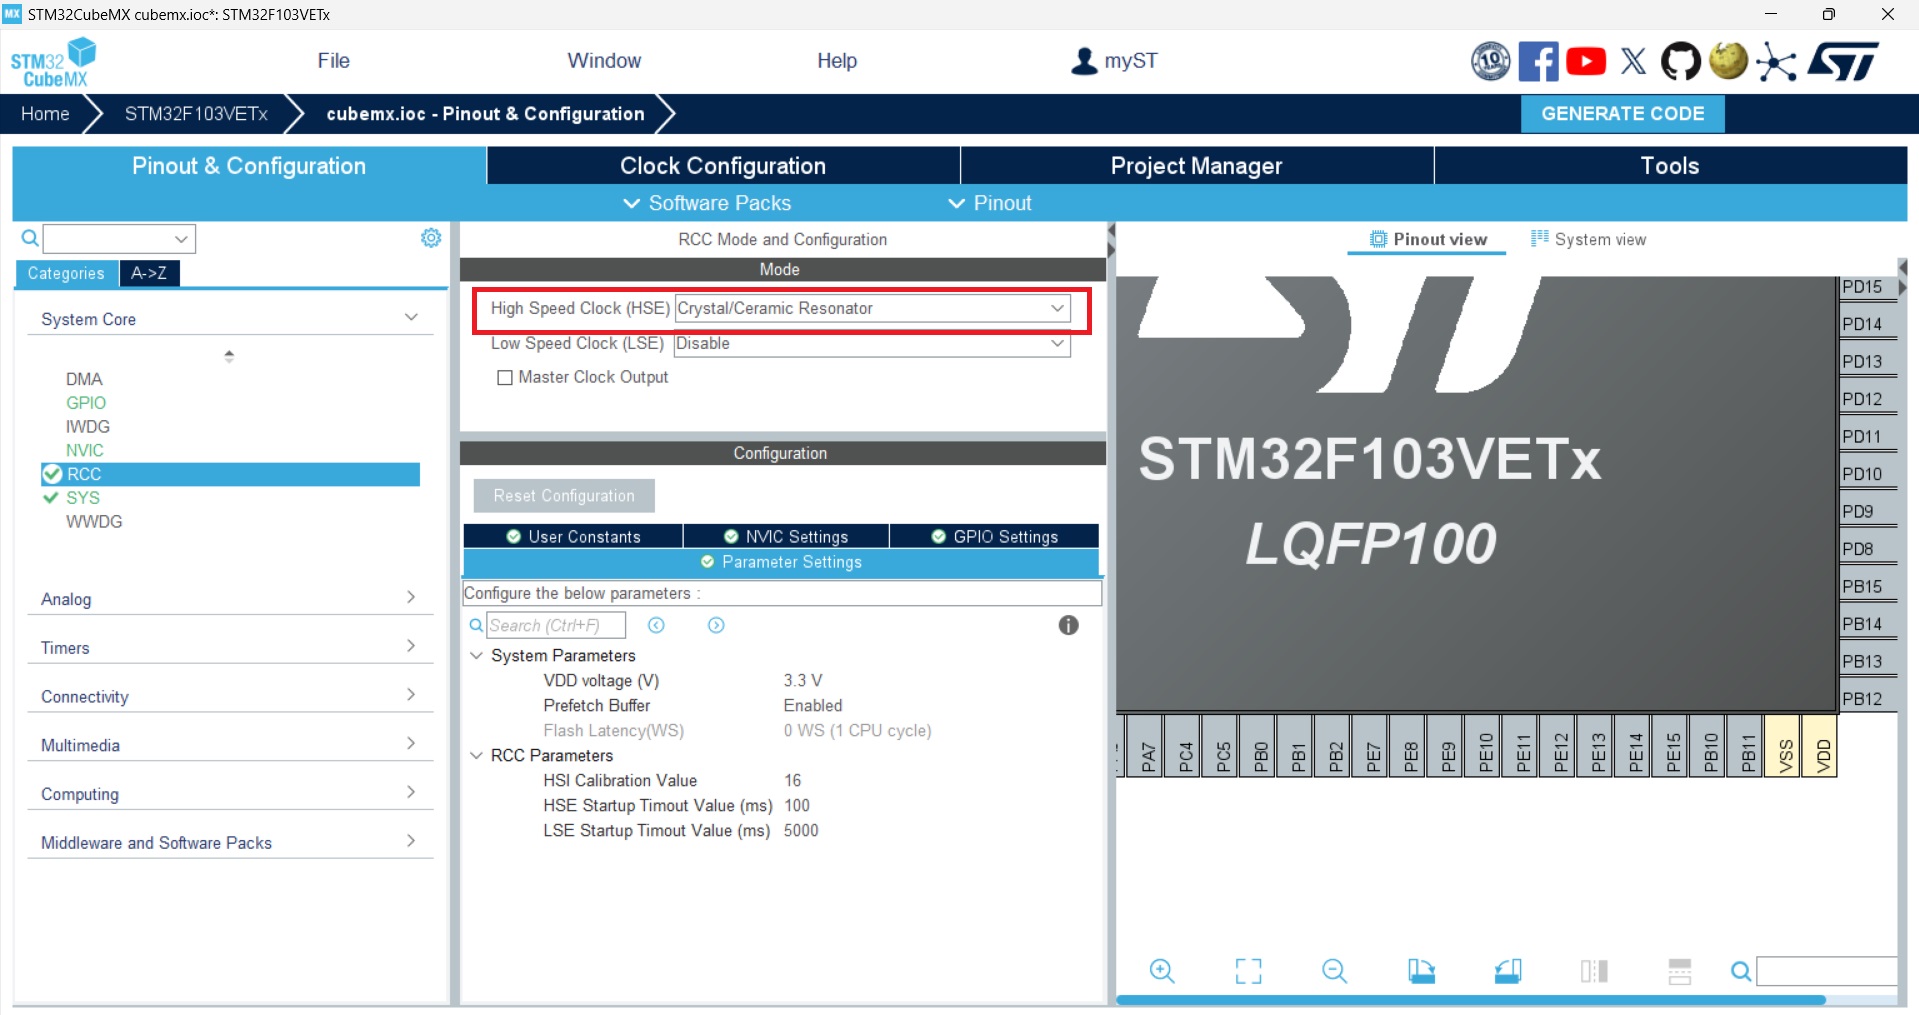
4.然后开始进行实现3个Led灯光闪烁任务,打开资源管理器的CubeMX进行我们想要的配置
5.开启外部高速时钟
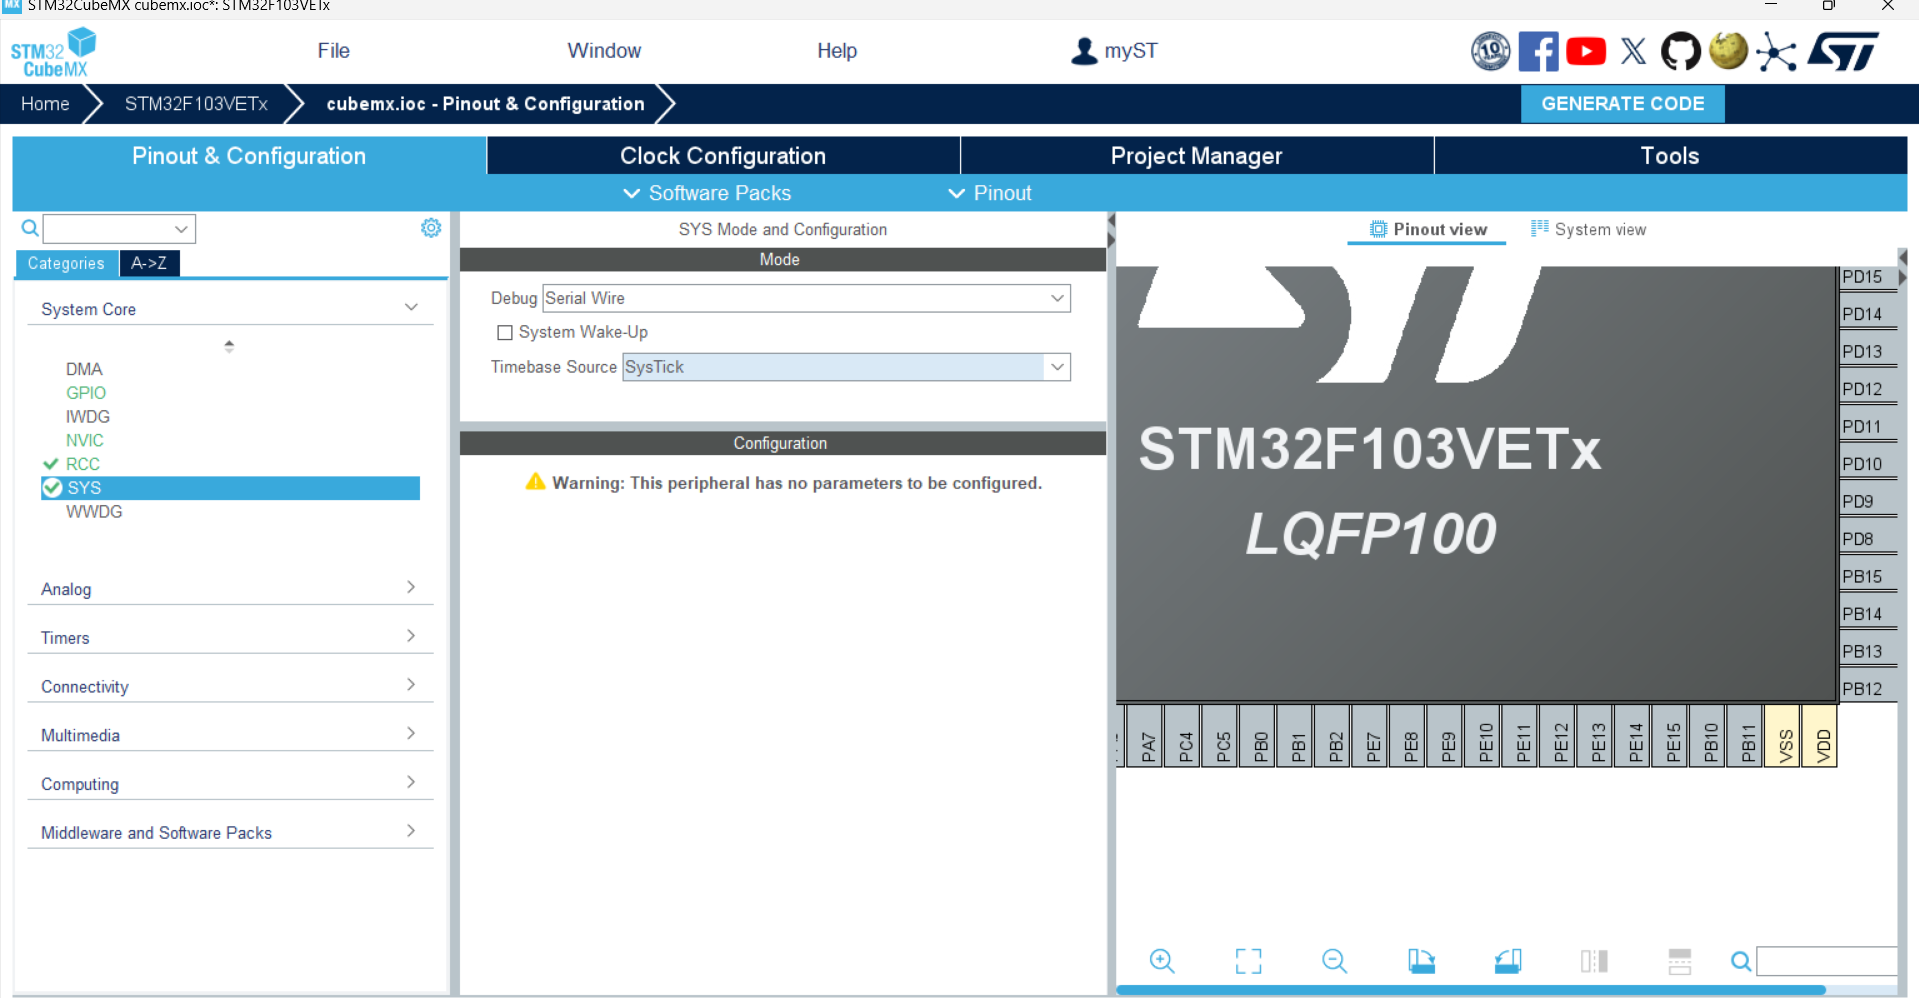
6.开启SWD
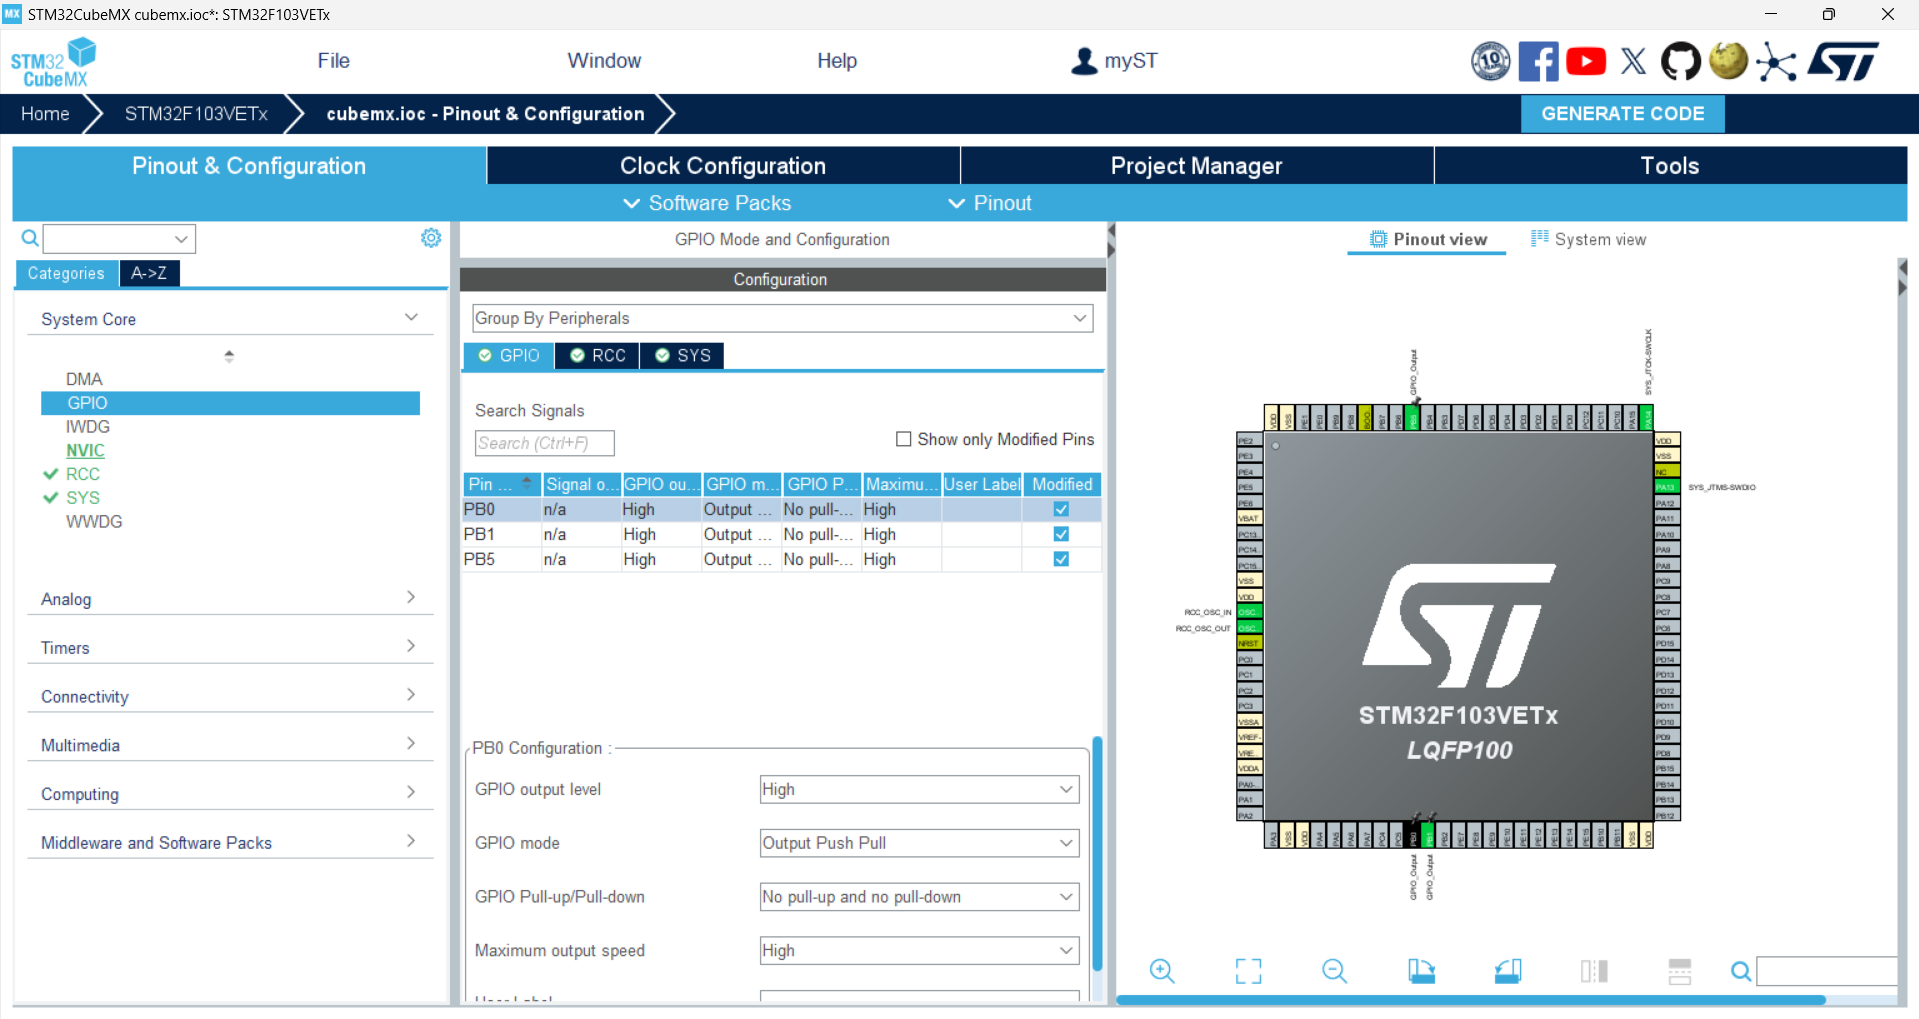
7.开启PB0、PB1、PB5三个GPIO设置为输出高电平,使其熄灭灯光
8.开启串口1,因为之前工程创建时选择了串口1后是RT-Thread帮助初始化的,但是现在会用到CubeMX生成配置,之前的会被弱化并以CubeMX的串口1配置为准
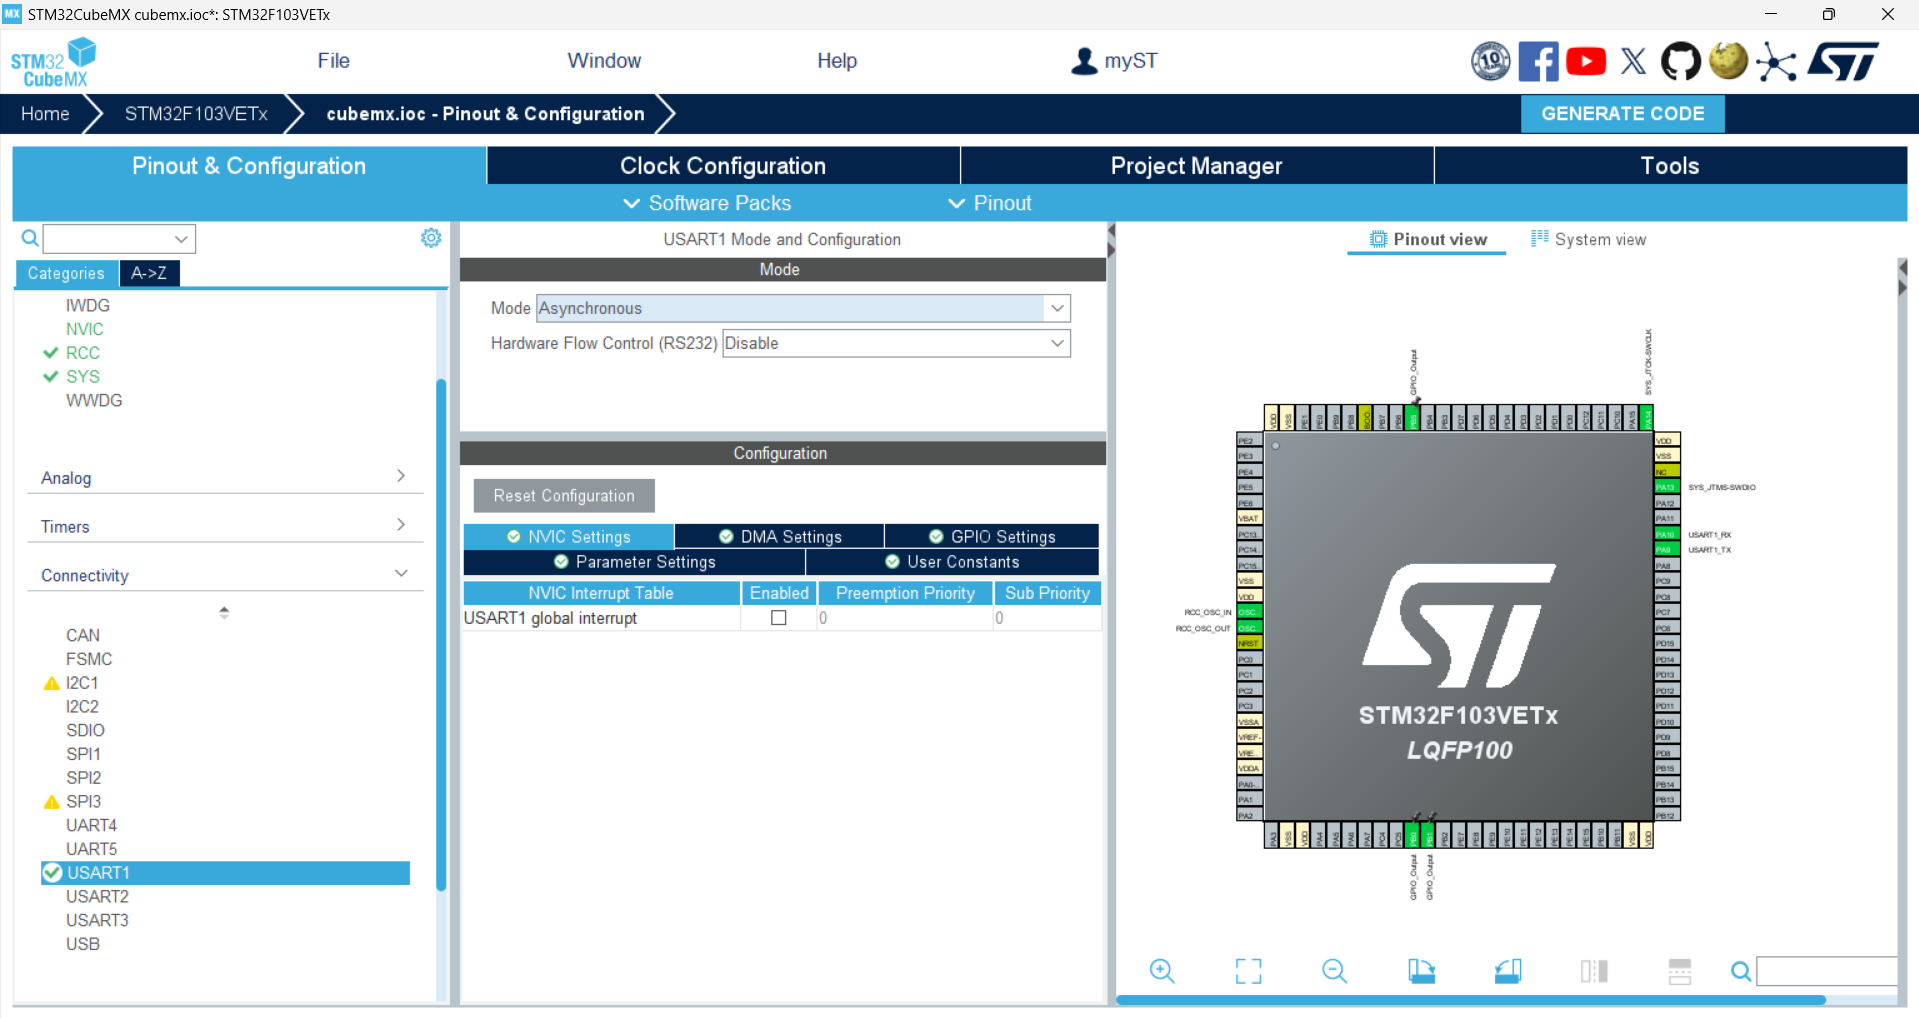
如果没有开启CubeMX的串口1,就会报错
//串口报错
../drivers/drv_usart.c:94:5: error: unknown type name 'UART_HandleTypeDef'
UART_HandleTypeDef handle;
^
../drivers/drv_usart.c: In function 'stm32_configure':
../drivers/drv_usart.c:502:17: error: request for member 'Instance' in something not a structure or union
uart->handle.Instance = uart->config->Instance;
^
../drivers/drv_usart.c:503:17: error: request for member 'Init' in something not a structure or union
uart->handle.Init.BaudRate = cfg->baud_rate;
^
../drivers/drv_usart.c:504:17: error: request for member 'Init' in something not a structure or union
uart->handle.Init.HwFlowCtl = UART_HWCONTROL_NONE;
^
../drivers/drv_usart.c:504:38: error: 'UART_HWCONTROL_NONE' undeclared (first use in this function)
uart->handle.Init.HwFlowCtl = UART_HWCONTROL_NONE;
^
../drivers/drv_usart.c:504:38: note: each undeclared identifier is reported only once for each function it appears in
../drivers/drv_usart.c:505:17: error: request for member 'Init' in something not a structure or union
uart->handle.Init.Mode = UART_MODE_TX_RX;
^
../drivers/drv_usart.c:505:38: error: 'UART_MODE_TX_RX' undeclared (first use in this function)
uart->handle.Init.Mode = UART_MODE_TX_RX;
^
../drivers/drv_usart.c:506:17: error: request for member 'Init' in something not a structure or union
uart->handle.Init.OverSampling = UART_OVERSAMPLING_16;
^
../drivers/drv_usart.c:506:38: error: 'UART_OVERSAMPLING_16' undeclared (first use in this function)
uart->handle.Init.OverSampling = UART_OVERSAMPLING_16;
^
../drivers/drv_usart.c:510:21: error: request for member 'Init' in something not a structure or union
uart->handle.Init.WordLength = UART_WORDLENGTH_8B;
^
../drivers/drv_usart.c:510:40: error: 'UART_WORDLENGTH_8B' undeclared (first use in this function)
uart->handle.Init.WordLength = UART_WORDLENGTH_8B;
^
../drivers/drv_usart.c:513:21: error: request for member 'Init' in something not a structure or union
uart->handle.Init.WordLength = UART_WORDLENGTH_9B;
^
../drivers/drv_usart.c:513:40: error: 'UART_WORDLENGTH_9B' undeclared (first use in this function)
uart->handle.Init.WordLength = UART_WORDLENGTH_9B;
^
../drivers/drv_usart.c:516:21: error: request for member 'Init' in something not a structure or union
uart->handle.Init.WordLength = UART_WORDLENGTH_8B;
^
../drivers/drv_usart.c:522:21: error: request for member 'Init' in something not a structure or union
uart->handle.Init.StopBits = UART_STOPBITS_1;
^
../drivers/drv_usart.c:522:40: error: 'UART_STOPBITS_1' undeclared (first use in this function)
uart->handle.Init.StopBits = UART_STOPBITS_1;
^
../drivers/drv_usart.c:525:21: error: request for member 'Init' in something not a structure or union
uart->handle.Init.StopBits = UART_STOPBITS_2;
^
../drivers/drv_usart.c:525:40: error: 'UART_STOPBITS_2' undeclared (first use in this function)
uart->handle.Init.StopBits = UART_STOPBITS_2;
^
../drivers/drv_usart.c:528:21: error: request for member 'Init' in something not a structure or union
uart->handle.Init.StopBits = UART_STOPBITS_1;
^
../drivers/drv_usart.c:534:21: error: request for member 'Init' in something not a structure or union
uart->handle.Init.Parity = UART_PARITY_NONE;
^
../drivers/drv_usart.c:534:40: error: 'UART_PARITY_NONE' undeclared (first use in this function)
uart->handle.Init.Parity = UART_PARITY_NONE;
^
../drivers/drv_usart.c:537:21: error: request for member 'Init' in something not a structure or union
uart->handle.Init.Parity = UART_PARITY_ODD;
^
../drivers/drv_usart.c:537:40: error: 'UART_PARITY_ODD' undeclared (first use in this function)
uart->handle.Init.Parity = UART_PARITY_ODD;
^
../drivers/drv_usart.c:540:21: error: request for member 'Init' in something not a structure or union
uart->handle.Init.Parity = UART_PARITY_EVEN;
^
../drivers/drv_usart.c:540:40: error: 'UART_PARITY_EVEN' undeclared (first use in this function)
uart->handle.Init.Parity = UART_PARITY_EVEN;
^
../drivers/drv_usart.c:543:21: error: request for member 'Init' in something not a structure or union
uart->handle.Init.Parity = UART_PARITY_NONE;
^
../drivers/drv_usart.c:547:9: warning: implicit declaration of function 'HAL_UART_Init' [-Wimplicit-function-declaration]
if (HAL_UART_Init(&uart->handle) != HAL_OK)
^
../drivers/drv_usart.c: In function 'stm32_control':
../drivers/drv_usart.c:572:9: warning: implicit declaration of function '__HAL_UART_DISABLE_IT' [-Wimplicit-function-declaration]
__HAL_UART_DISABLE_IT(&(uart->handle), UART_IT_RXNE);
^
../drivers/drv_usart.c:572:48: error: 'UART_IT_RXNE' undeclared (first use in this function)
__HAL_UART_DISABLE_IT(&(uart->handle), UART_IT_RXNE);
^
../drivers/drv_usart.c:579:9: warning: implicit declaration of function '__HAL_UART_ENABLE_IT' [-Wimplicit-function-declaration]
__HAL_UART_ENABLE_IT(&(uart->handle), UART_IT_RXNE);
^
../drivers/drv_usart.c: In function 'stm32_putc':
../drivers/drv_usart.c:46:41: warning: implicit declaration of function '__HAL_UART_CLEAR_FLAG' [-Wimplicit-function-declaration]
#define UART_INSTANCE_CLEAR_FUNCTION __HAL_UART_CLEAR_FLAG
^
../drivers/drv_usart.c:597:5: note: in expansion of macro 'UART_INSTANCE_CLEAR_FUNCTION'
UART_INSTANCE_CLEAR_FUNCTION(&(uart->handle), UART_FLAG_TC);
^
../drivers/drv_usart.c:597:51: error: 'UART_FLAG_TC' undeclared (first use in this function)
UART_INSTANCE_CLEAR_FUNCTION(&(uart->handle), UART_FLAG_TC);
^
../drivers/drv_usart.c:603:17: error: request for member 'Instance' in something not a structure or union
uart->handle.Instance->DR = c;
^
../drivers/drv_usart.c:605:12: warning: implicit declaration of function '__HAL_UART_GET_FLAG' [-Wimplicit-function-declaration]
while (__HAL_UART_GET_FLAG(&(uart->handle), UART_FLAG_TC) == RESET);
^
../drivers/drv_usart.c: In function 'stm32_getc':
../drivers/drv_usart.c:617:46: error: 'UART_FLAG_RXNE' undeclared (first use in this function)
if (__HAL_UART_GET_FLAG(&(uart->handle), UART_FLAG_RXNE) != RESET)
^
../drivers/drv_usart.c:624:26: error: request for member 'Instance' in something not a structure or union
ch = uart->handle.Instance->DR & 0xff;
^
../drivers/drv_usart.c: In function 'stm32_dma_transmit':
../drivers/drv_usart.c:643:13: warning: implicit declaration of function 'HAL_UART_Transmit_DMA' [-Wimplicit-function-declaration]
if (HAL_UART_Transmit_DMA(&uart->handle, buf, size) == HAL_OK)
^
../drivers/drv_usart.c: In function 'uart_isr':
../drivers/drv_usart.c:681:47: error: 'UART_FLAG_RXNE' undeclared (first use in this function)
if ((__HAL_UART_GET_FLAG(&(uart->handle), UART_FLAG_RXNE) != RESET) &&
^
../drivers/drv_usart.c:682:14: warning: implicit declaration of function '__HAL_UART_GET_IT_SOURCE' [-Wimplicit-function-declaration]
(__HAL_UART_GET_IT_SOURCE(&(uart->handle), UART_IT_RXNE) != RESET))
^
../drivers/drv_usart.c:682:56: error: 'UART_IT_RXNE' undeclared (first use in this function)
(__HAL_UART_GET_IT_SOURCE(&(uart->handle), UART_IT_RXNE) != RESET))
^
../drivers/drv_usart.c:716:50: error: 'UART_FLAG_ORE' undeclared (first use in this function)
if (__HAL_UART_GET_FLAG(&(uart->handle), UART_FLAG_ORE) != RESET)
^
../drivers/drv_usart.c:718:13: warning: implicit declaration of function '__HAL_UART_CLEAR_OREFLAG' [-Wimplicit-function-declaration]
__HAL_UART_CLEAR_OREFLAG(&uart->handle);
^
../drivers/drv_usart.c:720:50: error: 'UART_FLAG_NE' undeclared (first use in this function)
if (__HAL_UART_GET_FLAG(&(uart->handle), UART_FLAG_NE) != RESET)
^
../drivers/drv_usart.c:722:13: warning: implicit declaration of function '__HAL_UART_CLEAR_NEFLAG' [-Wimplicit-function-declaration]
__HAL_UART_CLEAR_NEFLAG(&uart->handle);
^
../drivers/drv_usart.c:724:50: error: 'UART_FLAG_FE' undeclared (first use in this function)
if (__HAL_UART_GET_FLAG(&(uart->handle), UART_FLAG_FE) != RESET)
^
../drivers/drv_usart.c:726:13: warning: implicit declaration of function '__HAL_UART_CLEAR_FEFLAG' [-Wimplicit-function-declaration]
__HAL_UART_CLEAR_FEFLAG(&uart->handle);
^
../drivers/drv_usart.c:728:50: error: 'UART_FLAG_PE' undeclared (first use in this function)
if (__HAL_UART_GET_FLAG(&(uart->handle), UART_FLAG_PE) != RESET)
^
../drivers/drv_usart.c:730:13: warning: implicit declaration of function '__HAL_UART_CLEAR_PEFLAG' [-Wimplicit-function-declaration]
__HAL_UART_CLEAR_PEFLAG(&uart->handle);
^
../drivers/drv_usart.c:735:50: error: 'UART_FLAG_LBD' undeclared (first use in this function)
if (__HAL_UART_GET_FLAG(&(uart->handle), UART_FLAG_LBD) != RESET)
^
../drivers/drv_usart.c:740:50: error: 'UART_FLAG_CTS' undeclared (first use in this function)
if (__HAL_UART_GET_FLAG(&(uart->handle), UART_FLAG_CTS) != RESET)
^
../drivers/drv_usart.c:744:50: error: 'UART_FLAG_TXE' undeclared (first use in this function)
if (__HAL_UART_GET_FLAG(&(uart->handle), UART_FLAG_TXE) != RESET)
^
../drivers/drv_usart.c:748:50: error: 'UART_FLAG_TC' undeclared (first use in this function)
if (__HAL_UART_GET_FLAG(&(uart->handle), UART_FLAG_TC) != RESET)
^
make: *** [drivers/subdir.mk:69: drivers/drv_usart.o] Error 1
make: *** Waiting for unfinished jobs....
"make -j20 all" terminated with exit code 2. Build might be incomplete.
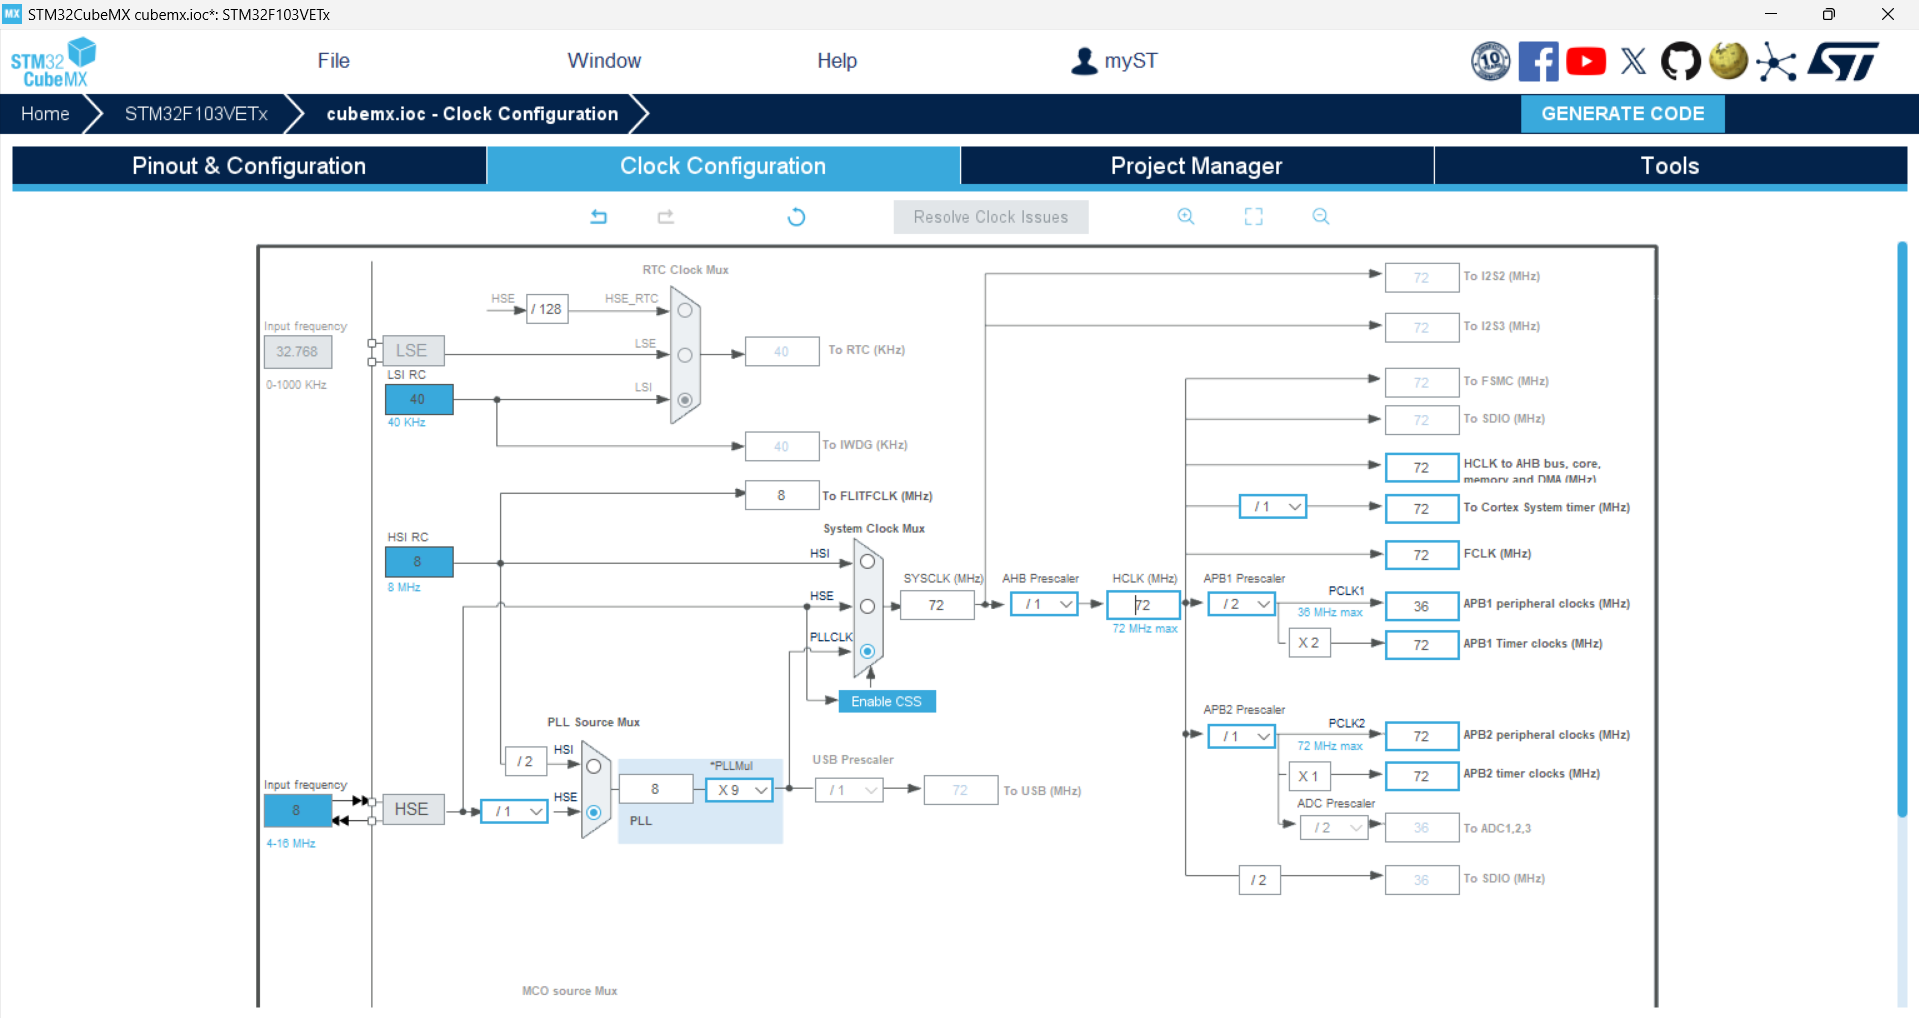
23:37:30 Build Failed. 43 errors, 11 warnings. (took 18s.401ms)9.配置时钟树
10.工程配置
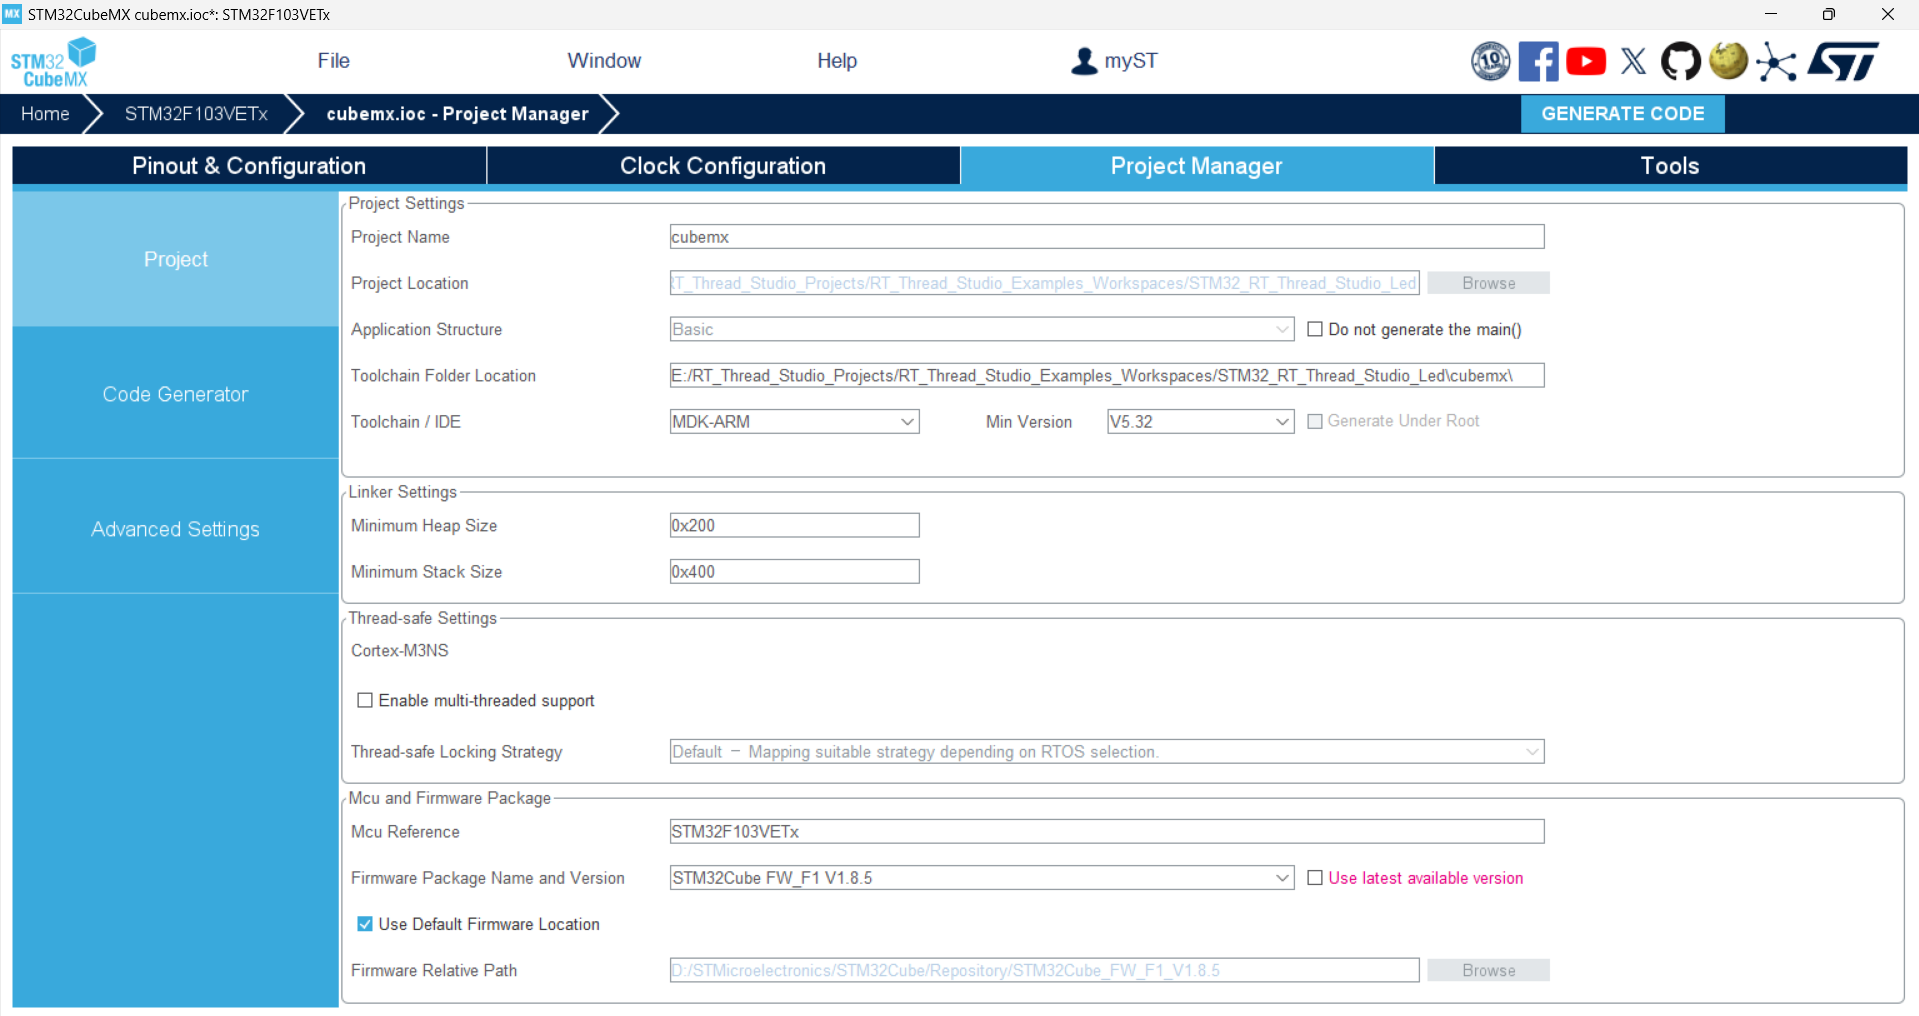
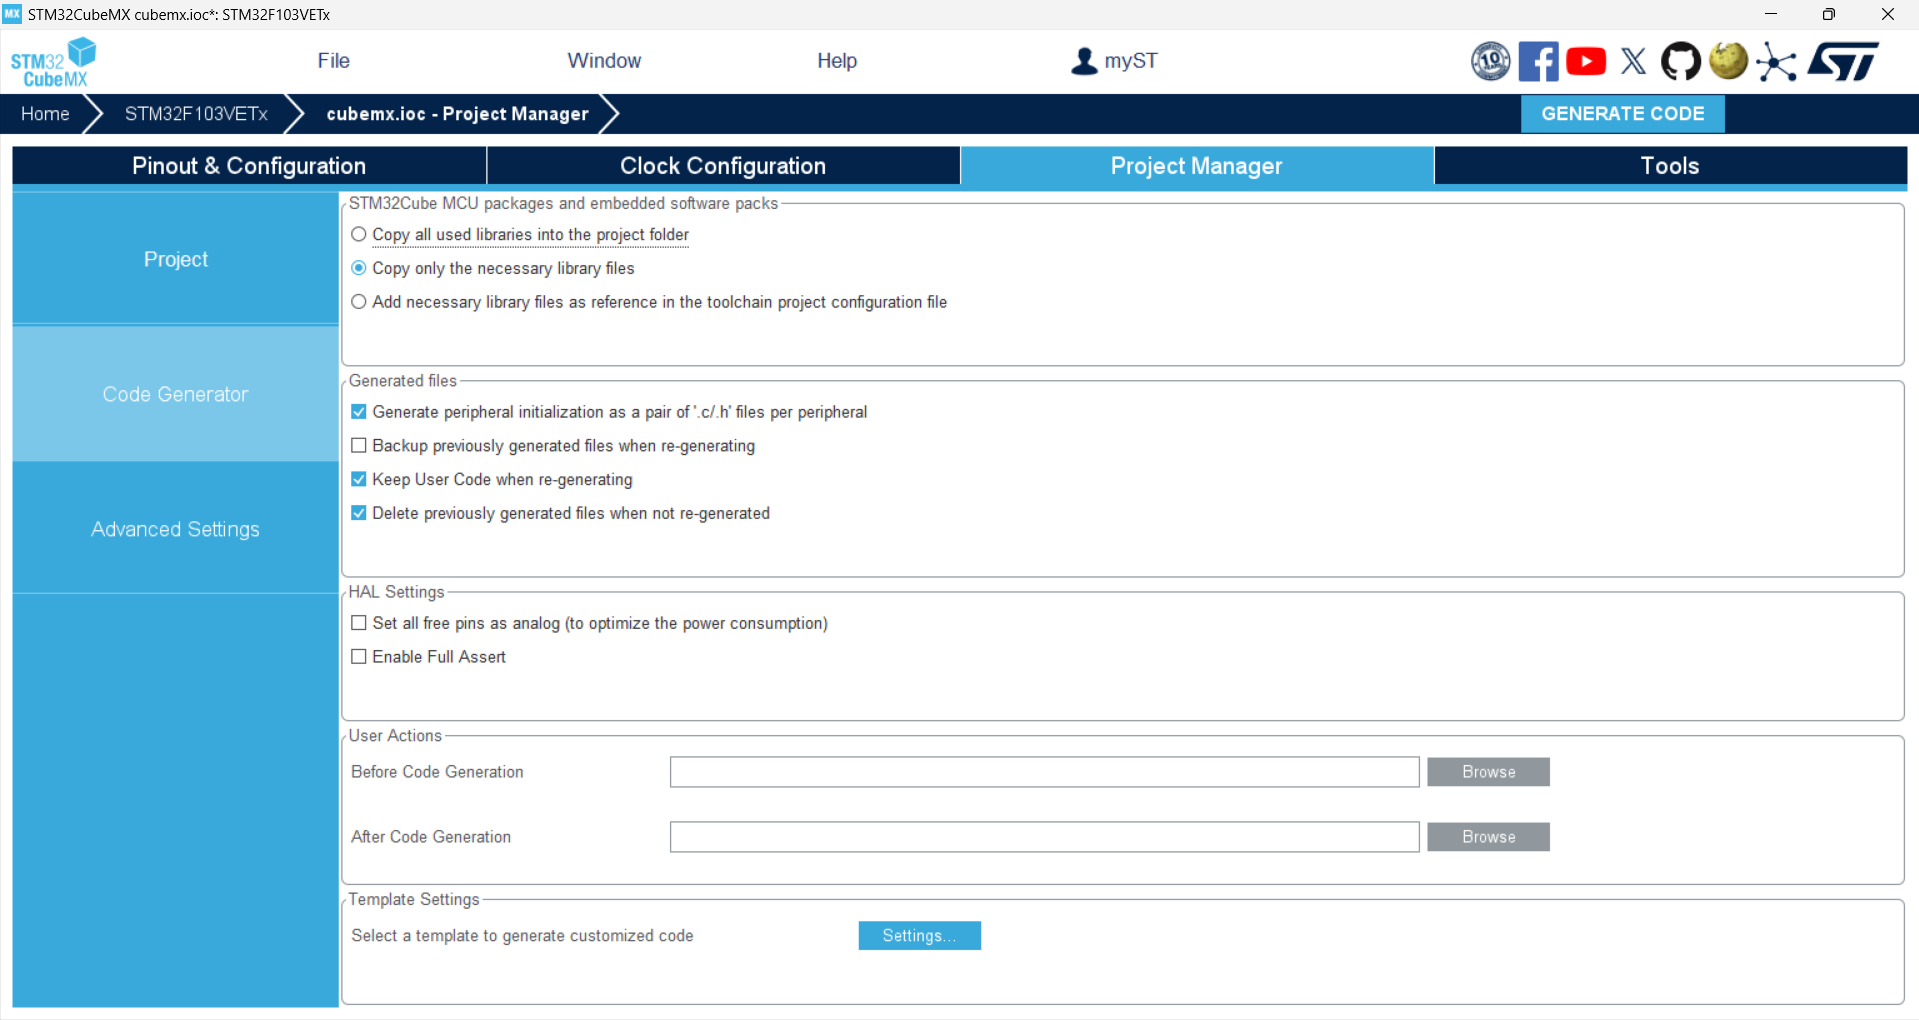
11.生成完毕就彻底关掉CubeMX才能进行其他操作,然后编译运行一下
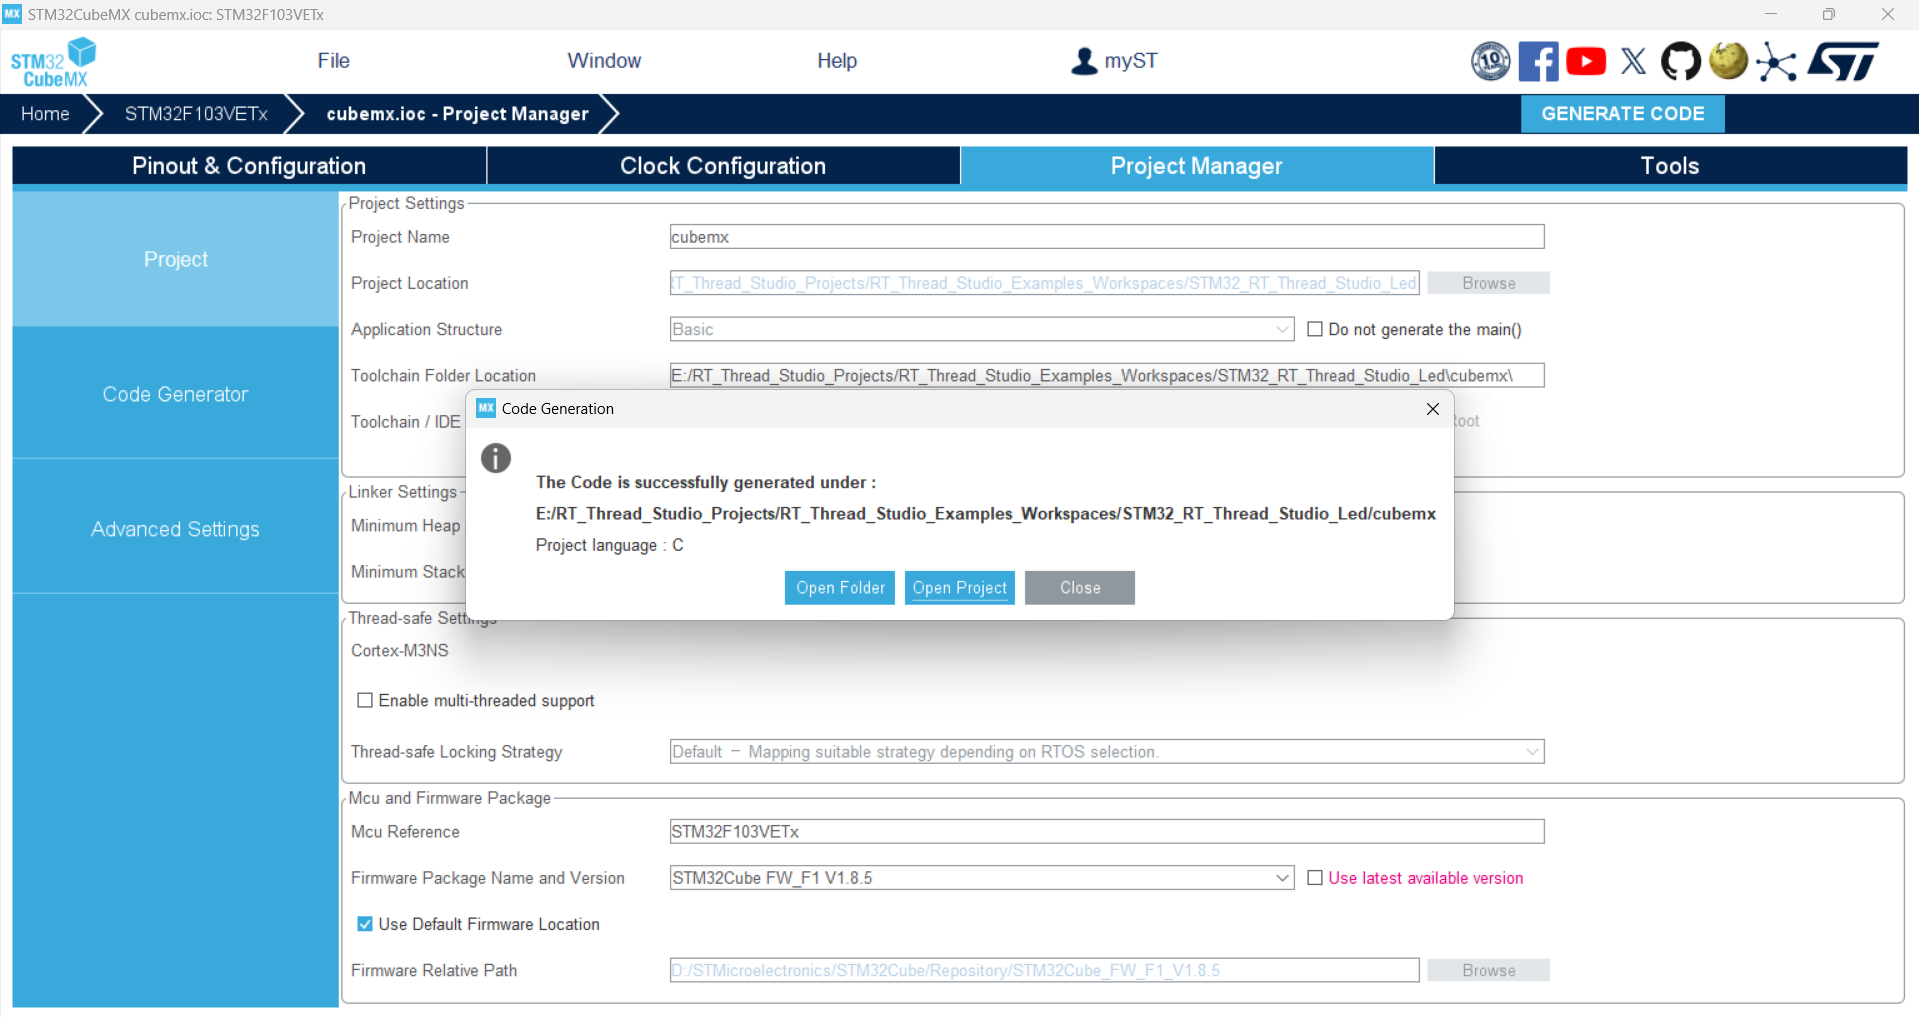
至此,工程创建与配置差不多了。
三、代码的编写
在进行代码的编写前,需提醒一下对于RT-Thread该操作系统的整个框架和运行流程要有一定的了解,如下图:
框架:

启动流程:
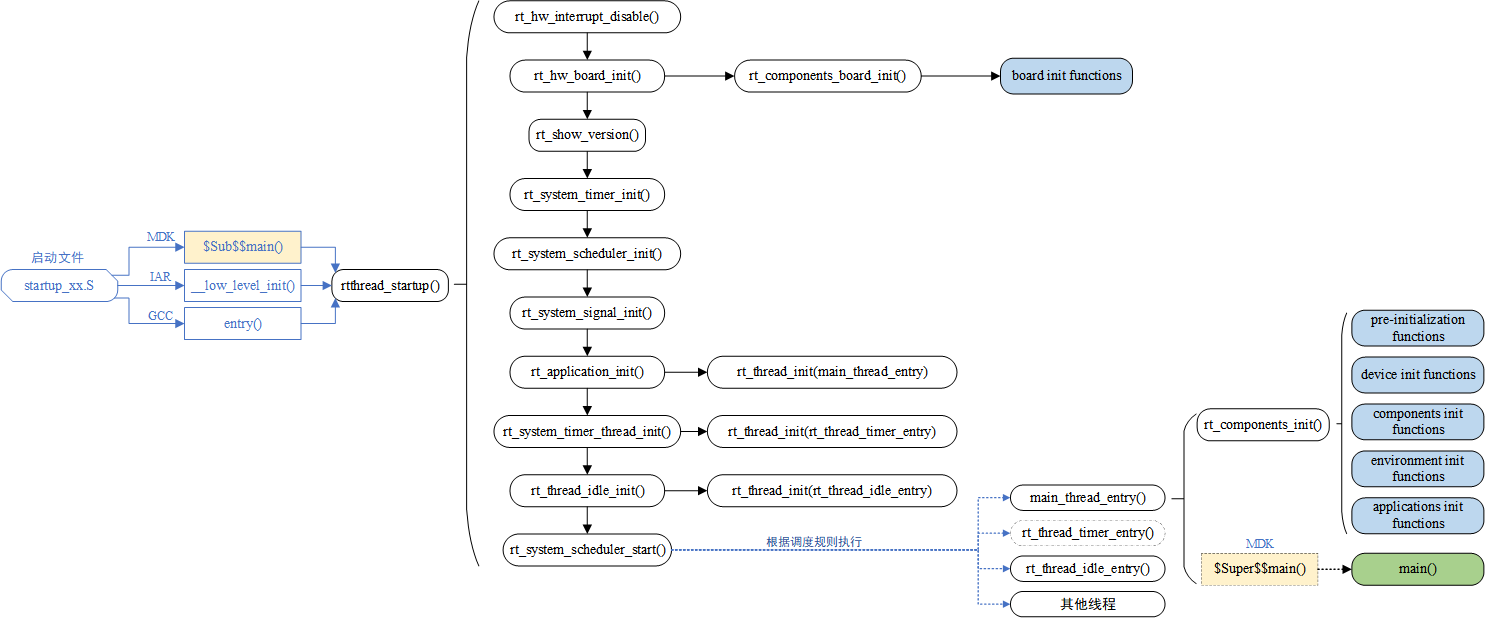
主要是启动流程,我们可以翻看工程代码与该流程是对应的。
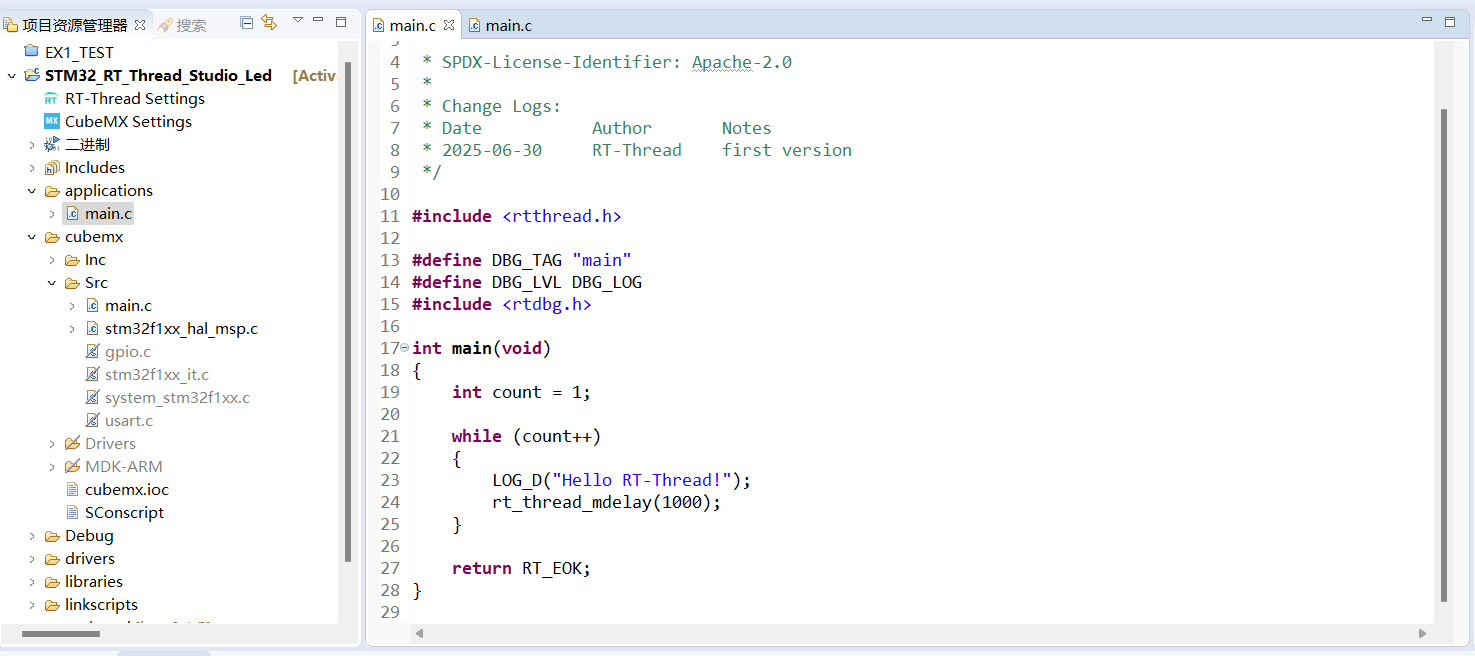
1.不用在applications下的main.c里再进行HAL_Init();
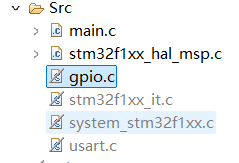
(1)首先,经常使用CubeMX的朋友来说,CubeMX的代码结构是非常熟悉的,但是,在这里有些许区别,RT-Thread Studio是将需要的CubeMX的代码配置嵌入RT-Thread当中配合使用。__WEAK将CubeMX的main函数入口弱化,以applications下的main.c为入口,同时注意到gpio.c和usart.c等几个选项是灰色的其实就是并未处于编译状态。
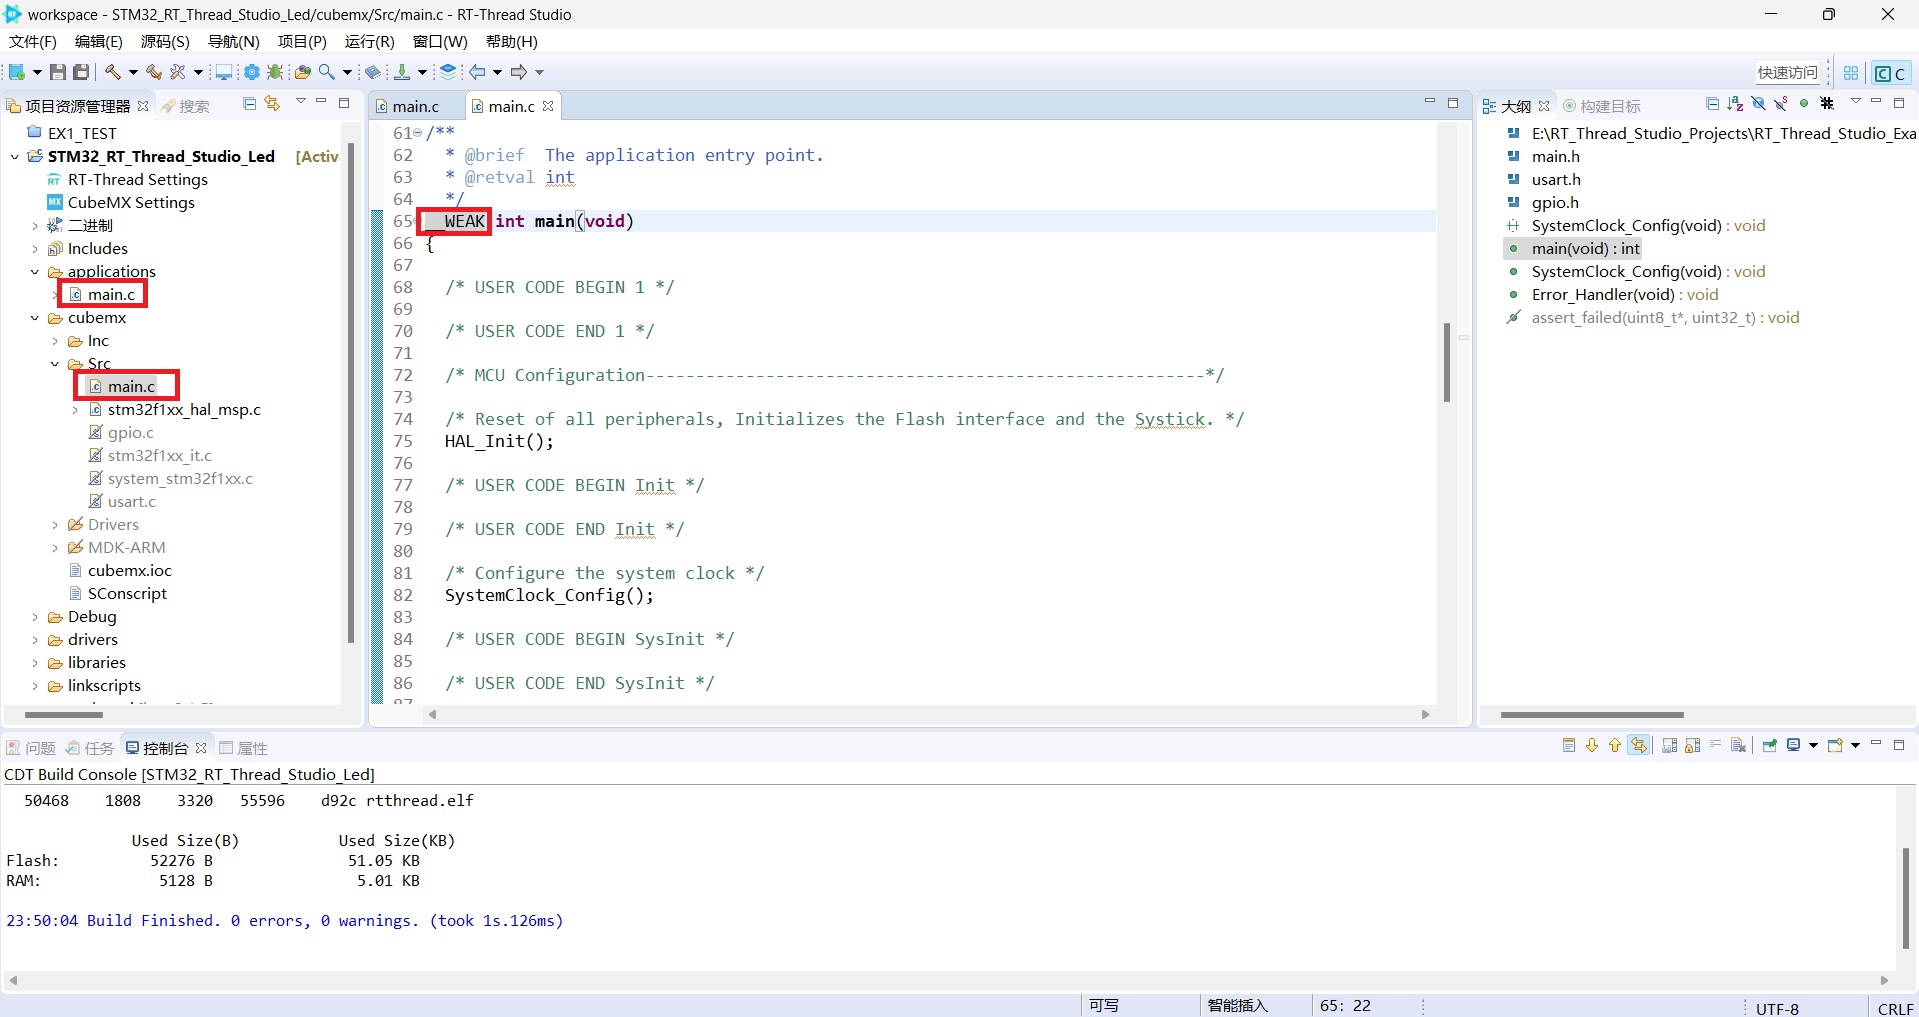
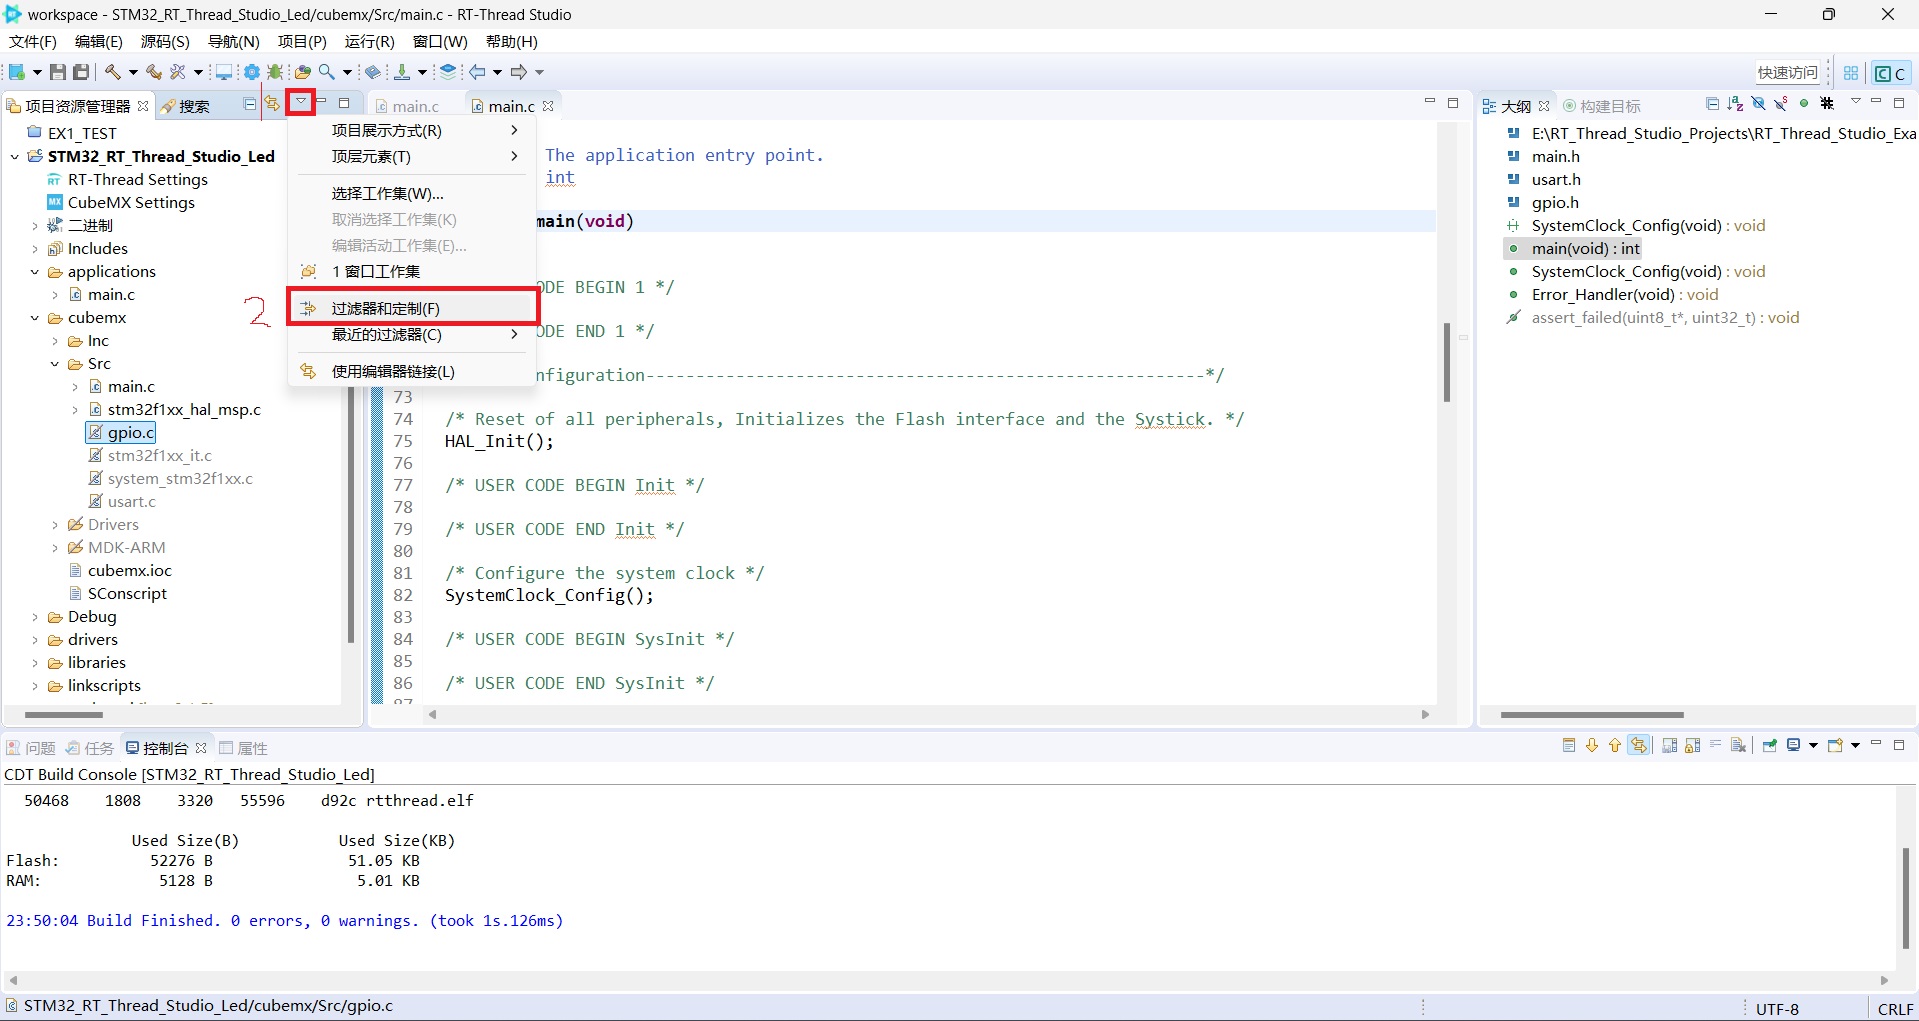
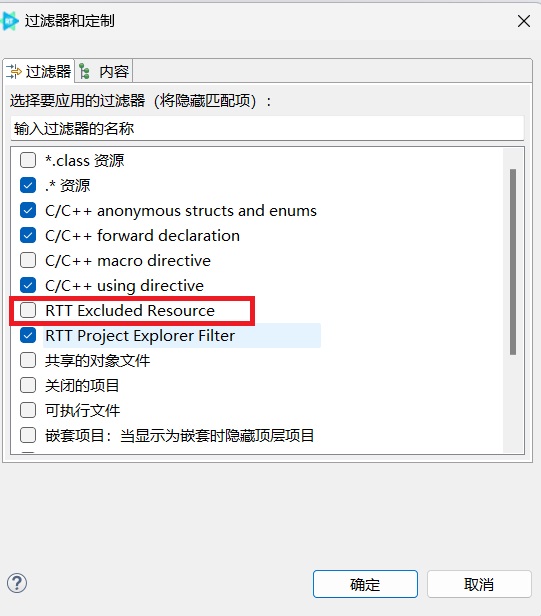
同时提一下如何显示未参与编译的文件,设置过滤器不要过滤掉排除编译的文件
(2)看似没有进行像HAL库的HAL_Init和MX_GPIO_Init操作
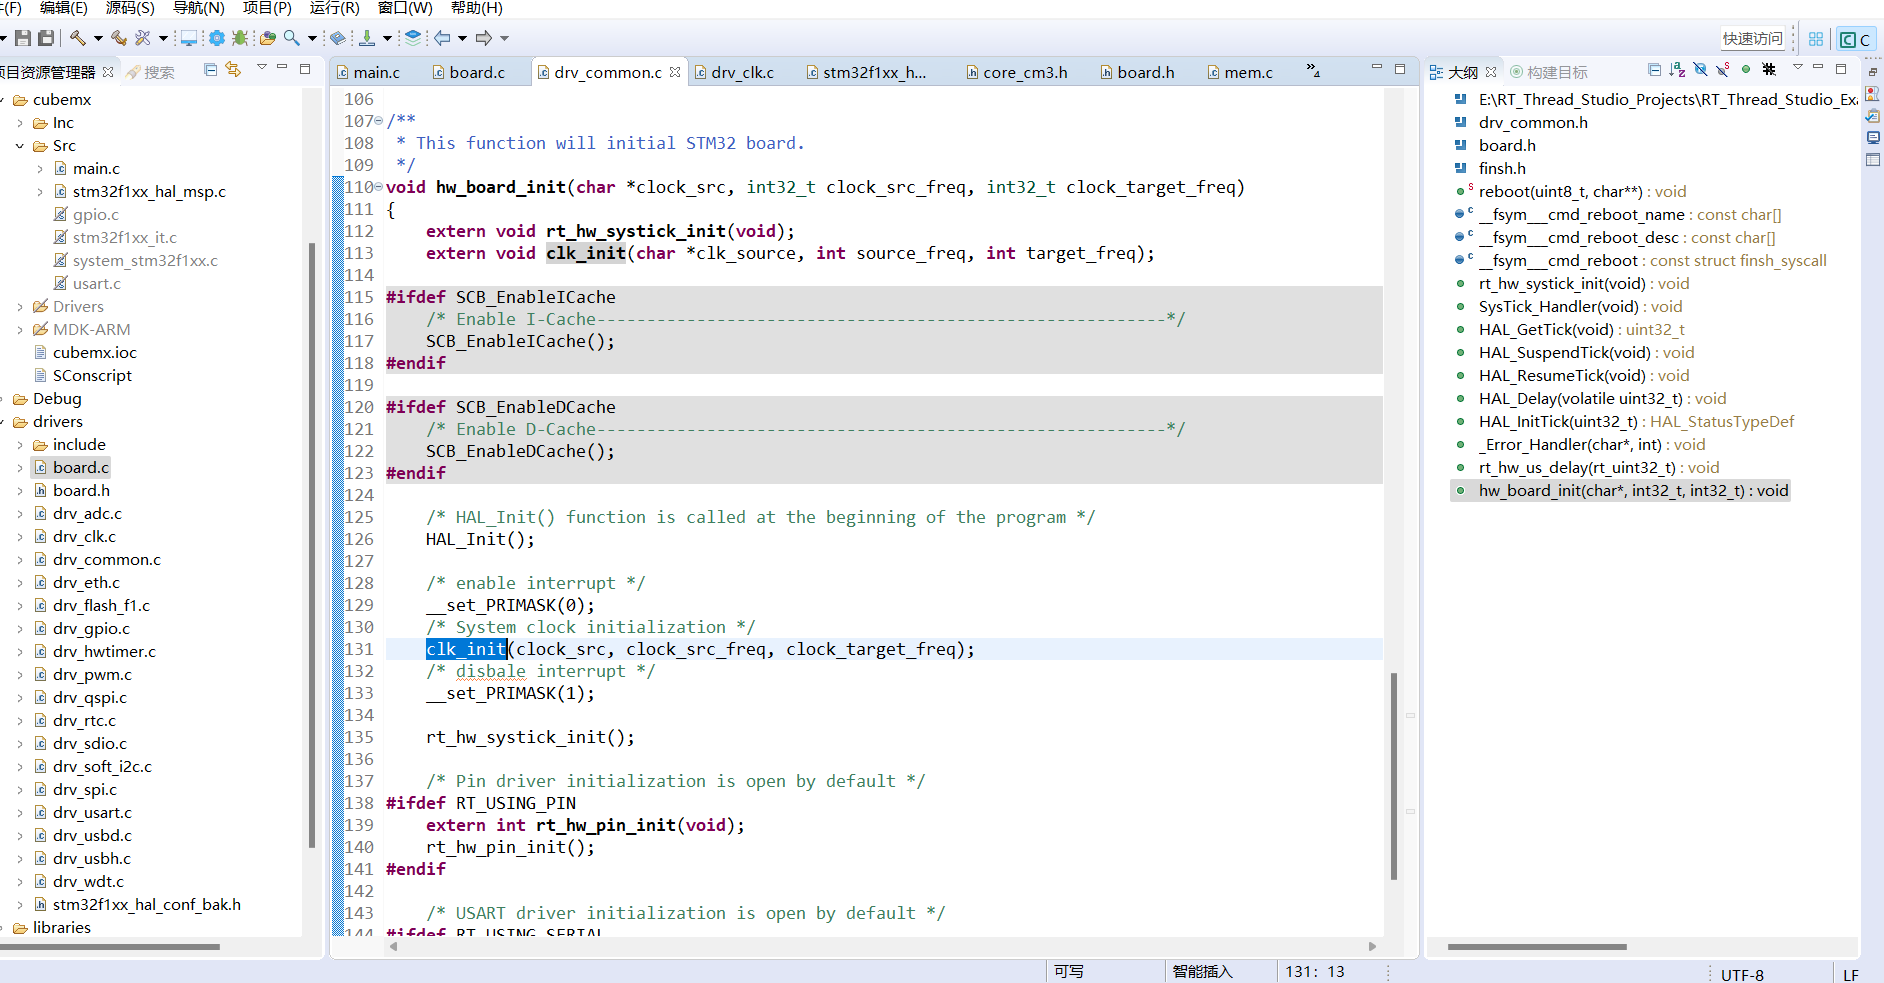
但是,到board.c下双击hw_board_init并按下F3可跳转到其定义,就会看到一些熟悉的“老朋友”了
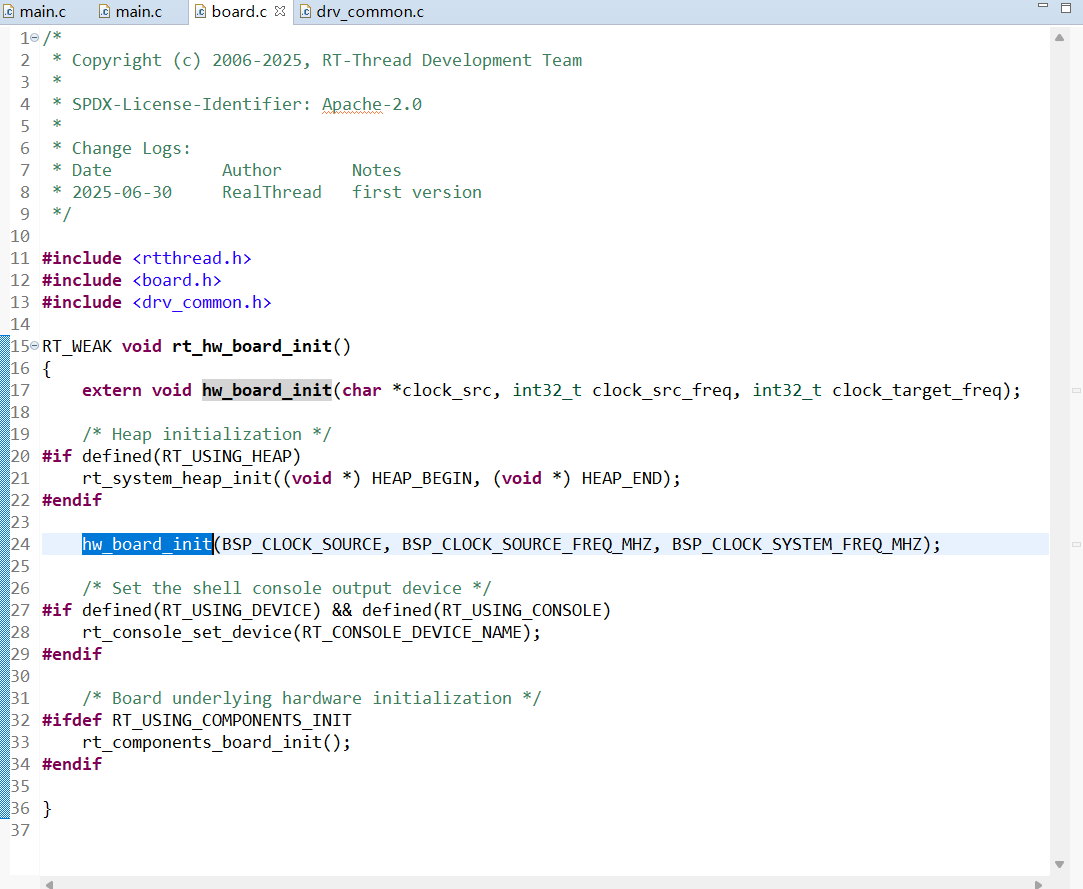
下面就是:
/* HAL_Init() function is called at the beginning of the program */
    HAL_Init();

    /* enable interrupt */
    __set_PRIMASK(0);
    /* System clock initialization */
    clk_init(clock_src, clock_src_freq, clock_target_freq);
    /* disbale interrupt */
    __set_PRIMASK(1);

    rt_hw_systick_init();

    /* Pin driver initialization is open by default */
#ifdef RT_USING_PIN
    extern int rt_hw_pin_init(void);
    rt_hw_pin_init();
#endif

    /* USART driver initialization is open by default */
#ifdef RT_USING_SERIAL
    extern int rt_hw_usart_init(void);
    rt_hw_usart_init();
#endif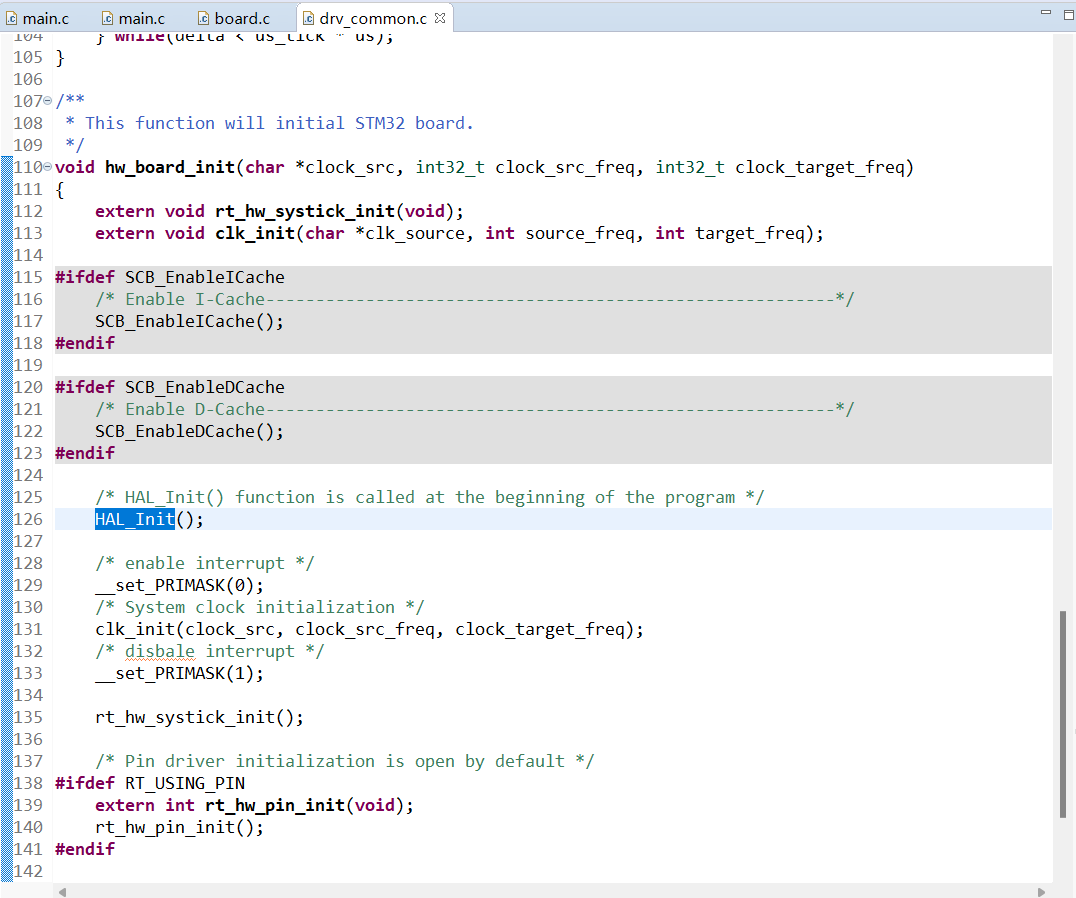
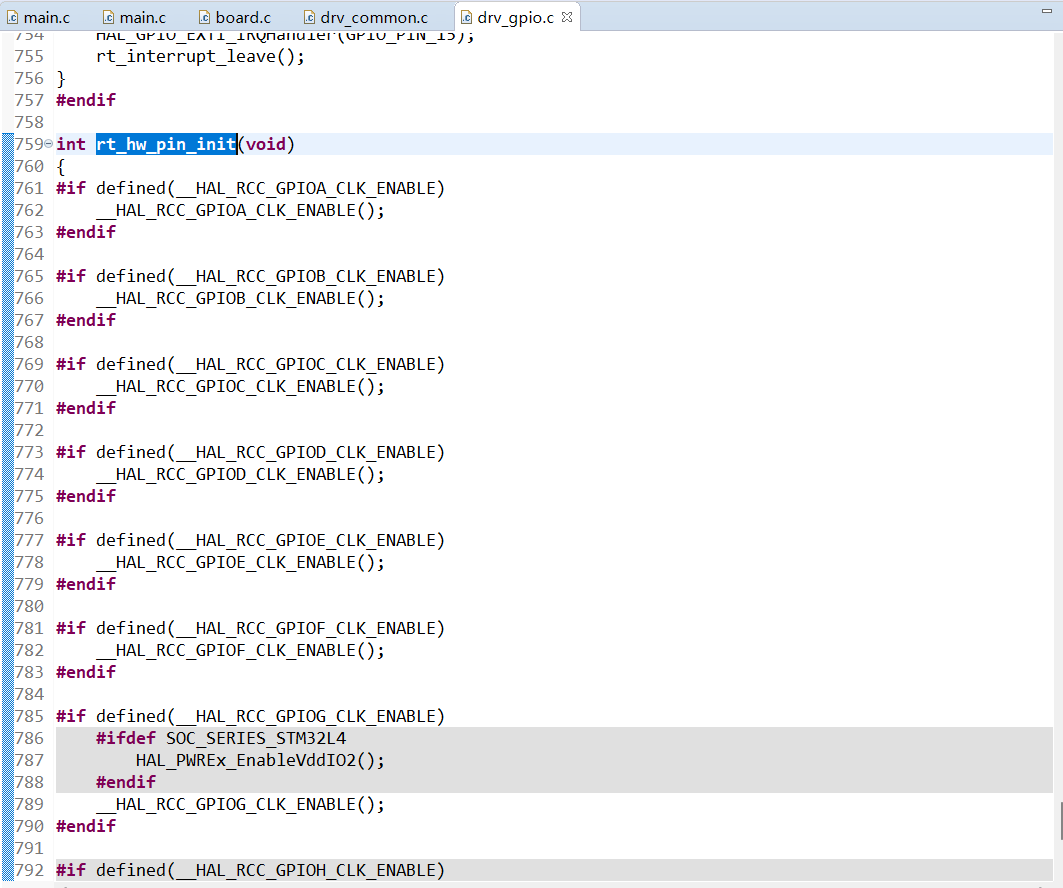
比如:GPIO通过其是否开启或存在对应宏定义,则开启对应的GPIO时钟,但GPIO的详细配置仍需自己配置
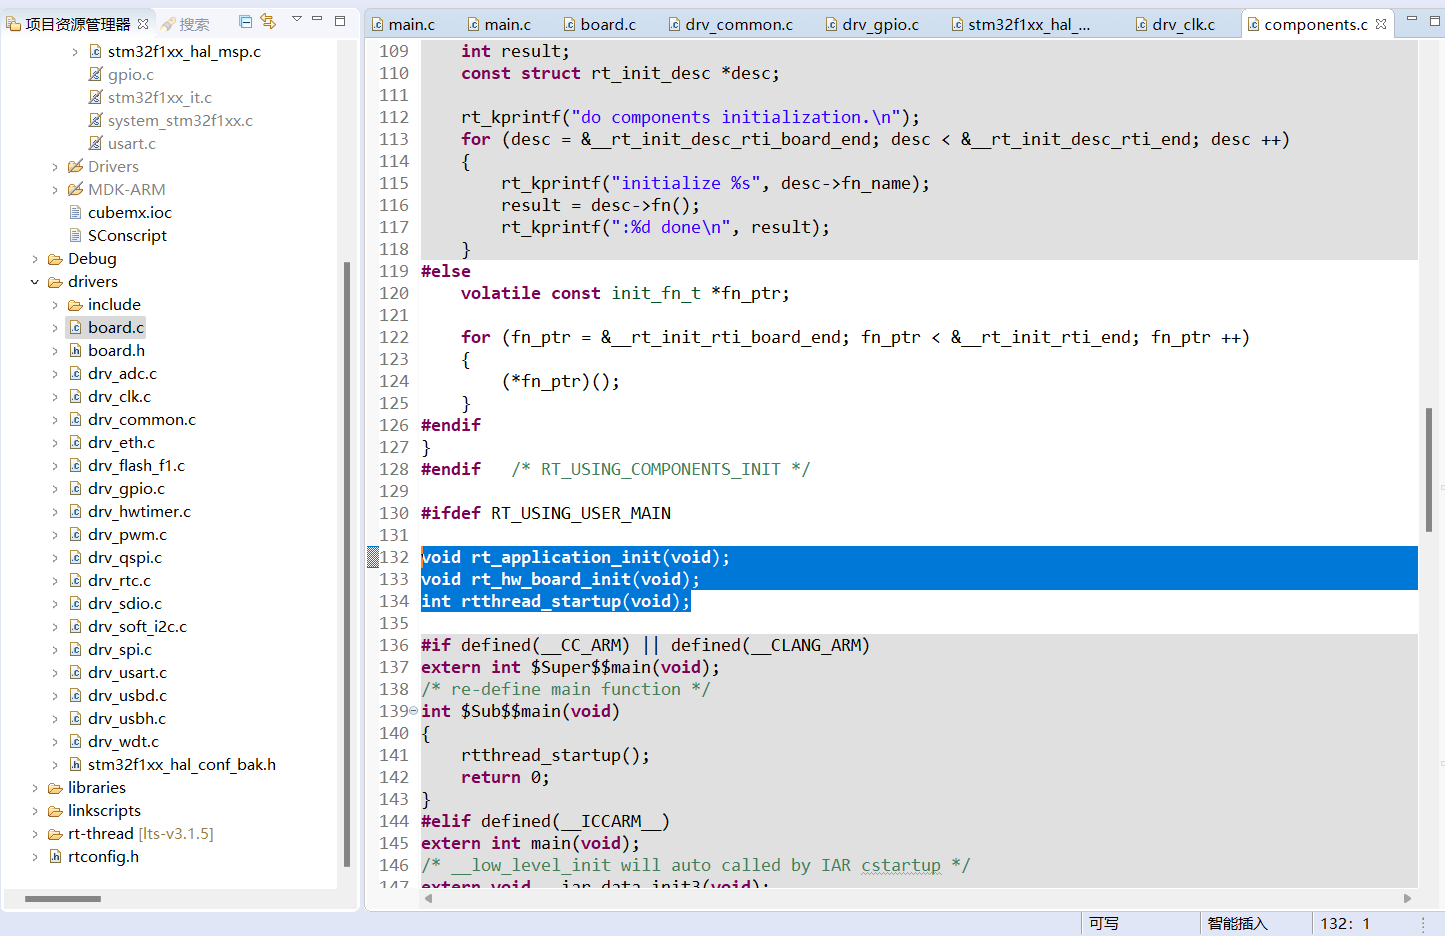
(3)同时,可查看components.c其中有启动流程关键节点,便于理解源码
2.查看时钟配置是否正确,转到clk_init查看详细内容,发现就是CubeMX的时钟配置。

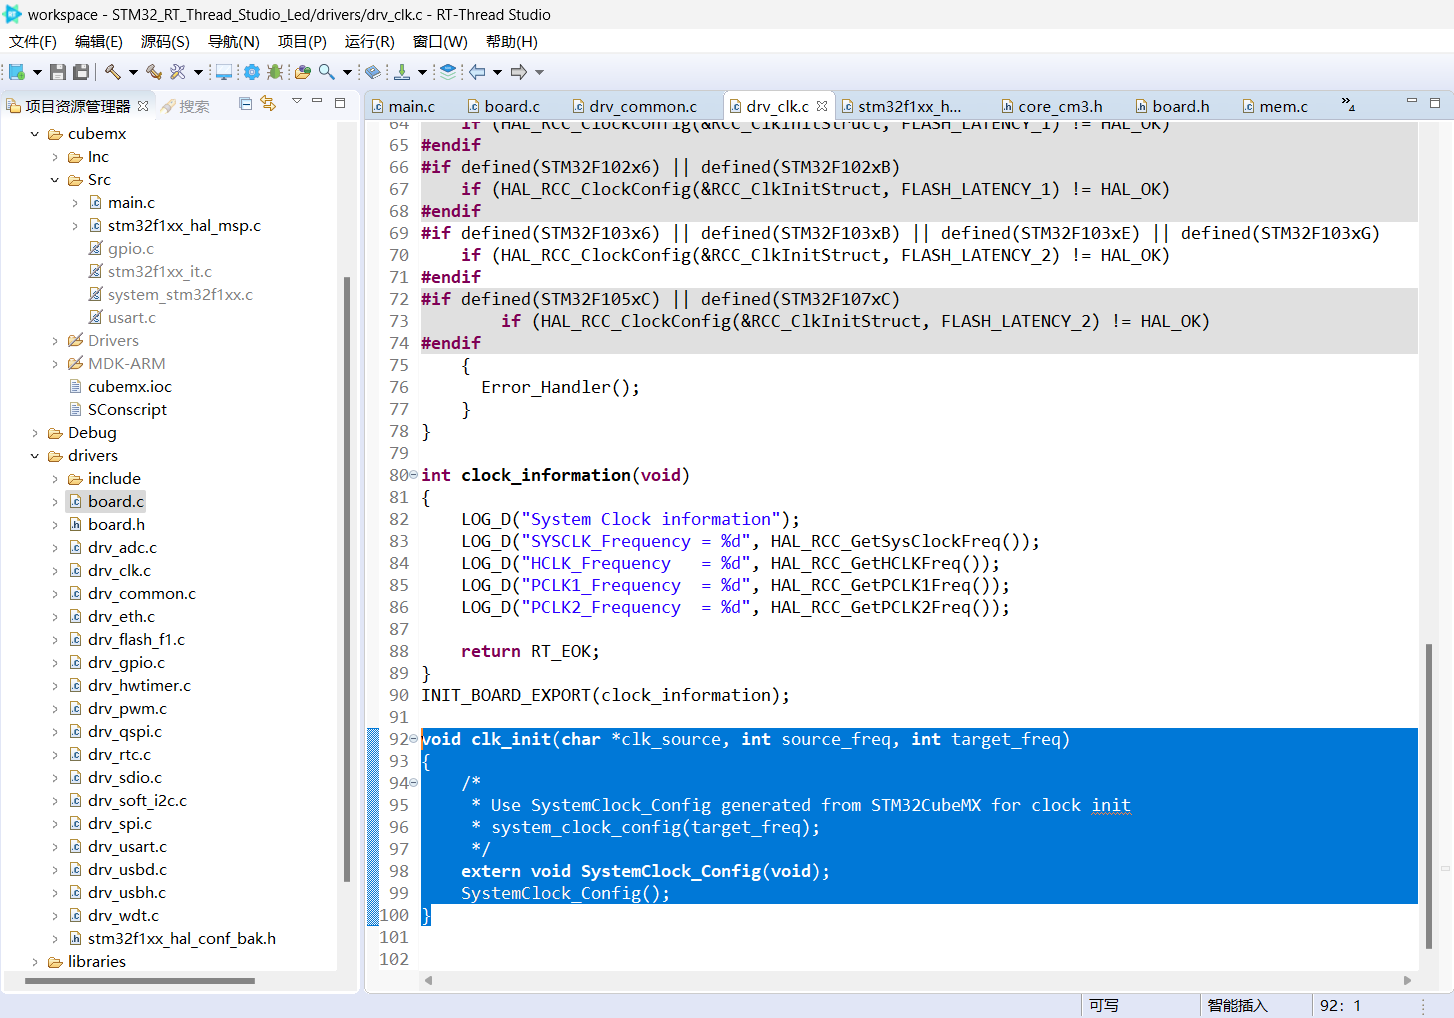
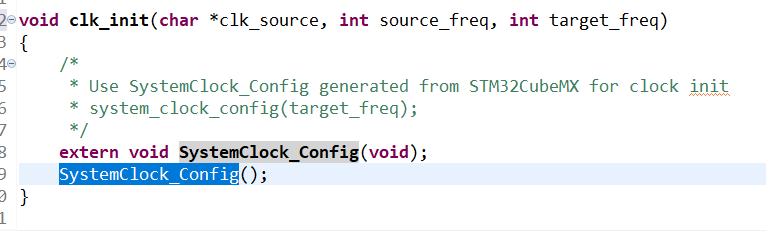
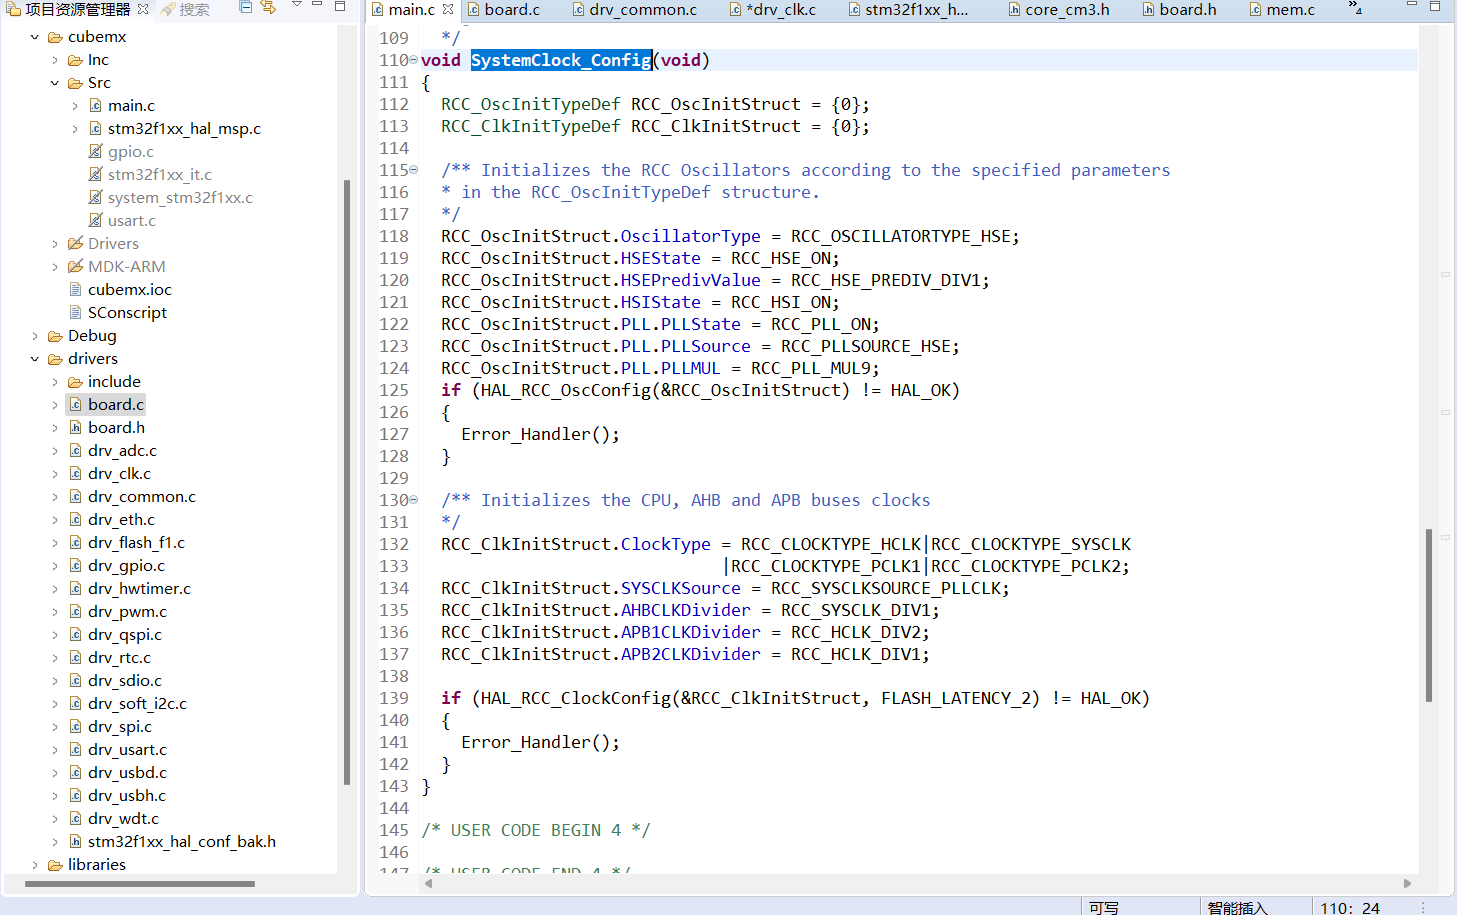
至此,配置检查无误。
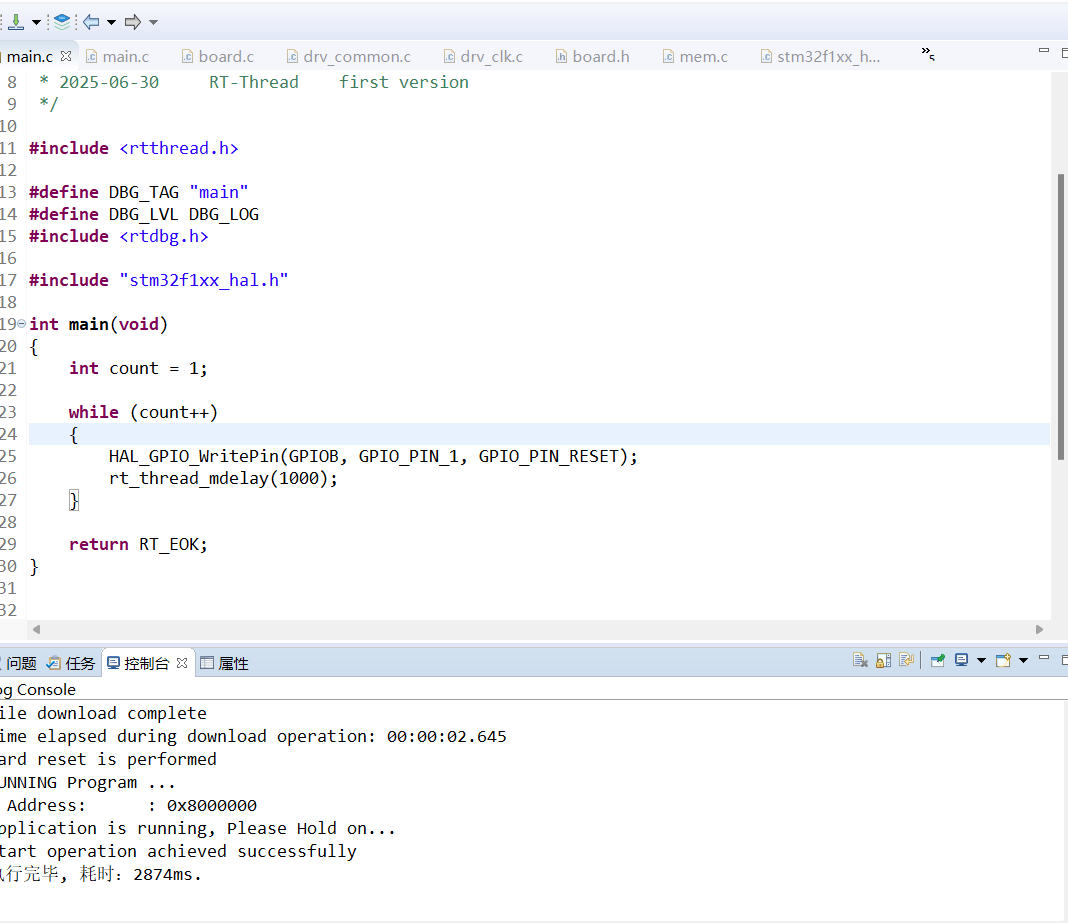
3.在main.c里,可使用HAL库的GPIO配置方法或者使用RT-Thread封装的GPIO配置方法,在这里可以先测试一下,低电平点亮来RT-Thread试一试是否初始化了GPIO输出,结果是并没有。(笔者在这里研究过RT-Thread在board.c只是帮我们开启了GPIO的时钟,只是没有配置GPIO输入输出模式)
RT-Thread通过PIN设备对芯片的GPIO引脚进行管理,应用程序可以通过其提供的一组PIN设备管理接口来操作GPIO,PIN设备管理接口如表所示:
| 接口 | 描述 |
| rt_pin_get() | 获取引脚编号 |
| rt_pin_mode() | 设置引脚模式 |
| rt_pin_write() | 设置引脚电平 |
| rt_pin_read() | 读取引脚电平 |
| rt_pin_attach_irq() | 绑定引脚中断回调函数 |
| rt_pin_irq_enable() | 使能引脚中断 |
| rt_pin_detach_irq() | 脱离引脚中断回调函数 |
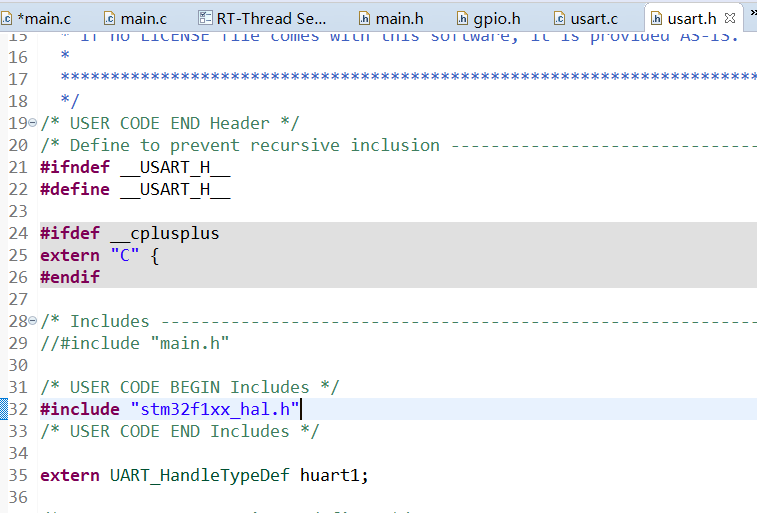
然后就设置并开启GPIO,但是会出现错误,尝试了包含很多个头文件才解决
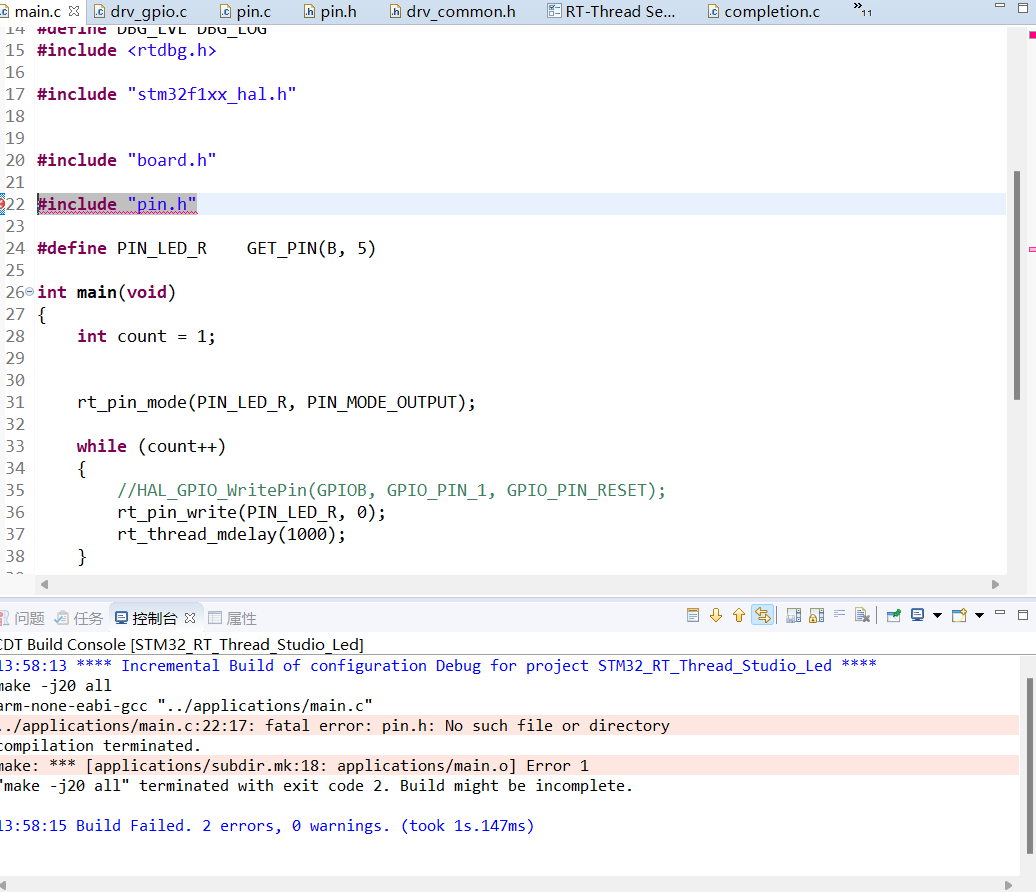

解决办法(参考链接):
//添加头文件
#include "drv_common.h"
#include "rtdevice.h"
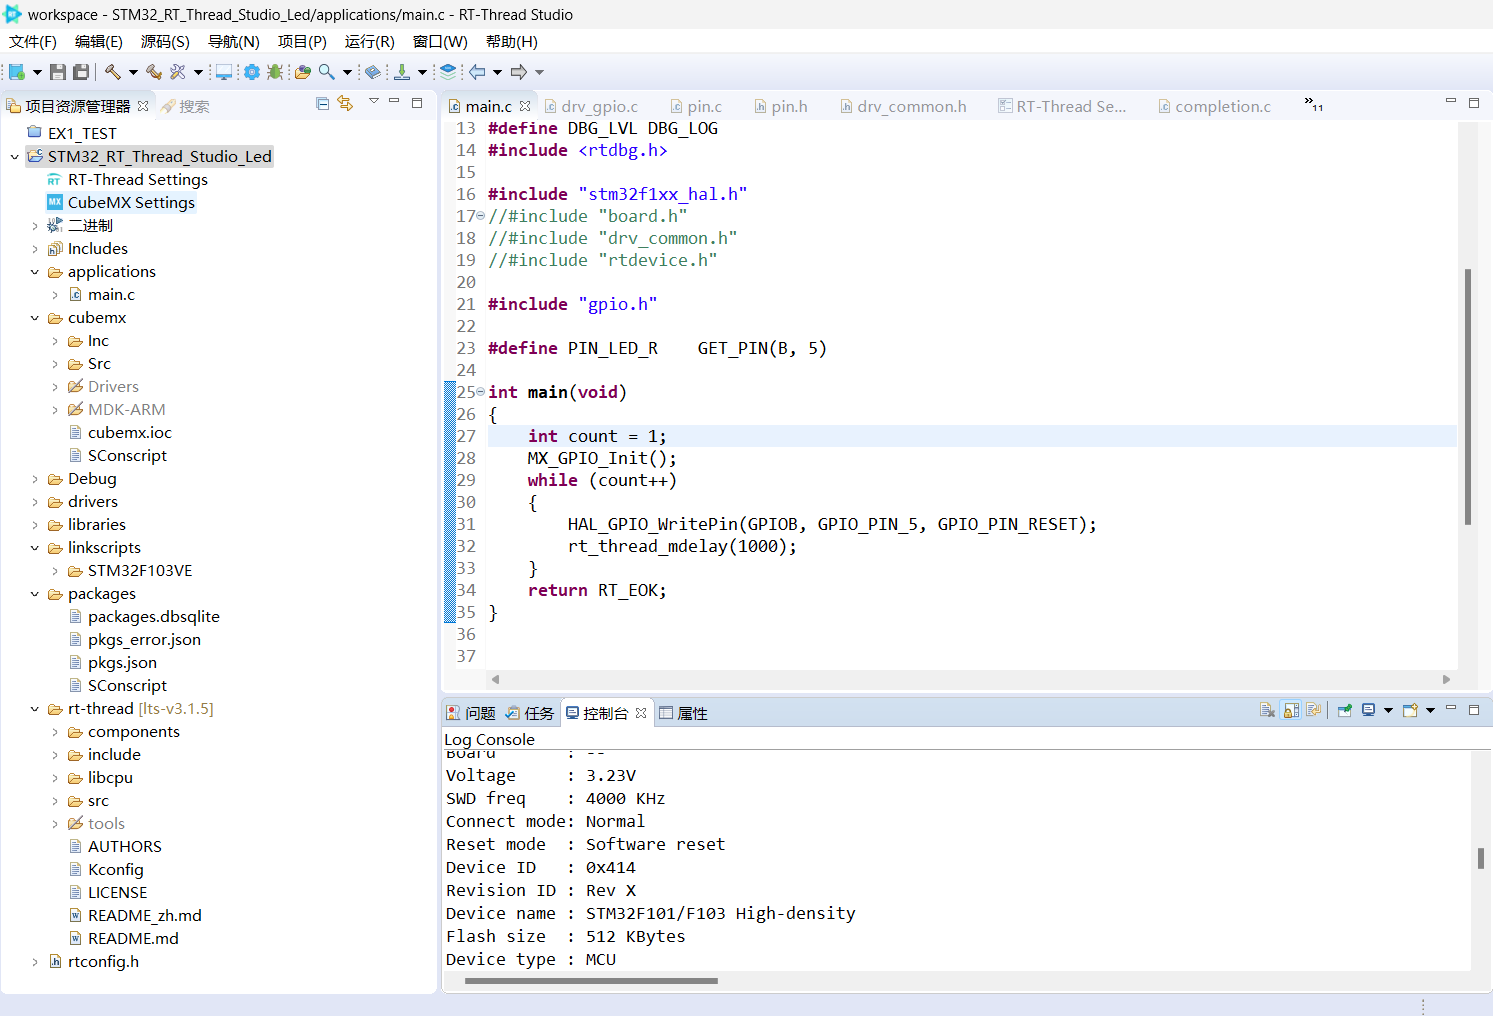
那么,还可以用HAL库来初始化GPIO配置:
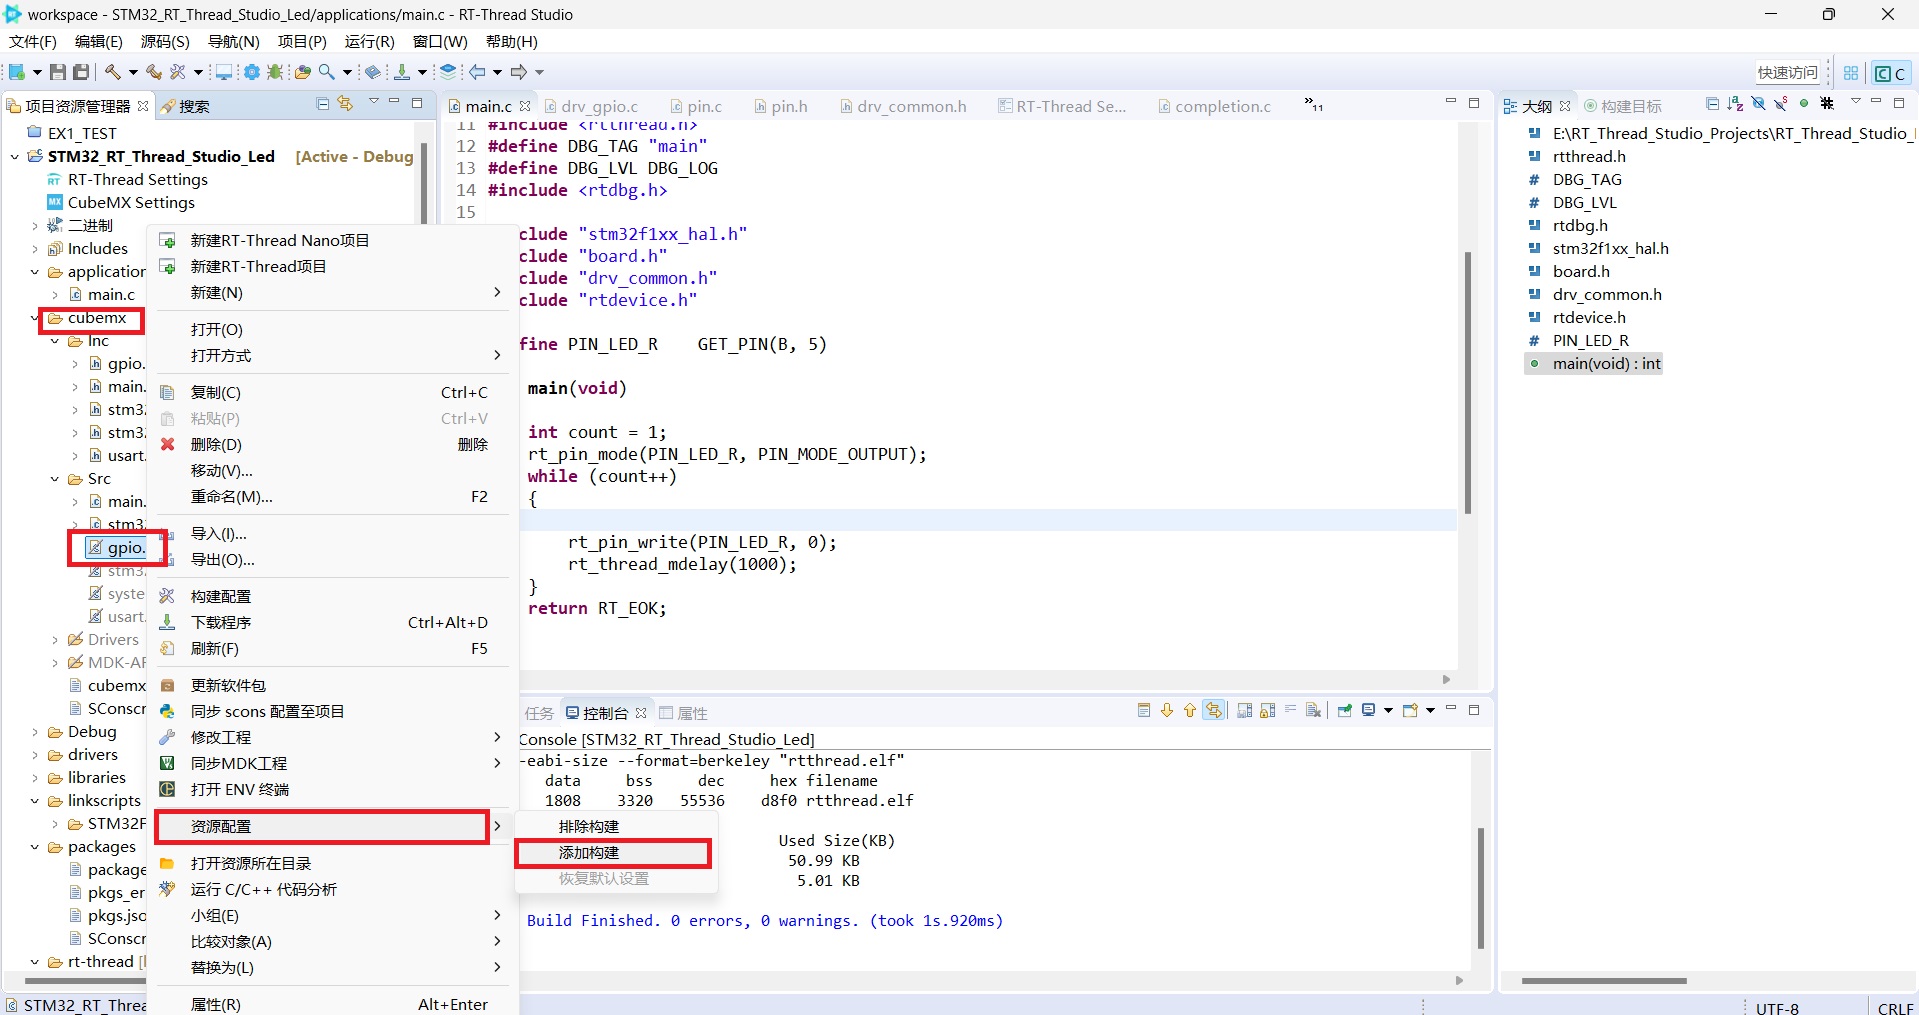
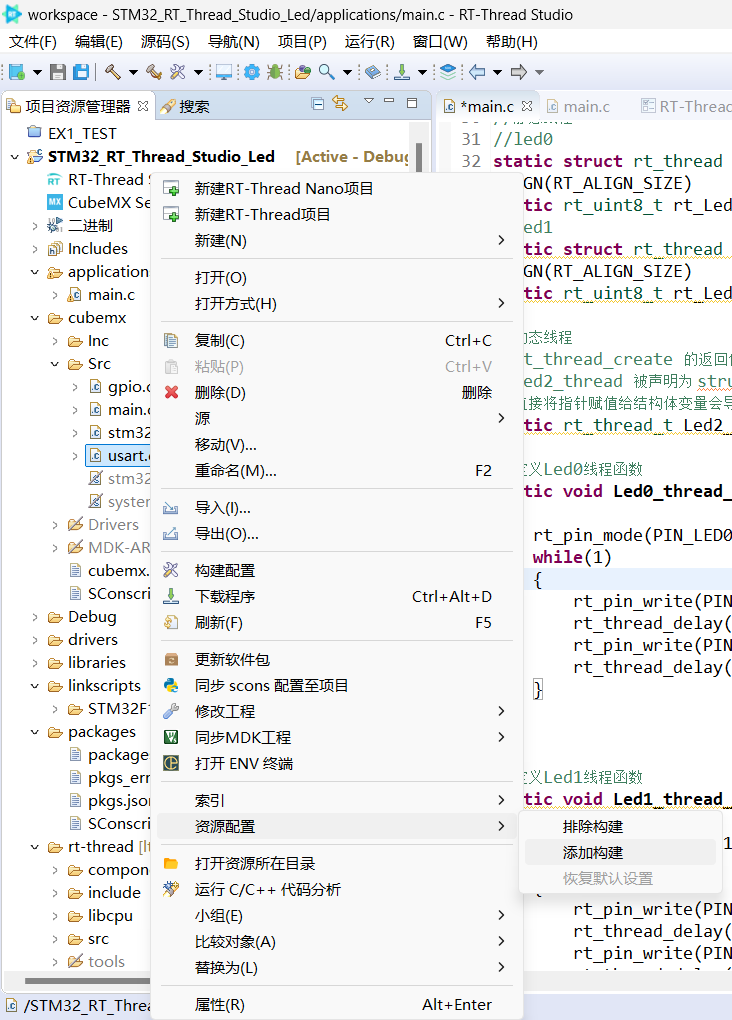
右击CubeMX文件夹下的gpio.c,将其加入编译中,同时,在main.c添加头文件gpio.h,使用现成的HAL库GPIO配置(或者自己写也没有问题),替代掉 rt_pin_mode()、rt_pin_write()。
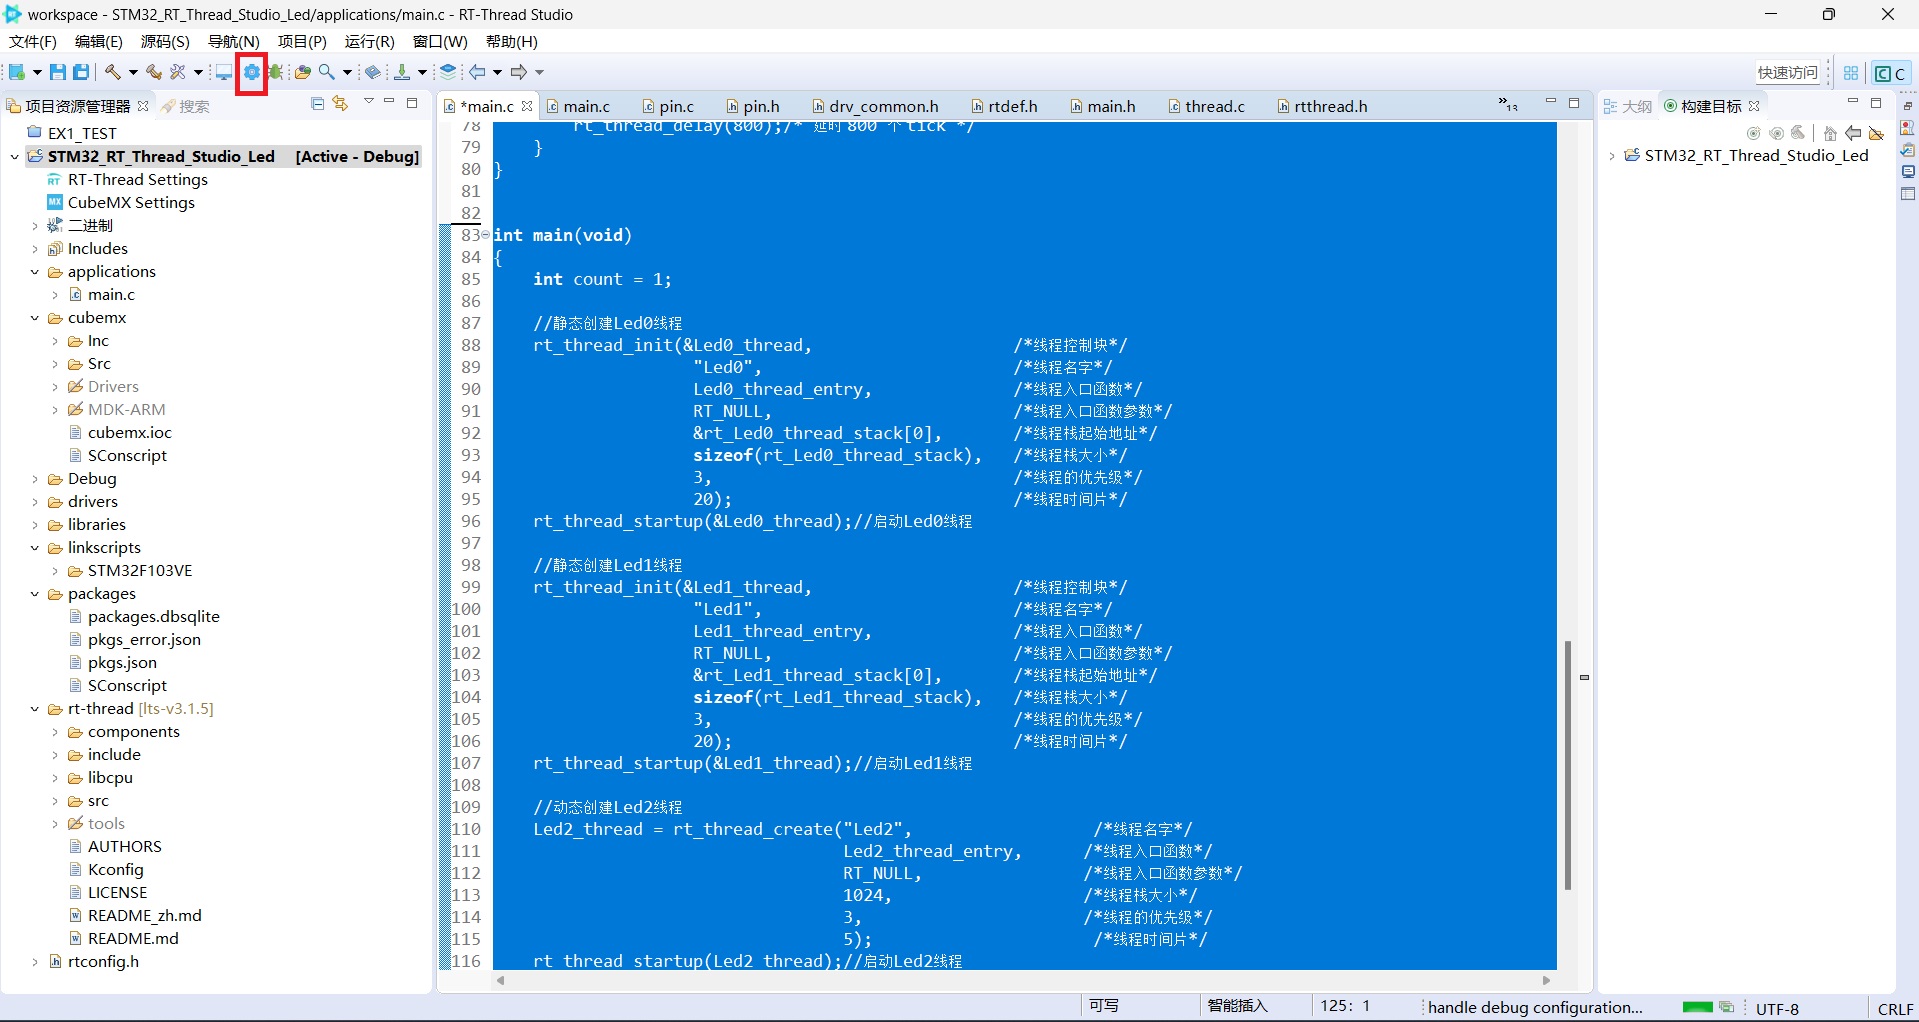
 4.正式编写多任务/线程代码
rt_thread_init和rt_thread_create的区别:

这里LED0和LED1使用静态创建任务/线程,LED2使用动态创建任务/线程。
main.c
/*
 * Copyright (c) 2006-2025, RT-Thread Development Team
 *
 * SPDX-License-Identifier: Apache-2.0
 *
 * Change Logs:
 * Date           Author       Notes
 * 2025-06-30     RT-Thread    first version
 */

#include <rtthread.h>
#define DBG_TAG "main"
#define DBG_LVL DBG_LOG
#include <rtdbg.h>

#include "stm32f1xx_hal.h"

#include "board.h"
#include "drv_common.h"
#include "rtdevice.h" //包含了pin.h

#include "gpio.h" //CubueMX HAL库

//LED的PIN
#define PIN_LED0_GREEN GET_PIN(B, 0)
#define PIN_LED1_BLUE GET_PIN(B, 1)
//#define PIN_LED2_RED GET_PIN(B, 5)

//静态线程
//led0
static struct rt_thread Led0_thread;  /*定义线程控制块*/
static rt_uint8_t rt_Led0_thread_stack[1024]; /* 定义线程栈 */
//led1
static struct rt_thread Led1_thread;  /*定义线程控制块*/
static rt_uint8_t rt_Led1_thread_stack[1024]; /* 定义线程栈 */

//动态线程
//rt_thread_create 的返回值是 rt_thread_t(即 struct rt_thread*,一个指针)。
//Led2_thread 被声明为 struct rt_thread(一个结构体变量,而非指针)。
//直接将指针赋值给结构体变量会导致类型不匹配。
static rt_thread_t Led2_thread;

//定义Led0线程函数
static void Led0_thread_entry(void* parameter)
{
    rt_pin_mode(PIN_LED0_GREEN, PIN_MODE_OUTPUT);
    while(1)
    {
        rt_pin_write(PIN_LED0_GREEN, RESET);
        rt_thread_delay(400);
        rt_pin_write(PIN_LED0_GREEN, SET);
        rt_thread_delay(400);
    }
}


//定义Led1线程函数
static void Led1_thread_entry(void* parameter)
{
    rt_pin_mode(PIN_LED1_BLUE, PIN_MODE_OUTPUT);
    while(1)
    {
        rt_pin_write(PIN_LED1_BLUE, RESET);
        rt_thread_delay(600);
        rt_pin_write(PIN_LED1_BLUE, SET);
        rt_thread_delay(600);
    }
}


//定义Led2线程函数
static void Led2_thread_entry(void* parameter)
{
    MX_GPIO_Init();
    while(1)
    {
        HAL_GPIO_TogglePin(GPIOB, GPIO_PIN_5);
        rt_thread_delay(800);
    }
}


int main(void)
{
    int count = 1;

    //静态创建Led0线程
    rt_thread_init(&Led0_thread,                    /*线程控制块*/
                    "Led0",                         /*线程名字*/
                    Led0_thread_entry,              /*线程入口函数*/
                    RT_NULL,                        /*线程入口函数参数*/
                    &rt_Led0_thread_stack[0],       /*线程栈起始地址*/
                    sizeof(rt_Led0_thread_stack),   /*线程栈大小*/
                    3,                              /*线程的优先级*/
                    20);                            /*线程时间片*/
    rt_thread_startup(&Led0_thread);//启动Led0线程

    //静态创建Led1线程
    rt_thread_init(&Led1_thread,                    /*线程控制块*/
                    "Led1",                         /*线程名字*/
                    Led1_thread_entry,              /*线程入口函数*/
                    RT_NULL,                        /*线程入口函数参数*/
                    &rt_Led1_thread_stack[0],       /*线程栈起始地址*/
                    sizeof(rt_Led1_thread_stack),   /*线程栈大小*/
                    3,                              /*线程的优先级*/
                    20);                            /*线程时间片*/
    rt_thread_startup(&Led1_thread);//启动Led1线程

    //动态创建Led2线程
    Led2_thread = rt_thread_create("Led2",                  /*线程名字*/
                                   Led2_thread_entry,      /*线程入口函数*/
                                   RT_NULL,                /*线程入口函数参数*/
                                   1024,                   /*线程栈大小*/
                                   3,                      /*线程的优先级*/
                                   5);                      /*线程时间片*/
    rt_thread_startup(Led2_thread);//启动Led2线程

    while (count++)
    {
        //rt_thread_mdelay(1000);
    }
    return RT_EOK;
}
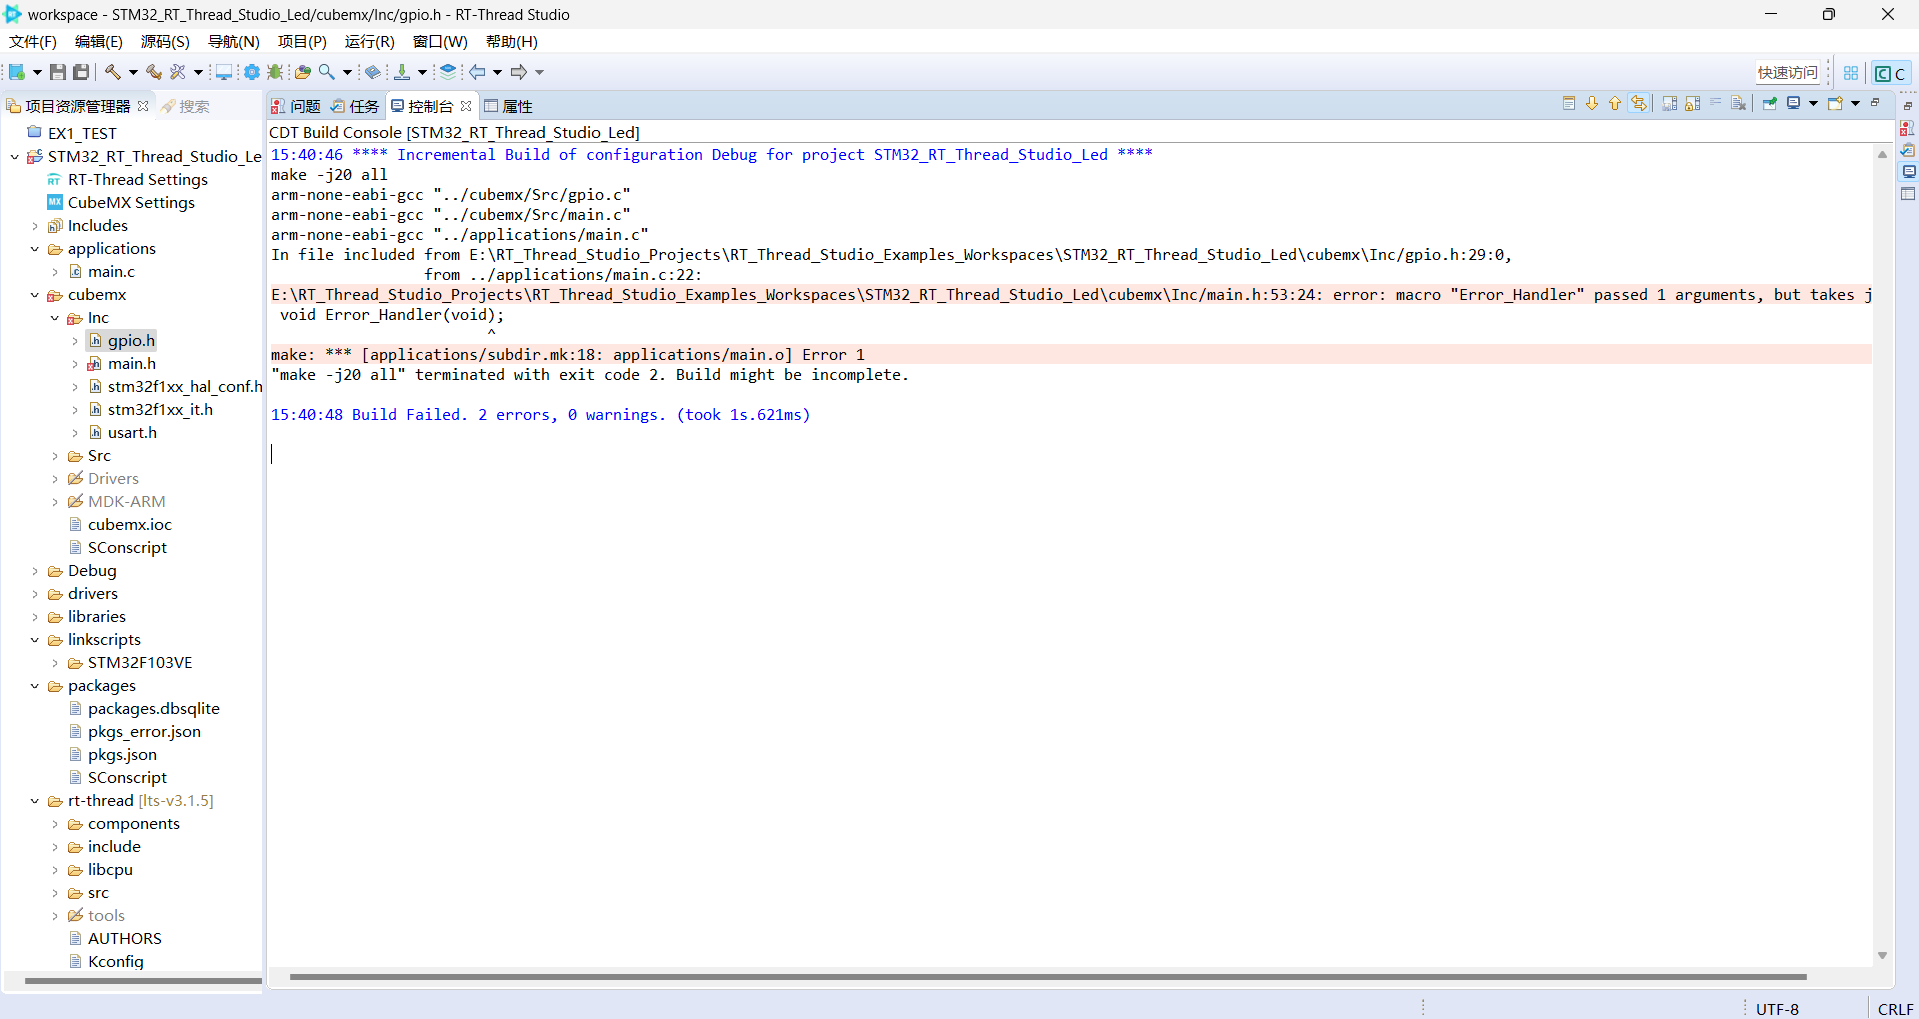
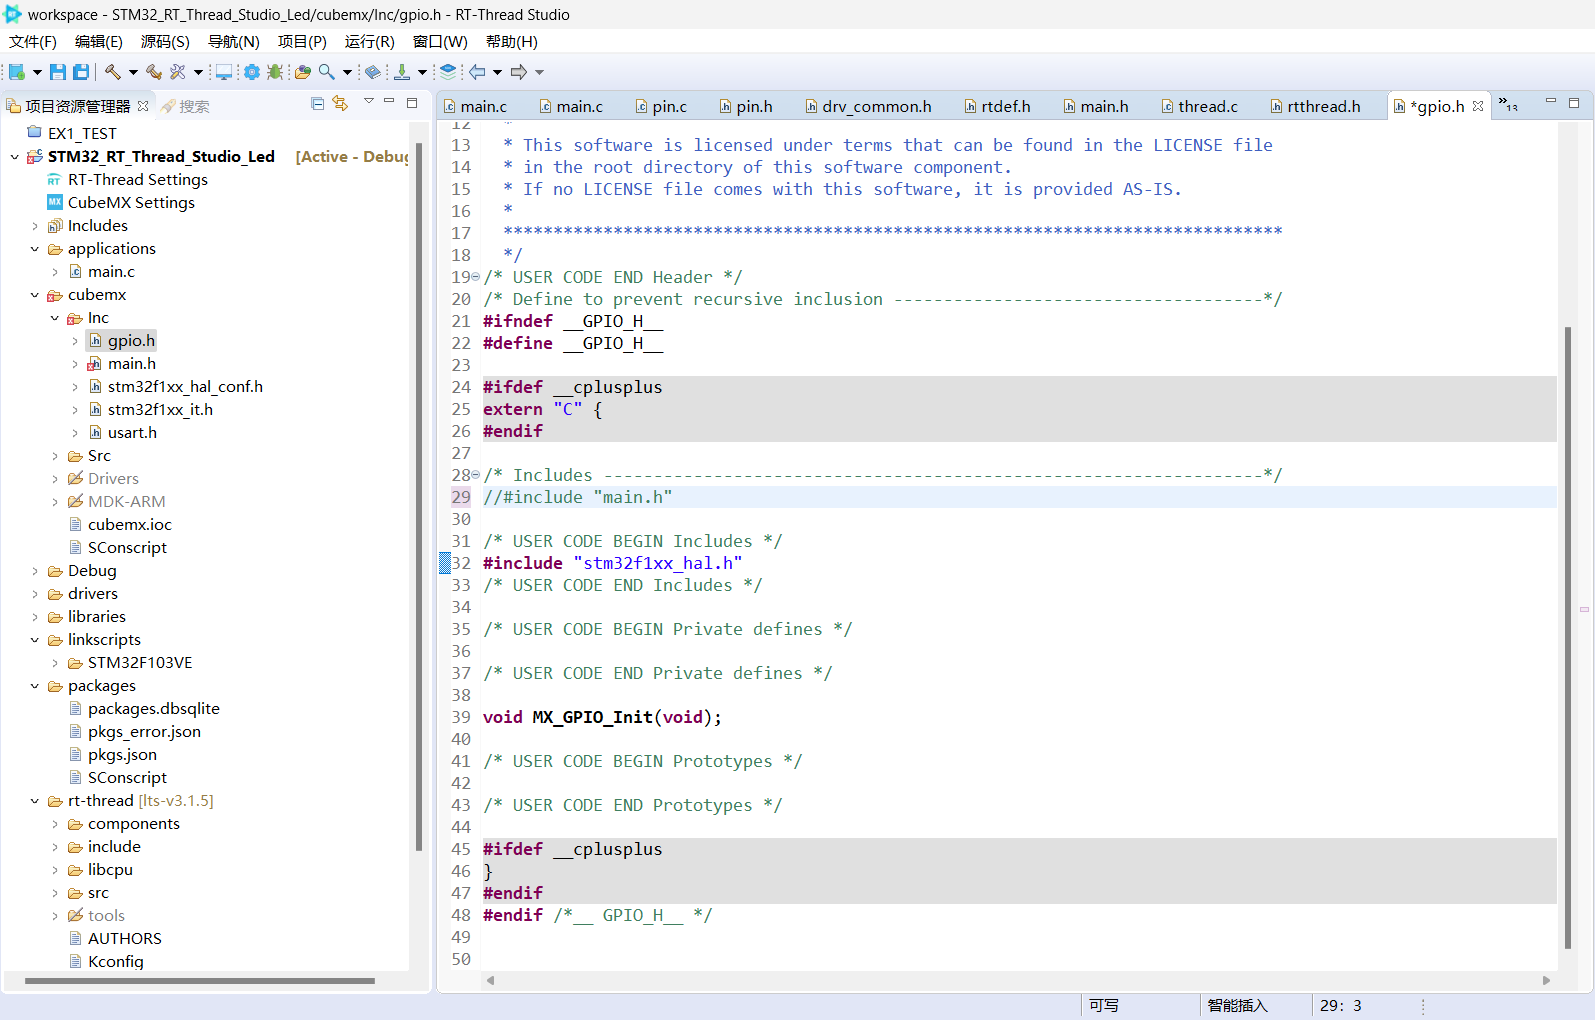
注意:如果出现了关于void Error_Handler(void);的冲突,就注释掉gpio.h的main.h头文件
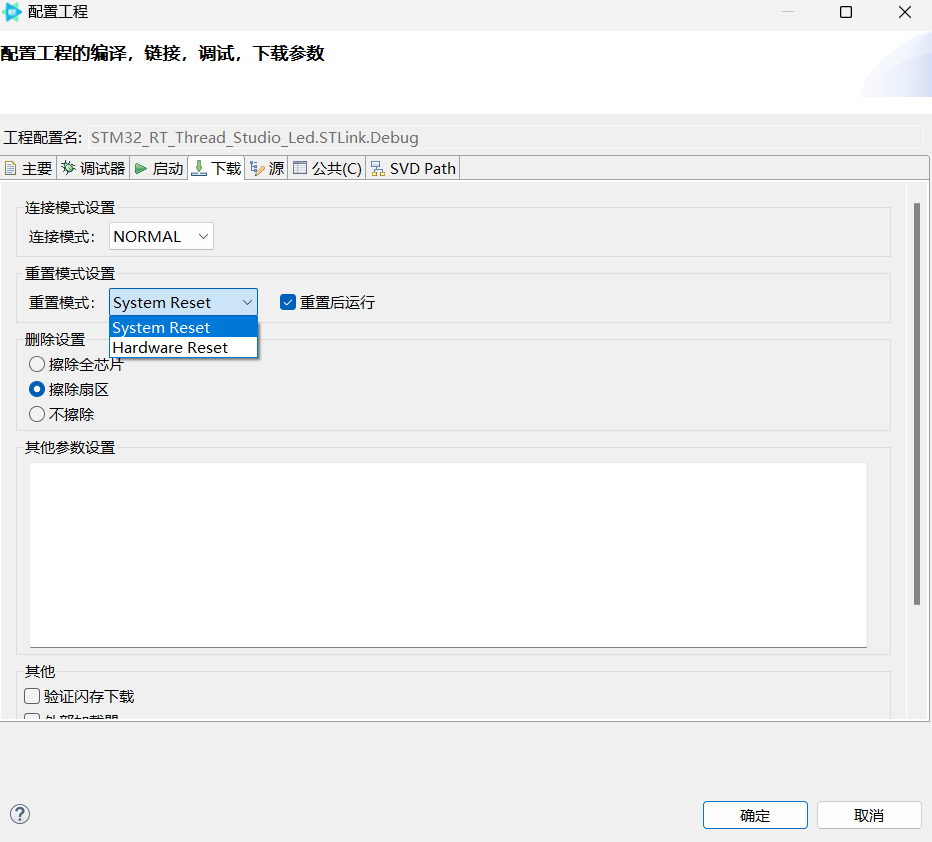
下载时,可开启软件复位:
至此,完成多任务/线程项目示例运行。
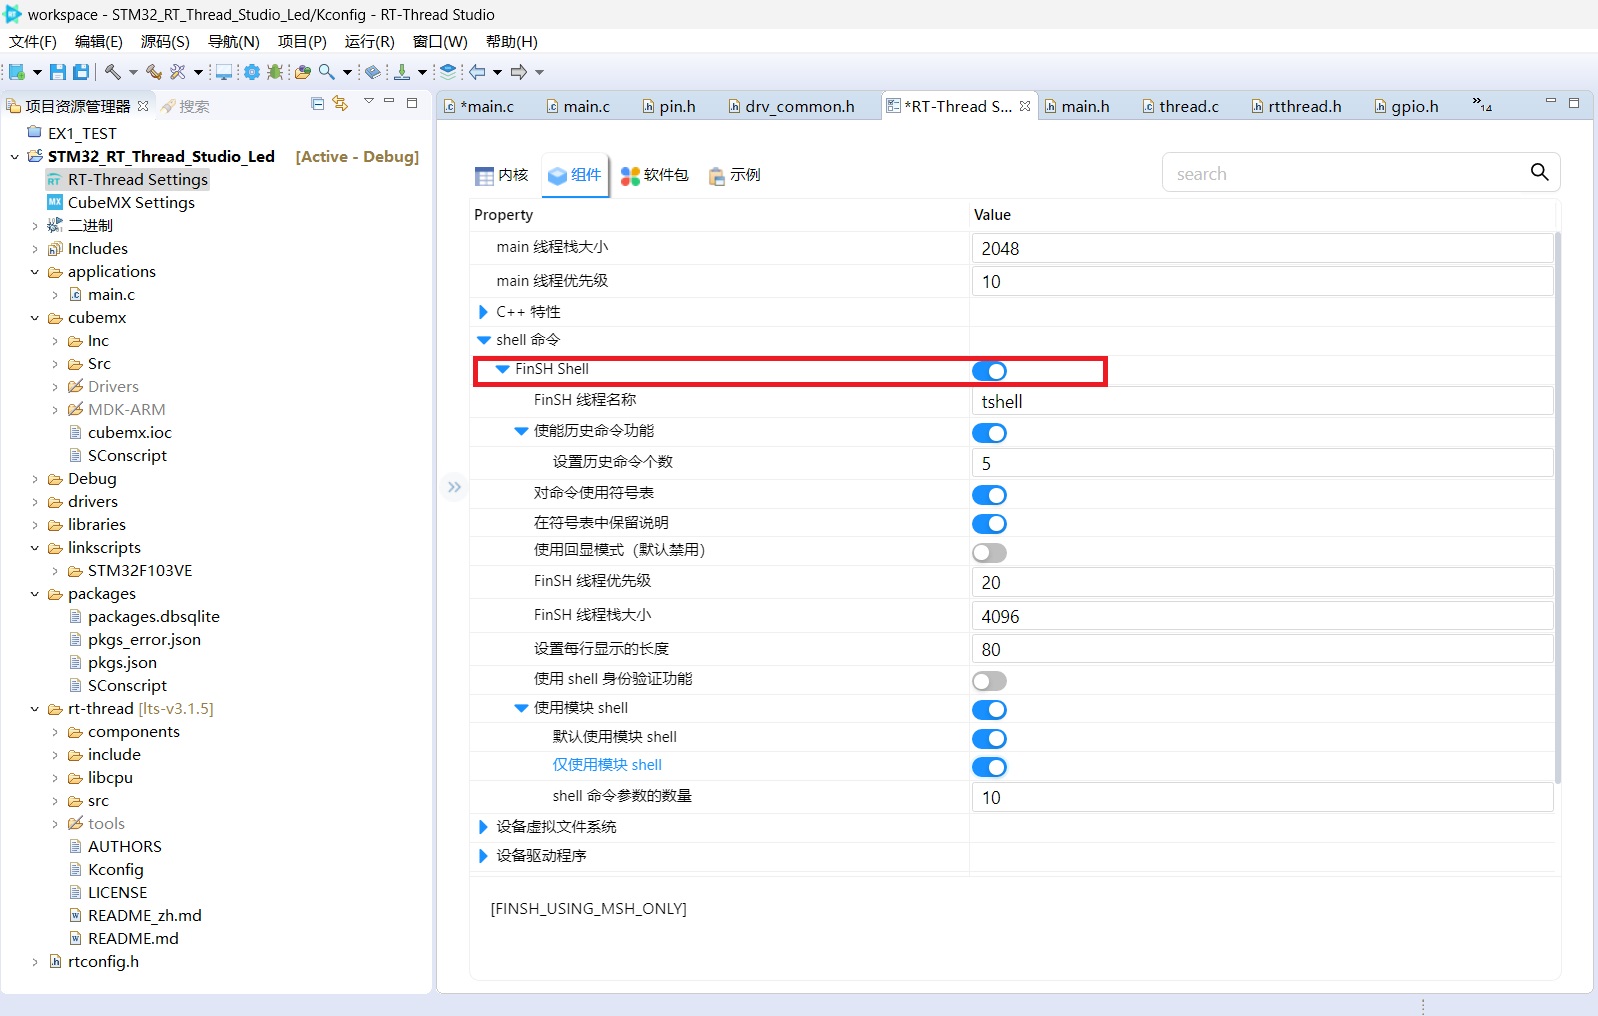
额外演示一下FinSH组件的使用:
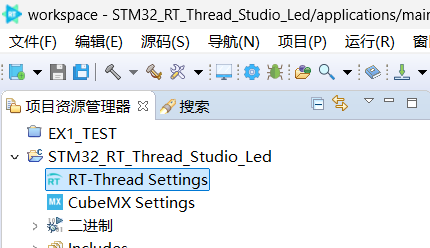
(1)开启FinSH组件,点击RT-Thread Settings
(2)开启串口1配置,跟gpio.c的添加差不多
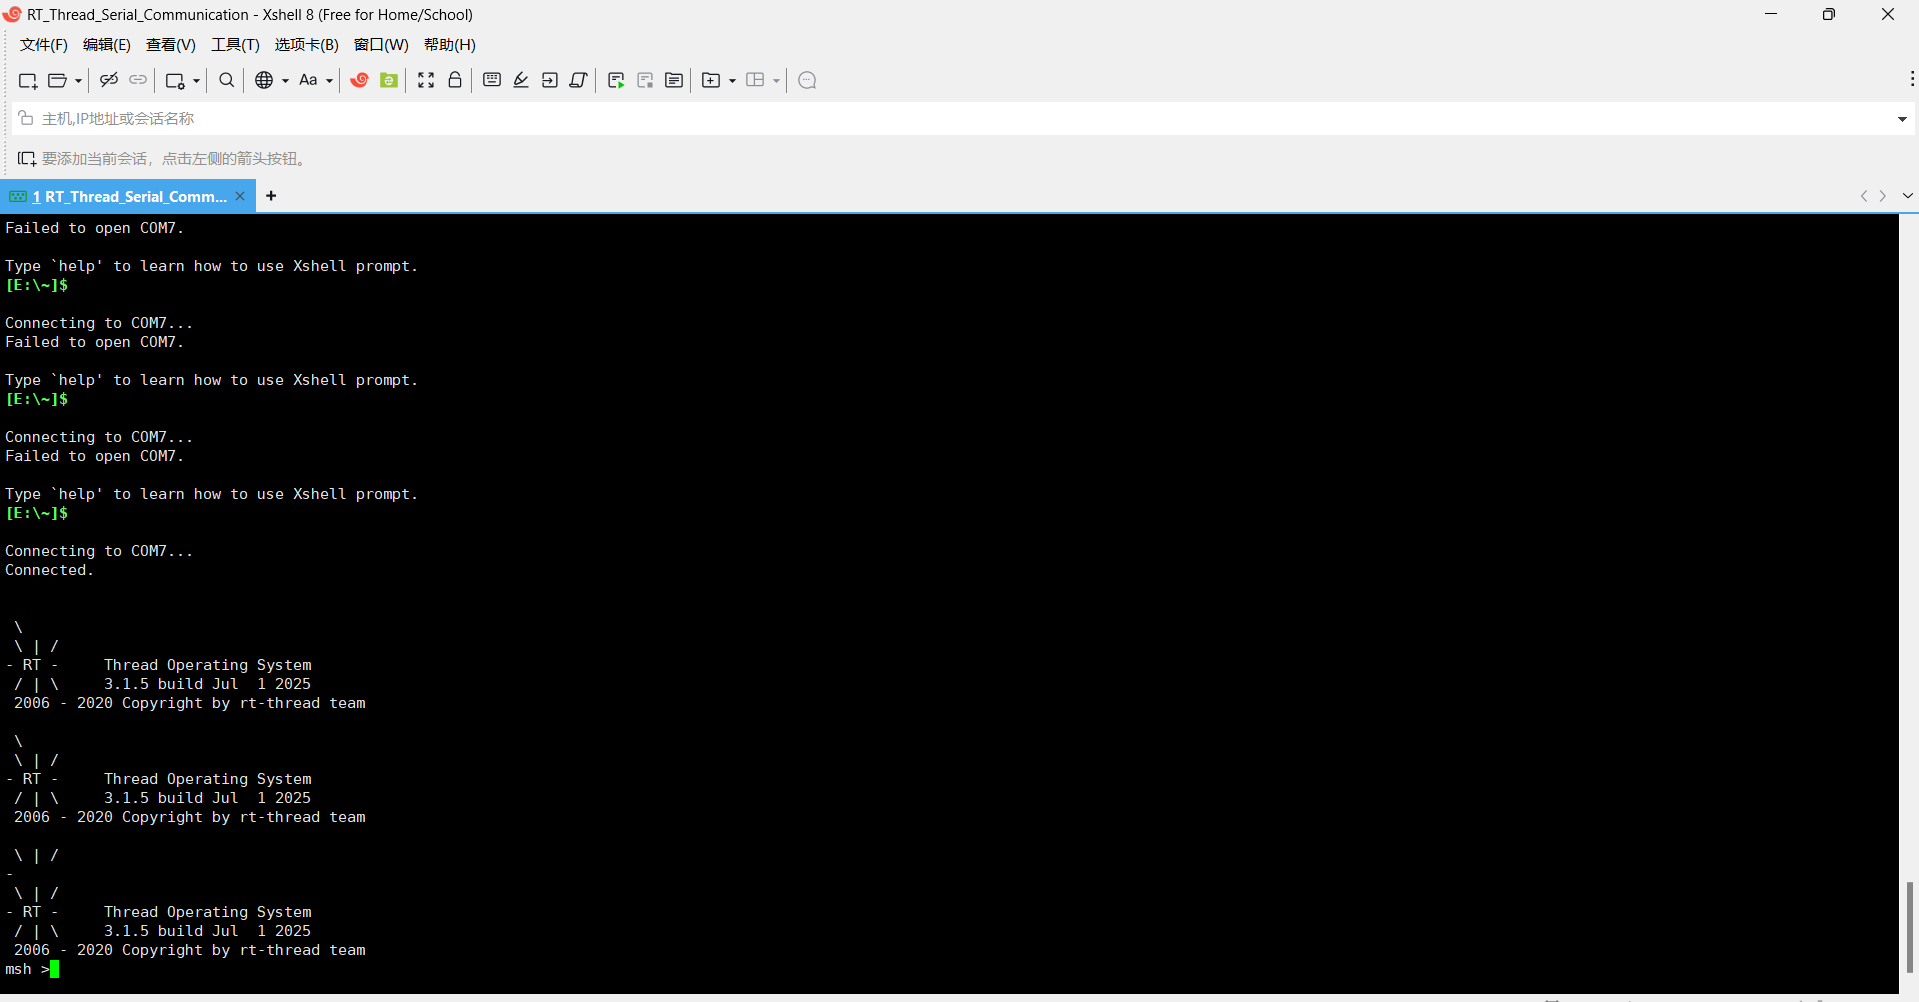
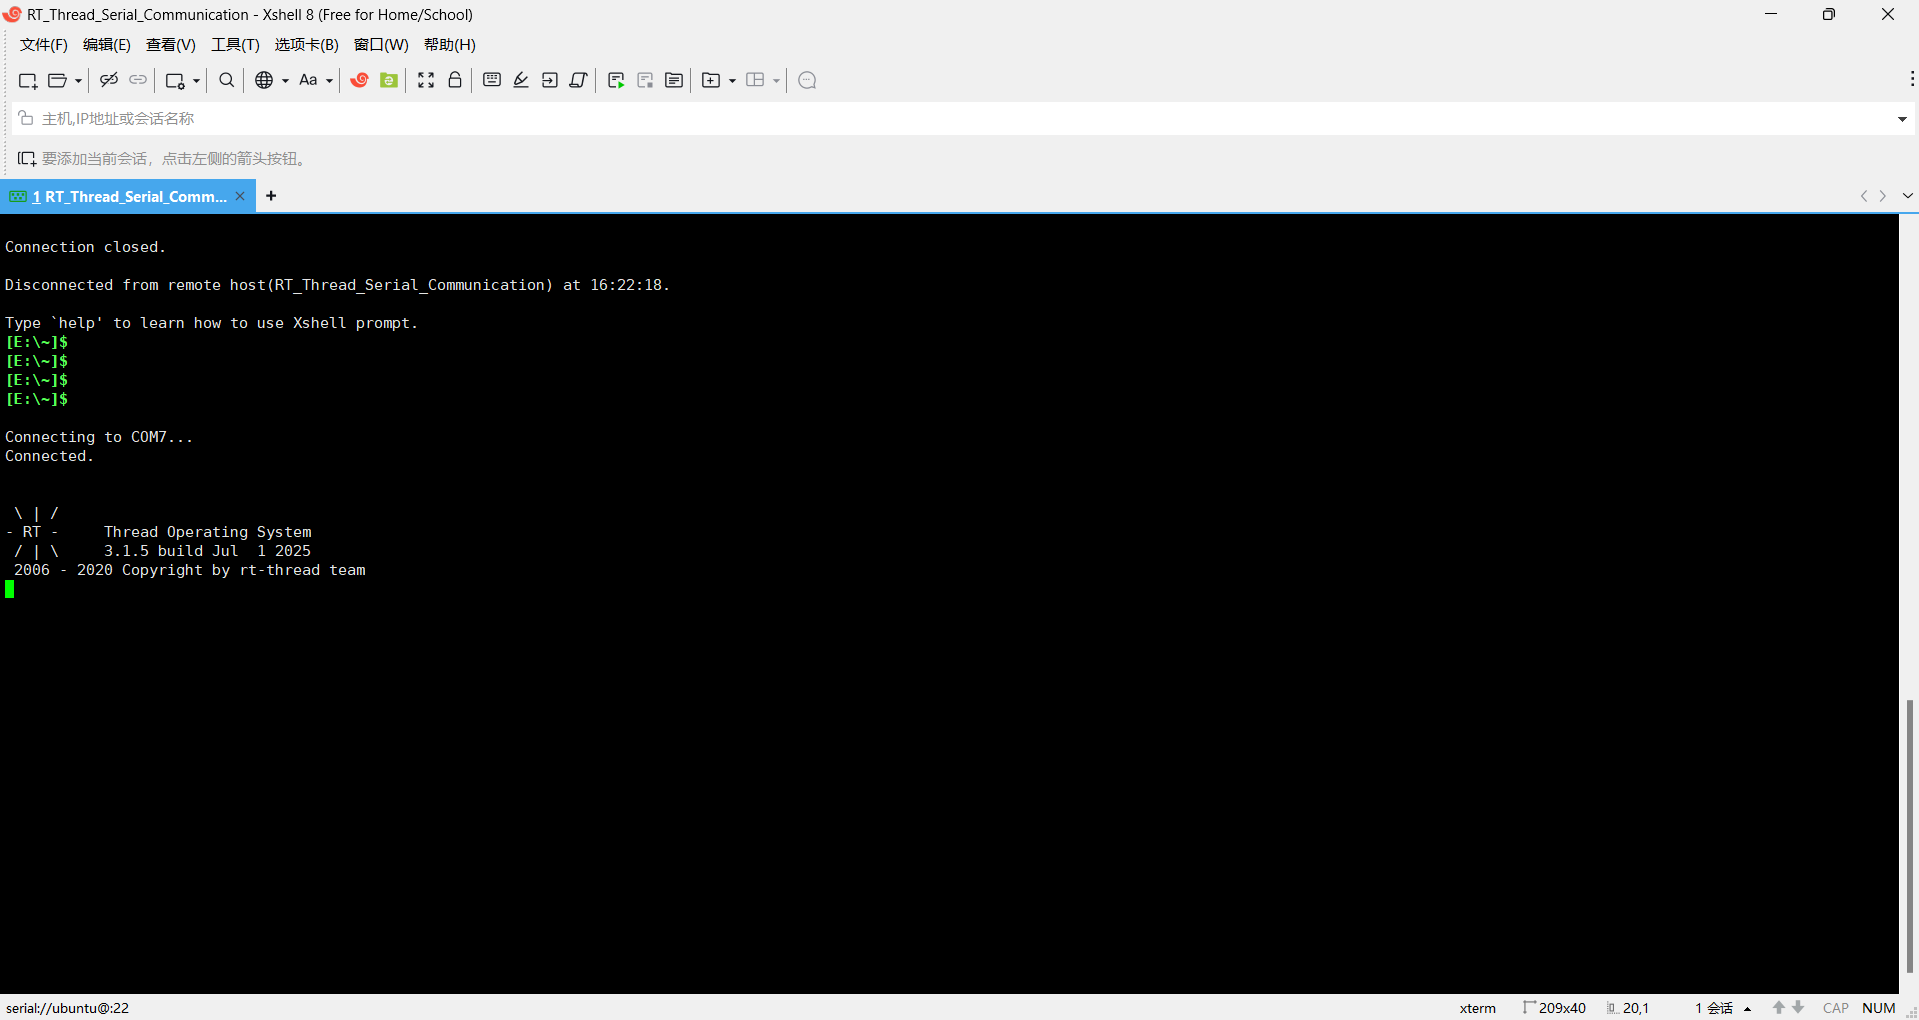
(3)随便找一个串口助手连接串口1,我这里用的是XShell8建立的串口终端通信会话
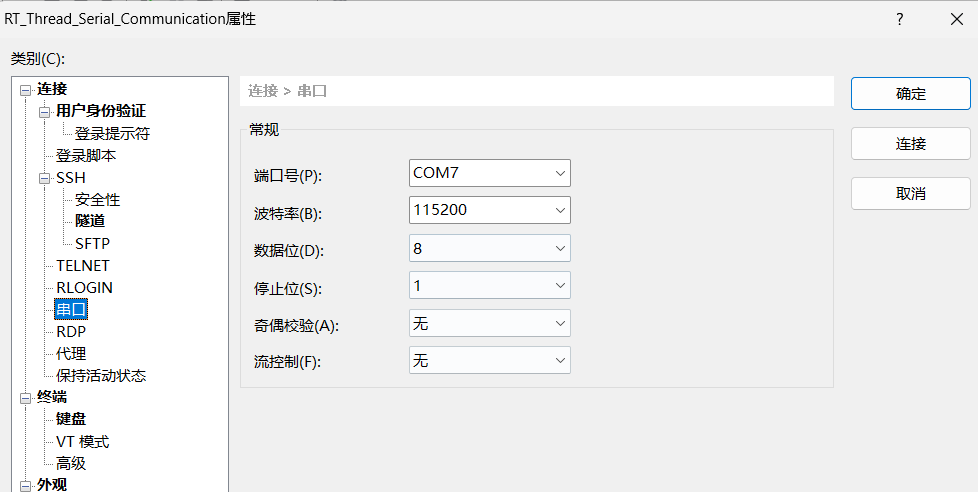
也可以使用其他的串口助手。
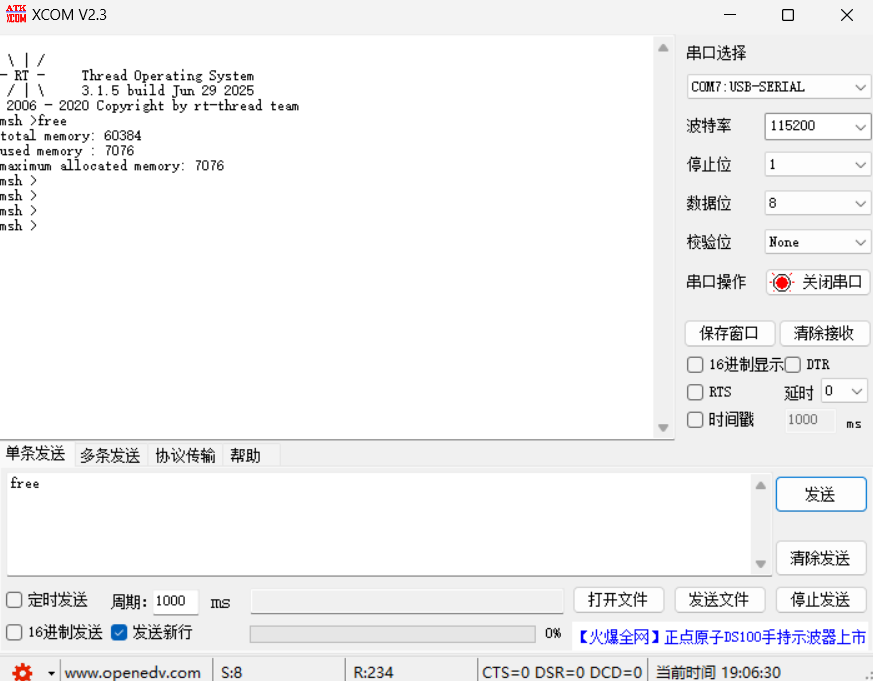
(4)编写自定义的 MSH命令,这里未创建后续任务是需要另外一个灯,以及减少空间的使用
/*
* Copyright (c) 2006-2025, RT-Thread Development Team
*
* SPDX-License-Identifier: Apache-2.0
*
* Change Logs:
* Date Author Notes
* 2025-06-30 RT-Thread first version
*/
#include <rtthread.h>
#define DBG_TAG "main"
#define DBG_LVL DBG_LOG
#include <rtdbg.h>
#include "stm32f1xx_hal.h"
#include "board.h"
#include "drv_common.h"
#include "rtdevice.h" //包含了pin.h
#include "gpio.h" //CubueMX HAL库
#include "usart.h"
//LED的PIN
#define PIN_LED0_GREEN GET_PIN(B, 0)
#define PIN_LED1_BLUE GET_PIN(B, 1)
#define PIN_LED2_RED GET_PIN(B, 5)
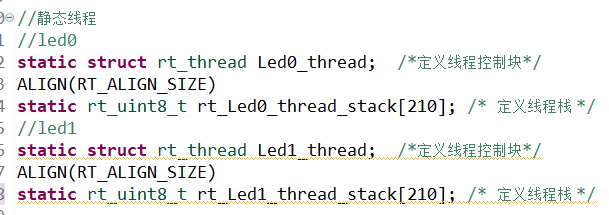
//静态线程
//led0
static struct rt_thread Led0_thread; /*定义线程控制块*/
ALIGN(RT_ALIGN_SIZE)
static rt_uint8_t rt_Led0_thread_stack[210]; /* 定义线程栈 */
//led1
static struct rt_thread Led1_thread; /*定义线程控制块*/
ALIGN(RT_ALIGN_SIZE)
static rt_uint8_t rt_Led1_thread_stack[210]; /* 定义线程栈 */
//动态线程
//rt_thread_create 的返回值是 rt_thread_t(即 struct rt_thread*,一个指针)。
//Led2_thread 被声明为 struct rt_thread(一个结构体变量,而非指针)。
//直接将指针赋值给结构体变量会导致类型不匹配。
static rt_thread_t Led2_thread;
//定义Led0线程函数
static void Led0_thread_entry(void* parameter)
{
rt_pin_mode(PIN_LED0_GREEN, PIN_MODE_OUTPUT);
while(1)
{
rt_pin_write(PIN_LED0_GREEN, RESET);
rt_thread_delay(400);
rt_pin_write(PIN_LED0_GREEN, SET);
rt_thread_delay(400);
}
}
//定义Led1线程函数
static void Led1_thread_entry(void* parameter)
{
rt_pin_mode(PIN_LED1_BLUE, PIN_MODE_OUTPUT);
while(1)
{
rt_pin_write(PIN_LED1_BLUE, RESET);
rt_thread_delay(600);
rt_pin_write(PIN_LED1_BLUE, SET);
rt_thread_delay(600);
}
}
//定义Led2线程函数
static void Led2_thread_entry(void* parameter)
{
MX_GPIO_Init();
while(1)
{
HAL_GPIO_TogglePin(GPIOB, GPIO_PIN_5);
rt_thread_delay(800);
}
}
//MSH 自定义
uint8_t MSH_Led_Flag = 0;
void Close_All_Led(void)
{
rt_kprintf("Close_All_Led function called!\n");
// rt_pin_mode(PIN_LED0_GREEN, PIN_MODE_OUTPUT);
// rt_pin_write(PIN_LED0_GREEN, PIN_HIGH);
//
// rt_pin_mode(PIN_LED1_BLUE, PIN_MODE_OUTPUT);
// rt_pin_write(PIN_LED1_BLUE, PIN_HIGH);
//
// rt_pin_mode(PIN_LED2_RED, PIN_MODE_OUTPUT);
// rt_pin_write(PIN_LED2_RED, PIN_LOW);
MX_GPIO_Init();
if(MSH_Led_Flag == 0)
{
MSH_Led_Flag=1;
HAL_GPIO_WritePin(GPIOB, GPIO_PIN_5, GPIO_PIN_RESET);
}else{
MSH_Led_Flag=0;
HAL_GPIO_WritePin(GPIOB, GPIO_PIN_5, GPIO_PIN_SET);
}
}
MSH_CMD_EXPORT(Close_All_Led , say Close_All_Led to STM32);
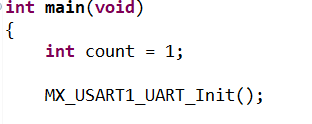
int main(void)
{
int count = 1;
MX_USART1_UART_Init();
//静态创建Led0线程
rt_thread_init(&Led0_thread, /*线程控制块*/
"Led0", /*线程名字*/
Led0_thread_entry, /*线程入口函数*/
RT_NULL, /*线程入口函数参数*/
&rt_Led0_thread_stack[0], /*线程栈起始地址*/
sizeof(rt_Led0_thread_stack), /*线程栈大小*/
3, /*线程的优先级*/
20); /*线程时间片*/
rt_thread_startup(&Led0_thread);//启动Led0线程
// //静态创建Led1线程
// rt_thread_init(&Led1_thread, /*线程控制块*/
// "Led1", /*线程名字*/
// Led1_thread_entry, /*线程入口函数*/
// RT_NULL, /*线程入口函数参数*/
// &rt_Led1_thread_stack[0], /*线程栈起始地址*/
// sizeof(rt_Led1_thread_stack), /*线程栈大小*/
// 3, /*线程的优先级*/
// 20); /*线程时间片*/
// rt_thread_startup(&Led1_thread);//启动Led1线程
//
// //动态创建Led2线程
// Led2_thread = rt_thread_create("Led2", /*线程名字*/
// Led2_thread_entry, /*线程入口函数*/
// RT_NULL, /*线程入口函数参数*/
// 210, /*线程栈大小*/
// 3, /*线程的优先级*/
// 5); /*线程时间片*/
// rt_thread_startup(Led2_thread);//启动Led2线程
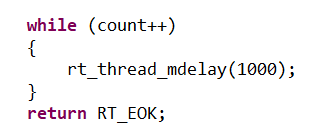
while (count++)
{
rt_thread_mdelay(1000);
}
return RT_EOK;
}
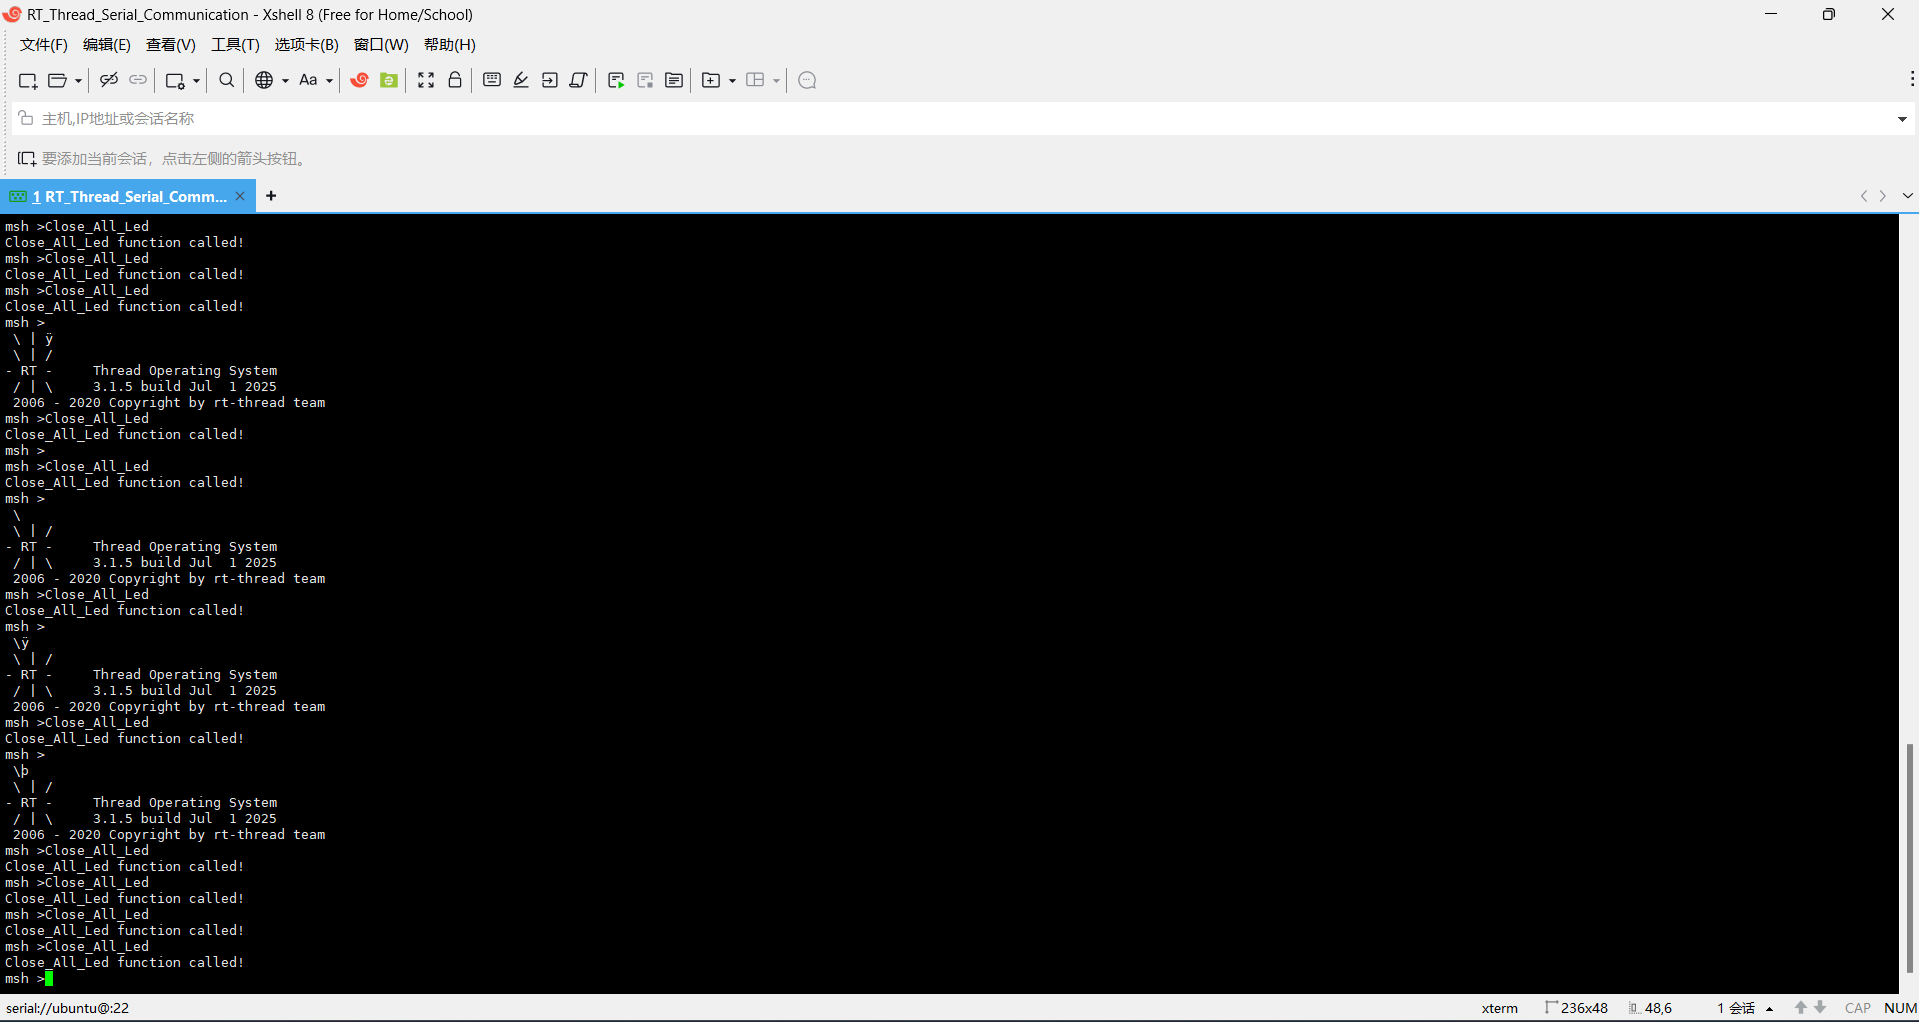
至此,FinSH组件成功开启并且自定义的MSH命令完成。
 问题(1):出现栈溢出,需要调整任务/线程的栈大小,或是调整FinSH线程栈大小
\ | /
- RT -     Thread Operating System
 / | \     3.1.5 build Jul  1 2025
 2006 - 2020 Copyright by rt-thread team
warning: Led0 stack is close to end of stack address.
warning: Led1 stack is close to end of stack address.
warning: Led2 stack is close to end of stack address.
warning: Led0 stack is close to end of stack address.
warning: Led1 stack is close to end of stack address.
psr: 0x01000000
r00: 0x20003284
r01: 0x20001470
r02: 0x20001470
r03: 0x20003284
r04: 0x00000001
r05: 0xdeadbeef
r06: 0xdeadbeef
r07: 0x200014c8
r08: 0xdeadbeef
r09: 0xdeadbeef
r10: 0xdeadbeef
r11: 0xdeadbeef
r12: 0x00000000
 lr: 0x08003447
 pc: 0x080030b0
hard fault on thread: Led1

thread pri  status      sp     stack size max used left tick  error
------ ---  ------- ---------- ----------  ------  ---------- ---
Led2     3  suspend 0x0a0000a6 0x0a0000be    23%   0x00000000 536875644
Led1     3  suspend 0x000000a6 0x000000be    100%   0x00000011 000
Led0     3  suspend 0x000000a6 0x000000be    87%   0x00000012 000
tshell  20  ready   0x00000040 0x00001000    01%   0x0000000a 000
tidle   31  ready   0x00000040 0x00000100    25%   0x00000020 000
timer    4  suspend 0x00000078 0x00000200    23%   0x00000009 000
main    10  ready   0x00000074 0x00000800    13%   0x00000004 000
bus fault:
SCB_CFSR_BFSR:0x04 IMPRECISERR
问题(1)的解决方案:

问题(2):如果出现卡死,没有msh
问题(2)的解决方案:一定要在main函数的while里加入rt_thread_mdelay,因为main也是一个线程,需要不断运行。(这个问题找了好久才解决)
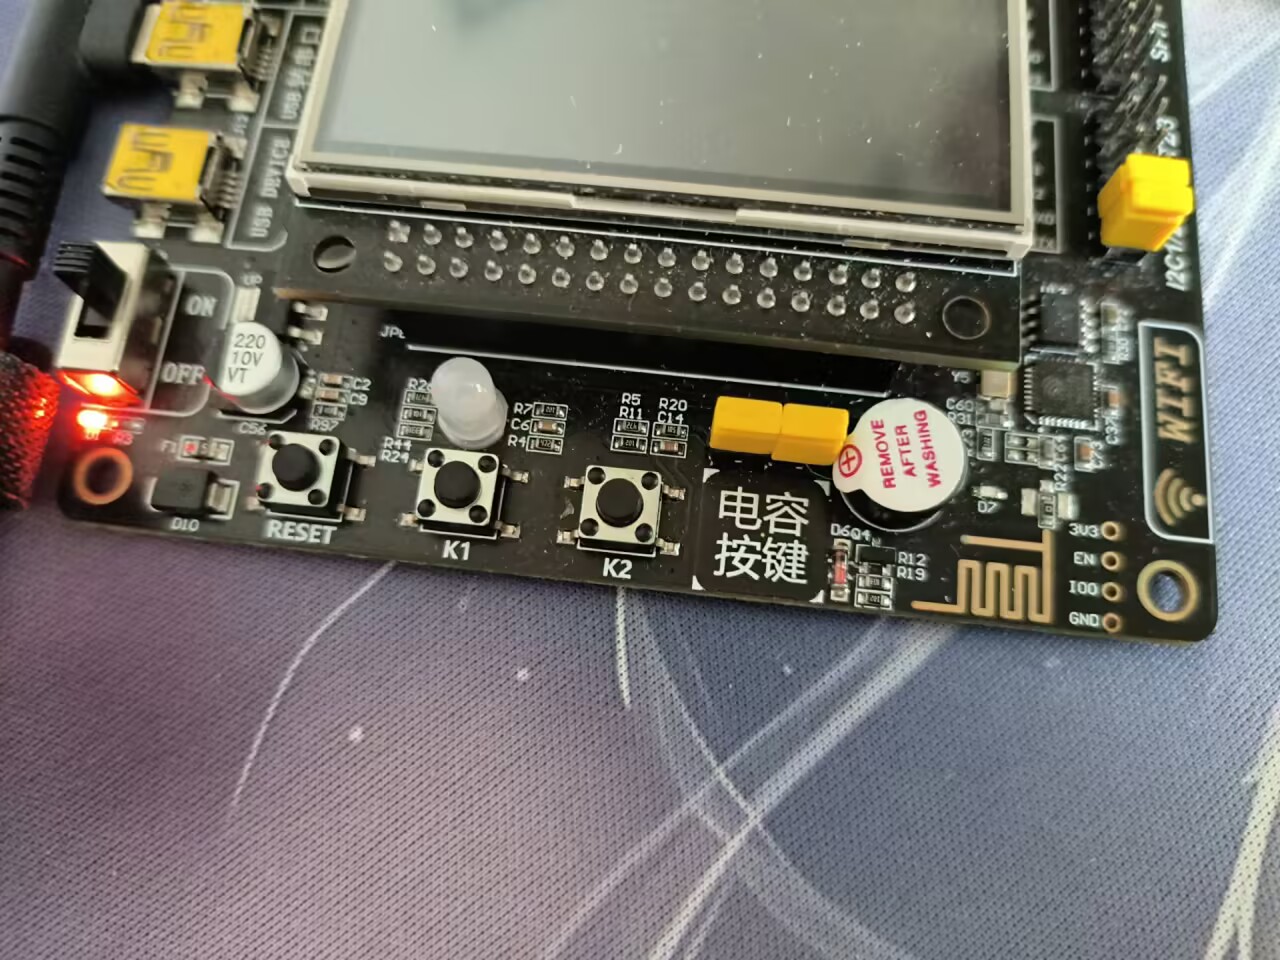
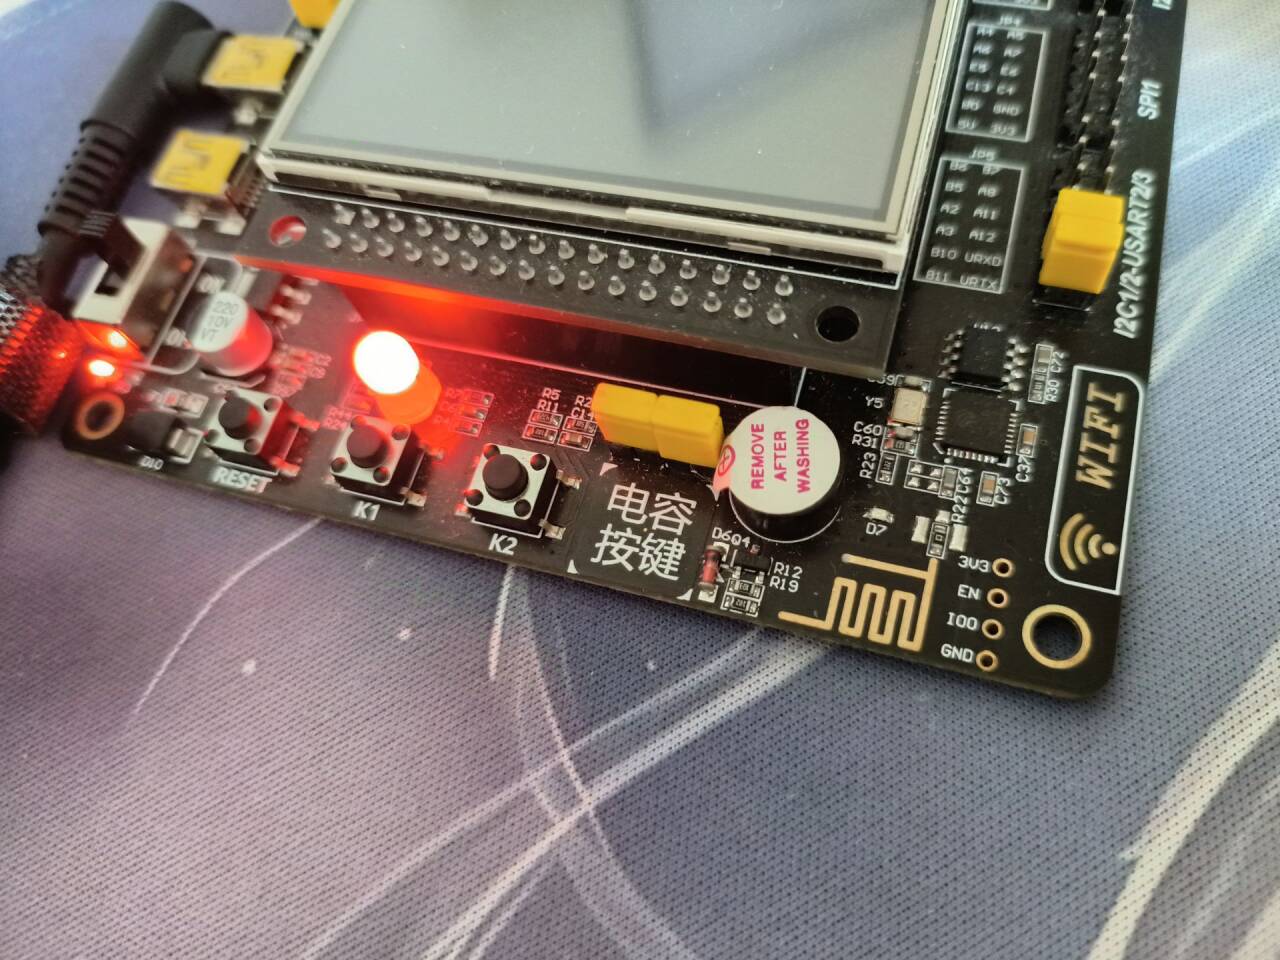
三、实验效果演示
普通实验效果:
Finsh组件使用效果:
四、RT-Thread相关知识补充(后续更新持续中)
1.线程
(1)线程状态
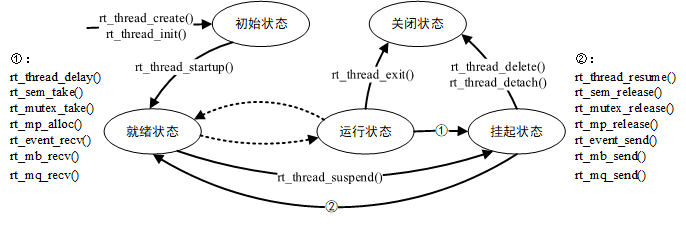
线程运行的过程中,同一时间内只允许一个线程在处理器中运行,从运行的过程上划分,线程有多种不同的运行状态,如初始状态、挂起状态、就绪状态等。在 RT-Thread 中,线程包含五种状态,操作系统会自动根据它运行的情况来动态调整它的状态。RT-Thread 中线程的五种状态,如下表所示:
| 状态 | 描述 |
|---|---|
| 初始状态 | 当线程刚开始创建还没开始运行时就处于初始状态;在初始状态下,线程不参与调度。此状态在 RT-Thread 中的宏定义为 RT_THREAD_INIT |
| 就绪状态 | 在就绪状态下,线程按照优先级排队,等待被执行;一旦当前线程运行完毕让出处理器,操作系统会马上寻找最高优先级的就绪态线程运行。此状态在 RT-Thread 中的宏定义为 RT_THREAD_READY |
| 运行状态 | 线程当前正在运行。在单核系统中,只有 rt_thread_self() 函数返回的线程处于运行状态;在多核系统中,可能就不止这一个线程处于运行状态。此状态在 RT-Thread 中的宏定义为 RT_THREAD_RUNNING |
| 挂起状态 | 也称阻塞态。它可能因为资源不可用而挂起等待,或线程主动延时一段时间而挂起。在挂起状态下,线程不参与调度。此状态在 RT-Thread 中的宏定义为 RT_THREAD_SUSPEND |
| 关闭状态 | 当线程运行结束时将处于关闭状态。关闭状态的线程不参与线程的调度。此状态在 RT-Thread 中的宏定义为 RT_THREAD_CLOSE |
(2)线程状态切换
RT-Thread 提供一系列的操作系统调用接口,使得线程的状态在这五个状态之间来回切换。几种状态间的转换关系如下图所示:
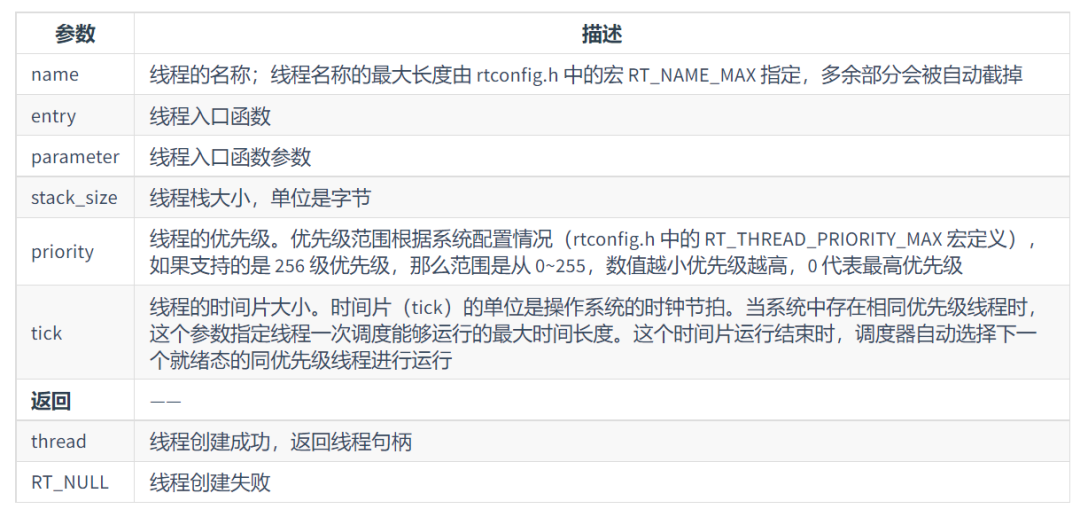
调用rt_thread_create函数时,系统会从动态堆内存中分配一个线程句柄以及按照参数中指定的栈大小从动态堆内存中分配相应的空间。分配出来的栈空间是按照 rtconfig.h 中配置的 RT_ALIGN_SIZE 方式对齐。线程创建 rt_thread_create() 的参数和返回值见下图:
示例项目链接:


 浙公网安备 33010602011771号