
ASP.NET Core分布式项目实战(Consent 确认逻辑实现)--学习笔记
任务22:Consent 确认逻辑实现
接下来,我们会在上一节的基础上添加两个按钮,同意和不同意,点击之后会把请求 post 到 ConsentController 处理,如果同意会通过 return url 跳转到客户端,如果不同意就会取消,同时客户端也会进行处理
首先完善 ViewModel,我们接收的是按钮,同意或者不同意,以及勾选的 checkbox,最终以 ScopesConsented 的形式返回,一个 string,value 是选中的 scope 的名称
在 ViewModels 下新建 InputConsentViewModel,用于接收 Consented 信息
InputConsentViewModel
public class InputConsentViewModel
{
    public string Button { get; set; }
    public IEnumerable<string> ScopesConsented { get; set; }
    public bool RememberConsent { get; set; }
    public string ReturnUrl { get; set; }
}
ReturnUrl 是 AccountController 传到 ConsentController 的,它们之间是通过 get 来传的,传完之后我们在 ConsentController 的 Index 中拿到,我们需要把它绑定到 ConsentViewModel,因为它最终需要通过 post 发回来
ConsentController
[HttpPost]
public async Task<IActionResult> Index(InputConsentViewModel viewModel)
{
    viewModel.ReturnUrl
}
这里面可以拿到 ReturnUrl,那它是怎么过来的呢,我们需要在 Consent 的 view 表单 index.cshtml 里面把它填过了,至少需要一个比如 hidden 控件,它里面需要有一个 ReturnUrl
index.cshtml
<form asp-action="Index" method="post">
<input type="hidden" asp-for="ReturnUrl"/>
同时需要在 ConsentViewModel 中加入 ReturnUrl
ConsentViewModel
public string ReturnUrl { get; set; }
接着可以在 ConsentController 的 BuildConsentViewModel 中给 Viewmodel 赋值 ReturnUrl
ConsentController
var vm = CreateConsentViewModel(request, client, resources);
vm.ReturnUrl = returnUrl;
return vm;
完成之后客户端就可以 index.cshtml 中展示的时候有一个隐藏的 ReturnUrl,它最终在 post 的时候会被包含到整个 Form 表单,所以我们可以在 ConsentController 的 Index 中拿到 viewModel 的 ReturnUrl
当我们点击“是”之后会跳转到客户端,如果点击“否”,也会跳转回去,所以我们需要在 ConsentController 的 index 中接收,然后 Redirect 到一个 url,那么在什么地方拿这个 url 呢,我们会用到之前讲到 InteractionService
ConsentController
[HttpPost]
public async Task<IActionResult> Index(InputConsentViewModel viewModel)
{
    ConsentResponse consentResponse = null;
    if (viewModel.Button == "no")
    {
        consentResponse = ConsentResponse.Denied;
    }
    else if (viewModel.Button == "yes")
    {
        if (viewModel.ScopesConsented != null && viewModel.ScopesConsented.Any())
        {
            consentResponse = new ConsentResponse
            {
                RememberConsent = viewModel.RememberConsent,
                ScopesConsented = viewModel.ScopesConsented,
            };
        }
    }

    if (consentResponse != null)
    {
        var request = await _identityServerInteractionService.GetAuthorizationContextAsync(viewModel.ReturnUrl);
        await _identityServerInteractionService.GrantConsentAsync(request, consentResponse);

        return Redirect(viewModel.ReturnUrl);
    }

    return View();
}
接着在 Consent 的视图中补充显示同意按钮,以及 Remember
Index.cshtml
<div class="row">
    <div class="col-sm-8">
        <form asp-action="Index" method="post">
        <input type="hidden" asp-for="ReturnUrl"/>

            @if (Model.IdentityScopes.Any())
            {
                <div class="panel">
                    <div class="panel-heading">
                        <span class="glyphicon glyphicon-user"></span>
                        用户信息
                    </div>
                    <ul class="list-group">
                        @foreach (var scope in Model.IdentityScopes)
                        {
                            @Html.Partial("_ScopeListitem", scope)
                        }
                    </ul>
                </div>
            }

            @if (Model.ResourceScopes.Any())
            {
                <div class="panel">
                    <div class="panel-heading">
                        <span class="glyphicon glyphicon-tasks"></span>
                        应用权限
                    </div>
                    <ul class="list-group">
                        @foreach (var scope in Model.IdentityScopes)
                        {
                            @Html.Partial("_ScopeListitem", scope)
                        }
                    </ul>
                </div>
            }

            <div>
                <label>
                    <input type="checkbox" asp-for="RememberConsent"/>
                    <strong>记住我的选择</strong>
                </label>
            </div>

            <div>
                <button name="button" value="yes" class="btn btn-primary" autofocus>同意</button>
                <button name="button" value="no">取消</button>

                @if (!string.IsNullOrEmpty(Model.ClientUrl))
                {
                    <a href="@Model.ClientUrl" class="pull-right btn btn-default">
                        <span class="glyphicon glyphicon-info-sign"></span>
                        <strong>@Model.ClientUrl</strong>
                    </a>
                }
            </div>
        </form>
    </div>
</div>
因为最终 AllowRemeberConsent 的 checkbox 需要 psot 回去,就是在 InputConsentViewModel 中有一个 RememberConsent,所以我们需要把 ConsentViewModel 的 AllowRemeberConsent 改为 RememberConsent,
因为 RememberConsent 与 ReturnUrl 这两个属性与 InputConsentViewModel 中一致,所以直接继承
ConsentViewModel
public class ConsentViewModel : InputConsentViewModel
{
    public string ClientId { get; set; }
    public string ClientName { get; set; }
    public string ClientLogoUrl { get; set; }
    public string ClientUrl { get; set; }

    // 对两种用户分别做出选择
    public IEnumerable<ScopeViewModel> IdentityScopes { get; set; }
    public IEnumerable<ScopeViewModel> ResourceScopes { get; set; }
}
ConsentController
vm.RememberConsent = client.AllowRememberConsent;
因为在 Config.cs 中传了两个 Resources
Config
IdentityServerConstants.StandardScopes.Profile,
IdentityServerConstants.StandardScopes.OpenId,
OpenId 是必须需要的,因为客户端接收的时候使用的是 oidc,它会根据 OpenId 获取用户信息
Startup
.AddOpenIdConnect("oidc", options =>
所以我们需要在 _ScopeListitem.cshtml 中把选中的 scope 传回去
_ScopeListitem.cshtml
<input type="checkbox"
               name="ScopesConsented"
               id="scopes_@Model.Name"
               value="@Model.Name"
               checked="@Model.Checked"
               disabled="@Model.Required"/>

        @if (Model.Required)
        {
            <input type="hidden" name="ScopesConsented" value="@Model.Name"/>
        }
在 Conifg 中添加上 Claims
Conifg
public static List<TestUser> GetTestUsers()
{
    return new List<TestUser>
    {
        new TestUser
        {
            SubjectId = "1",
            Username = "mingsonzheng",
            Password = "123456",
            Claims = new List<Claim>
            {
                new Claim("name", "mingson"),
                new Claim("website", "https://www.cnblogs.com/MingsonZheng/"),
            }
        }
    };
}
启动服务端,再启动客户端,访问 http://localhost:5001/
自动跳转到 5000 登录
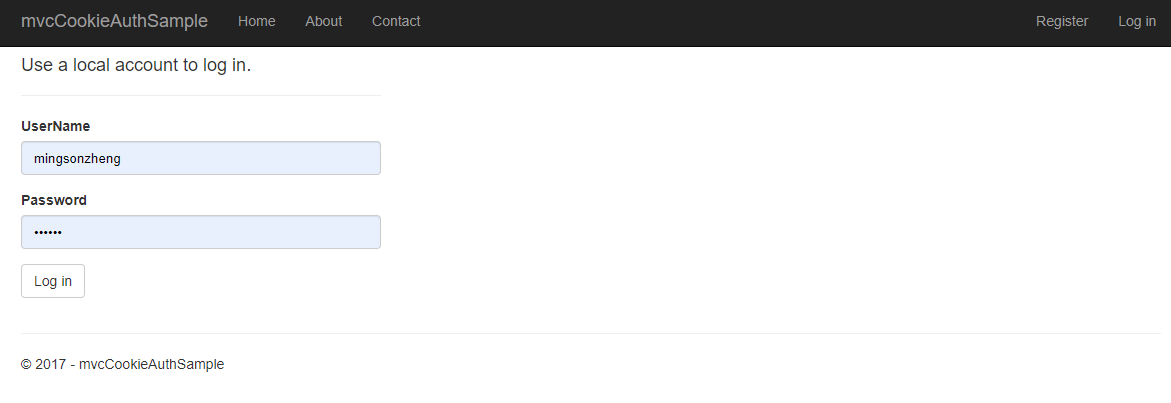
登录之后进入授权界面

勾选 profile ,点击同意,跳转到 5001,说明登录成功
点击 About,查看返回信息
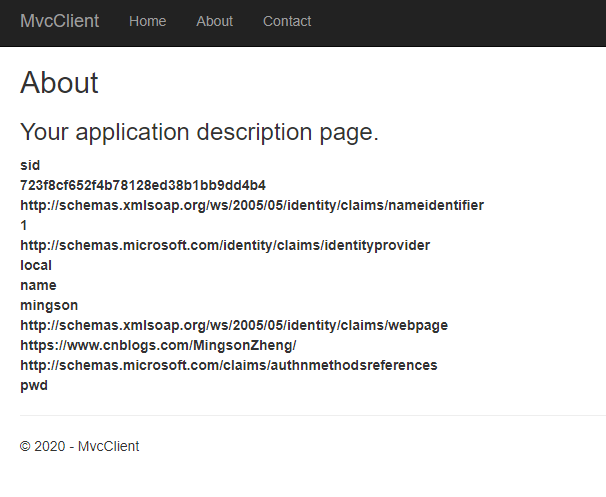
可以看到带回来了 Conifg 里面的信息,这些信息包含在 Profile 中返回回来的
Conifg
new IdentityResources.Profile(),
现在我们已经走完了流程,后面会在这个基础之上进行重构
课程链接
http://video.jessetalk.cn/course/explore


本作品采用知识共享署名-非商业性使用-相同方式共享 4.0 国际许可协议进行许可。
欢迎转载、使用、重新发布,但务必保留文章署名 郑子铭 (包含链接: http://www.cnblogs.com/MingsonZheng/ ),不得用于商业目的,基于本文修改后的作品务必以相同的许可发布。
如有任何疑问,请与我联系 (MingsonZheng@outlook.com) 。

 浙公网安备 33010602011771号