git与git远程仓库
git与git远程仓库
持续集成
1.什么是版本控制系统?
a.sh--a.sh--a.sh 一次又一次的修改,最后还是觉得第一个好
版本控制系统就可以让你快速回滚到指定的版本,只保留变化的内容
2.svn与git
svn: 中心化的代码仓库
中心仓库挂了 全挂
git: 分布式的代码仓库
自己本地有个git本地仓库,先提交给自己的仓库 然后整个提交到中心仓库,就算中心仓库挂了,他也不会挂
3.安装和配置git
[root@tomcat01 ~]# yum install git -y
[root@tomcat01 ~]# git --version
git version 1.8.3.1

[root@tomcat01 ~]# git config --global user.name "msy"
[root@tomcat01 ~]# git config --global user.email "912418275@qq.com"
[root@tomcat01 ~]# git config --global color.ui "true"
[root@tomcat01 ~]# cat /root/.gitconfig
[user]
	name = msy
	email = 912418275@qq.com
[color]
	ui = true
4.创建版本库
[root@tomcat01 /opt/msy]# git init
5.创建所需目录
[root@tomcat01 ~]# cd /opt/
[root@tomcat01 /opt]# mkdir msy
[root@tomcat01 /opt]# cd msy/
[root@tomcat01 /opt/msy]# pwd
/opt/msy
[root@tomcat01 /opt/msy]# ls
[root@tomcat01 /opt/msy]# ls -a 隐藏文件
.  ..  .git
[root@tomcat01 /opt/msy]# ls .git/
branches/    description  hooks/       objects/
config       HEAD         info/        refs/
文件在上传到仓库的时候会先经过缓冲区 这样就不会一直提交了
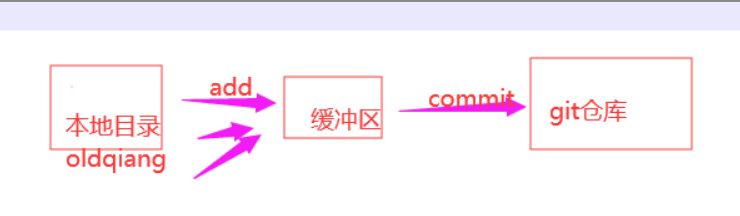
6.上传文件,删除文件,提交文件
[root@tomcat01 /opt/msy]# touch {1..5}.txt
[root@tomcat01 /opt/msy]# ls
1.txt 2.txt 3.txt 4.txt 5.txt
[root@tomcat01 /opt/msy]# git add 1.txt 上传缓冲区
[root@tomcat01 /opt/msy]# git status
# Changes to be committed:
# (use "git rm --cached <file>..." to unstage)
#
# new file: 1.txt 一个在缓冲区
#
# Untracked files:
# (use "git add <file>..." to include in what will be committed)
#
# 2.txt 这几个不在
# 3.txt
# 4.txt
# 5.txt
[root@tomcat01 /opt/msy]# git add . 全上传
[root@tomcat01 /opt/msy]# git status
# On branch master
#
# Initial commit
#
# Changes to be committed:
# (use "git rm --cached <file>..." to unstage)
#
# new file: 1.txt 全在缓冲区
# new file: 2.txt
# new file: 3.txt
# new file: 4.txt
# new file: 5.txt
[root@tomcat01 /opt/msy]# git rm --cached 3.txt 删掉缓冲区中的3
rm '3.txt'
[root@tomcat01 /opt/msy]# git status
# Changes to be committed:
# (use "git rm --cached <file>..." to unstage)
#
# new file: 1.txt
# new file: 2.txt
# new file: 4.txt
# new file: 5.txt
#
# Untracked files:
# (use "git add <file>..." to include in what will be committed)
#
# 3.txt
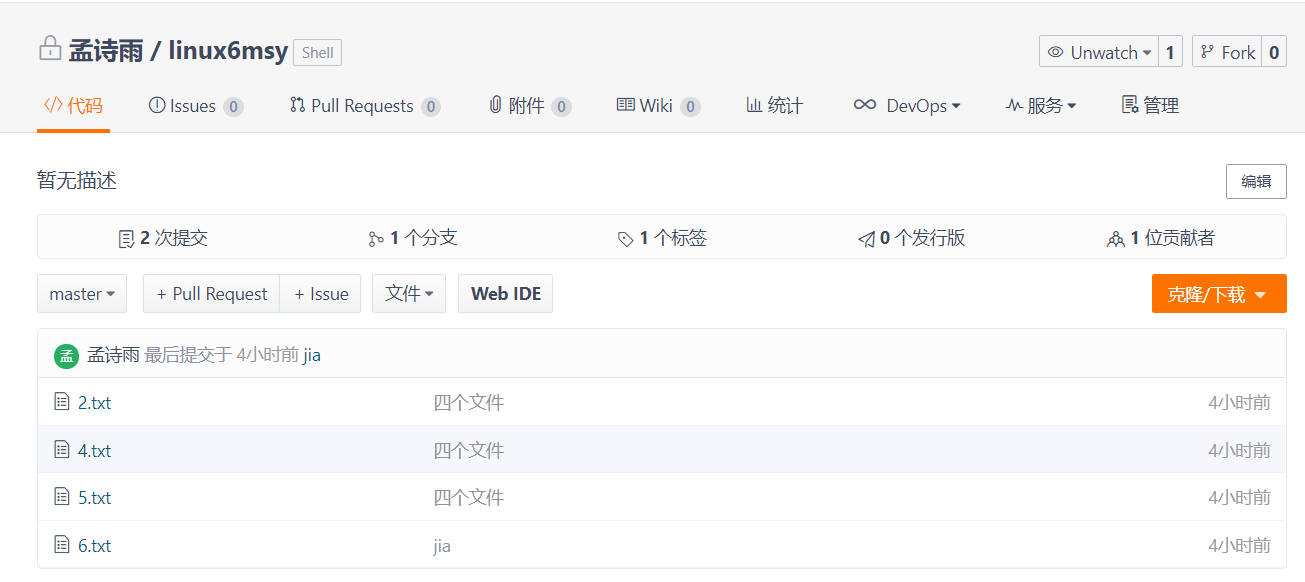
[root@tomcat01 /opt/msy]# git commit -m '四个文件' 提交文件
[master (root-commit) 8e5187e] 四个文件
4 files changed, 0 insertions(+), 0 deletions(-)
create mode 100644 1.txt
create mode 100644 2.txt
create mode 100644 4.txt
create mode 100644 5.txt
7.仓库里面文件改名
[root@tomcat01 /opt/msy]# git mv 1.txt 6.txt
[root@tomcat01 /opt/msy]# git status
告诉你1.txt变6.txt了
8.文件对比
[root@tomcat01 /opt/msy]# vim 6.txt
123
456
[root@tomcat01 /opt/msy]# git status
告诉你6变化了
[root@tomcat01 /opt/msy]# git diff 6.txt 本地目录文件和缓冲区文件对比
diff --git a/6.txt b/6.txt
index e69de29..ce8c77d 100644
--- a/6.txt
+++ b/6.txt
@@ -0,0 +1,2 @@     告诉你加了这些
+123
+456

[root@tomcat01 /opt/msy]# git add 6.txt 上传缓冲区
[root@tomcat01 /opt/msy]# git diff --cached  6.txt 缓冲区文件与仓库文件对比
diff --git a/6.txt b/6.txt
new file mode 100644
index 0000000..ce8c77d
--- /dev/null
+++ b/6.txt
@@ -0,0 +1,2 @@
+123
+456
[root@tomcat01 /opt/msy]# git commit -m 'jia'
9.回退功能
[root@tomcat01 /opt/msy]# git log --oneline 查看当前历史版本
341bc1a jia
8e5187e 四个文件

[root@tomcat01 /opt/msy]# git reflog --oneline 查看所有历史版本
341bc1a HEAD@{0}: commit: jia
8e5187e HEAD@{1}: commit (initial): 四个文件

[root@tomcat01 /opt/msy]# git reset --hard 8e5187e 回到了之前第一个版本
HEAD is now at 8e5187e 四个文件
10.撤销修改文件
[root@tomcat01 /opt/msy]# vim 5.txt
123
[root@tomcat01 /opt/msy]# git add 5.txt 上传缓冲区
[root@tomcat01 /opt/msy]# git diff 5.txt 缓冲区与本地对比 一样的
[root@tomcat01 /opt/msy]# git diff --cached 5.txt 缓冲区与仓库对比不一样
diff --git a/5.txt b/5.txt
index e69de29..190a180 100644
--- a/5.txt
+++ b/5.txt
@@ -0,0 +1 @@
+123

现在把上传到缓冲区的文件撤回
[root@tomcat01 /opt/msy]# git reset HEAD 5.txt
[root@tomcat01 /opt/msy]# git diff 5.txt 缓冲区与本地对比 就不一样了
diff --git a/5.txt b/5.txt
index e69de29..190a180 100644
--- a/5.txt
+++ b/5.txt
@@ -0,0 +1 @@
+123
[root@tomcat01 /opt/msy]# git diff --cached 5.txt 缓冲区与仓库对比一样了

[root@tomcat01 /opt/msy]# git checkout -- 5.txt 没有上传到缓冲区 撤回
[root@tomcat01 /opt/msy]# git diff 5.txt 对比没有不一样
[root@tomcat01 /opt/msy]# cat 5.txt 查看源文件 没有修改过
11.git分支管理
[root@tomcat01 /opt/msy]# git branch  查看分支
* master
[root@tomcat01 /opt/msy]# git branch test1
[root@tomcat01 /opt/msy]# git branch
* master
  test1

#增加一个新分支
git branch dev01

#切换分支
git checkout  dev01

#在开发分支上合并主分支
git merge master  -m '注释'   都是在开发分支上合并,没有冲突后主分支再拉过来

#切回主分支
git checkout  master

#在主分支合并开发
git merge dev01  -m '注释'
12.git标签管理
起个容易记住的名
[root@tomcat01 /opt/msy]# git log --oneline
341bc1a jia
8e5187e 四个文件
[root@tomcat01 /opt/msy]# git reset --hard 341bc1a 回滚
HEAD is now at 341bc1a jia
[root@tomcat01 /opt/msy]# git tag v1.2 给当前的这个打标签
[root@tomcat01 /opt/msy]# git tag
v1.2

#给当前版本打标签
git tag v1.2

#删除标签
git  tag  -d  v1.2

#给任意版本打标签
git tag  -a v1.0  -m  '优化了1111  修复bug'  a119962
13.git远程仓库gitee
https://gitee.com/ 码云注册
创建仓库 可以新创建 可以用已有仓库
[root@tomcat01 /opt/msy]# git config --global user.name "孟诗雨"
[root@tomcat01 /opt/msy]# git config --global user.email "912418275@qq.com" 用户创建
[root@tomcat01 /opt/msy]# ssh-keygen -t rsa 创建公钥
[root@tomcat01 /opt/msy]# cat /root/.ssh/id_rsa.pub 把公钥存在码云
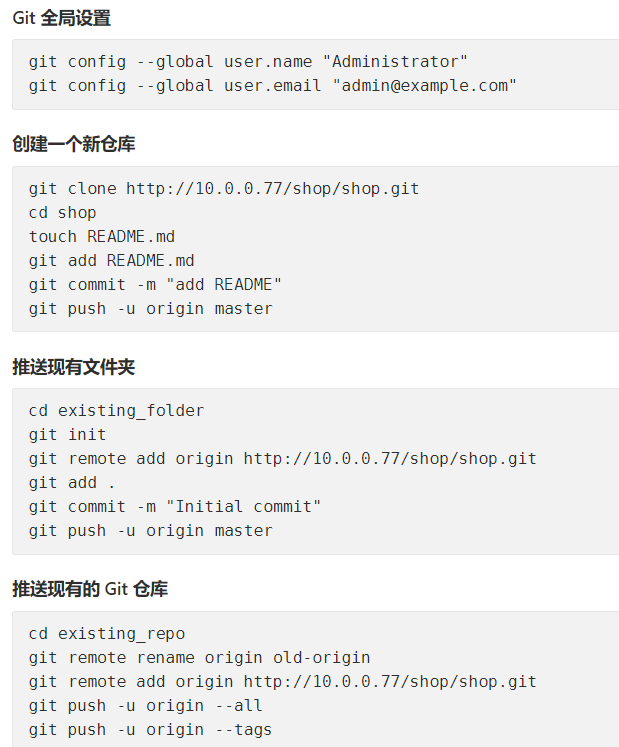
[root@tomcat01 /opt/msy]# git remote add origin git@gitee.com:meng_shi_yu/linux6msy.git
把你之前的仓库推到origin用户
[root@tomcat01 /opt/msy]# git push -u origin master 把你之前的仓库用origin用户推到码云master上
[root@tomcat01 /opt/msy]# git push -u origin master --tags 把标签也推过去
14.gitlab安装
私有代码仓库
[root@tomcat01 ~]# wget http://192.168.13.120/191118/gitlab-ce-12.3.5-ce.0.el7.x86_64.rpm
[root@tomcat01 ~]# yum localinstall gitlab-ce-12.3.5-ce.0.el7.x86_64.rpm -y

[root@tomcat01 ~]# vim /etc/gitlab/gitlab.rb
external_url 'http://10.0.0.77'
prometheus_monitoring['enable'] = false

#配置gitlab通过smtp发送邮件
gitlab_rails['gitlab_email_enabled'] = true
gitlab_rails['gitlab_email_from'] = '912418275@qq.com'
gitlab_rails['gitlab_email_display_name'] = 'msy_gitlab'

gitlab_rails['smtp_enable'] = true
gitlab_rails['smtp_address'] = "smtp.qq.com"
gitlab_rails['smtp_port'] = 465
gitlab_rails['smtp_user_name'] = "912418275@qq.com"
gitlab_rails['smtp_password'] = "xxxxxx"授权码
gitlab_rails['smtp_domain'] = "qq.com"
gitlab_rails['smtp_authentication'] = "login"
gitlab_rails['smtp_enable_starttls_auto'] = true
gitlab_rails['smtp_tls'] = true

[root@tomcat01 ~]# gitlab-ctl  reconfigure
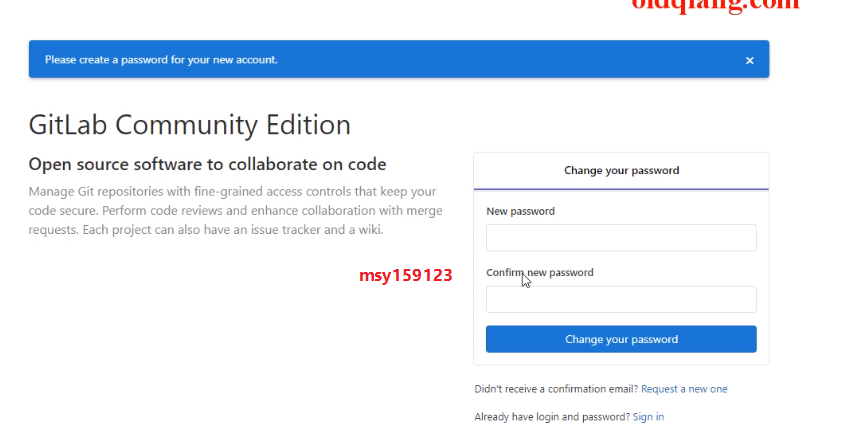
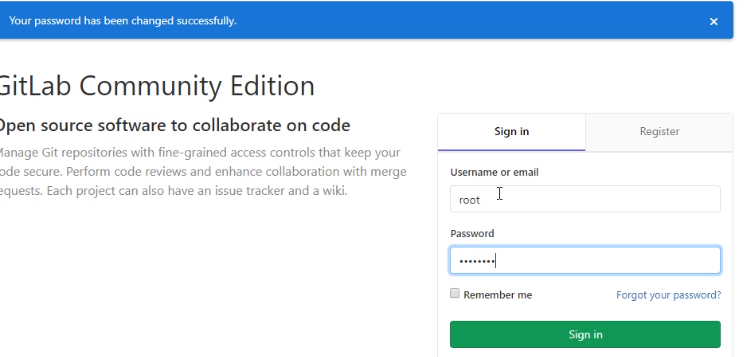
访问10.0.0.77
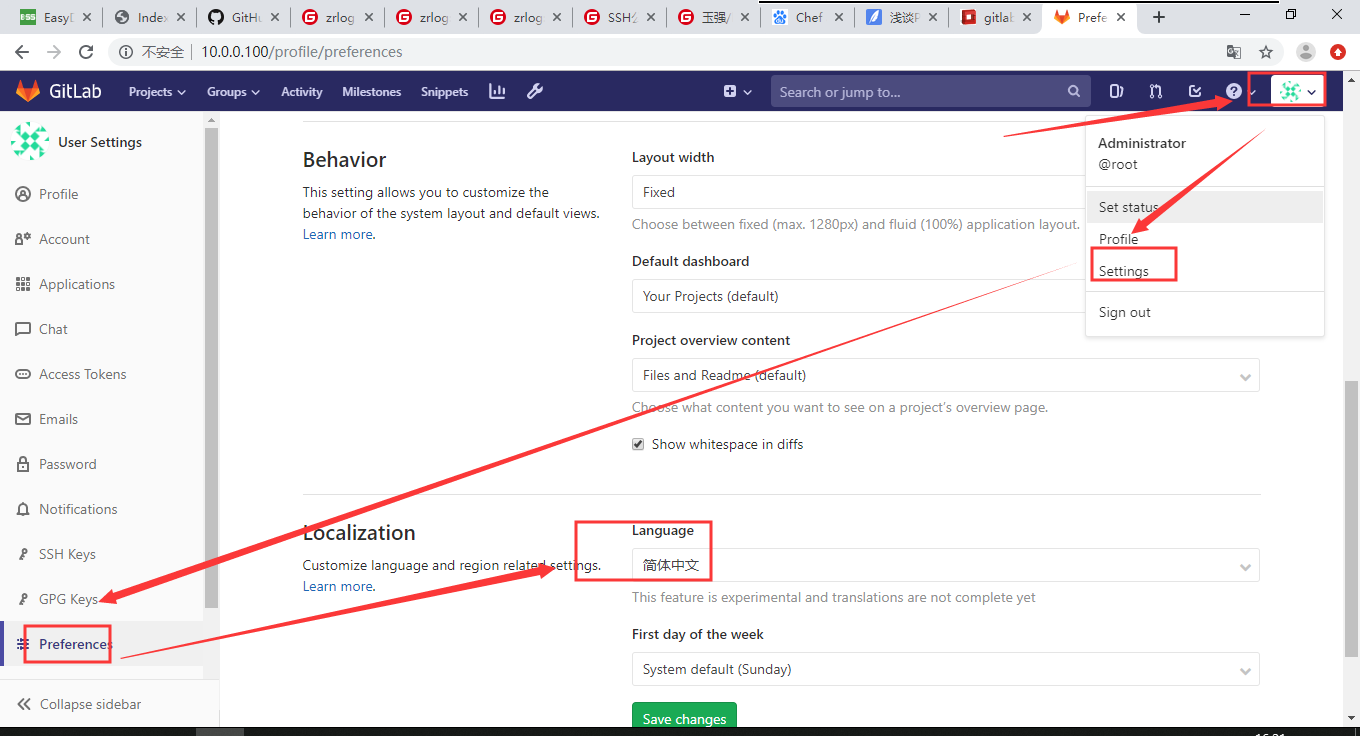
15.gitlab汉化
[root@tomcat01 ~]# gitlab-ctl stop 先停止服务
#下载汉化包https://gitlab.com/xhang/gitlab 官网地址
[root@tomcat01 ~]# wget http://192.168.13.120/191118/gitlab-v12.3.5-zh.tar.gz
[root@tomcat01 ~]# \cp -a gitlab-v12.3.5-zh/* /opt/gitlab/embedded/service/gitlab-rails/
cp: cannot overwrite non-directory ‘/opt/gitlab/embedded/service/gitlab-rails/log’ with directory ‘gitlab-v12.3.5-zh/log’
cp: cannot overwrite non-directory ‘/opt/gitlab/embedded/service/gitlab-rails/tmp’ with directory ‘gitlab-v12.3.5-zh/tmp’

[root@tomcat01 ~]# gitlab-ctl start 重启
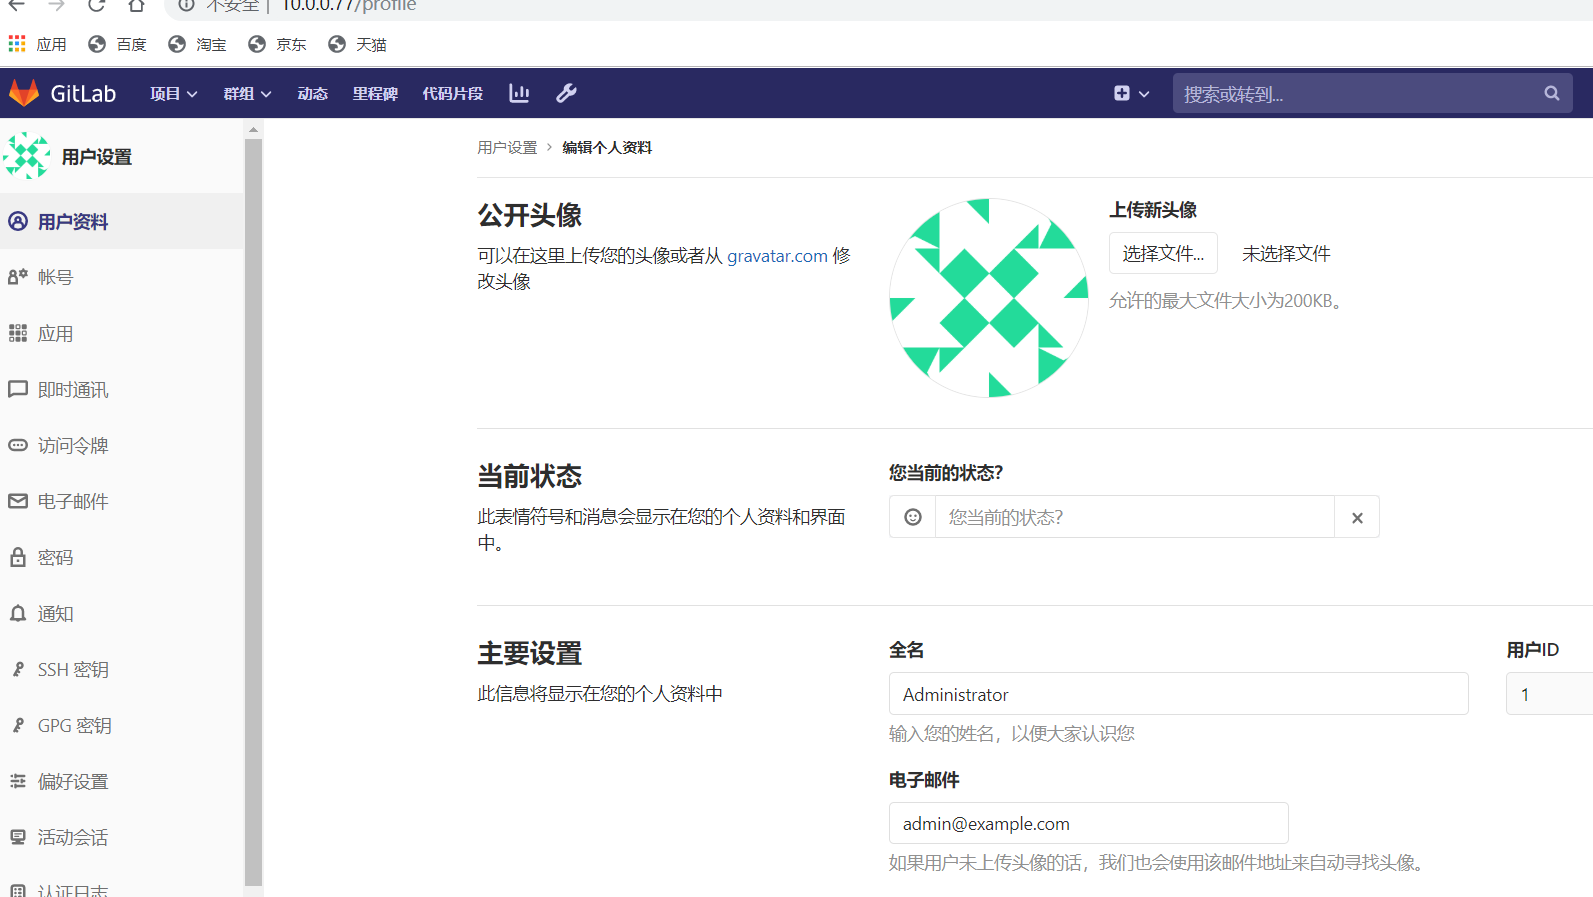
16.gitlab-用户-用户组-项目之间的关系
先创建用户组,在基于用户组创建项目,最后创建用户,编辑用户组,添加成员,注意权限
里面的功能自己了解,比较简单的,上传已有仓库开发人员上传会失败,需要所有者一起,上传仓库要保证私有仓库为空,不然会失败。
拉取代码什么的 需要配置密钥
记得把注册功能取消掉!
17.gitlab备份和恢复
#备份
gitlab-rake gitlab:backup:create

#恢复
gitlab-ctl  stop unicorn
gitlab-ctl  stop sidekiq
gitlab-rake gitlab:backup:restore BACKUP=1510472027_2017_11_12_9.4.5
gitlab-ctl  start unicorn
gitlab-ctl  start sidekiq

vim /etc/gitlab/gitlab.rb
gitlab_rails['manage_backup_path'] = true
gitlab_rails['backup_path'] = "/var/opt/gitlab/backups"
gitlab_rails['backup_keep_time'] = 604800

#迁移云主机
先备份,云主机安装相同版本,恢复
18.gitlab版本升级
gitlab升级,  10-->11-->12
不能跨大版本

 浙公网安备 33010602011771号