实验 7:OpenDaylight 实验——Python 中的 REST API 调用
实验 7:OpenDaylight 实验——Python 中的 REST API 调用
一、实验目的
对 Python 调用 OpenDaylight 的 REST API 方法有初步了解。
二、实验任务
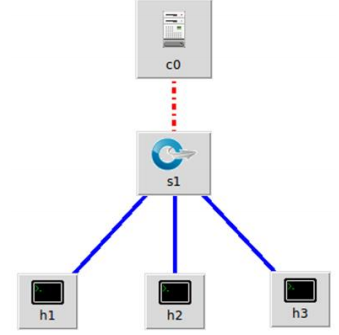
本实验需要用另一种方法完成上一个实验相同的功能,即通过 Python 程序调用OpenDaylight 的北向接口下发关于硬超时的流表,实现拓扑内主机在一定时间内的网络通断。实验拓扑如下:
三、实验步骤
1.实验环境
安装了 Ubuntu 18.04.5 Desktop amd64 的虚拟机
2.实验过程
(1)生成拓扑
$ sudo mn --topo=single,3 --controller=remote,ip=127.0.0.1,port=6633 --switch ovsk,protocols=OpenFlow13
生成拓扑的方法同之前的实验一致。
(2)编写 Python 代码和 JSON 格式的请求内容
$ nano odlnorth.py
#!/usr/bin/python

import requests
from requests.auth import HTTPBasicAuth

def http_put(url,jstr):
	url= url
	headers = {'Content-Type':'application/json'}
	resp = requests.put(url,jstr,headers=headers,auth=HTTPBasicAuth('admin', 'admin'))
	return resp
if __name__ == "__main__":
	url = 'http://127.0.0.1:8181/restconf/config/opendaylight-inventory:nodes/node/openflow:1/flow-node-inventory:table/0/flow/1'
	with open('hardtimeout.json') as f:
		jstr = f.read()
	resp = http_put(url,jstr)
	print resp.content
由于是下发流表,因此需要有 http 请求的具体内容,同之前的 Postman 一样,也是以 JSON 格式来表示。
编辑 hardtimeout.json 文件:
$ nano hardtimeout.json
文件中不包含 http 请求的 url 地址
{
	"flow": [
	    {
		"id": "1",
		"match": {
		        "in-port": "1",
			"ethernet-match": {
				"ethernet-type": {
					"type": "0x0800"
				}
		         },
			"ipv4-destination": "10.0.0.3/32"
	        },
	        "instructions": {
		        "instruction": [
			    {
				"order": "0",
				"apply-actions": {
					"action": [
					     {
						"order": "0",
						"drop-action": {}
					     }
				        ]
				  }
			    }
			 ]
	        },
		"flow-name": "flow1",
		"priority": "65535",
		"hard-timeout": "10",
	        "cookie": "2",
		"table_id": "0"
	 }
     ]
}
(3)运行 Python 代码,完成流表下发
$ python odlnorth.py
结果验证方法同实验 6。
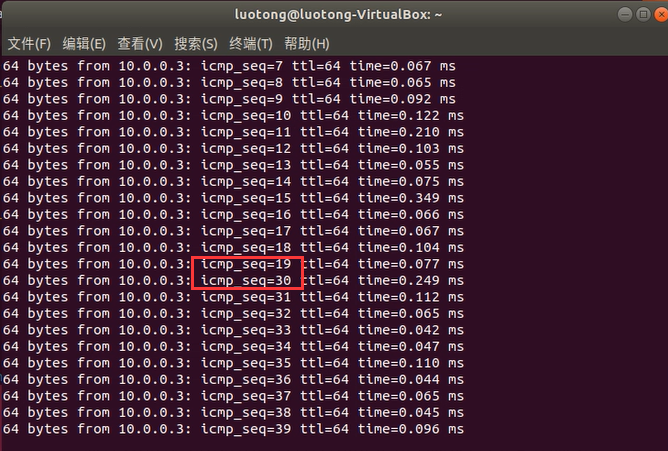
可以看到,中间有大约10秒的中断。
提示:运行代码如果报错:ImportError: No module named requests,可尝试如下方法。
$ sudo apt-get install python-pip //如果 pip 没装的话需要运行
$ sudo pip install requests
- 更多 OpenDaylight 的 REST API 文档可以在下面的地址中查找:
http://127.0.0.1:8181/apidoc/explorer/index.html
四、总结
实验中,创建拓扑之前需要先运行OpenDaylight,否则会导致连接不上控制器(没错,又是控制器Orz),其他方面跟上一个实验差不多,总的来说较为流畅。

 浙公网安备 33010602011771号