

Vue3
Vue3介绍
一、 Vue3的变化
1.性能的提升
打包大小减少41%
初次渲染快55%, 更新渲染快133%
内存减少54%
2.源码的升级
使用Proxy代替defineProperty实现响应式
重写虚拟DOM的实现和Tree-Shaking(摇树--清除死代码进行优化)
3.拥抱TypeScript
Vue3可以更好的支持TypeScript
4.新的特性
Composition API(组合API)
setup配置
ref与reactive
watch与watchEffect
provide与inject
新的内置组件
Fragment
Teleport
Suspense
其他改变
新的生命周期钩子
data 选项应始终被声明为一个函数
组合式API和配置项api
组合式api:都写到一个函数中,定义变量和定义方法,定义计算属性都是放在一起,不是拆到不同地方了
vue3兼容vue2 ---》vue2 的内容,vue3完全适用
vue3 不建议这么用来,建议使用组合式api,不建议使用配置项api
配置项api:之前vue2中的写法
new Vue({
data:{
name:'lqz'
},
methods:{
# 使用变量
}
})
组合式api
setup{
var name=ss
console.log(name)
}
二、创建vue3
1. 使用vue-cli创建
官方文档:https://cli.vuejs.org/zh/guide/creating-a-project.html#vue-create
## 查看@vue/cli版本,确保@vue/cli版本在4.5.0以上
vue --version
## 安装或者升级你的@vue/cli
npm install -g @vue/cli
## 创建
vue create vue_test
## 启动
cd vue_test
npm run serve
2. 使用vite 创建
官方文档:https://v3.cn.vuejs.org/guide/installation.html#vite
vite官网:https://vitejs.cn
介绍:https://cn.vitejs.dev/guide/why.html#the-problems
1. 什么是vite?
vite是新一代前端构建工具
2. vite的优点:
- 开发环境中,无需打包操作,可快速的冷启动
- 轻量快速的热重载(HMR)
- 真正的按需编译,不在等待整个应用编译完成
## 创建工程
npm init vite-app <project-name>
## 进入工程目录
cd <project-name>
## 安装依赖
npm install
## 运行
npm run dev
补充:
编程语言的链式调用:
对象.changeName('lqz').printName().showAge()
python是如何实现链式调用的
class Person:
def changeName(self,name):
self.name=name
return self
def printName(self):
print(self.name)
return self
三、setup函数
1. setup为Vue3.0中一个新的配置项,值为一个函数2. setup是所有Composition API(组合API)编写的位置
3. 组件中所用到的:数据、方法等等,均要配置在setup中
4.setup函数的返回值:返回一个对象,对象中的属性、方法, 在模板中均可以直接使用
5. 注意:
尽量不要与Vue2.x配置混用
- Vue2.x配置(data、methos、computed...)中可以访问到setup中的属性、方法。
- 但在setup中不能访问到Vue2.x配置(data、methos、computed...)。
- 如果有重名, setup优先
基本使用:

结果:
setup的两个注意点:
1. setup执行的时机
在beforeCreate之前执行一次,所以this是undefined
2. setup的参数
props:值为对象,包含:组件外部传递过来,且组件内部声明接收了的属性
context:上下文对象
attrs:值为对象,包含:组件外部传递过来的,但没有在props配置中声明的属性,相当于this.$attrs
slots:收到的插槽内容,相当于this.$slots
emit:分发自定义事件的函数,相当于this.$emit
总结:
1. setup执行时在beforeCreate,没有this对象,以后不要用this了
2. 如果写setup函数,想接收父组件自定义属性传入的值,需要:
export default {
       setup(props) {
            console.log(props.msg)
          },
          props: ['msg']
        }
3. 如果是vue3的最新写法,想接收父组件自定义属性传入的值,需要:
<script setup>
defineProps(['msg'])
</script>
四、ref函数
作用: 定义一个响应式的数据
语法:const xxx = ref(initValue)
- 创建一个包含响应式数据的引用对象(reference对象,简称ref对象)
- js中操作数据:xxx.value
- 模版中读取数据:不需要.value,直接:<div>{{xxx}}</div>
接收的数据可以是:基本类型(值类型)、也可以是对象(引用类型)类型。
值类型:数字,字符串,布尔,用ref做响应式
// 变量要具备响应式---》页面内容变化,变量和变,变量变化,页面也变
// 普通变量,通过ref绑定响应式
// 引用类型变量:通过reactive 绑定响应式
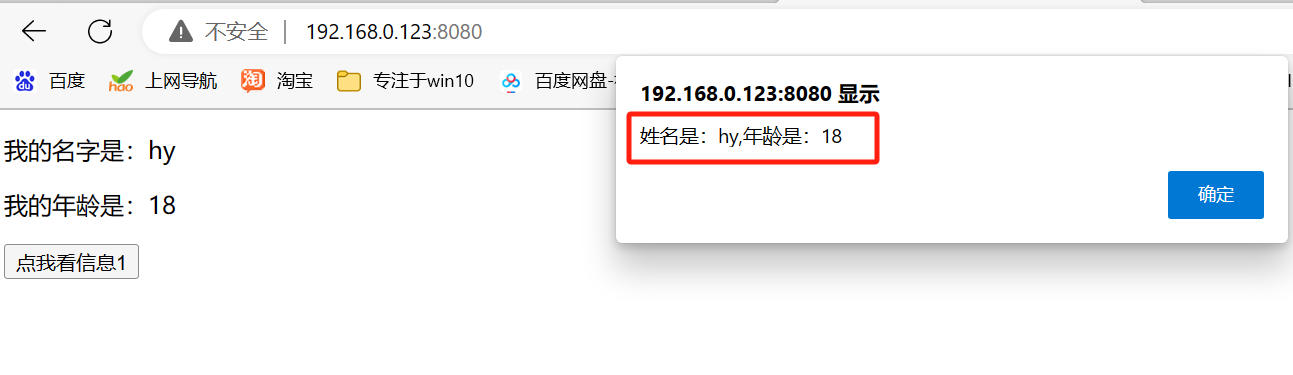
<template>
  <div class="home">
    <p>我的名字是:{{ name }}</p>
    <p>我的年龄是:{{ age }}</p>
    <button @click="handleAdd">点我年龄+1</button>
    <button @click="handleChangeName">点我秒变彭于晏</button>
  </div>
</template>
<script>
import {ref} from 'vue'

export default {

  setup() {
    // 1 定义数据
    let name = ref('lqz')
    let age = ref(19)
    // 2 定义方法
    const handleAdd = () => {
      age.value += 1
      console.log(typeof age)
    }
    const handleChangeName = () => {
      name.value = '彭于晏'
    }
    return {name, age, handleAdd,handleChangeName}
  },
}
</script>
五、reactive函数
作用:定义一个对象类型的响应式数据
语法:const 代理对象 = reactive(源对象)接收一个对象(或数组),返回一个代理对象(Proxy的实例对象,简称proxy对象)
reactive定义的响应式数据是‘深层次的’,无论套多少层,都具备响应式
<template>
  <div class="home">
    <p>我的名字是:{{ data.name }}</p>
    <p>我的年龄是:{{ data.age }}</p>
    <p>我的爱好是:{{ hobby }}</p>
    <button @click="addAge">点我年龄+1</button>
    <br>
    {{ obj.hobby }}
    <br>
    <button @click="changeHobby">点我把保龄球换成足球</button>

    <hr>
    <HelloWorld msg="asdfasdfasdfasdf"></HelloWorld>
  </div>
</template>

<script>

// 变量要具备响应式---》页面内容变化,变量和变,变量变化,页面也变
// 普通变量值类型,通过ref绑定响应式   数字,字符串
// 引用类型变量:通过reactive 绑定响应式   对象,数组

import {reactive, ref} from 'vue'
import HelloWorld from "@/components/HelloWorld.vue";
export default {
  name: 'HomeView',
  setup(props) {
    let hobby = ref('篮球')
    let obj = ref({
      age: 99,
      hobby: '保龄球'
    })
    const changeHobby = () => {
      console.log(obj)
      obj.value.hobby = '足球'
    }
    let data = reactive({
      name: '彭于晏',
      age: 19
    })
    const addAge = () => {
      //data.age++
      console.log(typeof data)
      console.log(data) // 是一个代理对象,无法拿出原来对象,但是操作起来跟操作源对象一样
      data.age++
    }
    return {hobby, data, addAge, obj, changeHobby}
},
  components: {
    HelloWorld
  }
}
</script>
总结:
如果用基本数据类型:数字,字符串,布尔,用ref 做响应式
如果是对象类型,用ref 和 reactive 都可以,但是建议使用reactive
如果使用ref 包裹对象类型,多了一层value
六、计算属性与监听
1. computed函数
与Vue2中computed配置功能一样
写法:
<template>
  <p>姓:<input type="text" v-model="person.firstName"></p>
  <p>名:<input type="text" v-model="person.lastName"></p>
  <p>全名:{{ person.fullName }}</p>
  <p>全名修改:<input type="text" v-model="person.fullName"></p>

</template>

<script>

import {ref, reactive} from 'vue'
import {computed} from 'vue'

export default {
  name: 'App',
  setup() {
    const person = reactive({
      firstName: '刘',
      lastName: '清政'
    })

    // let fullName = computed(() => {
    //   return person.firstName + '-' + person.lastName
    // })
    // 或者,传入箭头函数
    // person.fullName=computed(() => {
    //   return person.firstName + '-' + person.lastName
    // })
    // 修改,传入配置项目
    person.fullName = computed({
      get() {
        return person.firstName + '-' + person.lastName
      },
      set(value) {
        const nameArr = value.split('-')
        person.firstName = nameArr[0]
        person.lastName = nameArr[1]
      }
    })
    return {person}
  },
}
</script>
2. watch函数
与Vue2中watch配置功能一致
两个注意点:
- 1. 监听reactive定义的响应式数据时:oldValue无法正确获取,强制开启了深度监视(deep配置失效)
- 2. 监听reactive定义的响应式数据中某个属性时:deep配置有效
<template>
  <h2>年龄是:{{ age }}</h2>
  <button @click="age++">点我年龄增加</button>
  <hr>
  <h2>姓名是:{{ person.name }}</h2>
  <button @click="person.name+='?'">点我姓名变化</button>
  <hr>
  <h2>sum是:{{ sum }},msg是:{{ msg }}</h2>
  <button @click="sum++">点我sum变化</button>
  |
  <button @click="msg+='?'">点我msg变化</button>
</template>

<script>

import {ref, reactive} from 'vue'
import {watch} from 'vue'

export default {
  name: 'App',
  setup() {
    const age = ref(19)
    const person = reactive({
      name: 'lqz',
      age: 20
    })
    //1 监听普通
    watch(age, (newValue, oldValue) => {
      console.log('sum变化了', newValue, oldValue)
    })
    // 2 监听对象
    watch(() => person.name, (newValue, oldValue) => {
      console.log('person.name变化了', newValue, oldValue)
    })
    // 3 监听多个
    const sum = ref(100)
    const msg = ref('很好')

    watch([sum, msg], (newValue, oldValue) => {
      console.log('sum或msg变化了', newValue, oldValue)
    })
    return {person, age, sum, msg}
  },
}
</script>
3. watchEffect函数
watch的套路是:既要指明监听的属性,也要指明监听的回调
watchEffect的套路是:不用指明监听哪个属性,监听的回调中用到哪个属性,那就监听哪个属性
watchEffect有点像computed:
- 但computed注重的是计算出来的值(回调函数的返回值),所以必须要写返回值
- 而watchEffect更注重的是过程(回调函数的函数体),所以不用写返回值
//watchEffect所指定的回调中用到的数据只要发生变化,则直接重新执行回调。
watchEffect(() => {
      const x1 = sum.value
      const x2 = person.age
      console.log('watchEffect配置的回调执行了')
    })
七、生命周期
Vue3 中可以继续使用Vue2中的生命周期钩子,但是有两个被更名:
- beforeDestroy改名为 beforeUnmount
- destroyed 改名为 unmounted
在Vue3中把生命周期写下setup函数中,把生命周期写在配置项中
Vue3也提供了Composition API 形式的生命周期钩子 ,与Vue2中钩子对应关系如下:
beforeCreate ----> setup()
created -----------> setup()
beforeMount -----> onBeforeMount
mounted ----------> onMounted
beforeUpdate ----> onBeforeUpdate
updated -----------> onUpdated
beforeUnmount --> onBeforeUnmount
unmounted --------> onUnmounted
<template>
  <div class="home">
    <h1>首页</h1>
  </div>
</template>

<script>

import axios from "axios";
import {
  computed,
  watch,
  reactive,
  ref,
  watchEffect,
  onBeforeMount,
  onMounted,
  onBeforeUpdate,
  onUpdated,
  onBeforeUnmount,
  onUnmounted
} from 'vue'

export default {
  name: 'HomeView',
  setup() {

    // 第一个beforeCrete
    console.log('我是beforeCrete')

    // 第二个Creted
    let name = ref('lqz')
    console.log('Creted')
    // axios.get().then(res => {
    //   name.value = res.data.name
    // })

    // 直接启动定时器
    let t = setInterval(() => {
          console.log('lqz')
        }, 3000
    )
    // 第三个:onBeforeMount
    onBeforeMount(() => {
      console.log('挂载了')
    })
    onBeforeUnmount(() => {
      clearInterval(t)
      t = null
    })
    return {}
  },
}
</script>
八、toRef
作用:创建一个ref对象,其value值指向另一个对象中的某个属性
语法:const name = toRef(person, 'name')
应用:要将响应式对象中的某个属性单独提供给外部使用
扩展:toRefs 与 toRef功能一致,但可以批量创建多个ref 对象,语法:toRefs(person)
<template>
  <div>
    <h2>姓名:{{ name }}</h2>
    <h2>年龄:{{ age }}</h2>
    <button @click="age++">改年龄</button>| <button @click="name+='~'">改姓名</button>
  </div>
</template>

<script>
import {ref, reactive,toRefs} from 'vue'
export default {
  name: 'App',
  setup() {
    const person = reactive({
      name: 'lqz',
      age: 19
    })
    return {
      ...toRefs(person)
    }
  },
}
</script>
//对象展开语法

let obj1 = {foo: 'bar', x: 42};
let obj2 = {foo: 'baz', y: 13};
let mergedObj = {...obj1, ...obj2};
console.log(mergedObj)
九、
1. 以后vue3推荐,把setup函数的代码,直接写在script中
<script setup>
定义变量
写函数
不用return,在html中直接使用
</script>
2. 使用组件,直接导入,不需要配置,直接用即可
import HelloWorld from "../components/HelloWorld.vue";
在html中直接用:<HelloWorld msg="NB"></HelloWorld>
3. 自定义属性,在子组件中接收
<script setup>
defineProps({
msg: {
type: String,
required: true
}
})
</script>

 浙公网安备 33010602011771号