Github+Hexo个人博客搭建:butterfly主题配置
分类页
在项目根目录下,在命令行输入:
hexo new page categories
你会找到 source/categories/index.md 这个文件, 修改这个文件内容:
标签页
在项目根目录下,在命令行输入:
hexo new page tags
你会找到 source/tags/index.md 这个文件, 修改这个文件内容:
本地搜索
在项目根目录下,在命令行输入:
npm install hexo-generator-search --save
_config.yml中添加
search:
  path: search.xml
  field: post
  content: true
_config.butterfly.yml修改为
local_search:
  enable: true
重新部署即可在顶栏中找到搜索按钮
后台管理
只能用于本地管理
在项目根目录下,在命令行输入:
npm install --save hexo-admin
设置密码
先将服务启动
hexo clean && hexo g && hexo s
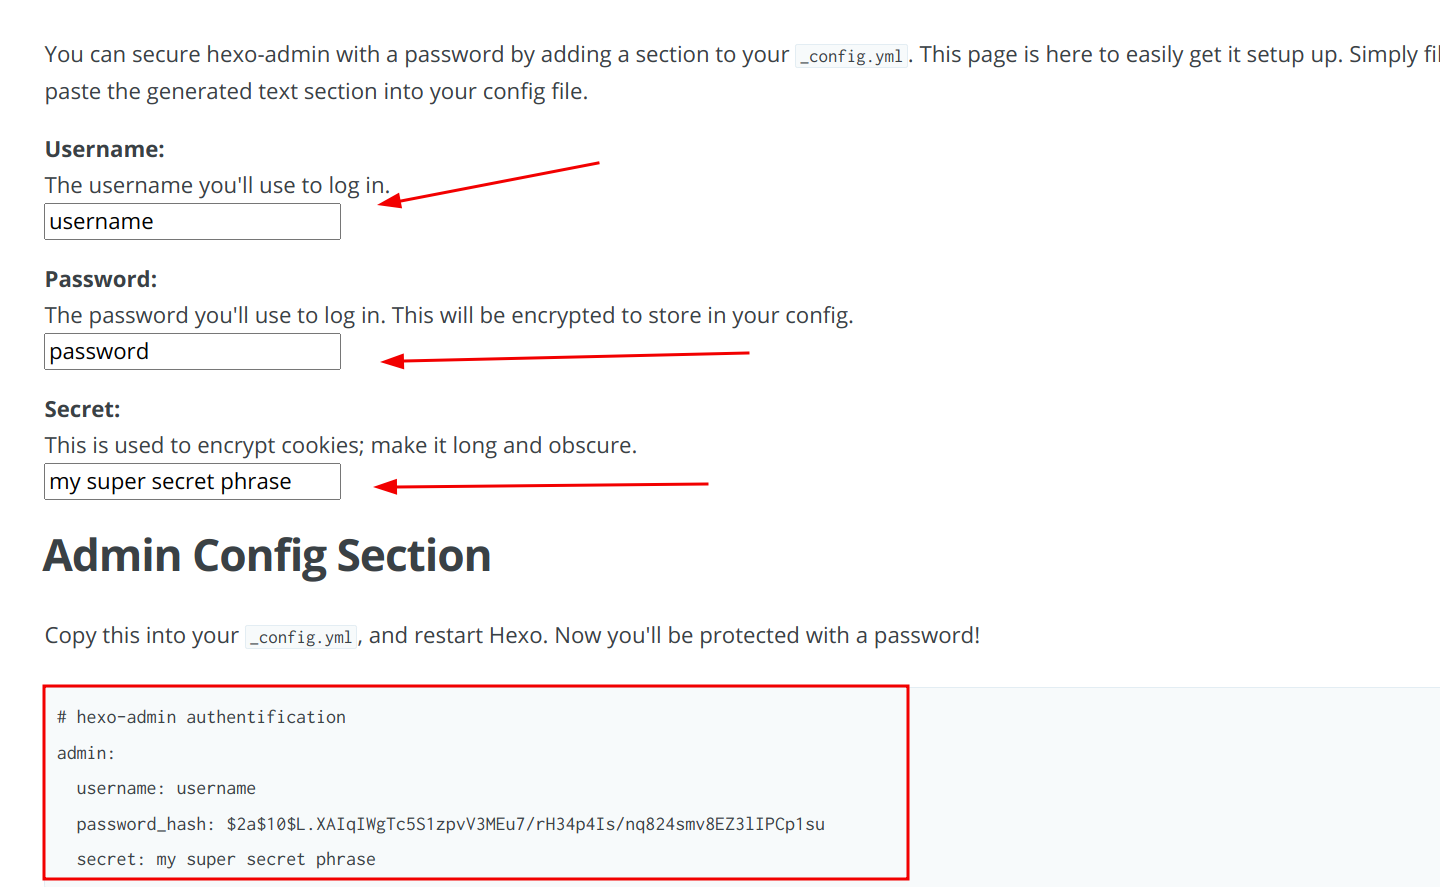
访问 http://localhost:4000/admin/#/auth-setup
输入对应的账号密码信息,自动生成配置信息

_config.yml 文件末尾添加复制的内容

重启服务后,再次访问 http://localhost:4000/admin 就会提示你输入密码
评论功能
使用 Gitalk 插件
Gitalk 的特性:
- 使用 GitHub 登录
- 支持多语言 [en, zh-CN, zh-TW, es-ES, fr, ru]
- 支持个人或组织
- 无干扰模式(设置 distractionFreeMode 为 true 开启)
- 快捷键提交评论 (cmd|ctrl + enter)
使用Gitalk需要你做一些提前准备:
- 在github上创建一个仓库,Gitalk会把评论放在这个仓库的issues里面。
- 在github上申请一个GitHub OAuth application,来让Gitalk有权限操作github上的仓库。
申请一个OAuth application
GitHub OAuth application允许程序来操作你的github账户,可以对github中仓库读写。
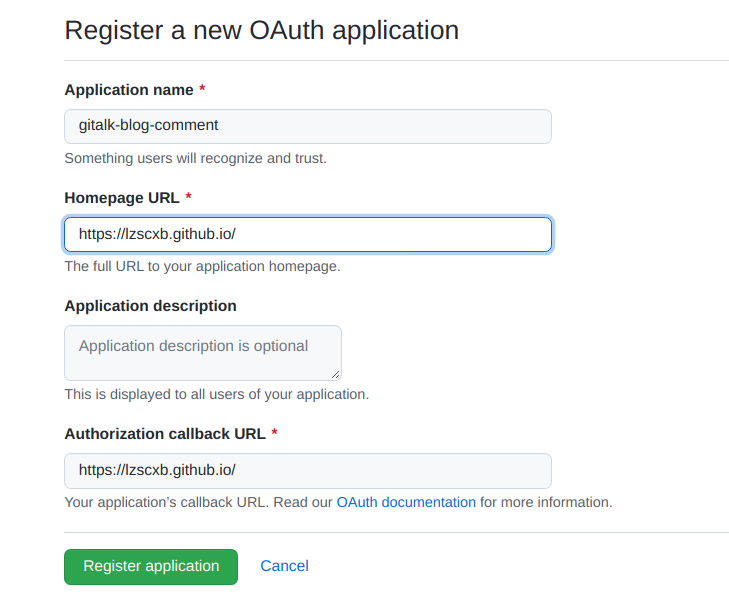
打开 https://github.com/settings/applications/new 进入新建页面
在注册OAuth应用页面有如下几个参数需要填写:
Application name:必填,OAuth的名字
Homepage URL:必填,你应用的网址,哪个网站用了Gitalk组件,就填写这个网址
Application description:选填,该OAuth的说明
Authorization callback URL:必填,授权成功后回调网址,跟Homepage URL参数保持一致就好
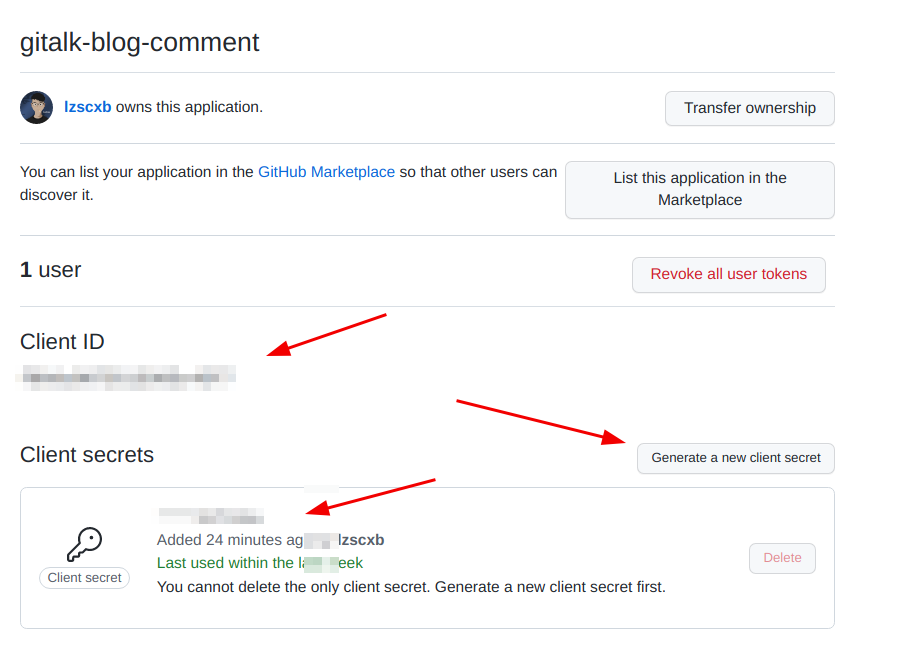
这些参数在注册成功后是可以修改


``_config.butterfly.yml` 修改 gitalk 两处配置信息
comments:
  # Up to two comments system, the first will be shown as default
  # Choose: Disqus/Disqusjs/Livere/Gitalk/Valine/Waline/Utterances/Facebook Comments/Twikoo
  use:
    - Gitalk
  text: true # Display the comment name next to the button
  # lazyload: The comment system will be load when comment element enters the browser's viewport.
  # If you set it to true, the comment count will be invalid
  lazyload: true
  count: true # Display comment count in top_img
  card_post_count: false # Display comment count in Home Page

gitalk:
  client_id: 你的client id
  client_secret: 你的client secret
  repo: 你的github仓库
  owner: 你的github用户名
  admin: 该仓库的拥有者或协作者
  language: zh-CN # en, zh-CN, zh-TW, es-ES, fr, ru
  perPage: 10 # Pagination size, with maximum 100.
  distractionFreeMode: false # Facebook-like distraction free mode.
  pagerDirection: last # Comment sorting direction, available values are last and first.
  createIssueManually: false # Gitalk will create a corresponding github issue for your every single page automatically
  option:
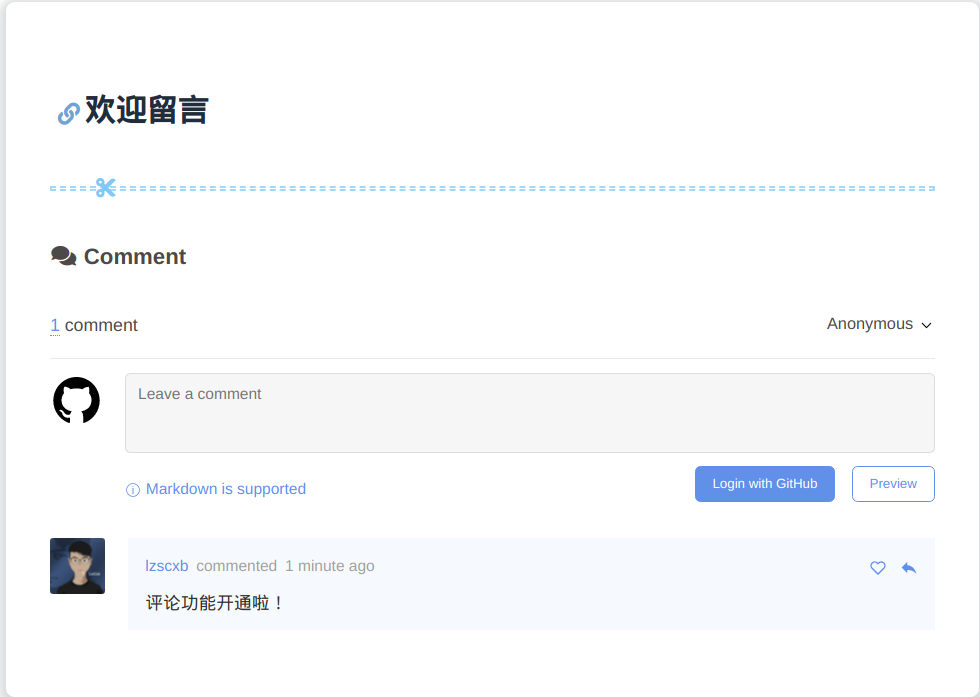
重新部署后

Pjax
当用户点击链接,通过 ajax 更新页面需要变化的部分,然后使用 HTML5 的 pushState 修改浏览器的 URL 地址。
这样可以不用重复加载相同的资源(css/js), 从而提升网页的加载速度。
修改主题配置文件_config.butterfly.yml:
# 如果你有使用hexo-douban,可配置这个
pjax:
  enable: true
  exclude:
Gulp压缩
一个可以自动压缩 HTML、JS、CSS 文件、图片,可以将 ES6 语法转换成 ES5,减少网络请求,同时降低网络负担
首先全局安装 gulp
npm install -g gulp-cli
npm install gulp
安装babel7
npm install gulp-babel @babel/core @babel/preset-env babel-preset-es2015 babel-core@6 --save
安装模块
npm install gulp-cache gulp-changed gulp-clean gulp-debug gulp-htmlmin gulp-minify gulp-util --save-dev
安装压缩 HTML
npm install gulp-htmlclean --save-dev
安装压缩 CSS
npm install gulp-minify-css --save-dev
安装压缩 JS
这里我选择 gulp-uglify + gulp-babel,可以把 ES6 转换成 ES5,因为兼容所以选择
npm install --save-dev gulp-uglify
安装如上插件之后,在你的博客根目录创建一个 gulpfile.js 文件并把如下代码 CV 进去
var gulp = require('gulp');
var gutil = require('gulp-util');
var clean = require('gulp-clean');
var debug = require('gulp-debug');
var cache = require('gulp-cache');
var babel = require('gulp-babel');
var uglify = require('gulp-uglify');
var changed = require('gulp-changed');
var htmlmin = require('gulp-htmlmin');
var htmlclean = require('gulp-htmlclean');
var minifycss = require('gulp-minify-css');

// 压缩css文件
gulp.task('minify-css', function() {
  return gulp.src('./public/css/**/*.css')
    .pipe(minifycss())
    .pipe(gulp.dest('./public/css'));
});

// 压缩js文件,支持将ES6代码转换成ES5代码
gulp.task('minify-js', function() {
  return gulp.src('./public/lib/**/*.js')
    .pipe(babel({
      presets: ['es2015']
    }))
    .pipe(uglify())
    .pipe(gulp.dest('./public/lib'));
});

// 压缩html文件
gulp.task('minify-html', function() {
  return gulp.src('./public/**/*.html')
    .pipe(htmlclean())
    .pipe(htmlmin({
      removeComments: true,
      minifyJS: true,
      minifyCSS: true,
      minifyURLs: true,
    }))
    .pipe(gulp.dest('./public'));
});

// gulp3的写法

gulp.task('default', gulp.parallel('minify-css', 'minify-js', 'minify-html'));
使用:
在 hexo g 之后运行 gulp 即可
例如:
hexo cl && hexo g && gulp && hexo d


 浙公网安备 33010602011771号