

lucenc代码阅读指南、测试范例
阅读指南
Lucene 原理与代码分析完整版 -- 力荐
Lucene介绍及源码剖析: http://javenstudio.org/blog/annotated-lucene -- 核心IndexWriter
下载:Annotated+Lucene+.pdf: http://ishare.iask.sina.com.cn/f/24103589.html
阅读步骤:
1、了解检索的基本原理和概念
2、了解lucene的基本概念
3、熟悉lucene的索引文件格式 -- 关键
4、熟悉lucene的索引流程:具体代码的类层次较多,且引入不必要的设计模式致使代码阅读相对困难。基本思路:controler + model 封装索引链,实现多线程并发处理(数据不共享)。
5、熟悉lucene的搜索流程
6、了解lucene搜索语法解析器 和 熟悉分词
推荐资料深入剖析lucene的源码,非常有价值。光看文档,不够形象,大体看过文档后,建议结合源码理解文档内容。代码能让读者有大体的基本概念,但文档对源码细节的解释容易让读者"只见枝叶不见森林”,理解困难。根据文档作者提供的大体思路,结合实际源码,读起来更容易。
测试
测试对于了解lucene的工作原理、代码执行流程极有帮助,是阅读代码的重要辅助手段。
IndexerExample.java

/*
 * Compiler: javac -classpath .:../lucene-core-2.9.1.jar:http://www.cnblogs.com/ChineseSegmenter/chineseSegmenter.jar  IndexerExample.java
 * Exec    : java  -classpath .:../lucene-core-2.9.1.jar:http://www.cnblogs.com/ChineseSegmenter/chineseSegmenter.jar  IndexerExample
 *
 */

import java.io.BufferedReader;
import java.io.File;
import java.io.FileReader;
import java.io.FileInputStream;
import java.io.IOException;
import java.io.InputStreamReader;
import java.io.StringReader;

import org.apache.lucene.analysis.Analyzer;
import org.apache.lucene.analysis.TokenStream;
import org.apache.lucene.analysis.standard.StandardAnalyzer;
import org.apache.lucene.analysis.PerFieldAnalyzerWrapper;
import org.apache.lucene.analysis.WhitespaceAnalyzer;
import org.apache.lucene.analysis.cn.ChineseAnalyzer;
import org.apache.lucene.document.Document;
import org.apache.lucene.document.Field;
import org.apache.lucene.document.DateTools;
import org.apache.lucene.index.IndexWriter;
import org.apache.lucene.store.Directory;
import org.apache.lucene.store.FSDirectory;


public class IndexerExample {

    private static void EnExample() throws Exception {

        // Store the index on disk
        Directory directory = FSDirectory.getDirectory("/tmp/testindex");
        // Use standard analyzer
        Analyzer analyzer = new StandardAnalyzer();
        // Create IndexWriter object
        IndexWriter iwriter = new IndexWriter(directory, analyzer, true);
        iwriter.setMaxFieldLength(25000);
        // make a new, empty document
        Document doc = new Document();
        File f = new File("/tmp/test.txt");

        // Add the path of the file as a field named "path".  Use a field that is
        // indexed (i.e. searchable), but don't tokenize the field into words.
        doc.add(new Field("path", f.getPath(), Field.Store.YES, Field.Index.UN_TOKENIZED));

        String text = "This is the text to be indexed.";
        doc.add(new Field("fieldname", text, Field.Store.YES,      Field.Index.TOKENIZED));
        doc.add(new Field("name", text, Field.Store.YES,      Field.Index.TOKENIZED));

        // Add the last modified date of the file a field named "modified".  Use
        // a field that is indexed (i.e. searchable), but don't tokenize the field
        // into words.
        doc.add(new Field("modified",
                    DateTools.timeToString(f.lastModified(), DateTools.Resolution.MINUTE),
                    Field.Store.YES, Field.Index.UN_TOKENIZED));
        // Add the contents of the file to a field named "contents".  Specify a Reader,
        // so that the text of the file is tokenized and indexed, but not stored.
        // Note that FileReader expects the file to be in the system's default encoding.
        // If that's not the case searching for special characters will fail.
        doc.add(new Field("contents", new FileReader(f)));

        iwriter.addDocument(doc);
        iwriter.optimize();
        iwriter.close();

    }

    private static void CnExample() throws Exception {

        // Store the index on disk
        Directory directory = FSDirectory.getDirectory("/tmp/testindex");
        // Use chinese analyzer
        Analyzer analyzer = new ChineseAnalyzer();
        PerFieldAnalyzerWrapper wrapper = new PerFieldAnalyzerWrapper(new WhitespaceAnalyzer());
        wrapper.addAnalyzer("name", analyzer);

        // Create IndexWriter object
        IndexWriter iwriter = new IndexWriter(directory, wrapper, true);
        iwriter.setMaxFieldLength(25000);
        // make a new, empty document
        Document doc = new Document();
        File f = new File("/tmp/test.txt");

        // Add the path of the file as a field named "path".  Use a field that is
        // indexed (i.e. searchable), but don't tokenize the field into words.
        doc.add(new Field("path", f.getPath(), Field.Store.YES, Field.Index.UN_TOKENIZED));

        String text = "This is the text to be indexed.";
        doc.add(new Field("fieldname", text, Field.Store.YES, Field.Index.TOKENIZED));

        String name = "2013春装新款女气质修身风衣大翻领双层大摆长款外套 系腰带";
        doc.add(new Field("name", name, Field.Store.YES, Field.Index.TOKENIZED));

        // Add the last modified date of the file a field named "modified".  Use
        // a field that is indexed (i.e. searchable), but don't tokenize the field
        // into words.
        doc.add(new Field("modified",
                    DateTools.timeToString(f.lastModified(), DateTools.Resolution.MINUTE),
                    Field.Store.YES, Field.Index.UN_TOKENIZED));
        // Add the contents of the file to a field named "contents".  Specify a Reader,
        // so that the text of the file is tokenized and indexed, but not stored.
        // Note that FileReader expects the file to be in the system's default encoding.
        // If that's not the case searching for special characters will fail.
        doc.add(new Field("contents", new FileReader(f)));

        iwriter.addDocument(doc);
        iwriter.optimize();
        iwriter.close();
    }

    public static void main(String[] args) throws Exception {
        System.out.println("Start test: ");

        if( args.length > 0){
            CnExample();
        }
        else{
            EnExample();
        }

        System.out.println("Index dir: /tmp/testindex");
    }
}
SearcherExample.java
/*
 * Compiler: javac -classpath .:../lucene-core-2.9.1.jar:http://www.cnblogs.com/ChineseSegmenter/chineseSegmenter.jar  SearcherExample.java
 * Exec    : java  -classpath .:../lucene-core-2.9.1.jar:http://www.cnblogs.com/ChineseSegmenter/chineseSegmenter.jar  SearcherExample
 *
 */

import java.io.BufferedReader;
import java.io.File;
import java.io.FileReader;
import java.io.FileInputStream;
import java.io.IOException;
import java.io.InputStreamReader;
import java.io.StringReader;
import java.util.Date;

import org.apache.lucene.analysis.Analyzer;
import org.apache.lucene.analysis.TokenStream;
import org.apache.lucene.analysis.standard.StandardAnalyzer;
import org.apache.lucene.analysis.cn.ChineseAnalyzer;
import org.apache.lucene.document.Document;
import org.apache.lucene.document.Field;
import org.apache.lucene.document.DateTools;
import org.apache.lucene.index.IndexWriter;
import org.apache.lucene.store.Directory;
import org.apache.lucene.store.FSDirectory;

import org.apache.lucene.search.IndexSearcher;
import org.apache.lucene.search.Searcher;
import org.apache.lucene.search.Query;
import org.apache.lucene.search.Hits;
import org.apache.lucene.queryParser.QueryParser;


public class SearcherExample {

    public static void main(String[] args) throws Exception {
        if (args.length < 2) {
            throw new Exception("Usage: java " + Searcher.class.getName()
                    + "<index dir> <query> [cn]");
        }
        File indexDir = new File(args[0]);
        String q = args[1];
        boolean bCn = args.length > 2? true : false;

        if (!indexDir.exists() || !indexDir.isDirectory()) {
            throw new Exception(indexDir +
                    " does not exist or is not a directory.");
        }
        search(indexDir, q, bCn);
    }

    public static void search(File indexDir, String q, boolean bCn)
        throws Exception {
        Directory fsDir = FSDirectory.getDirectory(indexDir, false);
        IndexSearcher is = new IndexSearcher(fsDir);

        Analyzer analyzer = new StandardAnalyzer();
        if( bCn ){
            analyzer = new ChineseAnalyzer();
        }

        QueryParser parser = new QueryParser( "name",  analyzer);
        Query query = parser.parse(q);

        System.out.println("Query: " + query.toString());
        long start = new Date().getTime();
        Hits hits = is.search(query);
        long end = new Date().getTime();

        System.err.println("Found " + hits.length() +
                " document(s) (in " + (end - start) +
                " milliseconds) that matched query '" +
                q + "'");

        for (int i = 0; i < hits.length(); i++) {
            Document doc = hits.doc(i);
            System.out.println( "HIT " + i + " :" + doc.get("name"));
        }
    }
}
中文分词可采用lucene自带的库,效果不好,或者自行封装,核心就是封装分词Tokenizer。
package org.apache.lucene.analysis.cn;

import java.io.BufferedReader;
import java.io.File;
import java.io.FileInputStream;
import java.io.IOException;
import java.io.InputStreamReader;
import java.io.Reader;
import java.nio.charset.Charset;
import java.util.ArrayList;
import java.util.HashSet;
import java.util.Iterator;
import java.util.List;

import org.apache.commons.lang.StringUtils;
import org.apache.lucene.analysis.Token;
import org.apache.lucene.analysis.Tokenizer;

public class SnippetTermTokenizer extends Tokenizer {
        private StringBuffer buffer = new StringBuffer();
        private BufferedReader inputBuffer;
        private JNISelecter selecter;     // 中文分词核心类
        private List<Token> tokenList = null;
        private List<String> phraseTokenList = null;
        private Iterator<Token> tokenIter = null;

        public SnippetTermTokenizer(Reader reader, JNISelecter s) {
                inputBuffer = new BufferedReader(reader, 2048);
                selecter = s;
        }

        public Token next() throws IOException {
                if (tokenIter != null) {
                        if (tokenIter.hasNext()) {
                                return tokenIter.next();
                        } else {
                                // finish read input
                                return null;
                        }
                }
                // need to read content
                readContent();
                if (segment()) {
                        // segment succeed, create iterator
                        return tokenIter.next();
                }
                return null;
        }

        public void close() throws IOException {
                inputBuffer.close();
        }

        // 分词相关略
}
作者:zhenjing.chen
出处:http://www.cnblogs.com/zhenjing/
未注明转载的文章,版权归作者所有,欢迎转载,但未经作者同意必须保留此段声明,且在文章页面明显位置给出原文连接,否则保留追究法律责任的权利。
前言:
CYQ.Data 框架的稳定与前进:
CYQ.Data 对于V4系列,版本号就在V4.55版本就不再提高了,主要是为了保留一个最稳定的版本,基本除了Bug修正,不会再有大于V4.N的版本号出现了。
而V5版本,这一两年来,事实上,代码改动相当大,内部类的结构也调整不少,由于功能的新增加导致和改动,被记录的就有四五十项,没记录的数不清了,不过V5在各项目中沉淀了也近一年了,稳定性也很强。
CYQ.Data 文本数据库:
以前写过相关的文章:周末一起用文本数据库玩玩Code First
对于文本数据库的应用,在原来的 OAuth2 登陆组件,就应用上了,用户存储AccessToken和对应账号,不知道大伙注意到了没有。
这里我再举昨天发布的 CYQ.Data.ProjectTool 项目配置工具发布(包源码),保存用户配置的也是文本数据库。
CYQ.Data 文本数据库技术原理:
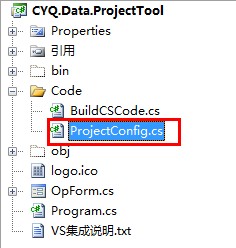
先看图片:

简单工程描述:
用什么来保存配置?
下面用源码里的部分代码片断来解密文本数据库的本质:
这个简单的工程,事实包含了数据库基本的增删改查操作:
1:添加用户配置。
2:同配置名,更新用户配置。
3:删除用户配置(估计被我遗忘了,没加上这功能)
4:从所有配置中,查询出被标识为IsMain=true的数据,并还原为默认配置。
项目里建了一个ProjectConfig实体类,来个CodeFirst:
这实体多了一个ORM继承,让它具备ORM的基础功能:
实体类代码如下:
 CYQ.Data.ProjectToolnamespace CYQ.Data.ProjectTool
{
public class ProjectConfig : CYQ.Data.Orm.OrmBase
{
public ProjectConfig()
{
base.SetInit(this, "ProjectConfig", "Txt Path={0}");
}
private int _ID;
/// <summary>
/// 标识
/// </summary>
public int ID
{
get
{
return _ID;
}
set
{
_ID = value;
}
}
private string _Name;
/// <summary>
/// 配置名称
/// </summary>
public string Name
{
get
{
return _Name;
}
set
{
_Name = value;
}
}
private string _Conn;
/// <summary>
/// 链接字符串
/// </summary>
public string Conn
{
get
{
return _Conn;
}
set
{
_Conn = value;
}
}
private string _DBType;
/// <summary>
/// 数据库类型
/// </summary>
public string DBType
{
get
{
return _DBType;
}
set
{
_DBType = value;
}
}
private bool _MutilDatabase;
/// <summary>
/// 支持多数据库模式
/// </summary>
public bool MutilDatabase
{
get
{
return _MutilDatabase;
}
set
{
_MutilDatabase = value;
}
}
private string _ProjectPath;
public string ProjectPath
{
get
{
return _ProjectPath;
}
set
{
_ProjectPath = value;
}
}
private bool _IsMain;
public bool IsMain
{
get
{
return _IsMain;
}
set
{
_IsMain = value;
}
}
private string _BuildMode;
/// <summary>
/// 创建模式(枚举模式;ORM实体类模式)
/// </summary>
public string BuildMode
{
get
{
return _BuildMode;
}
set
{
_BuildMode = value;
}
}
private string _NameSpace;
/// <summary>
/// 默认的名称空间
/// </summary>
public string NameSpace
{
get
{
return _NameSpace;
}
set
{
_NameSpace = value;
}
}
}
PS:如果你数据库链接从Txt Path改成Xml Path,你会发现,存储的格式变成Xml。
看一段增加配置的代码片断:
在用户点击“测试链接”或“生成文件”时,如果检测到链接是成功的,则自动保存当前配置信息,代码如下:
string name = ddlName.Text.Trim();
if (string.IsNullOrEmpty(name))
{
name = "DefaultConn";
}
ResetMainState();
using (ProjectConfig config = new ProjectConfig())
{
config.SetAutoParentControl(gbConn, gbBuild);
if (config.Fill("Name='" + name + "'"))
{
config.IsMain = true;
config.Update(null, true);
}
else
{
config.IsMain = true;
if (config.Insert(true))
{
ddlName.Items.Add(name);
}
}
}
return name;
}
看看实体类New的这一行代码:
using 语法:
构造函数New初始化:
系统会获取实体类上的属性成员,组成一个表结构,然后写到数据库链接里指定的路径。
你运行软件后,会自动发下在指定的目录下多了一个文件:ProjectConfig.ts
里面存储了表的结构,内容如下:
简单说明:
表结构存储格式为:名称,类型,允许为空,是否只读,长度,默认值。
对于文本数据库,就是创建了“表名.ts",如果是其它数据库链接,就会直接在数据库创建相应的表。
后面的属性赋值,和ORM的基础操作方法,我们简单略过:
这里使用和UI结合的方式取值:config.SetAutoParentControl(gbConn, gbBuild);
自动多两个GroupBox里的子控件里取值。
而IsMain属性,是不在控件里出现的,所以需要单独赋值。
通过和UI结合,在还原配置项的时候,也只要一句SetToAll(),就搞定了:
源码里有这样一段代码,根据配置名,还原所有配置,看一眼就可以了:
{
if (!string.IsNullOrEmpty(name))
{
using (ProjectConfig config = new ProjectConfig())
{
if (config.Fill("Name='" + name + "'"))
{
config.SetToAll(gbConn, gbBuild);
}
}
}
}
对于文本数据库,刚才只是说自动生成了表结构,存储为“*.ts"文件了。
对于数据的存储呢?
CYQ.Data 对于本文数据库而言,有两个核心类:
1:JsonHelper:和Json打交道的类。
2:MDataTalle:内存表,功能很强大,具备和Json或Xml加载与输出的功能。
文本数据库的实现,正是基于这个两个类。
在存储时,如果有多个文本,则是多个Static MDataTable
通过MDataTable与Json(或Xml)的交互,加载与输入来实现。
所以若运行后,基本可以看到这个文件:ProjectConfig.txt,里面存储着json文件如下:
{"ID":"1","Name":"DefaultConn","Conn":"server=.;database=qblog;uid=sa;pwd=123456","DBType":"Mssql","MutilDatabase":"False","ProjectPath":"","IsMain":"True","BuildMode":"实体型(ORM操作方式)","NameSpace":"Web.Entity"}
简单说明:
第一行,根据某些情况,可能存储数据类型,这是为丢失表结构的情况下,从Json还原为MDataTable时,仍能有基本的数据结构存在。
当然第一行也可能直接就是json数据了,系统根据某些特定标识来识别第一行是架构还是数据。
文件数据库的增删改查原理:
如果你对DataTable熟悉,相信也对MDataTable也熟悉,文本数据库的增删改查,全在MDataTable里进行。
框架的统一:分页与Sql查询语法:
对于文本而言,存储的结果就是json,为了多数据的统一,使的它必需具备基础的数据库应有的功能,分页与sql语句语法的查询。
为此,我对MDataTable进行了一个重要功能的补充,对sql语句进行解析,然后进行列的比较,再对数据行进行自定义排序,从而筛选出最终结果。
为此,MDataTable事实上,就是一个具备分页,查询功能的强大表类,而且可以脱离数据库,拿到数据后,可以继续再进行分页查询操作。
MDataTalle的其它特性:
总结:
基本文件数据库到这里也没啥秘密了:
1:根据实体类自动生成表结构(如果已存在表结构,自动加载)。
2:存储格式是Json,依赖JsonHelper和MDataTable进行加载和写入互动。
3:增删改查,实际是依赖于MDataTable,对数据行的增删改查。
4:CodeFirst模式,本质是基于MAction的实现。
欢迎路过的吐槽 。。。
。。。


 浙公网安备 33010602011771号