SpringBoot实现OAuth2认证服务器
一、最简单认证服务器
1. pom依赖
<dependency>
    <groupId>org.springframework.boot</groupId>
    <artifactId>spring-boot-starter-security</artifactId>
</dependency>
<dependency>
    <groupId>org.springframework.security.oauth.boot</groupId>
    <artifactId>spring-security-oauth2-autoconfigure</artifactId>
    <version>2.1.0.RELEASE</version>
</dependency>
2. 配置application.yml
security:
  oauth2:
    client:
      client-id: clientId
      client-secret: clientSecret
      scope: scope1, scope2, scope3, scope4
      registered-redirect-uri: http://www.baidu.com

spring:
  security:
    user:
      name: admin
      password: admin
3. 开启@EnableAuthorizationServer,同时开启SpringSecurity用户登录认证
@SpringBootApplication
@EnableAuthorizationServer
public class SpringBootTestApplication {

    public static void main(String[] args) {
        SpringApplication.run(SpringBootTestApplication.class, args);
    }

    @Bean
    public WebSecurityConfigurerAdapter webSecurityConfigurerAdapter() {
        return new WebSecurityConfigurerAdapter() {
            @Override
            public void configure(HttpSecurity httpSecurity) throws Exception {
                httpSecurity.formLogin().and().csrf().disable();
       }
     };
   }
}
4. 测试
(1)密码模式和客户端模式直接通过单元测试就可以完成
@RunWith(SpringRunner.class)
@SpringBootTest(webEnvironment = SpringBootTest.WebEnvironment.RANDOM_PORT)
public class SpringBootTestApplicationTest {

    @Autowired
    private TestRestTemplate restTemplate;

    @Test
    public void token_password() {
        MultiValueMap<String, String> params = new LinkedMultiValueMap<>();
        params.add("grant_type", "password");
        params.add("username", "admin");
        params.add("password", "admin");
        params.add("scope", "scope1 scope2");
        String response = restTemplate.withBasicAuth("clientId", "clientSecret").
                postForObject("/oauth/token", params, String.class);
        System.out.println(response);
    }

    @Test
    public void token_client() {
        MultiValueMap<String, String> params = new LinkedMultiValueMap<>();
        params.add("grant_type", "client_credentials");
        String response = restTemplate.withBasicAuth("clientId", "clientSecret").
                postForObject("/oauth/token", params, String.class);
        System.out.println(response);
    }

}
(2)授权码验证模式
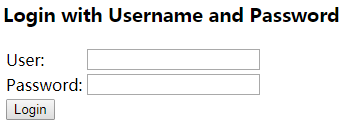
- 访问 http://127.0.0.1:8080/oauth/authorize?client_id=clientId&response_type=code,跳转到SpringSecurity默认的登录页面:
![]()
-
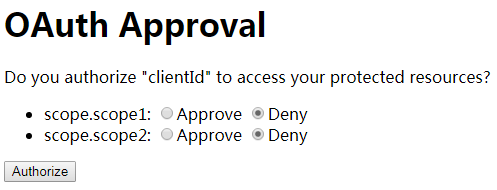
输入用户名/密码:admin/admin,点击登录后跳转到确认授权页面:
![]()
-
至少选中一个,然后点击Authorize按钮,跳转到 https://www.baidu.com/?code=tg0GDq,这样我们就拿到了授权码。
-
通过授权码申请token:
@Test
public void token_code() {
    MultiValueMap<String, String> params = new LinkedMultiValueMap<>();
    params.add("grant_type", "authorization_code");
    params.add("code", "tg0GDq");
    String response = restTemplate.withBasicAuth("clientId", "clientSecret").postForObject("/oauth/token", params, String.class);
    System.out.println(response);
}
(3)刷新token
@Test
    public void token_refresh() {
        MultiValueMap<String, String> params = new LinkedMultiValueMap<>();
        params.add("grant_type", "refresh_token");
        params.add("refresh_token", "fb00358a-44e2-4679-9129-1b96f52d8d5d");
        String response = restTemplate.withBasicAuth("clientId", "clientSecret").
                postForObject("/oauth/token", params, String.class);
        System.out.println(response);
    }
刷新token功能报错,// todo 2018-11-08 此处留坑
二、比较复杂的认证服务器
上面我们搭建的认证服务器存在以下弊端:
- clientId和clientSecret是写死在配置文件里的。
- 用户信息写死在配置文件里。
- 通过clientId和clientSecret获取的code和token都存在内存中。第一:如果服务器宕机code和token会丢失;第二:不支持多点部署。
针对以上问题,我们要做的就是
- 将clientId和clientSecret等信息存储在数据库中。
- 将用户信息存储在数据库中。
- 将code和token存储在redis中。
接下来我们一步一步实现:
1. 创建测试用表及数据


drop table if exists test.oauth2_client;
create table test.oauth2_client (
  id int auto_increment primary key,
  clientId varchar(50),
  clientSecret varchar(50),
  redirectUrl varchar(2000),
  grantType varchar(100),
  scope varchar(100)
);

insert into test.oauth2_client(clientId, clientSecret, redirectUrl, grantType, scope)
values ('clientId','clientSecret','http://www.baidu.com,http://www.csdn.net', 'authorization_code,client_credentials,password,implicit', 'scope1,scope2');


drop table if exists test.oauth2_user;
create table test.oauth2_user (
  id int auto_increment primary key,
  username varchar(50),
  password varchar(50)
);

insert into test.oauth2_user (username, password)
values ('admin','admin');

insert into test.oauth2_user (username, password)
values ('guest','guest');
- 表oauth2_client:存储clientId、clientSecret及其他信息。本例只创建了一个client。
- 表oauth2_user:用户信息。本例创建了两个用户:admin/admin、guest/guest。
2. Dao和Service
Dao和Service就不用废话了,肯定要有的
public class Oauth2Client {

    private int id;
    private String clientId;
    private String clientSecret;
    private String redirectUrl;
    private String grantType;
    private String scope;

    public int getId() {
        return id;
    }

    public void setId(int id) {
        this.id = id;
    }

    public String getClientId() {
        return clientId;
    }

    public void setClientId(String clientId) {
        this.clientId = clientId;
    }

    public String getClientSecret() {
        return clientSecret;
    }

    public void setClientSecret(String clientSecret) {
        this.clientSecret = clientSecret;
    }

    public String getRedirectUrl() {
        return redirectUrl;
    }

    public void setRedirectUrl(String redirectUrl) {
        this.redirectUrl = redirectUrl;
    }

    public String getGrantType() {
        return grantType;
    }

    public void setGrantType(String grantType) {
        this.grantType = grantType;
    }

    public String getScope() {
        return scope;
    }

    public void setScope(String scope) {
        this.scope = scope;
    }
}
public class Oauth2User {

    private int id;
    private String username;
    private String password;

    public int getId() {
        return id;
    }

    public void setId(int id) {
        this.id = id;
    }

    public String getUsername() {
        return username;
    }

    public void setUsername(String username) {
        this.username = username;
    }

    public String getPassword() {
        return password;
    }

    public void setPassword(String password) {
        this.password = password;
    }
}
@Repository
public class Oauth2Dao {

    private final JdbcTemplate jdbcTemplate;

    @Autowired
    public Oauth2Dao(JdbcTemplate jdbcTemplate) {
        this.jdbcTemplate = jdbcTemplate;
    }

    public List<Oauth2Client> getOauth2ClientByClientId(String clientId) {
        String sql = "select * from oauth2_client where clientId = ?";
        return jdbcTemplate.query(sql, new String[]{clientId}, new BeanPropertyRowMapper<>(Oauth2Client.class));
    }

    public List<Oauth2User> getOauth2UserByUsername(String username) {
        String sql = "select * from oauth2_user where username = ?";
        return jdbcTemplate.query(sql, new String[]{username}, new BeanPropertyRowMapper<>(Oauth2User.class));
    }

}
@Service
public class Oauth2Service {

    private final Oauth2Dao oauth2Dao;

    @Autowired
    public Oauth2Service(Oauth2Dao oauth2Dao) {
        this.oauth2Dao = oauth2Dao;
    }

    public List<Oauth2Client> getOauth2ClientByClientId(String clientId) {
        return oauth2Dao.getOauth2ClientByClientId(clientId);
    }

    public List<Oauth2User> getOauth2UserByUsername(String username) {
        return oauth2Dao.getOauth2UserByUsername(username);
    }
}
3. 增加pom依赖
因为要使用到数据库以及redis,所以我们需要增加如下依赖:
<dependency>
    <groupId>org.springframework.boot</groupId>
    <artifactId>spring-boot-starter-jdbc</artifactId>
</dependency>
<dependency>
    <groupId>org.springframework.boot</groupId>
    <artifactId>spring-boot-starter-data-redis</artifactId>
</dependency>
<dependency>
    <groupId>mysql</groupId>
    <artifactId>mysql-connector-java</artifactId>
</dependency>
4. 修改启动主类,增加bean注册
(1)注册一个PasswordEncoder用于密码加密:
这样做的目的是:在我们的应用中,可能都多个地方需要我们对用户的明文密码进行加密。在这里我们统一注册一个PasswordEncoder,以保证加密算法的一致性。
@Bean
public PasswordEncoder passwordEncoder() {
    return PasswordEncoderFactories.createDelegatingPasswordEncoder();
}
(2)注册一个UserDetailsService用于用户身份认证
@Bean
public UserDetailsService userDetailsService(Oauth2Service oauth2Service, PasswordEncoder passwordEncoder) {
    return username -> {
        List<Oauth2User> users = oauth2Service.getOauth2UserByUsername(username);
        if (users == null || users.size() == 0) {
            throw new UsernameNotFoundException("username无效");
        }
        Oauth2User user = users.get(0);
        String passwordAfterEncoder = passwordEncoder.encode(user.getPassword());
        return User.withUsername(username).password(passwordAfterEncoder).roles("").build();
    };
}
标红这句代码大家忽略吧,常理来讲数据库中存储的密码应该就是密文所以这句代码是不需要的,我比较懒数据库直接存储明文密码所以这里需要加密一下。
(3)注册一个ClientDetailsService用户clientId和clientSecret验证
@Bean
public ClientDetailsService clientDetailsService(Oauth2Service oauth2Service, PasswordEncoder passwordEncoder) {
    return clientId -> {
        List<Oauth2Client> clients1 = oauth2Service.getOauth2ClientByClientId(clientId);
        if (clients1 == null || clients1.size() == 0) {
            throw new ClientRegistrationException("clientId无效");
        }
        Oauth2Client client = clients1.get(0);
        String clientSecretAfterEncoder = passwordEncoder.encode(client.getClientSecret());
        BaseClientDetails clientDetails = new BaseClientDetails();
        clientDetails.setClientId(client.getClientId());
        clientDetails.setClientSecret(clientSecretAfterEncoder);
        clientDetails.setRegisteredRedirectUri(new HashSet<>(Arrays.asList(client.getRedirectUrl().split(","))));
        clientDetails.setAuthorizedGrantTypes(Arrays.asList(client.getGrantType().split(",")));
        clientDetails.setScope(Arrays.asList(client.getScope().split(",")));
        return clientDetails;
    };
}
标红代码忽略,理由同上。
关于BaseClientDetails的属性,这里要啰嗦几句:它继承于接口ClientDetails,该接口包含如下属性:
- getClientId:clientId,唯一标识,不能为空
- getClientSecret:clientSecret,密码
- isSecretRequired:是否需要验证密码
- getScope:可申请的授权范围
- isScoped:是否需要验证授权范围
- getResourceIds:允许访问的资源id,这个涉及到资源服务器
- getAuthorizedGrantTypes:可使用的Oauth2授权模式,不能为空
- getRegisteredRedirectUri:回调地址,用户在authorization_code模式下接收授权码code
- getAuthorities:授权,这个完全等同于SpringSecurity本身的授权
- getAccessTokenValiditySeconds:access_token过期时间,单位秒。null等同于不过期
- getRefreshTokenValiditySeconds:refresh_token过期时间,单位秒。null等同于getAccessTokenValiditySeconds,0或者无效数字等同于不过期
- isAutoApprove:判断是否获得用户授权scope
(4)注册一个TokenStore以保存token信息
@Bean
public TokenStore tokenStore(RedisConnectionFactory redisConnectionFactory) {
    return new RedisTokenStore(redisConnectionFactory);
}
(5)注册一个AuthorizationCodeServices以保存authorization_code的授权码code
生成一个RandomValueAuthorizationCodeServices的bean,而不是直接生成AuthorizationCodeServices的bean。RandomValueAuthorizationCodeServices可以帮我们完成code的生成过程。如果你想按照自己的规则生成授权码code请直接生成AuthorizationCodeServices的bean。
@Bean
public AuthorizationCodeServices authorizationCodeServices(RedisConnectionFactory redisConnectionFactory) {
    RedisTemplate<String, OAuth2Authentication> redisTemplate = new RedisTemplate<>();
    redisTemplate.setConnectionFactory(redisConnectionFactory);
    redisTemplate.afterPropertiesSet();

    return new RandomValueAuthorizationCodeServices() {

        @Override
        protected void store(String code, OAuth2Authentication authentication) {
            redisTemplate.boundValueOps(code).set(authentication, 10, TimeUnit.MINUTES);
        }

        @Override
        protected OAuth2Authentication remove(String code) {
            OAuth2Authentication authentication = redisTemplate.boundValueOps(code).get();
            redisTemplate.delete(code);
            return authentication;
        }
    };
}
(6)注册一个AuthenticationManager用来password模式下用户身份认证
直接使用上面注册的UserDetailsService来完成用户身份认证。
@Bean
public AuthenticationManager authenticationManager(UserDetailsService userDetailsService, PasswordEncoder passwordEncoder) {
    DaoAuthenticationProvider provider = new DaoAuthenticationProvider();
    provider.setUserDetailsService(userDetailsService);
    provider.setPasswordEncoder(passwordEncoder);
    return new ProviderManager(Collections.singletonList(provider));
}
(7)配置认证服务器
上面注册了这么多bean,到了他们发挥作用的时候了
@Bean
public AuthorizationServerConfigurer authorizationServerConfigurer(UserDetailsService userDetailsService, ClientDetailsService clientDetailsService,
                  TokenStore tokenStore, AuthorizationCodeServices authorizationCodeServices, AuthenticationManager authenticationManager) {
    return new AuthorizationServerConfigurer() {
        @Override
        public void configure(AuthorizationServerSecurityConfigurer security) throws Exception {

        }

        @Override
        public void configure(ClientDetailsServiceConfigurer clients) throws Exception {
            clients.withClientDetails(clientDetailsService);
        }

        @Override
        public void configure(AuthorizationServerEndpointsConfigurer endpoints) throws Exception {
            endpoints.userDetailsService(userDetailsService);
            endpoints.tokenStore(tokenStore);
            endpoints.authorizationCodeServices(authorizationCodeServices);
            endpoints.authenticationManager(authenticationManager);
        }
    };
}
5. 修改配置文件,配置数据库及redis连接
spring:
  datasource:
    driver-class-name: com.mysql.jdbc.Driver
    url: jdbc:mysql://192.168.2.12:3306/test?characterEncoding=utf8
    username: root
    password: onceas

  redis:
    host: 192.168.2.12
    port: 6379
    password: 123456
6.测试
(1)密码模式和客户端模式同上
(2)授权码验证模式
- 访问 http://127.0.0.1:8080/oauth/authorize?client_id=clientId&response_type=code&scope=scope1 scope2&redirect_uri=http://www.baidu.com,跳转到SpringSecurity默认的登录页面:
![]()
-
输入用户名/密码:admin/admin,点击登录后跳转到确认授权页面:
![]()
-
至少选中一个,然后点击Authorize按钮,跳转到 https://www.baidu.com/?code=tg0GDq,这样我们就拿到了授权码。
-
通过授权码申请token:
@Test
public void token_code() {
    MultiValueMap<String, String> params = new LinkedMultiValueMap<>();
    params.add("grant_type", "authorization_code");
    params.add("code", "tg0GDq");
    String response = restTemplate.withBasicAuth("clientId", "clientSecret").postForObject("/oauth/token", params, String.class);
    System.out.println(response);
}
(3)刷新token
申请的所有token中都没有返回refresh_token,// todo 2018-11-08 此处留坑
三、自定义页面
1. 自定义用户登录页面
用户登录页面就是SpringSecurity的默认登录页面,所以按照SpringSecurity的规则更改即可,可参照https://www.cnblogs.com/LOVE0612/p/9897647.html里面的相关内容
2. 自定义用户授权页面
用户授权页面是/oauth/authorize转发给/oauth/confirm_access然后才呈现最终页面给用户的。所以想要自定义用户授权页面,用户点击Authorize按钮时会通过form表单发送请求:
Request URL: http://127.0.0.1:8080/oauth/authorize
Request Method: POST

FormData
user_oauth_approval: true
scope.scope1: true
scope.scope2: true
所以我们要自定义用户授权页面,我们只要重新定义一个mapping即可并按照上述要求完成post请求即可。
(1)增加pom依赖
<dependency>
    <groupId>org.springframework.boot</groupId>
    <artifactId>spring-boot-starter-thymeleaf</artifactId>
</dependency>
(2)Controller
@Controller
public class Oauth2Controller {

    @GetMapping("oauth/confirm_access")
    public String authorizeGet() {
        return "oauth/confirm_access";
    }
}
(3)创建/resources/templates/oauth/confirm_access.html
<!DOCTYPE html>
<html lang="en">
<head>
    <meta charset="UTF-8">
    <title>my authorize page</title>
</head>
<body>
<form action="/oauth/authorize" method="post">
    <input type="hidden" name="user_oauth_approval" value="true">
    <div id="scope"></div>
    <input type="submit" value="授权">
</form>
<script>
    function getQueryString(name) {
        var reg = new RegExp("(^|&)" + name + "=([^&]*)(&|$)", "i");
        var r = window.location.search.substr(1).match(reg);
        if (r != null) return unescape(r[2]);
        return null;
    }
</script>
<script>
    var scope = getQueryString("scope");

    var scopeList = scope.split(" ");
    var html = "";
    for (var i = 0; i < scopeList.length; i++) {
        html += scopeList[i] + ":<input type='checkbox' name='scope." + scopeList[i] + "' value='true'/><br />";
    }
    document.getElementById("scope").innerHTML = html;
</script>
</body>
</html>
3. 自定义错误页面
与上面同理,重新定义一个mapping对应uri:/oauth/error,可通过 Object error = request.getAttribute("error"); 获取错误信息,具体html页面内容就不再赘述了。
四、支持Restfull风格
如果考虑前后分离呢?那么流程应该是:
- 用户访问第三方client网站
- 第三方网站将用户导向我们的某个前端页面地址并携带参数client_id、scope、redirect_uri
- 该前端页面通过ajax请求后台接口/oauth/authorize?client_id={client_id}&response_type=code&scope={scope}&redirect_uri={redirect_uri}
- 后端接到请求后SpringSecurity首先会校验参数合法性,不合法则转发到/oauth/error,/oauth/error返回jons结果告知前端参数不合法。如果参数合法则再判断当前是否已有用户通过认证:有,则会将请求转发到/oauth/confirm_access,/oauth/confirm_access方法返回json结果告知前端需要用户授权;如果没有则会将请求转发到/login(get请求),/login方法也返回json结果告知前端需要用户登录。
- 前端页面根据返回结果判断,如果需要登录则跳转到登录页面,如果需要用户授权则跳转到用户授权页面。
- 如果跳转到用户登录页面,用户输入用户名密码点击登录按钮,前端通过ajax请求后台接口/login(post请求),后端接到请求后SpringSecurity判断用户认证是否通过:如果通过则转发请求到and().formLogin().successForwardUrl()所设定的uri,该uri返回json结果告知用户登录成功。如果未通过则转发请求到and().formLogin().failureForwardUrl("/login/error")所设定的uri,该uri返回json结果告知用户登录失败
- 前端用户登录页面拿到后端返回的登录结果,如果登录失败则继续等待用户填写用户名密码重新登录,如果登录成功则跳转到用户授权页面。
- 用户进行授权勾选并点击确认授权后,前端通过表单post到后台接口/oauth/authorize
- 后端接到请求后处理并重定向会第三方client回调地址

 浙公网安备 33010602011771号