
SpringBoot 配置加密证书
1、在云平台下载证书
1、登录阿里云SSL证书控制台。
2、在SSL证书页面,单击已签发标签,定位到需要下载的证书并单击证书卡片右下角的下载。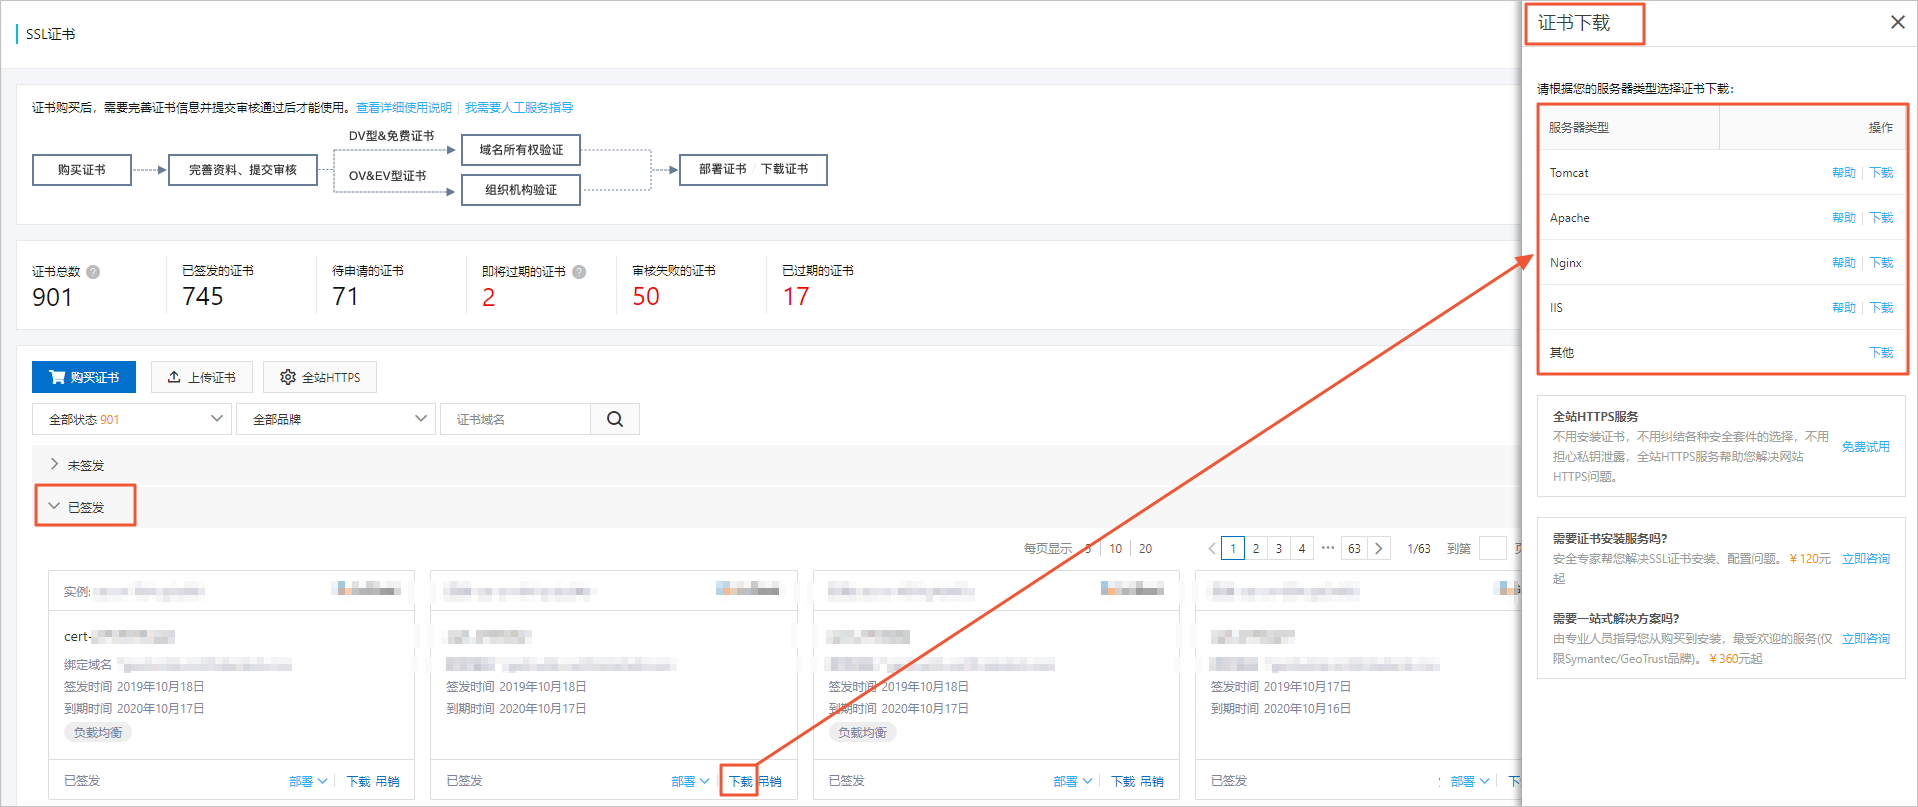
3、定位到您需要安装证书的服务器类型并单击右侧操作栏的下载将证书压缩包下载到本地。
4、将证书解压缩后安装到您的Web服务器上。
阿里云SSL证书支持安装到以下类型的Web服务器:Tomcat(笔者这里下载的是这个证书,以下都是基于此证书进行操作)ApacheNginxIIS其他
2、将下载的证书通过jdk自带工具生成jks文件
1、进入到jdk的bin目录,进行cmd操作
2、 以下为操作命令,其中第一处标红的字,为你下载的证书的路径,第二处标红为你给自己的证书取的名字
 keytool -importkeystore -srckeystore D:\3358419__xftm.com_tomcat\3358419__xftm.com.pfx  -destkeystore xftmapp.jks -srcstoretype PKCS12 -
deststoretype JKS
3、具体操作如下,笔者红色框框标出来的为笔者操作过程中的错误,以及需要注意的事项

3、SpringBoot代码
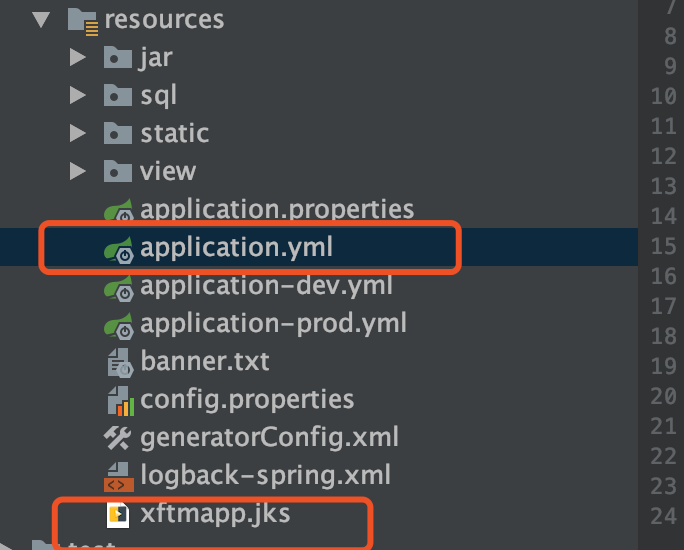
1、将步骤2生成的.jks文件复制到项目中,与application同目录
2、application启动类(去掉红色代码兼容http和https,否则只兼容https)
package org.xftm.app;


import org.apache.catalina.Context;
import org.apache.catalina.connector.Connector;
import org.apache.tomcat.util.descriptor.web.SecurityCollection;
import org.apache.tomcat.util.descriptor.web.SecurityConstraint;
import org.springframework.beans.factory.annotation.Autowired;
import org.springframework.beans.factory.annotation.Value;
import org.springframework.boot.Banner;
import org.springframework.boot.SpringApplication;
import org.springframework.boot.autoconfigure.SpringBootApplication;
import org.springframework.boot.context.embedded.EmbeddedServletContainerFactory;
import org.springframework.boot.context.embedded.tomcat.TomcatEmbeddedServletContainerFactory;
import org.springframework.boot.web.client.RestTemplateBuilder;
import org.springframework.context.annotation.Bean;
import org.springframework.web.client.RestTemplate;
import springfox.documentation.swagger2.annotations.EnableSwagger2;

@SpringBootApplication
@EnableSwagger2//Swaggerapi集成,入不需要可直接删除
public class Application {


    @Value("${server.httpPort}")
    private String httpPort;//在yml文件中自定义的http端口
    @Value("${server.httpsPort}")
    private String httpsPort; //在yml文件中自定义https端口


    @Autowired
    RestTemplateBuilder restTemplateBuilider;

    public static void main(String[] args) {
        SpringApplication application = new SpringApplication(Application.class);
        application.setBannerMode(Banner.Mode.CONSOLE);//笔者自定义的banner 此处可按照Springboot默认启动方式启动
        application.run(args);
    }

    @Bean
    public EmbeddedServletContainerFactory servletContainer() {
        TomcatEmbeddedServletContainerFactory tomcat = new TomcatEmbeddedServletContainerFactory() {
            @Override
            protected void postProcessContext(Context context) {
                SecurityConstraint constraint = new SecurityConstraint();
                constraint.setUserConstraint("CONFIDENTIAL");
                SecurityCollection collection = new SecurityCollection();
                collection.addPattern("/*");
                constraint.addCollection(collection);
                context.addConstraint(constraint);
            }
        };
        tomcat.addAdditionalTomcatConnectors(httpConnector());
        return tomcat;
    }


    @Bean
    public Connector httpConnector() {
        Connector connector = new Connector("org.apache.coyote.http11.Http11NioProtocol");
        connector.setScheme("http");
        System.out.println("httpport="+httpPort);
        System.out.println("httpsPort="+httpsPort);

        // Connector监听的http的端口号
        connector.setPort(httpPort ==null?8080:Integer.valueOf(httpPort));
        connector.setSecure(false);
        // 监听到http的端口号后转向到的https的端口号
        connector.setRedirectPort(httpsPort ==null?443:Integer.valueOf(httpPort));
        return connector;
    }

    @Bean
    public RestTemplate restTemplate() {
        // 使用build()方法进行获取
        return restTemplateBuilider.build();
    }

}
3、ssl的配置
server:
  #htpp转发到https的端口
  port: 8443
  #http请求端口
  httpPort: 8767
  #https请求端口
  httpsPort: 8443
  ssl:
    key-store:  classpath:xftmapp.jks
    key-store-password:  TVPxezV9
    key-store-type:  JKS
    key-alias:  alias
  context-path: /XftmApp
    #address: 0.0.0.0
  tomcat:
      #uri-encoding: UTF-8
    max-threads: 2000
    max-connections: 20000
4、测试(笔者不演示自己的路径)
请求方式为:http://ip:httpPort/
请求方式为:https://ip:httpsPort/
作者:诗和远方
本文版权归作者和博客园共有,欢迎转载,但未经作者同意必须保留此段声明,且在文章页面明显位置给出原文连接,否则保留追究法律责任的权利.

 浙公网安备 33010602011771号