理解Docker(1):Docker 安装和基础用法
http://www.cnblogs.com/sammyliu/p/5875470.html
http://blog.csdn.net/dc_726/article/details/48206779
http://www.runoob.com/docker/docker-container-usage.html
本系列文章将介绍Docker的有关知识:
(2)Docker 镜像
(3)Docker 容器的隔离性 - 使用 Linux namespace 隔离容器的运行环境
(4)Docker 容器的隔离性 - 使用 cgroups 限制容器使用的资源
(5)Docker 网络
1. 安装
1.1 在 Ubuntu 14.04 上安装 Docker
前提要求:
- 内核版本必须是3.10或者以上
依次执行下面的步骤:
- sudo apt-get update
- sudo apt-get install apt-transport-https ca-certificates
- sudo apt-key adv --keyserver hkp://p80.pool.sks-keyservers.net:80 --recv-keys 58118E89F3A912897C070ADBF76221572C52609D
- 编辑 /etc/apt/sources.list.d/docker.list 文件,添加 deb https://apt.dockerproject.org/repo ubuntu-trusty main
- sudo apt-get update
- sudo apt-get purge lxc-docker
- apt-cache policy docker-engine
- apt-get upgrade
- sudo apt-get install linux-image-extra-$(uname -r) linux-image-extra-virtual
- sudo apt-get install docker-engine
至此,安装过程完成。
- 运行 sudo service docker start 启动 Docker 守护进程。
- 运行 docker version 查看 Docker 版本
root@devstack:/home/sammy# docker --version
Docker version 1.12.1, build 23cf638
启动第一个容器:
- 启动第一个Docker 容器 docker run hello-world
root@devstack:/home/sammy# docker run hello-world

Hello from Docker!
This message shows that your installation appears to be working correctly.
它的运行成功也表明前面的安装步骤都运行正确了。
以上内容参考自 Docker 官网:https://docs.docker.com/engine/installation/linux/ubuntulinux/
1.2 Docker 到目前(2016/09/16)为止的版本历史
| 版本号 | 发布日期 | 发布经理 |
|---|---|---|
| Docker 1.12.1 | 08/18/2016 | |
| Docker 1.12.0 | 07/28/2016 | |
| Docker 1.11.0 | 04/12/2016 | @mlaventure |
| Docker 1.10.0 | 02/04/2016 | @thaJeztah |
| Docker 1.9.0 | 10/29/2015 | @tiborvass |
| Docker 1.8.0 | 08/11/2015 | @calavera |
2. Docker 的基本操作
2.1 Docker 容器的状态机
 (图片来源)
一个容器在某个时刻可能处于以下几种状态之一:
- created:已经被创建 (使用 docker ps -a 命令可以列出)但是还没有被启动 (使用 docker ps 命令还无法列出)
- running:运行中
- paused:容器的进程被暂停了
- restarting:容器的进程正在重启过程中
- exited:上图中的 stopped 状态,表示容器之前运行过但是现在处于停止状态(要区别于 created 状态,它是指一个新创出的尚未运行过的容器)。可以通过 start 命令使其重新进入 running 状态
- destroyed:容器被删除了,再也不存在了
你可以在 docker inspect 命令的输出中查看其详细状态:

"State": {
            "Status": "running",
            "Running": true,
            "Paused": false,
            "Restarting": false,
            "OOMKilled": false,
            "Dead": false,
            "Pid": 4597,
            "ExitCode": 0,
            "Error": "",
            "StartedAt": "2016-09-16T08:09:34.53403504Z",
            "FinishedAt": "2016-09-16T08:06:44.365106765Z"
        }
2.2 Docker 命令概述
我们可以把Docker 的命令大概地分类如下:
    镜像操作:
    build     Build an image from a Dockerfile
    commit    Create a new image from a container's changes
    images    List images
    load      Load an image from a tar archive or STDIN
    pull      Pull an image or a repository from a registry
    push      Push an image or a repository to a registry
    rmi       Remove one or more images
    search    Search the Docker Hub for images
    tag       Tag an image into a repository
    save      Save one or more images to a tar archive (streamed to STDOUT by default)
    history   显示某镜像的历史
    inspect   获取镜像的详细信息

    容器及其中应用的生命周期操作:
    create    Create a new container (创建一个容器)
    kill      Kill one or more running containers
    inspect   Return low-level information on a container, image or task
    pause     Pause all processes within one or more containers
    ps        List containers
    rm        Remove one or more containers (删除一个或者多个容器)
    rename    Rename a container
    restart   Restart a container
    run       Run a command in a new container (创建并启动一个容器)
    start     Start one or more stopped containers (启动一个处于停止状态的容器)
    stats     Display a live stream of container(s) resource usage statistics (显示容器实时的资源消耗信息)
    stop      Stop one or more running containers (停止一个处于运行状态的容器)
    top       Display the running processes of a container
    unpause   Unpause all processes within one or more containers
    update    Update configuration of one or more containers
    wait      Block until a container stops, then print its exit code
    attach    Attach to a running container
    exec      Run a command in a running container
    port      List port mappings or a specific mapping for the container
    logs      获取容器的日志

    容器文件系统操作:
    cp        Copy files/folders between a container and the local filesystem
    diff      Inspect changes on a container's filesystem
    export    Export a container's filesystem as a tar archive
    import    Import the contents from a tarball to create a filesystem image

    Docker registry 操作:
    login     Log in to a Docker registry.
    logout    Log out from a Docker registry.

    Volume 操作
    volume    Manage Docker volumes

    网络操作
    network   Manage Docker networks

    Swarm 相关操作
    swarm     Manage Docker Swarm
    service   Manage Docker services
    node      Manage Docker Swarm nodes

    系统操作:
    version   Show the Docker version information
    events    Get real time events from the server  (持续返回docker 事件)
    info      Display system-wide information (显示Docker 主机系统范围内的信息)
比较有意思的几个命令:
(1)容器从生到死整个生命周期
root@devstack:/home/sammy# docker create --name web31 training/webapp python app.py  #创建名字为 web31 的容器
7465f4cb7c49555af32929bd1bc4213f5e72643c0116450e495b71c7ec128502
root@devstack:/home/sammy# docker inspect --format='{{.State.Status}}' web31 #其状态为 created
created
root@devstack:/home/sammy# docker start web31 #启动容器
web31
root@devstack:/home/sammy# docker inspect --format='{{.State.Status}}' web31 #其状态为 running
running
root@devstack:/home/sammy# docker pause web31 #暂停容器
web31
root@devstack:/home/sammy# docker inspect --format='{{.State.Status}}' web31
paused
root@devstack:/home/sammy# docker unpause web31 #继续容器
web31
root@devstack:/home/sammy# docker inspect --format='{{.State.Status}}' web31
running
root@devstack:/home/sammy# docker rename web31 newweb31 #重命名
root@devstack:/home/sammy# docker inspect --format='{{.State.Status}}' newweb31
running
root@devstack:/home/sammy# docker top newweb31 #在容器中运行 top 命令
UID                 PID                 PPID                C                   STIME               TTY                 TIME                CMD
root                5009                4979                0                   16:28               ?                   00:00:00            python app.py
root@devstack:/home/sammy# docker logs newweb31 #获取容器的日志
 * Running on http://0.0.0.0:5000/ (Press CTRL+C to quit)
root@devstack:/home/sammy# docker stop newweb31 #停止容器
newweb31
root@devstack:/home/sammy# docker inspect --format='{{.State.Status}}' newweb31
exited
root@devstack:/home/sammy# docker rm newweb31 #删除容器
newweb31
root@devstack:/home/sammy# docker inspect --format='{{.State.Status}}' newweb31
Error: No such image, container or task: newweb31
(2) docker stop 和 docker kill
在docker stop 命令执行的时候,会先向容器中PID为1的进程发送系统信号 SIGTERM,然后等待容器中的应用程序终止执行,如果等待时间达到设定的超时时间(默认为 10秒,用户可以指定特定超时时长),会继续发送SIGKILL的系统信号强行kill掉进程。在容器中的应用程序,可以选择忽略和不处理SIGTERM信号,不过一旦达到超时时间,程序就会被系统强行kill掉,因为SIGKILL信号是直接发往系统内核的,应用程序没有机会去处理它。
比如运行 docker stop web5 -t 20 命令后:
2016-09-16T16:01:18.206540853+08:00 container kill b3256ef1400a7f6a6f242e377a77af5e25d3b12237c4ee7c2e9b31a5f6437868 (image=training/webapp, name=web5, signal=15)
2016-09-16T16:01:38.212352224+08:00 container kill b3256ef1400a7f6a6f242e377a77af5e25d3b12237c4ee7c2e9b31a5f6437868 (image=training/webapp, name=web5, signal=9)
2016-09-16T16:01:38.235021315+08:00 container die b3256ef1400a7f6a6f242e377a77af5e25d3b12237c4ee7c2e9b31a5f6437868 (exitCode=137, image=training/webapp, name=web5)
能看到:
- 首先 docker 向容器发出 SIGTERM 信号(signal=15)
- 等待20秒 (01:18 到 01:38)
- 再发送 SIGKILL 系统信号 (signal = 9)
- 然后容器被杀掉了 (die)
而 docker kill 命令会直接发出SIGKILL的系统信号,以强行终止容器中程序的运行。运行 docker kill web5 命令后:
2016-09-16T16:06:44.351086471+08:00 container kill b3256ef1400a7f6a6f242e377a77af5e25d3b12237c4ee7c2e9b31a5f6437868 (image=training/webapp, name=web5, signal=9)
2016-09-16T16:06:44.365116100+08:00 container die b3256ef1400a7f6a6f242e377a77af5e25d3b12237c4ee7c2e9b31a5f6437868 (exitCode=137, image=training/webapp, name=web5)
可见直接发出的是 SIGKILL 信号,容器立马就被杀掉了。
(3)使用 docker cp 在 host 和 container 之间拷贝文件或者目录
root@devstack:/home/sammy# docker cp /home/sammy/mydockerbuild/Dockerfile web5:/webapp #从 host 拷贝文件到 container 里面
root@devstack:/home/sammy#
root@devstack:/home/sammy# docker cp web5:/webapp/Dockerfile /home/sammy/Dockerfile #从 container 里面拷贝文件到 host 上
root@devstack:/home/sammy# ls /home/sammy
chroot  devstack  Dockerfile  mongodbdocker  mydockerbuild  webapp
(4)docker export 和 import
docker export:将一个容器的文件系统打包为一个压缩文件
root@devstack:/home/sammy# docker export web5 -o ./web5
root@devstack:/home/sammy# ls
chroot  devstack  Dockerfile  mongodbdocker  mydockerbuild  web5  webapp
docker import:从一个压缩文件创建一个镜像
root@devstack:/home/sammy# docker import web5 web5img -m "imported on 0916"
sha256:745bb258be0a69a517367667646148bb2f662565bb3d222b50c0c22e5274a926
root@devstack:/home/sammy# docker history web5img
IMAGE               CREATED             CREATED BY          SIZE                COMMENT
745bb258be0a        6 seconds ago                           324 MB              imported on 0916
2.3 docker run 命令
docker run 命令会创建一个容器并启动它,它也是包含很多的参数,按照用途将它们分类如下:
   cgroups 和 namespace 相关:
      --blkio-weight value          Block IO (relative weight), between 10 and 1000
      --blkio-weight-device value   Block IO weight (relative device weight) (default [])
      --cgroup-parent string        Optional parent cgroup for the container
      --cpu-percent int             CPU percent (Windows only)
      --cpu-period int              Limit CPU CFS (Completely Fair Scheduler) period
      --cpu-quota int               Limit CPU CFS (Completely Fair Scheduler) quota
  -c, --cpu-shares int              CPU shares (relative weight)
      --cpuset-cpus string          CPUs in which to allow execution (0-3, 0,1)
      --cpuset-mems string          MEMs in which to allow execution (0-3, 0,1)
      --device-read-bps value       Limit read rate (bytes per second) from a device (default [])
      --device-read-iops value      Limit read rate (IO per second) from a device (default [])
      --device-write-bps value      Limit write rate (bytes per second) to a device (default [])
      --device-write-iops value     Limit write rate (IO per second) to a device (default [])
      --ipc string                  IPC namespace to use
  -m, --memory string               Memory limit
      --memory-reservation string   Memory soft limit
      --memory-swap string          Swap limit equal to memory plus swap: '-1' to enable unlimited swap
      --memory-swappiness int       Tune container memory swappiness (0 to 100) (default -1)
      --kernel-memory string        Kernel memory limit
  -u, --user string                 Username or UID (format: <name|uid>[:<group|gid>])
      --userns string               User namespace to use
      --uts string                  UTS namespace to use
  -h, --hostname string             Container host name
      --pid string                  PID namespace to use
      --pids-limit int              Tune container pids limit (set -1 for unlimited)
      --isolation string            Container isolation technology
      --io-maxbandwidth string      Maximum IO bandwidth limit for the system drive (Windows only)
      --io-maxiops uint             Maximum IOps limit for the system drive (Windows only)

    linux process capabilities 相关参数:
      --cap-add value               Add Linux capabilities (default [])
      --cap-drop value              Drop Linux capabilities (default [])

    容器运行模式和环境相关:
  -d, --detach                      Run container in background and print container ID
  -e, --env value                   Set environment variables (default [])
      --env-file value              Read in a file of environment variables (default [])

    DNS 相关:
      --dns value                   Set custom DNS servers (default [])
      --dns-opt value               Set DNS options (default [])
      --dns-search value            Set custom DNS search domains (default [])

    健康检查相关:
      --health-cmd string           Command to run to check health
      --health-interval duration    Time between running the check
      --health-retries int          Consecutive failures needed to report unhealthy
      --health-timeout duration     Maximum time to allow one check to run
      --no-healthcheck              Disable any container-specified HEALTHCHECK

    IP 和端口:
      --ip string                   Container IPv4 address (e.g. 172.30.100.104)
      --ip6 string                  Container IPv6 address (e.g. 2001:db8::33)
  -p, --publish value               Publish a container's port(s) to the host (default [])
  -P, --publish-all                 Publish all exposed ports to random ports
      --expose value                Expose a port or a range of ports (default [])
      --mac-address string          Container MAC address (e.g. 92:d0:c6:0a:29:33)
      --add-host value              Add a custom host-to-IP mapping (host:ip) (default [])

    Volume 相关:
  -v, --volume value                Bind mount a volume (default [])
      --volume-driver string        Optional volume driver for the container
      --volumes-from value          Mount volumes from the specified container(s) (default [])
      --storage-opt value           Storage driver options for the container (default [])

    Network 有关:
      --network string              Connect a container to a network (default "default")
      --network-alias value         Add network-scoped alias for the container (default [])
      --link value                  Add link to another container (default [])
      --link-local-ip value         Container IPv4/IPv6 link-local addresses (default [])

    日志有关:
      --log-driver string           Logging driver for the container
      --log-opt value               Log driver options (default [])

    交互性有关:
  -a, --attach value                Attach to STDIN, STDOUT or STDERR (default [])
  -i, --interactive                 Keep STDIN open even if not attached

    OOM 有关:
      --oom-kill-disable            Disable OOM Killer
      --oom-score-adj int           Tune host's OOM preferences (-1000 to 1000)

    其它(待更进一步分类):
      --cidfile string              Write the container ID to the file
      --detach-keys string          Override the key sequence for detaching a container
      --device value                Add a host device to the container (default [])
      --disable-content-trust       Skip image verification (default true)
      --entrypoint string           Overwrite the default ENTRYPOINT of the image
      --group-add value             Add additional groups to join (default [])
      --help                        Print usage
  -l, --label value                 Set meta data on a container (default [])
      --label-file value            Read in a line delimited file of labels (default [])
      --name string                 Assign a name to the container
      --privileged                  Give extended privileges to this container
      --read-only                   Mount the container's root filesystem as read only
      --restart string              Restart policy to apply when a container exits (default "no")
      --rm                          Automatically remove the container when it exits
      --runtime string              Runtime to use for this container
      --security-opt value          Security Options (default [])
      --shm-size string             Size of /dev/shm, default value is 64MB
      --sig-proxy                   Proxy received signals to the process (default true)
      --stop-signal string          Signal to stop a container, SIGTERM by default (default "SIGTERM")
      --sysctl value                Sysctl options (default map[])
      --tmpfs value                 Mount a tmpfs directory (default [])
  -t, --tty                         Allocate a pseudo-TTY
      --ulimit value                Ulimit options (default [])
  -w, --workdir string              Working directory inside the container
具体的内容以后会有专门文件分析。
3. Doker 平台的基本构成

Docker 平台基本上由三部分组成:
- 客户端:用户使用 Docker 提供的工具(CLI 以及 API 等)来构建,上传镜像并发布命令来创建和启动容器
- Docker 主机:从 Docker registry 上下载镜像并启动容器
- Docker registry:Docker 镜像仓库,用于保存镜像,并提供镜像上传和下载
http://songhuiming.github.io/pages/2017/02/25/an-zhuang-dockerhe-tensorflow/
3. 获取镜像
Docker Hub 上有大量的高质量的镜像可以用,下面说明怎么获取这些镜像并运行.
从 Docker Registry 获取镜像的命令是 docker pull。其命令格式为:
docker pull [选项] [Docker Registry地址]<仓库名>:<标签>
4. 镜像管理
4.0. 下载镜像
docker pull image-name
4.1. 查看本地镜像
docker images
4.2. 查看运行的容器
查看active镜像:  docker ps
查看所有镜像:    docker ps -a
查看最近的镜像:   docker ps -l
4.3. 删除镜像 删除容器
docker rmi image-name

docker rm <container id>
4.4. 在repo里搜索镜像
docker search [image-name]
4.5. 停止镜像
docker stop container-id
4.6. 停止并删除所有容器
docker stop $(docker ps -a -q)
docker rm $(docker ps -a -q)
5. 生成新镜像(pull一个干净ubuntu镜像,安装anaconda,提交保存)
5.0. pull一个ubuntu镜像
docker pull ubuntu
5.1. 启动镜像(ubuntu 镜像),进入bash
docker run -it ubuntu /bin/bash
5.3. 更新ubuntu,安装vim, 安装wget
apt-get update
apt-get install vim
apt-get install wget
5.4. 退出
exit
To restart the exited container:
docker start -a -i `docker ps -q -l`
docker start start a container (requires name or ID)
-a attach to container
-i interactive mode
docker ps List containers
-q list only container IDs
-l list only last created container
5.5. How do I install new libraries in Docker?
Therre are two ways to do this:
First methodd: Modify the Dockerfile directly to install new or update your existing libraries. You will need to do a docker build after you do this. If you just want to update to a newer version of the DL framework(s), you can pass them as CLI parameter using the --build-arg tag (see for details). The framework versions are defined at the top of the Dockerfile. For example, docker build -t shmhub/dl-docker:cpu -f Dockerfile.cpu --build-arg TENSORFLOW_VERSION=1.2.0 .
Second mthodd: you can install or upgrade in the container. After it is done, exit the cocntainer and do a commit as introducte below.
5.5. 向docker image提交container change
docker commit -m "install vim wget on ubuntu" -a "author: shm" 7de2c97f7a85 shm/ubuntu_custom
这里7de2c97f7a85是image id.也就是在bash下面看到的root@后面的id: root@7de2c97f7a85. 这时候比较前后的镜像,就会发现commit以后多了一个镜像
shm@ubuntu:~$ docker images
REPOSITORY              TAG                 IMAGE ID            CREATED             SIZE
tensorflow/tensorflow   latest              ea40dcc45724        2 weeks ago         1.03 GB
ubuntu                  latest              f49eec89601e        5 weeks ago         129 MB

shm@ubuntu:~$ docker commit -m "install vim wget on ubuntu" -a "author: shm" 7de2c97f7a85 shm/ubuntu_custom
sha256:5ed742f690e11c65db83936847c7c5659c5834f6b2c93b52d110455936e6a224

shm@ubuntu:~$ docker images
REPOSITORY              TAG                 IMAGE ID            CREATED             SIZE
shm/ubuntu_custom       latest              5ed742f690e1        12 seconds ago      647 MB
tensorflow/tensorflow   latest              ea40dcc45724        2 weeks ago         1.03 GB
ubuntu                  latest              f49eec89601e        5 weeks ago         129 MB
5.6. 向仓库提交镜像
首先登陆
docker login -u docker-username
然后push
5.6.1. list the image and get the tag id
shm@shm-xps9550:~/projects/dl_lessons/courses-master/deeplearning1/nbs$ `docker images`
REPOSITORY          TAG                 IMAGE ID            CREATED             SIZE
shmhub/dl-docker    cpu                 0f1e40d1bed8        12 days ago         9.13 GB
ubuntu              16.04               6a2f32de169d        13 days ago         117 MB
5.6.2. tag the giage with the registoryhost
docker tag 0f1e40d1bed8 pinseng/dl-docker
5.6.3. push the image to the repo
docker push docker-username/docker-image-name
docker push pinseng/dl-docker
一个例子,安装tensorflow
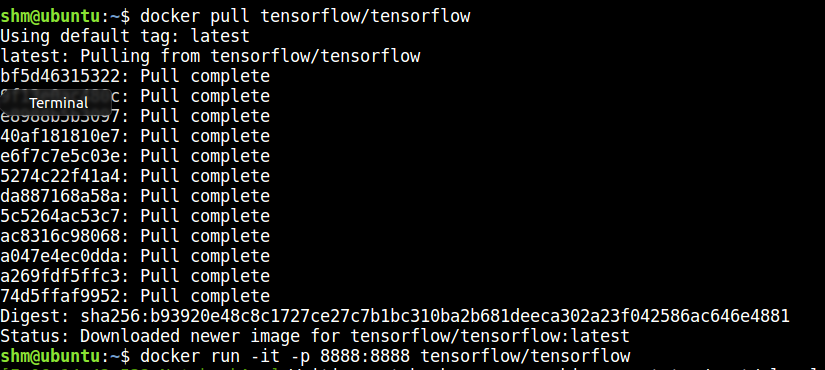
tensorflow提供了好几种安装办法,其中一种是提供的docker镜像.非常简单可以拉下来docker pull tensorflow/tensorflow
运行cpu版本的tensorflow, docker run -it -p 8888:8888 tensorflow/tensorflow
然后浏览器打开jupyter notebook http://localhost:8888/
安装其他软件(非Dockerfile安装,不推荐)
首先进入bash
docker run -it tensorflow/tensorflow /bin/bash
其次输入命令安装
apt-get install python-pandas
然后退出
exit
退出docker容器,再给docker commit传递一个json来提交新的镜像
docker commit -m "test" -a"autho name" ea40dcc45724 tensorflow-pandas
好方便!
http://www.jianshu.com/p/ea4a00c6c21c
实例
使用docker镜像nginx:latest以后台模式启动一个容器,并将容器命名为mynginx。
docker run --name mynginx -d nginx:latest使用镜像nginx:latest以后台模式启动一个容器,并将容器的80端口映射到主机随机端口。
docker run -P -d nginx:latest使用镜像nginx:latest以后台模式启动一个容器,将容器的80端口映射到主机的80端口,主机的目录/data映射到容器的/data。
docker run -p 80:80 -v /data:/data -d nginx:latest使用镜像nginx:latest以交互模式启动一个容器,在容器内执行/bin/bash命令。
runoob@runoob:~$ docker run -it nginx:latest /bin/bash
root@b8573233d675:/#


Usage: docker run [OPTIONS] IMAGE [COMMAND] [ARG...]
02.
03.  -d, --detach=false         指定容器运行于前台还是后台,默认为false
04.  -i, --interactive=false   打开STDIN,用于控制台交互
05.  -t, --tty=false            分配tty设备,该可以支持终端登录,默认为false
06.  -u, --user=""              指定容器的用户
07.  -a, --attach=[]            登录容器(必须是以docker run -d启动的容器)
08.  -w, --workdir=""           指定容器的工作目录
09.  -c, --cpu-shares=0        设置容器CPU权重,在CPU共享场景使用
10.  -e, --env=[]               指定环境变量,容器中可以使用该环境变量
11.  -m, --memory=""            指定容器的内存上限
12.  -P, --publish-all=false    指定容器暴露的端口
13.  -p, --publish=[]           指定容器暴露的端口
14.  -h, --hostname=""          指定容器的主机名
15.  -v, --volume=[]            给容器挂载存储卷,挂载到容器的某个目录
16.  --volumes-from=[]          给容器挂载其他容器上的卷,挂载到容器的某个目录
17.  --cap-add=[]               添加权限,权限清单详见:http://linux.die.net/man/7/capabilities
18.  --cap-drop=[]              删除权限,权限清单详见:http://linux.die.net/man/7/capabilities
19.  --cidfile=""               运行容器后,在指定文件中写入容器PID值,一种典型的监控系统用法
20.  --cpuset=""                设置容器可以使用哪些CPU,此参数可以用来容器独占CPU
21.  --device=[]                添加主机设备给容器,相当于设备直通
22.  --dns=[]                   指定容器的dns服务器
23.  --dns-search=[]            指定容器的dns搜索域名,写入到容器的/etc/resolv.conf文件
24.  --entrypoint=""            覆盖image的入口点
25.  --env-file=[]              指定环境变量文件,文件格式为每行一个环境变量
26.  --expose=[]                指定容器暴露的端口,即修改镜像的暴露端口
27.  --link=[]                  指定容器间的关联,使用其他容器的IP、env等信息
28.  --lxc-conf=[]              指定容器的配置文件,只有在指定--exec-driver=lxc时使用
29.  --name=""                  指定容器名字,后续可以通过名字进行容器管理,links特性需要使用名字
30.  --net="bridge"             容器网络设置:
31.                                bridge 使用docker daemon指定的网桥
32.                                host    //容器使用主机的网络
33.                                container:NAME_or_ID  >//使用其他容器的网路,共享IP和PORT等网络资源
34.                                none 容器使用自己的网络(类似--net=bridge),但是不进行配置
35.  --privileged=false         指定容器是否为特权容器,特权容器拥有所有的capabilities
36.  --restart="no"             指定容器停止后的重启策略:
37.                                no:容器退出时不重启
38.                                on-failure:容器故障退出(返回值非零)时重启
39.                                always:容器退出时总是重启
40.  --rm=false                 指定容器停止后自动删除容器(不支持以docker run -d启动的容器)
41.  --sig-proxy=true           设置由代理接受并处理信号,但是SIGCHLD、SIGSTOP和SIGKILL不能被代理
作者:Hongrui_Ji
链接:http://www.jianshu.com/p/ea4a00c6c21c
來源:简书
著作权归作者所有。商业转载请联系作者获得授权,非商业转载请注明出处。
后续的问题
1. docker跟主机共享文件(-v)
2. 相互copy文件
3. 不同的docker之间交互(一个tf,一个Theano,怎么交互: bridge / link)
4. 用Dockerfile创建镜像(Dockerfile)
Reference
- Get Docker for Ubuntu
- Manage Docker as a non-root user
- Error gpg: no valid OpenPGP data found
- Docker — 从入门到实践
- docker tensorflow repository
- How do I deal with certificates using cURL while trying to access an HTTPS url
- How to push a docker image to a private repository
http://www.cnblogs.com/vikings-blog/p/4238062.html
Docker学习总结之Run命令介绍
本文由Vikings(http://www.cnblogs.com/vikings-blog/) 原创,转载请标明.谢谢!
在使用Docker时,执行最多的命令某过于run了。这个命令可以说是所有docker操作的入口。在Docker官方Reference中单独列出了一个章节来介绍Run的各种参数使用,也足以看出Docker run的重要性。有感于此,我感觉有必要好好学习一下Run命令,因此特意看了一下Run命令介绍,结合日常中的使用心得,分享一下。以下文档大部分翻译于Docker 官方Reference,肯定会存在不少错误之处,希望能抛砖引玉,大家共同讨论。
Docker在执行时会将相关进程封装到相互隔离的容器(container)中。当执行 docker run时,Docker会启动一个进程,同时给这个进程分配其独占的文件系统,独占的网络资源和以此进程为根进程的进程组。在Docker启动container时加载的Image,或许已经定义好了默认的启动进程,需要exposer的网络端口和其他在Dockerfile中定义好的资源。但使用docker run 都可以重新对这个image进行默认定义。这就是为什么run命令参数比docker其他命令参数都多的原因。
最基本的docker run命令是如下格式:
$ sudo docker run [OPTIONS] IMAGE[:TAG] [COMMAND] [ARG...]
如果需要查看[OPTIONS]的详细使用说明,请参考Docker关于OPTIONS的说明。这里仅简要介绍Run所使用到的参数。
OPTIONS总起来说分为两类:
- 设定操作执行方式:
- 决定container的运行方式,前台执行还是后台执行
- 设定containerID
- 设定network参数
- 设定container的CPU和Memory参数
- 设定权限(Privileges )和LXC参数
- 设定image的默认资源,也就是image使用者可以用此命令来覆盖image开发者在build阶段所设定的默认值。
docker run [OPTIONS]可以让image使用者完全控制container的生命周期,允许image使用者覆盖所有image开发者在执行docker build时所设定的参数,甚至也可以修改本身由Docker所控制的内核级参数。
Operator exclusive options
当执行docker run时可以设定的资源如下:
- Detached vs Foreground
- Container Identification
- IPC Setting
- Network Settings
- Clean Up (--rm)
- Runtime Constraints on CPU and Memory
- Runtime Privilege, Linux Capabilities, and LXC Configuration
我们依次进行介绍。
Detached vs foreground
当我们启动一个container时,首先需要确定这个container是运行在前台模式还是运行在后台模式。
-d=false: Detached mode: Run container in the background, print new container id
Detached (-d)
如果在docker run 后面追加-d=true或者-d,则containter将会运行在后台模式(Detached mode)。此时所有I/O数据只能通过网络资源或者共享卷组来进行交互。因为container不再监听你执行docker run的这个终端命令行窗口。但你可以通过执行docker attach 来重新挂载这个container里面。需要注意的时,如果你选择执行-d使container进入后台模式,那么将无法配合"--rm"参数。
Foregroud
如果在docker run后面没有追加-d参数,则container将默认进入前台模式(Foregroud mode)。Docker会启动这个container,同时将当前的命令行窗口挂载到container的标准输入,标准输出和标准错误中。也就是container中所有的输出,你都可以再当前窗口中查看到。甚至docker可以虚拟出一个TTY窗口,来执行信号中断。这一切都是可以配置的:
-a=[]               : Attach to `STDIN`, `STDOUT` and/or `STDERR`
-t=false            : Allocate a pseudo-tty
--sig-proxy=true : Proxify all received signal to the process (non-TTY mode only)
-i=false            : Keep STDIN open even if not attached
如果在执行run命令时没有指定-a,那么docker默认会挂载所有标准数据流,包括输入输出和错误。你可以特别指定挂载哪个标准流。
$ sudo docker run -a stdin -a stdout -i -t ubuntu /bin/bash (只挂载标准输入输出)
对于执行容器内的交互式操作,例如shell脚本。我们必须使用 -i -t来申请一个控制台同容器进行数据交互。但是当通过管道同容器进行交互时,就不能使用-t. 例如下面的命令
echo test | docker run -i busybox cat
Container identification
Name (--name)
给container命名有三种方式:
1. 使用UUID长命名("f78375b1c487e03c9438c729345e54db9d20cfa2ac1fc3494b6eb60872e74778")
2. 使用UUID短命令("f78375b1c487")
3. 使用Name("evil_ptolemy")
这个UUID标示是由Docker deamon来生成的。如果你在执行docker run时没有指定 --name,那么deamon会自动生成一个随机数字符串当做UUID。但是对于一个container来说有个name会非常方便,因为你可以当你需要link其它容器时或者其他类似需要区分其它容器时,使用容器名称会简化操作。无论container运行在前台或者后台,这个名字都是有效的。
PID equivalent
当你在运行docker时有自动化的要求,那么你可以要求Docker将containerID 输出到你指定的文件中(PIDfile).这种行为就类似于有些应用程序将自身ID输出到文件中,方便后续脚本操作。
--cidfile="": Write the container ID to the file
Image[:tag]
当一个image的名称不足以分辨这个image所代表的含义时,你可以通过tag将版本信息添加到run 命令中来执行特定版本的image。例如: docker run ubuntu:14.04
IPC Settings
默认情况下,所有容器都开启了IPC命名空间。
--ipc=""  : Set the IPC mode for the container,
            'container:<name|id>': reuses another container's IPC namespace
            'host': use the host's IPC namespace inside the container
IPC(POSIX/SysV IPC)命名空间提供了相互隔离的命名共享内存,信号灯变量和消息队列。
共享内存可以提高进程数据交互速度。共享内存一般用在database和高性能应用(C/OpenMPI, C++/using boost libraries)上或者金融服务上。如果需要容器里面部署上述类型的应用,那么就应该在多个容器直接采取共享内存了。
Network settings
默认情况下,所有的container都开启了网络接口,同时可以接受任何外部的数据请求。
--dns=[]         : Set custom dns servers for the container
--net="bridge"   : Set the Network mode for the container
                              'bridge': creates a new network stack for the container on the docker bridge
                              'none': no networking for this container
                              'container:<name|id>': reuses another container network stack
                              'host': use the host network stack inside the container
--add-host=""    : Add a line to /etc/hosts (host:IP)
--mac-address="" : Sets the container's Ethernet device's MAC address
可以通过docker run --net none 来关闭网络接口,此时将关闭所有网络数据的输入输出。这时,你只能通过STDIN,STDOUT或者files来完成I/O操作了。默认情况下,container使用host的DNS设置。但是你可以通过--dns来覆盖container内的dns设置。同时docker会对containter默认生成一个MAC地址,你可以通过--mac-address 12:34:56:78:9a:bc 来设置你自己的mac地址。
以下是网络设置中常用的参数:
- none 关闭container内的网络连接
- bridge 通过veth接口来连接contianer 默认选项
- host 允许container使用host的网络堆栈信息。 注意:这种方式将允许container访问host中类似D-BUS之类的系统服务,所以被认为是不安全的。
- container 使用另外一个container的网络堆栈信息。
None:
将网络模式设置为none时,这个container将不允许访问任何外部router。这个container内部只会有一个loopback接口,而且不存在任何可以访问外部网络的router。
Bridge:
Docker默认是将container设置为bridge模式。此时在host上面讲存在一个docker0的网络接口,同时会针对container创建一对veth接口。其中一个veth接口是在host充当网卡桥接作用,另外一个veth接口存在于container的命名空间中,并且指向container的loopback。Docker会自动给这个container分配一个IP,并且将container内的数据通过桥接转发到外部。
Host:
当网络模式设置为host时,这个container将完全共享host的网络堆栈。host所有的网络接口将完全对container开放。container的主机名也会存在于host的hostname中。这时,container所有对外暴露的port和对其它container的link,将完全失效。
Container:
当网络模式设置为Container时,这个container将完全复用另外一个container的网络堆栈。同时使用时这个container的名称必须要符合下面的格式:--net container:<name|id>.
比如当前有一个绑定了本地地址localhost的redis container。如果另外一个container需要复用这个网络堆栈,则需要如下操作:
$ sudo docker run -d --name redis example/redis --bind 127.0.0.1
$ # use the redis container's network stack to access localhost
$ sudo docker run --rm -ti --net container:redis example/redis-cli -h 127.0.0.1
Managing /etc/hosts
当一个container再启动时,在/etc/hosts文件里面将会存在包括localhost在内的一些hostname信息。我们也可以使用--add-host这个参数来动态添加/etc/hosts里面的数据。
$ /docker run -ti --add-host db-static:86.75.30.9 ubuntu cat /etc/hosts
172.17.0.22     09d03f76bf2c
fe00::0         ip6-localnet
ff00::0         ip6-mcastprefix
ff02::1         ip6-allnodes
ff02::2         ip6-allrouters
127.0.0.1       localhost
::1             localhost ip6-localhost ip6-loopback
86.75.30.9      db-static
Clean up (--rm)
默认情况下,每个container在退出时,它的文件系统也会保存下来。这样一方面调试会方便些,因为你可以通过查看日志等方式来确定最终状态。另外一方面,你也可以保存container所产生的数据。但是当你仅仅需要短期的运行一个前台container,这些数据同时不需要保留时。你可能就希望docker能在container结束时自动清理其所产生的数据。
这个时候你就需要--rm这个参数了。 注意:--rm 和 -d不能共用!
--rm=false: Automatically remove the container when it exits (incompatible with -d)
Security configuration
--security-opt="label:user:USER"   : Set the label user for the container
--security-opt="label:role:ROLE"   : Set the label role for the container
--security-opt="label:type:TYPE"   : Set the label type for the container
--security-opt="label:level:LEVEL" : Set the label level for the container
--security-opt="label:disable"     : Turn off label confinement for the container
--secutity-opt="apparmor:PROFILE"  : Set the apparmor profile to be applied
                                     to the container
你可以通过--security-opt修改container中默认的schema标签。比如说,对于一个MLS系统来说(MLS可能是指Multiple Listing System,本人不确定.),你可以指定MCS/MLS级别。
下面的这些级别将允许多个container共享content。
# docker run --security-opt label:level:s0:c100,c200 -i -t fedora bash
如果是MLS系统,则使用下面的命令:
# docker run --security-opt label:level:TopSecret -i -t rhel7 bash
使用下面的命令可以在container内禁用安全策略:
# docker run --security-opt label:disable -i -t fedora bash
如果你需要在container内执行更为严格的安全策略,那么你可以为这个container指定一个策略替代。比如你可以使用下面的命令来指定container只允许监听apache port
# docker run --security-opt label:type:svirt_apache_t -i -t centos bash
注意:此时,在你的host环境中必须存在一个名为svirt_apache_t的安全策略。
Runtime constraints on CPU and memory
下面的参数可以用来调整container内的性能参数。
-m="": Memory limit (format: <number><optional unit>, where unit = b, k, m or g)
-c=0 : CPU shares (relative weight)
通过docker run -m 可以很方便的调整container所使用的内存资源。如果host支持swap内存,那么使用-m可以设定比host物理内存还大的值。
同样,通过-c 可以调整container的cpu优先级。默认情况下,所有的container享有相同的cpu优先级和cpu调度周期。但你可以通过Docker来通知内核给予某个或某几个container更多的cpu计算周期。
默认情况下,使用-c或者--cpu-shares 参数值为0,可以赋予当前活动container 1024个cpu共享周期。这个0值可以针对活动的container进行修改来调整不同的cpu循环周期。
比如,我们使用-c或者--cpu-shares =0启动了C0,C1,C2三个container,使用-c/--cpu-shares=512启动了C3.这时,C0,C1,C2可以100%的使用CPU资源(1024),但C3只能使用50%的CPU资源(512)。如果这个host的OS是时序调度类型的,每个CPU时间片是100微秒,那么C0,C1,C2将完全使用掉这100微秒,而C3只能使用50微秒。
Runtime privilege, Linux capabilities, and LXC configuration
--cap-add: Add Linux capabilities
--cap-drop: Drop Linux capabilities
--privileged=false: Give extended privileges to this container
--device=[]: Allows you to run devices inside the container without the --privileged flag.
--lxc-conf=[]: (lxc exec-driver only) Add custom lxc options --lxc-conf="lxc.cgroup.cpuset.cpus = 0,1"
默认情况下,Docker的container是没有特权的。例如不能再container里面再启动一个container。这是因为默认情况下container是不能访问任何其他设备的。但是通过"privileged",container就拥有了访问任何其他设备的权限。
当操作者执行docker run --privileged时,Docker将拥有访问host所有设备的权限,同时Docker也会在apparmor或者selinux做一些设置,使container可以容易的访问那些运行在container外部的设备。你可以访问Docker blog来获取更多关于--privileged的用法。
同时,你也可以限制container只能访问一些指定的设备。下面的命令将允许container只访问一些特定设备:
$ sudo docker run --device=/dev/snd:/dev/snd ...
默认情况下,container拥有对设备的读,写,创建设备文件的权限。使用:rwm来配合--device,你可以控制这些权限。
  $ sudo docker run --device=/dev/sda:/dev/xvdc --rm -it ubuntu fdisk  /dev/xvdc

    Command (m for help): q
    $ sudo docker run --device=/dev/sda:/dev/xvdc:r --rm -it ubuntu fdisk  /dev/xvdc
    You will not be able to write the partition table.

    Command (m for help): q

    $ sudo docker run --device=/dev/sda:/dev/xvdc:w --rm -it ubuntu fdisk  /dev/xvdc
        crash....

    $ sudo docker run --device=/dev/sda:/dev/xvdc:m --rm -it ubuntu fdisk  /dev/xvdc
    fdisk: unable to open /dev/xvdc: Operation not permitted
使用--cap-add和--cap-drop,配合--privileged,你可以更细致的控制container。默认使用这两个参数的情况下,container拥有一系列的内核修改权限。这两个参数都支持all值,如果你想让某个container拥有除了MKNOD之外的所有内核权限,那么可以执行下面的命令:
$ sudo docker run --cap-add=ALL --cap-drop=MKNOD ...
如果需要修改网络接口数据,那么就建议使用--cap-add=NET_ADMIN,而不是使用--privileged。
$ docker run -t -i --rm  ubuntu:14.04 ip link add dummy0 type dummy
RTNETLINK answers: Operation not permitted
$ docker run -t -i --rm --cap-add=NET_ADMIN ubuntu:14.04 ip link add dummy0 type dummy
如果要挂载一个FUSE文件系统,那么就需要--cap-add和--device了。
$ docker run --rm -it --cap-add SYS_ADMIN sshfs sshfs sven@10.10.10.20:/home/sven /mnt
fuse: failed to open /dev/fuse: Operation not permitted
$ docker run --rm -it --device /dev/fuse sshfs sshfs sven@10.10.10.20:/home/sven /mnt
fusermount: mount failed: Operation not permitted
$ docker run --rm -it --cap-add SYS_ADMIN --device /dev/fuse sshfs
# sshfs sven@10.10.10.20:/home/sven /mnt
The authenticity of host '10.10.10.20 (10.10.10.20)' can't be established.
ECDSA key fingerprint is 25:34:85:75:25:b0:17:46:05:19:04:93:b5:dd:5f:c6.
Are you sure you want to continue connecting (yes/no)? yes
sven@10.10.10.20's password:
root@30aa0cfaf1b5:/# ls -la /mnt/src/docker
total 1516
drwxrwxr-x 1 1000 1000   4096 Dec  4 06:08 .
drwxrwxr-x 1 1000 1000   4096 Dec  4 11:46 ..
-rw-rw-r-- 1 1000 1000     16 Oct  8 00:09 .dockerignore
-rwxrwxr-x 1 1000 1000    464 Oct  8 00:09 .drone.yml
drwxrwxr-x 1 1000 1000   4096 Dec  4 06:11 .git
-rw-rw-r-- 1 1000 1000    461 Dec  4 06:08 .gitignore
如果docker启动时选择了lxc-driver,(docker -d --exec-driver=lxc)。那么就可以使用--lxc-conf来设定LXC参数。但需要注意的是,未来host上面的docker deamon有可能不会使用LXC,所以这些参数有可能会包含一些没有实现的配置功能。那么意味着,操作者在操作这些参数时必须要十分熟悉LXC。
特别注意:当你使用--lxc-conf修改container参数后,docker deamon将不再管理这些参数,那么必须由操作者自行进行管理。比如说,你使用--lxc-conf修改了container的IP地址,那么在/etc/hosts里面是不会自动体现的,需要你自行维护。
Overriding Dockerfile image defaults
当开发者使用Dockerfile进行build或者使用commit提交container时,开发人员可以设定一些image默认参数。
这些参数中,有四个是无法被覆盖的:FROM,MAINTAINER,RUN和ADD。其余参数都可以通过docker run进行覆盖。我们将介绍如何对这些参数进行覆盖。
- CMD (Default Command or Options)
- ENTRYPOINT (Default Command to Execute at Runtime)
- EXPOSE (Incoming Ports)
- ENV (Environment Variables)
- VOLUME (Shared Filesystems)
- USER
- WORKDIR
CMD (default command or options)
$ sudo docker run [OPTIONS] IMAGE[:TAG] [COMMAND] [ARG...]
这条命令中的COMMAND部分是可选的。因为这个IMAGE在build时,开发人员可能已经设定了默认执行的command。作为操作人员,你可以使用上面命令中新的command来覆盖旧的command。
如果image中设定了ENTRYPOINT,那么命令中的CMD也可以作为参数追加到ENTRYPOINT中。
ENTRYPOINT (default command to execute at runtime)
--entrypoint="": Overwrite the default entrypoint set by the image
这个ENTRYPOINT和COMMAND类似,它指定了当container执行时,需要启动哪些进程。相对COMMAND而言,ENTRYPOINT是比较困难进行覆盖的,这个ENTRYPOINT可以让container设定默认启动行为,所以当container启动时,你可以执行任何一个二进制可执行程序。你也可以通过COMMAND给这个ENTRYPOINT传递参数。但当你需要再container中执行其他进程时,你就可以指定其他ENTRYPOINT了。
下面就是一个例子,container可以在启动时自动执行shell,然后启动其它进程。
$ sudo docker run -i -t --entrypoint /bin/bash example/redis
#or two examples of how to pass more parameters to that ENTRYPOINT:
$ sudo docker run -i -t --entrypoint /bin/bash example/redis -c ls -l
$ sudo docker run -i -t --entrypoint /usr/bin/redis-cli example/redis --help
EXPOSE (incoming ports)
Dockefile在网络方面除了提供一个EXPOSE之外,没有提供其它选项。下面这些参数可以覆盖Dockefile的expose默认值:
--expose=[]: Expose a port or a range of ports from the container
            without publishing it to your host
-P=false   : Publish all exposed ports to the host interfaces
-p=[]      : Publish a container᾿s port to the host (format:
             ip:hostPort:containerPort | ip::containerPort |
             hostPort:containerPort | containerPort)
             (use 'docker port' to see the actual mapping)
--link=""  : Add link to another container (name:alias)
--expose可以让container接受外部传入的数据。container内监听的port不需要和外部host的port相同。比如说在container内部,一个HTTP服务监听在80端口,对应外部host的port就可能是49880.
操作人员可以使用--expose,让新的container访问到这个container。具体有三个方式:
1. 使用-p来启动container。
2. 使用-P来启动container。
3. 使用--link来启动container。
如果使用-p或者-P,那么container会开发部分端口到host,只要对方可以连接到host,就可以连接到container内部。当使用-P时,docker会在host中随机从49153 和65535之间查找一个未被占用的端口绑定到container。你可以使用docker port来查找这个随机绑定端口。
当你使用--link方式时,作为客户端的container可以通过私有网络形式访问到这个container。同时Docker会在客户端的container中设定一些环境变量来记录绑定的IP和PORT。
ENV (environment variables)
| Variable | Value |
HOME |
Set based on the value of USER |
HOSTNAME |
The hostname associated with the container |
PATH |
Includes popular directories, such as :/usr/local/sbin:/usr/local/bin:/usr/sbin:/usr/bin:/sbin:/bin |
TERM |
xterm if the container is allocated a psuedo-TTY |
当container启动时,会自动在container中初始化这些变量。
操作人员可以通过-e来设定任意的环境变量。甚至覆盖已经存在的环境变量,或者是在Dockerfile中通过ENV设定的环境变量。
$ sudo docker run -e "deep=purple" --rm ubuntu /bin/bash -c export
declare -x HOME="/"
declare -x HOSTNAME="85bc26a0e200"
declare -x OLDPWD
declare -x PATH="/usr/local/sbin:/usr/local/bin:/usr/sbin:/usr/bin:/sbin:/bin"
declare -x PWD="/"
declare -x SHLVL="1"
declare -x container="lxc"
declare -x deep="purple"
操作人员可以通过-h来设定hostname。也可以使用"--link name:alias"来设定环境变量,当使用--link后,docker将根据后面提供的IP和PORT信息来连接服务端container。下面就是使用redis的例子:
# Start the service container, named redis-name
$ sudo docker run -d --name redis-name dockerfiles/redis
4241164edf6f5aca5b0e9e4c9eccd899b0b8080c64c0cd26efe02166c73208f3

# The redis-name container exposed port 6379
$ sudo docker ps
CONTAINER ID        IMAGE                      COMMAND                CREATED             STATUS              PORTS               NAMES
4241164edf6f        $ dockerfiles/redis:latest   /redis-stable/src/re   5 seconds ago       Up 4 seconds        6379/tcp            redis-name

# Note that there are no public ports exposed since we didn᾿t use -p or -P
$ sudo docker port 4241164edf6f 6379
2014/01/25 00:55:38 Error: No public port '6379' published for 4241164edf6f
你使用--link后,就可以获取到关于Redis Container的相关信息。
$ sudo docker run --rm --link redis-name:redis_alias --entrypoint /bin/bash dockerfiles/redis -c export
declare -x HOME="/"
declare -x HOSTNAME="acda7f7b1cdc"
declare -x OLDPWD
declare -x PATH="/usr/local/sbin:/usr/local/bin:/usr/sbin:/usr/bin:/sbin:/bin"
declare -x PWD="/"
declare -x REDIS_ALIAS_NAME="/distracted_wright/redis"
declare -x REDIS_ALIAS_PORT="tcp://172.17.0.32:6379"
declare -x REDIS_ALIAS_PORT_6379_TCP="tcp://172.17.0.32:6379"
declare -x REDIS_ALIAS_PORT_6379_TCP_ADDR="172.17.0.32"
declare -x REDIS_ALIAS_PORT_6379_TCP_PORT="6379"
declare -x REDIS_ALIAS_PORT_6379_TCP_PROTO="tcp"
declare -x SHLVL="1"
declare -x container="lxc"
#And we can use that information to connect from another container as a client:
$ sudo docker run -i -t --rm --link redis-name:redis_alias --entrypoint /bin/bash dockerfiles/redis -c '/redis-stable/src/redis-cli -h $REDIS_ALIAS_PORT_6379_TCP_ADDR -p $REDIS_ALIAS_PORT_6379_TCP_PORT'
172.17.0.32:6379>
Docker也会将这个alias的IP地址写入到/etc/hosts文件中。然后你就可以通过别名来访问link后的container。
$ sudo docker run -d --name servicename busybox sleep 30
$ sudo docker run -i -t --link servicename:servicealias busybox ping -c 1 servicealias
如果你重启了源container(servicename),相关联的container也会同步更新/etc/hosts。
VOLUME (shared filesystems)
-v=[]: Create a bind mount with: [host-dir]:[container-dir]:[rw|ro].
       If "container-dir" is missing, then docker creates a new volume.
--volumes-from="": Mount all volumes from the given container(s)
关于volume参数,可以再 Managing data in containers 查看详细说明。需要注意的是开发人员可以在Dockerfile中设定多个volume,但是只能由操作人员设置container直接的volume访问。
USER
container中默认的用户是root。但是开发人员创建新的用户之后,这些新用户也是可以使用的。开发人员可以通过Dockerfile的USER设定默认的用户,操作人员可以通过"-u "来覆盖这些参数。
WORKDIR
container中默认的工作目录是根目录(/)。开发人员可以通过Dockerfile的WORKDIR来设定默认工作目录,操作人员可以通过"-w"来覆盖默认的工作目录。

 浙公网安备 33010602011771号