SDN上机第4次作业
1. 解压安装OpenDayLight控制器(本次实验统一使用Beryllium版本)
1)JDK的安装与环境配置
嗯,装这个东西还得先装JDK:

输入sudo gedit ~/.bashrc配置环境变量,输入:
export JAVA_HOME=/usr/local/java/jdk1.8.0_201
export JRE_HOME=${JAVA_HOME}/jre
export CLASSPATH=.:${JAVA_HOME}/lib:${JRE_HOME}/lib
export PATH=${JAVA_HOME}/bin:$PATH
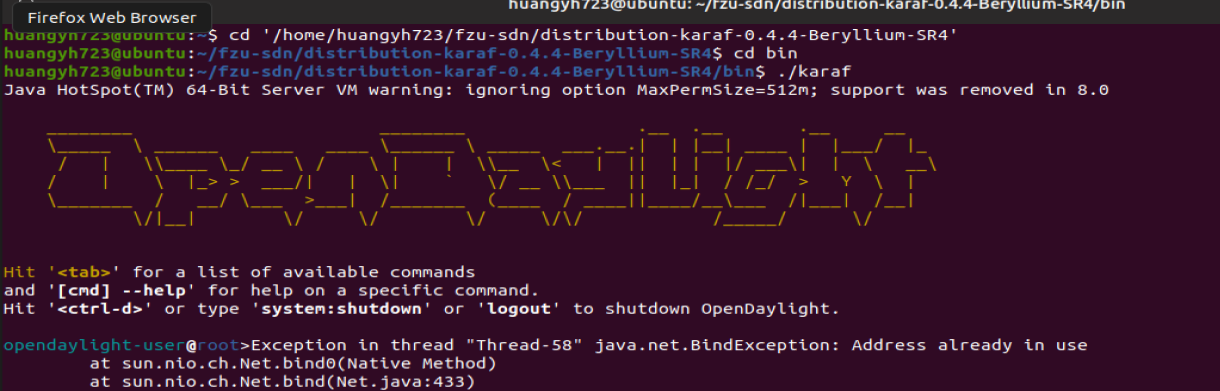
2.启动并安装OpenDayLight
-
终端下执行
./.../bin/karaf -
安装插件
feature:install odl-restconf
feature:install odl-l2switch-switch-ui
feature:install odl-openflowplugin-all
feature:install odl-mdsal-apidocs
feature:install odl-dlux-core
feature:install odl-dlux-node
feature:install odl-dlux-yangui
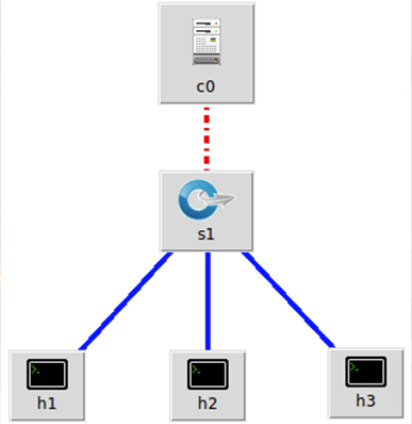
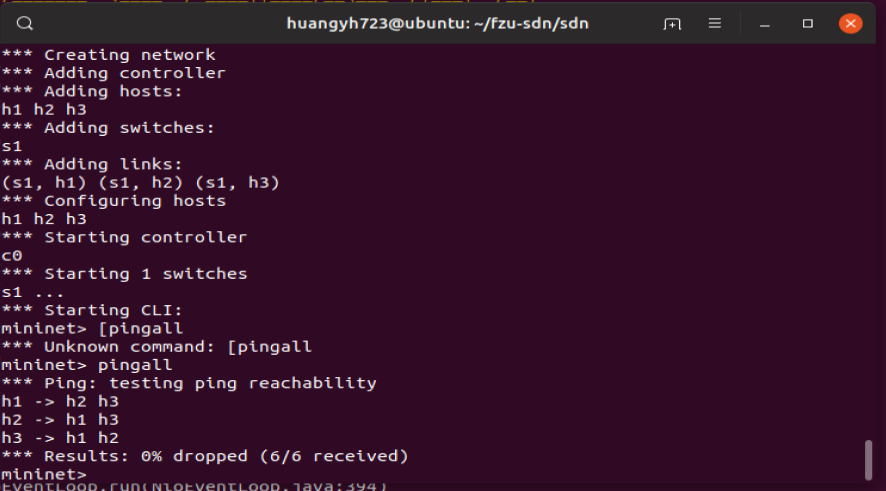
3.用Python脚本搭建如下拓扑,连接OpenDayLight控制器
-
Python代码
#!/usr/bin/python #Creating Inernet Topo from mininet.topo import Topo from mininet.net import Mininet from mininet.node import RemoteController,CPULimitedHost from mininet.link import TCLink from mininet.util import dumpNodeConnections class MyTopo(Topo): def __init__(self): #Initialize Topology Topo.__init__(self) sw1 = self.addSwitch('s{}'.format(1)) #add Hosts count = 1 for i in range(0, 3): host = self.addHost('h{}'.format(count)) count+=1 self.addLink(host,sw1) topos = {'mytopo':(lambda:MyTopo())} -
运行结果+Pingall
-
拓扑图
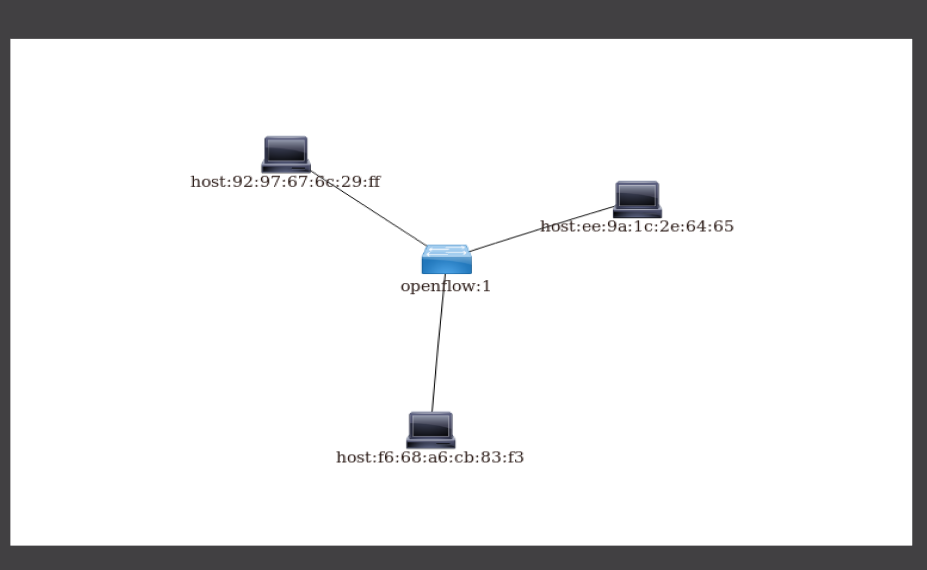
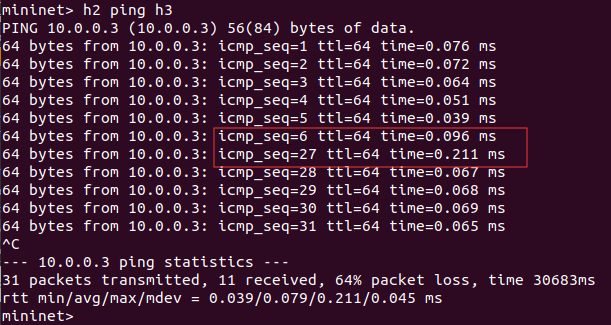
4. 在控制器提供的WEB UI中下发流表使h2 20s内ping不通h3,20s后恢复
-
查看拓扑端口连接:

h1 连接 s1 端口 1、h2 连接 s1 端口 2、h3 连接 s1 端口 3 -
ODL:
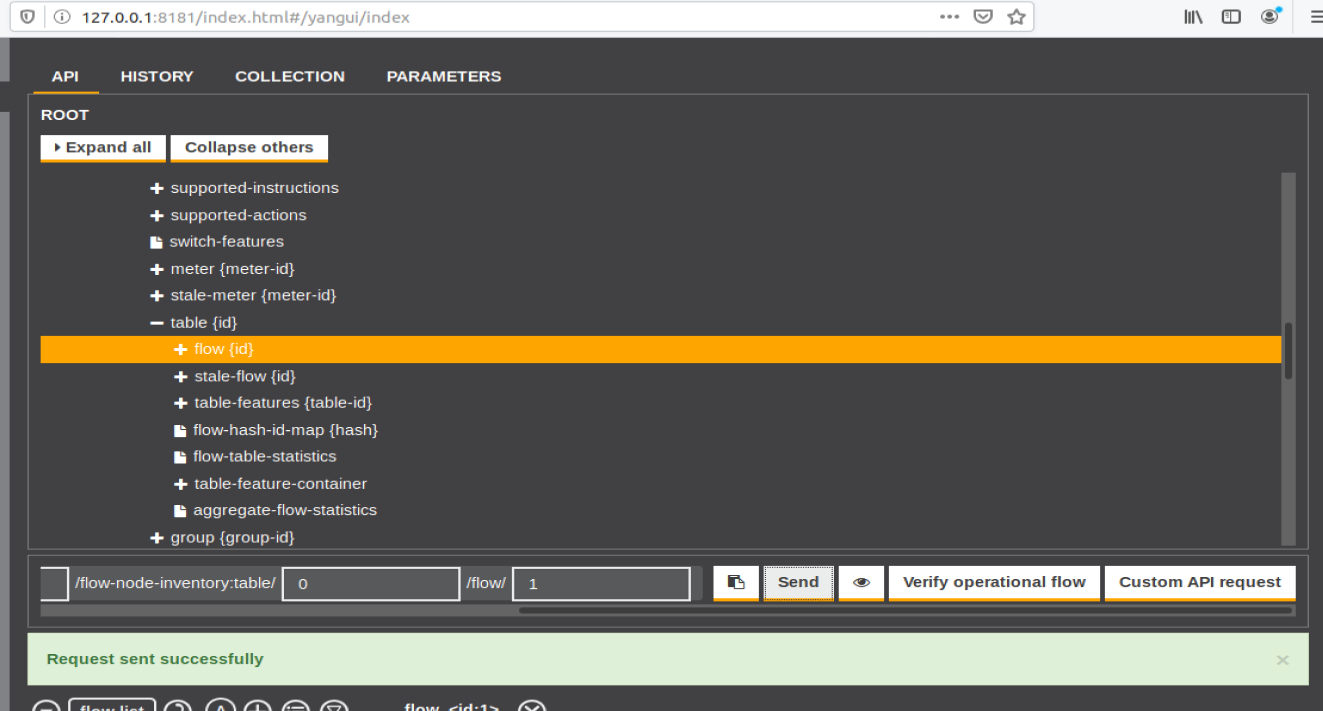
-
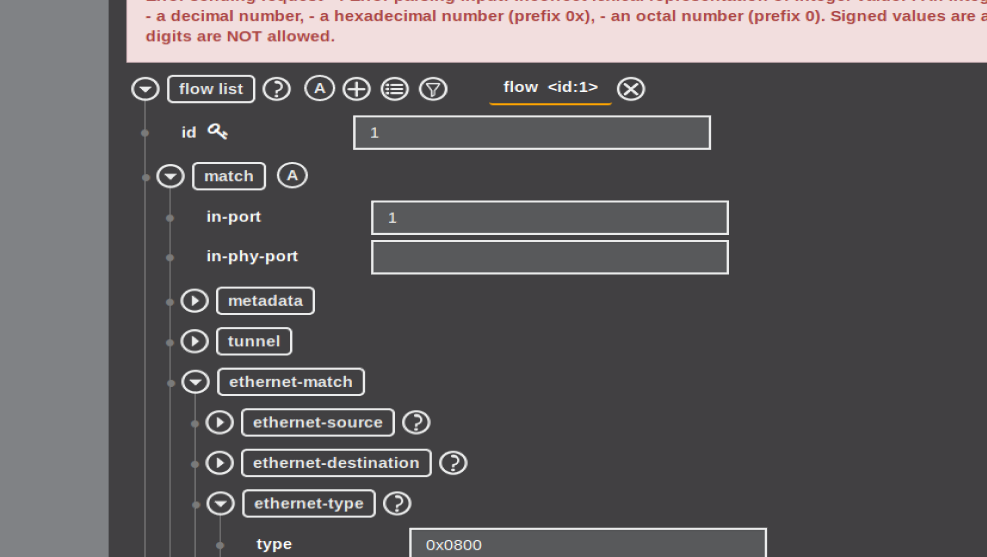
ODL具体设置:
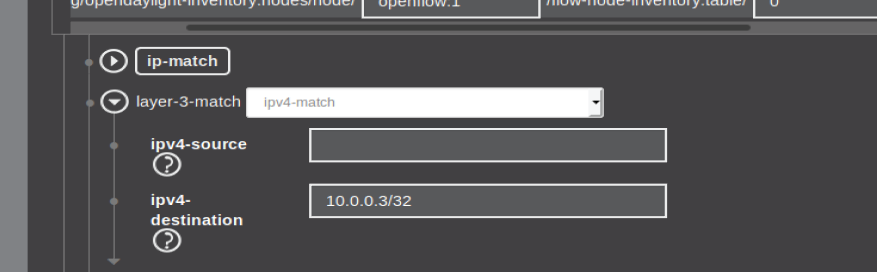
- get要改成put,node/openflow:1,table/0,flow/不超过1024,flow id为1,in-port为2,type为0x0800,目的地之为10.0.0.3/32
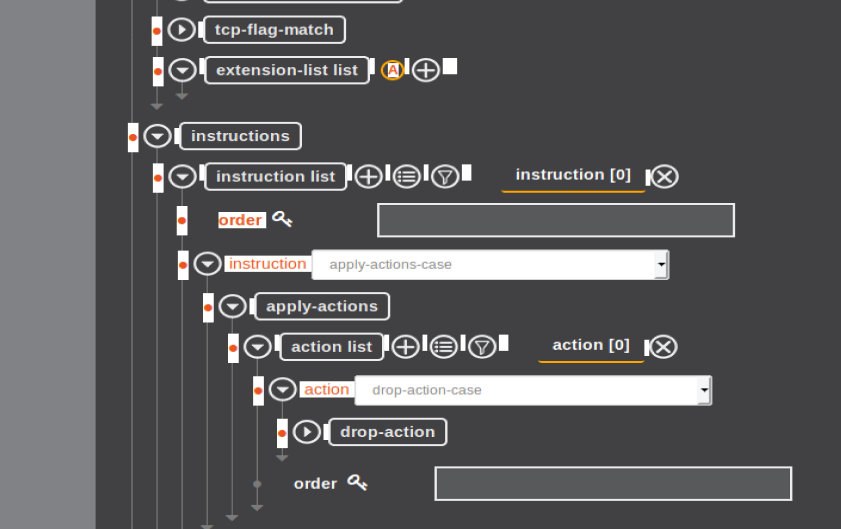
- instruction list中order为0,action list中order为0
- hard-timeout为20
-
效果:
5. 借助Postman通过OpenDayLight的北向接口下发流表,再利用OpenDayLight北向接口查看已下发的流表。
- 查看preview
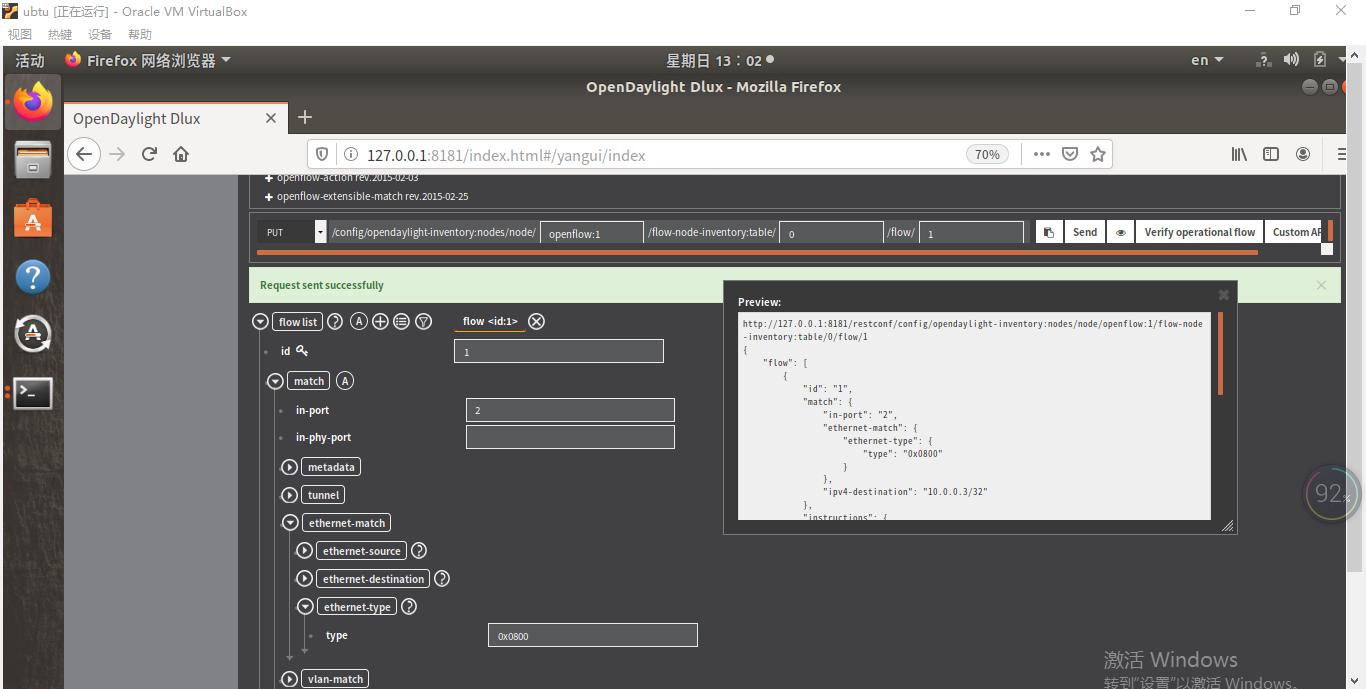
http://127.0.0.1:8181/restconf/config/opendaylight-inventory:nodes/node/openflow:1/flow-node-inventory:table/0/flow/1

{
    "flow": [
        {
            "id": "1",
            "match": {
                "in-port": "1",
                "ethernet-match": {
                    "ethernet-type": {
                        "type": "0x0800"
                    }
                },
                "ipv4-destination": "10.0.0.3/32"
            },
            "instructions": {
                "instruction": [
                    {
                        "apply-actions": {
                            "action": [
                                {
                                    "drop-action": {},
                                    "order": "0"
                                }
                            ]
                        }
                    }
                ]
            },
            "flow-name": "1",
            "priority": "65535",
            "hard-timeout": "10",
            "cookie": "0x02",
            "table_id": "0"
        }
    ]
}
打开postman,但是卡在进入界面,还会让我虚拟机疯狂死机,崩溃中上网查资料后,用rm -rf $HOME/.config/Postman后再./Postman,进入页面
将preview里的url复制到地址栏,消息方式选PUT
IP为控制器所在的PC的IP
type选择Basic Auth 用户名和密码是ODL的登录账号和密码都是admin

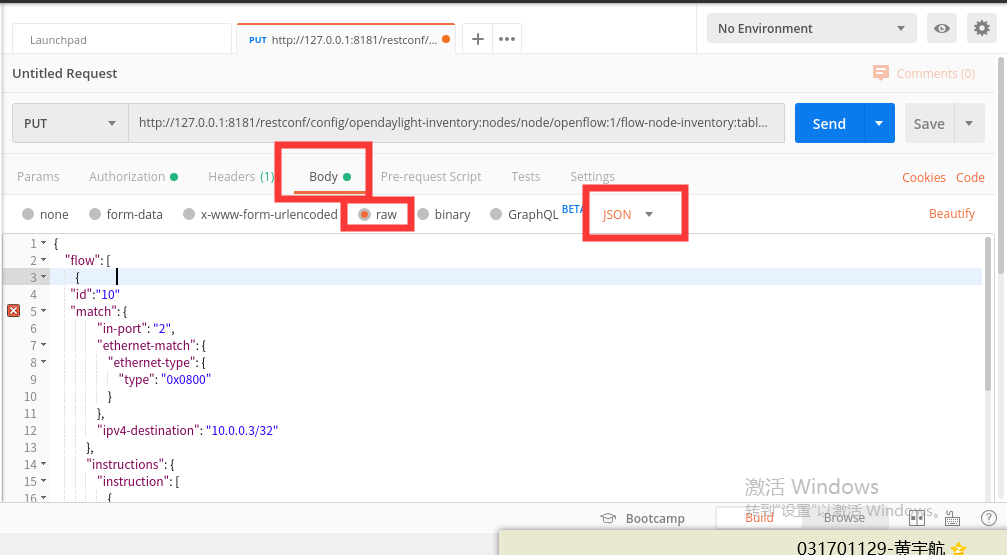
- Body中将消息格式设置成json,上传方式设置为raw
将preview中的消息粘贴在文本框内,更改id为10,点击send后下发成功
- 发送成功后改为GET并send查看刚刚下发的流表项
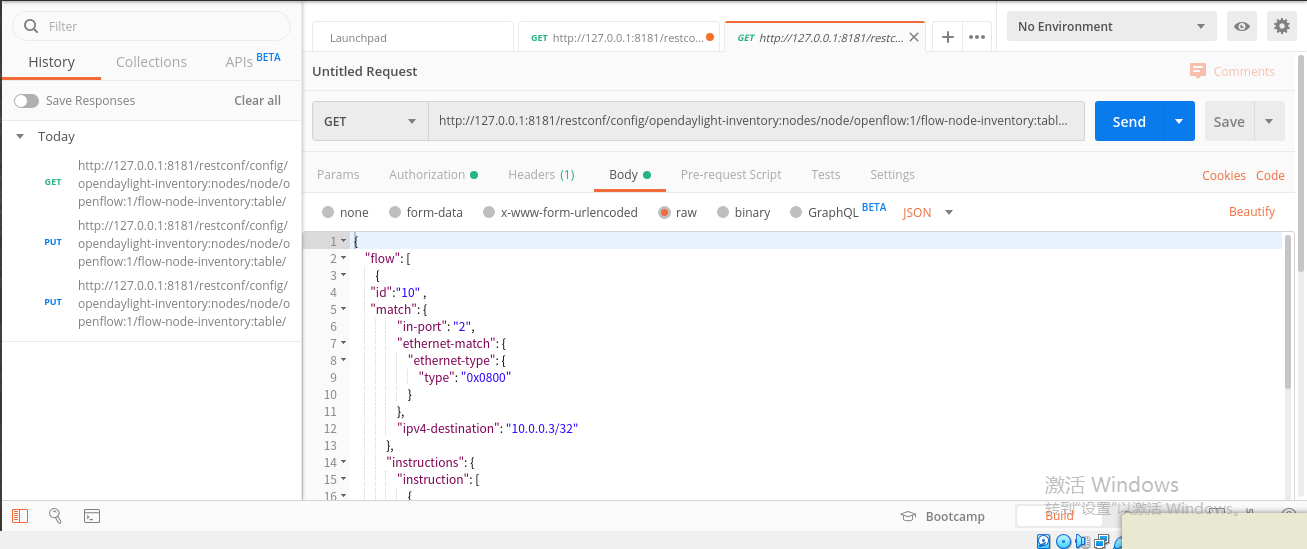
{
    "flow": [
        {
      "id":"10" ,
      "match": {
                "in-port": "2",
                "ethernet-match": {
                    "ethernet-type": {
                        "type": "0x0800"
                    }
                },
                "ipv4-destination": "10.0.0.3/32"
            },
            "instructions": {
                "instruction": [
                    {
                        "order": "0",
                        "apply-actions": {
                            "action": [
                                {
                                    "order": "0",
                                    "drop-action": {}
                                }
                            ]
                        }
                    }
                ]
            },
            "hard-timeout": "20",
            "table_id": "0"
        }
    ]
}

 浙公网安备 33010602011771号