第 18 章 使用CSS选择器(第Ⅱ 部分)
伪类跟伪元素一样,并不是直接针对文档元素的,而是为你基于某些共同特征选择元素提供方便。
使用结构性伪类选择器
使用结构性伪类选择器能够根据元素在文档中的位置选择元素。这类选择器都有一个冒号字符前缀(:),例如
:empty。它们可以单独使用,也可以跟其他选择器组合使用,如p:empty。
使用根元素选择器
:root选择器匹配文档中的根元素。它可能是用得最少的一个伪类选择器,因为总是返回html元素。下表简单总结了:root选择器。
:root选择器

代码清单1演示了一个
:root选择器用例。
代码清单1 使用:root选择器
<!DOCTYPE HTML>
<html>
    <head>
        <title>黄子涵</title>
        <meta http-equiv="Content-Type" content="text/html; charset=utf-8" />
        <link rel="shortcut icon" href="favicon.ico" type="image/x-icon"/>
        <style type="text/css">
            :root {
                border: thin black solid;
                padding: 4px;
            }
        </style>
    </head>
    <body>
        <a href="https://baike.baidu.com/item/%E5%B8%85%E5%93%A5/18510?fr=aladdin">黄子涵是帅哥!</a>
        <p>黄子涵<span lang="en-uk" class="class2">一定</span>很棒!</p>
        <a href="https://baike.baidu.com/item/%E9%9D%93%E4%BB%94/79651?fr=aladdin">黄子涵是靓仔!</a>
    </body>
</html>
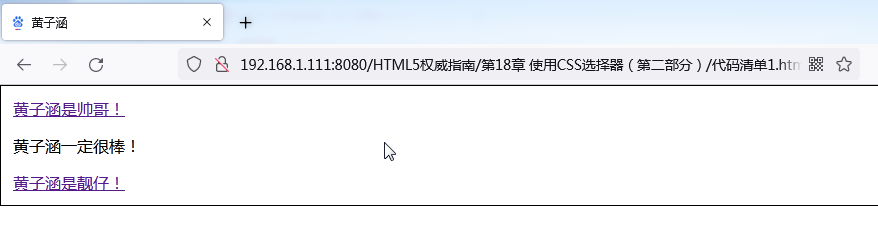
该选择器的效果如下图所示,看起来有点不好分辨,边框包着整个儿文档。
使用子元素选择器
使用子元素选择器匹配直接包含在其他元素中的单个元素。下表简单总结了这类选择器。
子元素选择器
| 选择器 | 说 明 | CSS版本 |
|---|---|---|
:first-child |
选择元素的第一个子元素 | 2 |
:last-child |
选择元素的最后一个子元素 | 3 |
:only-child |
选择元素的唯一子元素 | 3 |
:only-of-type |
选择元素指定类型的唯一子元素 | 3 |
使用:first-child选择器
:first-child选择器匹配由包含它们的元素(即父元素)定义的第一个子元素。代码清单2演了:first-child选择器选择器的用法。
代码清单2 使用:first-child选择器
<!DOCTYPE HTML>
<html>
    <head>
        <title>黄子涵</title>
        <meta http-equiv="Content-Type" content="text/html; charset=utf-8" />
        <link rel="shortcut icon" href="favicon.ico" type="image/x-icon"/>
        <style type="text/css">
            :first-child {
                border: thin black solid;
                padding: 4px;
            }
        </style>
    </head>
    <body>
        <a href="https://baike.baidu.com/item/%E5%B8%85%E5%93%A5/18510?fr=aladdin">黄子涵是帅哥!</a>
        <p>黄子涵<span lang="en-uk" class="class2">一定</span>很棒!</p>
        <a href="https://baike.baidu.com/item/%E9%9D%93%E4%BB%94/79651?fr=aladdin">黄子涵是靓仔!</a>
    </body>
</html>
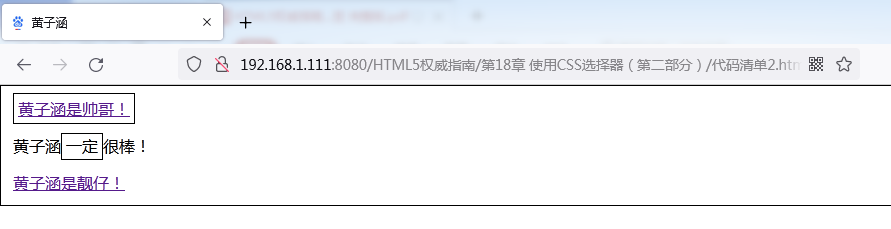
在代码清单2中,我只使用了
:first-child选择器,这意味着它会匹配任意元素的第一个子元素。从下图可以看到哪些元素被选中了。
将
:first-child选择器用做修饰符,或者跟其他选择器组合使用可以缩小选中元素的范围。代码清单3演示了怎么做。
代码清单3 组合使用:first-child选择器和其他选择器
<!DOCTYPE HTML>
<html>
    <head>
        <title>黄子涵</title>
        <meta http-equiv="Content-Type" content="text/html; charset=utf-8" />
        <link rel="shortcut icon" href="favicon.ico" type="image/x-icon"/>
        <style type="text/css">
            p > span:first-child {
                border: thin black solid;
                padding: 4px;
            }
        </style>
    </head>
    <body>
        <a href="https://baike.baidu.com/item/%E5%B8%85%E5%93%A5/18510?fr=aladdin">黄子涵是帅哥!</a>
        <p>黄子涵<span lang="en-uk" class="class2">一定</span>很棒!</p>
        <a href="https://baike.baidu.com/item/%E9%9D%93%E4%BB%94/79651?fr=aladdin">黄子涵是靓仔!</a>
    </body>
</html>
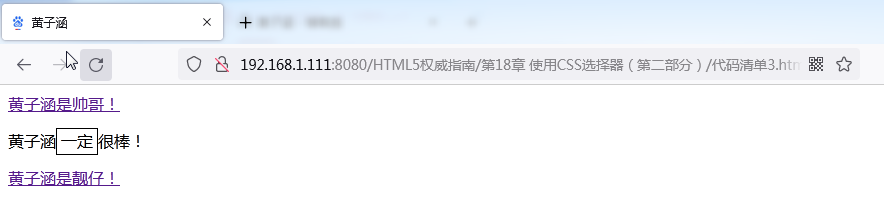
这个选择器会匹配作为p元素第一个子元素的任意span元素,本例的HTML文档中只有一个这样的元素。这个选择器的匹配结果如下图所示。
使用:last-child选择器
:last-child选择器匹配由包含它们的元素定义的最后一个元素。代码清单4演示了:last-child选择的用法。
代码清单4 使用:last-child选择器
<!DOCTYPE HTML>
<html>
    <head>
        <title>黄子涵</title>
        <meta http-equiv="Content-Type" content="text/html; charset=utf-8" />
        <link rel="shortcut icon" href="favicon.ico" type="image/x-icon"/>
        <style type="text/css">
            :last-child {
                border: thin black solid;
                padding: 4px;
            }
        </style>
    </head>
    <body>
        <a href="https://baike.baidu.com/item/%E5%B8%85%E5%93%A5/18510?fr=aladdin">黄子涵是帅哥!</a>
        <p>黄子涵<span>一定</span><span>很棒</span>!</p>
        <a href="https://baike.baidu.com/item/%E9%9D%93%E4%BB%94/79651?fr=aladdin">黄子涵是靓仔!</a>
    </body>
</html>
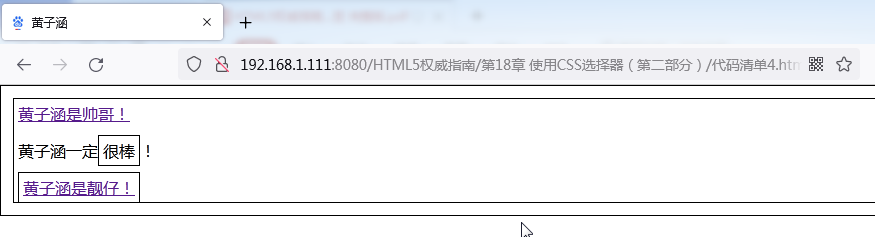
该选择器匹配的元素如下图所示。注意,整个内容区域包了一个边框,原因是body元素是html的最后一个子元素,body中的内容会匹配这个选择器。
使用:only-child选择器
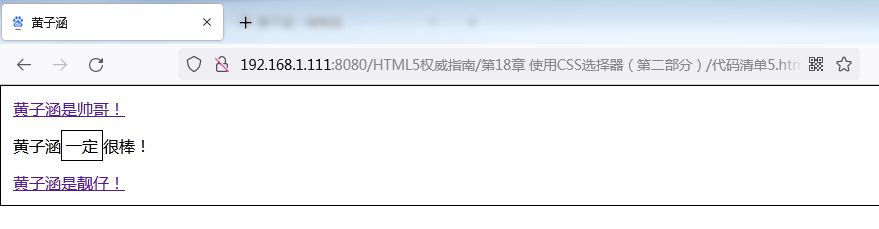
:only-child选择器匹配父元素包含的唯一子元素。代码清单5展示了这个选择器的用法。
代码清单5 使用:only-child选择器
<!DOCTYPE HTML>
<html>
    <head>
        <title>黄子涵</title>
        <meta http-equiv="Content-Type" content="text/html; charset=utf-8" />
        <link rel="shortcut icon" href="favicon.ico" type="image/x-icon"/>
        <style type="text/css">
            :only-child {
                border: thin black solid;
                padding: 4px;
            }
        </style>
    </head>
    <body>
        <a href="https://baike.baidu.com/item/%E5%B8%85%E5%93%A5/18510?fr=aladdin">黄子涵是帅哥!</a>
        <p>黄子涵<span>一定</span>很棒!</p>
        <a href="https://baike.baidu.com/item/%E9%9D%93%E4%BB%94/79651?fr=aladdin">黄子涵是靓仔!</a>
    </body>
</html>
只有一个子元素的元素就p元素一个,它的唯一子元素是span元素,下图可以看到这个选择器匹配的元素。
使用:only-of-type选择器
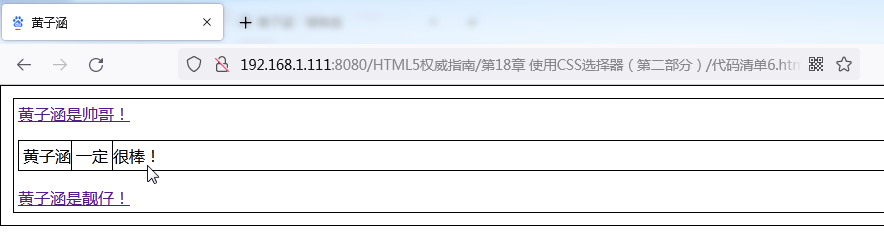
:only-of-type选择器匹配父元素定义类型的唯一子元素。代码清单6展示了一个例子。
代码清单6 使用:only-of-type选择器
<!DOCTYPE HTML>
<html>
    <head>
        <title>黄子涵</title>
        <meta http-equiv="Content-Type" content="text/html; charset=utf-8" />
        <link rel="shortcut icon" href="favicon.ico" type="image/x-icon"/>
        <style type="text/css">
            :only-of-type {
                border: thin black solid;
                padding: 4px;
            }
        </style>
    </head>
    <body>
        <a href="https://baike.baidu.com/item/%E5%B8%85%E5%93%A5/18510?fr=aladdin">黄子涵是帅哥!</a>
        <p>黄子涵<span>一定</span>很棒!</p>
        <a href="https://baike.baidu.com/item/%E9%9D%93%E4%BB%94/79651?fr=aladdin">黄子涵是靓仔!</a>
    </body>
</html>
该选择器匹配的元素如下图所示。看来这个选择器单独使用匹配范围比较广。通常,任意文档都存在不少父元素定义类型的唯一子元素。当然,将这个选择器跟其他选择器组合使用可以缩下匹配范围。
使用:nth-child选择器
:nth-child选择器跟上一节讲的子元素选择器类似,但使用这类选择器可以指定一个索引以匹配特定位置的元素。下表简单总结了:nth-child选择器。
nth-child选择器
| 选择器 | 说明 | CSS版本 |
|---|---|---|
:nth-child(n) |
选择父元素的第n个子元素 | 3 |
:nth-last-child(n) |
选择父元素的倒数第n个子元素 | 3 |
:nth-of-type(n) |
选择父元素定义类型的第n个子元素 | 3 |
:nth-last-of-type(n) |
选择父元素定义类型的倒数第n个子元素 | 3 |
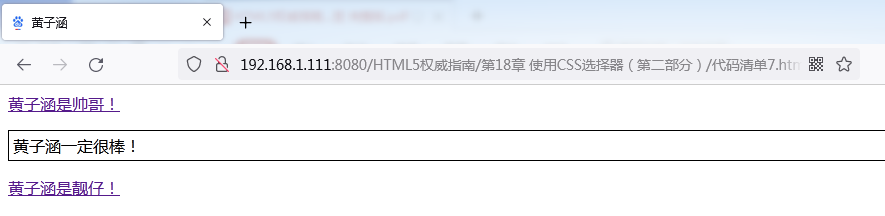
这类选择器都带有一个参数,是你感兴趣的元素的索引,索引从1开始。代码清单7展示了
:nth-child选择器的用法。
代码清单7 使用:nth-child选择器
<!DOCTYPE HTML>
<html>
    <head>
        <title>黄子涵</title>
        <meta http-equiv="Content-Type" content="text/html; charset=utf-8" />
        <link rel="shortcut icon" href="favicon.ico" type="image/x-icon"/>
        <style type="text/css">
            body > :nth-child(2) {
                border: thin black solid;
                padding: 4px;
            }
        </style>
    </head>
    <body>
        <a href="https://baike.baidu.com/item/%E5%B8%85%E5%93%A5/18510?fr=aladdin">黄子涵是帅哥!</a>
        <p>黄子涵<span>一定</span>很棒!</p>
        <a href="https://baike.baidu.com/item/%E9%9D%93%E4%BB%94/79651?fr=aladdin">黄子涵是靓仔!</a>
    </body>
</html>
在代码清单7中,我选择了body元素的第二个子元素,本例中只有一个,如下图所示。
这里我不打算再演示其他
:nth-child选择器了,因为它们跟相应的常规子选择器的作用一 样,只是加了个索引值。
使用UI伪类选择器
使用UI伪类选择器可以根据元素的状态匹配元素。下表概括了UI选择器。
UI选择器
| 选择器 | 说 明 | CSS版本 |
|---|---|---|
:enabled |
选择启用状态的元素 | 3 |
:disabled |
选择禁用状态的元素 | 3 |
:checked |
选择被选中的input元素(只用于单选按钮和复选框) | 3 |
:default |
选择默认元素 | 3 |
:valid |
根据输入验证选择有效或者无效的input元素 | 3 |
:invalid、:in-range、:out-of-range |
选择在指定范围之内或者之外受限的input元素 | 3 |
:required、:optional |
根据是否允许:required属性选择input元素 | 3 |
选择启用或禁用元素
有些元素有启用或者禁用状态,这些元素一般是用来收集用户输入的。
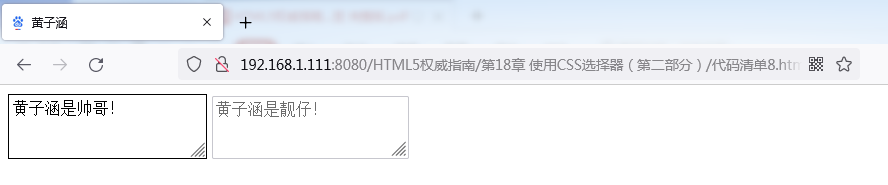
:enabled和:disabled选择器不会匹配没有禁用状态的元素。代码清单8给出了一个使用:enabled选择器的例子。
代码清单8 使用:enabled选择器
<!DOCTYPE HTML>
<html>
    <head>
        <title>黄子涵</title>
        <meta http-equiv="Content-Type" content="text/html; charset=utf-8" />
        <link rel="shortcut icon" href="favicon.ico" type="image/x-icon"/>
        <style type="text/css">
            :enabled {
                border: thin black solid;
                padding: 4px;
            }
        </style>
    </head>
    <body>
        <textarea>黄子涵是帅哥!</textarea>
        <textarea disabled>黄子涵是靓仔!</textarea>
    </body>
</html>
代码清单8中的HTML包含两个textarea元素,一个定义了enabled属性,一个定义了disabled属性。
: enabled选择器会匹配第一个textarea元素,如下图所示。
选择已勾选的元素
使用
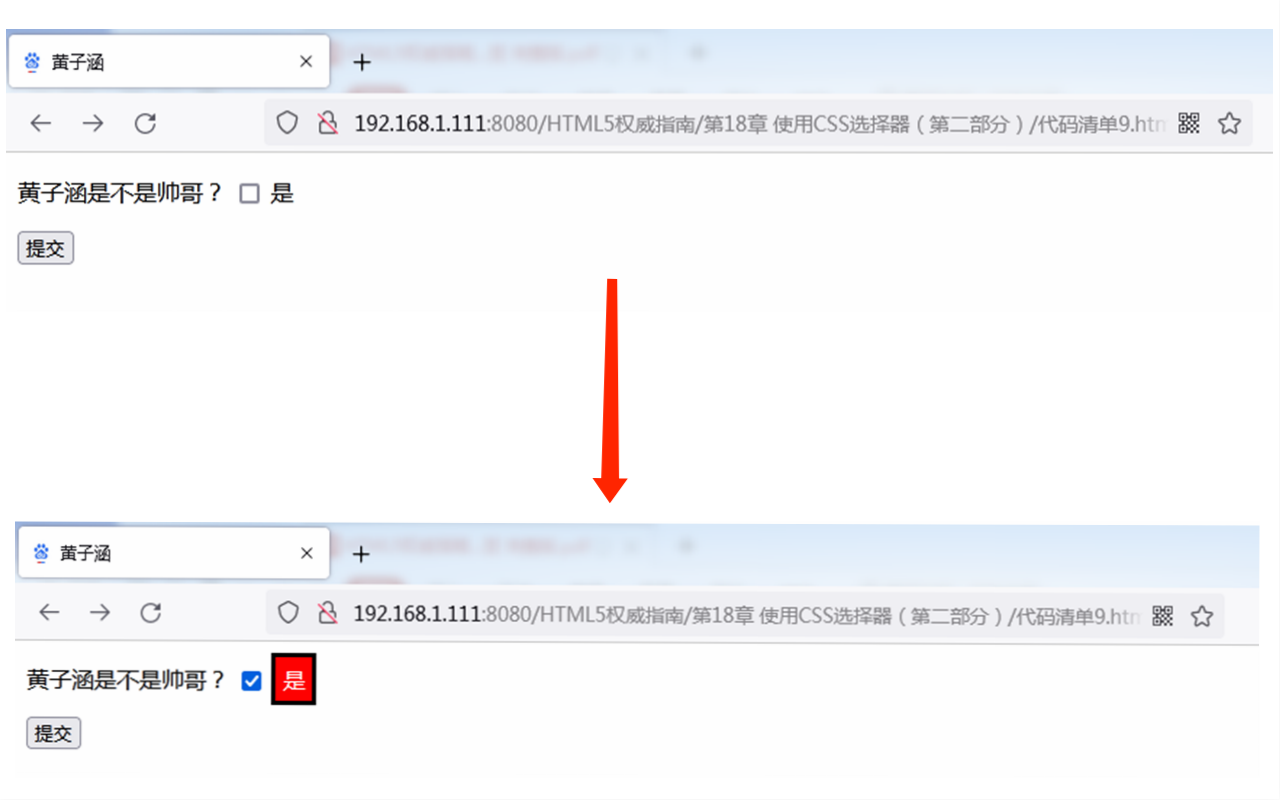
:checked选择器可以选中由checked属性或者用户勾选的单选按钮或者复选框。演示这个选择器的问题是应用到单选按钮和复选框的样式不多。代码清单9展示了:checked选择器的一个用例。
代码清单9 使用:checked选择器
<!DOCTYPE HTML>
<html>
    <head>
        <title>黄子涵</title>
        <meta name="作者" content="黄子涵"/>
        <meta name="描述" content="黄子涵是帅哥!"/>
        <meta http-equiv="Content-Type" content="text/html; charset=utf-8" />
        <link rel="shortcut icon" href="favicon.ico" type="image/x-icon"/>
        <style type="text/css">
            :checked + span {
                background-color: red;
                color: white;
                padding: 5px;
                border: medium solid black;
            }
        </style>
    </head>
    <body>
        <form method="post" action="https://www.cnblogs.com/Huang-zihan/">
            <p>
                <label for="黄子涵">黄子涵是不是帅哥?</label>
                <input type="checkbox" id="黄子涵" name="黄子涵"/>
                <span>是</span>
            </p>
            <input type="submit" value="提交">
        </form>
    </body>
</html>
为解决样式限制问题,我使用了兄弟选择器来改变复选框旁边的span元素的外观,复选框未勾选和勾选之后的效果如下图所示。
没有专门用来匹配未勾选元素的选择器,但我们可以组合使用
:checked选择器和否定选择器。
选择默认元素
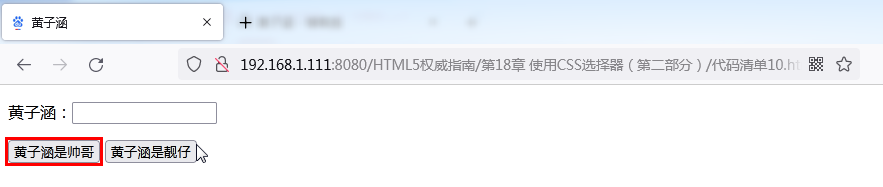
:default选择器从一组类似的元素中选择默认元素。例如,提交按钮总是表单的默认按钮。代码清单10展示了:default选择器的用法。
代码清单10 使用:default元素选择器
<!DOCTYPE HTML>
<html>
    <head>
        <title>黄子涵</title>
        <meta name="作者" content="黄子涵"/>
        <meta name="描述" content="黄子涵是帅哥!"/>
        <meta http-equiv="Content-Type" content="text/html; charset=utf-8" />
        <link rel="shortcut icon" href="favicon.ico" type="image/x-icon"/>
        <style>
            :default {
                outline: medium solid red;
            }
        </style>
    </head>
    <body>
        <form method="post" action="https://www.cnblogs.com/Huang-zihan/">
            <p>
                <label for="黄子涵">黄子涵:<input id="黄子涵" name="黄子涵"/></label>
            </p>
            <button type="submit">黄子涵是帅哥</button>
            <button type="reset">黄子涵是靓仔</button>
        </form>
    </body>
</html>
这个选择器通常跟outline属性一块使用。这个选择器的效果如下图所示。
选择有效和无效的input元素
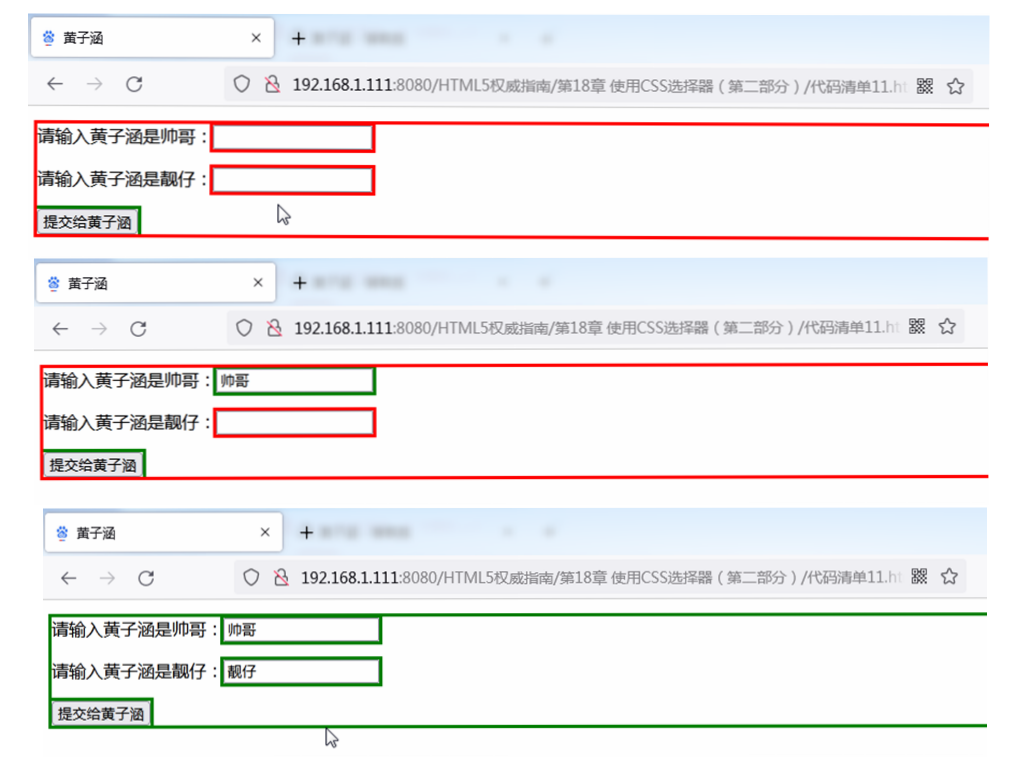
:valid和:invalid选择器分别匹配符合和不符合它们的输入验证要求的input元素。代码清单11展示了这两个选择器的用法。
代码清单11 :valid和:invalid选择器
<!DOCTYPE HTML>
<html>
    <head>
        <title>黄子涵</title>
        <meta name="作者" content="黄子涵"/>
        <meta name="描述" content="黄子涵是帅哥!"/>
        <meta http-equiv="Content-Type" content="text/html; charset=utf-8" />
        <link rel="shortcut icon" href="favicon.ico" type="image/x-icon"/>
        <style>
            :invalid {
                outline: medium solid red;
            }
            :valid {
                outline: medium solid green;
            }
        </style>
    </head>
    <body>
        <form method="post" action="https://www.cnblogs.com/Huang-zihan/">
            <p>
                <label for="name">请输入黄子涵是帅哥:<input required id="帅哥" name="帅哥"/></label>
            </p>
            <p>
                <label for="name">请输入黄子涵是靓仔:<input required id="靓仔" name="靓仔"></label>
            </p>
            <button type="submit">提交给黄子涵</button>
        </form>
    </body>
</html>
在代码清单11中,我对有效元素应用了绿色轮廓,对无效元素应用了红色轮廓。文档中有两个input元素,它们都有reqidred属性,这意味着只有输入值这两个元素才有效。这两个选择器的效果如下图所示。
提示
注意提交按钮也被选中了,起码在Chrome浏览器中是这样。出现这种情况的原因是
:valid选择器背后的逻辑非常简单:选中所有并非无效的input元素。要过滤掉某些input元素,可以使用属性选择器,或者具体程度更高的选择器,如接下来要介绍的选择器。
选择限定范围的input元素
关于输入验证的一种具体程度更高的变体是选择值限于指定范围的input元素。
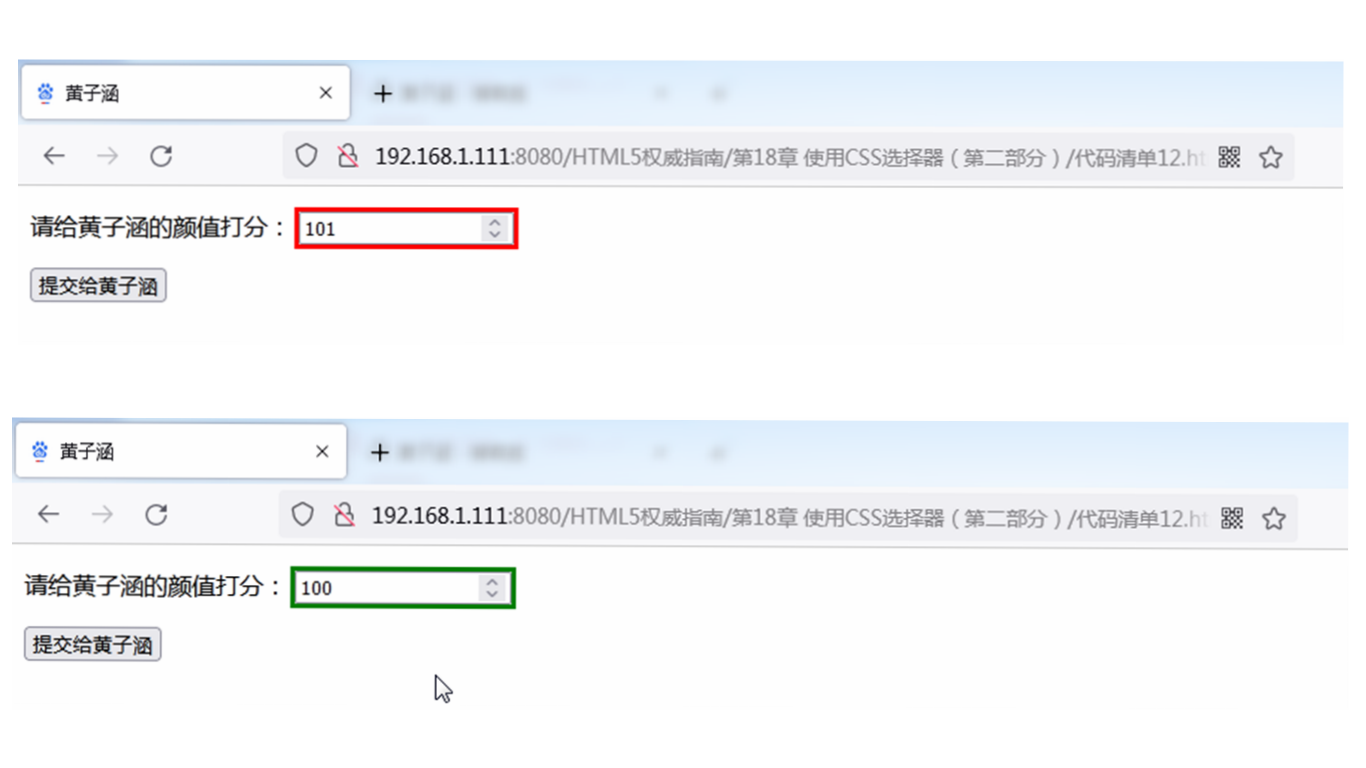
:in-range选择器匹配位于指定范围内的input元素,:out-of-range选择器匹配位于指定范围之外的input元素。代码清单12展示了这些属性的用法。
代码清单12 使用:in-range和:out-of-range选择器
<!DOCTYPE HTML>
<html>
    <head>
        <title>黄子涵</title>
        <meta name="作者" content="黄子涵"/>
        <meta name="描述" content="黄子涵是帅哥!"/>
        <meta http-equiv="Content-Type" content="text/html; charset=utf-8" />
        <link rel="shortcut icon" href="favicon.ico" type="image/x-icon"/>
        <style>
            :in-range {
                outline: medium solid green;
            }
            :out-of-range {
                outline: medium solid red;
            }
        </style>
    </head>
    <body>
        <form method="post" action="https://www.cnblogs.com/Huang-zihan/">
            <p>
                <label for="颜值">
                    请给黄子涵的颜值打分:
                    <input type="number" min="0" max="100"
                          value="1" id="颜值" name="颜值"/>
                </label>
            </p>
            <input type="submit" value="提交给黄子涵"/>
        </form>
    </body>
</html>
主流浏览器还都没有实现
:out-of-range选择器,只有Chrome和Opera支持:in-range选择器。希望这一点能尽快有所改变,因为这个功能跟新的HTML5支持是绑定的,很可能会得到广泛应用。:in-range选择器的效果如下图所示。
选择必需和可选的input元素
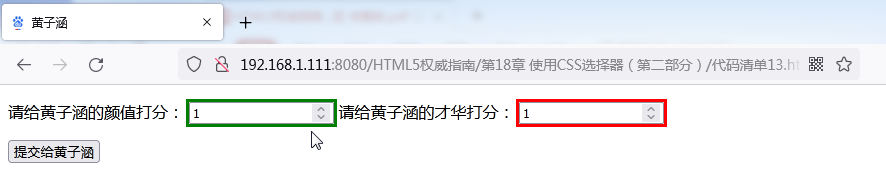
:required选择器匹配具有required属性的input元素,这能够确保用户必需输入与input元素相关的值才能提交表单。optional选择器匹配没有required属性的input元素。这两个属性都能在代码清单13中看到。
代码清单13 选择必需和可选的input元素
<!DOCTYPE HTML>
<html>
    <head>
        <title>黄子涵</title>
        <meta name="作者" content="黄子涵"/>
        <meta name="描述" content="黄子涵是帅哥!"/>
        <meta http-equiv="Content-Type" content="text/html; charset=utf-8" />
        <link rel="shortcut icon" href="favicon.ico" type="image/x-icon"/>
        <style>
            :required {
                outline: medium solid green;
            }
            :optional {
                outline: medium solid red;
            }
        </style>
    </head>
    <body>
        <form method="post" action="https://www.cnblogs.com/Huang-zihan/">
            <p>
                <label for="颜值">
                    请给黄子涵的颜值打分:
                    <input type="number" min="0" max="100" required
                          value="1" id="颜值" name="颜值"/>
                </label>
                <label for="才华">
                    请给黄子涵的才华打分:
                    <input type="number" min="0" max="100"
                          value="1" id="才华" name="才华"/>
                </label>
            </p>
            <input type="submit" value="提交给黄子涵"/>
        </form>
    </body>
</html>
在代码清单13中,我定义了两个数值类型的input元素,一个具有required属性,另一个没有,除此之外两者完全相同。从下图可以看到这个选择器的效果和相应的样式。注意,submit类型的input元素也被选中了,因为optional选择器不会分辨不同类型的input元素。
使用动态伪类选择器
之所以称为动态伪类选择器,是因为它们根据条件的改变匹配元素,是相对于文档的固定状态来说的。随着JavaScript广泛用于修改文档内容和元素状态,动态选择器和静态选择器之间的界限线越来越模糊,不过,动态伪类选择器仍然是一类比较特别的选择器。
使用:link和:visited选择器
:link选择器匹配超级链接,:visited选择器匹配用户已访问的超级链接。下表总结了这两个选择器。
:link和:visited选择器
| 属 性 | 说 明 | CSS版本 |
|---|---|---|
:link |
选择链接元素 | 1 |
:visited |
选择用户已访问的链接元素 | 1 |
对于用户访问过的链接,可在浏览器中设置保留已访问状态的时间。当用户清除浏览器历史记录,或者历史记录自然超时,链接会返回未访问状态。代码清单14展示了这两个选择器的用法。
代码清单14 使用:link和:visited选择器
<!DOCTYPE HTML>
<html>
    <head>
        <title>黄子涵</title>
        <meta http-equiv="Content-Type" content="text/html; charset=utf-8" />
        <link rel="shortcut icon" href="favicon.ico" type="image/x-icon"/>
        <style type="text/css">
            :link {
                border: thin black solid;
                background-color: lightgrey;
                padding: 4px;
                color: red;
            }
            :visited {
                background-color: grey;
                color: white;
            }
        </style>
    </head>
    <body>
        <a href="https://baike.baidu.com/item/%E5%B8%85%E5%93%A5/18510?fr=aladdin">黄子涵是帅哥!</a>
        <p>黄子涵<span>一定</span>很棒!</p>
        <a href="https://baike.baidu.com/item/%E9%9D%93%E4%BB%94/79651?fr=aladdin">黄子涵是靓仔!</a>
    </body>
</html>
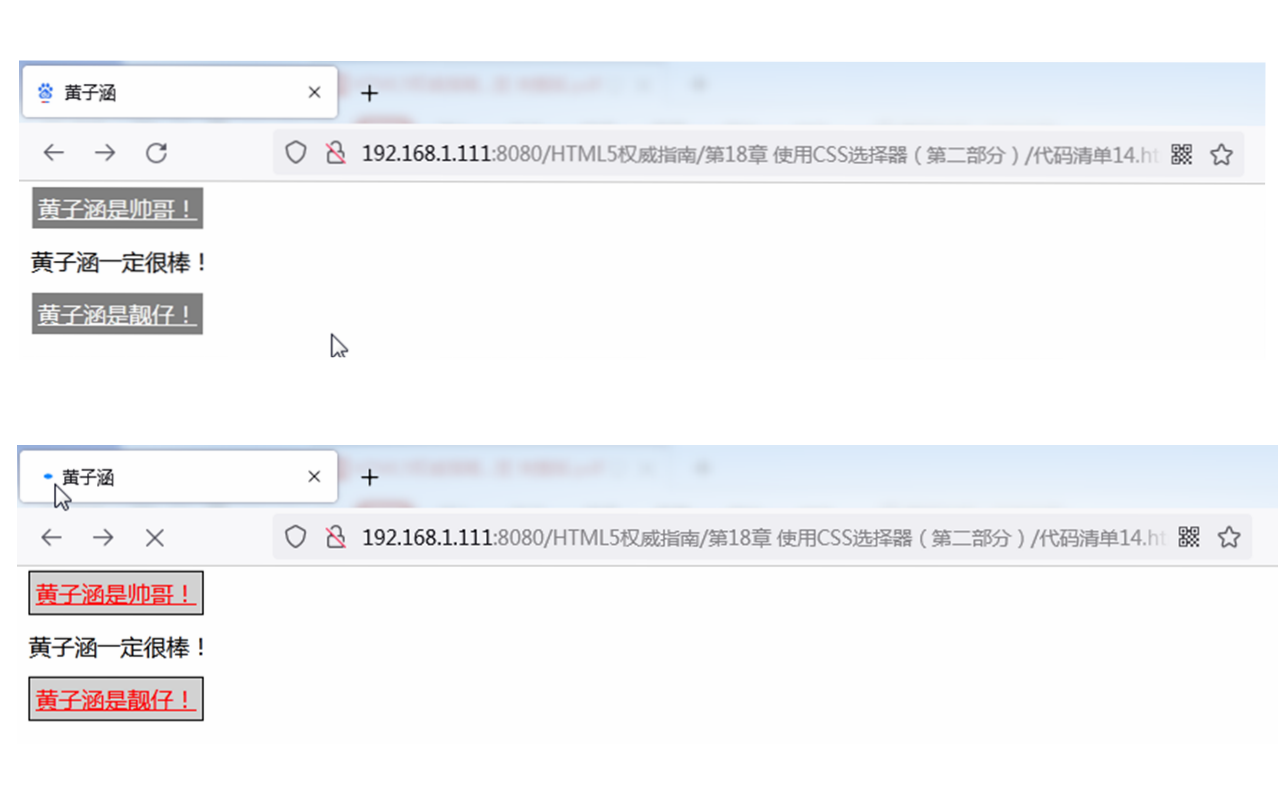
这个示例需要注意的唯一一点是:使用
:visited选择器可以应用到链接元素的属性不多。你可以改变颜色和字体,不过仅此而已。从下图可以看到链接被访问之后的状态变化。一开始示例中有两个未访问的链接,我点击其中一个跳转至网站,然后返回HTML文档, 已访问的链接样式跟以前不同了。
提示
:visited选择器匹配用户在所有页面访问过的href属性为URL的任意链接,而不只是你 的页面。:visited最常见的用法就是针对已访问的链接应用某种样式,从而让它们跟未访问的链接有所区别。
使用:hover选择器
:hover选择器匹配用户鼠标悬停在其上的任意元素。鼠标在HTML页面内移动时,选中的元素样式会发生改变。下表描述了这个选择器。
:hover选择器

浏览器可以随意釆用某种方式阐释
:hover选择器,只要对于它所使用的显示行得通即可,不过多数浏览器只有鼠标在窗口内移动的时候才用得上它。代码清单15展示了这个选择器的用法。
代码清单15 使用:hover选择器
<!DOCTYPE HTML>
<html>
    <head>
        <title>黄子涵</title>
        <meta http-equiv="Content-Type" content="text/html; charset=utf-8" />
        <link rel="shortcut icon" href="favicon.ico" type="image/x-icon"/>
        <style type="text/css">
            :hover {
                border: thin black solid;
                padding: 4px;
            }
        </style>
    </head>
    <body>
        <a href="https://baike.baidu.com/item/%E5%B8%85%E5%93%A5/18510?fr=aladdin">黄子涵是帅哥!</a>
        <p>黄子涵<span>一定</span>很棒!</p>
        <a href="https://baike.baidu.com/item/%E9%9D%93%E4%BB%94/79651?fr=aladdin">黄子涵是靓仔!</a>
    </body>
</html>
该选择器会匹配多个嵌套元素,如下图所示。
使用:active选择器
:active选择器匹配当前被用户激活的元素。浏览器依然可以自行决定如何诠释激活,但多数浏览器会在鼠标点击(在触摸屏上是手指按压)的情况下使用这个选择器。下表简单总结了:active选择器。
:active选择器

当前被用户激活的元素,通常意味着用户即将点击(或者按压)该元素。代码清单16给出了一个使用
:active选择器的例子。
代码清单16 使用:active选择器
<!DOCTYPE HTML>
<html>
    <head>
        <title>黄子涵</title>
        <meta http-equiv="Content-Type" content="text/html; charset=utf-8" />
        <link rel="shortcut icon" href="favicon.ico" type="image/x-icon"/>
        <style type="text/css">
            :active {
                border: thin black solid;
                padding: 4px;
            }
        </style>
    </head>
    <body>
        <a href="https://baike.baidu.com/item/%E5%B8%85%E5%93%A5/18510?fr=aladdin">黄子涵是帅哥!</a>
        <p>黄子涵<span>一定</span>很棒!</p>
        <button>黄子涵</button>
    </body>
</html>
我在代码清单中添加了一个按钮,不过
:active选择器不仅限于用户可以与之交互的元素。鼠标按在上面的任意元素都会被选中,如下图所示。
使用:focus选择器
最后一个动态伪类选择器是
:focus选择器,它匹配当前获得焦点的元素。下表总结了这个选择器。
:focus选择器

代码清单17演示了
:focus选择器的用法。
代码清单17 使用:focus选择器
<!DOCTYPE HTML>
<html>
    <head>
        <title>黄子涵</title>
        <meta http-equiv="Content-Type" content="text/html; charset=utf-8" />
        <link rel="shortcut icon" href="favicon.ico" type="image/x-icon"/>
        <style type="text/css">
            :focus {
                border: thin black solid;
                padding: 4px;
            }
        </style>
    </head>
    <body>
        <form>
            黄子涵是帅哥:<input type="text" name="name"/>
            <p/>
            黄子涵是靓仔:<input type="text" name="city"/>
            <p/>
            <input type="submit" value="黄子涵"/>
        </form>
    </body>
</html>
如果挨个点击页面中的input元素,样式会应用到每个元素。下图展示了依次点击三个input元素的结果。
其他伪类选择器
使用否定选择器
否定选择器可以对任意选择取反。这个选择器可谓相当实用,不过却常常被忽略。下表总结了这个选择器。
否定选择器

代码清单18展示了否定选择器的一种用法。
代码清单18 使用否定选择器
<!DOCTYPE HTML>
<html>
    <head>
        <title>黄子涵</title>
        <meta http-equiv="Content-Type" content="text/html; charset=utf-8" />
        <link rel="shortcut icon" href="favicon.ico" type="image/x-icon"/>
        <style type="text/css">
            a:not([href*="18510"]) {
                border: thin black solid;
                padding: 4px;
            }
        </style>
    </head>
    <body>
        <a href="https://baike.baidu.com/item/%E5%B8%85%E5%93%A5/18510?fr=aladdin">黄子涵是帅哥!</a>
        <p>黄子涵<span>一定</span>很棒!</p>
        <a href="https://baike.baidu.com/item/%E9%9D%93%E4%BB%94/79651?fr=aladdin">黄子涵是靓仔!</a>
    </body>
</html>
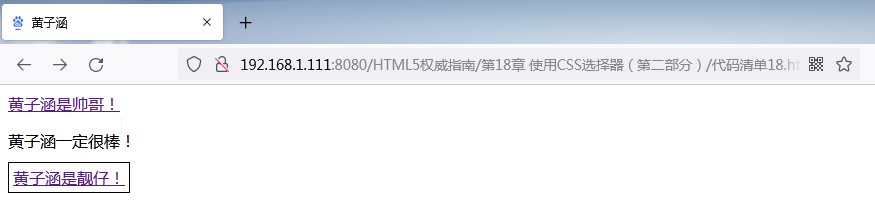
这个选择器匹配子元素没有包含18510字符串的href元素的所有元素,该选择器的效果如下图所示。
使用:empty选择器
:empty选择器匹配没有定义任何子元素的元素。下表简单总结了这个选择器。这个选择器不好演示,因为它匹配的元素没有任何内容。
:empty选择器

使用:lang选择器
:1ang选择器匹配基于lang全局属性值的元素。下表总结了这个选择器。
lang选择器

代码清单19展示了
:lang选择器的用法。
代码清单19 使用:lang选择器
<!DOCTYPE HTML>
<html>
    <head>
        <title>黄子涵</title>
        <meta http-equiv="Content-Type" content="text/html; charset=utf-8" />
        <link rel="shortcut icon" href="favicon.ico" type="image/x-icon"/>
        <style type="text/css">
            :lang(en) {
                border: thin black solid;
                padding: 4px;
            }
        </style>
    </head>
    <body>
        <a lang="en-us" id="黄子涵是帅哥" class="class1 class2" href="https://baike.baidu.com/item/%E5%B8%85%E5%93%A5/18510?fr=aladdin">黄子涵是帅哥</a>
        <p>黄子涵<span lang="en-uk" class="class2">一定</span>很棒!</p>
        <a lang="en" id="黄子涵是靓仔" href="https://baike.baidu.com/item/%E9%9D%93%E4%BB%94/79651?fr=aladdin">黄子涵是靓仔</a>
    </body>
</html>
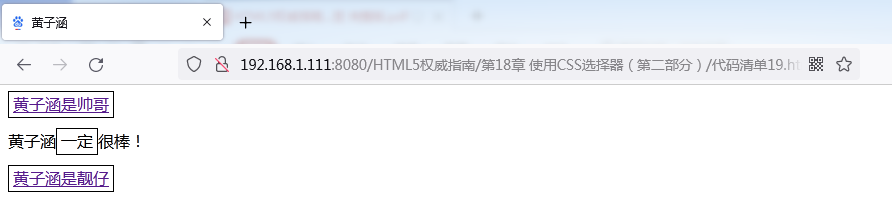
该选择器匹配具有lang属性代表其内容采用英语表达的元素。
使用:target选择器
我们可以为URL附加一个片段标识符,以便直接导航到基于id全局属性值的元素。例如,如果HTML文档example.html中包含一个id值为myelement的元素,那么你就可以直接通过请求example. htmlt#myelement导航到该元素。
:target选择器匹配URL片段标识符指向的元素。下表简单总结了这个选择器。
:target选择器

代码清单20展示了
:target选择器的用法。
代码清单20 使用:target选择器
<!DOCTYPE HTML>
<html>
    <head>
        <title>黄子涵</title>
        <meta http-equiv="Content-Type" content="text/html; charset=utf-8" />
        <link rel="shortcut icon" href="favicon.ico" type="image/x-icon"/>
        <style type="text/css">
            :target {
                border: thin black solid;
                padding: 4px;
                color: red;
            }
        </style>
    </head>
    <body>
        <a href="https://baike.baidu.com/item/%E5%B8%85%E5%93%A5/18510?fr=aladdin">黄子涵是帅哥</a>
        <p id="黄子涵">黄子涵<span>一定</span>很棒!</p>
        <a id="黄子涵是靓仔" href="https://baike.baidu.com/item/%E9%9D%93%E4%BB%94/79651?fr=aladdin">黄子涵是靓仔</a>
    </body>
</html>
从下图可以看到被请求的URL是如何改变了
:target选择器匹配的元素。


 浙公网安备 33010602011771号