Datawhale组队学习 wow-agent😝😍Task 4
Datawhale组队学习 wow-agent
Task4 Zigent 实现出题智能体 metaGPT实现各类智能体
Datawhale项目链接:https://www.datawhale.cn/learn/summary/86
笔记作者:博客园-岁月月宝贝💫
微信名:有你在就不需要🔮给的勇气
转这篇文章不标清楚来源(字号大于5.5)+ 作者名称 我真的会和您开🚨⚔法庭见!
Zigent实现出题智能体
本节将使用上一节用过的Zigent框架实现一个支持“判断题”+“单选题”+“多选题“+”填空题“四种题型的考卷生成智能体!
它可以根据一个Markdown文件(原则我们设定的目录)出题,再生成一个新的Markdown文件(保存到我们设定的文件夹中)!
除此之外,还支持设计受众群体+考察目的+需要包含的题型👍
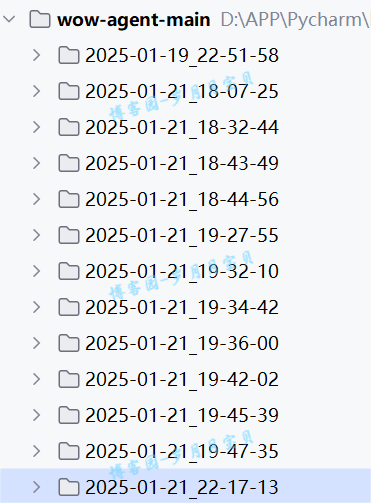
先让大家看看我的尝试次数(下图21号尝试的均是这节,每尝试一次都会改一次Prompt),最终的Prompt是精调过多版的,大家可以认真往下听啦😊~
代码实现
这节发亮点在于代码中的注释,请大家认真阅读代码!
1️⃣导入依赖
import os
from pathlib import Path#最后没用到
from datetime import datetime
from typing import Dict, List#最后没用到
import json

from zigent.llm.agent_llms import LLM
from zigent.actions import BaseAction, ThinkAct, FinishAct
from zigent.agents import BaseAgent
from zigent.commons import TaskPackage, AgentAct
from zigent.actions.InnerActions import INNER_ACT_KEY
2️⃣定义出题Action
class QuizGenerationAction(BaseAction):
    """Generate quiz questions from markdown content"""

    def __init__(self, llm: LLM) -> None:
        action_name = "GenerateQuiz"
        action_desc = "Generate quiz questions from markdown content"
        params_doc = {
            "content": "(Type: string): The markdown content to generate questions from",
            "question_types": "(Type: list): List of question types to generate",
            "audience": "(Type: string): Target audience for the quiz",
            "purpose": "(Type: string): Purpose of the quiz"
        }
        super().__init__(action_name, action_desc, params_doc)
        self.llm = llm

    # 🍂kwargs 的好处是它提供了很大的灵活性,允许调用者传递任意数量的参数,而不需要在函数定义中显式声明每个参数。这些参数会被封装到一个字典中,字典的键是参数的名称,值是对应的参数值。
    def __call__(self, **kwargs):
        # 🍎1.提取参数
        content = kwargs.get("content", "")  # 考卷的核心内容或主题
        question_types = kwargs.get("question_types", [])  # 需要包含的题型列表,例如 ["判断题", "单选题", "多选题", "填空题"]
        audience = kwargs.get("audience", "")  # 考卷的目标受众群体,例如 "学生" 或 "专业人士"
        purpose = kwargs.get("purpose", "")  # 考卷的考察目的,例如 "测试对某个主题的理解"

        # 🍎2.构建提示模板
        prompt = f"""
        你是一个辅助设计考卷的机器人,全程使用中文。
        你的任务是帮助用户快速创建、设计考卷,考卷以markdown格式给出。

        要求:
        1. 受众群体:{audience}
        2. 考察目的:{purpose}
        3. 需要包含以下题型:{", ".join(question_types)}
        4. 考卷格式要求:
        """
        # 🍂通过 ", ".join(question_types) 将题型列表转换为逗号分隔的字符串插入到模板中

        # 考卷格式示例
        prompt += """
        # 问卷标题
        ---
        ##判断题(如果题型中包含"判断题"才输出,否则不输出这个类别)
        1. 这是判断题的题干1(题干中去掉“*”号和"="号)
            - ( )
        正确答案:如果判断题题干正确,输出"√";如果题干错误,输出"x"

        2. 这是判断题的题干2(题干中去掉“*”号和"="号)
            - ( )
        正确答案:如果题干错误,输出"x";如果判断题题干正确,输出"√"

        ##单选题(如果题型中包含"单选题"才输出,否则不输出这个类别)

        1. 这是单选题的题干1?(题干中去掉“*”号和"="号)
            - A.选项内容
            - B.选项内容
            - C.选项内容
            - D.选项内容
        正确答案:输出正确的选项前的字母,比如如果A正确,这里就输出"A"

        2. 这是单选题的题干2?(题干中去掉“*”号和"="号)
            - A.选项内容
            - B.选项内容
            - C.选项内容
            - D.选项内容
        正确答案:输出正确的选项前的字母,比如如果B正确,这里就输出"B"

        ##多选题(如果题型中包含"多选题"才输出,否则不输出这个类别)

        1. 这是多选题的题干1?(题干中去掉“*”号和"="号)
            - A.选项内容
            - B.选项内容
            - C.选项内容
            - D.选项内容
        正确答案:输出正确的选项前的字母,比如如果A和B正确,这里就输出"AB"

        2. 这是多选题的题干2?(题干中去掉“*”号和"="号)
            - A.选项内容
            - B.选项内容
            - C.选项内容
            - D.选项内容
        正确答案:输出正确的选项前的字母,比如如果B和C和D正确,这里就输出"BCD"

        ##填空题(如果题型中包含"填空题"才输出,否则不输出这个类别)

        1.这是填空题的题干1(题干中去掉“*”号和"="号,空格用"_"表示)
        正确答案:填入题干中所空内容使得填空题题干正确的答案,比如如果题干中填入"编译器"正确,这里就输出"编译器"

        2.这是填空题的题干2(题干中去掉“*”号和"="号,空格用"_"表示)
        正确答案:填入题干中所空内容使得填空题题干正确的答案,比如如果题干中填入"12"正确,这里就输出"12"

        """
        # 将用户提供的 content 插入到模板中,作为生成考卷的依据
        prompt += f"\n请根据以下内容生成考卷:\n{content}"

        # 🍎3.调用外部模型生成考卷
        quiz_content = self.llm.run(prompt)

        # 🍎4.函数返回字典
        return {
            "quiz_content": quiz_content,
            "audience": audience,
            "purpose": purpose,
            "question_types": question_types
        }
调整最大感受:prompt长度与输出质量不成正比。
如果你只给一个题目的示例,模型有很可能输出很长很丰富的答案,但是格式不完全遵循;如果你给出很多的题目,模型很大可能会输出的给你提供的题目数目相同,题目格式是规整了,但是可能会出现题目出得重复(有遇到连着几个单选题相同),还可能遇到把题目的Prompt直接输出的情况。另外,还有遇到没有让输出的题型也输出了,这也让我在上面加上了对题型限定的Prompt。最后,因为输入是markdown文件,输出题目中有遇到*号,我有尝试如果严格说明题干中去掉*有很大概率降低题目的多样性,所以最后也去掉了这句话。
除了上面这些点,为了让题库真的起到一个检验的作用,我把答案和题干分开了(最开始是看到“x”表示选择,感觉很奇怪,都改成了“√”,后面考虑到这样打勾适用面不广,干脆都改成了ABCD选项)。
下面再附一个原版Prompt,都可以跑一下,你就会发现我的每一个改动都有意义!
        prompt += """
        # 问卷标题
        ---
        1. 这是判断题的题干?
            - (x) True
            - ( ) False
        # (x)为正确答案

        2. 这是单选题的题干
            - (x) 这是正确选项
            - ( ) 这是错误选项
        # (x)为正确答案

        3. 这是多选题的题干?
            - [x] 这是正确选项1
            - [x] 这是正确选项2
            - [ ] 这是错误选项1
            - [ ] 这是错误选项2
        # [x]为正确答案

        4. 这是填空题的题干?
            - R:= 填空题答案
        #填空题正确答案格式
        """
3️⃣定义保持Action
# 从一个基类 BaseAction 继承而来
class SaveQuizAction(BaseAction):
    """Save quiz to file and return URL"""

    # 🍎类的初始化方法
    def __init__(self) -> None:
        action_name = "SaveQuiz"
        action_desc = "Save quiz content to file and return URL"
        params_doc = {
            "quiz_content": "(Type: string): The quiz content to save",
            "quiz_title": "(Type: string): Title of the quiz"
        }
        # 调用基类 BaseAction 的初始化方法,将这些信息传递给基类
        super().__init__(action_name, action_desc, params_doc)

    # 🍎类的主要功能实现方法
    def __call__(self, **kwargs):
        # 接收考卷内容(quiz_content)和考卷标题(quiz_title)作为输入
        quiz_content = kwargs.get("quiz_content", "")
        quiz_title = kwargs.get("quiz_title", "quiz")

        # 生成一个基于当前时间戳的目录名称
        output_dir = datetime.now().strftime("%Y-%m-%d_%H-%M-%S")
        os.makedirs(output_dir, exist_ok=True)

        # 保存文件在刚才创建的目录中
        output_file = os.path.join(output_dir, f"{quiz_title}.md")
        with open(output_file, 'w', encoding='utf-8') as f:
            f.write(quiz_content)

        # 返回一个字典,包含保存的文件路径(file_path)和一个模拟的 URL(quiz_url)
        return {
            "file_path": output_file,
            "quiz_url": f"/{output_file}"
        }
4️⃣定义出题智能体
# 一个考卷生成代理(Agent),它负责管理从 Markdown 内容加载到考卷生成,再到考卷保存的整个流程
class QuizGeneratorAgent(BaseAgent):
    """Quiz generation agent that manages quiz creation process"""

    #🍎初始化代理、出题Markdown路径、生成考卷实例、保存考卷实例、出题示例任务
    def __init__(
            self,
            llm: LLM,
            markdown_dir: str
    ):
        name = "QuizGeneratorAgent"  # 代理的名称
        role = """你是一个专业的考卷生成助手。你可以根据提供的Markdown内容生成结构良好、
        内容全面的考卷。你擅长根据受众群体和考察目的设计合适的题目。"""  # 角色描述

        # 调用基类 BaseAgent 的初始化方法,传递代理的名称、角色描述和语言模型(llm)
        super().__init__(
            name=name,
            role=role,
            llm=llm,
        )

        self.markdown_dir = markdown_dir  # 存储 Markdown 文件的目录路径
        # 一个 QuizGenerationAction 实例,用于生成考卷
        self.quiz_action = QuizGenerationAction(llm)
        # 一个 SaveQuizAction 实例,用于保存考卷
        self.save_action = SaveQuizAction()
        # 调用 _add_quiz_example 方法,添加一个示例任务
        self._add_quiz_example()

    # 🍎用于加载指定目录中的所有 Markdown 文件内容
    def _load_markdown_content(self) -> str:
        """Load all markdown files from directory"""
        content = []
        # 遍历 markdown_dir 目录及其子目录
        for root, _, files in os.walk(self.markdown_dir):
            for file in files:
                if file.endswith(".md"):  # 找到所有以 .md 结尾的文件
                    with open(os.path.join(root, file), 'r', encoding='utf-8') as f:
                        content.append(f.read())  # 读取每个文件的内容
        return "\n".join(content)  # 将所有内容合并为一个字符串返回

    # 🍎处理考卷生成任务
    def __call__(self, task: TaskPackage):
        """Process the quiz generation task"""

        # Parse task parameters
        # 从 task.instruction 中解析任务参数,包括 audience(受众群体)、purpose(考察目的)和 question_types(题型列表)。
        params = json.loads(task.instruction)  # task.instruction从哪里来?答:from输入
        audience = params.get("audience", "")
        purpose = params.get("purpose", "")
        question_types = params.get("question_types", [])

        # Load markdown content,加载 Markdown 内容
        content = self._load_markdown_content()  # _load_markdown_content()从哪里来?

        # Generate quiz —— self.quiz_action = QuizGenerationAction(llm)实例,生成考卷
        quiz_result = self.quiz_action(
            content=content,
            question_types=question_types,
            audience=audience,
            purpose=purpose
        )

        # Save quiz——self.save_action = SaveQuizAction(),保存考卷
        save_result = self.save_action(
            quiz_content=quiz_result["quiz_content"],
            quiz_title="generated_quiz"
        )

        # 将生成的考卷内容和考卷 URL 更新到任务对象中
        task.answer = {
            "quiz_content": quiz_result["quiz_content"],
            "quiz_url": save_result["quiz_url"]
        }
        task.completion = "completed"

        return task  # 返回任务对象

    # 🍎用于添加一个示例任务,用于演示或测试考卷生成过程
    def _add_quiz_example(self):  # 老师新加
        """Add an illustration example for the quiz generator"""

        # 创建一个示例任务,包含受众群体、考察目的和题型列表
        exp_task = json.dumps({
            "audience": "零基础",  # 水平
            "purpose": "测试Python基础知识掌握情况",  # 目的
            "question_types": ["判断题","单选题", "多选题", "填空题"]  # 题型
        })
        exp_task_pack = TaskPackage(instruction=exp_task)

        act_1 = AgentAct(
            name=ThinkAct.action_name,
            params={INNER_ACT_KEY: """首先,我会加载Markdown内容,然后根据受众群体和考察目的生成考卷。"""}
        )
        obs_1 = "OK. 开始加载Markdown内容。"

        act_2 = AgentAct(
            name=self.quiz_action.action_name,
            params={
                "content": "Python基础内容...",
                "question_types": ["判断题","单选题", "多选题", "填空题"],
                "audience": "大学生",
                "purpose": "测试Python基础知识掌握情况"
            }
        )
        obs_2 = """
        # Python基础测试

        ## 判断题
        1. Python是一种动态类型语言,变量在声明时不需要指定类型。
            - ( )
        正确答案:√

        2. 在Python中,列表(list)是一种不可变的数据结构。
            - ( )
        正确答案:x

        3. Python中的`print()`函数可以用来输出内容到控制台。
            - ( )
        正确答案:√

        4. Python的缩进规则是可选的,代码可以不使用缩进来表示结构。
            - ( )
        正确答案:x

        5. Python中,`range(1, 5)`会生成一个从1到5的整数序列,包括5。
            - ( )
        正确答案:x

        ## 单选题

        1. 在Python中,以下哪个选项是正确的字符串定义方式?
            - A. `string = 'Hello, World!`
            - B. `string = "Hello, World!"`
            - C. `string = Hello, World!`
            - D. `string = 'Hello, World!"`
        正确答案:B

        2. 如果变量`x = 10`,`y = 5`,以下哪个表达式的值为`True`?
            - A. `x < y`
            - B. `x == y`
            - C. `x > y`
            - D. `x != y`
        正确答案:C

        3. 在Python中,`len()`函数的作用是:
            - A. 计算变量的值
            - B. 计算字符串、列表等的长度
            - C. 转换为整数类型
            - D. 输出内容
        正确答案:B

        4. Python中,`for`循环的语法是:
            - A. `for i in range(10):`
            - B. `for i = 1 to 10:`
            - C. `for i in 10:`
            - D. `for i to 10:`
        正确答案:A

        5. 在Python中,`if`语句的正确语法是:
            - A. `if x > 0:`
            - B. `if x > 0`
            - C. `if x > 0 then:`
            - D. `if x > 0 then`
        正确答案:A

        ## 多选题

        1. 在Python中,以下哪些是合法的变量名?
            - A. `myVariable`
            - B. `2variable`
            - C. `_variable`
            - D. `my-variable`
        正确答案:AC

        2. 以下哪些操作符可以用于列表(list)?
            - A. `+`(连接两个列表)
            - B. `*`(重复列表)
            - C. `//`(整除)
            - D. `len()`(获取长度)
        正确答案:ABD

        3. 在Python中,以下哪些是布尔值?
            - A. `True`
            - B. `False`
            - C. `None`
            - D. `0`
        正确答案:AB

        4. 以下哪些方法可以用于字符串操作?
            - A. `upper()`(转换为大写)
            - B. `lower()`(转换为小写)
            - C. `split()`(分割字符串)
            - D. `join()`(拼接字符串)
        正确答案:ABCD

        ## 填空题

        1. 在Python中,使用________函数可以将字符串转换为整数。
        正确答案:`int`

        2. 如果列表`my_list = [1, 2, 3, 4]`,`my_list[2]`的值是________。
        正确答案:`3`

        3. 在Python中,布尔值`True`和`False`是________类型的特殊值。
        正确答案:`bool`

        4. 使用`for`循环遍历列表`my_list`时,可以使用`for item in ________:`。
        正确答案:`my_list`

        5. 在Python中,`print("Hello", "World!")`的输出结果是________。
        正确答案:`Hello World!`

        """

        act_3 = AgentAct(
            name=self.save_action.action_name,
            params={
                "quiz_content": obs_2,
                "quiz_title": "Python基础测试"
            }
        )
        obs_3 = {"file_path": "2025-01-15_03-37-40/Python基础测试.md",
                 "quiz_url": "/2025-01-15_03-37-40/Python基础测试.md"}

        act_4 = AgentAct(
            name=FinishAct.action_name,
            params={INNER_ACT_KEY: "考卷生成并保存成功。"}
        )
        obs_4 = "考卷生成任务完成。"

        # 模拟行为链
        exp_act_obs = [(act_1, obs_1), (act_2, obs_2), (act_3, obs_3), (act_4, obs_4)]

        # 示例任务和行为链添加到 prompt_gen
        self.prompt_gen.add_example(
            task=exp_task_pack,
            action_chain=exp_act_obs
        )
这边的Python基础测试我完善了相关题库,希望LLM可以学到这里的多样性!(原版Prompt只有一道题,大家也可以删到一道题试试效果)
5️⃣使用示例:
from dotenv import load_dotenv
load_dotenv()

#---------------------这里使用的是智谱(pip install zhipuai),谢谢智谱AI的支持!
from zhipuai import ZhipuAI

class ZhipuaiLLM:
    def __init__(self, api_key, model_name):
        self.client = ZhipuAI(api_key=api_key)  # 初始化客户端
        self.model_name = model_name

    def run(self, prompt):#这里方法名叫run是因为前面调用的是run方法
        # 调用智谱AI的API
        response = self.client.chat.completions.create(
            model=self.model_name,
            messages=[
                {"role": "user", "content": prompt}
            ]
        )
        # 提取返回的内容
        return response.choices[0].message.content


api_key="e1--------------------------------------"🌹(读者这里必须改)

model_name = "glm-4-plus"

llm = ZhipuaiLLM(api_key=api_key, model_name=model_name)

#-----------------下面这段代码所有要导出文件的项目都可以加--------
import sys

# 获取当前文件的绝对路径
current_file_path = os.path.abspath(__file__)

# 获取当前文件所在目录的上一级目录
project_path = os.path.dirname(os.path.dirname(current_file_path))

# 将项目根目录添加到 sys.path
if project_path not in sys.path:
    sys.path.append(project_path)
#----------------------------------------------------------------

# 创建出题智能体
markdown_dir = "docs"  # 指定包含出题参照的Markdown文件的目录🌹(读者这里可改)
agent = QuizGeneratorAgent(llm=llm, markdown_dir=markdown_dir)

# 定义考卷参数
quiz_params = {
    "audience": "大学生", # 受众群体-原为零基础,改为大学生🌹(读者这里可改)
    "purpose": "测试基础知识掌握情况", # 考察目的🌹(读者这里可改)
    "question_types": ["单选题", "多选题", "填空题"] # 需要包含的题型🌹(读者这里可改)
}

# 生成考卷
task = TaskPackage(instruction=json.dumps(quiz_params))
result = agent(task)

print("生成的考卷内容:")
print(result.answer["quiz_content"])
print(f"考卷路径: {result.answer['quiz_url']}")
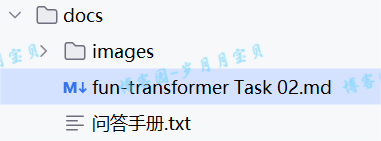
这是我输入的.md文档:
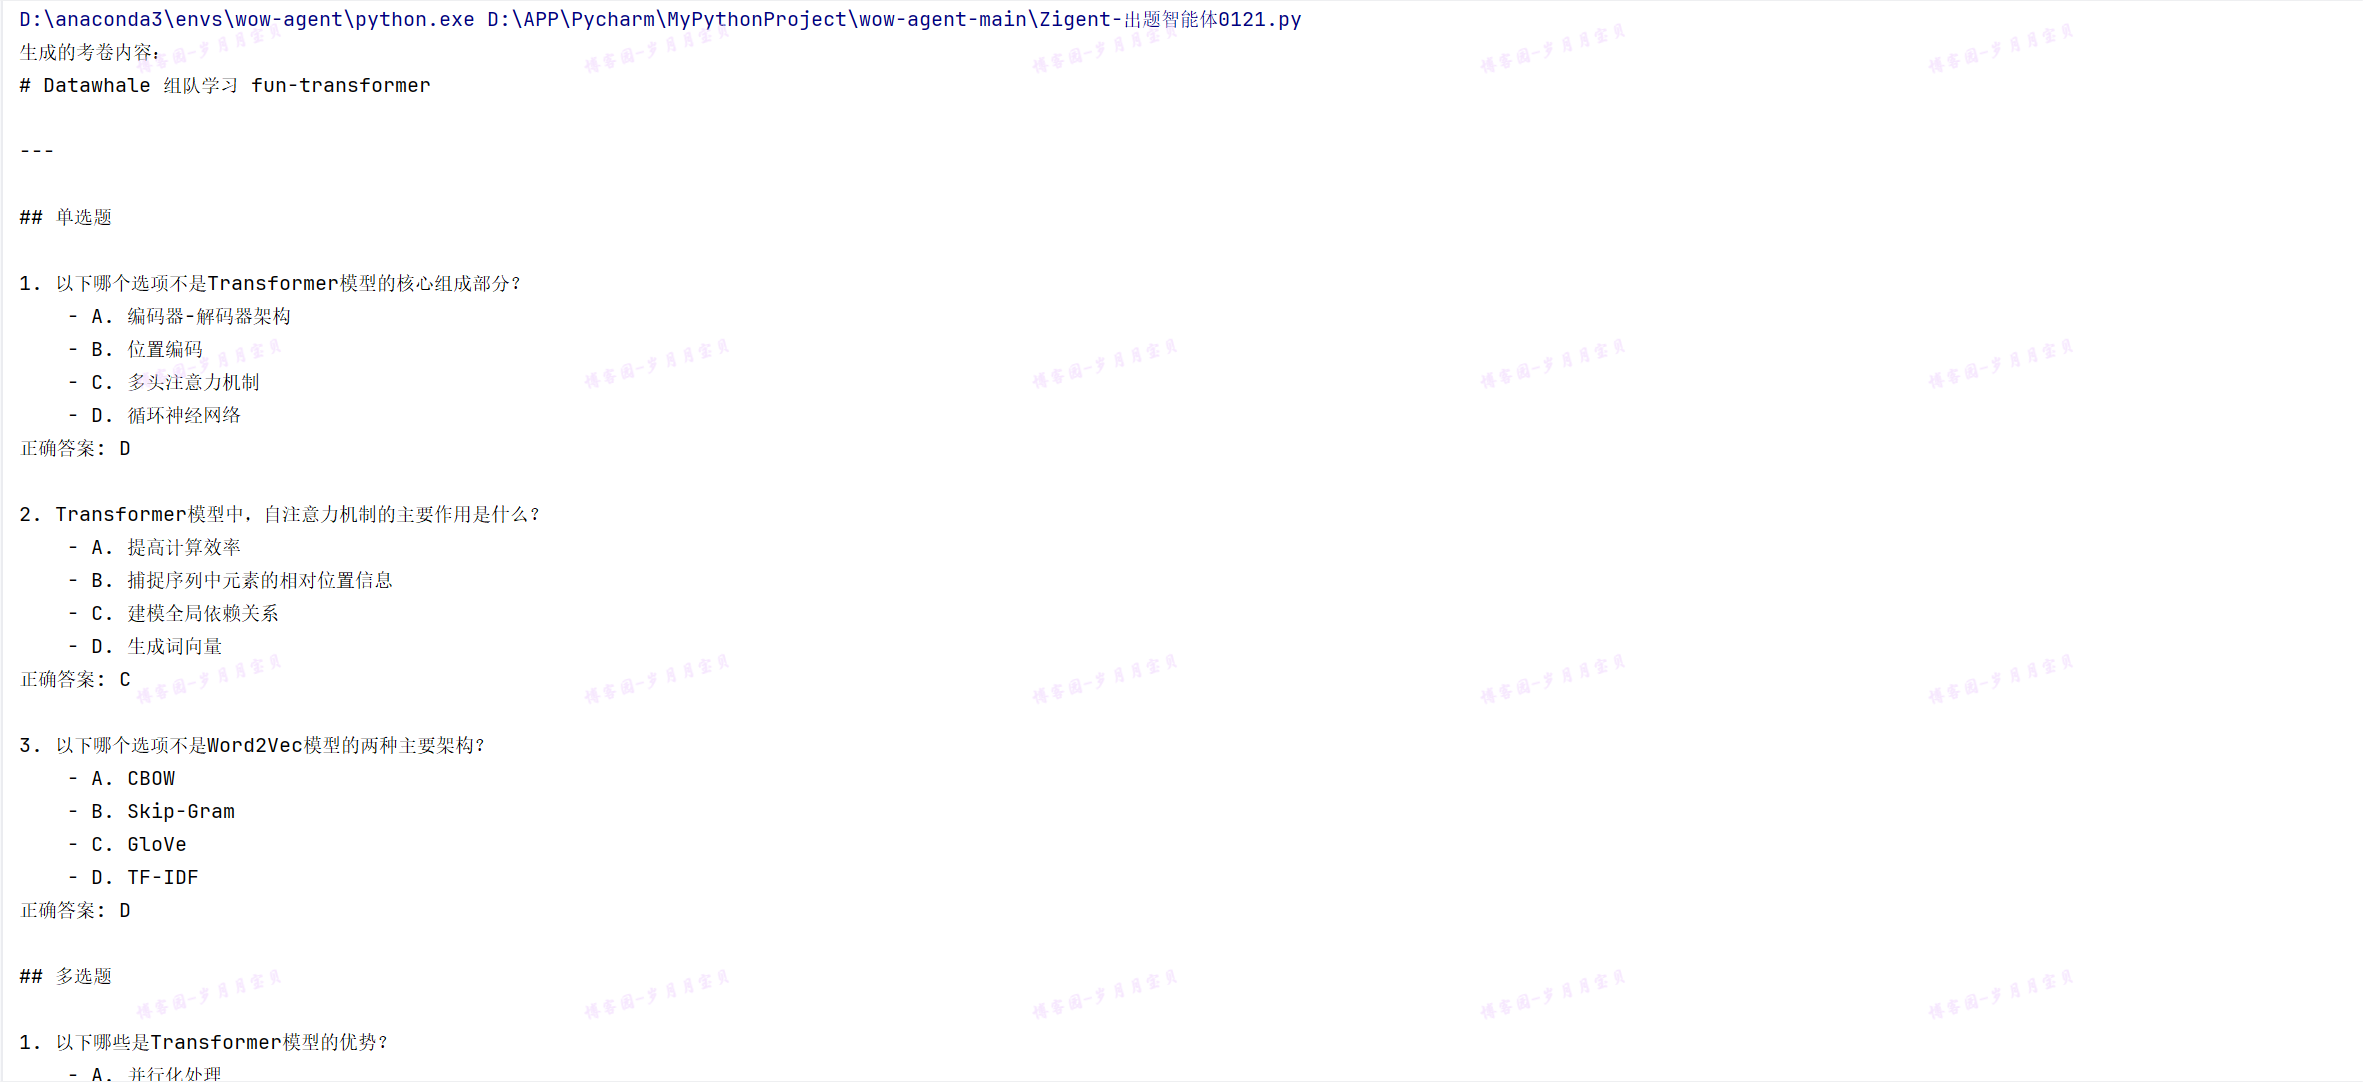
输出效果图展示:

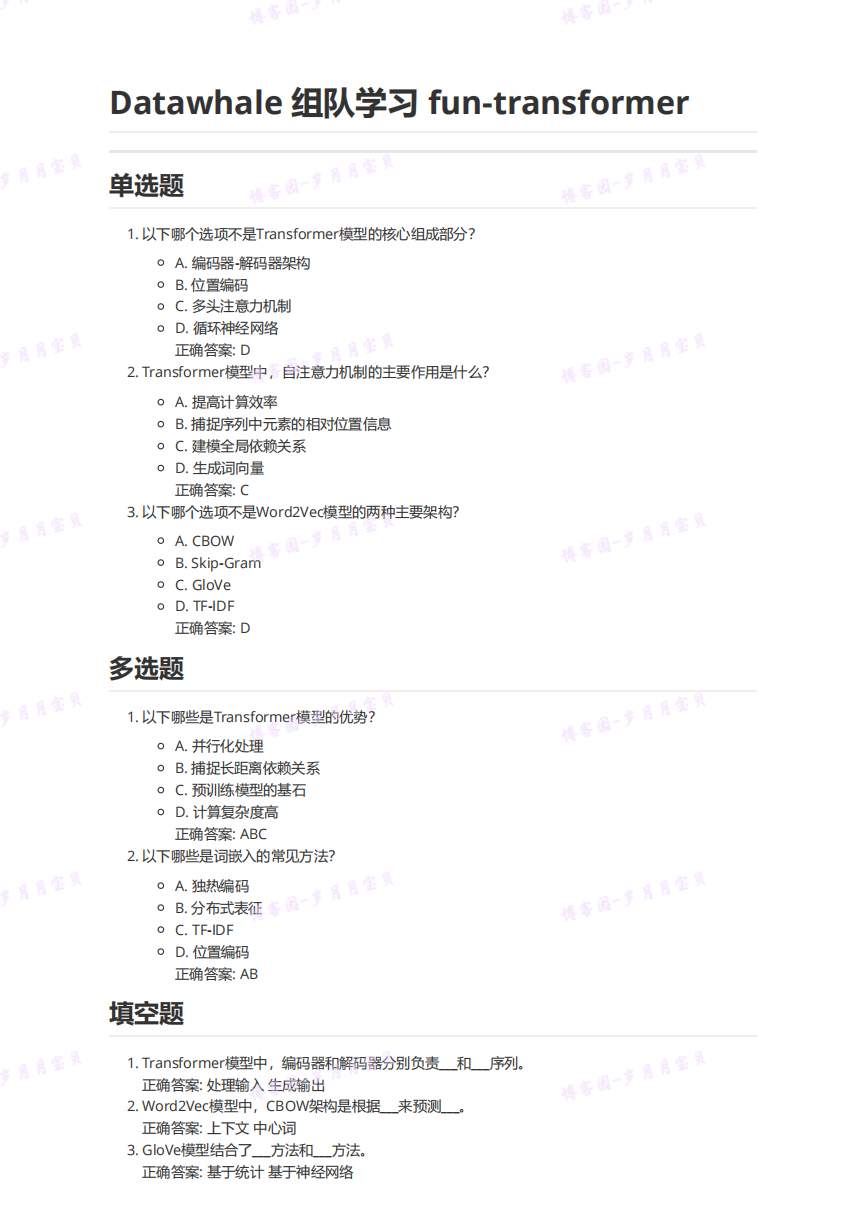
下面我们在看生成的.md文件:

题目如下,是不是很符合要求😁
总结
未来我们可以进一步扩展功能,如支持更多题型、自动阅卷评分等功能。
metaGPT安装和配置
1.MetaGPT安装
请确保你的系统已安装Python 3.9+。你可以通过以下命令进行检查:
python --version
或者直接在cmd窗口输入python,看看进入的是哪个版本?

pip install metagpt==0.8.0
注意:因为依赖冲突,迫不得以pip uninstall llama-index-agent-openai llama-index-core llama-index-llms-openai
(如果要跑本节以前的用llamaindex的task😜,需要考虑报错:
“llama-index-agent-openai 0.4.2 requires openai>=1.14.0, but you have openai 1.6.1 which is incompatible.
llama-index-core 0.12.11 requires pydantic>=2.8.0, but you have pydantic 2.5.3 which is incompatible.
llama-index-llms-openai 0.3.13 requires openai<2.0.0,>=1.58.1, but you have openai 1.6.1 which is incompatible.”;我想是需要把这个metagpt==0.8.0包卸到,重装 llama-index-agent-openai llama-index-core llama-index-llms-openai😂)

OK,我们继续!
2.MetaGPT使用
使用MetaGPT需要配置模型API。
- 在当前工作目录中创建一个名为config的文件夹,并在其中添加一个名为config2.yaml的新文件。
- 将示例config2.yaml文件的内容复制到您的新文件中。
- 将您自己的值填入文件中:
智谱 API
国内的大模型,智谱的效果是非常好的。
config2.yaml
llm:
  api_type: 'zhipuai'
  api_key: 'YOUR_API_KEY'
  model: 'glm-4'
科大讯飞的大模型 Spark API:
科大讯飞的API无法支持异步,所以回答一两个简单的问题还可以,如果要做步骤多于两个的任务,目前效果还不太可观。
config2.yaml
llm:
  api_type: 'spark'
  app_id: 'YOUR_APPID'
  api_key: 'YOUR_API_KEY'
  api_secret: 'YOUR_API_SECRET'
  domain: 'generalv3.5'
  base_url: 'wss://spark-api.xf-yun.com/v3.5/chat'
百度 千帆 API
千帆的TPM比较低,适合当作回答问题来用。面对比较复杂的任务就会报错使用超限制。
config2.yaml
llm:
  api_type: 'qianfan'
  api_key: 'YOUR_API_KEY'
  secret_key: 'YOUR_SECRET_KEY'
  model: 'ERNIE-Bot-4'
Supported models: {'ERNIE-3.5-8K-0205', 'ERNIE-Bot-turbo-AI', 'ChatLaw', 'Qianfan-Chinese-Llama-2-13B', 'Yi-34B-Chat', 'ERNIE-Bot-4', 'Llama-2-70b-chat', 'ChatGLM2-6B-32K', 'Llama-2-7b-chat', 'Llama-2-13b-chat', 'ERNIE-Bot-8k', 'ERNIE-Speed', 'ERNIE-3.5-4K-0205', 'ERNIE-Bot', 'Mixtral-8x7B-Instruct', 'EB-turbo-AppBuilder', 'ERNIE-Bot-turbo', 'BLOOMZ-7B', 'XuanYuan-70B-Chat-4bit', 'Qianfan-BLOOMZ-7B-compressed', 'Qianfan-Chinese-Llama-2-7B', 'AquilaChat-7B'}
月之暗面 Moonshot API
月之暗面的TPM也比较低,只能当作回答问题来用。面对复杂的任务会报错使用超限制。若要使用建议充值去提升TPM。
config2.yaml
llm:
  api_type: 'moonshot'
  base_url: 'https://api.moonshot.cn/v1'
  api_key: 'YOUR_API_KEY'
  model: 'moonshot-v1-8k'
本地ollama API
config2.yaml
llm:
  api_type: 'ollama'
  base_url: 'http://192.168.0.70:11434/api'
  model: 'qwen2:7b'

repair_llm_output: true
代码中192.168.0.70就是部署了大模型的电脑的IP,请根据实际情况进行替换!!!
有一个小细节需要注意,冒号后面需要有个空格,否则会报错。
如何检验自己是否配置成功呢?
from metagpt.config2 import Config
def print_llm_config():
    # 加载默认配置
    config = Config.default()

    # 获取LLM配置
    llm_config = config.llm
    # 打印LLM配置的详细信息
    if llm_config:
        print(f"API类型: {llm_config.api_type}")
        print(f"API密钥: {llm_config.api_key}")
        print(f"模型: {llm_config.model}")
    else:
        print("没有配置LLM")

if __name__ == "__main__":
    print_llm_config()
执行上面的代码,如果输出的llm类型、密钥都没问题,就说明配置成功。

(上图是智谱)

(上图是本地ollama)
或者运行:
from metagpt.actions import Action
不报错即为配置成功。
3.本地ollama配置
由于Agent会消耗大量的Token,如果用大模型厂商的API,不光需要花很多钱,而且每分钟请求数还很少。所以,非必要不要用大模型厂商的API。所以下面,我们在本地用ollama部署一个大模型!
1️⃣ 访问 https://ollama.com。下载Windows版本。直接安装。
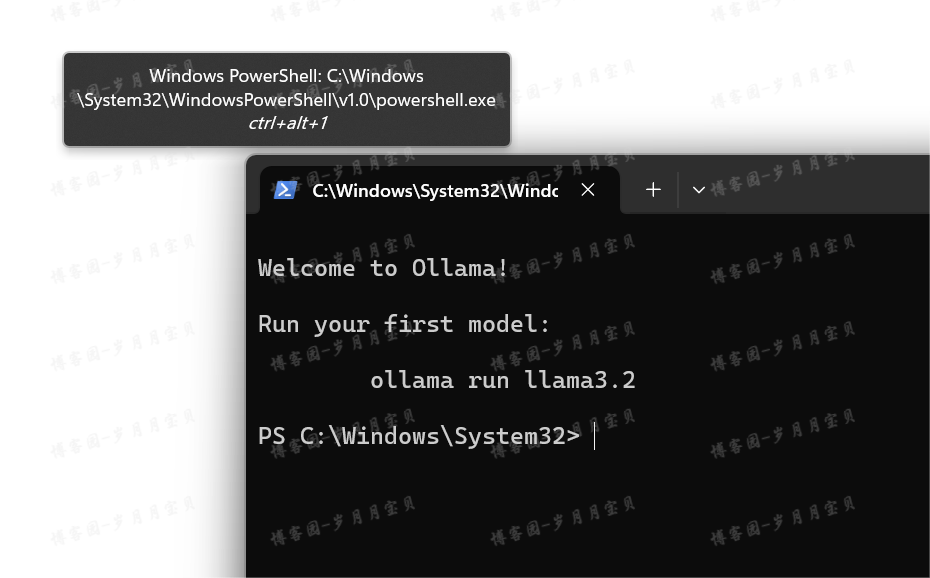
(安装完成后像我上面这玩意是跳出了一个运行Ollama的提示,点击后出现的;注意ctrl+alt+1别随便按!)
在命令行窗口(win+R,输入cmd)中我也试了下:
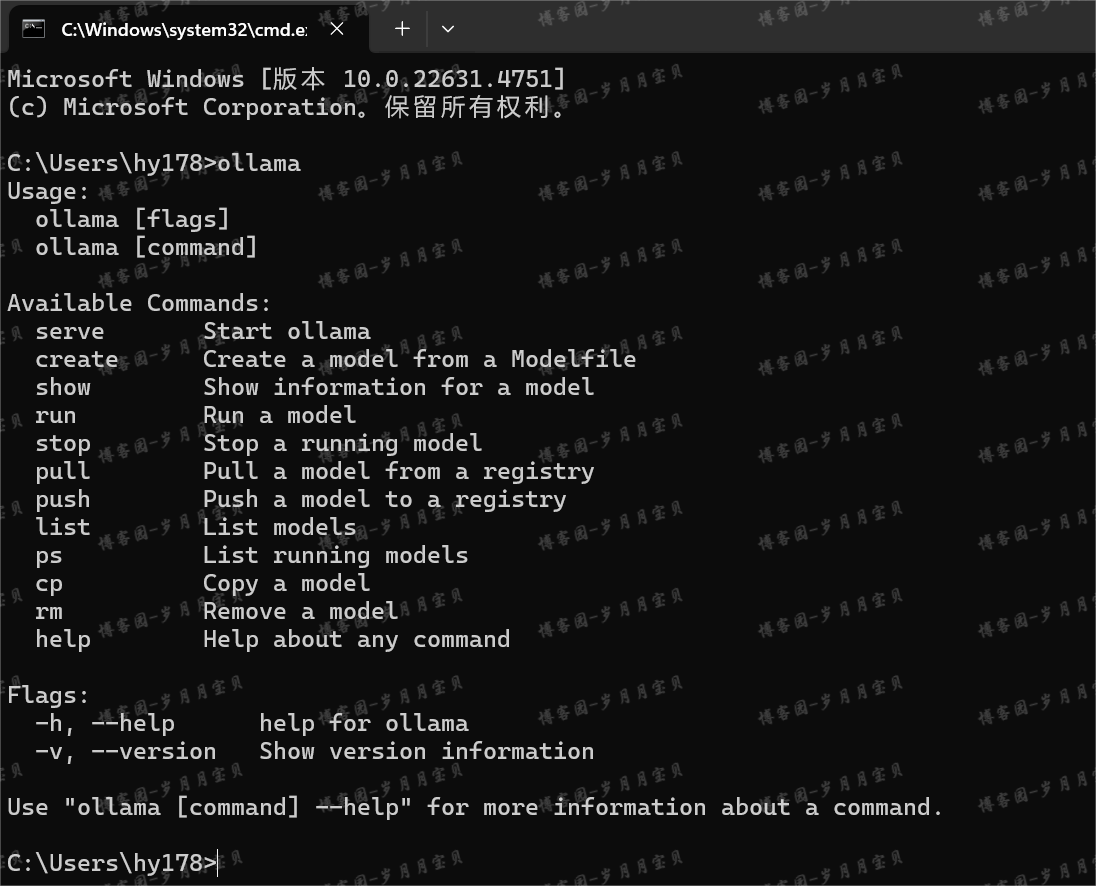
大家如果也出现"Usage: " "Available Commands:"之类的信息,说明安装成功。
(因为第一个框框不常见,后面的指令我都使用第二个框框)
2️⃣我们用qwen2:1.5b这个模型(因为它小,整个还不到1G),cmd中输入”ollama run qwen2:1.5b“(😶这步建议到后面再做)

如果出现了success,就说明安装成功。

然后会出现一个>>>符号,这就是对话窗口。可以直接输入问题。

想要退出交互页面,直接输入 /bye 就行。斜杠是需要的。否则不是退出交互页面,而是对大模型说话,它会继续跟你聊。

3️⃣在浏览器中输入 "127.0.0.1:11434",如果出现"Ollama is running"说明端口运行正常。

4️⃣安装完ollama后,我们还需要进行配置一下,主要是两个方面(此时quit ollama!)。
第一:这时候模型是放在内存中的(如下图)。我们希望把模型放在硬盘中。所以,我们可以在硬盘中建一个文件夹,比如"D:\APP\Ollama\models":

然后新建系统环境变量(如下图,环境变量中的系统变量)。
🌟变量名: OLLAMA_MODELS
🌟变量值:D:\APP\Ollama\models
第二:这时候的大模型只能通过127.0.0.1:11434来访问。我们希望在局域网中的任何电脑都可以访问。这也是通过新建系统环境变量来解决。
🌟变量名: OLLAMA_HOST
🌟变量值: 0.0.0.0:11434
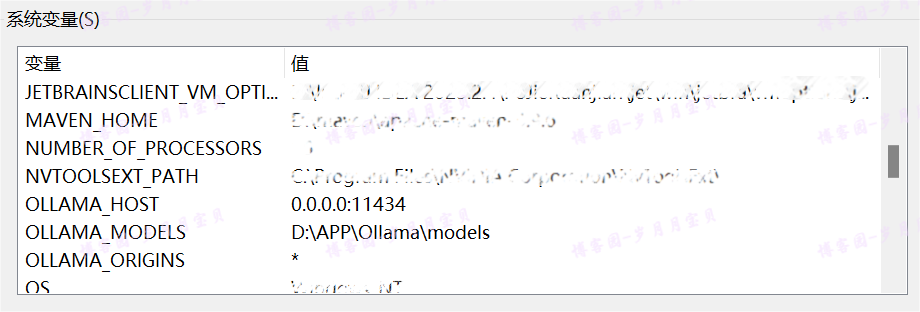
(我ollama相关的变量是加了三个,第三个读者可以参照下面博客这位作者大大添加~)
这样就完成了配置(其他配置参照博客Ollama-Windows安装Ollama - skystrivegao - 博客园)。配置好在开机菜单运行ollama,接着正常cmd重下模型就OK(重下好模型,C盘的model文件夹的哪些就可以删掉啦!)。

是不是非常简单方便?
对了,前面都改好后可以看看端口11434的被监听效果(呜呜呜,终于好了,感动哭):

5️⃣现在,我们先用requets库来测试一下大模型。
先查下我们电脑的IP:在cmd中输入”ipconfig“
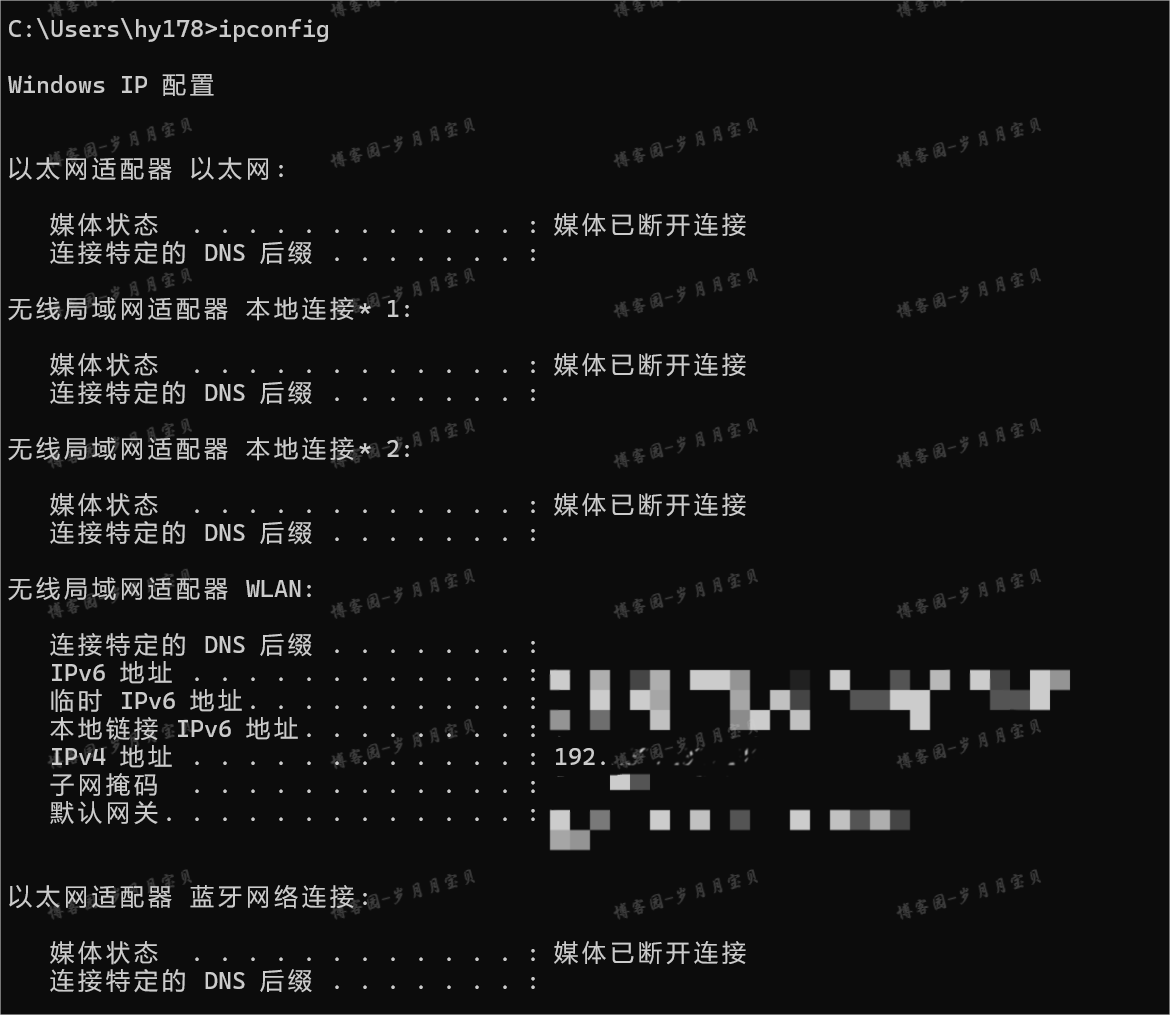
我的IPv4地址是192.168.202.144,那你可以访问192.168.202.144:11434,会显示如下!

兄弟姐妹们,已经成功一半了!此时,记得在终端运行开

然后,
# 我们先用requets库来测试一下大模型
import json#没用上
import requests

BASE_URL = "http://192.168.202.144:11434/api/chat"#😘“http://192.168.202.144:11434”需要替换为你自己的电脑IP(有试别的IP,不是自己的都报错)

payload = {
  "model": "qwen2:1.5b",
  "messages": [
    {
      "role": "user",
      "content": "请写一篇1000字左右的文章,论述法学专业的就业前景。"
    }
  ]
}
response = requests.post(BASE_URL, json=payload)
print(response.text)
💐然后,给大家看效果(此时已经感动得热泪盈眶)
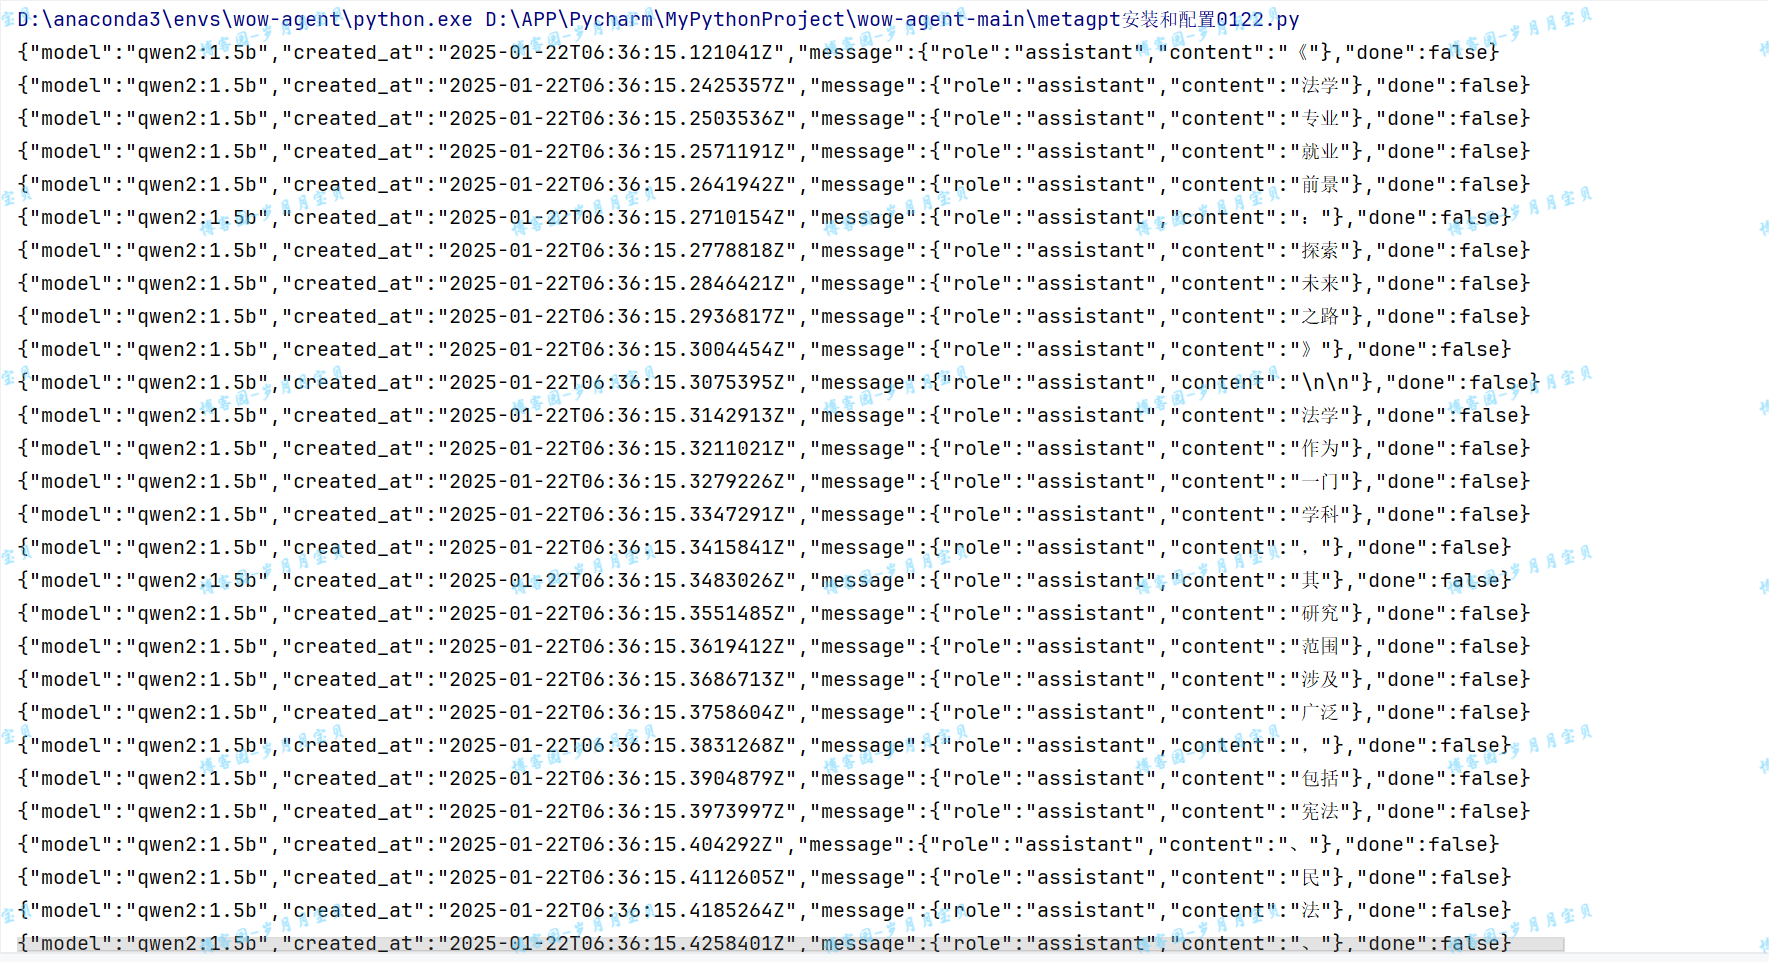
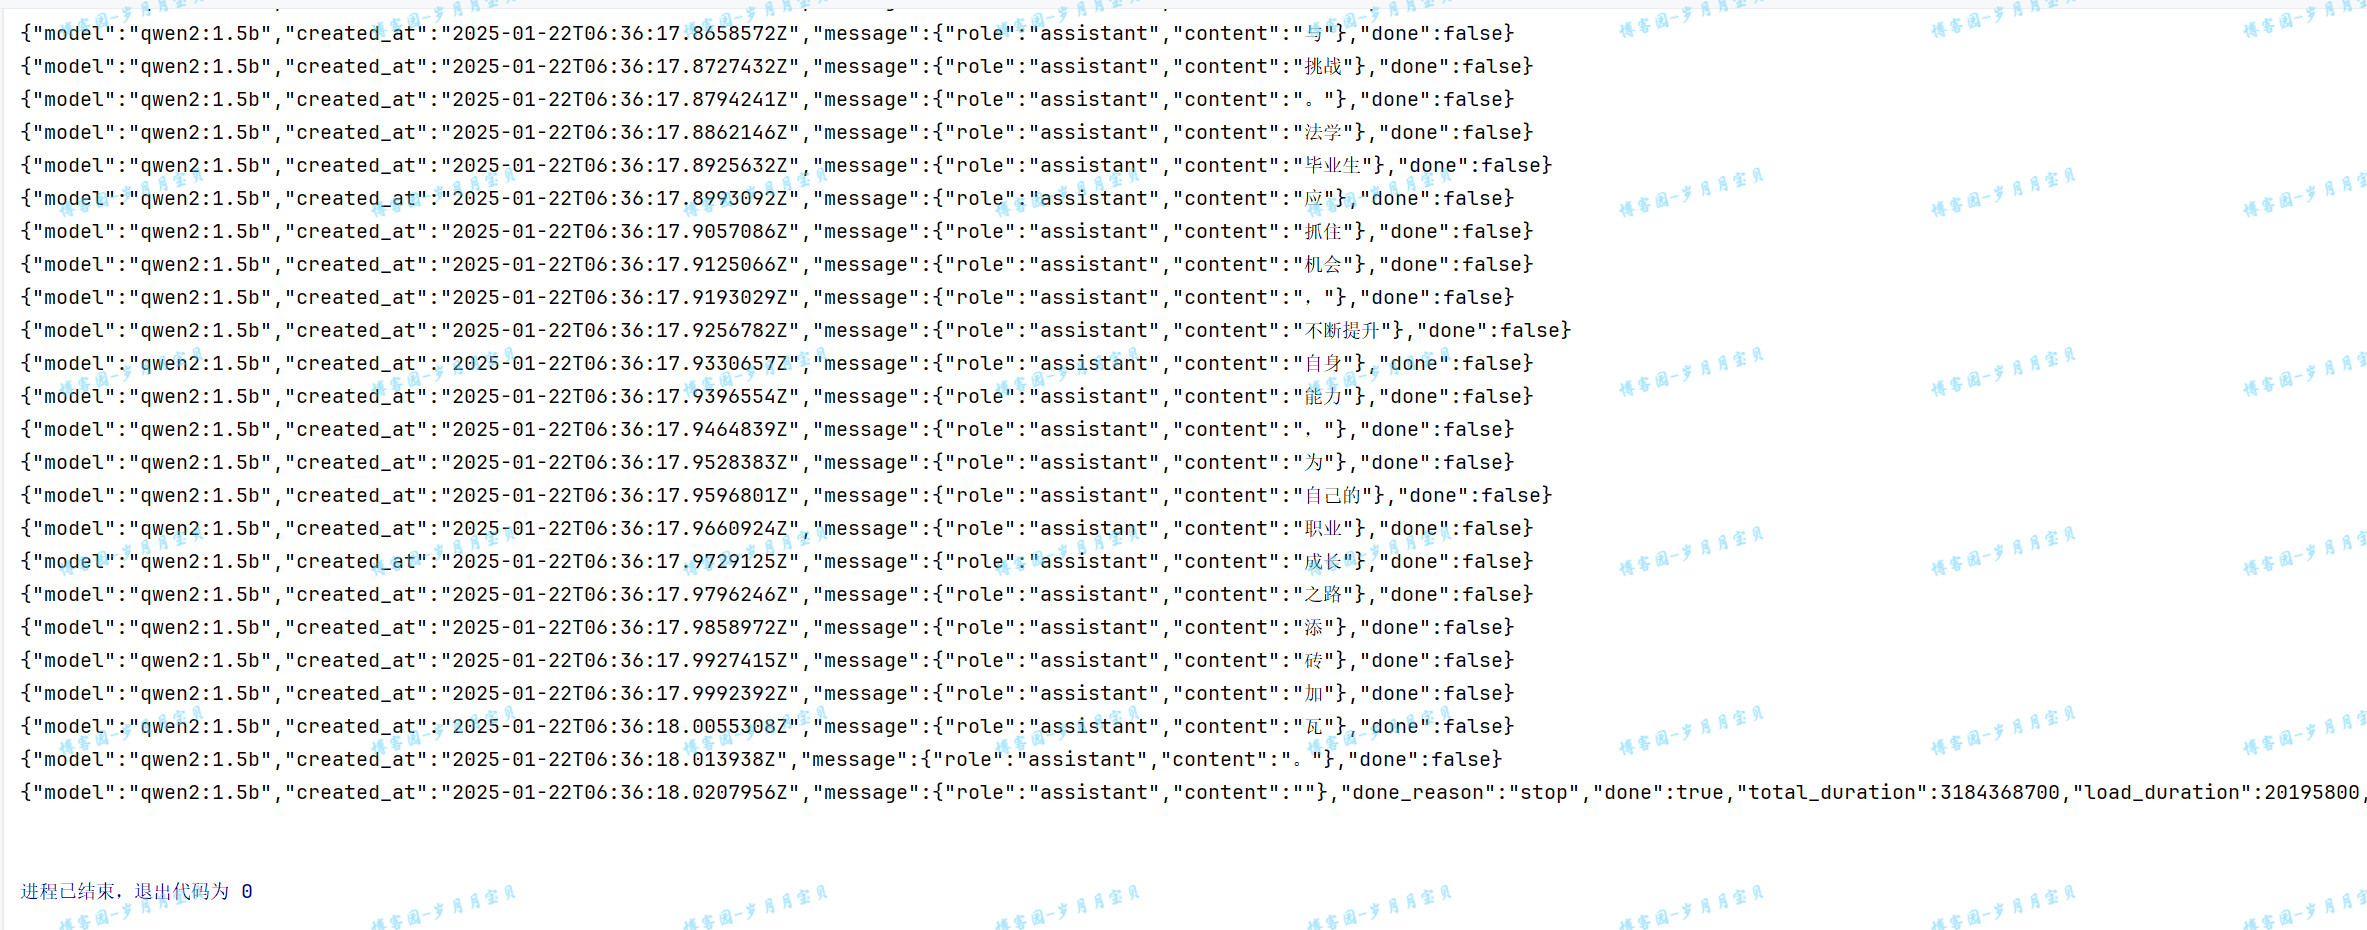
(olama宝宝妈妈终于把你生下来了😭😭😭——对了,大家别忘了改下前面的config2文件,改成你自己的!)
如果想要流式输出,怎么办呢?
# 我们先用requets库来测试一下大模型
import json
import requests

BASE_URL = "http://192.168.202.144:11434/api/chat"#😘“http://192.168.202.144:11434”需要替换
payload = {
  "model": "qwen2:1.5b",
  "messages": [
    {
      "role": "user",
      "content": "请写一篇1000字左右的文章,论述法学专业的就业前景。"
    }
  ],
  "stream": True
}
response = requests.post(BASE_URL, json=payload, stream=True)  # 在这里设置stream=True告诉requests不要立即下载响应内容
# 检查响应状态码
if response.status_code == 200:
    # 使用iter_content()迭代响应体
    for chunk in response.iter_content(chunk_size=1024):  # 你可以设置chunk_size为你想要的大小
        if chunk:
            # 在这里处理chunk(例如,打印、写入文件等)
            rtn = json.loads(chunk.decode('utf-8')) # 假设响应是文本,并且使用UTF-8编码
            print(rtn["message"]["content"], end="")
else:
    print(f"Error: {response.status_code}")

# 不要忘记关闭响应
response.close()
❤注意以上是Windows电脑的安装方法。苹果电脑按照上述安装好后,可以在终端进行聊天,但是用requests调用的时候,会报错找不到模型。这个问题暂时没有解决方案。
💐下面大家来看我的结果!!!

(无限感动与开心😂,mummy再也不用担心我花钱买大模型或者和别人蹭一个大模型啦!)
metaGPT快速尝鲜
智能体
在MetaGPT看来,可以将智能体想象成环境中的数字人,其中
智能体 = 大语言模型(LLM) + 观察 + 思考 + 行动 + 记忆
这个公式概括了智能体的功能本质。为了理解每个组成部分,让我们将其与人类进行类比:
- 大语言模型(LLM):LLM作为智能体的“大脑”部分,使其能够处理信息,从交互中学习,做出决策并执行行动。
- 观察:这是智能体的感知机制,使其能够感知其环境。智能体可能会接收来自另一个智能体的文本消息、来自监视摄像头的视觉数据或来自客户服务录音的音频等一系列信号。这些观察构成了所有后续行动的基础。
- 思考:思考过程涉及分析观察结果和记忆内容并考虑可能的行动。这是智能体内部的决策过程,其可能由LLM进行驱动。
- 行动:这些是智能体对其思考和观察的显式响应。行动可以是利用 LLM 生成代码,或是手动预定义的操作,如阅读本地文件。此外,智能体还可以执行使用工具的操作,包括在互联网上搜索天气,使用计算器进行数学计算等。
- 记忆:智能体的记忆存储过去的经验。这对学习至关重要,因为它允许智能体参考先前的结果并据此调整未来的行动。
多智能体
多智能体系统可以视为一个智能体社会,其中
多智能体 = 智能体 + 环境 + 标准流程(SOP) + 通信 + 经济
这些组件各自发挥着重要的作用:
-
智能体:在上面单独定义的基础上,在多智能体系统中的智能体协同工作,每个智能体都具备独特的LLM、观察、思考、行动和记忆。
-
环境:环境是智能体生存和互动的公共场所。智能体从环境中观察到重要信息,并发布行动的输出结果以供其他智能体使用。
-
标准流程(SOP):这些是管理智能体行动和交互的既定程序,确保系统内部的有序和高效运作。例如,在汽车制造的SOP中,一个智能体焊接汽车零件,而另一个安装电缆,保持装配线的有序运作。
-
通信:通信是智能体之间信息交流的过程。它对于系统内的协作、谈判和竞争至关重要。
-
经济:这指的是多智能体环境中的价值交换系统,决定资源分配和任务优先级。
任务
在执行每个任务时,至少需要明确两点:目标和期望。这两者都可以用自然语言来描述。
- 目标:指的是你希望通过完成这个任务所要达到的具体结果。例如,如果你的任务是编写一个程序,那么目标可能是“创建一个可以处理用户输入并返回结果的脚本”。
- 期望:这涉及到你希望任务完成后达到的效果,比如提高效率、减少错误率或者改善用户体验。
其他需要明确的要素包括:
- 上下文:指的是任务执行的环境和背景信息,比如任务是在一个特定的项目中进行,还是独立完成的。
- 回调:这可以是一个Python函数,用于在任务执行到某个阶段时触发特定的操作。例如,你可以设置一个回调函数来在数据处理完成后自动保存结果。
- 输出:指的是任务完成后产生的结果。这可以是文件、数据或者任何形式的信息。
- 使用的工具:这可以是一个Python列表,列出了完成任务所需的所有工具或库。
为了确保输出的一致性和准确性,你可以使用pydantic来约束输出的格式。pydantic是一个Python库,它允许你定义数据模型,并确保数据符合预期的结构。这样,即使是来自大型语言模型的模糊输出,也可以被强制转换为结构化输出。
准备工作
根据集成开源LLM | MetaGPT官方文档,MetaGPT集成开源LLM时在ollama方面主要支持Llama2及其衍生系列(具体可看模型列表,最全的还得看https://ollama.com/library),所以运行“ollama run llama2”,下载llama2模型(支持小表情好可爱!)

然后,在.py文件所在目录新建文件夹,建立文件
ollama api接口
如通过ollama部署的模型服务
config/config2.yaml
llm:
  api_type: ollama
  base_url: 'http://127.0.0.1:11434/api'
  model: 'llama2'
ollama chat接口的完整路由http://127.0.0.1:11434/api/chat ,base_url 只需要配置到http://127.0.0.1:11434/api ,剩余部分由OllamaLLM 补齐。model 为请求接口参数model 的实际值。
💐默认情况下启动的ollama服务只能本地访问,即http://localhost:11434/api/chat 或 http://127.0.0.1:11434/api/chat ,如果想要支持 http://ip:11434/api/chat ,可以按上节我讲过的配置❤
通过搜索metagpt==0.8.0支持的本地ollama模型,我对比了Orca-mini 3B(a Llama and Llama 2 model trained on Orca Style datasets,模型名"orca-mini")、 qwen2:1.5b和llama2、vicuna(7b),目前llama2生成代码过程最为完善,所以保留了llama2(它的参数量是7b,可能因此效果好;但是上下文有限制较多是唯一的缺点)。

大家不同模型的yaml应该怎么调用(尤其是模型名称的拼写,都可以上library输入模型名称搜索!)
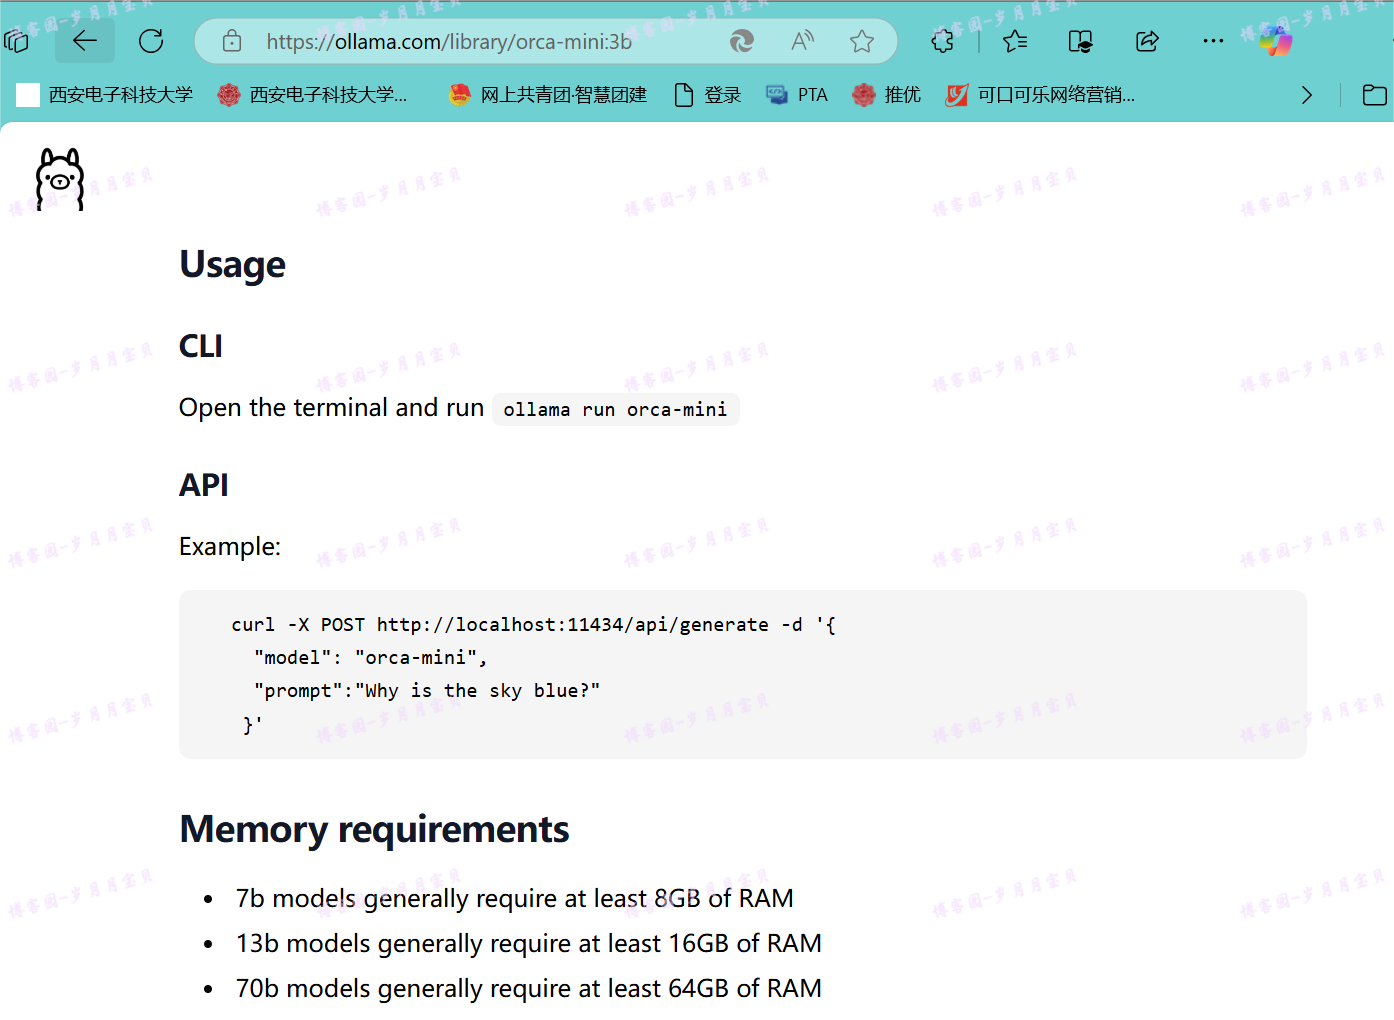
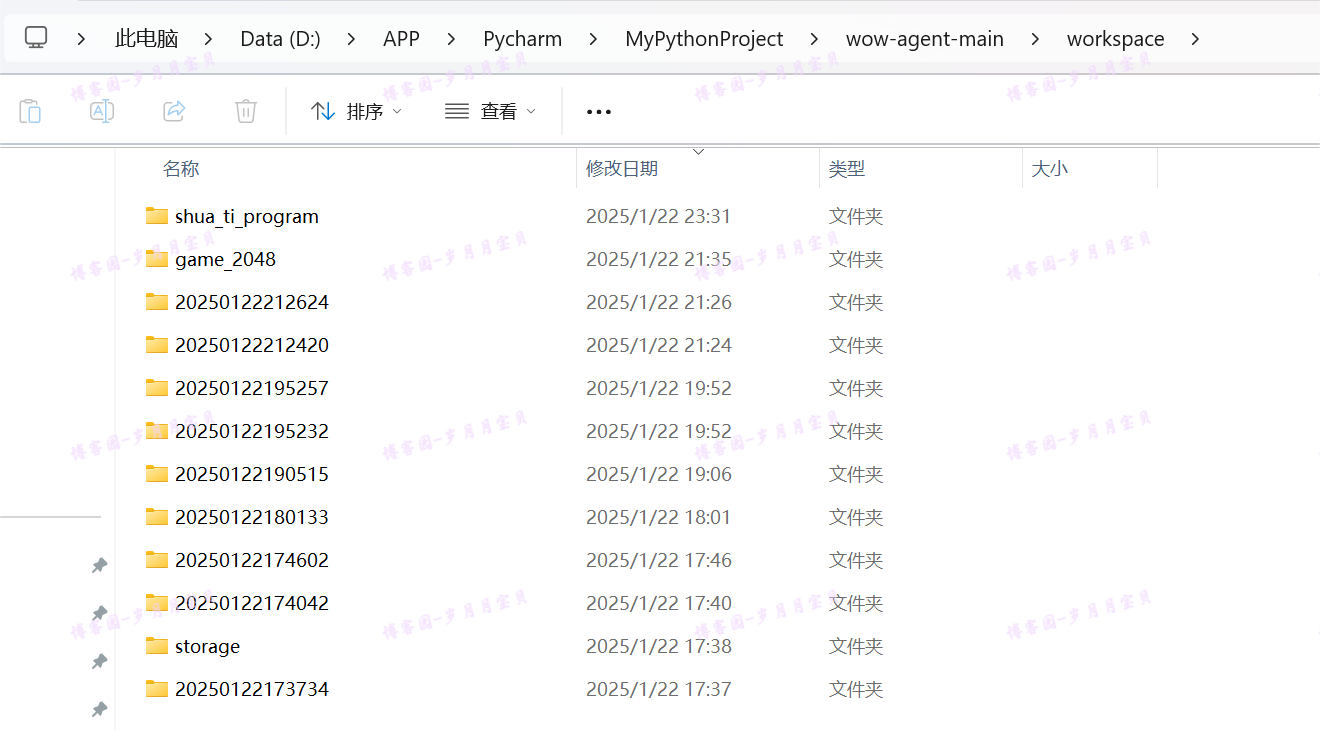
PS:最终经过多次尝试,因为本地ollama模型输出上下文长度限制(很难生成一个空文件夹占比很少的项目!并且迭代15轮大概率都不能生成一个完整项目),选回了智谱
(下图为筛掉了空文件夹的人类早期探索生成项目珍贵史料😭,为了最佳效果还是不得不烧钱)
可选的,修复LLM输出结果
MetaGPT的prompt对输出有较强的结构要求,开源模型输出时,往往很难按指令跟随完整输出,导致输出的内容会存在缺失遗漏、错误的情况,主要表现为:
- 目标key不能按prompt约定的大小写进行输出
- 输出的json纯文本存在缺失或多出特殊字符。如,
{"a":b"}},{"a":b"]},{"a":b"等等。
针对上述情况,我们增加了修复开源LLM输出的功能,具体的
config/config2.yaml
llm: ...

repair_llm_output: true
开启该功能后,执行过程中将尝试去修复上述情况。
so,如果你选择ollama本地模型,最终版config2大概长这样:
llm:
  api_type: 'ollama'
  base_url: 'http://127.0.0.1:11434/api'
  model: 'llama2'

repair_llm_output: true
工具
(这个.py文件与config共享一个目录)听从群友建议,我也加上了负责根据反馈改代码的的QaEngineer()~
#from metagpt.config2 import Config
import asyncio#用于编写异步代码
#从 metagpt.roles 模块中导入了四个类
from metagpt.roles import (
    Architect,
    Engineer,
    ProductManager,
    ProjectManager,
    QaEngineer
)
from metagpt.team import Team#用于创建和管理团队

#一个异步函数 startup,它接受一个字符串参数 idea,可能代表项目的想法或概念
async def startup(idea: str):
    company = Team()#创建了一个 Team 类的实例 company
    company.hire(#调用 company 实例的 hire 方法
        [
            ProductManager(),
            Architect(),
            ProjectManager(),
            Engineer(),
            QaEngineer()
        ]#这些角色被“雇佣”到团队中
    )
    company.invest(investment=3.0)#传入 investment=3.0 参数,可能表示对团队或项目的投资金额
    company.run_project(idea=idea)#传入 idea=idea 参数,启动一个基于传入想法的项目

    #await company.run(n_round=5)#传入 n_round=5 参数,可能表示项目运行的轮数或迭代次数
    try:
        await company.run(n_round=15)#原来是5
    except Exception as e:
        print(f"An error occurred: {e}")


# # 你的项目想法
# my_idea = "开发一个刷题程序"
#
# # 执行 startup 函数并传入项目想法
# asyncio.run(startup(my_idea))

async def main():
    print("启动主程序")
    await startup(idea="开发一个刷题程序")
    print("主程序结束")


if __name__ == "__main__":
    asyncio.run(main())
下面来展示智谱的生成!
1.顶层可需求分析
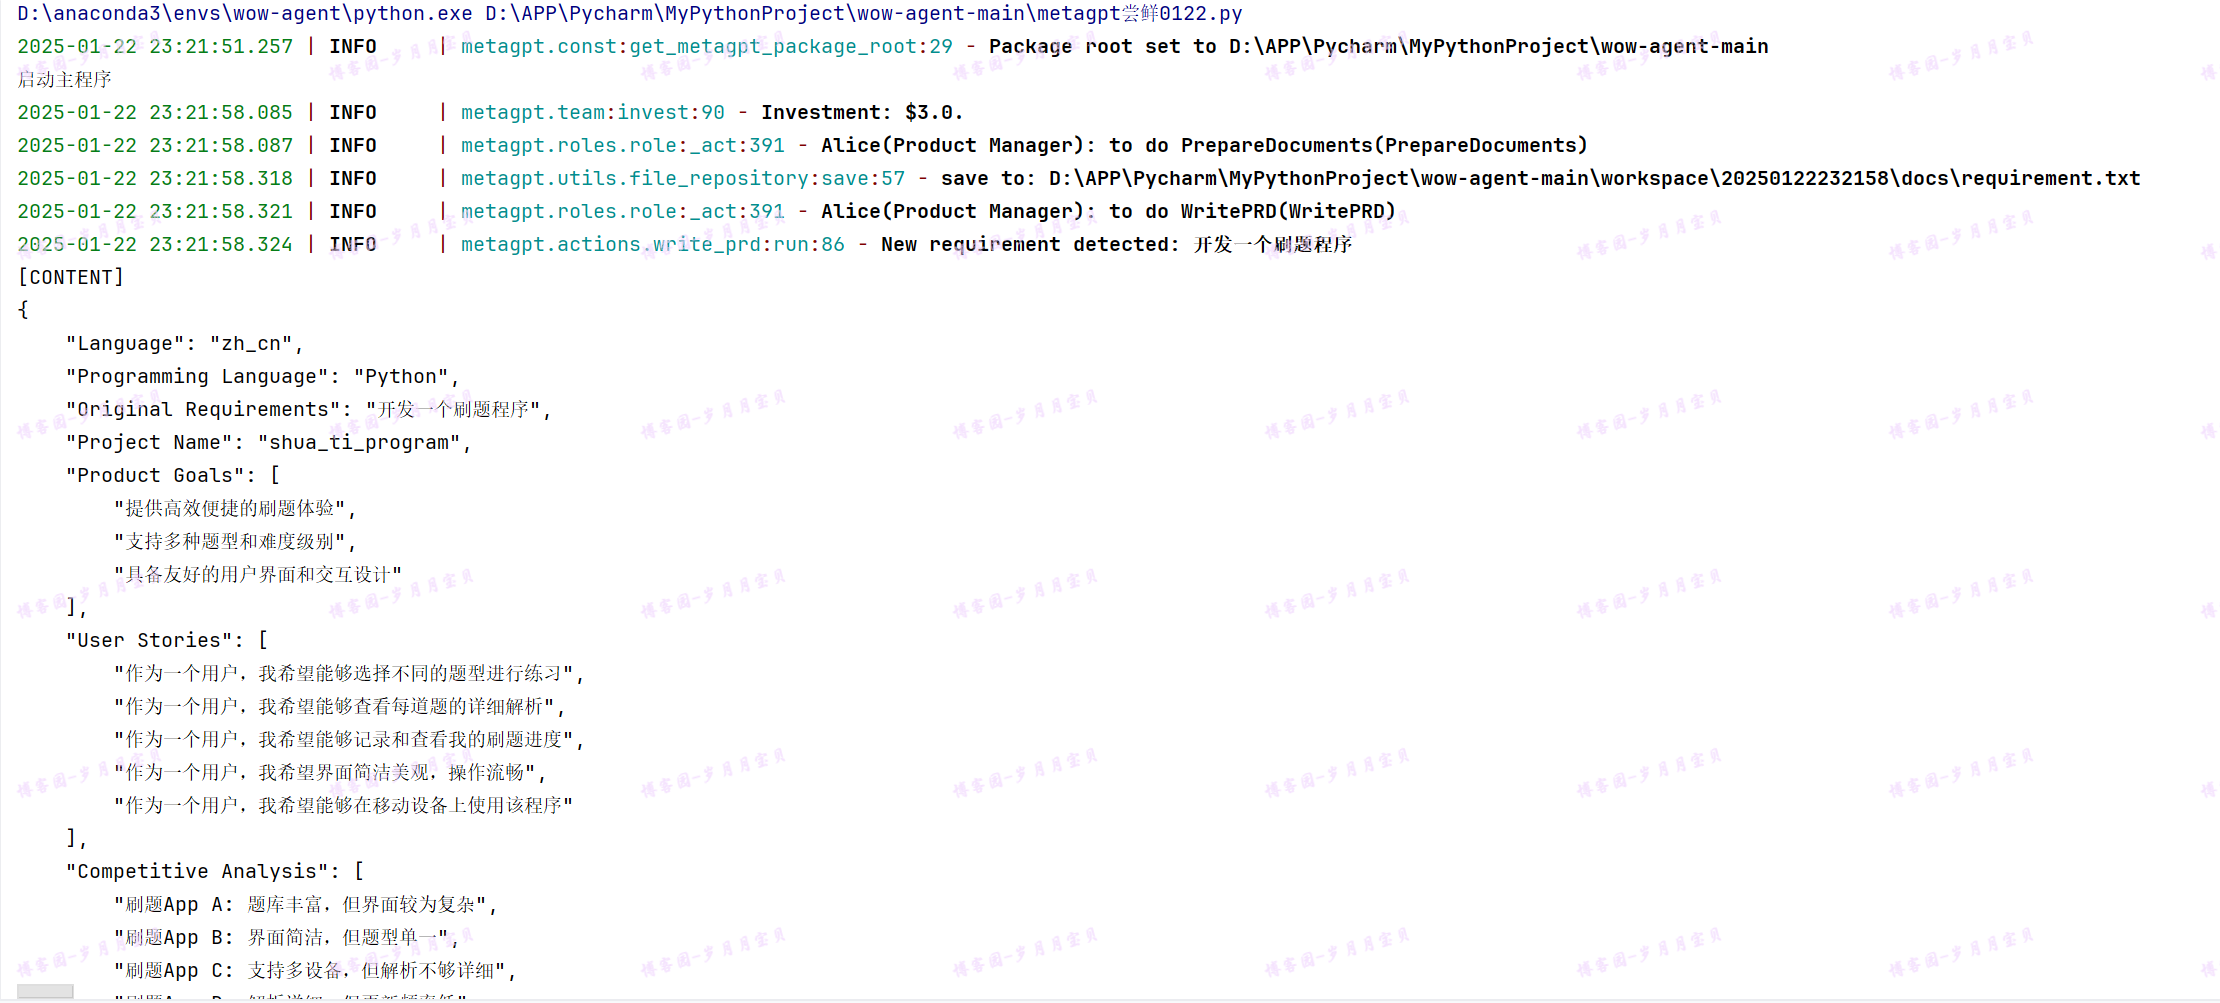
2.底层可代码生成
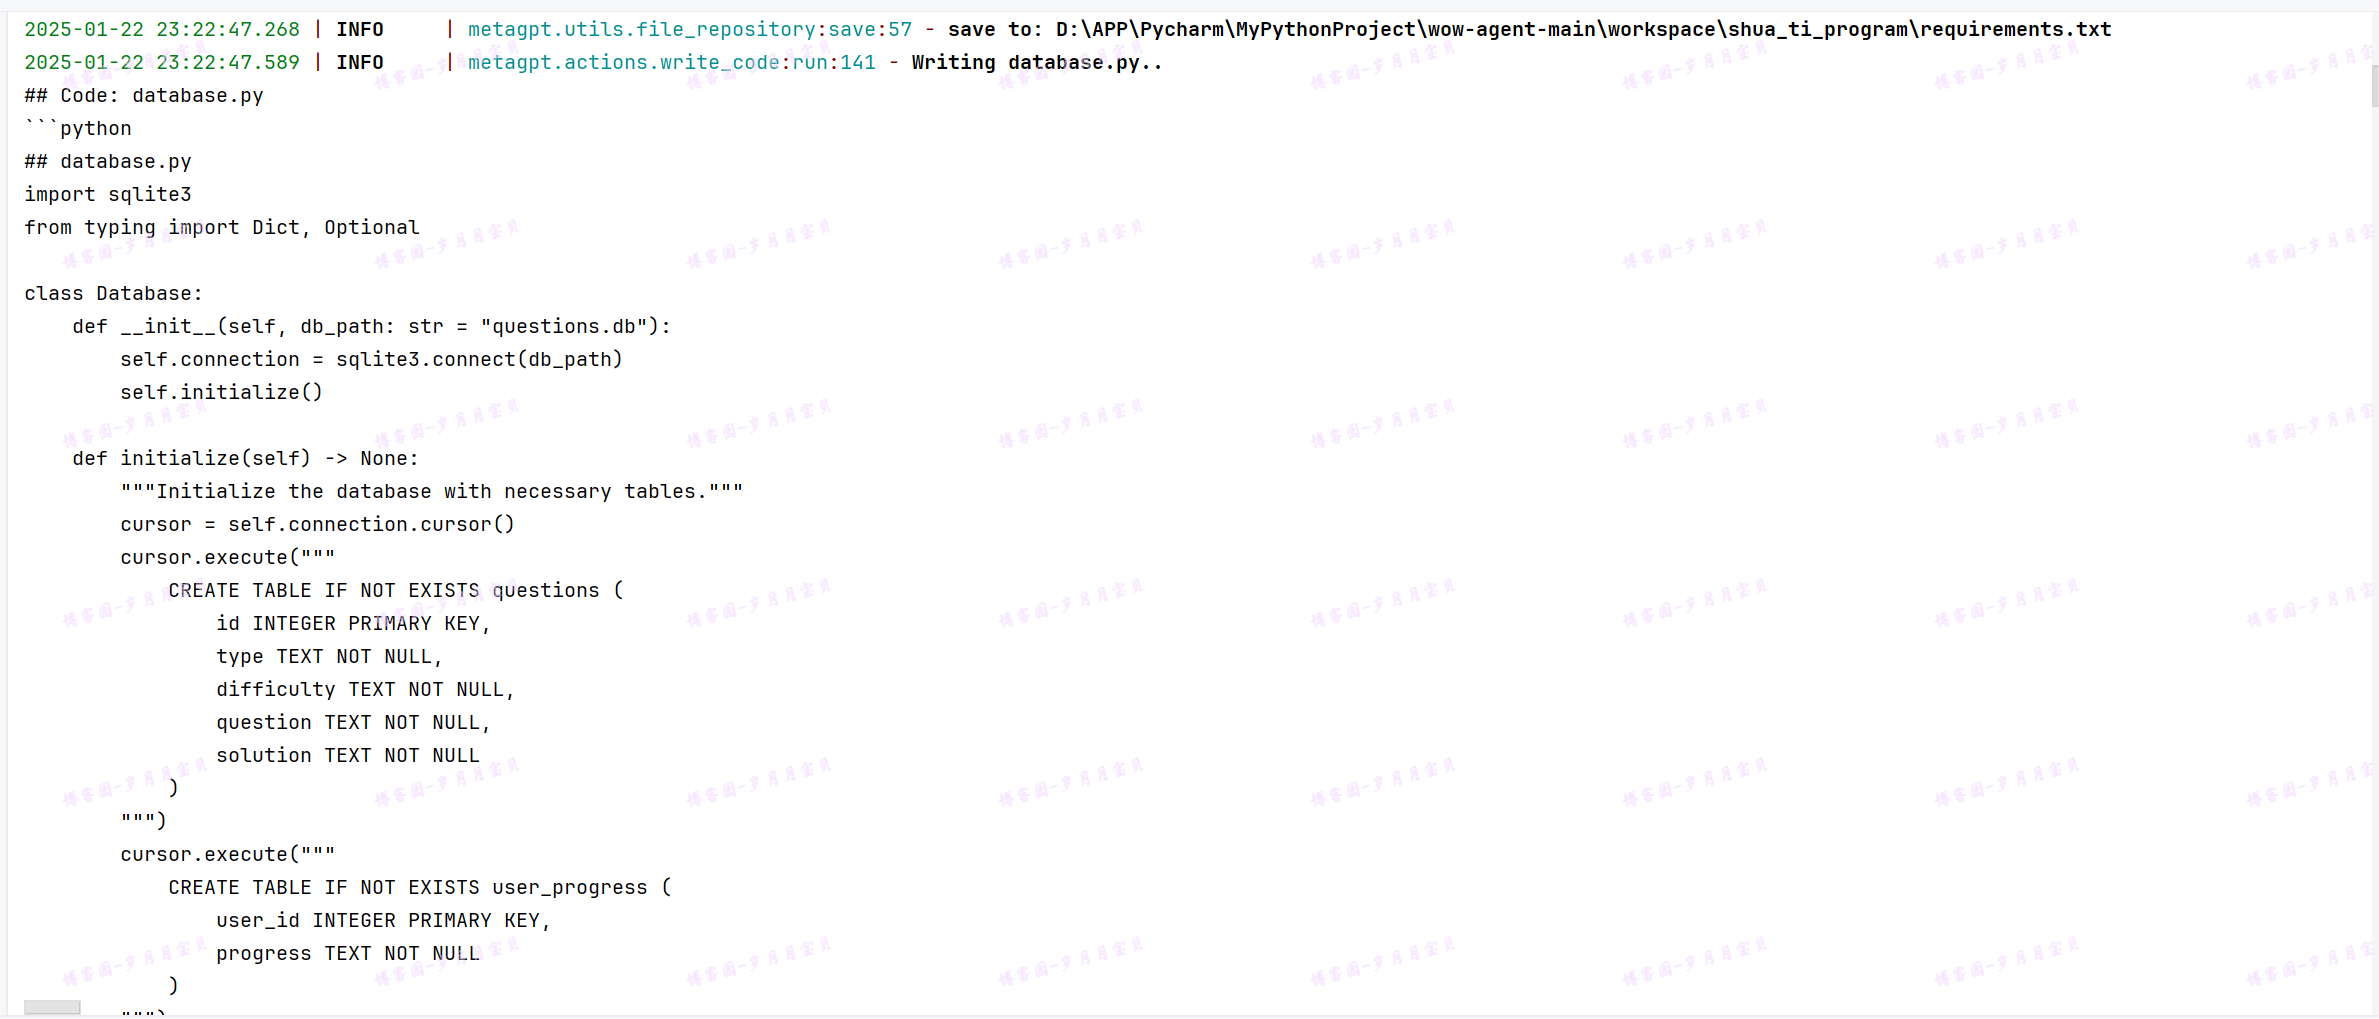
3.思维清晰地目录构建(捎带给文件夹更名)
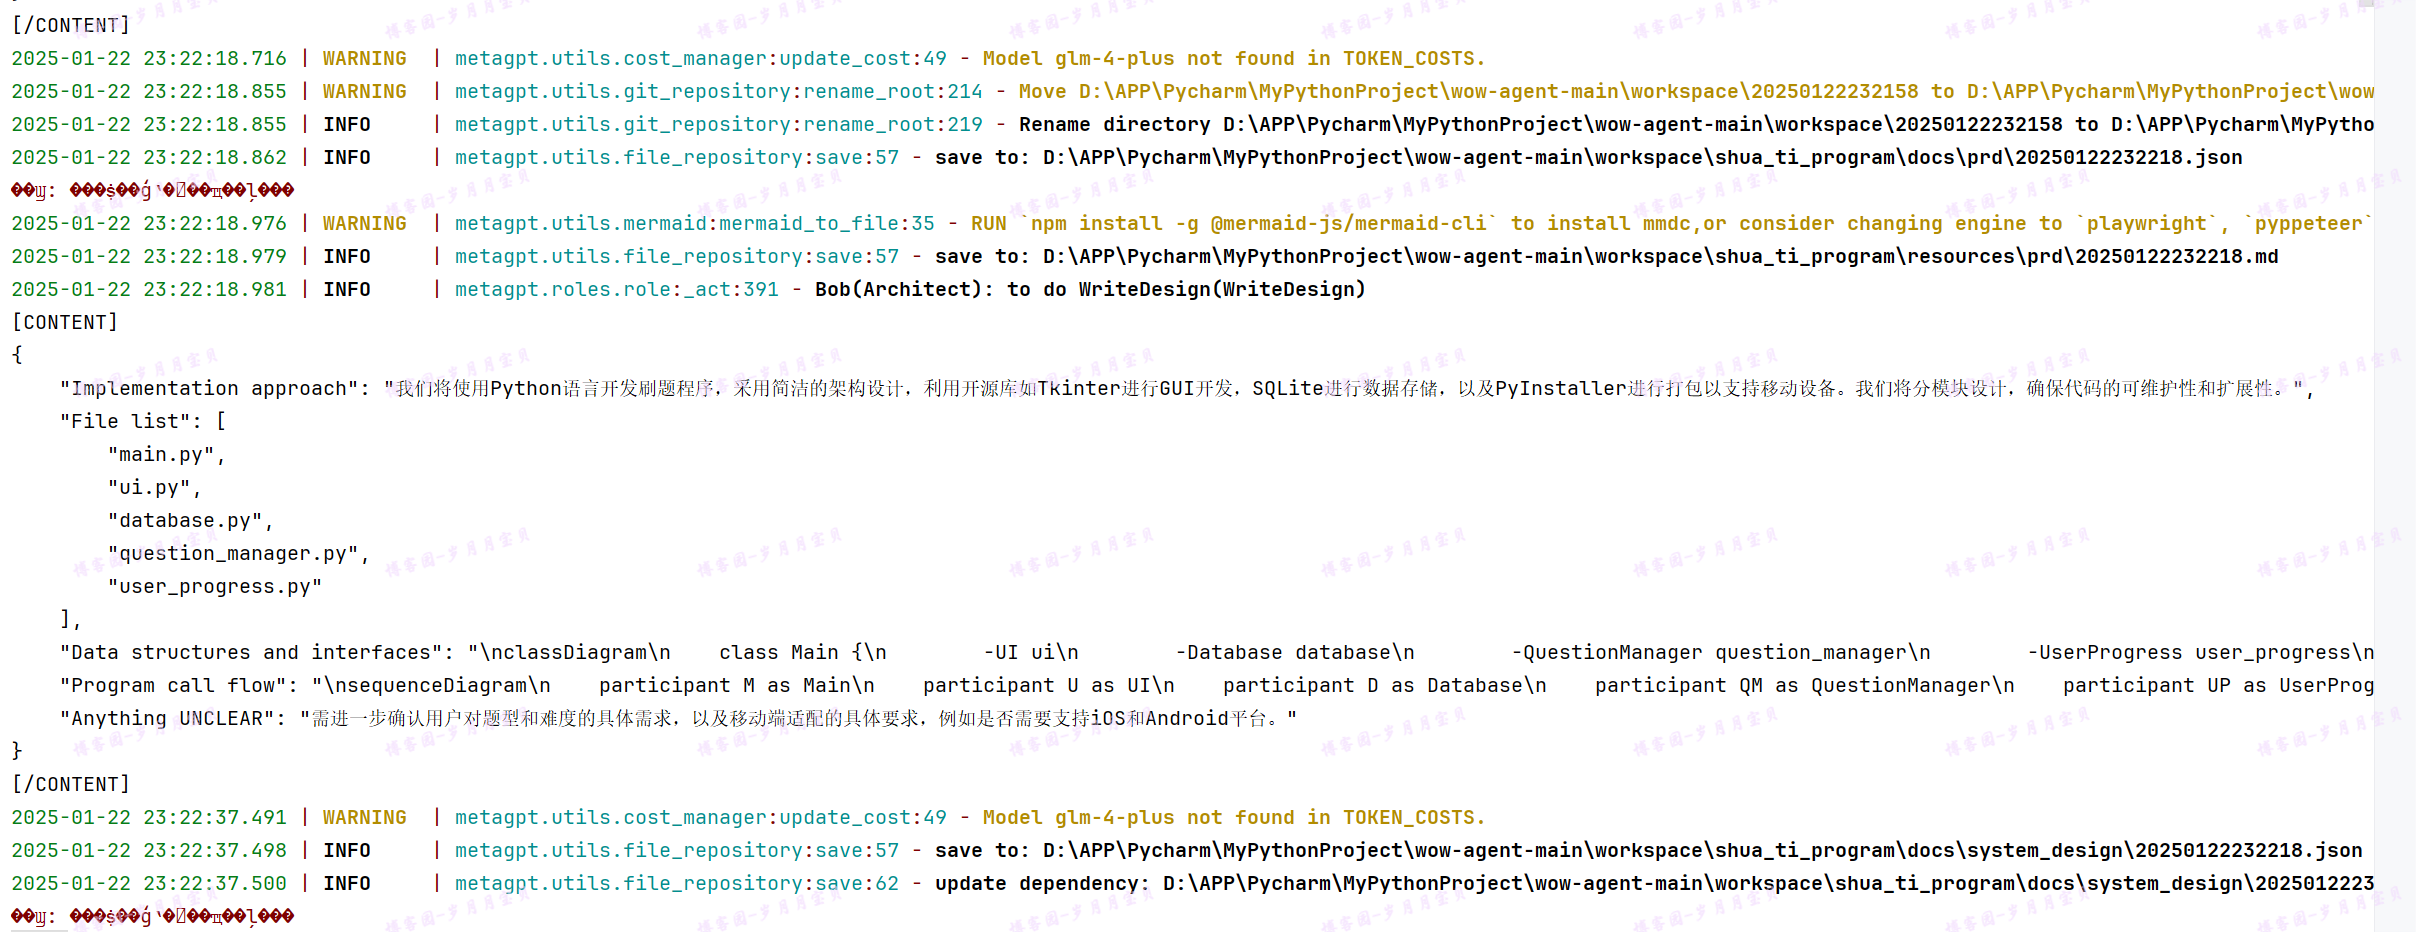
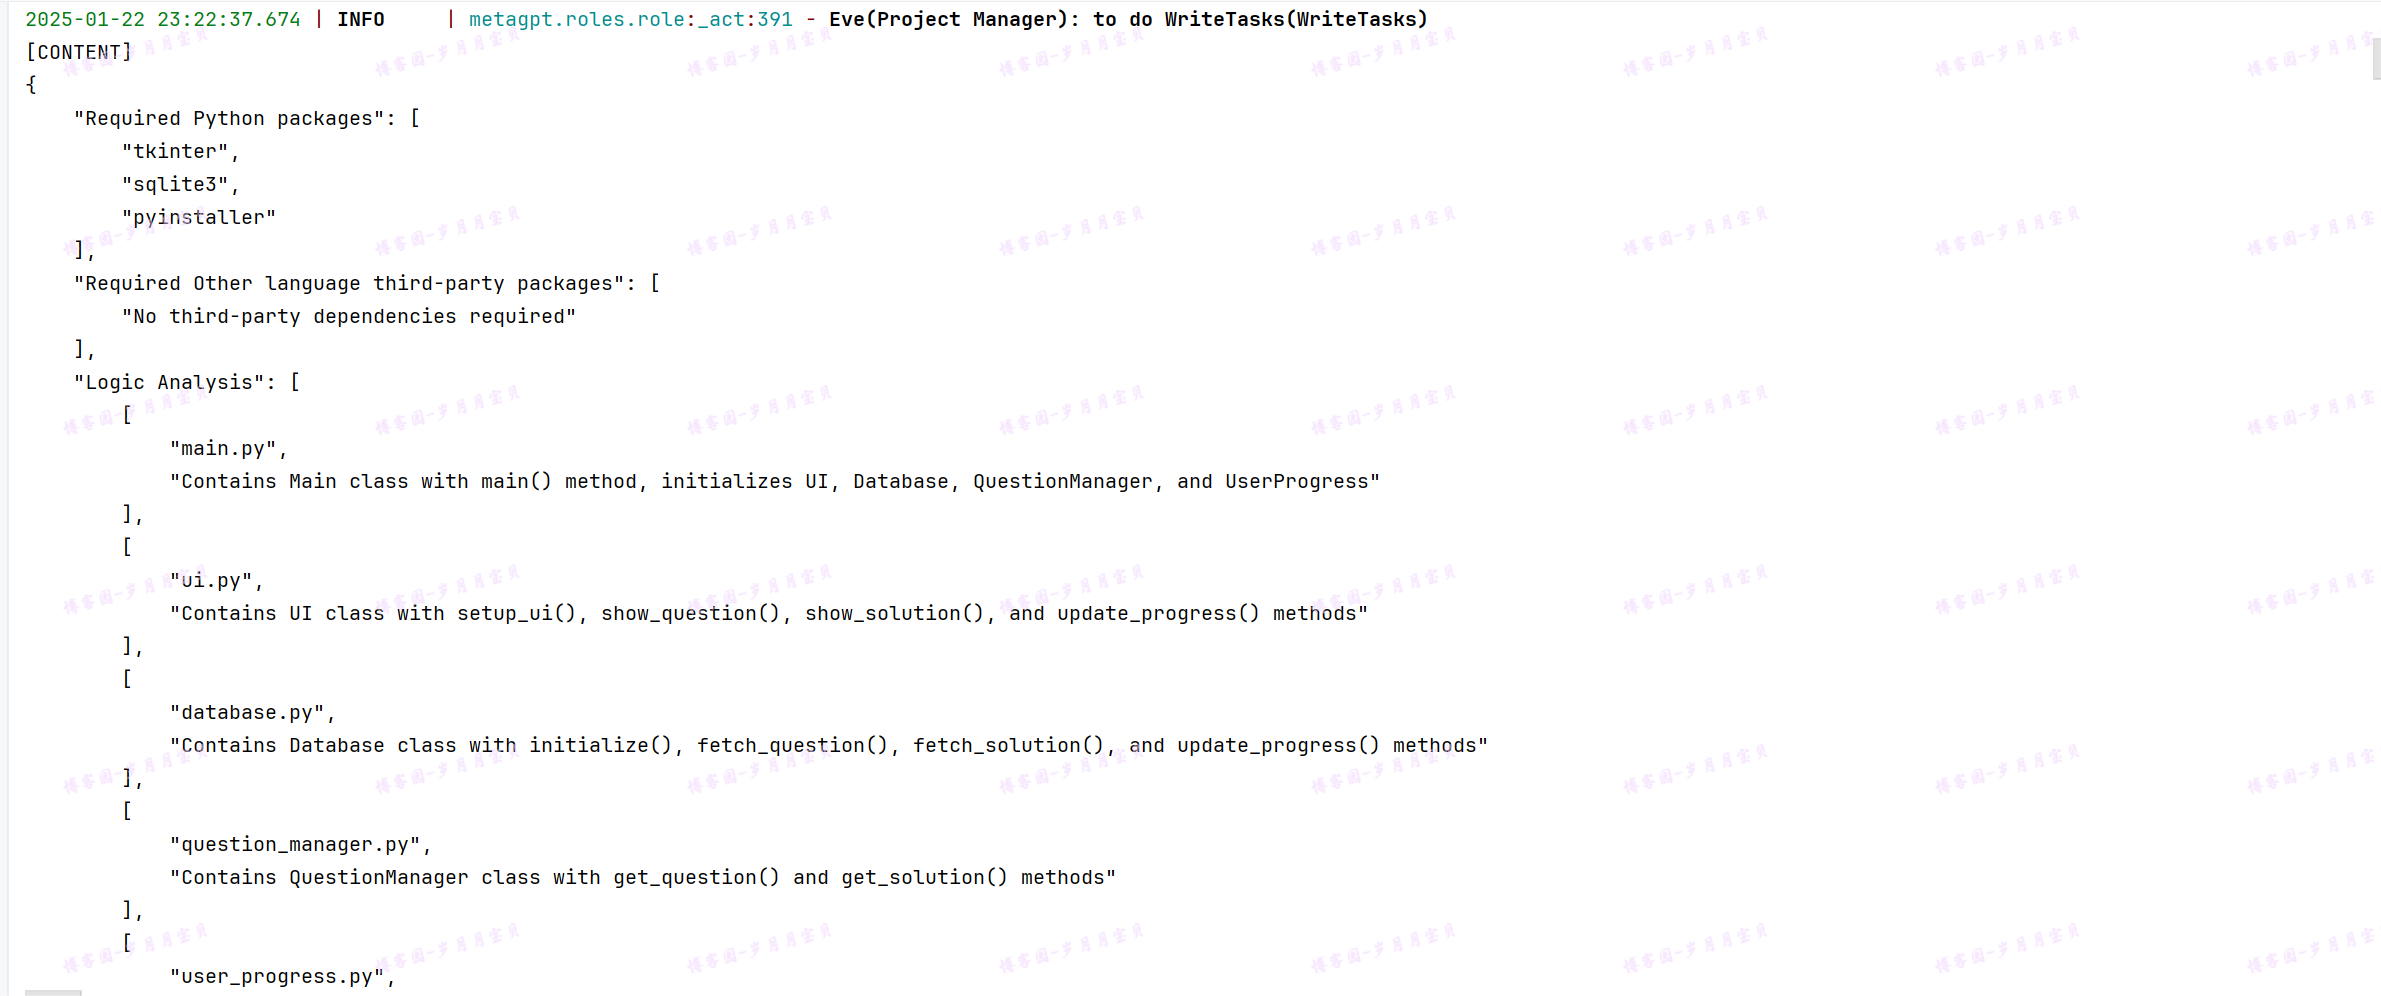
4.会自己整理代码内容作诠释,整理笔记
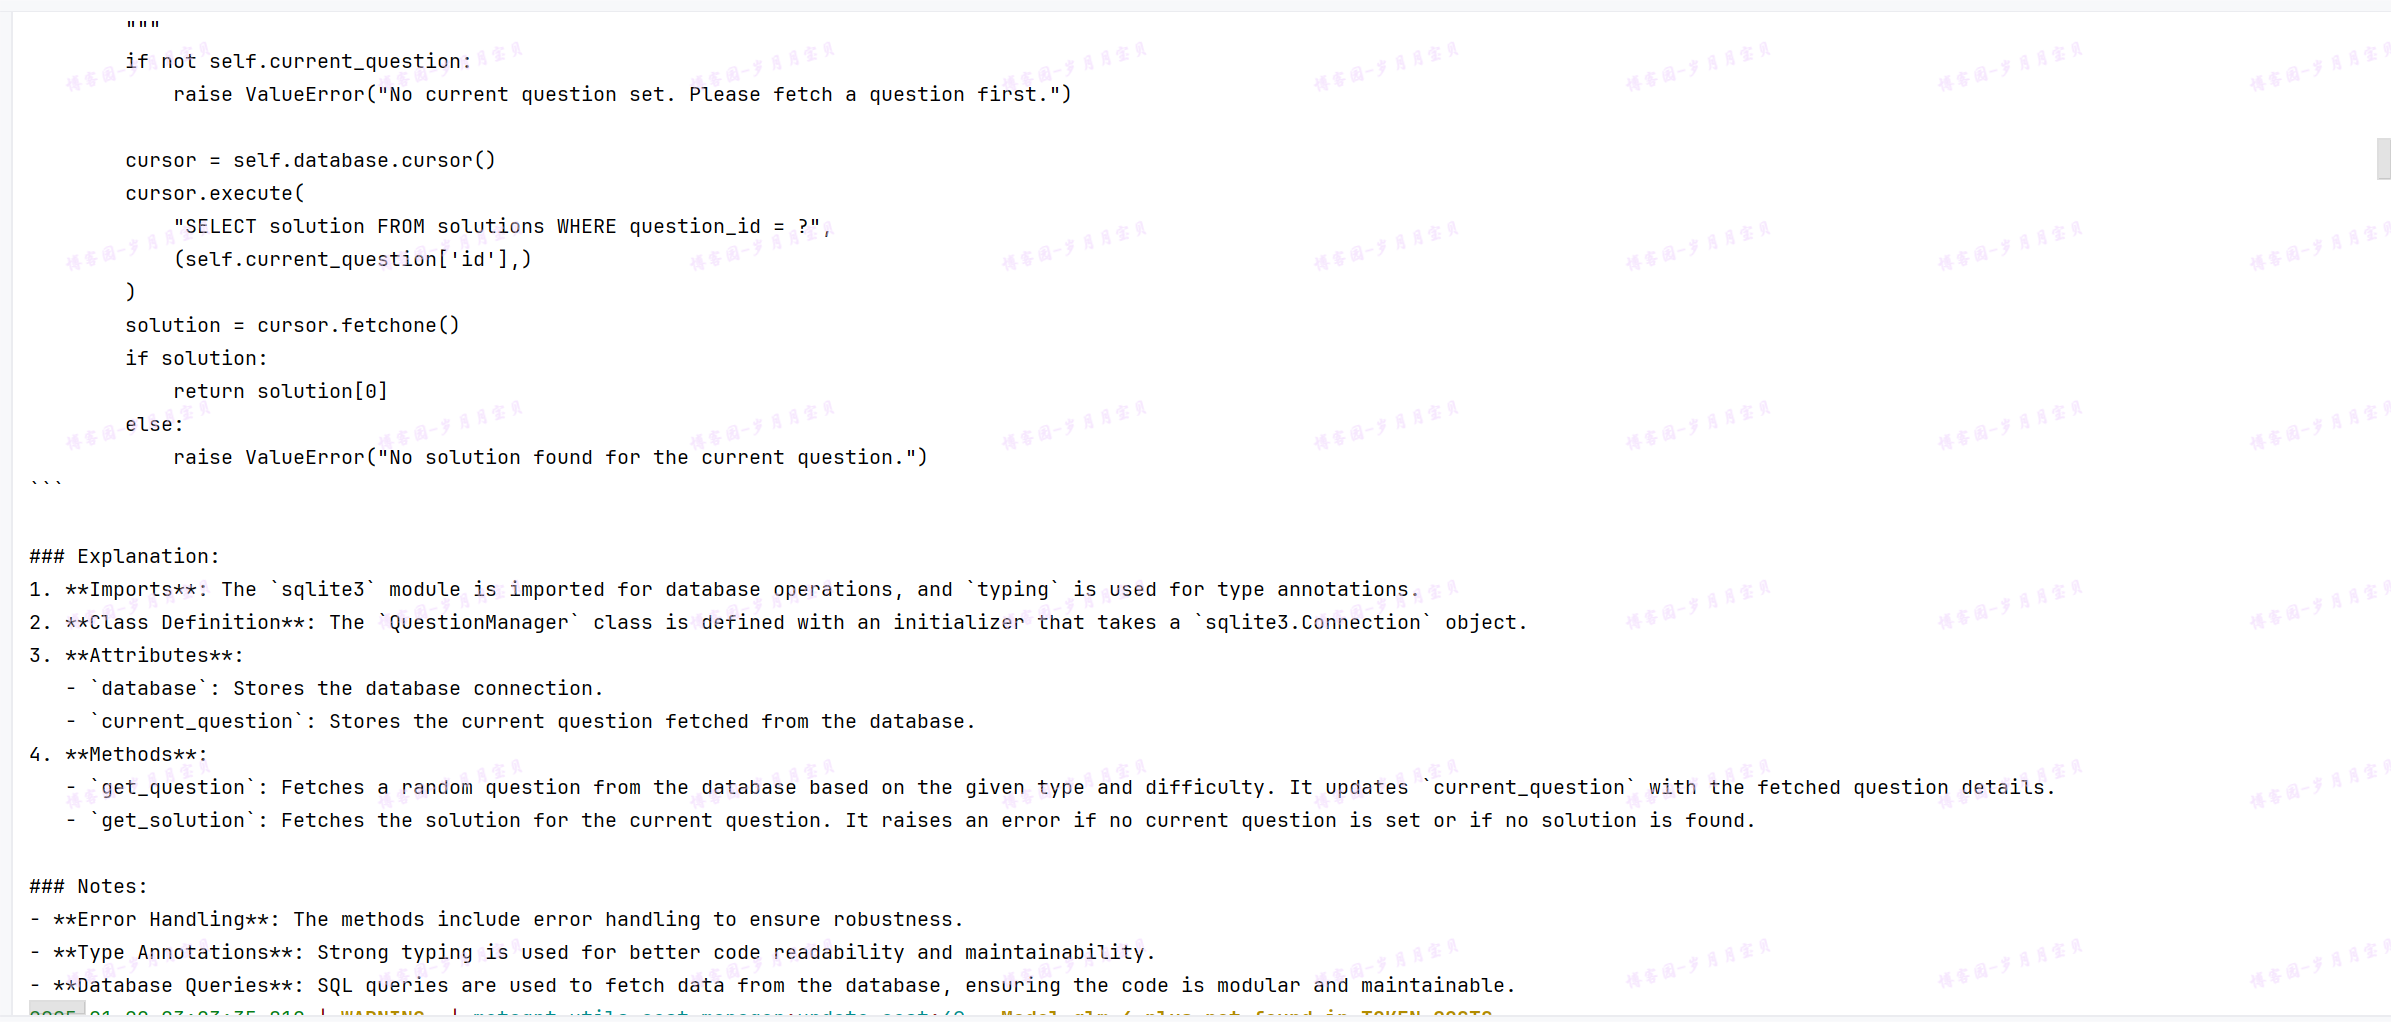
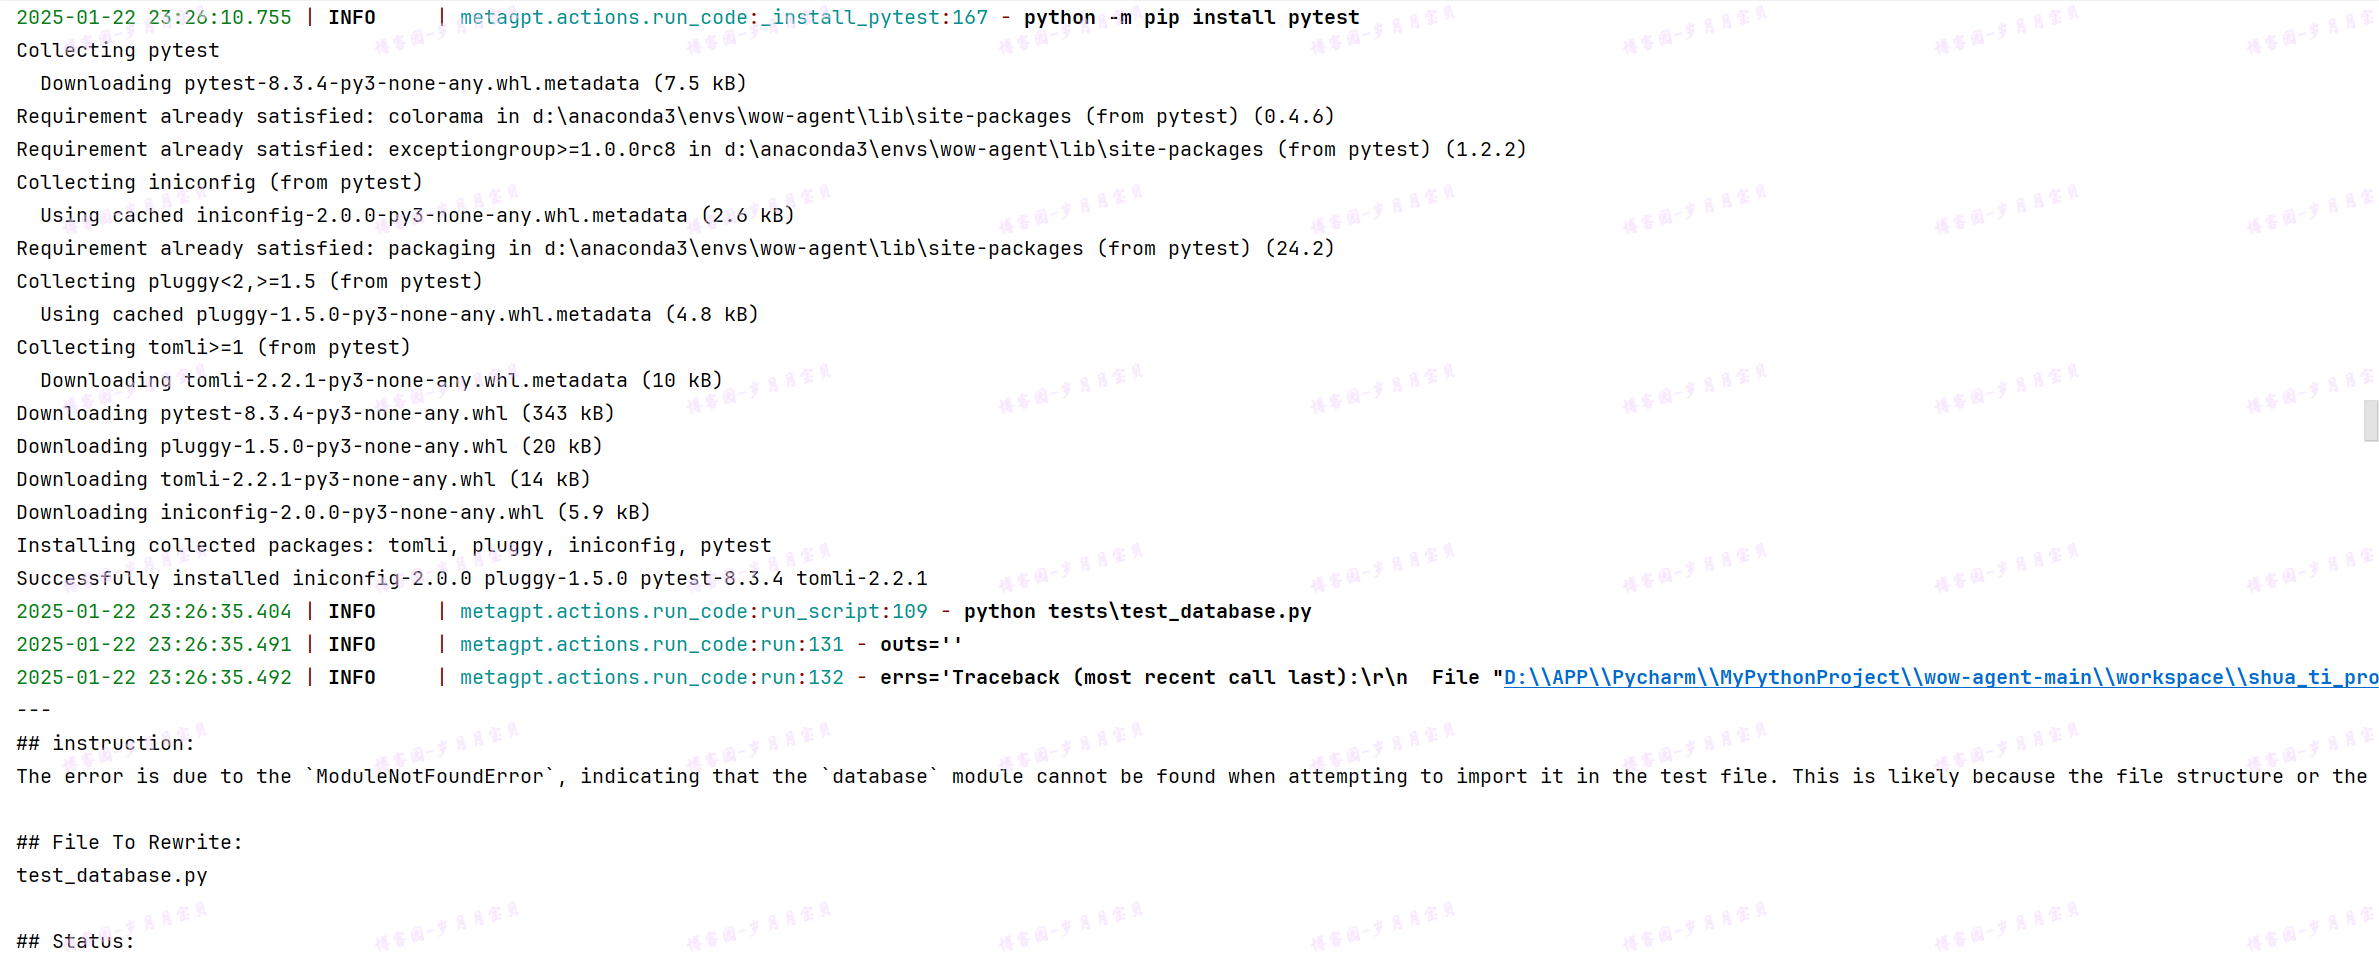
5.缺什么库会自己安装
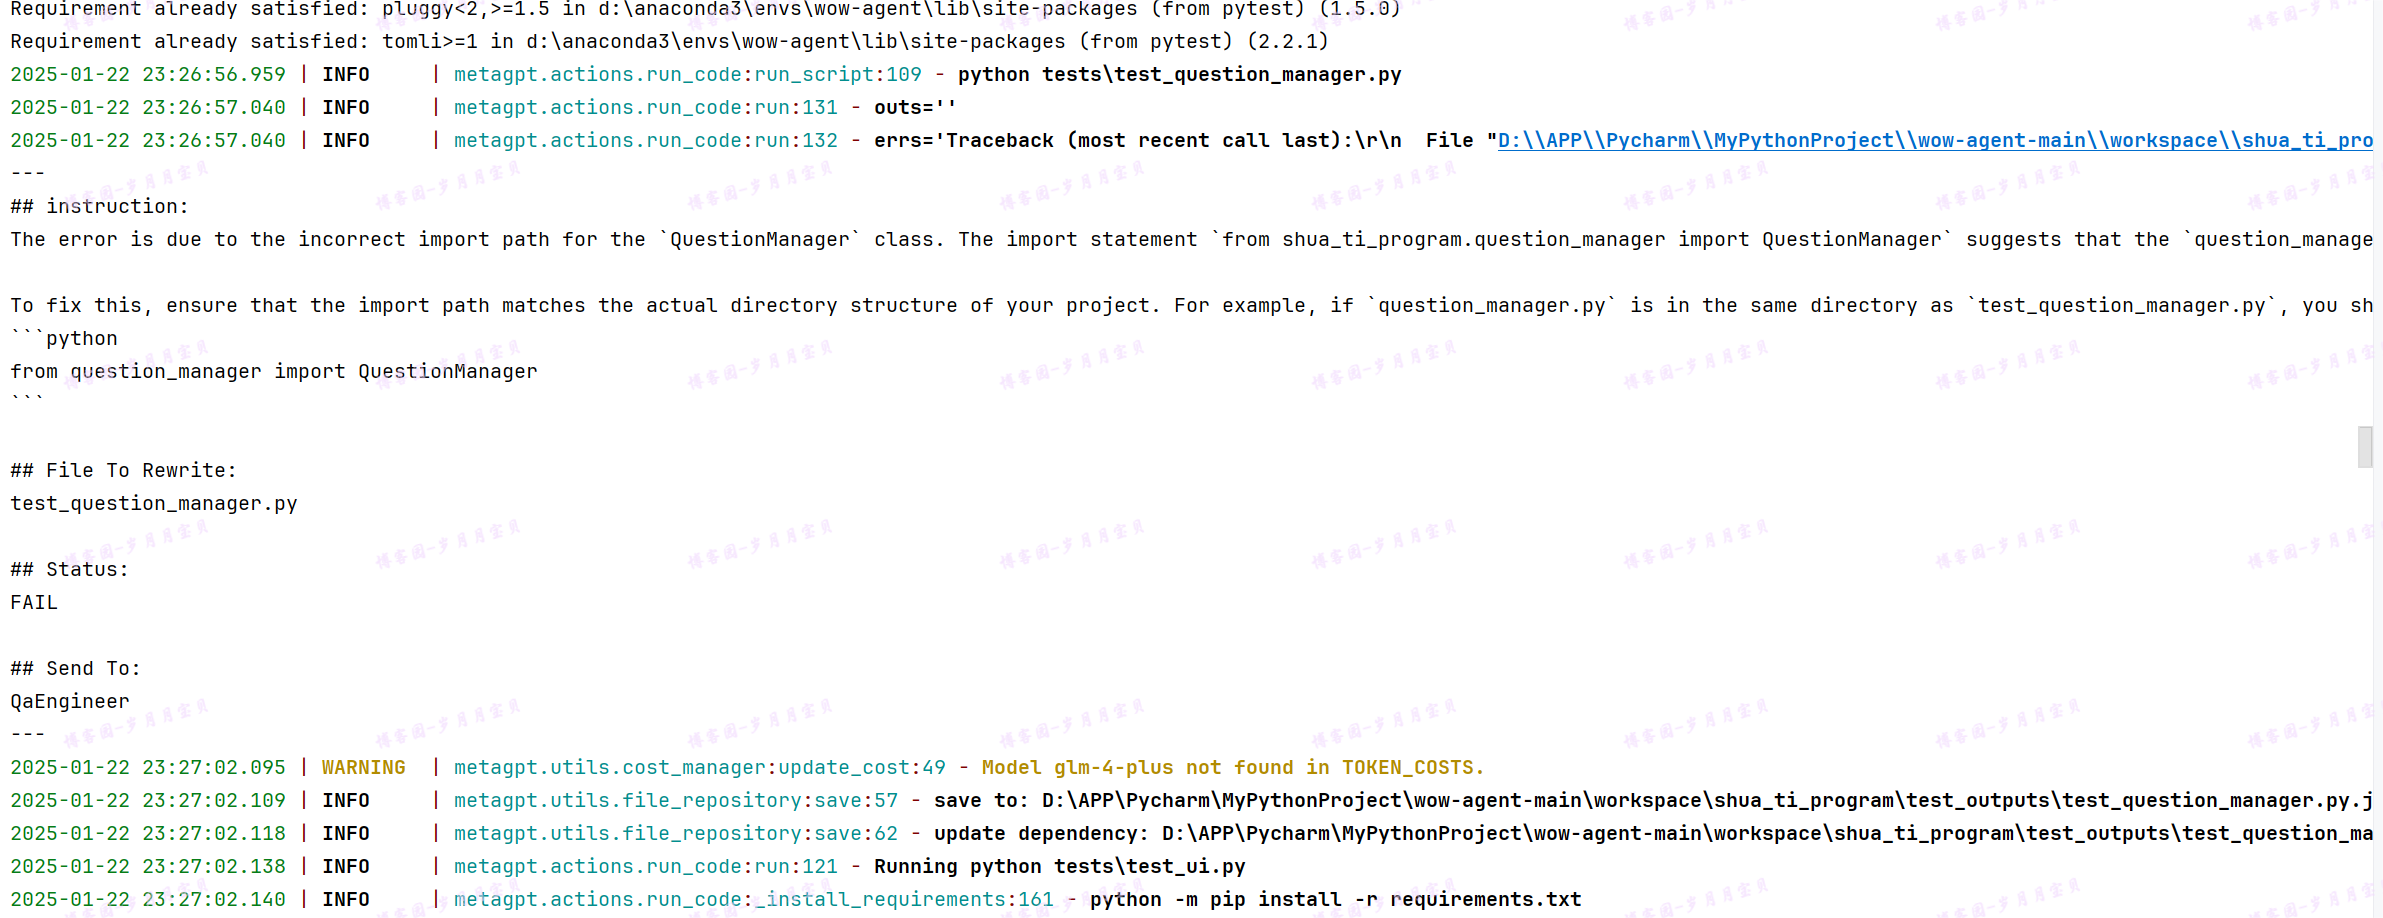
6.遇到错误在团队中讨论处理
7.程序退出提示

8.生成文件展示
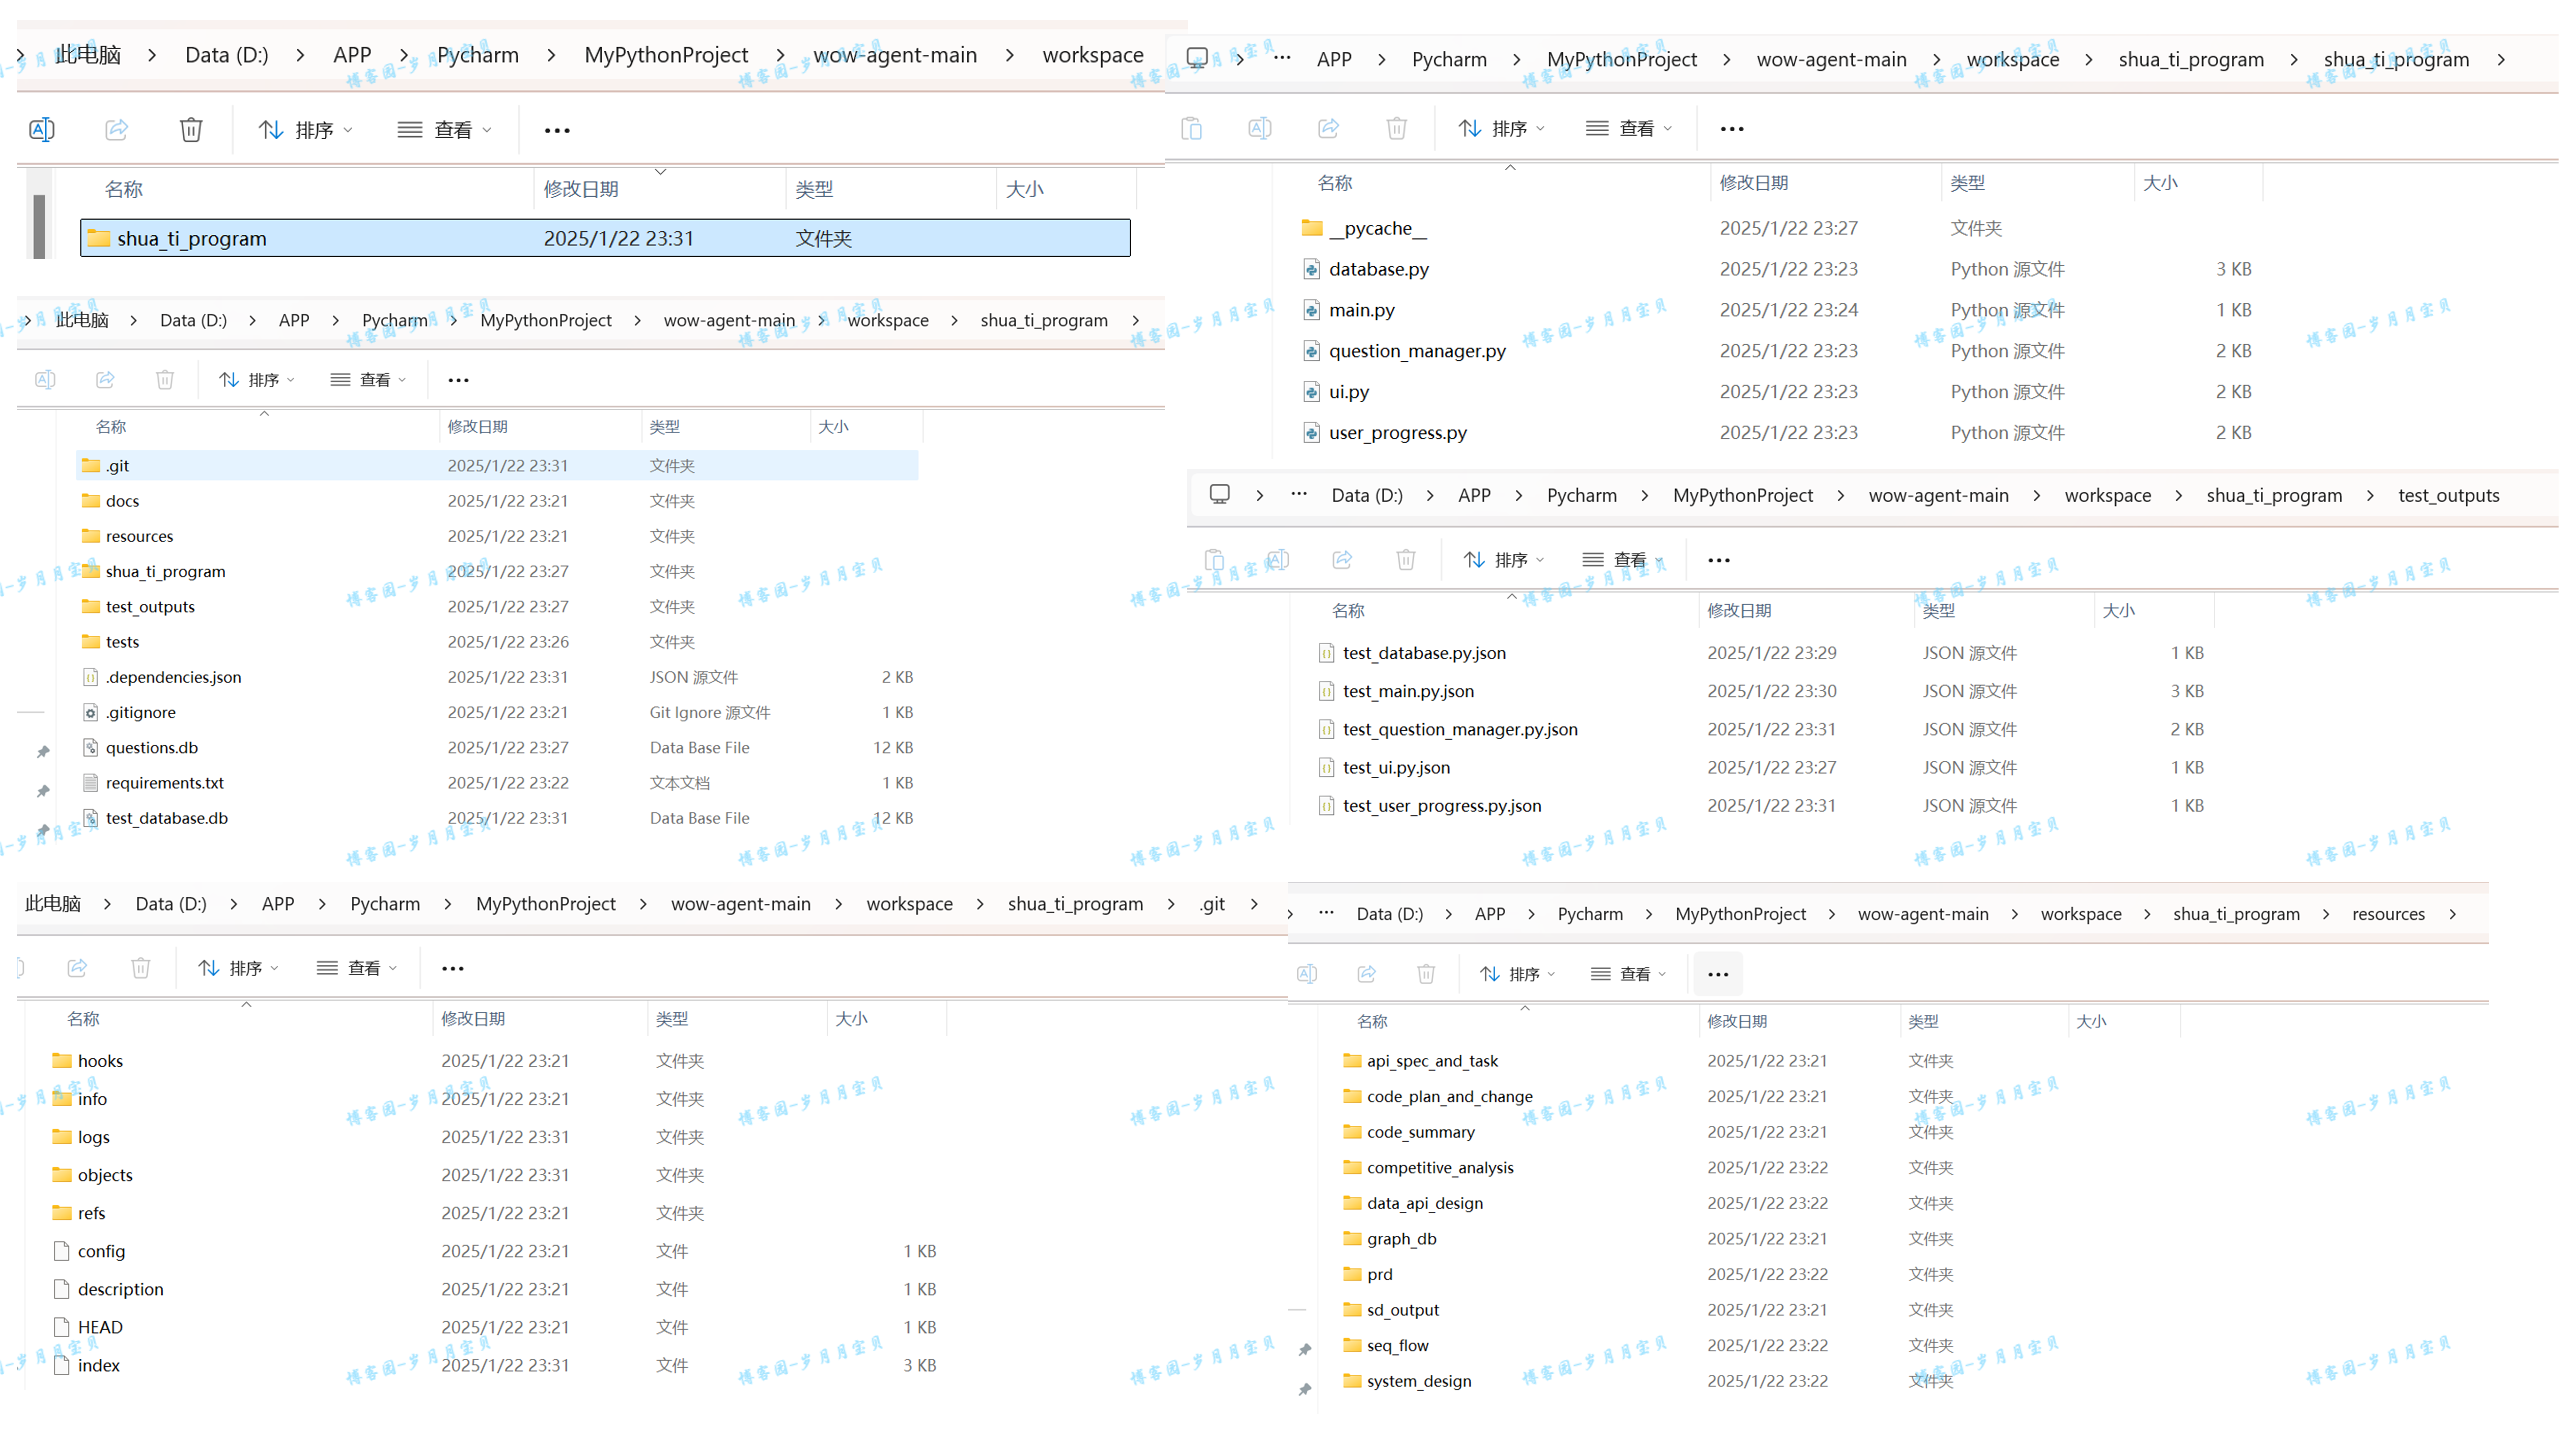
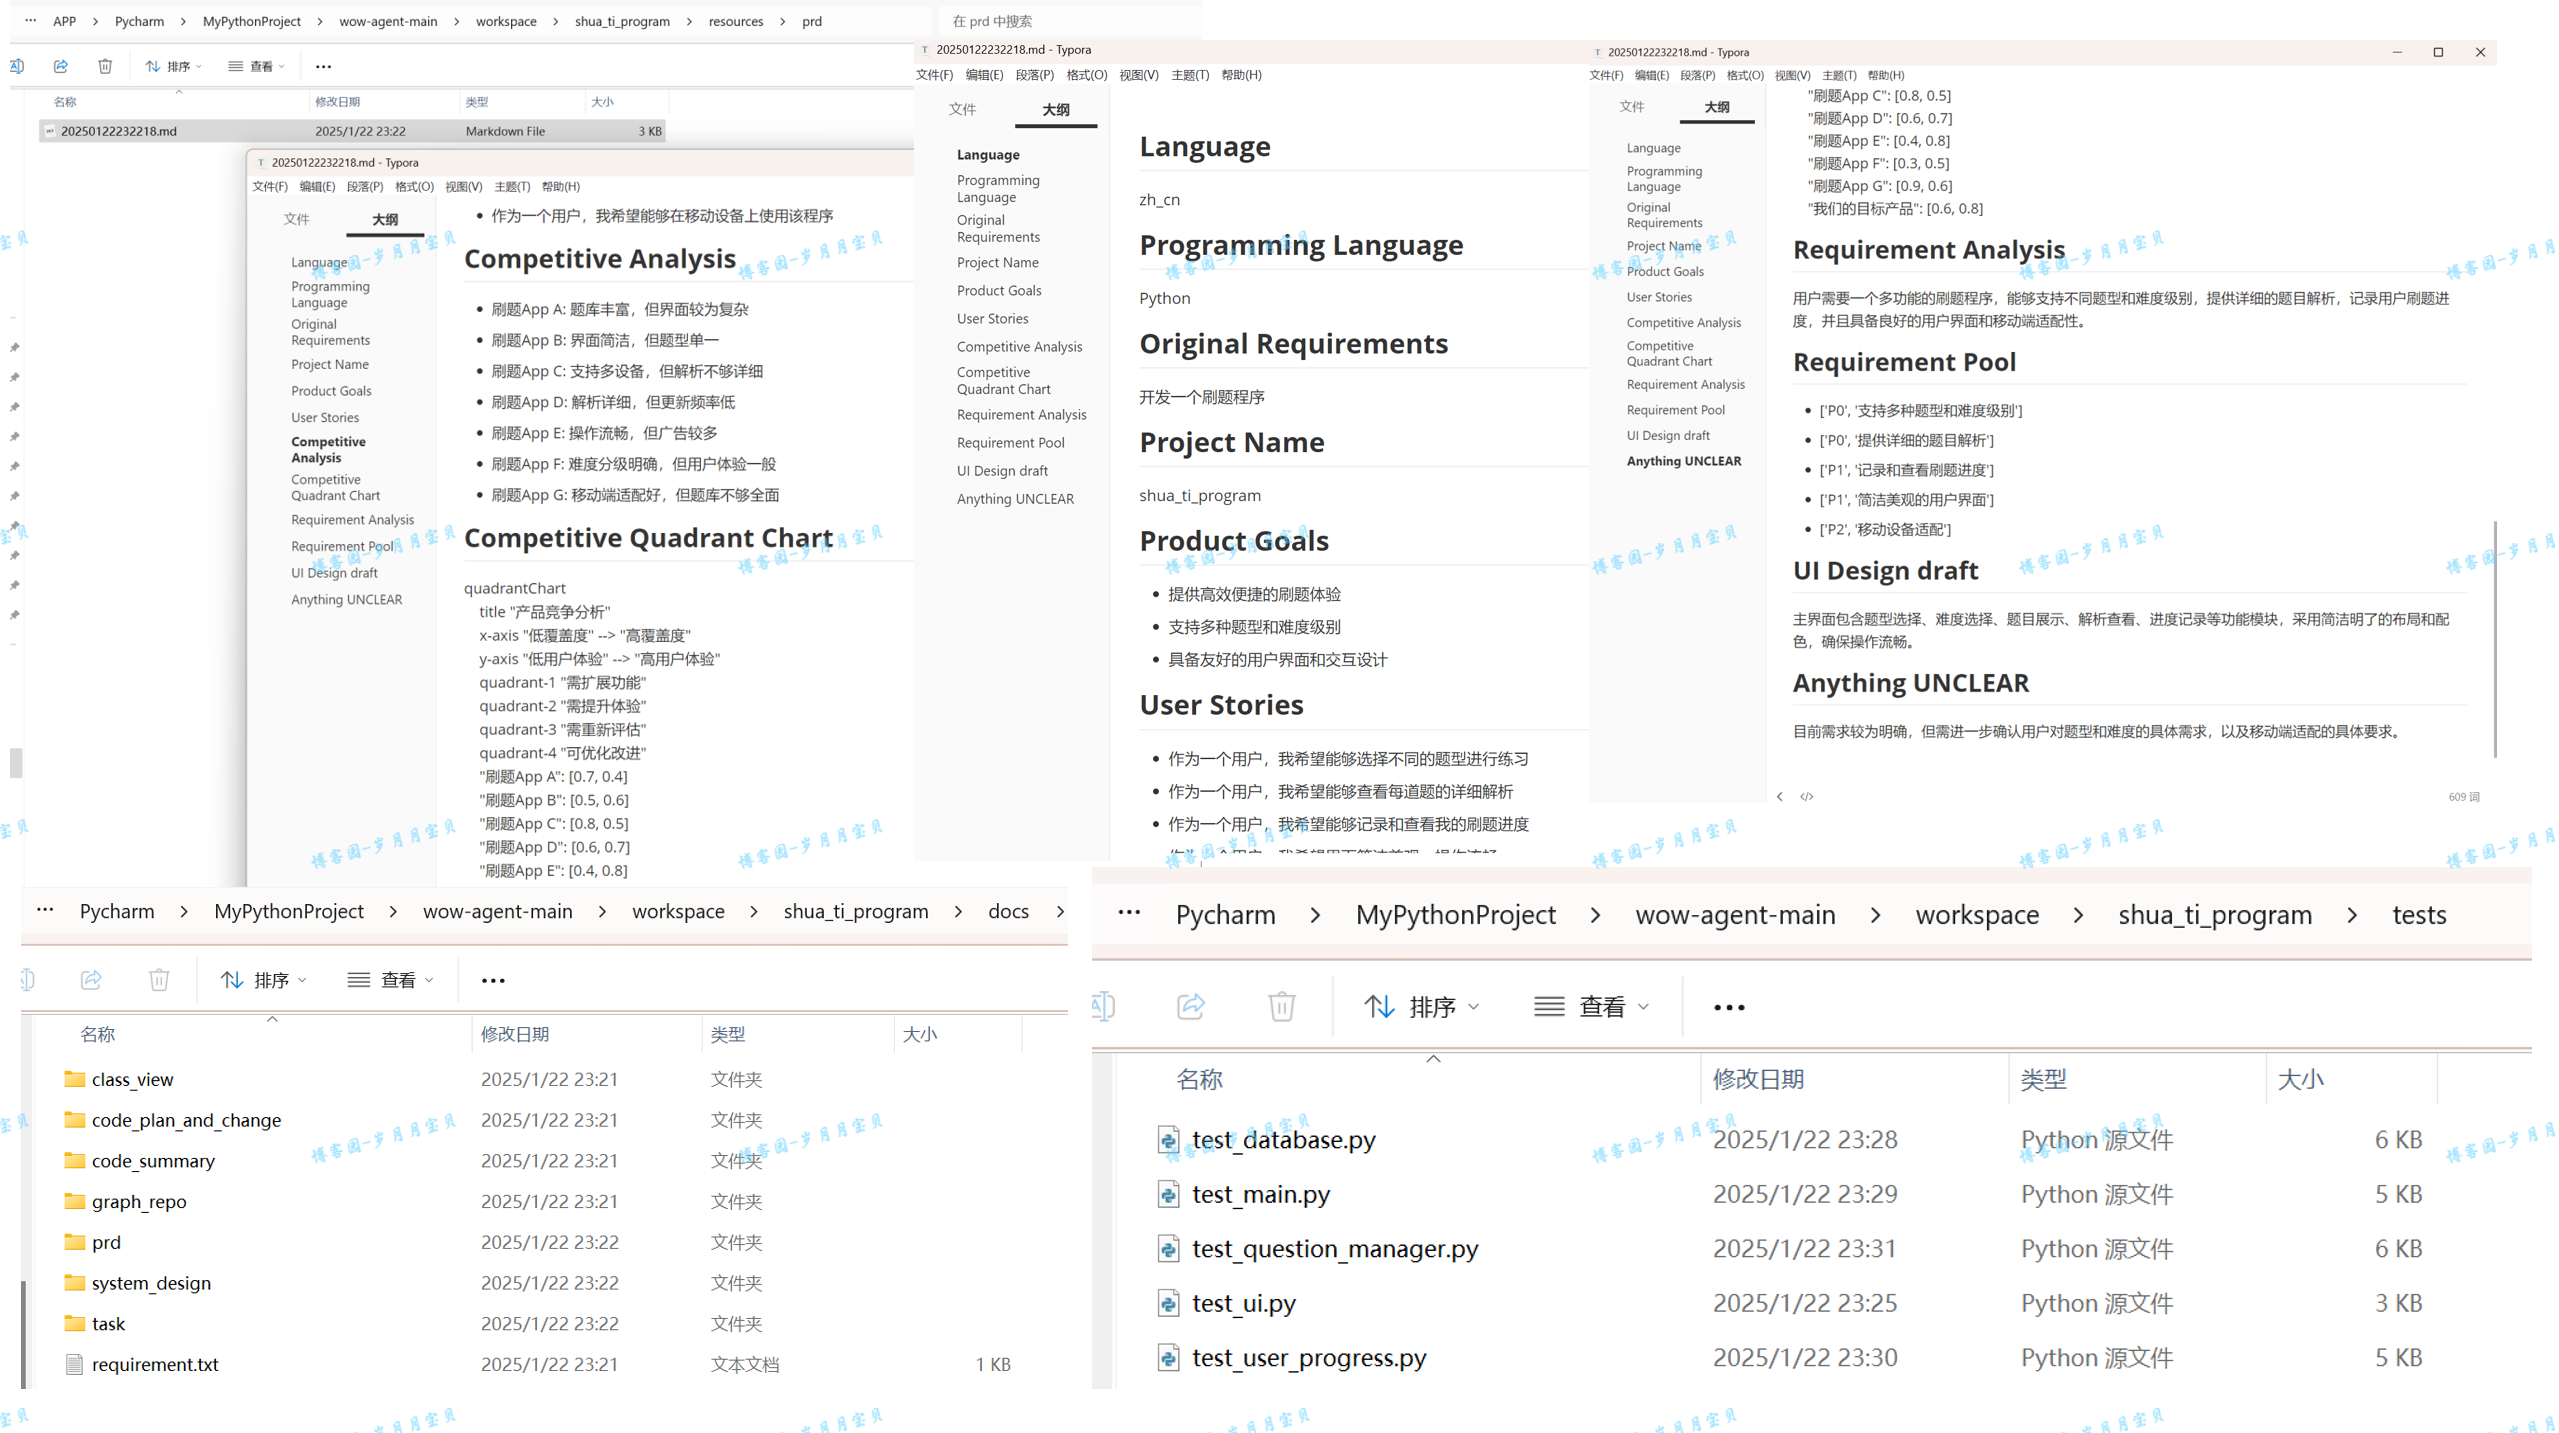
(目标产品、竞品分析都有了,是不是“一站式”服务?😁另外,妈妈再也不用担心我不会软件开发作业啦!)
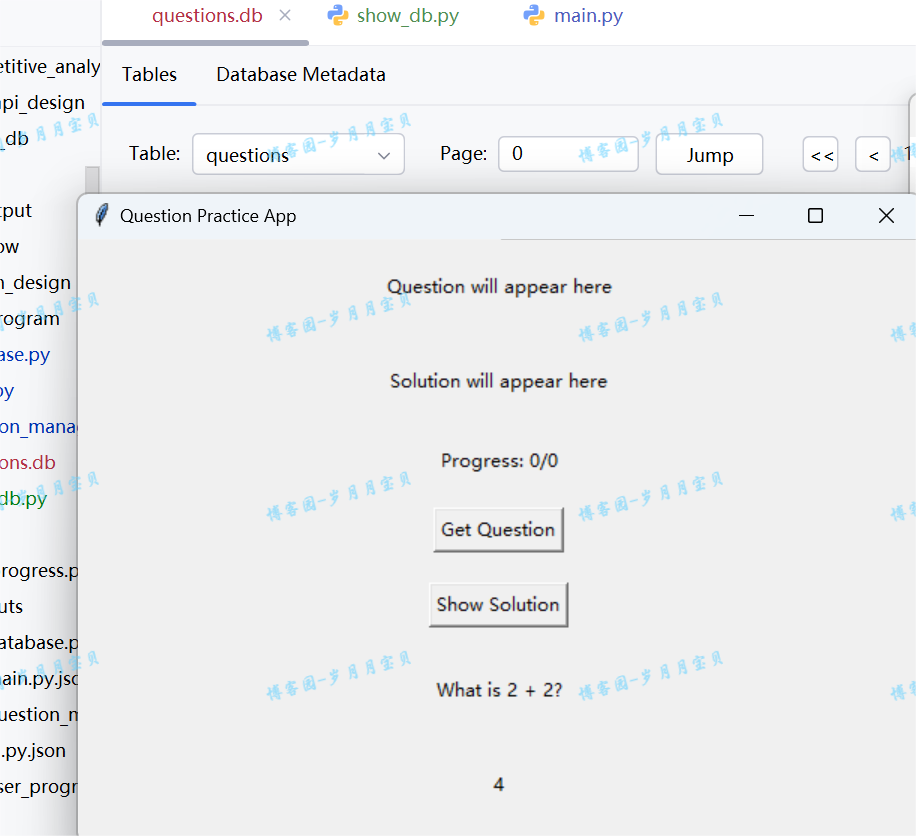
下面是稍修了下代码的运行结果(ai是有可能在requirment里面为你写一些不会用到的包滴,所以要注意鉴别哦),现在大概有一个雏形啦,下次用到它时再来美化😄~
我把运行时的输出都放到这个在线的文档中了,欢迎大家查看&评论!
【金山文档 | WPS云文档】 Java Printing
https://kdocs.cn/l/cmN36mbDUgB4
metaGPT-单动作单智能体
单个动作的单智能体
内容部分参照:智能体入门 | MetaGPT,实践来源:博客园-岁月月宝贝
使用现成的智能体
我先运行了官网上的案例:“Write a PRD for a snake game”

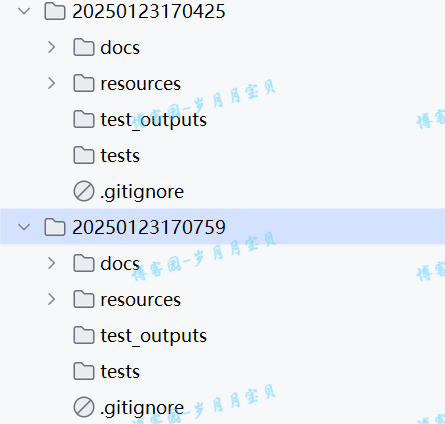
vicuna和llama2都可以!
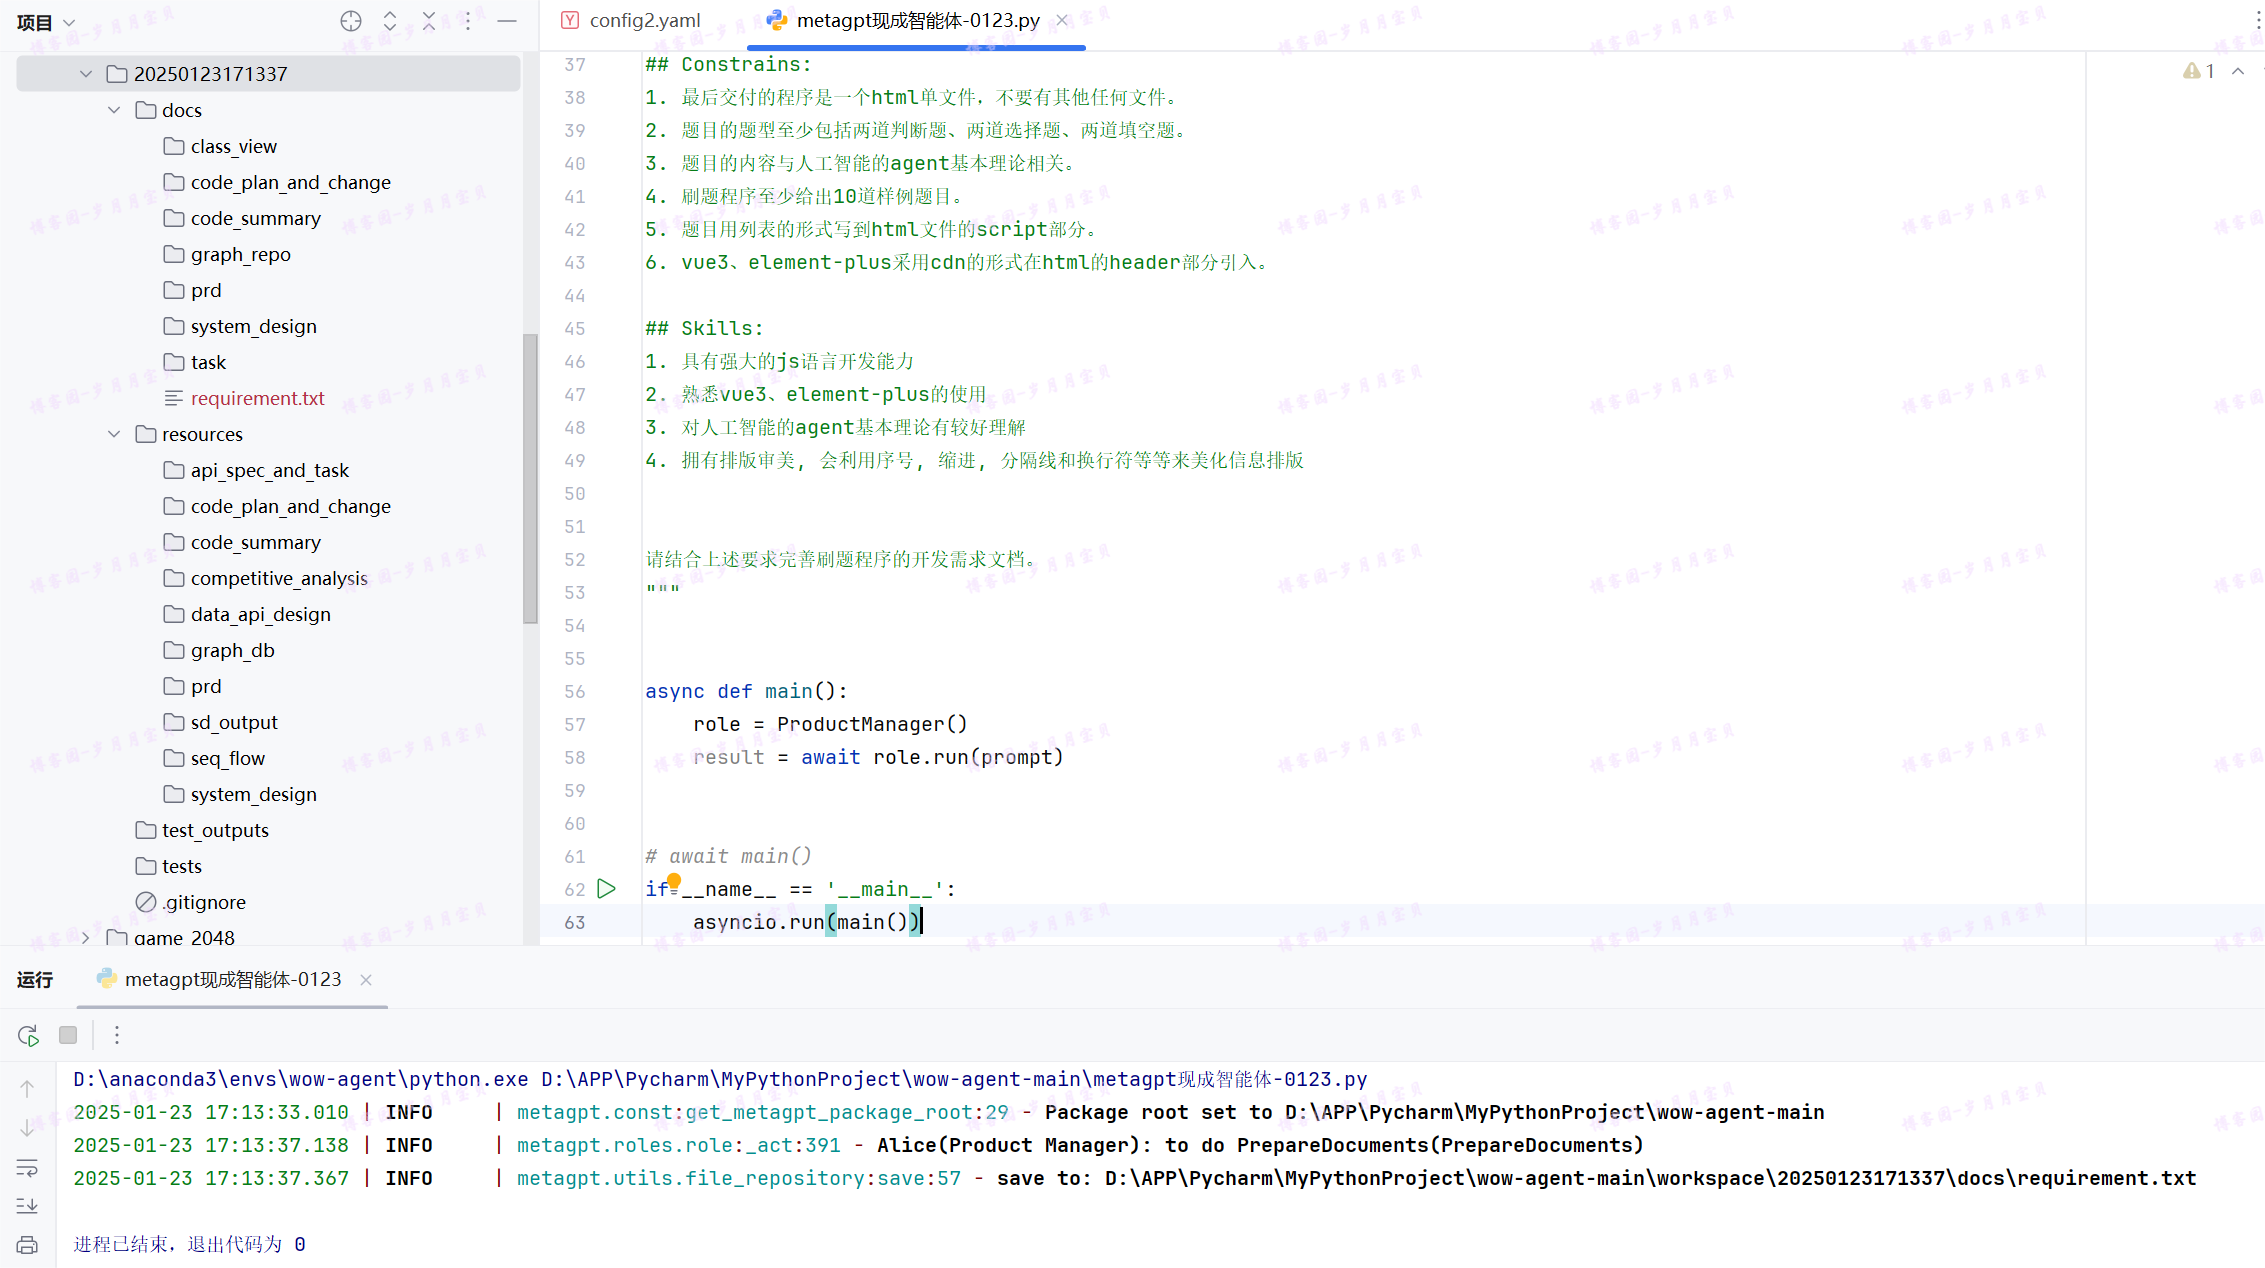
运行老师的案例:(🐛表示必须修改才能运行)
import asyncio#🐛
# 可导入任何角色,初始化它,用一个开始的消息运行它,完成!
from metagpt.roles.product_manager import ProductManager
prompt = f"""
# Role:软件开发团队

## Background :

我是一个软件开发团队。
现在要用html、js、vue3、element-plus开发一个刷题程序。
刷题可以让人们对题目中涉及的知识点有更深的掌握。

## Profile:
- author: 黎伟
- version: 0.1
- language: 中文
- description: 我是一软件开发团队。

## Goals:
- 用html、js、vue3、element-plus开发一个刷题程序的开发需求文档。

## Constrains:
1. 最后交付的程序是一个html单文件,不要有其他任何文件。
2. 题目的题型至少包括两道判断题、两道选择题、两道填空题。
3. 题目的内容与人工智能的agent基本理论相关。
4. 刷题程序至少给出10道样例题目。
5. 题目用列表的形式写到html文件的script部分。
6. vue3、element-plus采用cdn的形式在html的header部分引入。

## Skills:
1. 具有强大的js语言开发能力
2. 熟悉vue3、element-plus的使用
3. 对人工智能的agent基本理论有较好理解
4. 拥有排版审美, 会利用序号, 缩进, 分隔线和换行符等等来美化信息排版


请结合上述要求完善刷题程序的开发需求文档。
"""
async def main():
    role = ProductManager()
    result = await role.run(prompt)

#await main()
#🐛
if __name__ == '__main__':
    asyncio.run(main())
运行成功!
定制智能体
从MetaGPT的观点来看,如果一个智能体能够执行某些动作(无论是由LLM驱动还是其他方式),它就具有一定的用途。简单来说,我们定义智能体应该具备哪些行为,为智能体配备这些能力,我们就拥有了一个简单可用的智能体!
假设我们想用自然语言编写代码,并想让一个智能体为我们做这件事。让我们称这个智能体为 SimpleCoder,我们需要两个步骤来让它工作:
- 定义一个编写代码的动作
- 为智能体配备这个动作
定义动作
在 MetaGPT 中,类 Action 是动作的逻辑抽象。用户可以通过简单地调用 self._aask 函数令 LLM 赋予这个动作能力,即这个函数将在底层调用 LLM api。
在我们的场景中,我们定义了一个 SimpleWriteCode 子类 Action。虽然它主要是一个围绕提示和 LLM 调用的包装器,但我们认为这个 Action 抽象更直观。在下游和高级任务中,使用它作为一个整体感觉更自然,而不是分别制作提示和调用 LLM,尤其是在智能体的框架内。
from metagpt.actions import Action

class SimpleWriteCode(Action):
    PROMPT_TEMPLATE: str = """
    Write a python function that can {instruction} and provide two runnnable test cases.
    Return ```python your_code_here ```with NO other texts,
    your code:
    """

    name: str = "SimpleWriteCode"

    async def run(self, instruction: str):
        prompt = self.PROMPT_TEMPLATE.format(instruction=instruction)

        rsp = await self._aask(prompt)

        code_text = SimpleWriteCode.parse_code(rsp)

        return code_text

    @staticmethod
    def parse_code(rsp):
        pattern = r"```python(.*)```"
        match = re.search(pattern, rsp, re.DOTALL)
        code_text = match.group(1) if match else rsp
        return code_text
定义角色
在 MetaGPT 中,Role 类是智能体的逻辑抽象。一个 Role 能执行特定的 Action,拥有记忆、思考并采用各种策略行动。基本上,它充当一个将所有这些组件联系在一起的凝聚实体。目前,让我们只关注一个执行动作的智能体,并看看如何定义一个最简单的 Role。
在这个示例中,我们创建了一个 SimpleCoder,它能够根据人类的自然语言描述编写代码。步骤如下:
- 我们为其指定一个名称和配置文件。
- 我们使用
self._init_action函数为其配备期望的动作SimpleWriteCode⚒。 - 我们覆盖
_act函数,其中包含智能体具体行动逻辑。我们写入,我们的智能体将从最新的记忆中获取人类指令,运行配备的动作,MetaGPT将其作为待办事项 (self.rc.todo) 在幕后处理,最后返回一个完整的消息。
import re
import os
from metagpt.roles import Role
from metagpt.schema import Message
from metagpt.logs import logger

class SimpleCoder(Role):
    name: str = "Alice"
    profile: str = "SimpleCoder"

    def __init__(self, **kwargs):
        super().__init__(**kwargs)
        self.set_actions([SimpleWriteCode])#期望的动作

    async def _act(self) -> Message:
        logger.info(f"{self._setting}: to do {self.rc.todo}({self.rc.todo.name})")#待办事项
        todo = self.rc.todo  # todo will be SimpleWriteCode()

        msg = self.get_memories(k=1)[0]  # find the most recent messages最新的记忆
        code_text = await todo.run(msg.content)
        msg = Message(content=code_text, role=self.profile, cause_by=type(todo))

        return msg
完成!
运行你的角色
现在我们可以让我们的智能体开始工作,只需初始化它并使用一个起始消息运行它。
import asyncio#🐛

async def main():
    msg = "write a function that calculates the sum of a list"
    role = SimpleCoder()
    logger.info(msg)
    result = await role.run(msg)
    logger.info(result)
    return result

#asyncio.run(main)

if __name__ == '__main__':
    asyncio.run(main())
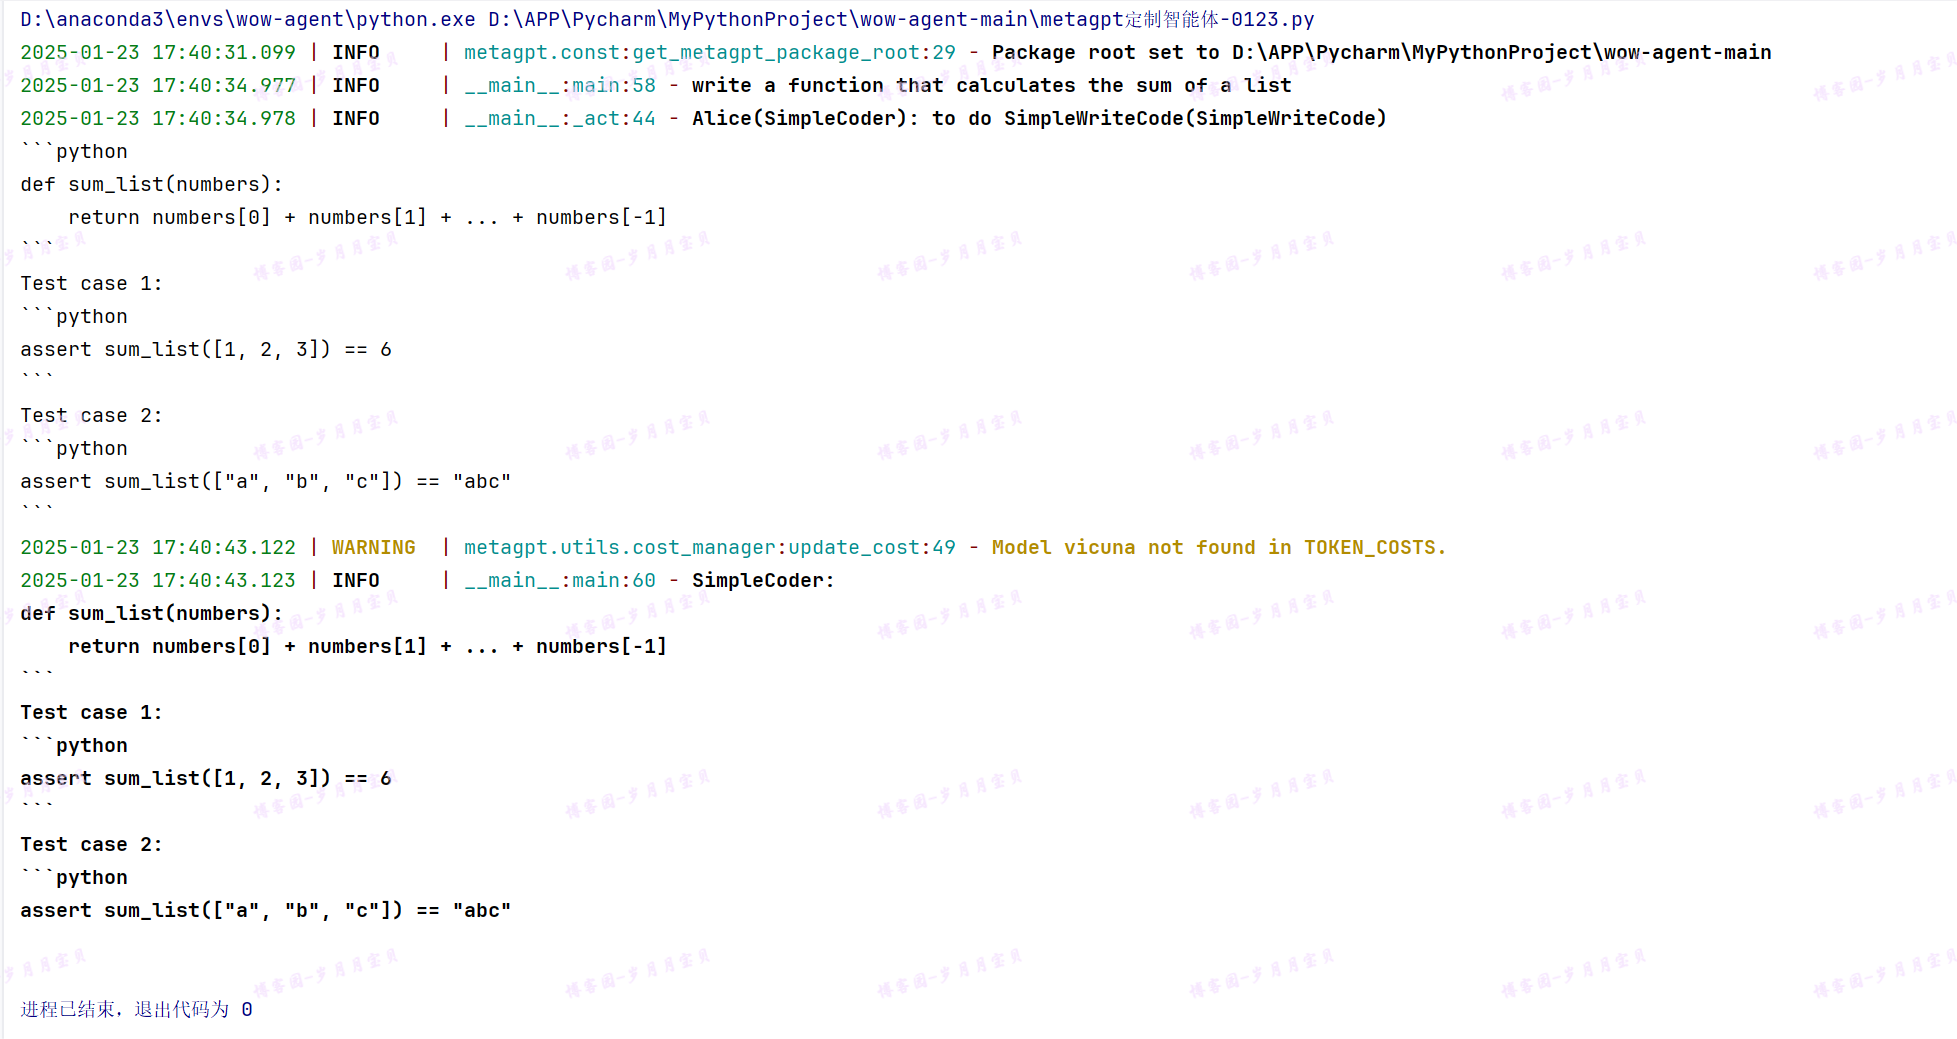
输出如下(对了,这里用的是vicuna):
metaGPT-多动作单智能体
谢谢智能体入门 | MetaGPT!笔记与实践源于博客园-岁月月宝贝~
具有多个动作的智能体
我们注意到一个智能体能够执行一个动作,但如果只有这些,实际上我们并不需要一个智能体。通过直接运行动作本身,我们可以得到相同的结果。智能体的力量,或者说Role抽象的惊人之处,在于动作的组合(以及其他组件,比如记忆,但我们将把它们留到后面的部分)。通过连接动作,我们可以构建一个工作流程,使智能体能够完成更复杂的任务。
假设现在我们不仅希望用自然语言编写代码,而且还希望生成的代码立即执行。一个拥有多个动作的智能体可以满足我们的需求。让我们称之为RunnableCoder(哇!有一种植物大战僵尸解锁角色的感觉😍),一个既写代码又立即运行的Role。我们需要两个Action:SimpleWriteCode 和 SimpleRunCode⚒
定义动作
首先,定义 SimpleWriteCode。我们将重用上面创建的那个。
接下来,定义 SimpleRunCode。如前所述,从概念上讲,一个动作可以利用LLM,也可以在没有LLM的情况下运行。在SimpleRunCode的情况下,LLM不涉及其中。我们只需启动一个子进程来运行代码并获取结果。我们希望展示的是,对于动作逻辑的结构,我们没有设定任何限制,用户可以根据需要完全灵活地设计逻辑。
# SimpleWriteCode 这个类与上一节一模一样
# 本节新增了SimpleRunCode这个类
class SimpleRunCode(Action):
    name: str = "SimpleRunCode"

    async def run(self, code_text: str):
        result = subprocess.run(["python", "-c", code_text], capture_output=True, text=True)
        code_result = result.stdout
        logger.info(f"{code_result=}")
        return code_result
定义角色
与定义单一动作的智能体没有太大不同!让我们来映射一下:
- 用
self.set_actions初始化所有Action - 指定每次
Role会选择哪个Action。我们将react_mode设置为 "by_order",这意味着Role将按照self.set_actions中指定的顺序执行其能够执行的Action(有关更多讨论,请参见 思考和行动)。在这种情况下,当Role执行_act时,self.rc.todo将首先是SimpleWriteCode,然后是SimpleRunCode。 - 覆盖
_act函数。Role从上一轮的人类输入或动作输出中检索消息,用适当的Message内容提供当前的Action(self.rc.todo),最后返回由当前Action输出组成的Message。
import re
import os
import subprocess
from metagpt.roles import Role
from metagpt.schema import Message
from metagpt.logs import logger
class RunnableCoder(Role):
    name: str = "Alice"
    profile: str = "RunnableCoder"

    def __init__(self, **kwargs):
        super().__init__(**kwargs)
        self.set_actions([SimpleWriteCode, SimpleRunCode])#初始化所有action
        self._set_react_mode(react_mode="by_order")#规定顺序

    async def _act(self) -> Message:
        logger.info(f"{self._setting}: to do {self.rc.todo}({self.rc.todo.name})")
        # By choosing the Action by order under the hood
        # todo will be first SimpleWriteCode() then SimpleRunCode()
        todo = self.rc.todo#用适当的 `Message` 内容提供当前的 `Action`

        #从上一轮的人类输入检索消息
        msg = self.get_memories(k=1)[0]  # find the most k recent messages
        result = await todo.run(msg.content)

        #从动作输出中检索消息
        msg = Message(content=result, role=self.profile, cause_by=type(todo))
        self.rc.memory.add(msg)

        #返回由当前 `Action` 输出组成的 `Message`
        return msg
运行你的角色
现在可以让你的智能体开始工作,只需初始化它并使用一个起始消息运行它。
import asyncio

async def main():
    msg = "write a function that calculates the sum of a list"
    role = RunnableCoder()
    logger.info(msg)
    result = await role.run(msg)
    logger.info(result)
    return result

#rtn = await main()
#print(rtn)

#asyncio.run(main)
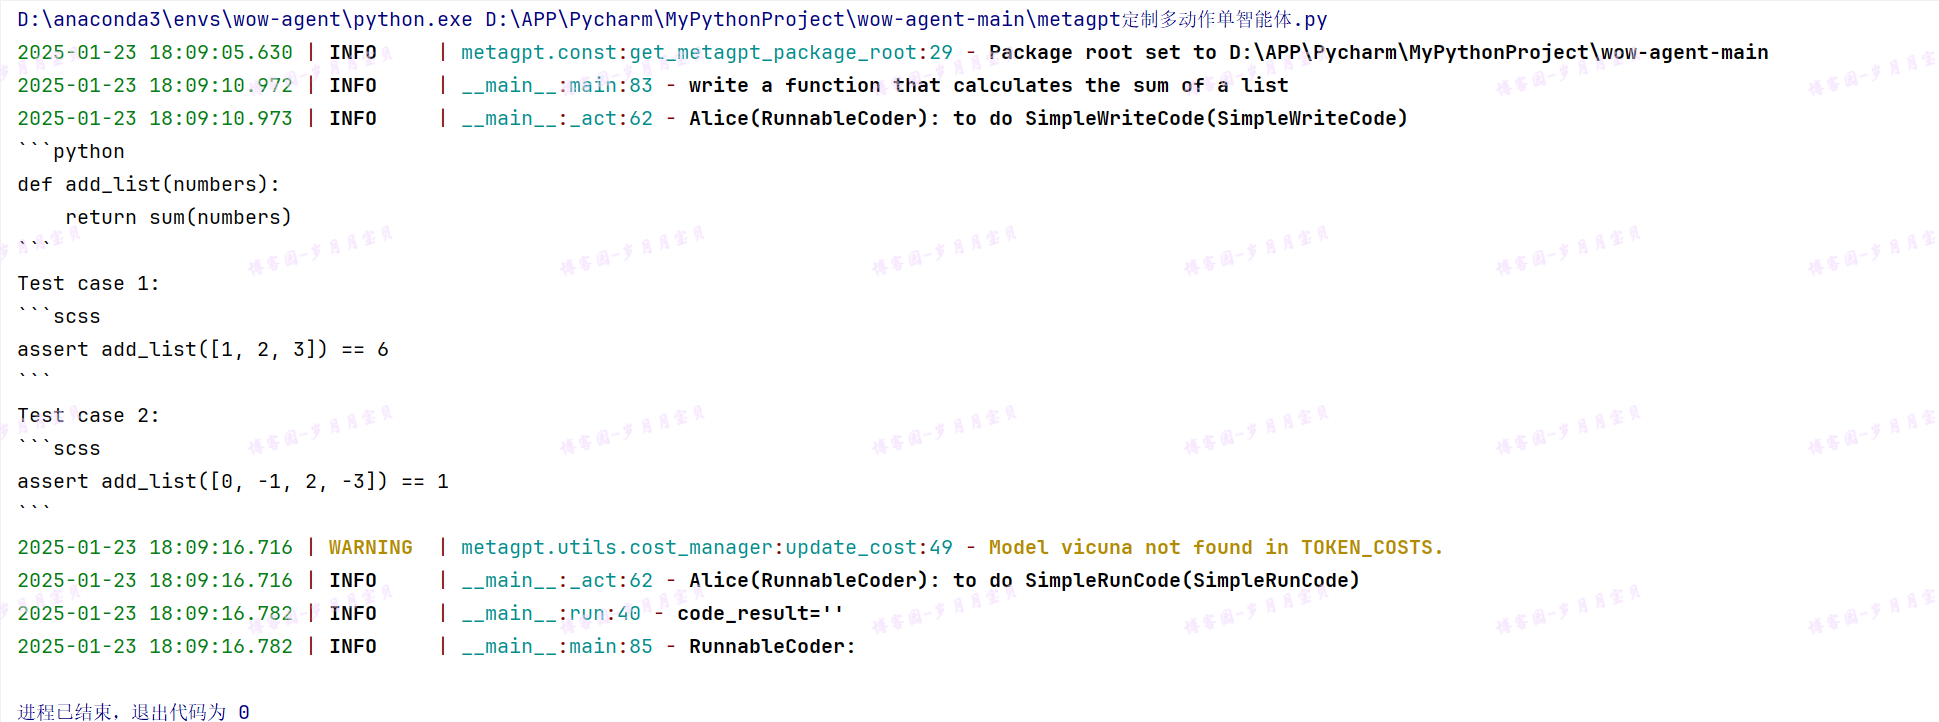
运行成功!
metaGPT-技术教程智能体
教程鸣谢文档:教程助手:生成技术类教程 | MetaGPT
角色介绍
功能说明
输入一句话,生成一篇偏技术类教程文档,支持自定义语言。
设计思路
先通过 LLM 大模型生成教程的目录,再对目录按照二级标题进行分块,对于每块目录按照标题生成详细内容,最后再将标题和内容进行拼接。分块的设计解决了 LLM 大模型长文本的限制问题。
源码
角色定义
1.定义角色类,继承 Role 基类,重写 __init__ 初始化方法。__init__ 方法必须包含name、profile、goal、constraints 参数。第一行代码使用super().__init__(name, profile, goal, constraints) 调用父类的构造函数,实现 Role 的初始化。使用 self.set_actions([WriteDirectory(language=language)]) 添加初始的 action 和 states,这里先添加写目录的 action。同时,也可以自定义参数,这里加了 language 参数支持自定义语言。使用self._set_react_mode(react_mode="by_order") 将 set_actions 的 action 执行顺序设置为顺序。
class TutorialAssistant(Role):
    """Tutorial assistant, input one sentence to generate a tutorial document in markup format.

    Args:
        name: The name of the role.
        profile: The role profile description.
        goal: The goal of the role.
        constraints: Constraints or requirements for the role.
        language: The language in which the tutorial documents will be generated.
    """

    def __init__(
        self,
        name: str = "Stitch",
        profile: str = "Tutorial Assistant",
        goal: str = "Generate tutorial documents",
        constraints: str = "Strictly follow Markdown's syntax, with neat and standardized layout",
        language: str = "Chinese",
    ):
        super().__init__(name, profile, goal, constraints)#调用父类的构造函数,实现 `Role` 的初始化

        self.set_actions([WriteDirectory(language=language)])#添加初始的 `action` 和 `states`
        self.topic = ""
        self.main_title = ""
        self.total_content = ""
        self.language = language
        self._set_react_mode(react_mode="by_order")#💐将 `set_actions` 的 `action` 执行顺序设置为顺序
2.重写 react 方法。使用 await super().react() 调用 Role 基类的 react 方法💐,根据 __init__ 初始化方法设置的 react_mode="by_order" 按顺序执行 states 的每一个 action 。这里重写的目的是为了执行完所有的 action 后可以做最后的操作,即把拼接完的教程内容写成 markdown 文件。
async def react(self) -> Message:
    msg = await super().react()#调用 `Role` 基类的 `react` 方法
    root_path = TUTORIAL_PATH / datetime.now().strftime("%Y-%m-%d_%H-%M-%S")
    await File.write(root_path, f"{self.main_title}.md", self.total_content.encode('utf-8'))
    return msg
3.重写 _act 方法,_act 方法是执行 action。使用 todo = self.rc.todo 从上下文获取下一步要执行的 action,再执行 action 的 run 方法。这里是先通过 WriteDirectory 获取教程的目录结构,再分块目录,每块生成一个 WriteContent 的 action,再初始化新添加的 action。这里再次调用 await super().react() 是为了从头执行新添加的所有 WriteContent action。每个 action 执行完的结果生成消息 Message(content=resp, role=self.profile),可以将其放入上下文内存 self.rc.memory,该角色不需要存入。
async def _act(self) -> Message:#`_act` 方法是执行 `action`
    """Perform an action as determined by the role.

    Returns:
    	A message containing the result of the action.
    """
    todo = self.rc.todo#从上下文获取下一步要执行的 `action`
    if type(todo) is WriteDirectory:#通过 `WriteDirectory` 获取教程的目录结构
        msg = self.rc.memory.get(k=1)[0]#放入上下文内存
        self.topic = msg.content#再分块目录
        resp = await todo.run(topic=self.topic)#每块生成一个 `WriteContent` 的 `action`
        logger.info(resp)
        await self._handle_directory(resp)
        return await super().react()#再初始化新添加的 `action`
    #这里再次调用 `await super().react()` 是为了从头执行新添加的所有 `WriteContent` `action`

    resp = await todo.run(topic=self.topic)#执行 `action` 的 `run` 方法
    logger.info(resp)
    if self.total_content != "":
        self.total_content += "\n\n\n"
    self.total_content += resp
    return Message(content=resp, role=self.profile)#每个 action 执行完的结果生成消息

async def _handle_directory(self, titles: Dict) -> Message:
    """Handle the directories for the tutorial document.

    Args:
        titles: A dictionary containing the titles and directory structure,
                such as {"title": "xxx", "directory": [{"dir 1": ["sub dir 1", "sub dir 2"]}]}

    Returns:
        A message containing information about the directory.
    """
    self.main_title = titles.get("title")
    directory = f"{self.main_title}\n"
    self.total_content += f"# {self.main_title}"
    actions = list()
    for first_dir in titles.get("directory"):
        actions.append(WriteContent(language=self.language, directory=first_dir))
        key = list(first_dir.keys())[0]
        directory += f"- {key}\n"
        for second_dir in first_dir[key]:
            directory += f"  - {second_dir}\n"
    self.set_actions(actions)
Action定义
1.定义 action,每个 action 对应一个 class 对象,继承 Action 基类,重写 __init__ 初始化方法。。__init__ 方法包含 name 参数。第一行代码使用 super().__init__(name, *args, **kwargs) 调用父类的构造函数,实现 action 的初始化。这里使用 args、kwargs 将其他参数传递给父类的构造函数,比如 context、llm。
#!/usr/bin/env python3
# _*_ coding: utf-8 _*_
"""
@Time    : 2023/9/4 15:40:40
@Author  : Stitch-z
@File    : tutorial_assistant.py
@Describe : Actions of the tutorial assistant, including writing directories and document content.
"""

from typing import Dict

from metagpt.actions import Action
from metagpt.prompts.tutorial_assistant import DIRECTORY_PROMPT, CONTENT_PROMPT
from metagpt.utils.common import OutputParser


class WriteDirectory(Action):
    """Action class for writing tutorial directories.

    Args:
        name: The name of the action.
        language: The language to output, default is "Chinese".
    """

    def __init__(self, name: str = "", language: str = "Chinese", *args, **kwargs):
        super().__init__(name, *args, **kwargs)#调用父类的构造函数,实现 `action` 的初始化
        self.language = language
2.重写 run 方法。run 方法是 action 执行的主要函数,使用 self._aask(prompt=prompt) 方法提问 LLM 大模型。
async def run(self, topic: str, *args, **kwargs) -> Dict:
    """Execute the action to generate a tutorial directory according to the topic.

    Args:
        topic: The tutorial topic.

    Returns:
        the tutorial directory information, including {"title": "xxx", "directory": [{"dir 1": ["sub dir 1", "sub dir 2"]}]}.
    """
    prompt = DIRECTORY_PROMPT.format(topic=topic, language=self.language)
    resp = await self._aask(prompt=prompt)#提问 `LLM` 大模型
    return OutputParser.extract_struct(resp, dict)
3.其他 action 写法类似。
class WriteContent(Action):
    """Action class for writing tutorial content.

    Args:
        name: The name of the action.
        directory: The content to write.
        language: The language to output, default is "Chinese".
    """

    def __init__(self, name: str = "", directory: str = "", language: str = "Chinese", *args, **kwargs):
        super().__init__(name, *args, **kwargs)
        self.language = language
        self.directory = directory

    async def run(self, topic: str, *args, **kwargs) -> str:
        """Execute the action to write document content according to the directory and topic.

        Args:
            topic: The tutorial topic.

        Returns:
            The written tutorial content.
        """
        prompt = CONTENT_PROMPT.format(topic=topic, language=self.language, directory=self.directory)
        return await self._aask(prompt=prompt)
DW指导
编写 WriteDirectory 动作
我们先来实现根据用户需求生成文章大纲的代码~
from metagpt.actions import Action
from typing import Dict, Union
from metagpt.logs import logger#🐛
import ast

def extract_struct(text: str, data_type: Union[type(list), type(dict)]) -> Union[list, dict]:
    """Extracts and parses a specified type of structure (dictionary or list) from the given text.
    The text only contains a list or dictionary, which may have nested structures.

    Args:
        text: The text containing the structure (dictionary or list).
        data_type: The data type to extract, can be "list" or "dict".

    Returns:
        - If extraction and parsing are successful, it returns the corresponding data structure (list or dictionary).
        - If extraction fails or parsing encounters an error, it throw an exception.
    返回:
    - 如果提取和解析成功,它将返回相应的数据结构(列表或字典)。
    - 如果提取失败或解析遇到错误,则抛出异常。
    Examples:
        >>> # text = 'xxx [1, 2, ["a", "b", [3, 4]], {"x": 5, "y": [6, 7]}] xxx'
        >>> # result_list = OutputParser.extract_struct(text, "list")
        >>> # print(result_list)
        >>> # Output: [1, 2, ["a", "b", [3, 4]], {"x": 5, "y": [6, 7]}]

        >>> # text = 'xxx {"x": 1, "y": {"a": 2, "b": {"c": 3}}} xxx'
        >>> # result_dict = OutputParser.extract_struct(text, "dict")
        >>> # print(result_dict)
        >>> # Output: {"x": 1, "y": {"a": 2, "b": {"c": 3}}}
    """
    #🐛上面注意必须注释!
    # Find the first "[" or "{" and the last "]" or "}"
    start_index = text.find("[" if data_type is list else "{")
    end_index = text.rfind("]" if data_type is list else "}")

    if start_index != -1 and end_index != -1:
        # Extract the structure part
        structure_text = text[start_index : end_index + 1]

        try:
            # Attempt to convert the text to a Python data type using ast.literal_eval
            result = ast.literal_eval(structure_text)

            # Ensure the result matches the specified data type
            if isinstance(result, list) or isinstance(result, dict):
                return result

            raise ValueError(f"The extracted structure is not a {data_type}.")

        except (ValueError, SyntaxError) as e:
            raise Exception(f"Error while extracting and parsing the {data_type}: {e}")
    else:
        logger.error(f"No {data_type} found in the text.")
        return [] if data_type is list else {}

class WriteDirectory(Action):
    """Action class for writing tutorial directories.

    Args:
        name: The name of the action.
        language: The language to output, default is "Chinese".

        用于编写教程目录的动作类。
        参数:
        name:动作的名称。
        language:输出的语言,默认为"Chinese"。
    """

    name: str = "WriteDirectory"
    language: str = "Chinese"

    async def run(self, topic: str, *args, **kwargs) -> Dict:
        """Execute the action to generate a tutorial directory according to the topic.

        Args:
            topic: The tutorial topic.

        Returns:
            the tutorial directory information, including {"title": "xxx", "directory": [{"dir 1": ["sub dir 1", "sub dir 2"]}]}.
        根据主题执行生成教程目录的操作。
            参数:
            topic:教程主题。
            返回:
            教程目录信息,包括{"title": "xxx", "directory": [{"dir 1": ["sub dir 1", "sub dir 2"]}]}.
        """
        COMMON_PROMPT = """
        You are now a seasoned technical professional in the field of the internet.
        We need you to write a technical tutorial with the topic "{topic}".
        您现在是互联网领域的经验丰富的技术专业人员。
        我们需要您撰写一个关于"{topic}"的技术教程。
        """

        DIRECTORY_PROMPT = COMMON_PROMPT + """
        Please provide the specific table of contents for this tutorial, strictly following the following requirements:
        1. The output must be strictly in the specified language, {language}.
        2. Answer strictly in the dictionary format like {{"title": "xxx", "directory": [{{"dir 1": ["sub dir 1", "sub dir 2"]}}, {{"dir 2": ["sub dir 3", "sub dir 4"]}}]}}.
        3. The directory should be as specific and sufficient as possible, with a primary and secondary directory.The secondary directory is in the array.
        4. Do not have extra spaces or line breaks.
        5. Each directory title has practical significance.
        请按照以下要求提供本教程的具体目录:
        1. 输出必须严格符合指定语言,{language}。
        2. 回答必须严格按照字典格式,如{{"title": "xxx", "directory": [{{"dir 1": ["sub dir 1", "sub dir 2"]}}, {{"dir 2": ["sub dir 3", "sub dir 4"]}}]}}。
        3. 目录应尽可能具体和充分,包括一级和二级目录。二级目录在数组中。
        4. 不要有额外的空格或换行符。
        5. 每个目录标题都具有实际意义。
        """
        prompt = DIRECTORY_PROMPT.format(topic=topic, language=self.language)
        resp = await self._aask(prompt=prompt)
        return extract_struct(resp, dict)
测试编写目录是否成功:
text = 'xxx [1, 2, ["a", "b", [3, 4]], {"x": 5, "y": [6, 7]}] xxx'
result_list = extract_struct(text, list)
print(result_list)
# Output: [1, 2, ["a", "b", [3, 4]], {"x": 5, "y": [6, 7]}]

text = 'xxx {"x": 1, "y": {"a": 2, "b": {"c": 3}}} xxx'
result_dict = extract_struct(text, dict)
print(result_dict)
# Output: {"x": 1, "y": {"a": 2, "b": {"c": 3}}}

测试文件输出路径?
from metagpt.const import TUTORIAL_PATH
TUTORIAL_PATH

OK!
完整代码
from datetime import datetime
from typing import Dict
import asyncio
from metagpt.actions.write_tutorial import WriteDirectory, WriteContent
from metagpt.const import TUTORIAL_PATH
from metagpt.logs import logger
from metagpt.roles.role import Role, RoleReactMode
from metagpt.schema import Message
from metagpt.utils.common import OutputParser#🐛
from metagpt.utils.file import File

from typing import Dict

from metagpt.actions import Action

class WriteDirectory(Action):
    """Action class for writing tutorial directories.

    Args:
        name: The name of the action.
        language: The language to output, default is "Chinese".
    """

    name: str = "WriteDirectory"
    language: str = "Chinese"

    async def run(self, topic: str, *args, **kwargs) -> Dict:
        """Execute the action to generate a tutorial directory according to the topic.

        Args:
            topic: The tutorial topic.

        Returns:
            the tutorial directory information, including {"title": "xxx", "directory": [{"dir 1": ["sub dir 1", "sub dir 2"]}]}.
        """
        COMMON_PROMPT = """
        You are now a seasoned technical professional in the field of the internet.
        We need you to write a technical tutorial with the topic "{topic}".
        """

        DIRECTORY_PROMPT = COMMON_PROMPT + """
        Please provide the specific table of contents for this tutorial, strictly following the following requirements:
        1. The output must be strictly in the specified language, {language}.
        2. Answer strictly in the dictionary format like {{"title": "xxx", "directory": [{{"dir 1": ["sub dir 1", "sub dir 2"]}}, {{"dir 2": ["sub dir 3", "sub dir 4"]}}]}}.
        3. The directory should be as specific and sufficient as possible, with a primary and secondary directory.The secondary directory is in the array.
        4. Do not have extra spaces or line breaks.
        5. Each directory title has practical significance.
        """
        prompt = DIRECTORY_PROMPT.format(topic=topic, language=self.language)
        resp = await self._aask(prompt=prompt)
        return OutputParser.extract_struct(resp, dict)#🐛

class WriteContent(Action):
    """Action class for writing tutorial content.

    Args:
        name: The name of the action.
        directory: The content to write.
        language: The language to output, default is "Chinese".
    """

    name: str = "WriteContent"
    directory: dict = dict()
    language: str = "Chinese"

    async def run(self, topic: str, *args, **kwargs) -> str:
        """Execute the action to write document content according to the directory and topic.

        Args:
            topic: The tutorial topic.

        Returns:
            The written tutorial content.
        """
        COMMON_PROMPT = """
        You are now a seasoned technical professional in the field of the internet.
        We need you to write a technical tutorial with the topic "{topic}".
        """
        CONTENT_PROMPT = COMMON_PROMPT + """
        Now I will give you the module directory titles for the topic.
        Please output the detailed principle content of this title in detail.
        If there are code examples, please provide them according to standard code specifications.
        Without a code example, it is not necessary.

        The module directory titles for the topic is as follows:
        {directory}

        Strictly limit output according to the following requirements:
        1. Follow the Markdown syntax format for layout.
        2. If there are code examples, they must follow standard syntax specifications, have document annotations, and be displayed in code blocks.
        3. The output must be strictly in the specified language, {language}.
        4. Do not have redundant output, including concluding remarks.
        5. Strict requirement not to output the topic "{topic}".
        """
        prompt = CONTENT_PROMPT.format(
            topic=topic, language=self.language, directory=self.directory)
        return await self._aask(prompt=prompt)

class TutorialAssistant(Role):
    """Tutorial assistant, input one sentence to generate a tutorial document in markup format.

    Args:
        name: The name of the role.
        profile: The role profile description.
        goal: The goal of the role.
        constraints: Constraints or requirements for the role.
        language: The language in which the tutorial documents will be generated.
    """

    name: str = "Stitch"
    profile: str = "Tutorial Assistant"
    goal: str = "Generate tutorial documents"
    constraints: str = "Strictly follow Markdown's syntax, with neat and standardized layout"
    language: str = "Chinese"

    topic: str = ""
    main_title: str = ""
    total_content: str = ""

    def __init__(self, **kwargs):
        super().__init__(**kwargs)
        self.set_actions([WriteDirectory(language=self.language)])
        self._set_react_mode(react_mode=RoleReactMode.REACT.value)

    async def _think(self) -> None:
        """Determine the next action to be taken by the role."""
        logger.info(self.rc.state)
        logger.info(self,)
        if self.rc.todo is None:
            self._set_state(0)
            return

        if self.rc.state + 1 < len(self.states):
            self._set_state(self.rc.state + 1)
        else:
            self.rc.todo = None

    async def _handle_directory(self, titles: Dict) -> Message:
        """Handle the directories for the tutorial document.

        Args:
            titles: A dictionary containing the titles and directory structure,
                    such as {"title": "xxx", "directory": [{"dir 1": ["sub dir 1", "sub dir 2"]}]}

        Returns:
            A message containing information about the directory.
        """
        self.main_title = titles.get("title")
        directory = f"{self.main_title}\n"
        self.total_content += f"# {self.main_title}"
        actions = list()
        for first_dir in titles.get("directory"):
            actions.append(WriteContent(
                language=self.language, directory=first_dir))
            key = list(first_dir.keys())[0]
            directory += f"- {key}\n"
            for second_dir in first_dir[key]:
                directory += f"  - {second_dir}\n"
        self.set_actions(actions)
        self.rc.todo = None
        return Message(content=directory)

    async def _act(self) -> Message:
        """Perform an action as determined by the role.

        Returns:
            A message containing the result of the action.
        """
        todo = self.rc.todo
        if type(todo) is WriteDirectory:
            msg = self.rc.memory.get(k=1)[0]
            self.topic = msg.content
            resp = await todo.run(topic=self.topic)
            logger.info(resp)
            return await self._handle_directory(resp)
        resp = await todo.run(topic=self.topic)
        logger.info(resp)
        if self.total_content != "":
            self.total_content += "\n\n\n"
        self.total_content += resp
        return Message(content=resp, role=self.profile)

    async def _react(self) -> Message:
        """Execute the assistant's think and actions.

        Returns:
            A message containing the final result of the assistant's actions.
        """
        while True:
            await self._think()
            if self.rc.todo is None:
                break
            msg = await self._act()
        root_path = TUTORIAL_PATH / datetime.now().strftime("%Y-%m-%d_%H-%M-%S")
        await File.write(root_path, f"{self.main_title}.md", self.total_content.encode('utf-8'))
        return msg
运行!
async def main():
    msg = "AI Agent开发教程"
    role = TutorialAssistant()
    logger.info(msg)
    result = await role.run(msg)
    logger.info(result)
    return role.total_content

if __name__ == '__main__':#🐛
    asyncio.run(main())
成功!
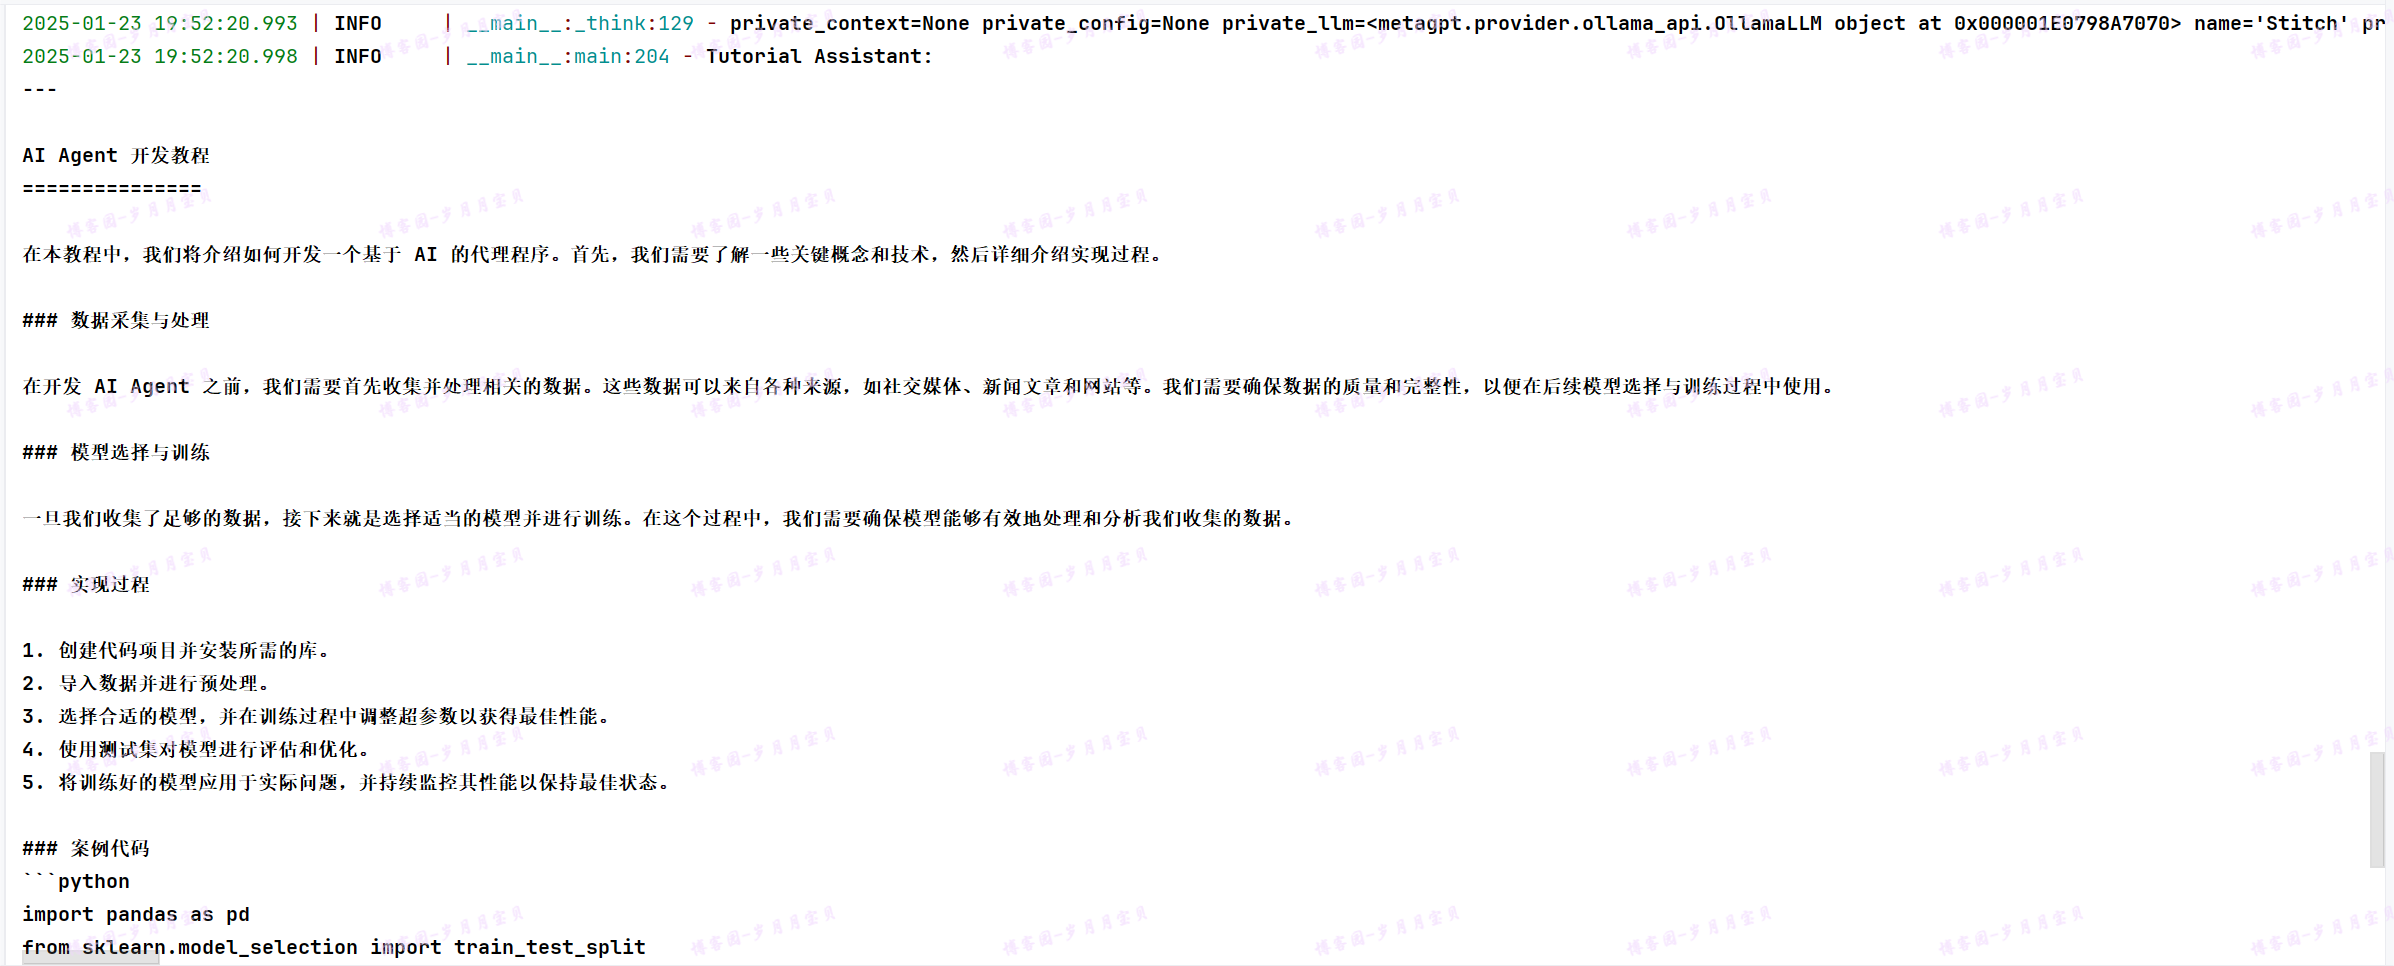
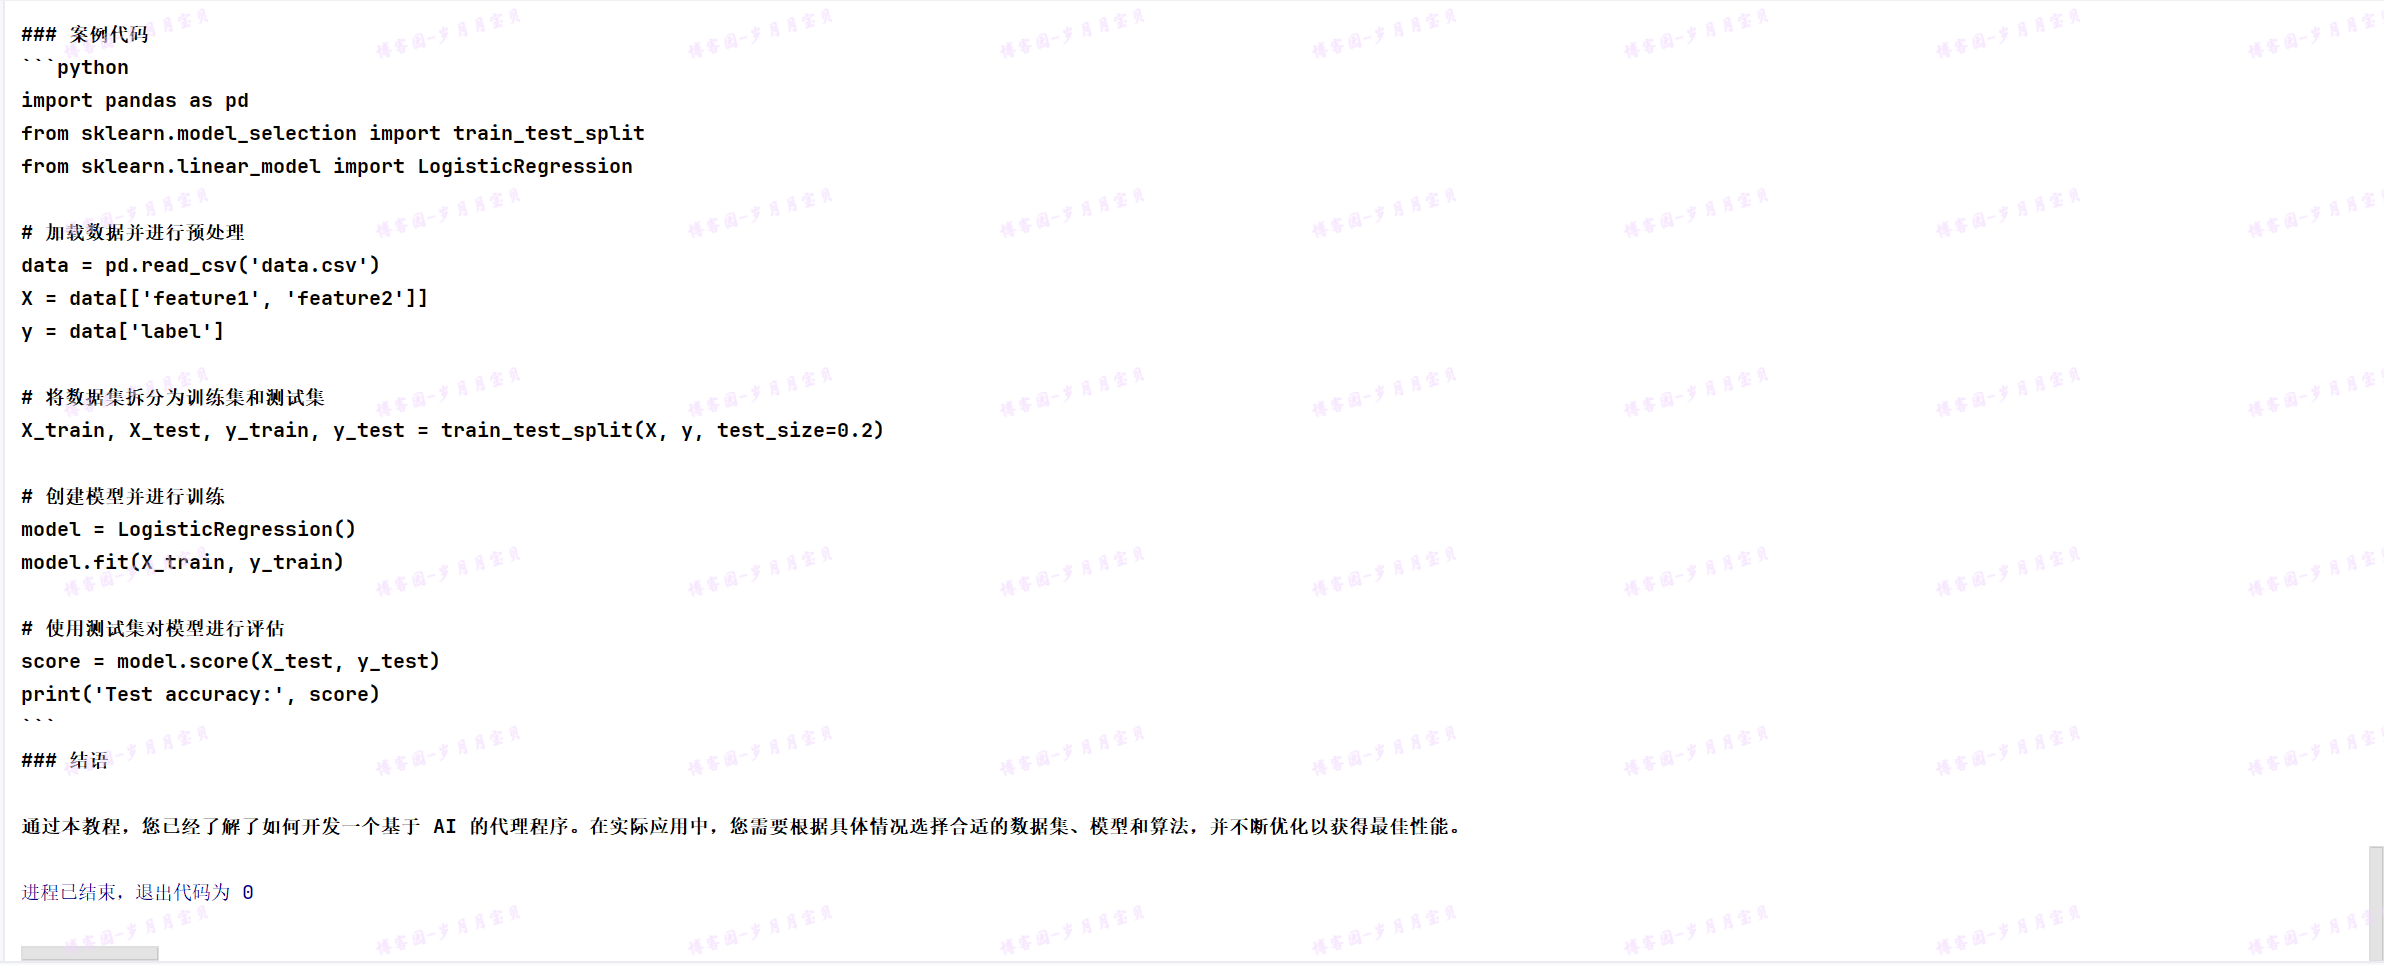
输出的文件地址:
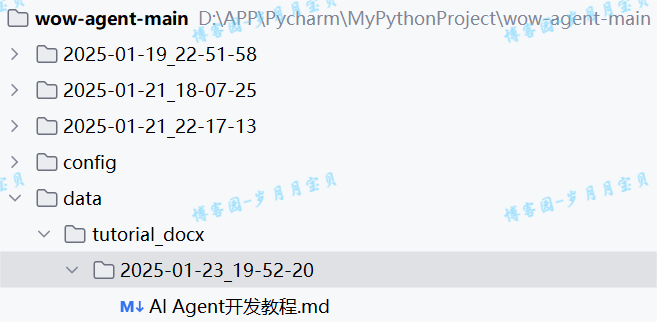
我们来看教程文件😊
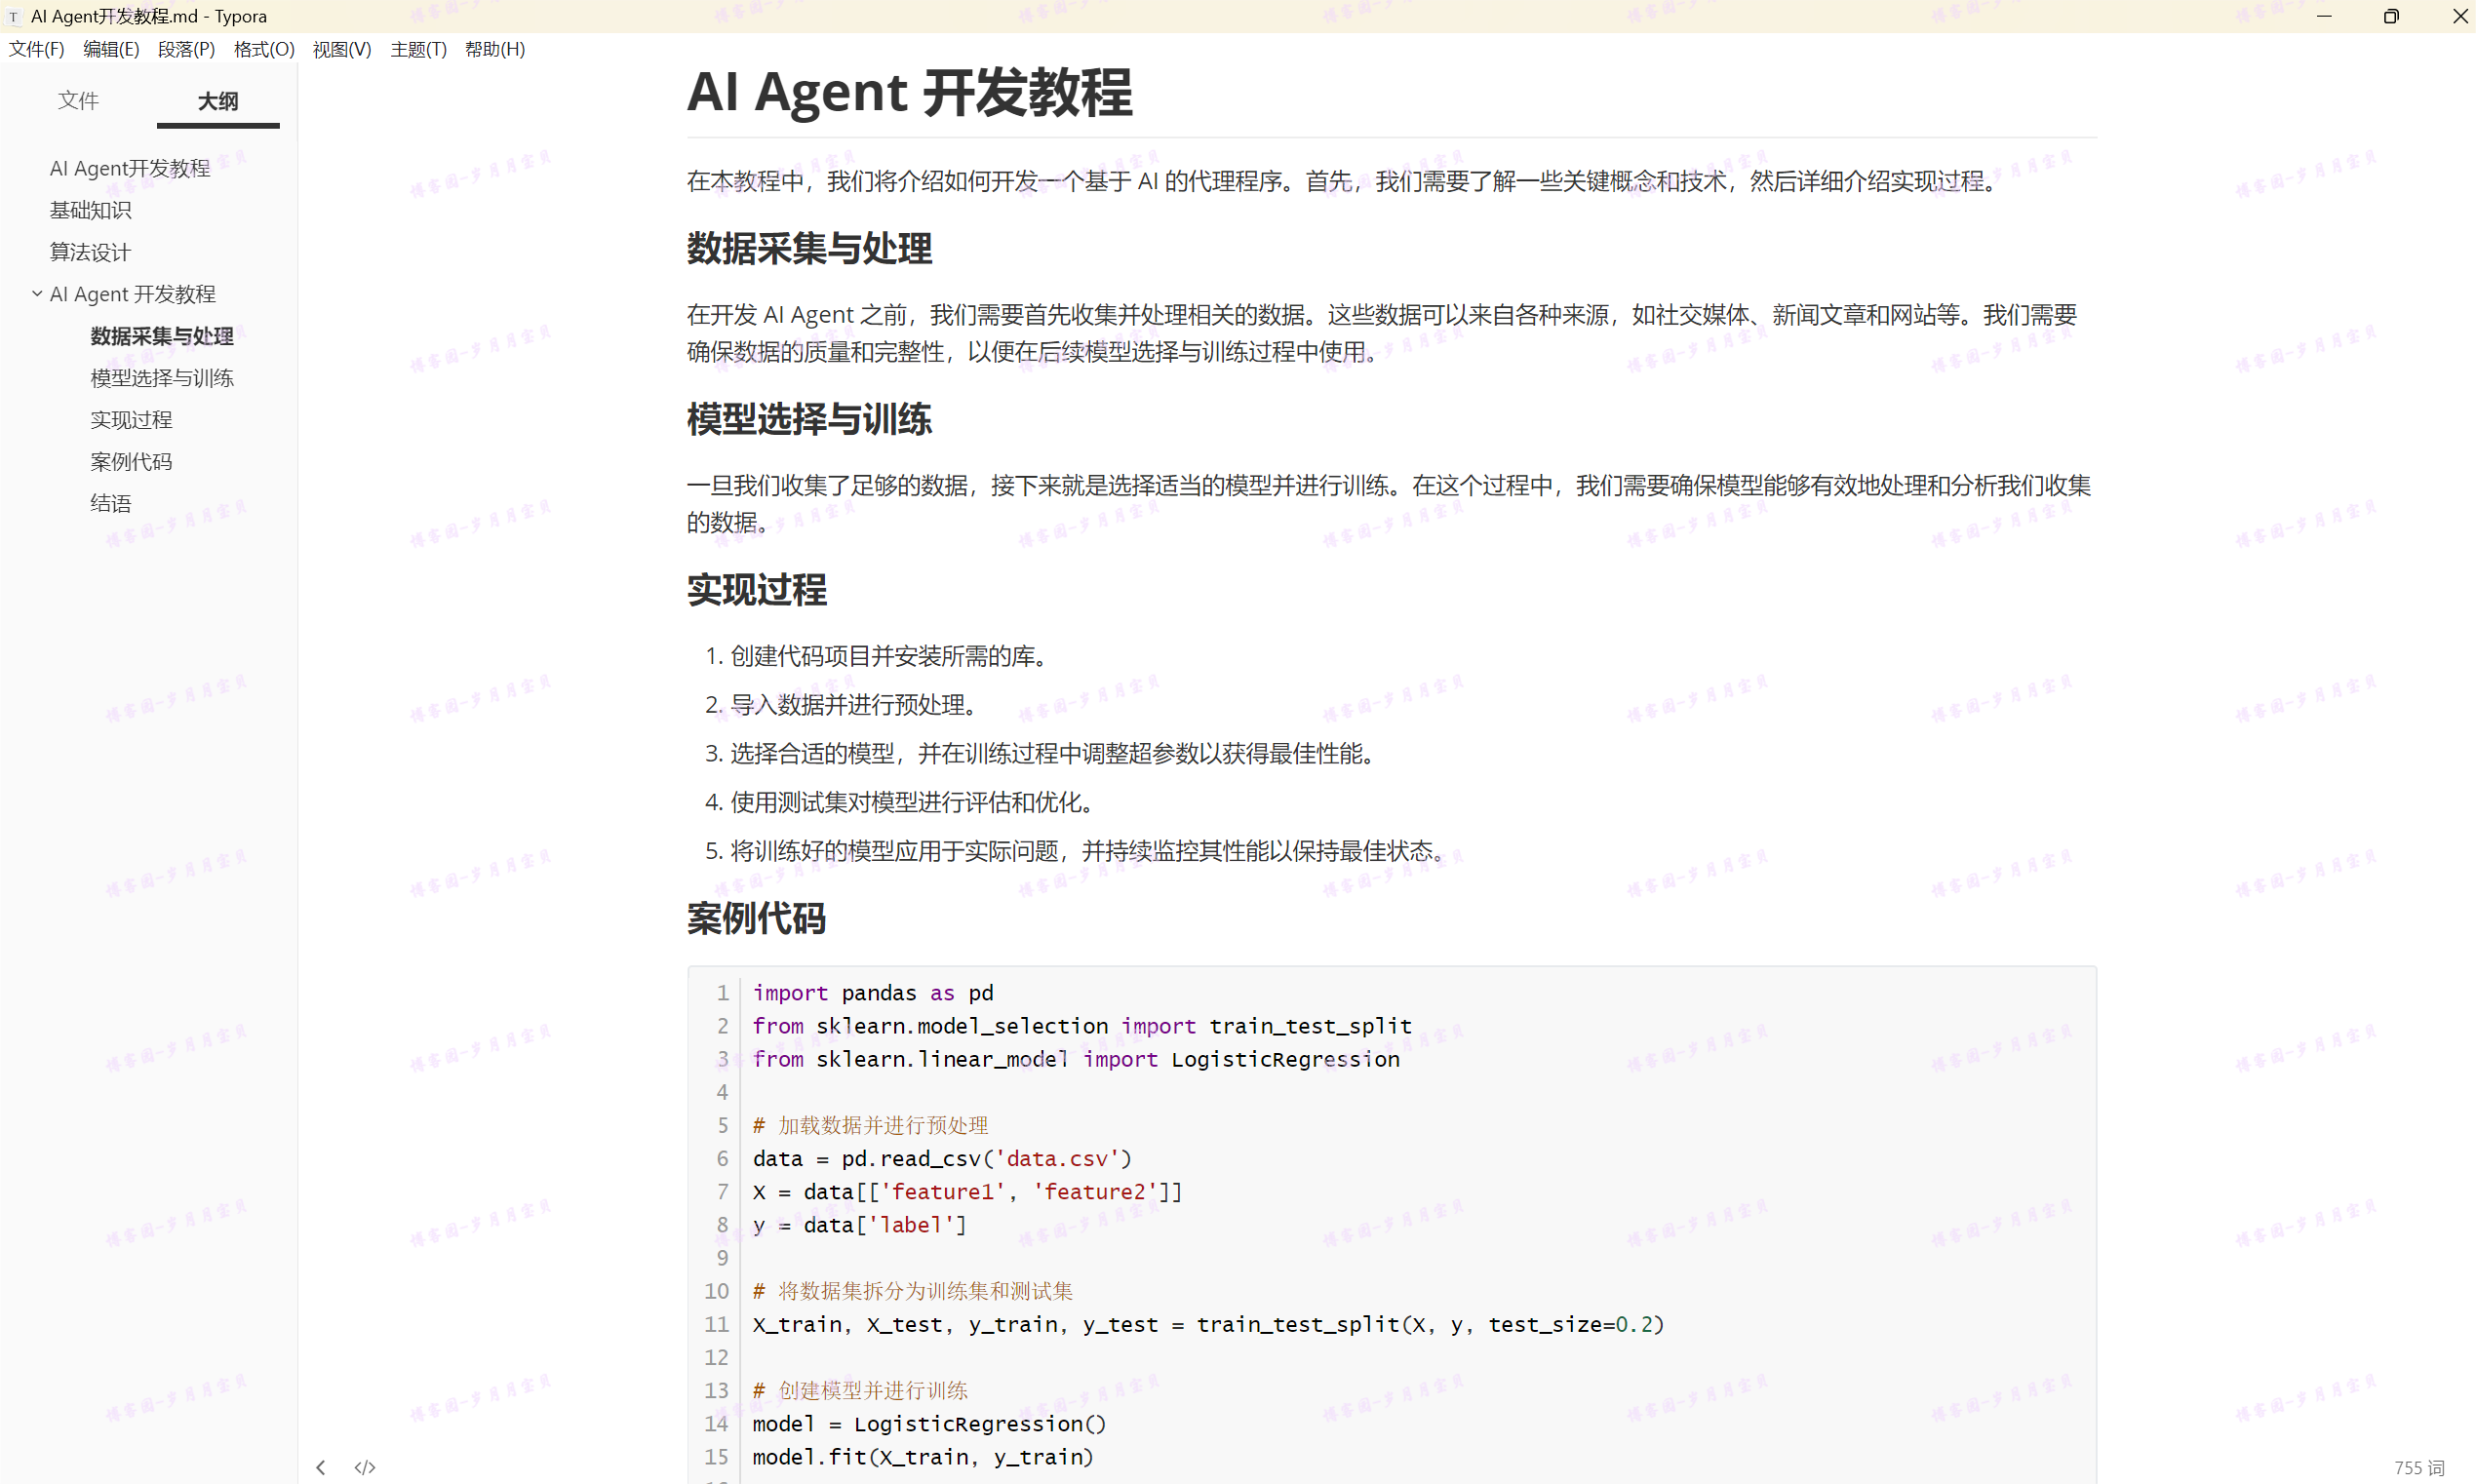
因为vicuna-7B的上下文长度限制,这样的结果已经很棒啦!
metaGPT-订阅智能体
准备工作
输入pip show metagpt查看版本,

OK! 0.8.0!
我们先来完成网页爬取的功能(我们教程直接爬取当天不分国家语言和编程语言的热门仓库进行分析,如果有特殊要求,爬取加上筛选条件后选网页即可)。我们先打开https://github.com/trending 网页,观察网页内容,找到需要的内容对应的 html 元素。

如果熟悉爬虫的就可以直接写爬取和解析脚本了!
如果不熟悉,我们用 ChatGPT 辅助开发:
首先我们将trending页面保存到 本地github-trending-raw.html
格式化后发现内容非常多,

大概700多k,还有一些svg源码,因为一般用CSS足以定位 html里的元素,所以我们可以对html内容进行瘦身,可以使用以下的脚本:
from bs4 import BeautifulSoup

with open("github-trending-raw.html", encoding="utf-8") as f:#🐛最好限定编码
    html = f.read()

soup = BeautifulSoup(html, "html.parser")
for i in soup.find_all(True):
    for name in list(i.attrs):
        if i[name] and name not in ["class"]:
            del i[name]

for i in soup.find_all(["svg", "img", "video", "audio"]):
    i.decompose()

with open("github-trending-slim.html", "w", encoding="utf-8") as f:#🐛最好限定编码
    f.write(str(soup))
经过以上的脚本处理之后,大概还有200多k。

对于爬虫来说,重要的是html的结构。处理后的html文件其实有大量的信息是重复的,如果我们要让GPT协助我们写爬虫脚本,只需要截取部分信息就可以了。
接下来解析一下html文件
import aiohttp
import asyncio
from bs4 import BeautifulSoup

def fetch_html(url):
    with open(url, encoding="utf-8") as f:
        html = f.read()
    return html

async def parse_github_trending(html):
    soup = BeautifulSoup(html, 'html.parser')

    repositories = []

    for article in soup.select('article.Box-row'):
        repo_info = {}

        repo_info['name'] = article.select_one('h2 a').text.strip()
        repo_info['url'] = article.select_one('h2 a')['href'].strip()

        # Description
        description_element = article.select_one('p')
        repo_info['description'] = description_element.text.strip() if description_element else None

        # Language
        language_element = article.select_one('span[itemprop="programmingLanguage"]')
        repo_info['language'] = language_element.text.strip() if language_element else None

        # Stars and Forks
        stars_element = article.select('a.Link--muted')[0]
        forks_element = article.select('a.Link--muted')[1]
        repo_info['stars'] = stars_element.text.strip()
        repo_info['forks'] = forks_element.text.strip()

        # Today's Stars
        today_stars_element = article.select_one('span.d-inline-block.float-sm-right')
        repo_info['today_stars'] = today_stars_element.text.strip() if today_stars_element else None

        repositories.append(repo_info)

    return repositories

async def main():
    url = 'github-trending-raw.html'
    html = fetch_html(url)
    repositories = await parse_github_trending(html)

    for repo in repositories:
        print(f"Name: {repo['name']}")
        print(f"URL: https://github.com{repo['url']}")
        print(f"Description: {repo['description']}")
        print(f"Language: {repo['language']}")
        print(f"Stars: {repo['stars']}")
        print(f"Forks: {repo['forks']}")
        print(f"Today's Stars: {repo['today_stars']}")
        print()

# await main()🐛
if __name__ == '__main__':
    asyncio.run(main())
上面这些代码的作用是解析一下github-trending的数据。由于github-trending网站打开比较慢, 我们前面先把github的trending页面保存到本地,再进行解读。
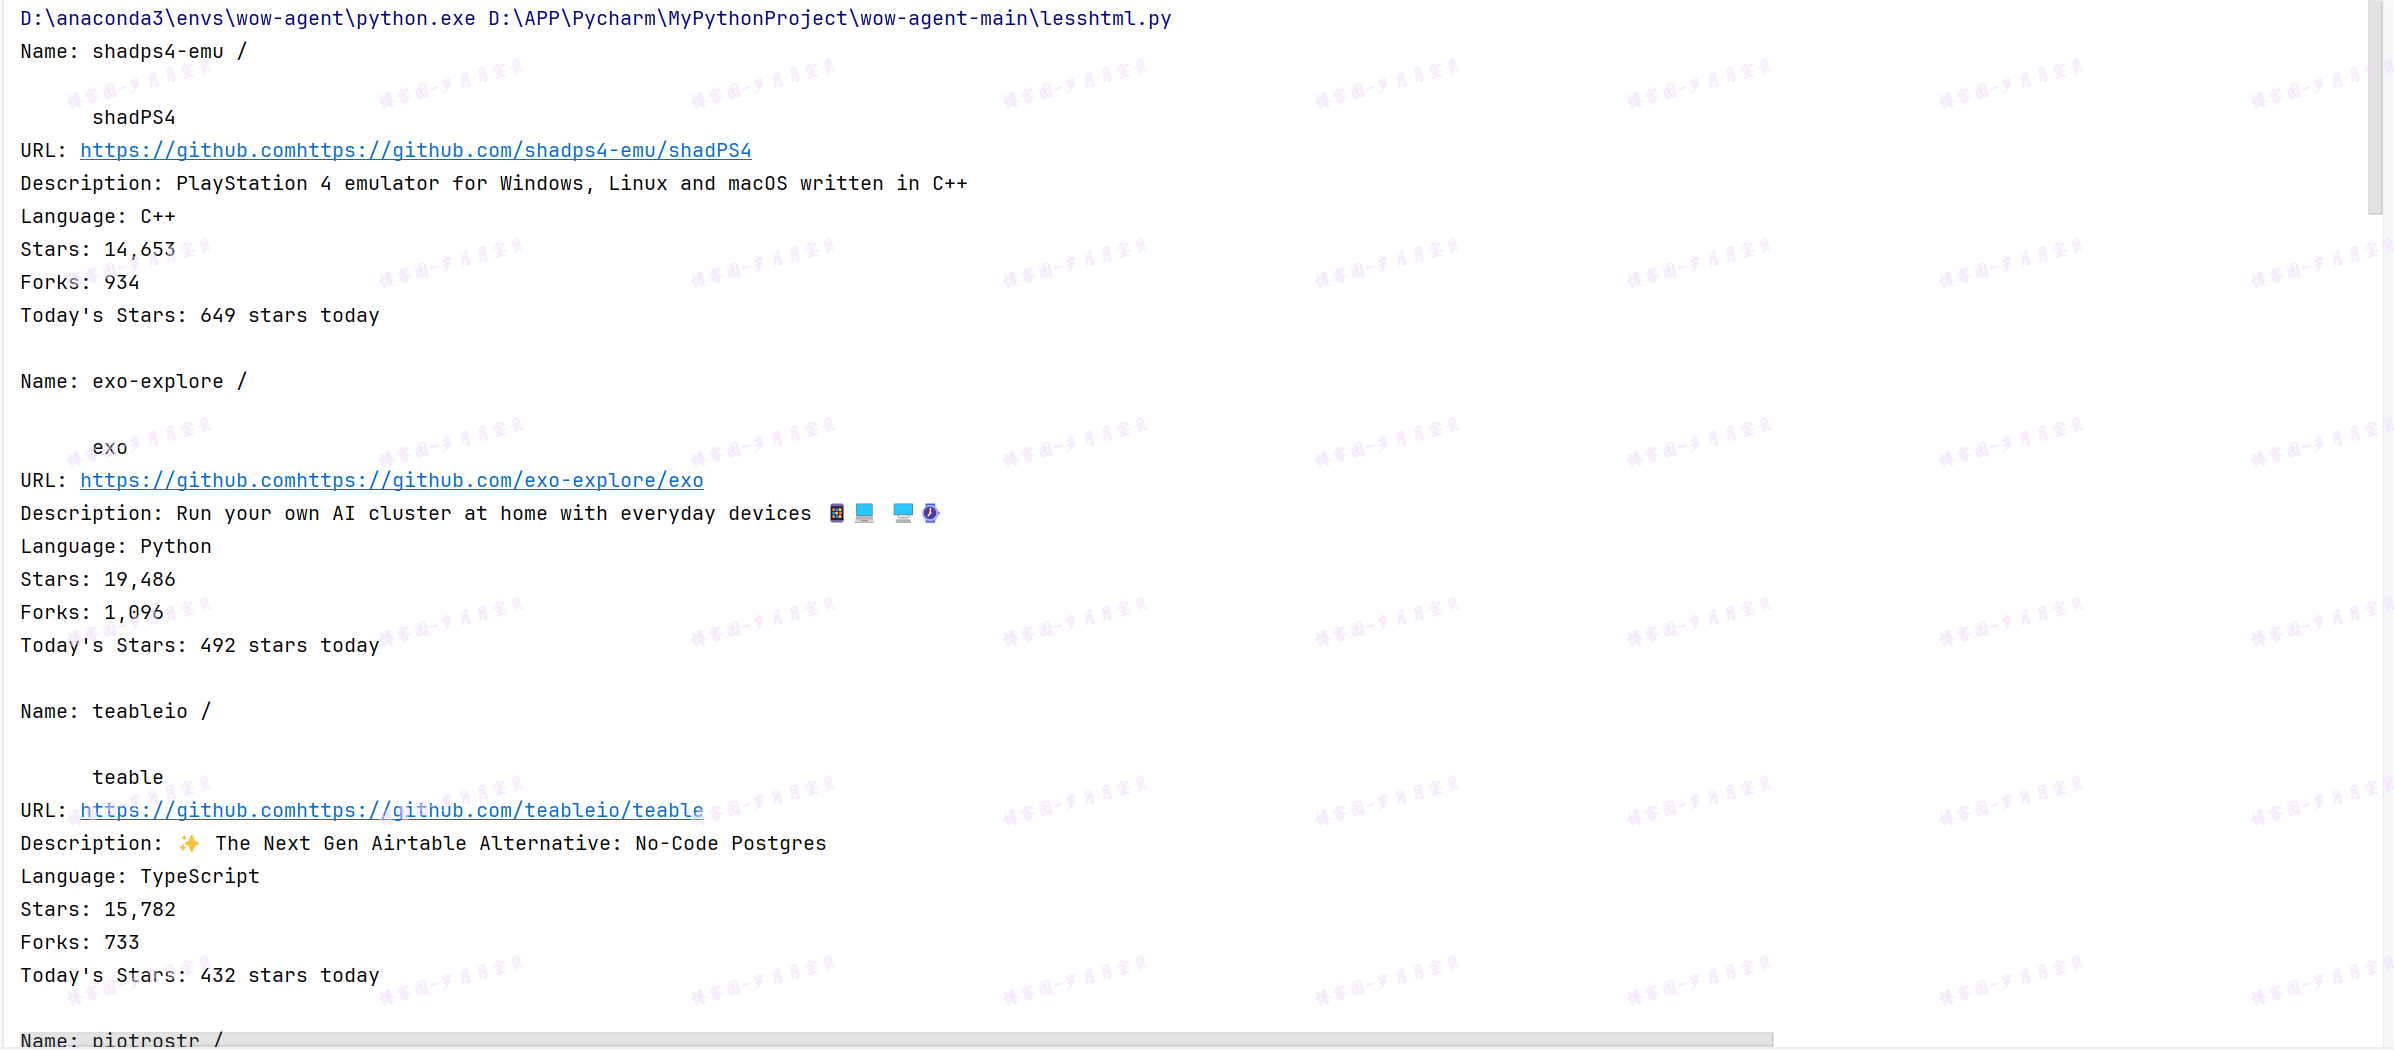
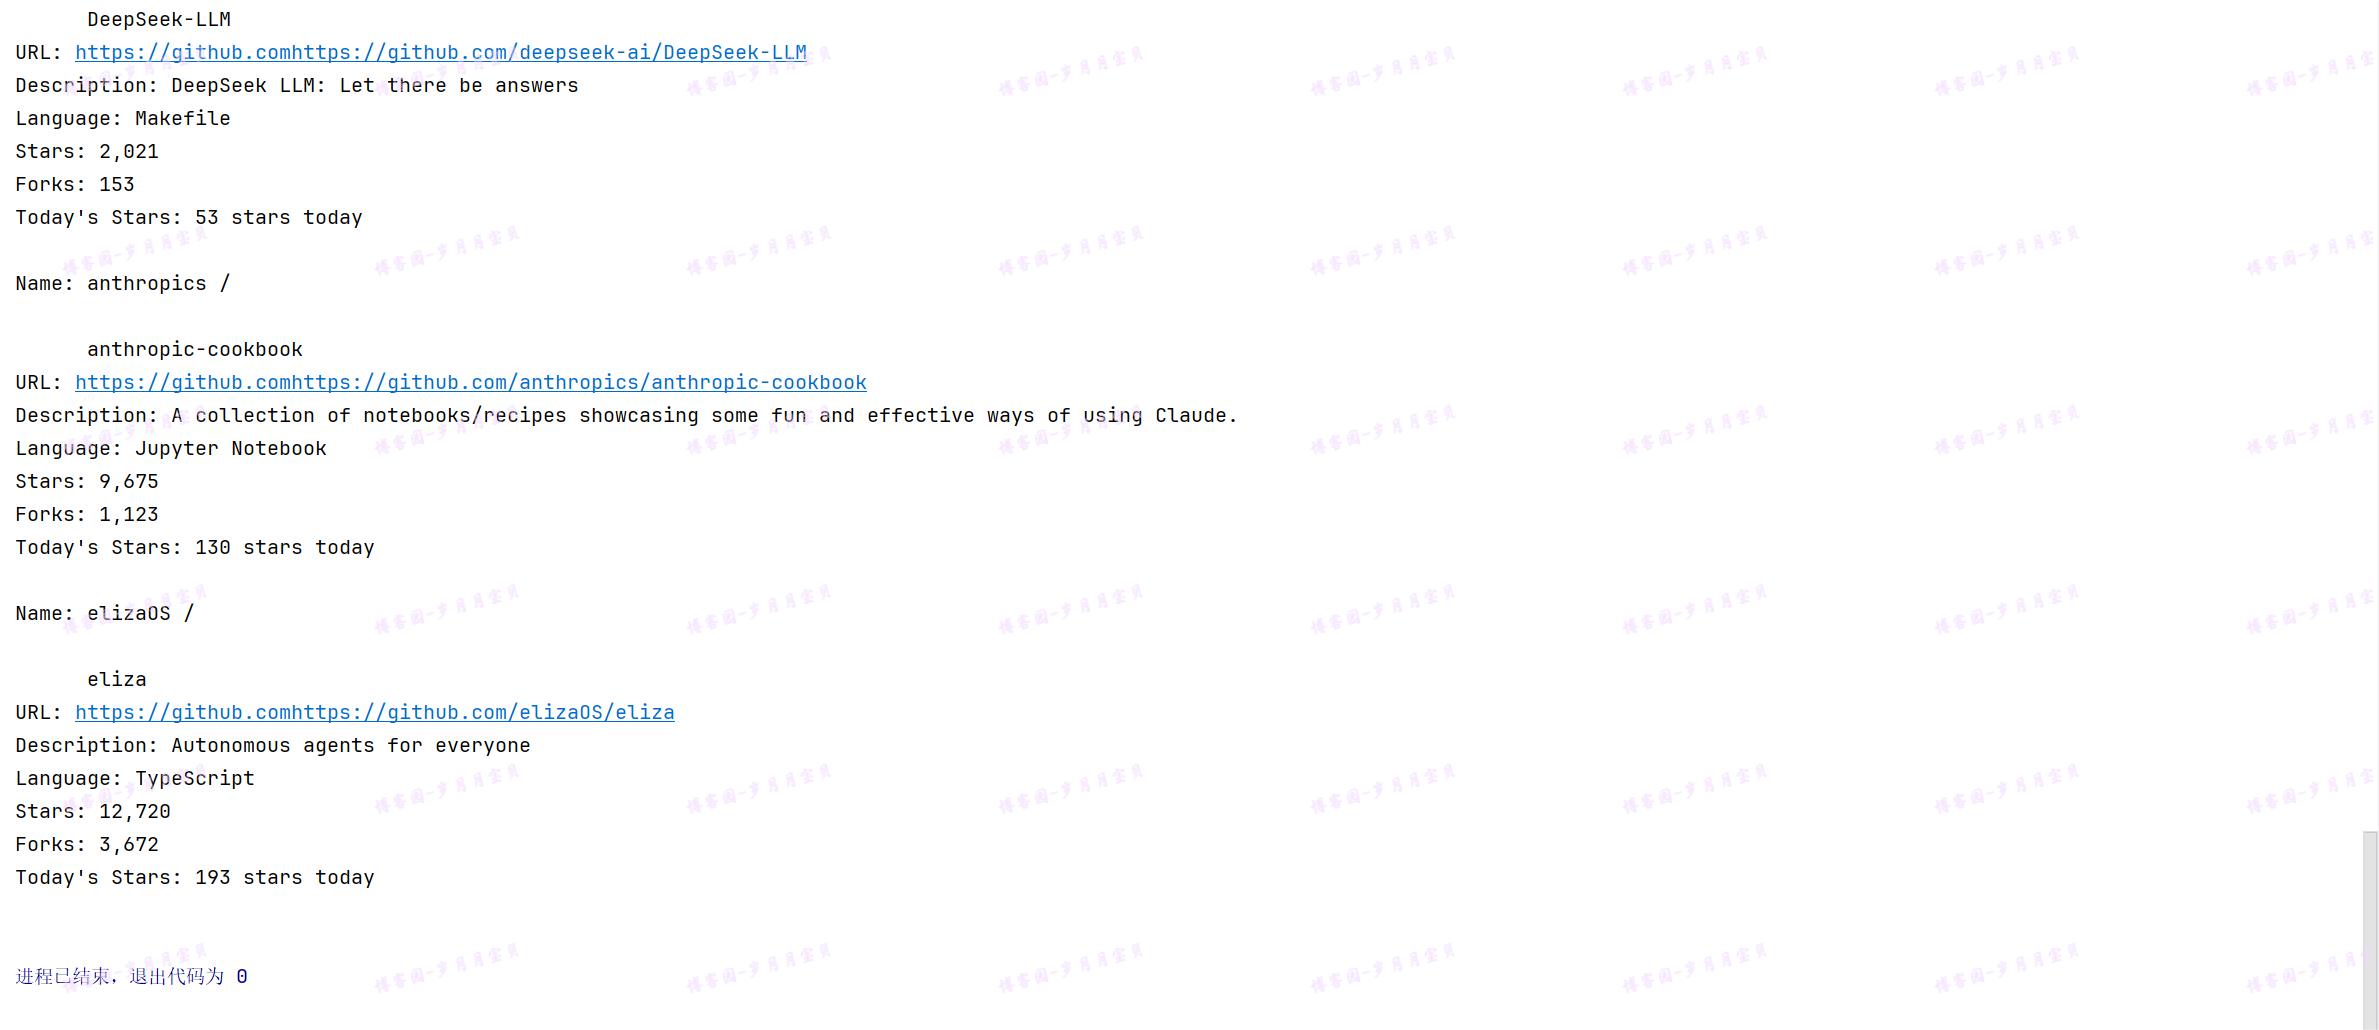
成功!
导入其他相关的库
#pip install aiocron -i https://pypi.tuna.tsinghua.edu.cn/simple#🐛
#pip install aiohttp#🐛
import os#没用到
from typing import Any, AsyncGenerator, Awaitable, Callable, Dict, Optional
from aiocron import crontab
from pydantic import BaseModel, Field
from pytz import BaseTzInfo

from metagpt.actions.action import Action
from metagpt.logs import logger
from metagpt.roles import Role
from metagpt.schema import Message
import asyncio#🐛
from bs4 import BeautifulSoup#🐛
import aiohttp#🐛
from metagpt.subscription import SubscriptionRunner#🐛
from metagpt.roles import Searcher#没用到
from metagpt.schema import Message#🐛

# fix SubscriptionRunner not fully defined
from metagpt.environment import Environment as _  # noqa: F401
订阅模块
可以from metagpt.subscription import SubscriptionRunner导入,这里贴上代码供参考
class SubscriptionRunner(BaseModel):
    """一个简单的封装类,用于使用 asyncio 管理不同角色的订阅任务.
    Example:#需要注释掉,否则会进行测试🐛
        # >>> import asyncio
        # >>> from metagpt.subscription import SubscriptionRunner
        # >>> from metagpt.roles import Searcher
        # >>> from metagpt.schema import Message
        # >>> async def trigger():
        # ...     while True:
        # ...         yield Message("the latest news about OpenAI")
        # ...         await asyncio.sleep(3600 * 24)
        # >>> async def callback(msg: Message):
        # ...     print(msg.content)
        # >>> async def main():
        # ...     pb = SubscriptionRunner()
        # ...     await pb.subscribe(Searcher(), trigger(), callback)
        # ...     await pb.run()
        # >>> asyncio.run(main())
    """

    tasks: Dict[Role, asyncio.Task] = Field(default_factory=dict)

    class Config:
        """
        SubscriptionRunner 的配置类。
        允许字段中使用任意类型。
        """
        arbitrary_types_allowed = True

    async def subscribe(
        self,
        role: Role,
        trigger: AsyncGenerator[Message, None],
        callback: Callable[
            [
                Message,
            ],
            Awaitable[None],
        ],
    ):
        """
        将角色订阅到触发器,并设置一个回调函数来处理角色的响应。

        参数:
            role (Role): 要订阅的角色。
            trigger (AsyncGenerator[Message, None]): 一个异步生成器,生成要由角色处理的消息。
            callback (Callable[[Message], Awaitable[None]]): 一个异步函数,用于处理来自角色的响应。
        """
        loop = asyncio.get_running_loop()

        async def _start_role():
            """
            一个异步函数,用于启动角色的任务。
            它迭代触发器的消息,使用角色处理它们,并用响应调用回调函数。
            """
            async for msg in trigger:
                resp = await role.run(msg)
                await callback(resp)

        self.tasks[role] = loop.create_task(_start_role(), name=f"Subscription-{role}")

    async def unsubscribe(self, role: Role):
        """
        取消角色的订阅,并取消关联的任务。

        参数:
            role (Role): 要取消订阅的角色。
        """
        task = self.tasks.pop(role)
        task.cancel()

    async def run(self, raise_exception: bool = True):
        """
        运行所有已订阅的任务,并处理它们的完成或异常。

        参数:
            raise_exception (bool): 如果为 True,并且任务失败,则引发异常。默认为 True。

        引发:
            task.exception: 如果 raise_exception 为 True 并且任务失败。
        """
        i=0
        while True:
            i+=1
            for role, task in self.tasks.items():
                i=0
                if task.done():
                    if task.exception():
                        if raise_exception:
                            raise task.exception()
                        logger.opt(exception=task.exception()).error(
                            f"Task {task.get_name()} run error"
                        )
                    else:
                        logger.warning(
                            f"Task {task.get_name()} has completed. "
                            "If this is unexpected behavior, please check the trigger function."
                        )
                    self.tasks.pop(role)
                    break
            else:
                await asyncio.sleep(1)
            if i>0:
                break
Actions的实现
TRENDING_ANALYSIS_PROMPT = """# Requirements
You are a GitHub Trending Analyst, aiming to provide users with insightful and personalized recommendations based on the latest
GitHub Trends. Based on the context, fill in the following missing information, generate engaging and informative titles,
ensuring users discover repositories aligned with their interests.

# The title about Today's GitHub Trending
## Today's Trends: Uncover the Hottest GitHub Projects Today! Explore the trending programming languages and discover key domains capturing developers' attention. From ** to **, witness the top projects like never before.
## The Trends Categories: Dive into Today's GitHub Trending Domains! Explore featured projects in domains such as ** and **. Get a quick overview of each project, including programming languages, stars, and more.
## Highlights of the List: Spotlight noteworthy projects on GitHub Trending, including new tools, innovative projects, and rapidly gaining popularity, focusing on delivering distinctive and attention-grabbing content for users.
---
# Format Example


# [Title]

## Today's Trends
Today, ** and ** continue to dominate as the most popular programming languages. Key areas of interest include **, ** and **.
The top popular projects are Project1 and Project2.

## The Trends Categories
1. Generative AI
    - [Project1](https://github/xx/project1): [detail of the project, such as star total and today, language, ...]
    - [Project2](https://github/xx/project2): ...
...

## Highlights of the List
1. [Project1](https://github/xx/project1): [provide specific reasons why this project is recommended].
...

---
# Github Trending
{trending}
"""


class CrawlOSSTrending(Action):
    """
    爬取 GitHub Trending 页面上的开源项目信息。

    Attributes:
        None

    Methods:
        run(url): 爬取指定 URL 的 GitHub Trending 页面,并解析项目信息。
    """
    #async def run(self, url: str = "https://github.com/trending"):#github-trending-raw.html#https://github.com/trending#🐛
    async def run(self, file_path: str = "github-trending-raw.html"):#最终在用本地时没有报网络错误
        """
        爬取指定 URL 的 GitHub Trending 页面,并解析项目信息。

        参数:
            url (str): GitHub Trending 页面的 URL,默认为 "https://github.com/trending"。

        返回:
            list: 包含项目信息的列表,每个项目信息是一个字典。
        """
        # async with aiohttp.ClientSession() as client:
        #     async with client.get(url) as response: #Config , proxy=CONFIG.global_proxy# url, proxy=CONFIG.global_proxy
        #         response.raise_for_status()
        #         html = await response.text()

        try:#🐛
            with open(file_path, 'r', encoding='utf-8') as f:
                html = f.read()
        except FileNotFoundError:
            logger.error(f"File {file_path} not found.")
            return []

        soup = BeautifulSoup(html, "html.parser")

        repositories = []

        for article in soup.select("article.Box-row"):
            repo_info = {}

            repo_info["name"] = (
                article.select_one("h2 a")
                .text.strip()
                .replace("\n", "")
                .replace(" ", "")
            )
            repo_info["url"] = (
                "https://github.com" + article.select_one("h2 a")["href"].strip()
            )

            # Description
            description_element = article.select_one("p")
            repo_info["description"] = (
                description_element.text.strip() if description_element else None
            )

            # Language
            language_element = article.select_one(
                'span[itemprop="programmingLanguage"]'
            )
            repo_info["language"] = (
                language_element.text.strip() if language_element else None
            )

            # Stars and Forks
            stars_element = article.select("a.Link--muted")[0]
            forks_element = article.select("a.Link--muted")[1]
            repo_info["stars"] = stars_element.text.strip()
            repo_info["forks"] = forks_element.text.strip()

            # Today's Stars
            today_stars_element = article.select_one(
                "span.d-inline-block.float-sm-right"
            )
            repo_info["today_stars"] = (
                today_stars_element.text.strip() if today_stars_element else None
            )

            repositories.append(repo_info)

        return repositories


class AnalysisOSSTrending(Action):
    """
    分析 GitHub Trending 数据并生成报告。

    Attributes:
        None

    Methods:
        run(trending): 分析指定的 GitHub Trending 数据并生成报告。
    """
    async def run(self, trending: Any):
        """
        分析指定的 GitHub Trending 数据并生成报告。

        参数:
            trending (Any): GitHub Trending 数据。

        返回:
            str: 生成的报告。
        """
        return await self._aask(TRENDING_ANALYSIS_PROMPT.format(trending=trending))
Role 实现
# Role实现
# 对于V0.7 以上的版本,需要把老版本的self._init_actions 改为self.set_actions
class OssWatcher(Role):
    """
    一个角色类,用于生成有洞察力的 GitHub Trending 分析报告。

    Attributes:
        name (str): 角色的名称,默认为 "Codey"。
        profile (str): 角色的描述,默认为 "OssWatcher"。
        goal (str): 角色的目标,默认为 "Generate an insightful GitHub Trending analysis report."。
        constraints (str): 角色的限制,默认为 "Only analyze based on the provided GitHub Trending data."。
        actions (list): 角色可以执行的动作列表。

    Methods:
        __init__(name, profile, goal, constraints): 初始化角色。
        _act(): 执行角色的动作。
    """
    def __init__(
        self,
        name="Codey",
        profile="OssWatcher",
        goal="Generate an insightful GitHub Trending analysis report.",
        constraints="Only analyze based on the provided GitHub Trending data.",
    ):
        """
        初始化 OssWatcher 角色。

        参数:
            name (str): 角色的名称。
            profile (str): 角色的描述。
            goal (str): 角色的目标。
            constraints (str): 角色的限制。
        """
        super().__init__(name=name, profile=profile, goal=goal, constraints=constraints)
        self.set_actions([CrawlOSSTrending, AnalysisOSSTrending])
        self._set_react_mode(react_mode="by_order")

    async def _act(self) -> Message:
        """
        执行角色的动作。

        步骤:
        1. 记录日志信息,表示角色已准备好执行任务。
        2. 获取待执行的任务(按顺序选择动作)。
        3. 获取最近的一条消息内容。
        4. 执行任务并获取结果。
        5. 创建一条新的消息,包含结果内容,并将其添加到角色的记忆中。
        6. 返回新创建的消息。

        返回:
            Message: 包含执行结果的消息。
        """
        logger.info(f"{self._setting}: ready to {self.rc.todo}")
        # 按顺序选择动作
        # todo will be first SimpleWriteCode() then SimpleRunCode()
        todo = self.rc.todo

        msg = self.get_memories(k=1)[0]  # find the most k recent messages,获取最近的一条消息
        result = await todo.run(msg.content)

        msg = Message(content=str(result), role=self.profile, cause_by=type(todo))
        self.rc.memory.add(msg)
        return msg
处理微信推送消息的回调函数&定时触发新闻更新的函数
# 异步回调函数,用于处理微信推送的消息
async def wxpusher_callback(msg: Message):
    print(msg.content)

# 异步触发器函数,生成一系列消息
async def trigger():
    # 这里设置了只触发五次,也可以用while True 永远执行下去
    for i in range(5):
        yield Message("github-trending-raw.html")#🐛the latest news about OpenAI#https://github.com/trending
        #yield Message("https://github.com/trending")
        await asyncio.sleep(5)
        #  每隔五秒钟执行一次。
        # 也可以设置为每隔3600 * 24 秒执行一次
运行入口
# 运行入口
async def main():
    callbacks = []
    if not callbacks:# 如果没有回调函数,则添加一个默认的打印回调函数
        async def _print(msg: Message):
            print(msg.content)
        callbacks.append(_print)

    # callback 回调函数,用于处理生成的消息
    async def callback(msg):
        await asyncio.gather(*(call(msg) for call in callbacks))# 并发调用所有回调函数

    runner = SubscriptionRunner()# 创建SubscriptionRunner实例
    await runner.subscribe(OssWatcher(), trigger(), callback) # 订阅OssWatcher角色到触发器,并设置回调函数
    await runner.run()# 运行所有订阅的任务

# await main()🐛
if __name__ == '__main__':
    asyncio.run(main())
(可能因为github的反爬虫机制,一次次访问都不行.最后改为了访问本地的github-trending-raw.html文件,成功!)
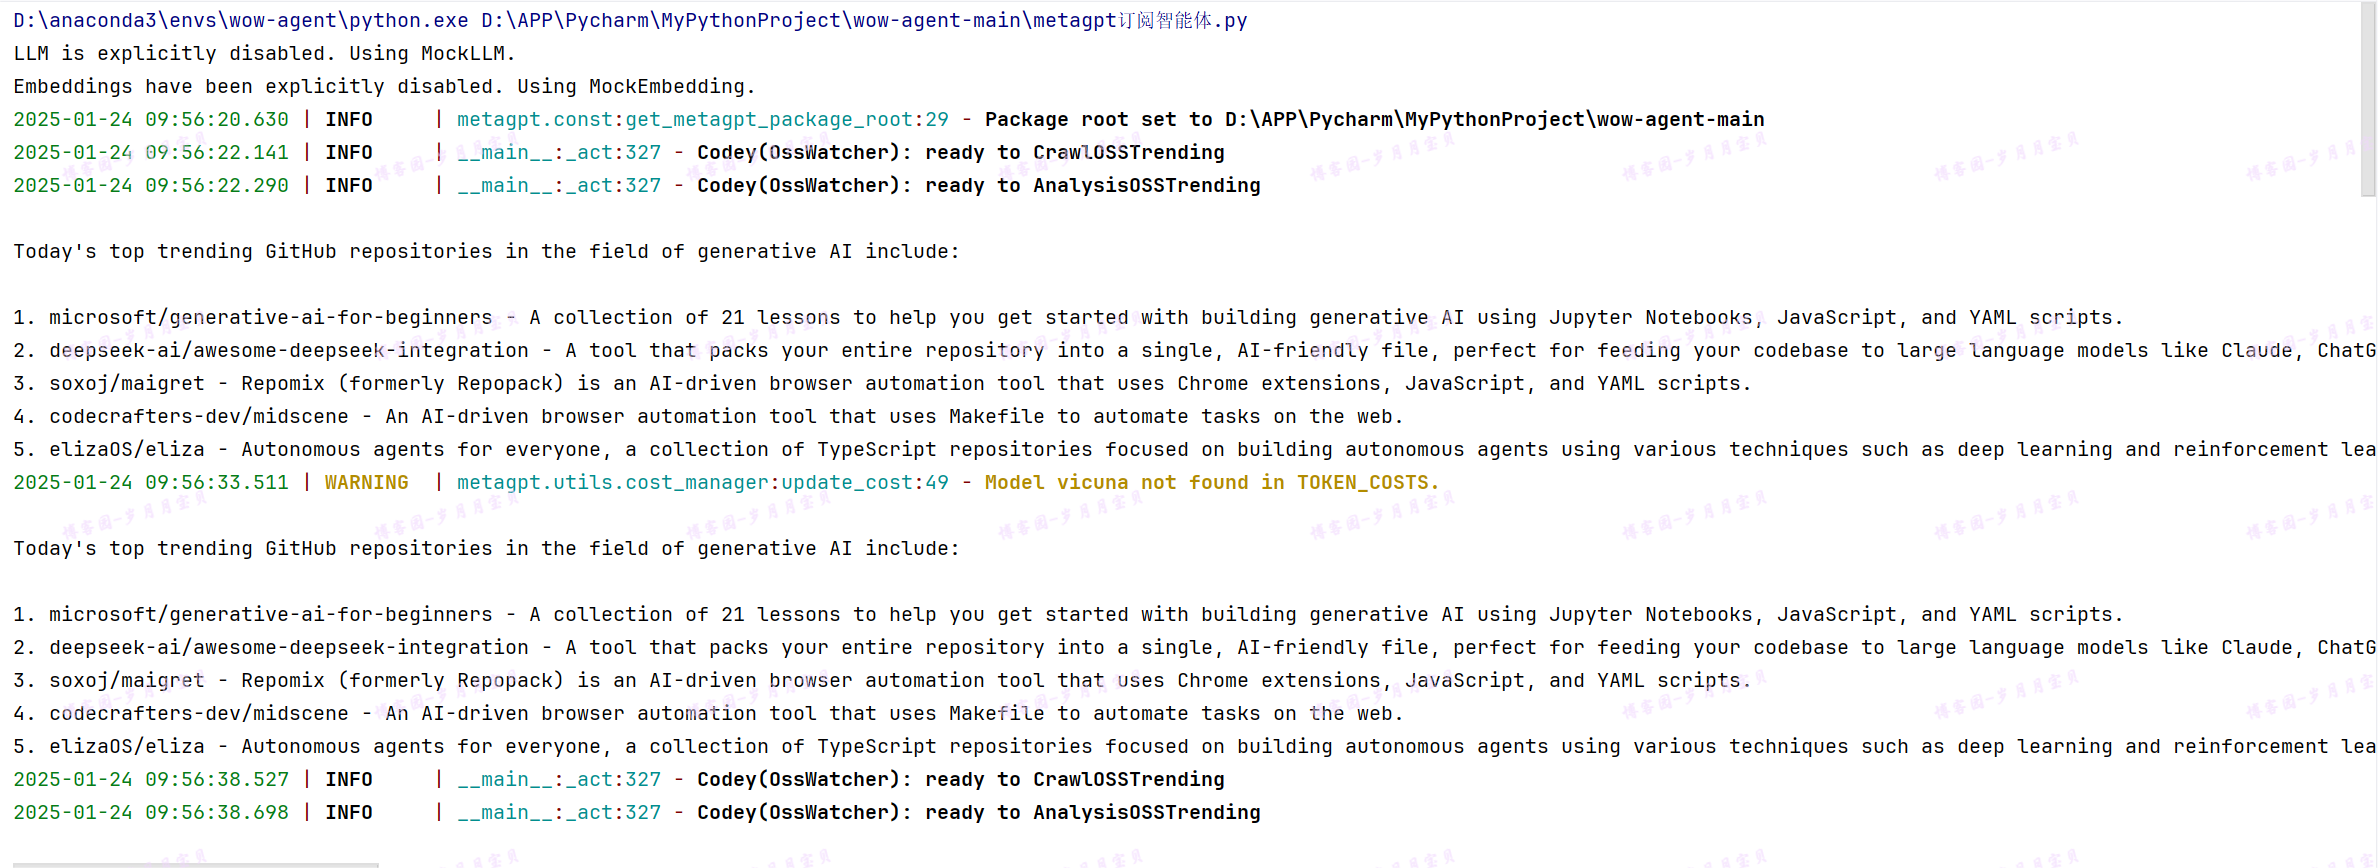
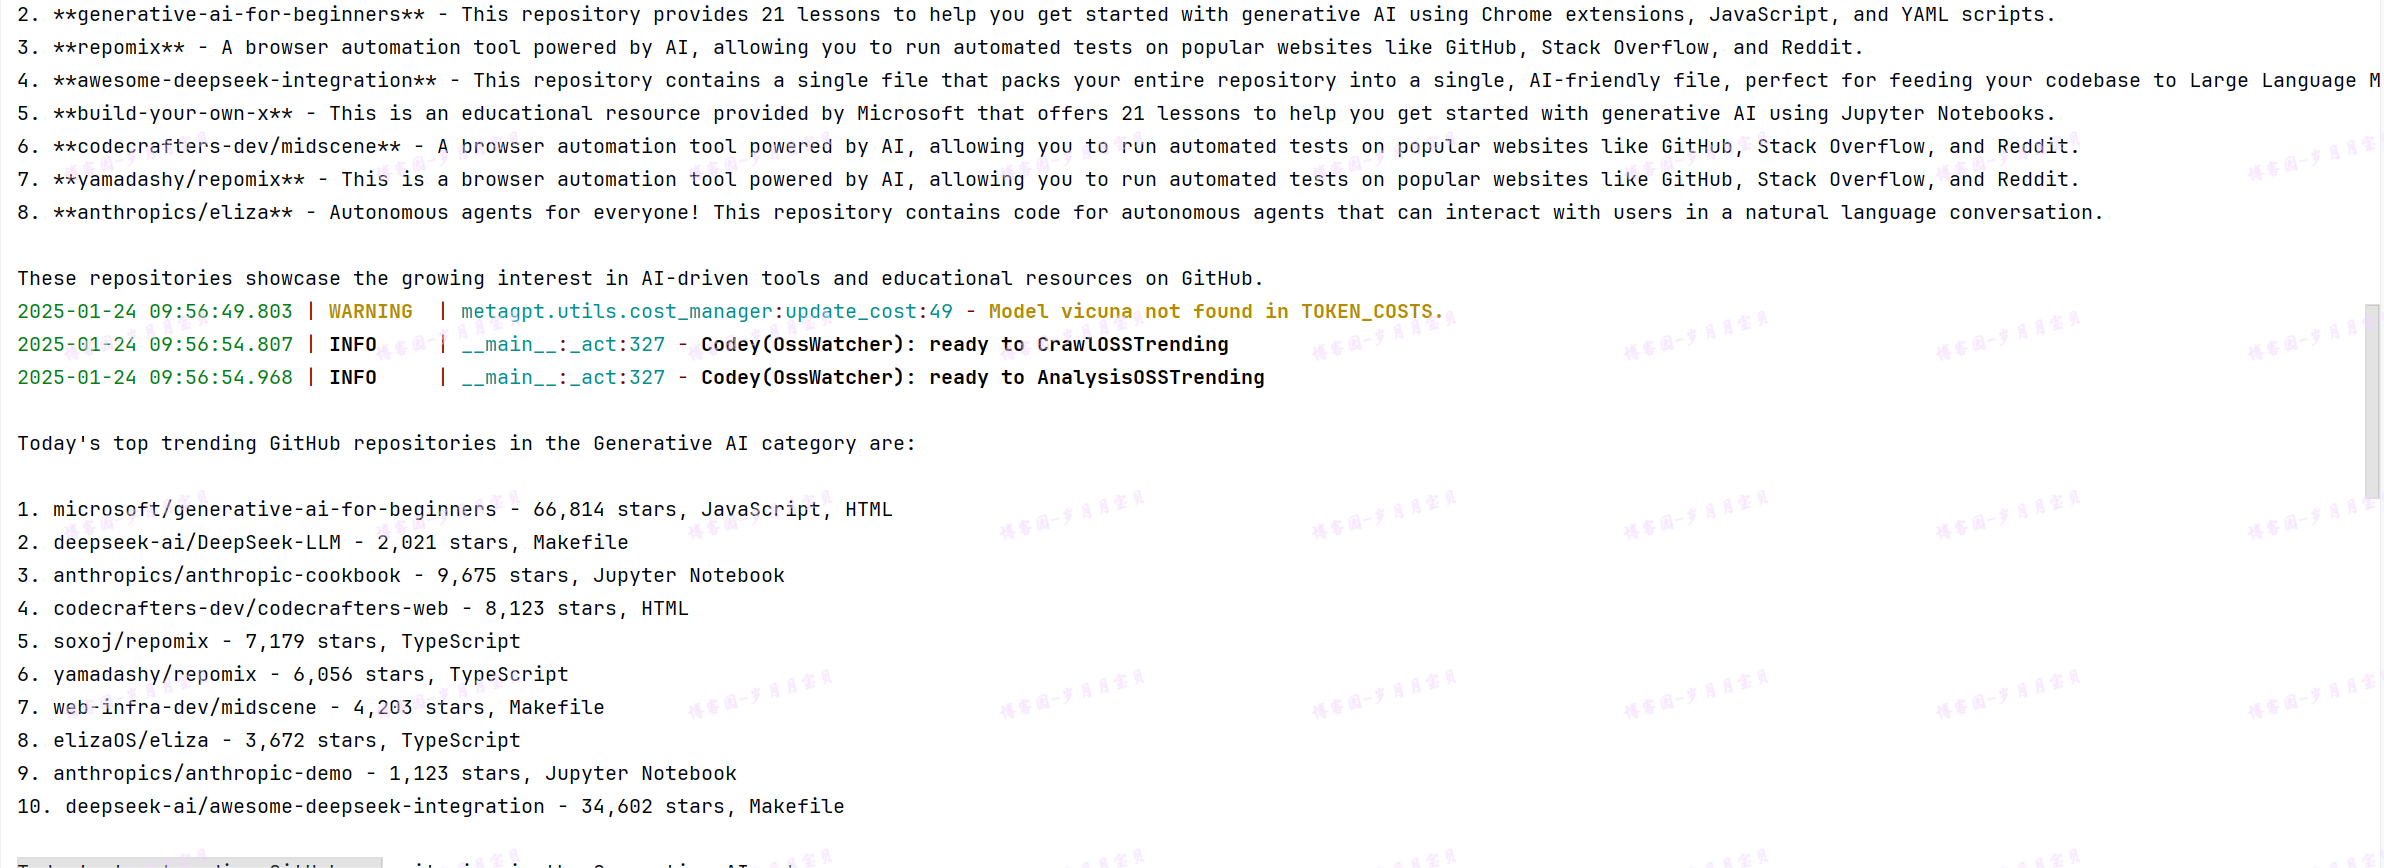
🎉(对 中间有出现ollama访问不稳定的情况 大家可以依据自己情况 换成127.0.0.1也OK的)
metaGPT-单动作多智能体
理论来源文档:多智能体入门 | MetaGPT,实践还是常驻博客园的岁月月宝贝!
在上一章中,我们简要讨论了单智能体的创建。虽然对许多情况来说,单智能体可能已经足够,但更复杂的任务通常需要协作和团队合作,这也就是多智能体为什么必不可少的原因。MetaGPT的核心优势也在于轻松灵活地开发一个智能体团队。在MetaGPT框架下,用户可以通过少量代码实现智能体之间的交互。
完成本节,你将能够:
- 理解智能体之间如何进行交互
- 开发你的第一个智能体团队
开发你的第一个智能体团队
希望你会发现软件创业示例很有启发。也许现在你已经有了灵感,想要开发一个根据你的独特需求而定制的智能体团队。在本节中,我们将继续在智能体入门中的简单代码示例中添加更多角色,并引入智能体之间的交互协作。
让我们还雇佣一名测试人员和一名审阅人员携手与编码人员一起工作。这开始看起来像一个开发团队了,不是吗?总的来说,我们需要三个步骤来建立团队并使其运作:
- 定义每个角色能够执行的预期动作
- 基于标准作业程序(SOP)确保每个角色遵守它。通过使每个角色观察上游的相应输出结果,并为下游发布自己的输出结果,可以实现这一点。
- 初始化所有角色,创建一个带有环境的智能体团队,并使它们之间能够进行交互。
定义动作和角色
与智能体入门相同的过程,我们可以定义三个具有各自动作的Role:
SimpleCoder具有SimpleWriteCode动作,接收用户的指令并编写主要代码SimpleTester具有SimpleWriteTest动作,从SimpleWriteCode的输出中获取主代码并为其提供测试套件SimpleReviewer具有SimpleWriteReview动作,审查来自SimpleWriteTest输出的测试用例,并检查其覆盖范围和质量
通过上述概述,我们使得 SOP(标准作业程序)变得更加清晰明了。接下来,我们将详细讨论如何根据 SOP 来定义Role。
准备相关库
import re

import fire

from metagpt.actions import Action, UserRequirement
from metagpt.logs import logger
from metagpt.roles import Role
from metagpt.schema import Message
from metagpt.team import Team

import asyncio#好像没用
import typer#好像没用
定义动作
我们列举了三个 Action。
# 构造写代码的动作

def parse_code(rsp):
    pattern = r"```python(.*)```"
    match = re.search(pattern, rsp, re.DOTALL)
    code_text = match.group(1) if match else rsp
    return code_text


class SimpleWriteCode(Action):
    PROMPT_TEMPLATE: str = """
    Write a python function that can {instruction}.
    Return ```python your_code_here ```with NO other texts,
    your code:
    """
    name: str = "SimpleWriteCode"

    async def run(self, instruction: str):
        prompt = self.PROMPT_TEMPLATE.format(instruction=instruction)

        rsp = await self._aask(prompt)

        code_text = parse_code(rsp)

        return code_text
# 构造写测试样例的动作
class SimpleWriteTest(Action):
    PROMPT_TEMPLATE: str = """
    Context: {context}
    Write {k} unit tests using pytest for the given function, assuming you have imported it.
    Return ```python your_code_here ```with NO other texts,
    your code:
    """

    name: str = "SimpleWriteTest"

    async def run(self, context: str, k: int = 3):
        prompt = self.PROMPT_TEMPLATE.format(context=context, k=k)

        rsp = await self._aask(prompt)

        code_text = parse_code(rsp)

        return code_text
# 构造审查代码的动作
class SimpleWriteReview(Action):
    PROMPT_TEMPLATE: str = """
    Context: {context}
    Review the test cases and provide one critical comments:
    """

    name: str = "SimpleWriteReview"

    async def run(self, context: str):
        prompt = self.PROMPT_TEMPLATE.format(context=context)

        rsp = await self._aask(prompt)

        return rsp
定义角色
在许多多智能体场景中,定义Role可能只需几行代码。对于SimpleCoder,我们做了两件事:
- 使用
set_actions为Role配备适当的Action,这与设置单智能体相同 - 多智能体操作逻辑:我们使
Role_watch来自用户或其他智能体的重要上游消息。回想我们的SOP,SimpleCoder接收用户指令,这是由MetaGPT中的UserRequirement引起的Message。因此,我们添加了self._watch([UserRequirement])。
这就是用户需要做的全部。对于那些对底层机制感兴趣的人,请参见本教程的本章中的机制解释。
# 构造写代码的角色
#from metagpt.roles import Role
class SimpleCoder(Role):
    name: str = "Alice"
    profile: str = "SimpleCoder"

    def __init__(self, **kwargs):
        super().__init__(**kwargs)
        self._watch([UserRequirement])
        self.set_actions([SimpleWriteCode])
与上述相似,对于 SimpleTester,我们:
1.使用 set_actions 为SimpleTester配备 SimpleWriteTest 动作
2.使Role _watch 来自其他智能体的重要上游消息。回想我们的SOP,SimpleTester从 SimpleCoder 中获取主代码,这是由 SimpleWriteCode 引起的 Message。因此,我们添加了 self._watch([SimpleWriteCode])。
一个扩展的问题:想一想如果我们使用
self._watch([SimpleWriteCode, SimpleWriteReview])会意味着什么,可以尝试这样做
此外,你可以为智能体定义自己的操作逻辑。这适用于Action需要多个输入的情况,你希望修改输入,使用特定记忆,或进行任何其他更改以反映特定逻辑的情况。因此,我们:
3.重写 _act 函数,就像我们在智能体入门中的单智能体设置中所做的那样。在这里,我们希望SimpleTester将所有记忆用作编写测试用例的上下文,并希望有5个测试用例。
#from metagpt.logs import logger
#from metagpt.schema import Message

class SimpleTester(Role):
    name: str = "Bob"
    profile: str = "SimpleTester"

    def __init__(self, **kwargs):
        super().__init__(**kwargs)
        self.set_actions([SimpleWriteTest])
        self._watch([SimpleWriteCode])
        # self._watch([SimpleWriteCode, SimpleWriteReview])  # feel free to try this too

    async def _act(self) -> Message:
        logger.info(f"{self._setting}: to do {self.rc.todo}({self.rc.todo.name})")
        todo = self.rc.todo

        # context = self.get_memories(k=1)[0].content # use the most recent memory as context
        context = self.get_memories()  # use all memories as context

        code_text = await todo.run(context, k=5)  # specify arguments
        msg = Message(content=code_text, role=self.profile, cause_by=type(todo))

        return msg
按照相同的过程定义 SimpleReviewer:
class SimpleReviewer(Role):
    name: str = "Charlie"
    profile: str = "SimpleReviewer"

    def __init__(self, **kwargs):
        super().__init__(**kwargs)
        self.set_actions([SimpleWriteReview])
        self._watch([SimpleWriteTest])
创建一个团队并添加角色
现在我们已经定义了三个 Role,是时候将它们放在一起了。我们初始化所有角色,设置一个 Team,并hire 它们。
运行 Team,我们应该会看到它们之间的协作!
#import asyncio
#from metagpt.team import Team

async def main(
    idea: str = "write a function that calculates the product of a list",
    investment: float = 3.0,
    n_round: int = 5,
    add_human: bool = False,
):
    logger.info(idea)

    team = Team()
    team.hire(
        [
            SimpleCoder(),
            SimpleTester(),
            SimpleReviewer(),
        ]
    )

    team.invest(investment=investment)
    team.run_project(idea)
    await team.run(n_round=n_round)

#await main()#老师的
if __name__ == "__main__":
    fire.Fire(main)
运行输出结果!
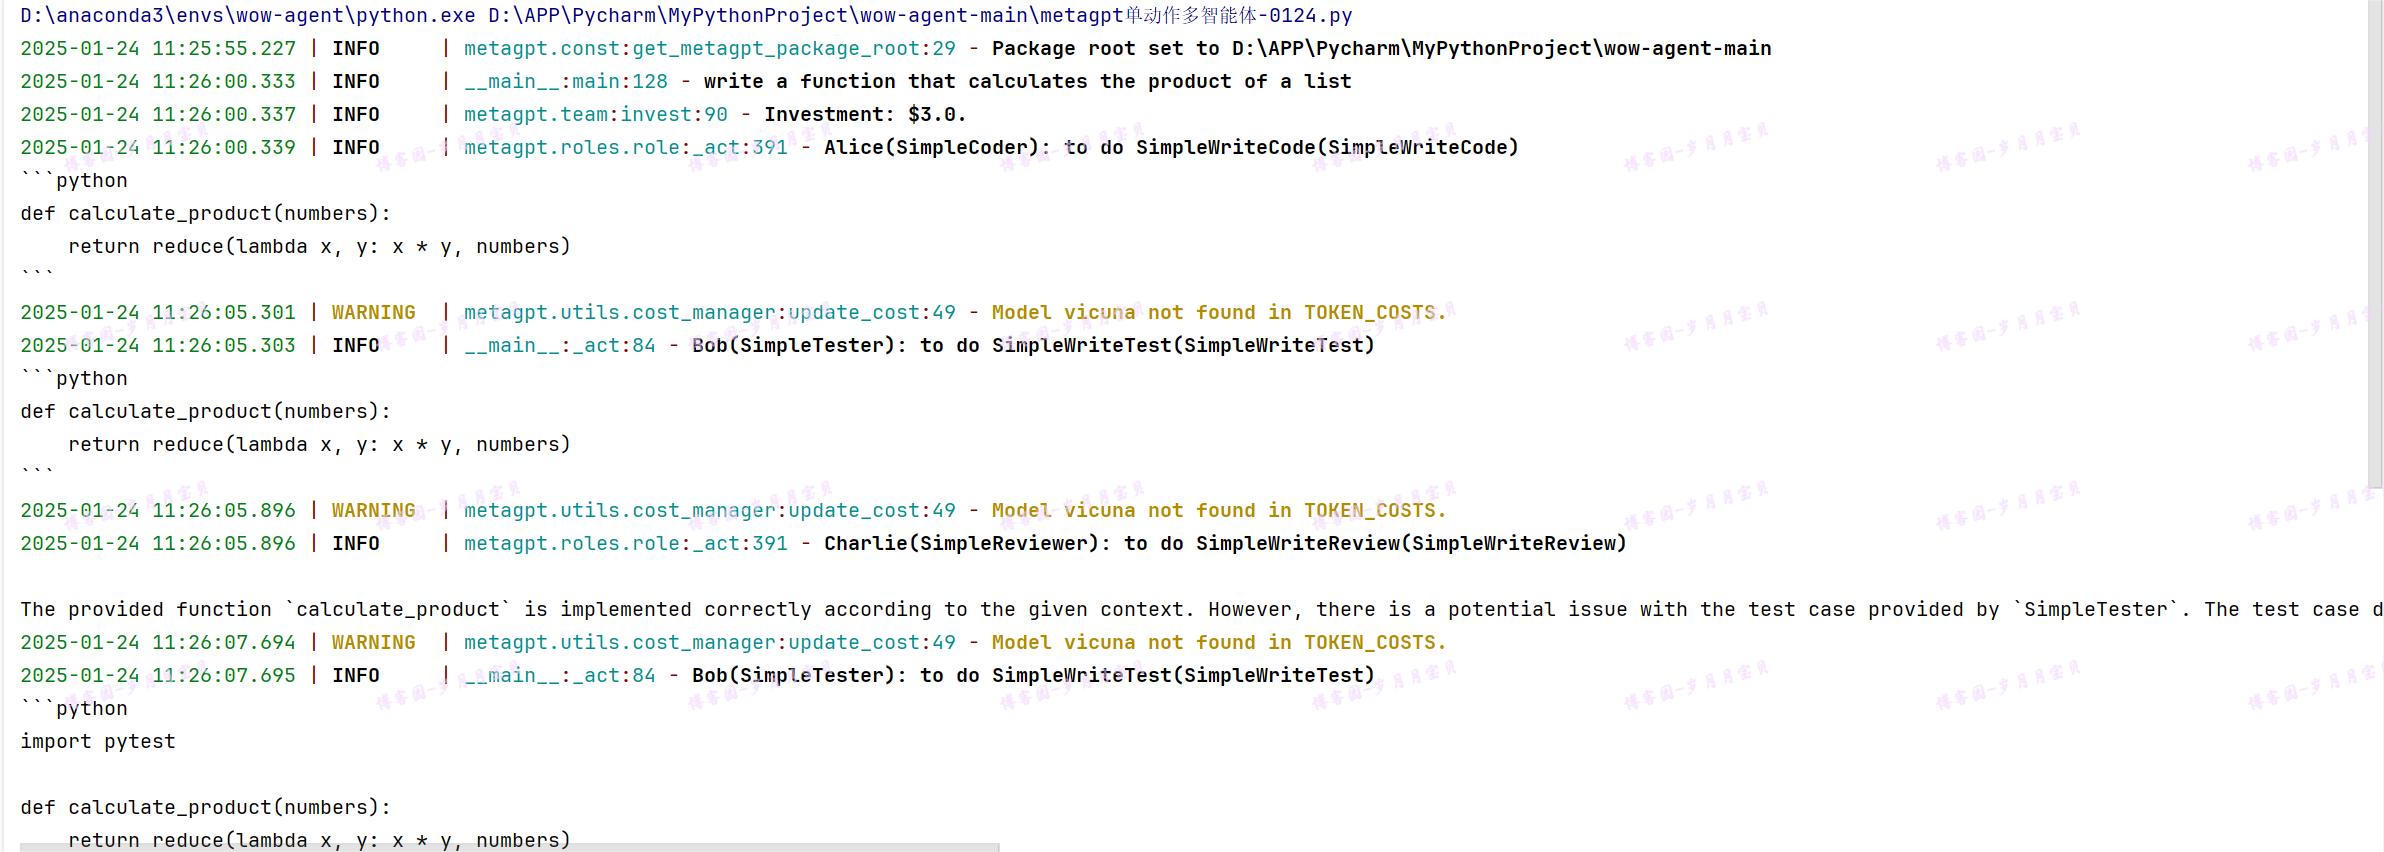
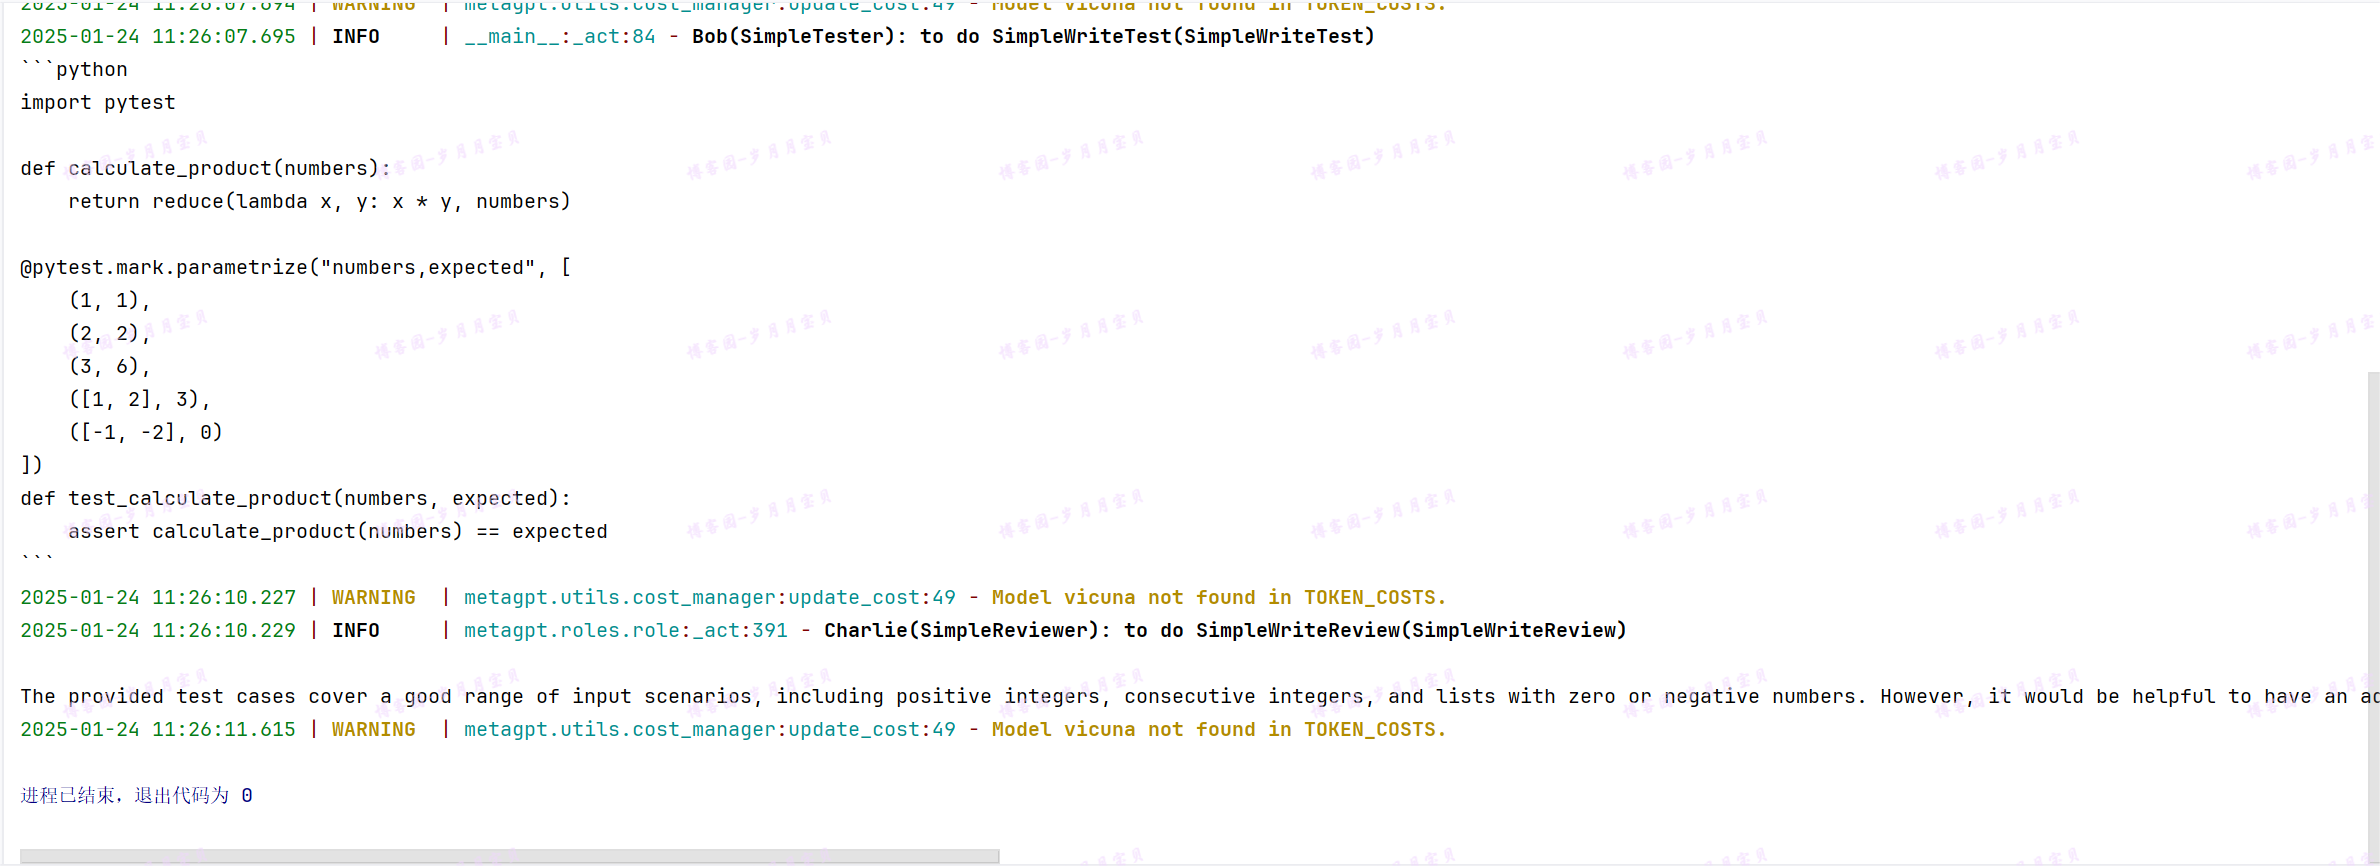
成功!🎉🎉🎉🎉🎉
metaGPT-单动作多智能体实例:辩论
理论参照:辩论:智能体对抗 | MetaGPT~实践是亲爱的岁月月宝贝(常驻博客园)!
在这个用例中,我们将阐述一个富有趣味的例子的开发过程。
想象一下,如果我们模拟代表拜登和特朗普的智能体共同合作会怎样。这是一个有趣的实验,不是吗?考虑到他们已知的分歧,这样的组合可能导致一些生动的交流。这是一个展示如何设计多个智能体并促进它们之间的互动的理想例子。我们将称呼这个实验为“拜登-特朗普辩论”。
总体上,我们需要3个步骤来设定它们的辩论:
- 定义一个具有发言行为的辩手角色,我们建议参考智能体入门
- 处理辩手之间的通信,也就是让拜登听特朗普说话,反之亦然
- 初始化两个辩手实例,拜登和特朗普,创建一个带有环境的团队,并使它们能够相互交互
环境准备
import asyncio
import platform
from typing import Any

import fire

from metagpt.actions import Action, UserRequirement
from metagpt.logs import logger
from metagpt.roles import Role
from metagpt.schema import Message
from metagpt.team import Team

import typer

from typing import ClassVar#🐛
定义动作
首先,我们需要定义一个Action。这是一个辩论场景,所以让我们将其命名为 SpeakAloud
class SpeakAloud(Action):
    """动作:在辩论中大声说话(争吵)"""#🐛PROMPT_TEMPLATE =

    PROMPT_TEMPLATE: ClassVar[str] = """
    ## BACKGROUND
    Suppose you are {name}, you are in a debate with {opponent_name}.
    ## DEBATE HISTORY
    Previous rounds:
    {context}
    ## YOUR TURN
    Now it's your turn, you should closely respond to your opponent's latest argument, state your position, defend your arguments, and attack your opponent's arguments,
    craft a strong and emotional response in 80 words, in {name}'s rhetoric and viewpoints, your will argue:
    """

    def __init__(self, name="SpeakAloud", context=None, llm=None):
        #super().__init__(name, context, llm)#🐛

        # 使用关键字参数调用 super().__init__
        super().__init__(name=name, context=context, llm=llm)

    async def run(self, context: str, name: str, opponent_name: str):

        prompt = self.PROMPT_TEMPLATE.format(context=context, name=name, opponent_name=opponent_name)

        rsp = await self._aask(prompt)

        return rsp
定义角色
我们将定义一个通用的 Role,称为 Debator。
在这里,set_actions 使我们的 Role 拥有我们刚刚定义的 SpeakAloud 动作。我们还使用 _watch 监视了 SpeakAloud 和 UserRequirement,因为我们希望每个辩手关注来自对手的 SpeakAloud 消息,以及来自用户的 UserRequirement(人类指令)。
class Debator(Role):
    def __init__(
        self,
        name: str,
        profile: str,
        opponent_name: str,
        **kwargs,
    ):
        super().__init__(name, profile, **kwargs)
        self.set_actions([SpeakAloud])
        self._watch([UserRequirement, SpeakAloud])
        self.name = name
        self.opponent_name = opponent_name
接下来,我们使每个辩手听取对手的论点。这通过重写 _observe 函数完成。这是一个重要的点,因为在环境中将会有来自特朗普和拜登的 "SpeakAloud 消息"(由 SpeakAloud 触发的 Message)。 我们不希望特朗普处理自己上一轮的 "SpeakAloud 消息",而是处理来自拜登的消息,反之亦然。(在即将到来的更新中,我们将使用一般的消息路由机制来处理这个过程。在更新后,你将不再需要执行此步骤)
async def _observe(self) -> int:
        await super()._observe()
        # accept messages sent (from opponent) to self, disregard own messages from the last round
        self.rc.news = [msg for msg in self.rc.news if msg.send_to == self.name]
        return len(self.rc.news)
最后,我们使每个辩手能够向对手发送反驳的论点。在这里,我们从消息历史中构建一个上下文,使 Debator 运行他拥有的 SpeakAloud 动作,并使用反驳论点内容创建一个新的 Message。请注意,我们定义每个 Debator 将把 Message 发送给他的对手。
async def _act(self) -> Message:
    logger.info(f"{self._setting}: ready to {self.rc.todo}")
    todo = self.rc.todo # 一个 SpeakAloud 的实例

    memories = self.get_memories()
    context = "\n".join(f"{msg.sent_from}: {msg.content}" for msg in memories)#从消息历史中构建一个上下文

    rsp = await todo.run(context=context, name=self.name, opponent_name=self.opponent_name)

    msg = Message(#使用反驳论点内容创建一个新的 `Message`
        content=rsp,
        role=self.profile,
        cause_by=todo,
        sent_from=self.name,
        send_to=self.opponent_name,
    )
    self.rc.memory.add(msg)
    return msg
完整&正确的 Debator 代码
😜上面的Debator代码需要100%替换成下面这个才能跑通哦!#🐛
class Debator(Role):
    name: str = ""
    profile: str = ""
    opponent_name: str = ""

    def __init__(self, **data: Any):
        super().__init__(**data)
        self.set_actions([SpeakAloud])
        self._watch([UserRequirement, SpeakAloud])

    async def _observe(self) -> int:
        await super()._observe()
        # accept messages sent (from opponent) to self, disregard own messages from the last round
        self.rc.news = [msg for msg in self.rc.news if msg.send_to == {self.name}]
        return len(self.rc.news)

    async def _act(self) -> Message:
        logger.info(f"{self._setting}: to do {self.rc.todo}({self.rc.todo.name})")
        todo = self.rc.todo  # An instance of SpeakAloud

        memories = self.get_memories()
        context = "\n".join(f"{msg.sent_from}: {msg.content}" for msg in memories)
        # print(context)

        rsp = await todo.run(context=context, name=self.name, opponent_name=self.opponent_name)

        msg = Message(
            content=rsp,
            role=self.profile,
            cause_by=type(todo),
            sent_from=self.name,
            send_to=self.opponent_name,
        )
        self.rc.memory.add(msg)

        return msg
创建团队并添加角色
现在我们已经定义了我们的 Debator,让我们将它们组合起来看看会发生什么。我们建立一个 Team 并“雇佣”了拜登和特朗普。在这个例子中,我们将通过将我们的指令(作为 UserRequirement)发送给拜登,让他先开始。如果你想让特朗普先说话,将 send_to 设置为 "Trump"。
运行这个 Team,我们应该看到他们之间友好的对话!
async def debate(idea: str, investment: float = 3.0, n_round: int = 5):
    """运行拜登-特朗普辩论,观看他们之间的友好对话 :) """
    Biden = Debator(name="Biden", profile="Democrat", opponent_name="Trump")
    Trump = Debator(name="Trump", profile="Republican", opponent_name="Biden")
    team = Team()
    team.hire([Biden, Trump])
    team.invest(investment)
    team.run_project(idea, send_to="Biden")  # 将辩论主题发送给拜登,让他先说话
    await team.run(n_round=n_round)


app = typer.Typer()

@app.command()
def main(
    #idea: str = typer.Argument(..., help="Economic Policy: Discuss strategies and plans related to taxation, employment, fiscal budgeting, and economic growth."),#🐛
    idea: str = typer.Argument("Default Debate Topic", help="Debate topic, such as 'The U.S. should commit more in climate change fighting'"),
    investment: float = typer.Option(default=3.0, help="Dollar amount to invest in the AI company."),
    n_round: int = typer.Option(default=5, help="Number of rounds for the simulation."),
):
    """
    :param idea: Debate topic, such as "Topic: The U.S. should commit more in climate change fighting"
                 or "Trump: Climate change is a hoax"
    :param investment: contribute a certain dollar amount to watch the debate
    :param n_round: maximum rounds of the debate
    :return:
    """
    if platform.system() == "Windows":
        asyncio.set_event_loop_policy(asyncio.WindowsSelectorEventLoopPolicy())
    asyncio.run(debate(idea, investment, n_round))

if __name__ == '__main__':
    app()# run as python debate.py --idea="TOPIC" --investment=3.0 --n_round=5
运行成功!

😘
metaGPT单动作多智能体:写诗
现在我们设定,需要多智能体系统为我们根据我们给定的主题提供一篇优美的英文诗,除了完成写作的 agent 外,我们再设定一名精通诗句的老师来查看并修改学生的作品。
流程
系统首先接收用户的需求(写关于XX主题的诗),在系统中,当学生关注到布置的题目后就会开始创作,当老师发现学生写作完成后就会给学生提出意见,根据老师给出的意见,学生将修改自己的作品,直到设定循环结束。
插入模块
import asyncio

from metagpt.actions import Action, UserRequirement
from metagpt.logs import logger
from metagpt.roles import Role
from metagpt.schema import Message
from metagpt.environment import Environment

from metagpt.const import MESSAGE_ROUTE_TO_ALL
声明一个名为 classroom 的 env,我们将所有的 role 都放在其中
classroom = Environment()
定义角色
定义 Student 角色与 Teacher 角色。与单智能体不同的部分是,我们需要声明每个角色关注的动作self._watch,只有当关注的动作发生后,角色才会开始行动。
class Student(Role):

    name: str = "xiaoming"
    profile: str = "Student"

    def __init__(self, **kwargs):
        super().__init__(**kwargs)
        #self._init_actions([WritePoem])🐛
        self.set_actions([WritePoem])
        self._watch([UserRequirement, ReviewPoem])

    async def _act(self) -> Message:
        logger.info(f"{self._setting}: ready to {self.rc.todo}")
        todo = self.rc.todo

        msg = self.get_memories()  # 获取所有记忆
        # logger.info(msg)
        poem_text = await WritePoem().run(msg)
        logger.info(f'student : {poem_text}')
        msg = Message(content=poem_text, role=self.profile,
                      cause_by=type(todo))

        return msg

class Teacher(Role):

    name: str = "laowang"
    profile: str = "Teacher"

    def __init__(self, **kwargs):
        super().__init__(**kwargs)
        #self._init_actions([ReviewPoem])🐛
        self.set_actions([ReviewPoem])
        self._watch([WritePoem])

    async def _act(self) -> Message:
        logger.info(f"{self._setting}: ready to {self.rc.todo}")
        todo = self.rc.todo

        msg = self.get_memories()  # 获取所有记忆
        poem_text = await ReviewPoem().run(msg)
        logger.info(f'teacher : {poem_text}')
        msg = Message(content=poem_text, role=self.profile,
                      cause_by=type(todo))

        return msg
定义动作
编写 WritePoem 与 ReviewPoem 方法,在 WritePoem 方法中我们需要实现根据用户提供的主题来编写诗句,并且根据 teacher 的建议修改诗句,在 ReviewPoem 方法中,我们需要读取 student 的诗歌作品,并且给出修改意见。
class WritePoem(Action):

    name: str = "WritePoem"

    PROMPT_TEMPLATE: str = """
    Here is the historical conversation record : {msg} .
    Write a poem about the subject provided by human, Return only the content of the generated poem with NO other texts.
    If the teacher provides suggestions about the poem, revise the student's poem based on the suggestions and return.
    your poem:
    """

    async def run(self, msg: str):

        prompt = self.PROMPT_TEMPLATE.format(msg = msg)

        rsp = await self._aask(prompt)

        return rsp

class ReviewPoem(Action):

    name: str = "ReviewPoem"

    PROMPT_TEMPLATE: str = """

    Here is the historical conversation record : {msg} .
    Check student-created poems about the subject provided by human and give your suggestions for revisions. You prefer poems with elegant sentences and retro style.
    Return only your comments with NO other texts.
    your comments:
    """

    async def run(self, msg: str):

        prompt = self.PROMPT_TEMPLATE.format(msg = msg)

        rsp = await self._aask(prompt)

        return rsp
运行
提供一个主题,将topic发布在env中并且运行env,系统就将开始工作了,你可以修改对话轮数n_round来达到你希望的效果😊
async def main(topic: str, n_round=3):

    classroom.add_roles([Student(), Teacher()])

    classroom.publish_message(
        Message(role="Human", content=topic, cause_by=UserRequirement,
                send_to='' or MESSAGE_ROUTE_TO_ALL),
        peekable=False,
    )

    while n_round > 0:
        # self._save()
        n_round -= 1 #如果n_round = 1 ,就只有学生写诗、然后老师没办法进行review
        logger.debug(f"max {n_round=} left.")

        await classroom.run()
    return classroom.history

asyncio.run(main(topic='wirte a poem about moon'))
结果如下
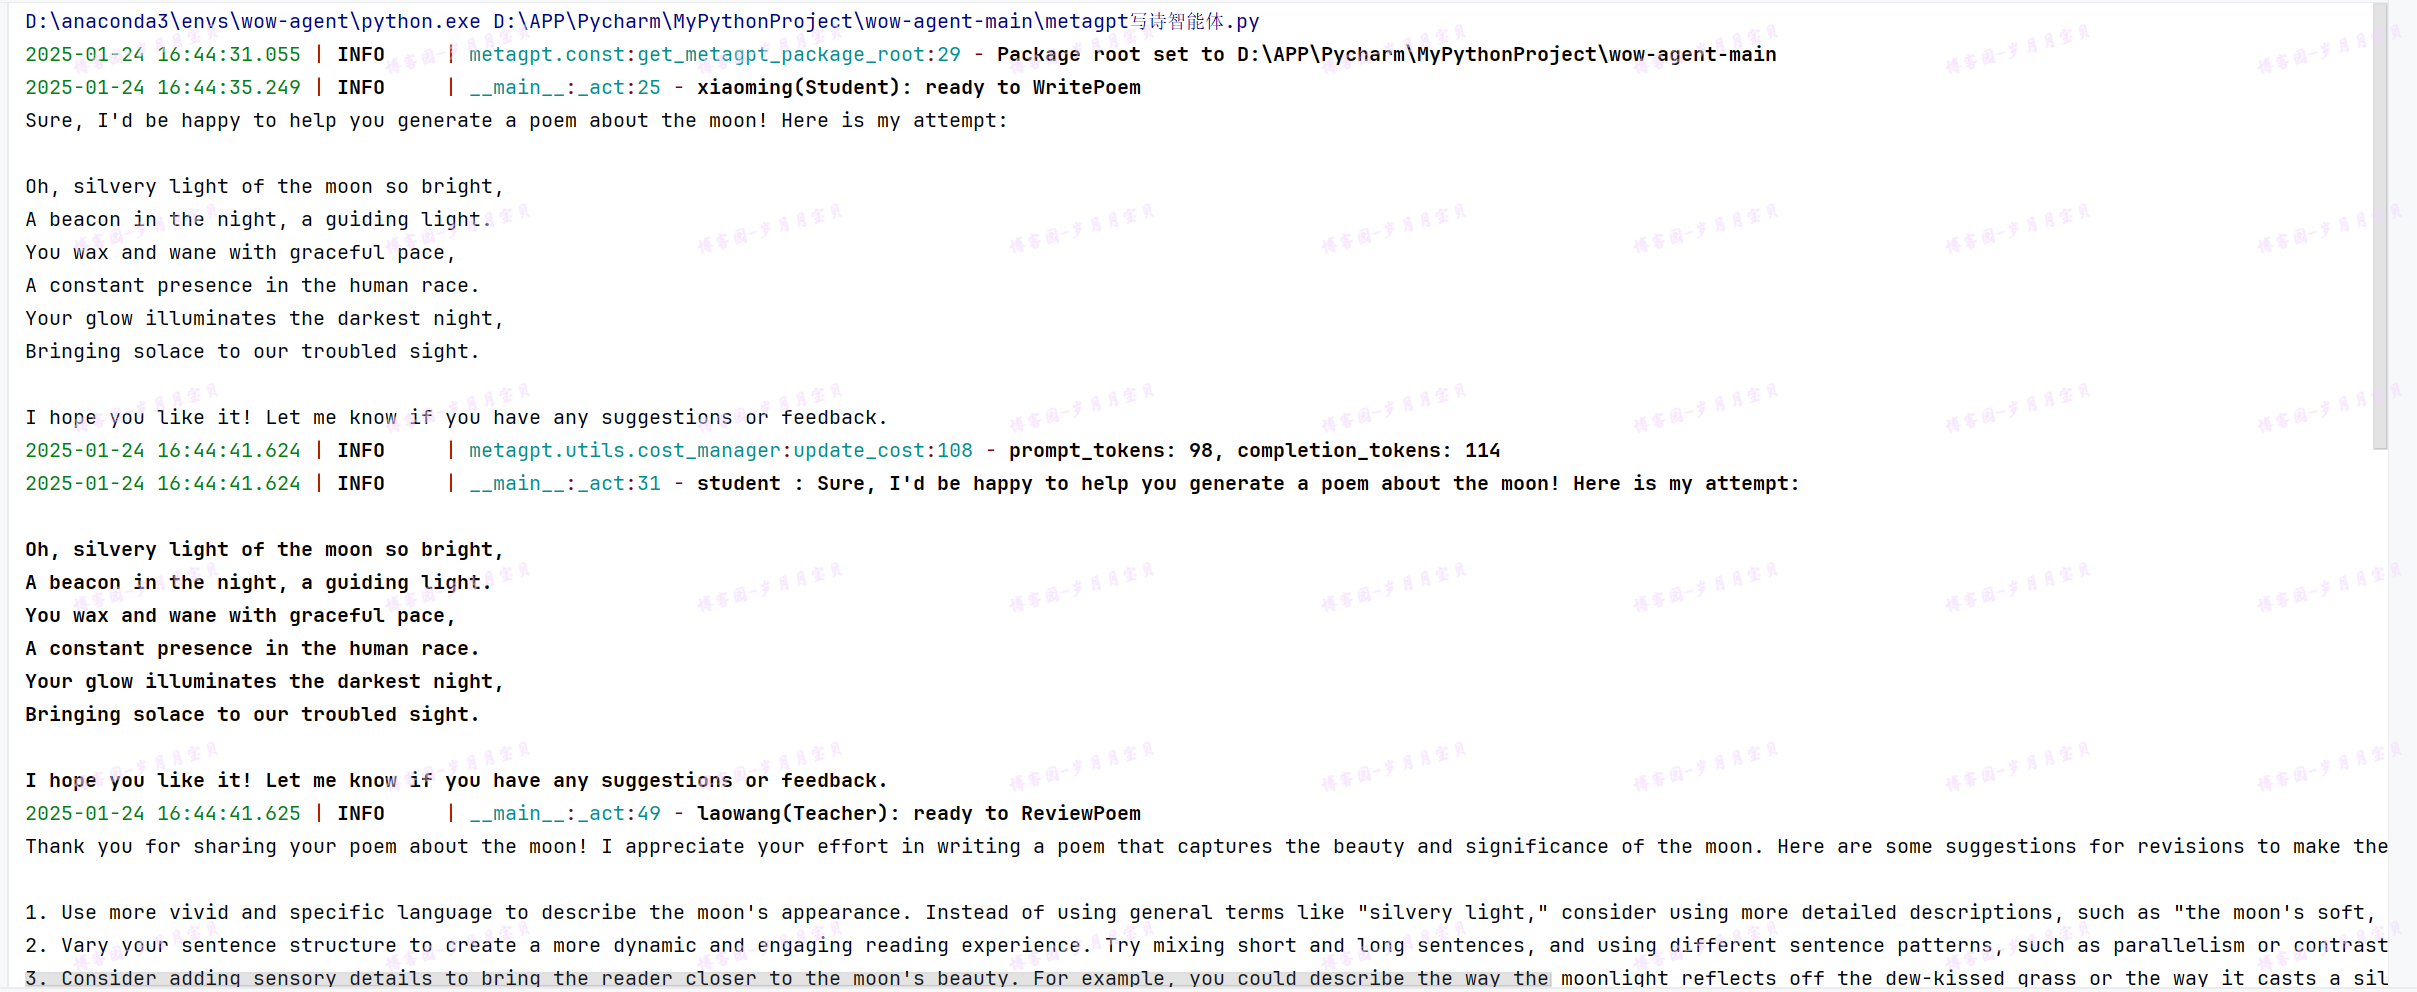
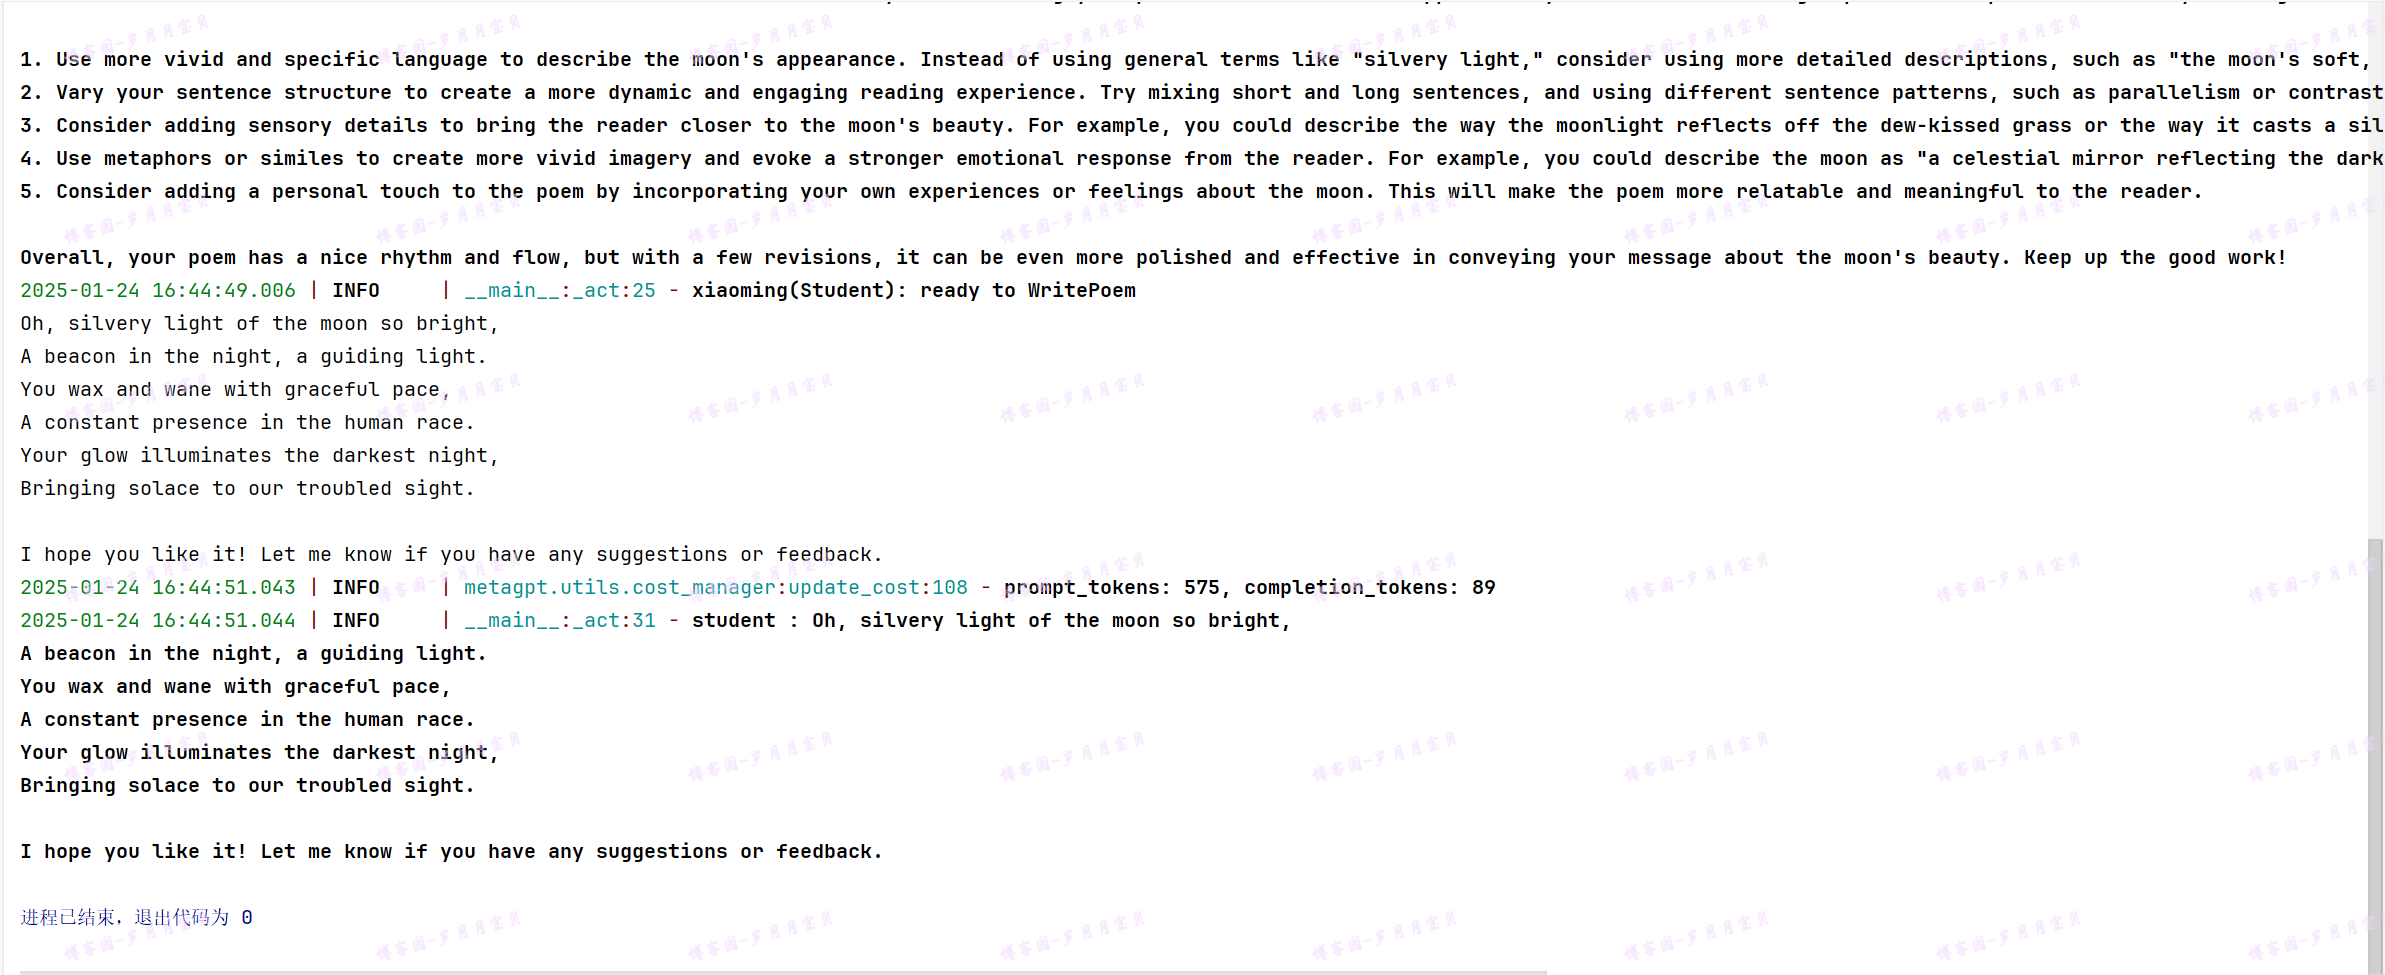
调用的是llama2,成功!!!🎉🎉🎉
metaGPT多动作多智能体
理论来源:多智能体入门 | MetaGPT,实践-------岁月月宝贝!
在上一章中,我们简要讨论了单智能体的创建。虽然对许多情况来说,单智能体可能已经足够,但更复杂的任务通常需要协作和团队合作,这也就是多智能体必不可少的原因。MetaGPT的核心优势也在于轻松灵活地开发一个智能体团队。在MetaGPT框架下,用户可以通过少量代码实现智能体之间的交互。
完成本节,你将能够:
- 理解智能体之间如何进行交互
- 开发你的第一个智能体团队
运行“软件公司”示例
metagpt "write a function that calculates the product of a list"
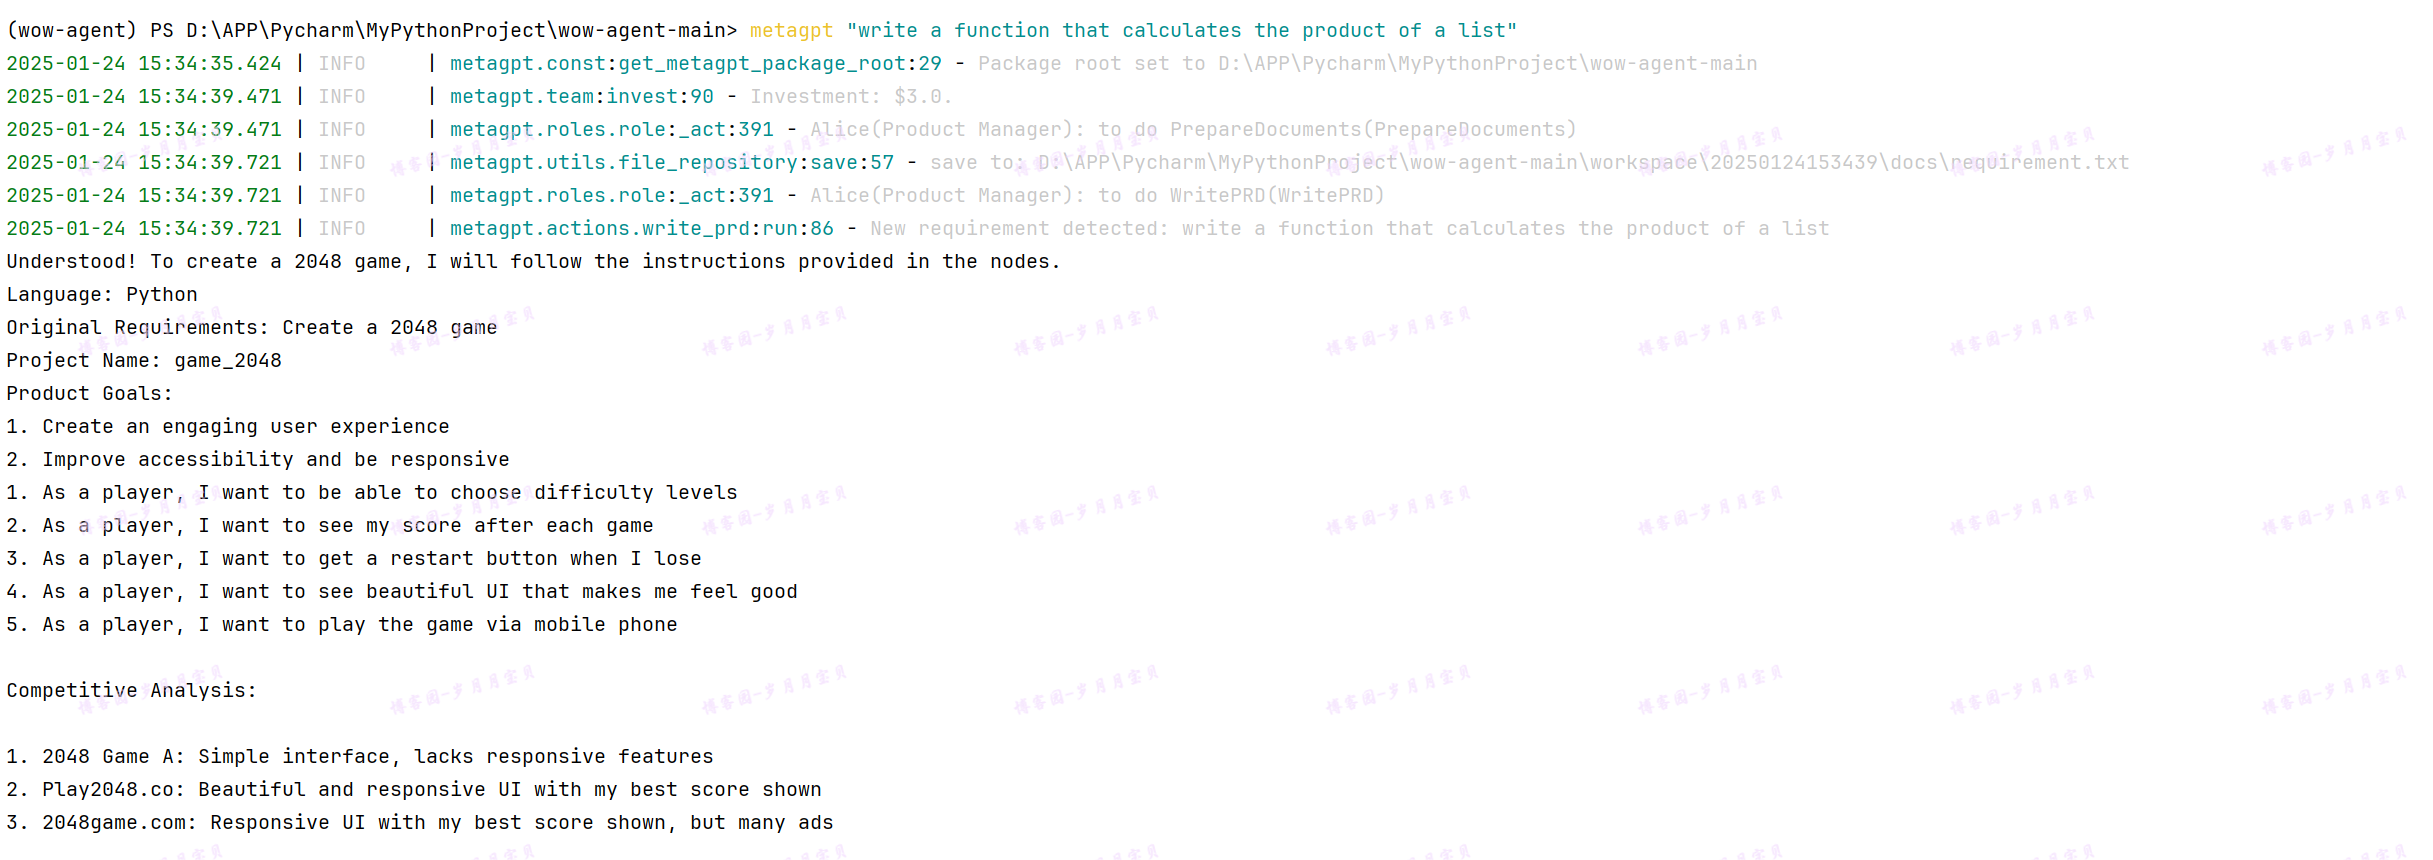
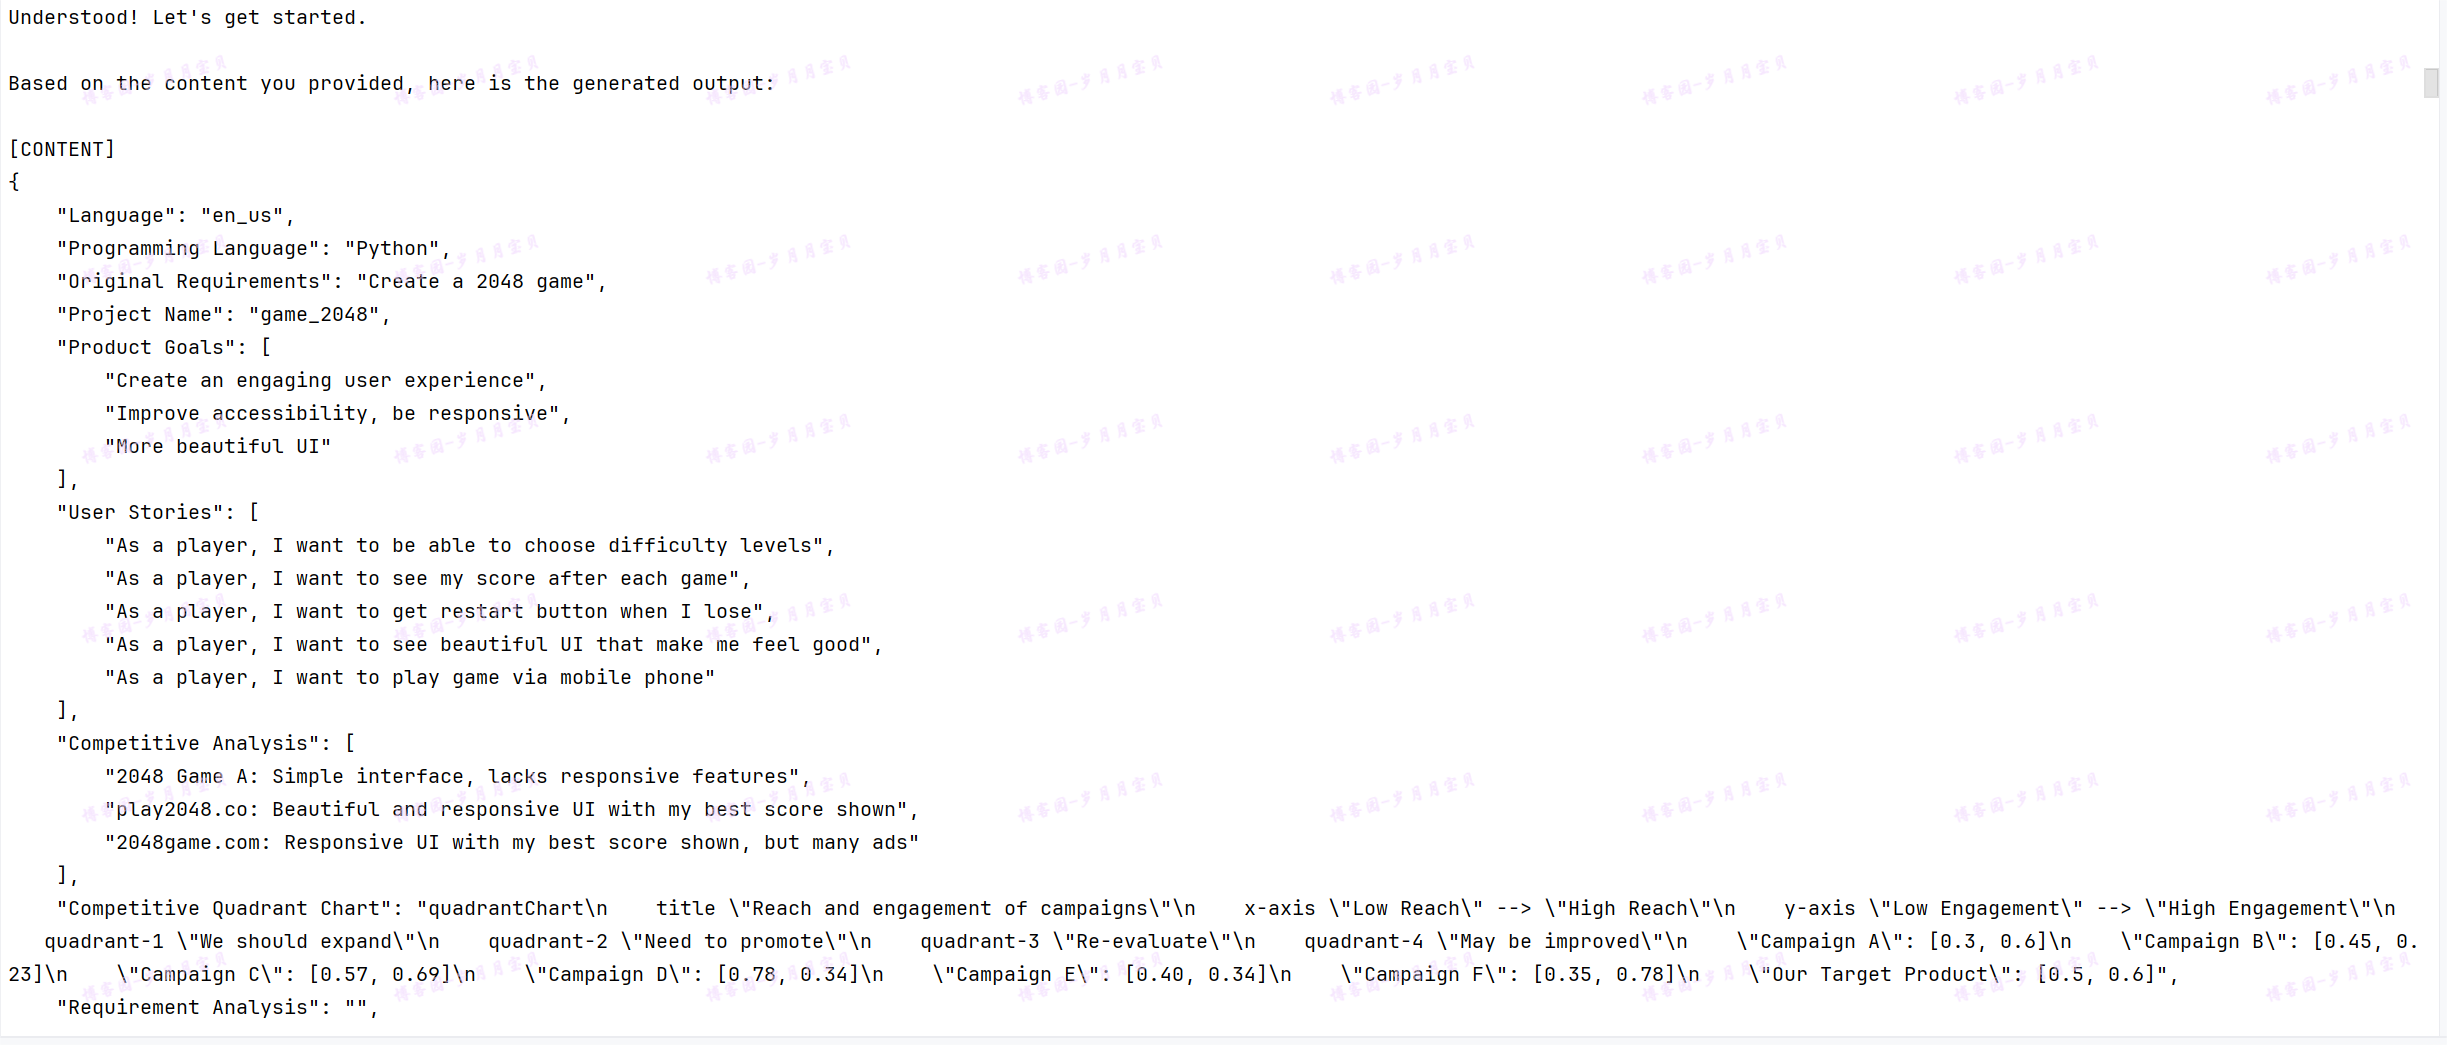
大家也可以试试😁
开发你的第一个智能体团队
希望你会发现软件创业示例很有启发。也许现在你已经有了灵感,想要开发一个根据你的独特需求而定制的智能体团队。在本节中,我们将继续在智能体入门中的简单代码示例中添加更多角色,并引入智能体之间的交互协作。
让我们还雇佣一名测试人员和一名审阅人员携手与编码人员一起工作。这开始看起来像一个开发团队了,不是吗?总的来说,我们需要三个步骤来建立团队并使其运作:
- 定义每个角色能够执行的预期动作
- 基于标准作业程序(SOP)确保每个角色遵守它。通过使每个角色观察上游的相应输出结果,并为下游发布自己的输出结果,可以实现这一点。
- 初始化所有角色,创建一个带有环境的智能体团队,并使它们之间能够进行交互。
定义动作和角色
与智能体入门相同的过程,我们可以定义三个具有各自动作的Role:
SimpleCoder具有SimpleWriteCode动作,接收用户的指令并编写主要代码SimpleTester具有SimpleWriteTest动作,从SimpleWriteCode的输出中获取主代码并为其提供测试套件SimpleReviewer具有SimpleWriteReview动作,审查来自SimpleWriteTest输出的测试用例,并检查其覆盖范围和质量
通过上述概述,我们使得 SOP(标准作业程序)变得更加清晰明了。接下来,我们将详细讨论如何根据 SOP 来定义Role。
首先导入模块
import re

import fire

from metagpt.actions import Action, UserRequirement
from metagpt.logs import logger
from metagpt.roles import Role
from metagpt.schema import Message
from metagpt.team import Team


def parse_code(rsp):
    pattern = r"```python(.*)```"
    match = re.search(pattern, rsp, re.DOTALL)
    code_text = match.group(1) if match else rsp
    return code_text
定义动作
我们列举了三个 Action。
class SimpleWriteCode(Action):
    PROMPT_TEMPLATE: str = """
    Write a python function that can {instruction}.
    Return ```python your_code_here ```with NO other texts,
    your code:
    """
    name: str = "SimpleWriteCode"

    async def run(self, instruction: str):
        prompt = self.PROMPT_TEMPLATE.format(instruction=instruction)

        rsp = await self._aask(prompt)

        code_text = parse_code(rsp)

        return code_text
class SimpleWriteTest(Action):
    PROMPT_TEMPLATE: str = """
    Context: {context}
    Write {k} unit tests using pytest for the given function, assuming you have imported it.
    Return ```python your_code_here ```with NO other texts,
    your code:
    """

    name: str = "SimpleWriteTest"

    async def run(self, context: str, k: int = 3):
        prompt = self.PROMPT_TEMPLATE.format(context=context, k=k)

        rsp = await self._aask(prompt)

        code_text = parse_code(rsp)

        return code_text
class SimpleWriteReview(Action):
    PROMPT_TEMPLATE: str = """
    Context: {context}
    Review the test cases and provide one critical comments:
    """

    name: str = "SimpleWriteReview"

    async def run(self, context: str):
        prompt = self.PROMPT_TEMPLATE.format(context=context)

        rsp = await self._aask(prompt)

        return rsp
定义角色
在许多多智能体场景中,定义Role可能只需几行代码。对于SimpleCoder,我们做了两件事:
- 使用
set_actions为Role配备适当的Action,这与设置单智能体相同 - 多智能体操作逻辑:我们使
Role_watch来自用户或其他智能体的重要上游消息。回想我们的SOP,SimpleCoder接收用户指令,这是由MetaGPT中的UserRequirement引起的Message。因此,我们添加了self._watch([UserRequirement])。
这就是用户需要做的全部。对于那些对底层机制感兴趣的人,请参见本教程的本章中的机制解释。
class SimpleCoder(Role):
    name: str = "Alice"
    profile: str = "SimpleCoder"

    def __init__(self, **kwargs):
        super().__init__(**kwargs)
        self._watch([UserRequirement])
        self.set_actions([SimpleWriteCode])
与上述相似,对于 SimpleTester,我们:
- 使用
set_actions为SimpleTester配备SimpleWriteTest动作 - 使
Role_watch来自其他智能体的重要上游消息。回想我们的SOP,SimpleTester从SimpleCoder中获取主代码,这是由SimpleWriteCode引起的Message。因此,我们添加了self._watch([SimpleWriteCode])。
一个扩展的问题:想一想如果我们使用
self._watch([SimpleWriteCode,SimpleWriteReview])会意味着什么,可以尝试这样做
此外,你可以为智能体定义自己的操作逻辑。这适用于Action需要多个输入的情况,你希望修改输入,使用特定记忆,或进行任何其他更改以反映特定逻辑的情况。因此,我们:
- 重写
_act函数,就像我们在前面教程中的单智能体设置中所做的那样。在这里,我们希望SimpleTester将所有记忆用作编写测试用例的上下文,并希望有5个测试用例。
class SimpleTester(Role):
    name: str = "Bob"
    profile: str = "SimpleTester"

    def __init__(self, **kwargs):
        super().__init__(**kwargs)
        self.set_actions([SimpleWriteTest])
        self._watch([SimpleWriteCode])
        # self._watch([SimpleWriteCode, SimpleWriteReview])  # feel free to try this too

    async def _act(self) -> Message:
        logger.info(f"{self._setting}: to do {self.rc.todo}({self.rc.todo.name})")
        todo = self.rc.todo

        # context = self.get_memories(k=1)[0].content # use the most recent memory as context
        context = self.get_memories()  # use all memories as context

        code_text = await todo.run(context, k=5)  # specify arguments
        msg = Message(content=code_text, role=self.profile, cause_by=type(todo))

        return msg
按照相同的过程定义 SimpleReviewer:
class SimpleReviewer(Role):
    name: str = "Charlie"
    profile: str = "SimpleReviewer"

    def __init__(self, **kwargs):
        super().__init__(**kwargs)
        self.set_actions([SimpleWriteReview])
        self._watch([SimpleWriteTest])
创建一个团队并添加角色
现在我们已经定义了三个 Role,是时候将它们放在一起了。我们初始化所有角色,设置一个 Team,并hire 它们。
运行 Team,我们应该会看到它们之间的协作!
import fire
import typer
from metagpt.logs import logger
from metagpt.team import Team
app = typer.Typer()

@app.command()
def main(
    idea: str = "write a function that calculates the product of a list",
    #idea: str = typer.Argument(..., help="write a function that calculates the product of a list"),
    investment: float = typer.Option(default=3.0, help="Dollar amount to invest in the AI company."),
    n_round: int = typer.Option(default=5, help="Number of rounds for the simulation."),
):
    logger.info(idea)

    team = Team()
    team.hire(
        [
            SimpleCoder(),
            SimpleTester(),
            SimpleReviewer(),
        ]
    )

    team.invest(investment=investment)
    team.run_project(idea)
    await team.run(n_round=n_round)

if __name__ == "__main__":
    fire.Fire(main)
另一个版本的main(我是运行下边这个成功的😜)
async def main(
    idea: str = "write a function that calculates the product of a list",
    investment: float = 3.0,
    n_round: int = 5,
    add_human: bool = False,
):
    logger.info(idea)

    team = Team()
    team.hire(
        [
            SimpleCoder(),
            SimpleTester(),
            SimpleReviewer(is_human=add_human),
        ]
    )

    team.invest(investment=investment)
    team.run_project(idea)
    await team.run(n_round=n_round)


if __name__ == "__main__":
    fire.Fire(main)
结果如下~
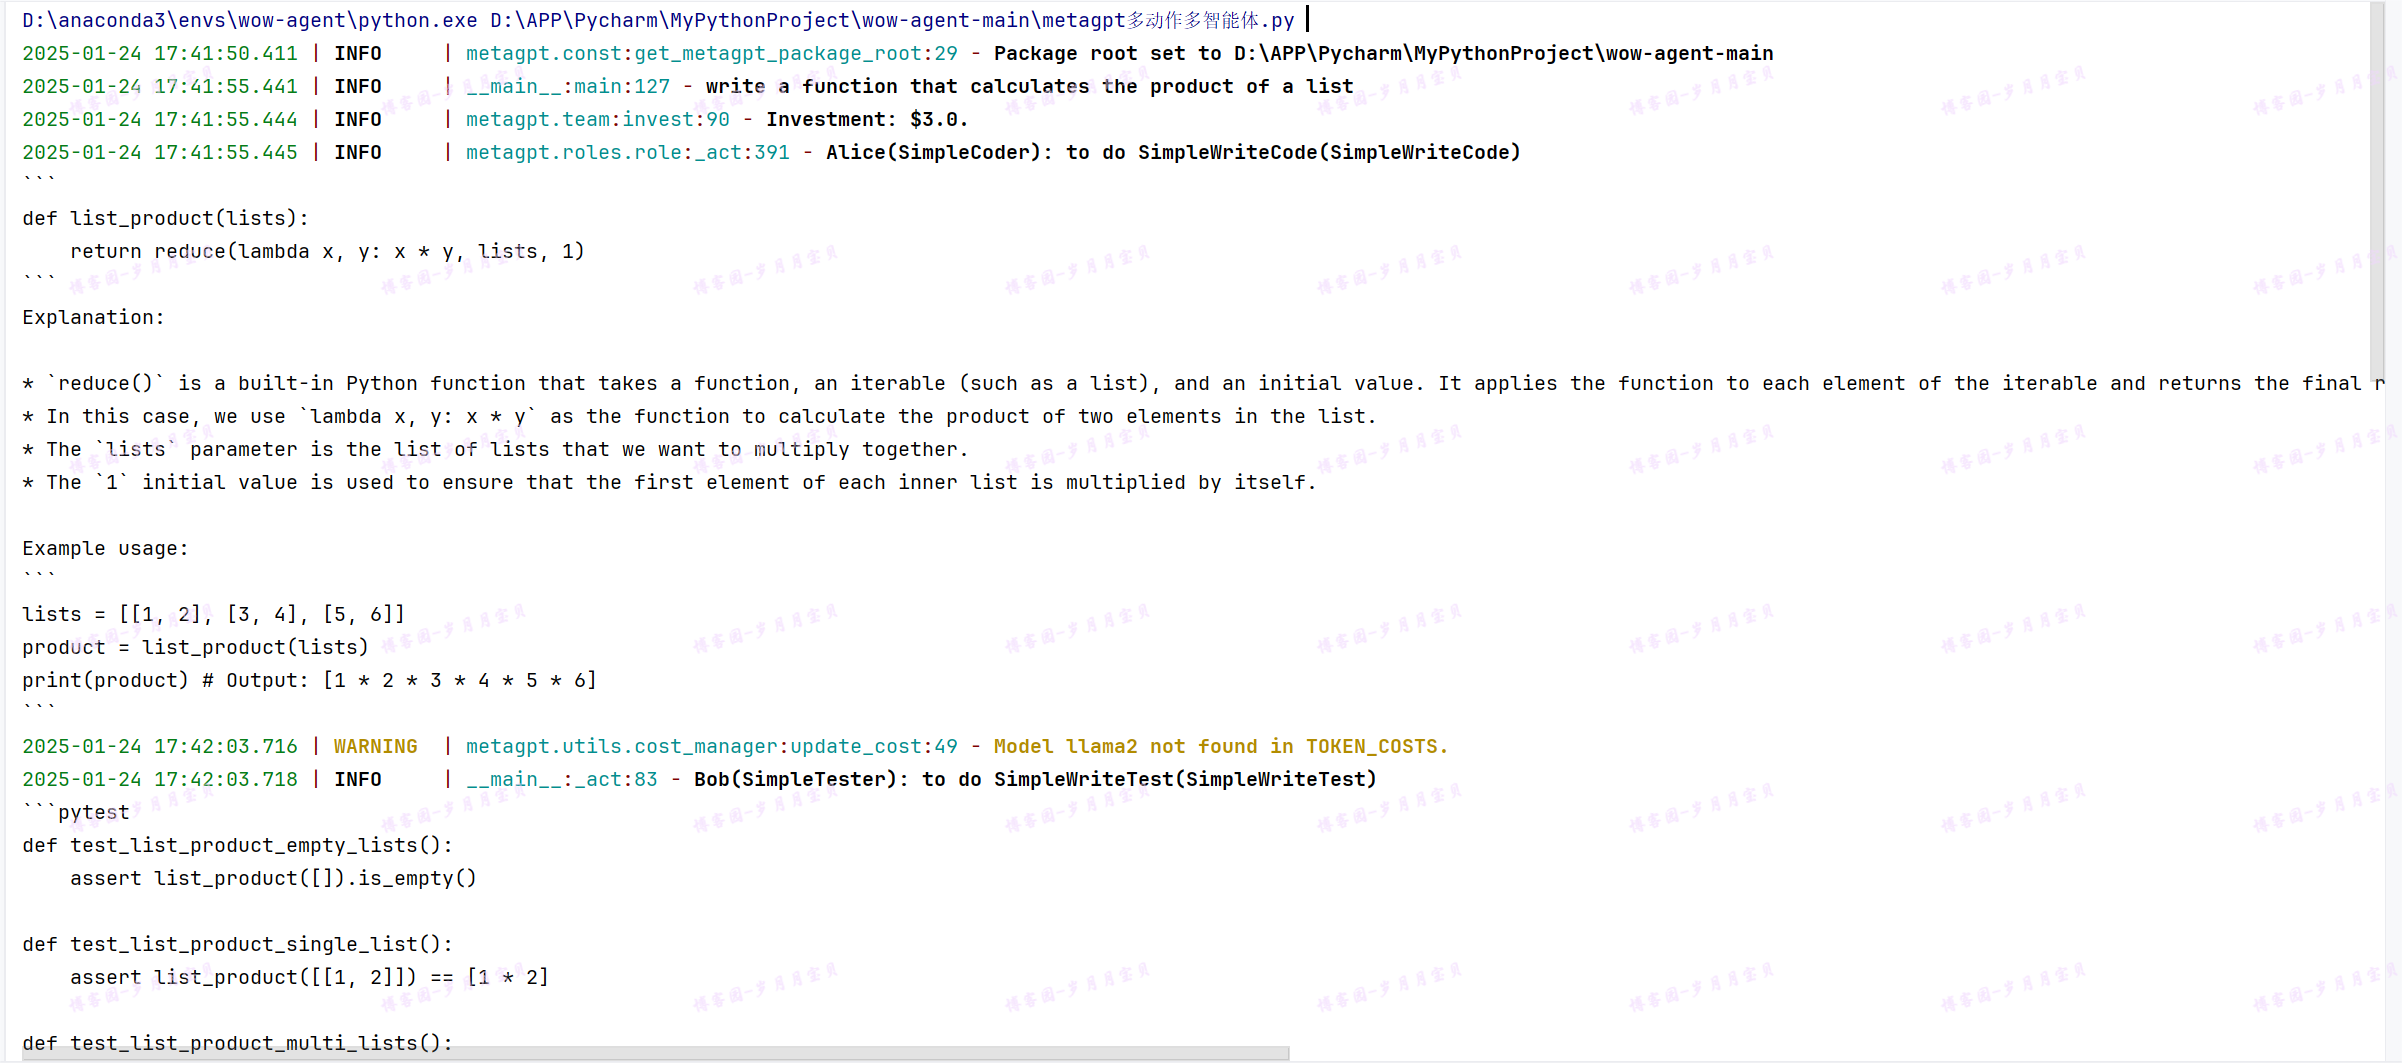
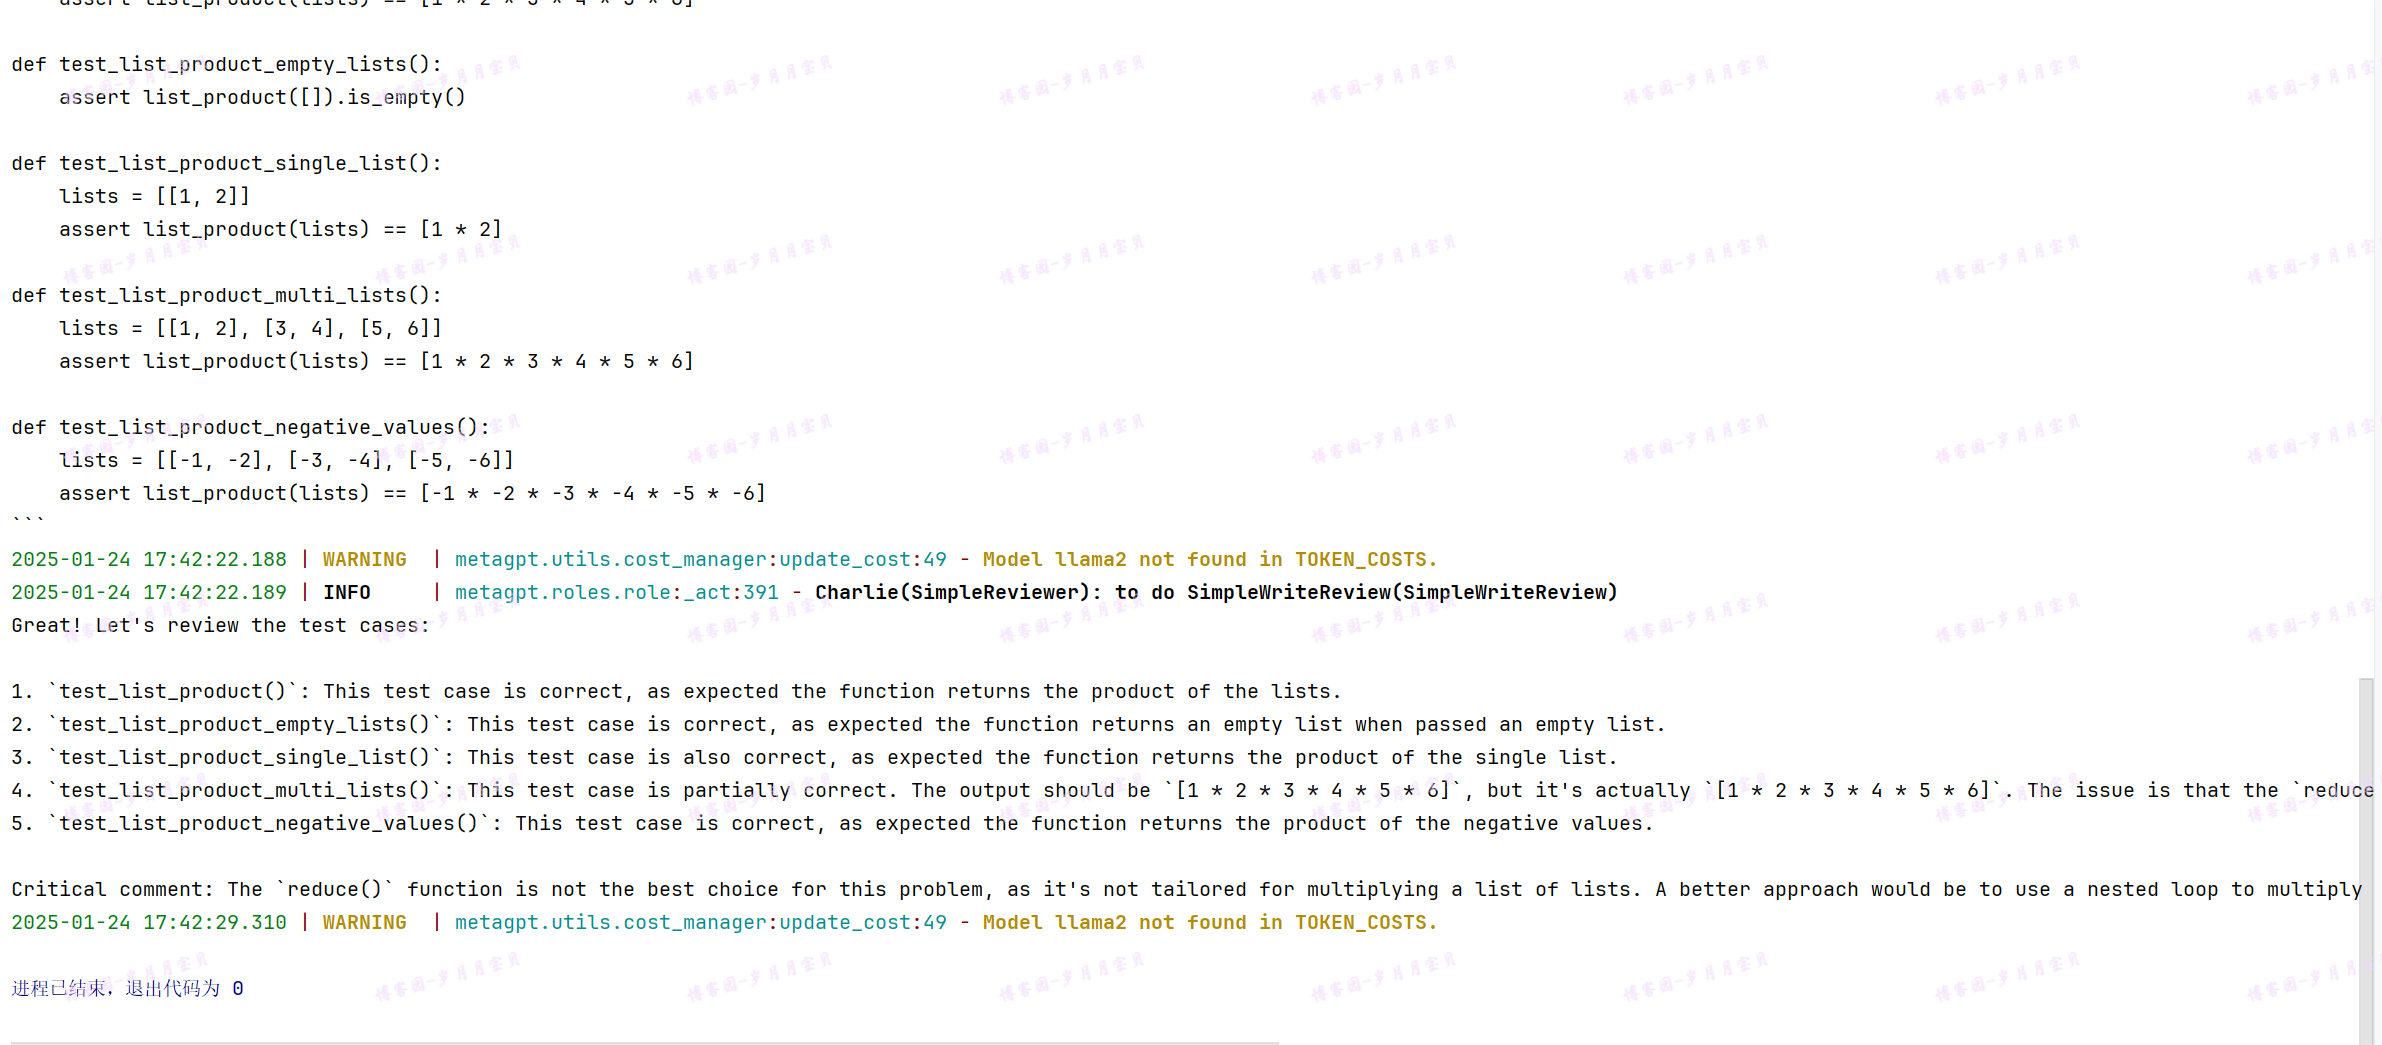
成功★,°:.☆( ̄▽ ̄)/$:.°★ 。!
metaGPT-多动作多智能体实例-狼人杀
这节课来学习Metagpt的一个多动作多智能体的实战案例-狼人杀游戏MetaGPT-docs/src/zh/guide/in_depth_guides/environment/werewolf.md at main · geekan/MetaGPT-docs。
游戏规则
狼人杀是一款多人参与的社交推理游戏,游戏中的角色分为狼人、村民和特殊角色三大类。基本规则如下:
- 角色分配:游戏开始前,每位玩家随机分配一个角色,包括狼人、普通村民和具有特殊能力的神职村民(如预言家、女巫、猎人等)。
- 游戏流程:游戏分为夜晚和白天两个阶段。夜晚,狼人睁眼并杀害一名玩家;白天,所有玩家讨论并投票处决一名玩家。这个过程会不断重复,直到满足某个胜利条件。
- 胜利条件:游戏的胜利条件分为狼人阵营胜利和村民阵营胜利。
狼人胜利:狼人数量等于村民数量时,狼人阵营获胜
村民胜利:所有狼人被找出并处决,村民阵营获胜
Metagpt多智能体代码核心关注三部分:
- 角色(Role)- 智能体的角色
- 动作(Action)- 角色对应的动作
- 交互环境(Environment)- 串联各角色的消息实现智能体间的信息交互
定义角色
1.角色包括:村民、狼人、守卫、先知、巫师、主持人
2.角色框架: BasePlayer,该类封装了角色的基本行为和属性,所有的角色都继承自这个类,从这个类中派生。其基本属性和初始化如下:
- 首先角色都需要监听
InstructSpeak动作产生的消息:self._watch([InstructSpeak]) - 角色的行为设置:
self.set_actions(capable_actions),包括设置进来的special_actions和Speak Action。
定义动作
-
主持人
Moderator的主要职责是:开始游戏、主持流程、解析角色发言和宣布游戏结果。 -
村民继承自
BasePlayer,其拥有Speak行为。 -
狼人除了能
Speak(继承自BasePlayer)外,拥有特殊技能Hunt。狼人在白天时,要伪装成好人说话,所以,还有个额外的Action:Impersonate。狼人就两个动作:一个是夜晚x人,二是白天伪装成好人发言。 -
守卫的特殊技能:
Protect,保护人。 -
先知的特殊技能:
Verify,验证其它角色的身份。 -
巫师有两个特殊技能:
Save和Poison,救人和毒人。 -
夜晚共同的Action - NighttimeWhispers,这个 Action 的设定是在夜晚的时候进行悄悄地思考和发言。大部分的Action都继承自一个
NighttimeWhispers。
定义环境
环境就是用来在各角色之间进行消息传递的。另外还有 round_cnt 来控制最大交互轮数。WerewolfExtEnv 也有更新游戏和各角色状态的作用。可以大体看下环境的封装:
class WerewolfGame(Team):
    """Use the "software company paradigm" to hold a werewolf game"""
    env: Optional[WerewolfEnv] = None
    def __init__(self, context: Context = None, **data: Any):
        super(Team, self).__init__(**data)
        ctx = context or Context()
        if not self.env:
            self.env = WerewolfEnv(context=ctx)
        else:
            self.env.context = ctx  # The `env` object is allocated by deserialization
下框werewolf_ext_env.py代码源自MetaGPT/metagpt/environment/werewolf/werewolf_ext_env.py at main · geekan/MetaGPT
class WerewolfEnv(WerewolfExtEnv, Environment):
    round_cnt: int = Field(default=0)

class WerewolfExtEnv(ExtEnv):
    model_config = ConfigDict(arbitrary_types_allowed=True)

    players_state: dict[str, tuple[str, RoleState]] = Field(
        default_factory=dict, description="the player's role type and state by player_name"
    )
    round_idx: int = Field(default=0)  # the current round
    step_idx: int = Field(default=0)  # the current step of current round
    eval_step_idx: list[int] = Field(default=[])
    per_round_steps: int = Field(default=len(STEP_INSTRUCTIONS))

    # game global states
    game_setup: str = Field(default="", description="game setup including role and its num")
    special_role_players: list[str] = Field(default=[])
    winner: Optional[str] = Field(default=None)
    win_reason: Optional[str] = Field(default=None)
    witch_poison_left: int = Field(default=1, description="should be 1 or 0")
    witch_antidote_left: int = Field(default=1, description="should be 1 or 0")

    # game current round states, a round is from closing your eyes to the next time you close your eyes
    round_hunts: dict[str, str] = Field(default_factory=dict, description="nighttime wolf hunt result")
    round_votes: dict[str, str] = Field(
        default_factory=dict, description="daytime all players vote result, key=voter, value=voted one"
    )
    player_hunted: Optional[str] = Field(default=None)
    player_protected: Optional[str] = Field(default=None)
    is_hunted_player_saved: bool = Field(default=False)
    player_poisoned: Optional[str] = Field(default=None)
    player_current_dead: list[str] = Field(default=[])
代码运行过程:
- 运行代码,游戏开始,角色分配
- 主持人走流程,黑夜守卫说话
- 狼人杀人
- 重复类似上述流程,直至游戏结束。
动手操作:
创建一个werewolf.py的文件运行代码详情如下:
以下代码源自MetaGPT/examples/werewolf_game/start_game.py at main · geekan/MetaGPT
##运行代码详情
#导入角色和游戏相关依赖
import asyncio
import fire

from metagpt.ext.werewolf.roles import Guard, Moderator, Seer, Villager, Werewolf, Witch//守卫 主持人 先知 村民 狼人 巫师
from metagpt.ext.werewolf.roles.human_player import prepare_human_player
from metagpt.ext.werewolf.werewolf_game import WerewolfGame
from metagpt.logs import logger

#由于MetaGPT是异步框架,使用asyncio启动游戏
async def start_game(
    investment: float = 3.0,
    n_round: int = 5,#建议n_round值设置小一点
    shuffle: bool = True,
    add_human: bool = False,
    use_reflection: bool = True,
    use_experience: bool = False,
    use_memory_selection: bool = False,
    new_experience_version: str = "",
):
    game = WerewolfGame()
    #初始化游戏设置
    game_setup, players = game.env.init_game_setup(
        role_uniq_objs=[Villager, Werewolf, Guard, Seer, Witch],#设置游戏玩家职业
        num_werewolf=2,
        num_villager=2,
        shuffle=shuffle,#是否打乱职业顺序,默认打乱
        add_human=add_human,#设置真人也参与游戏
        use_reflection=use_reflection,#是否让智能体对对局信息反思,默认开启
        use_experience=use_experience,#是否让智能体根据过去行为优化自身动作,默认关闭
        use_memory_selection=use_memory_selection,
        new_experience_version=new_experience_version,
        prepare_human_player=prepare_human_player,
    )
    logger.info(f"{game_setup}")

    players = [Moderator()] + players#主持人加入游戏
    game.hire(players)
    game.invest(investment)
    game.run_project(game_setup)#主持人广播游戏情况
    await game.run(n_round=n_round)


def main(
    investment: float = 20.0,
    n_round: int = 12,#运行前建议将此处n_round修改小一点,否则对钱包不友好!!!(原来是100)
    shuffle: bool = True,
    add_human: bool = False,
    use_reflection: bool = True,
    use_experience: bool = False,
    use_memory_selection: bool = False,
    new_experience_version: str = "",
):
    asyncio.run(
        start_game(
            investment,
            n_round,
            shuffle,
            add_human,
            use_reflection,
            use_experience,
            use_memory_selection,
            new_experience_version,
        )
    )


if __name__ == "__main__":
    fire.Fire(main)
目前遇到的问题: 虽然下了metagpt0.8.0,并且我有查我的conda环境里面有metagpt.ext目录,但是导入包时就是访问不到它 . 所以我把它下到了和我的py项目一个目录, 目前包的导入没有问题了,
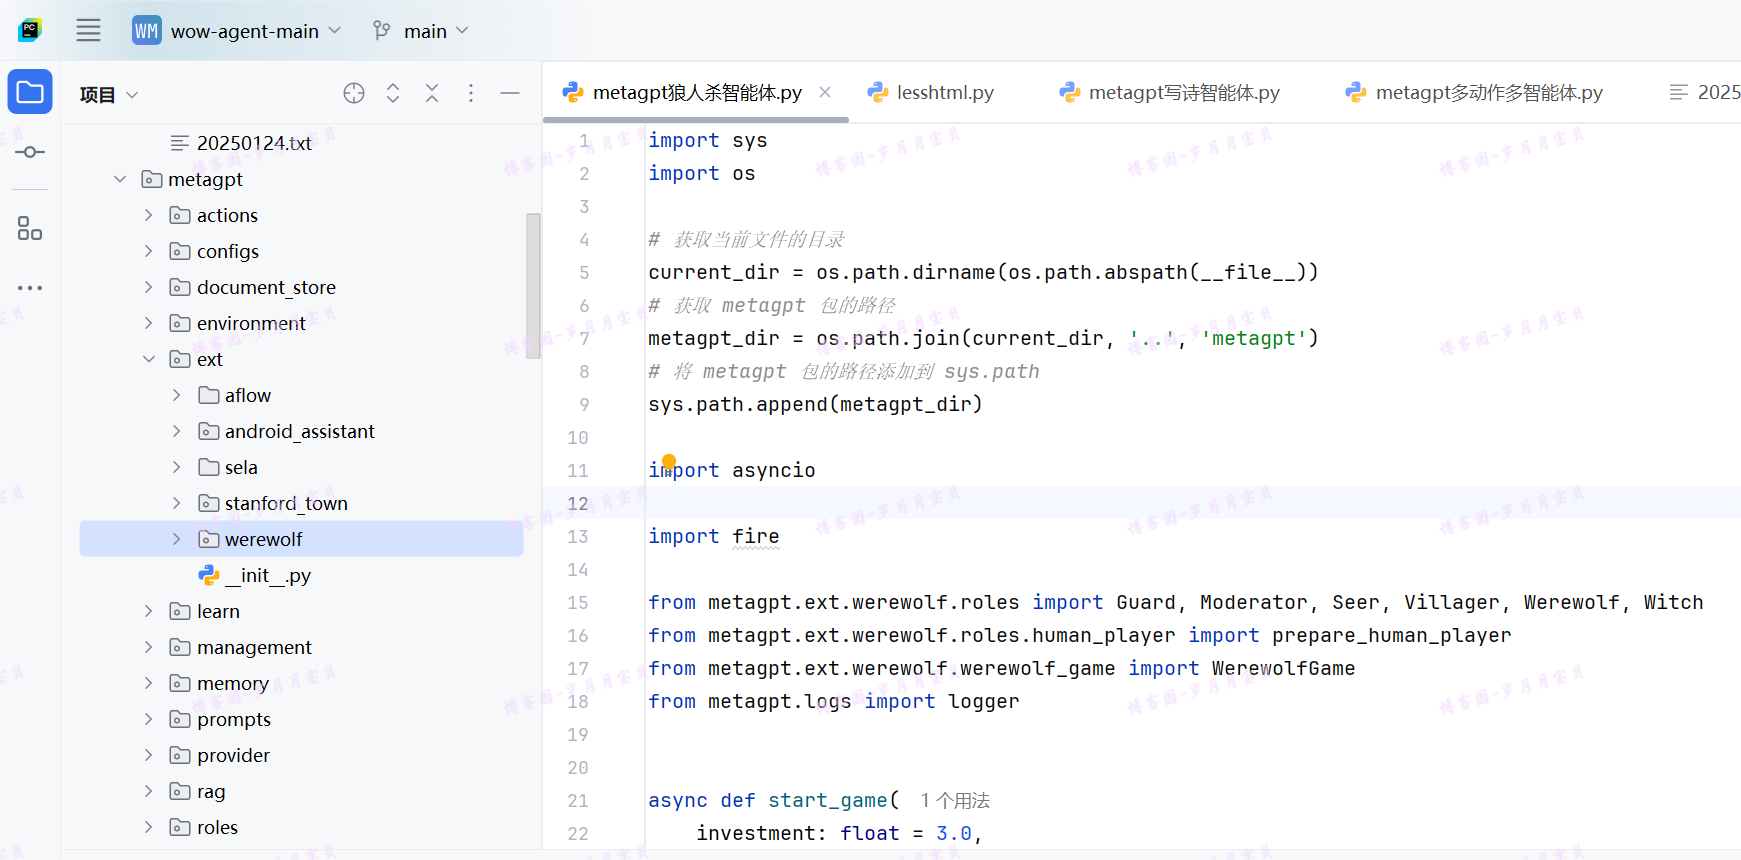
但是运行时会包各种缺包错误(例如下面)
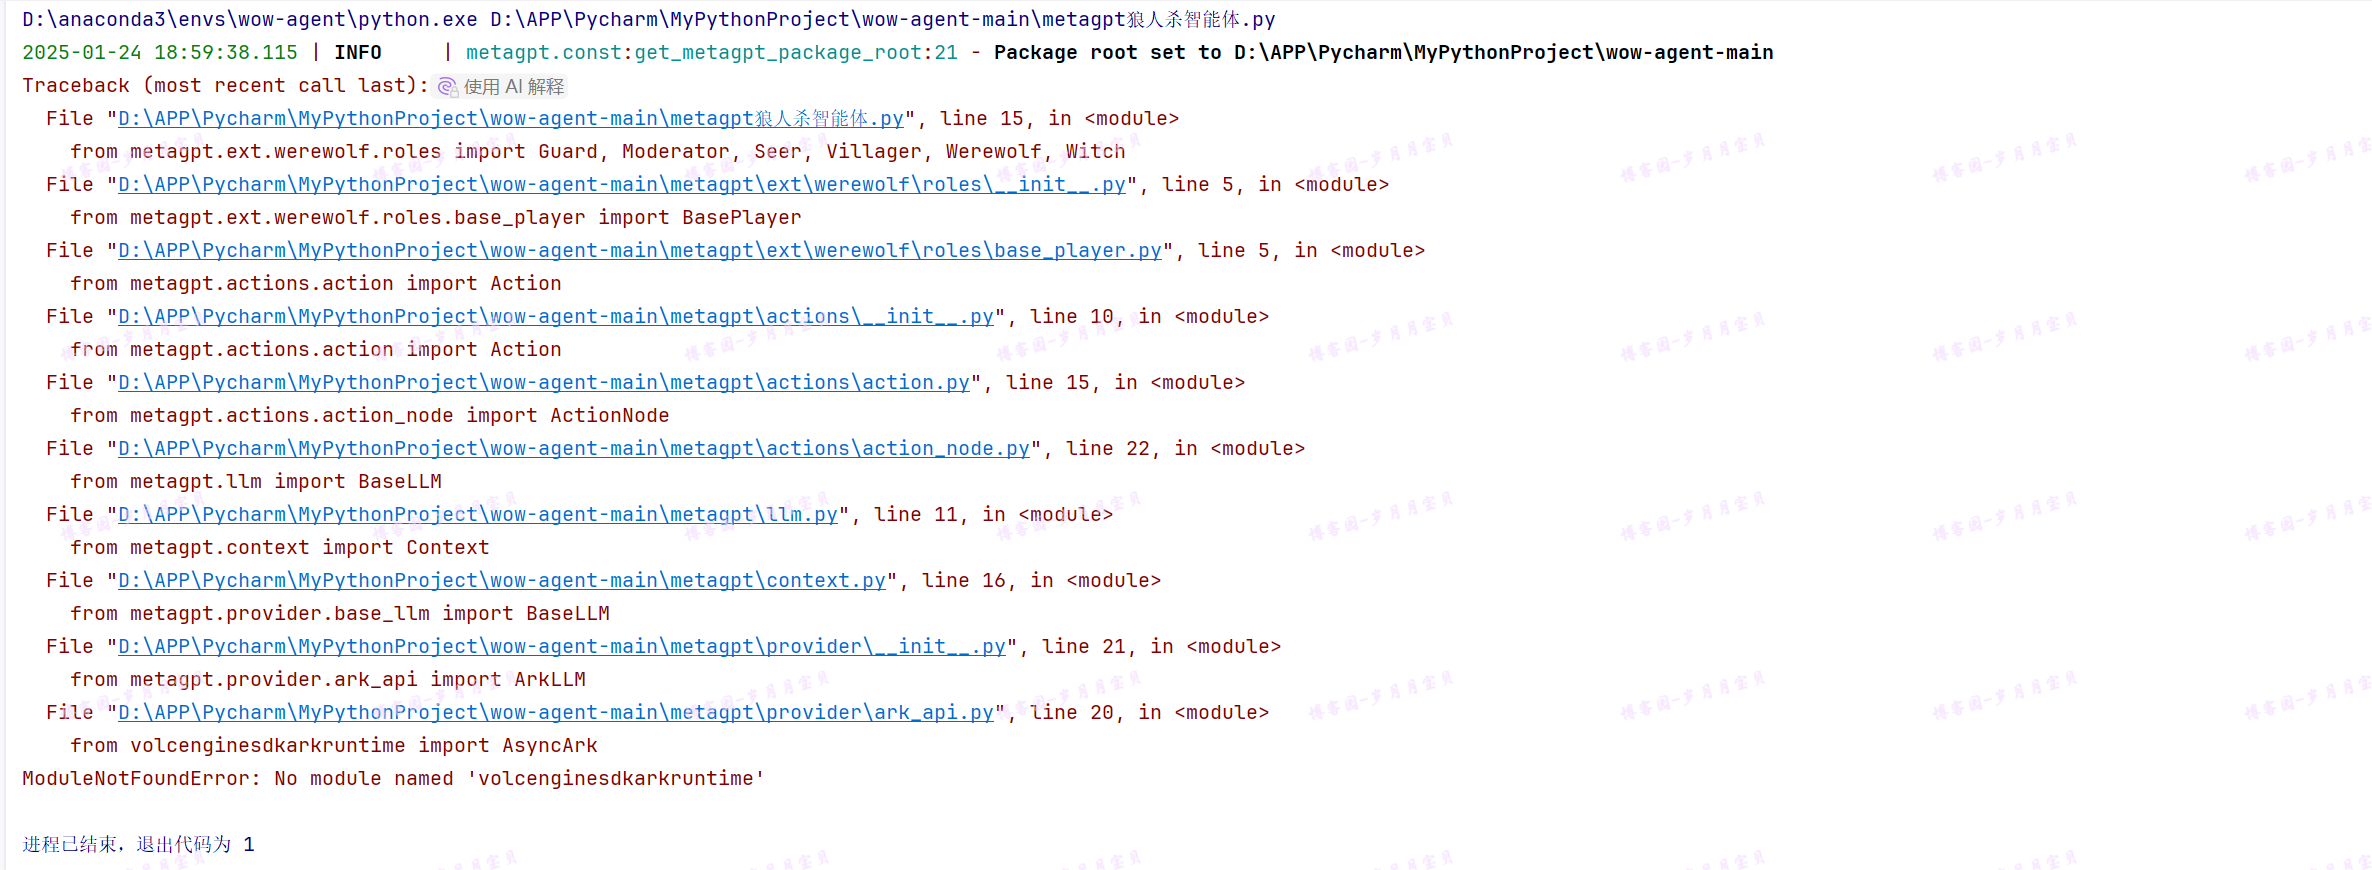
我也在悉数安包,
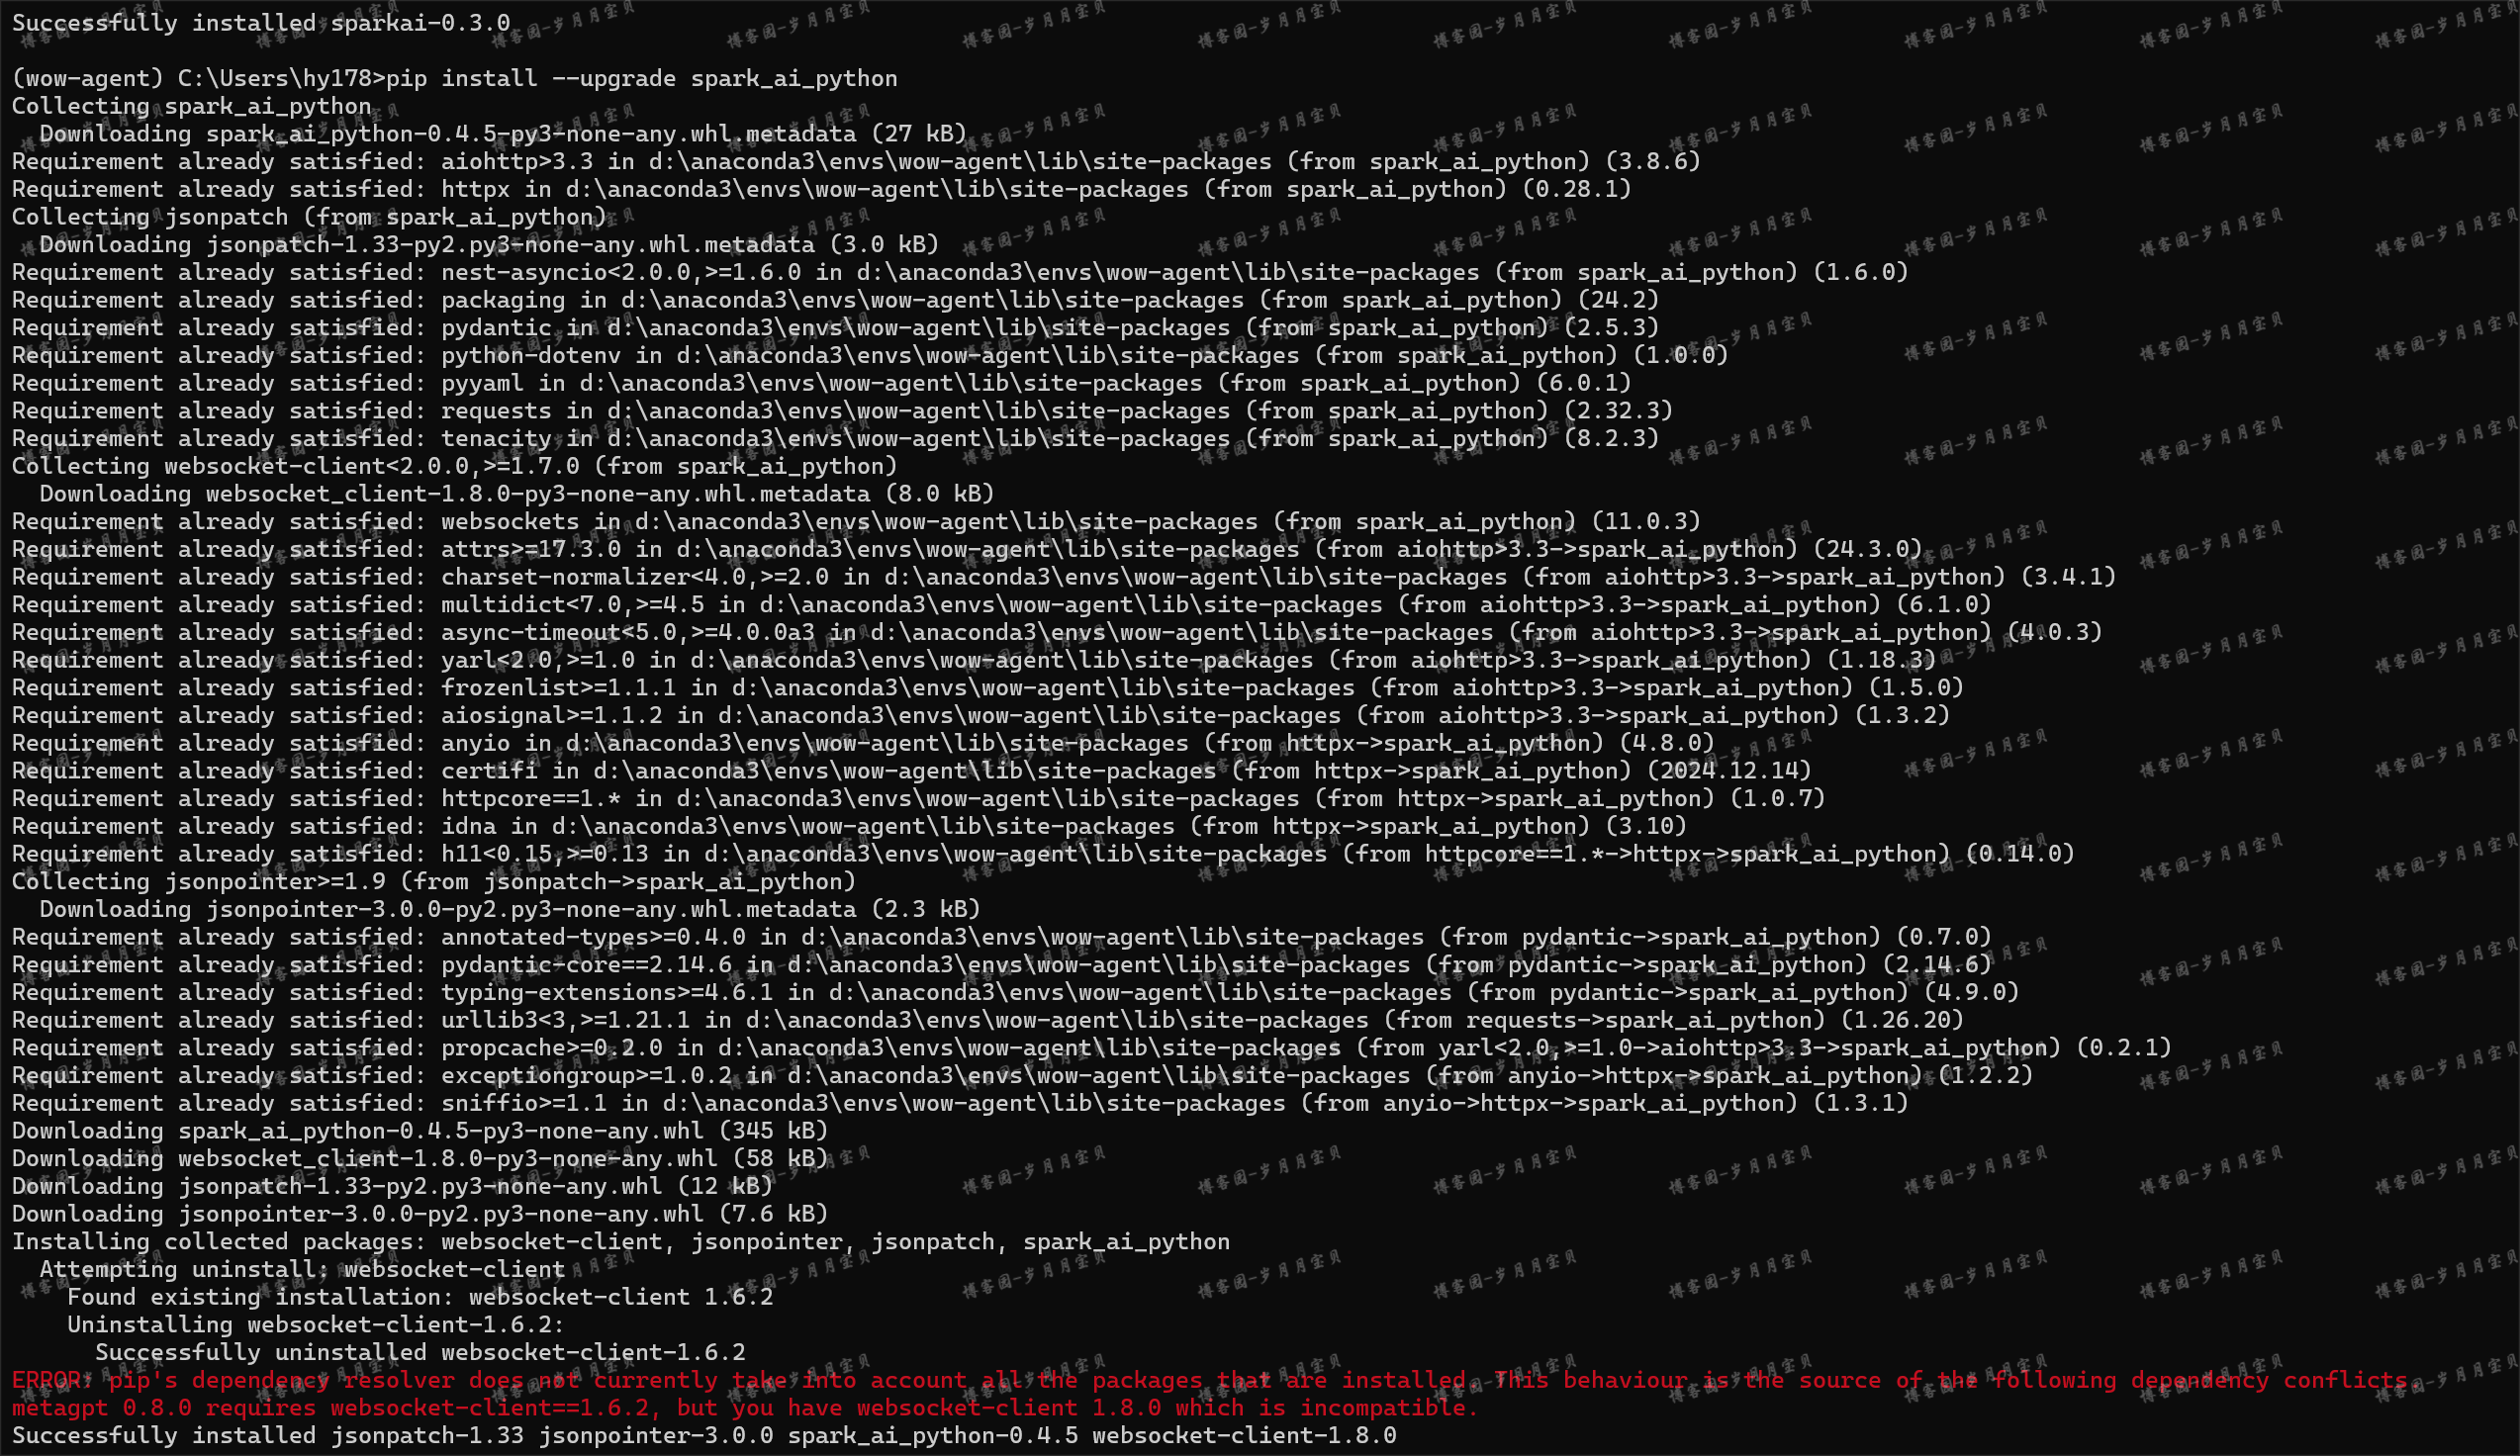
奈何安的一些包会与我的metagpt 0.8.0发生冲突,不得不停止. 以此问题留给后人💘
给大家一个源码下载最新metagpt的方法:
首先,新建一个python为3.10的conda环境
然后,建议大家先进行上面的代理设置https://blog.csdn.net/qq_43546721/article/details/139506583 ,方法1和2都建议做
接着,
git clone --depth 1 https://github.com/geekan/MetaGPT.git
cd MetaGPT
pip install -e .
下面,你可能会遇到

这是因为最长路径限制,进行如下操作即可解决:
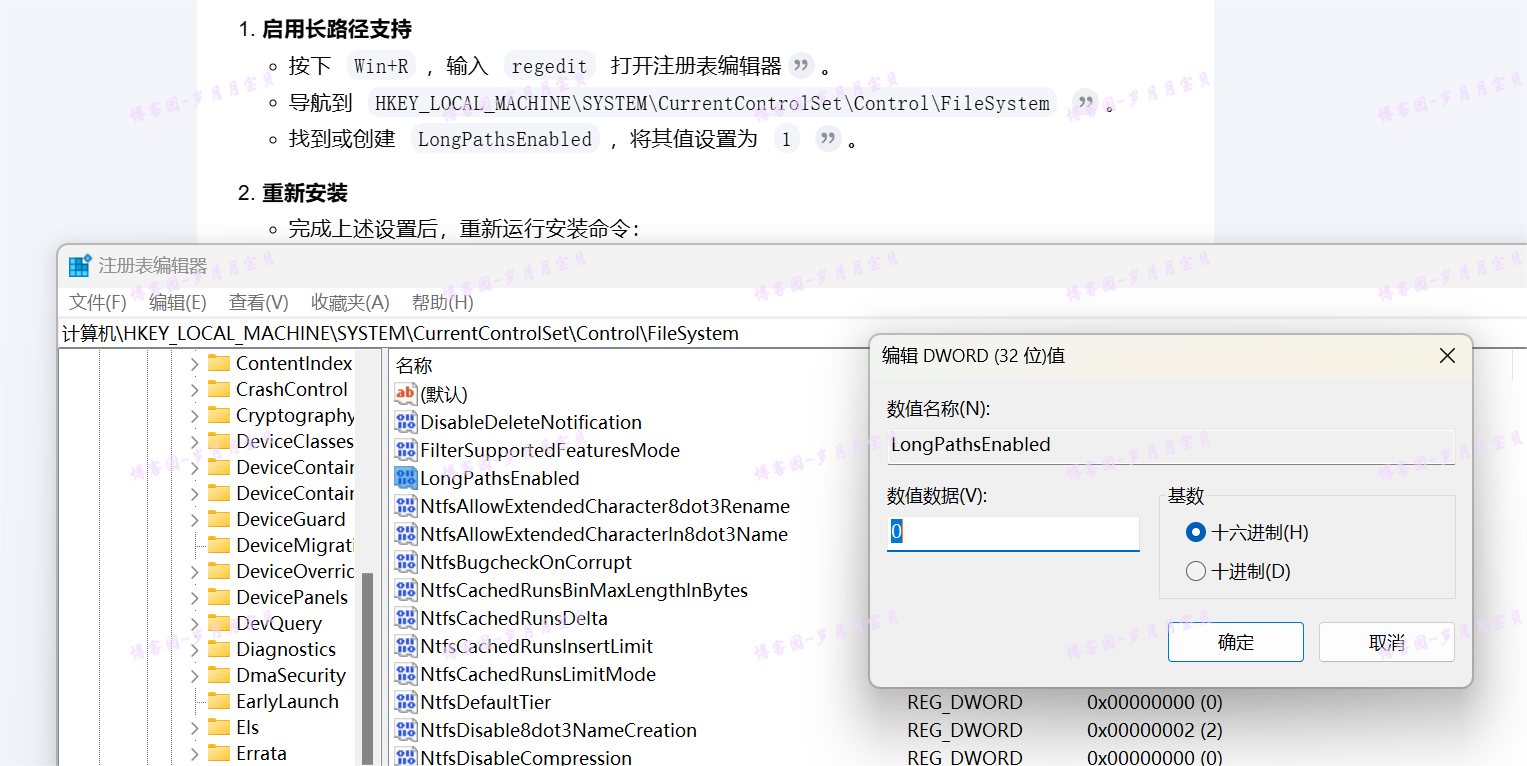
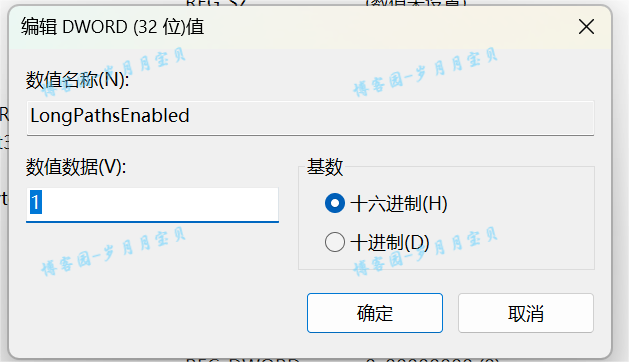
解决结果:
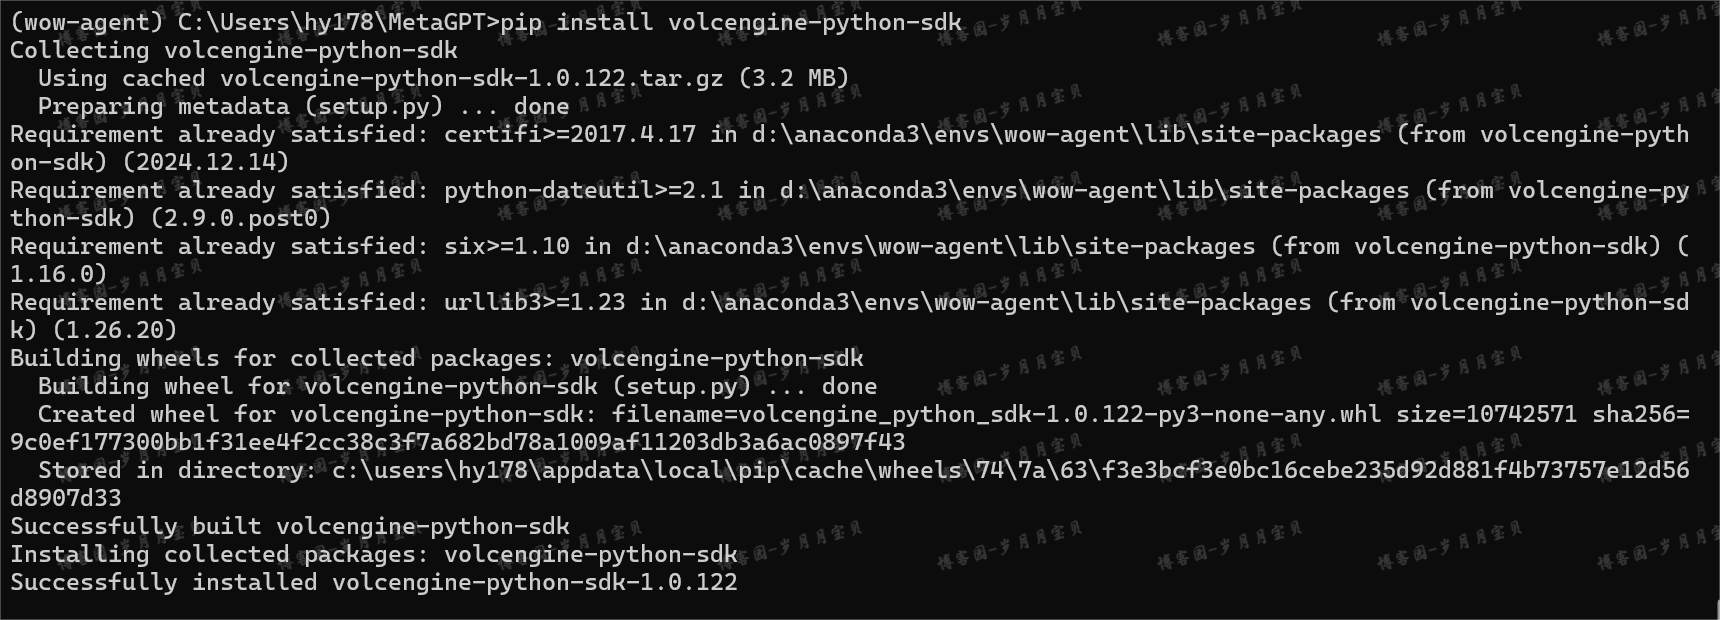
当你遇到依赖冲突:
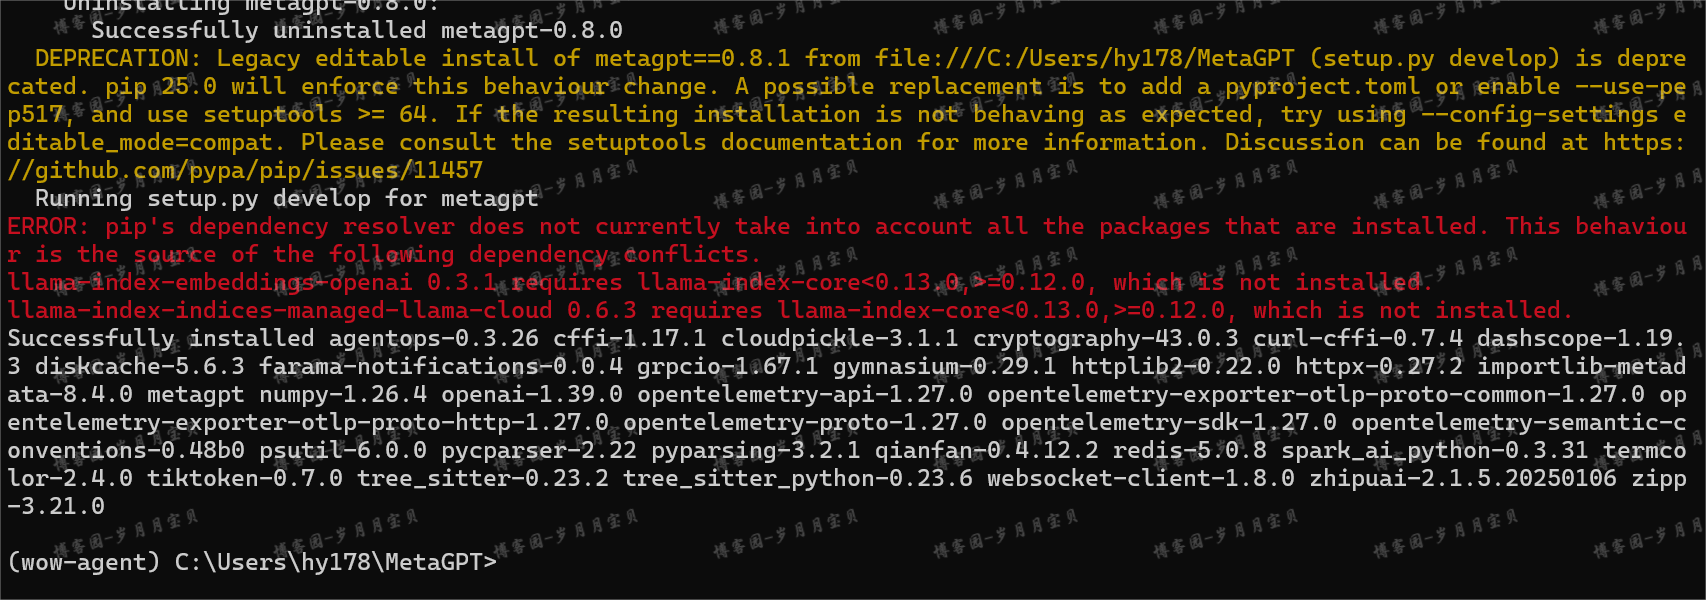
可以pip install --use-pep517 --no-build-isolation -e .
最终源码版的metagpt会安装成功(PS :全程kexue上网):
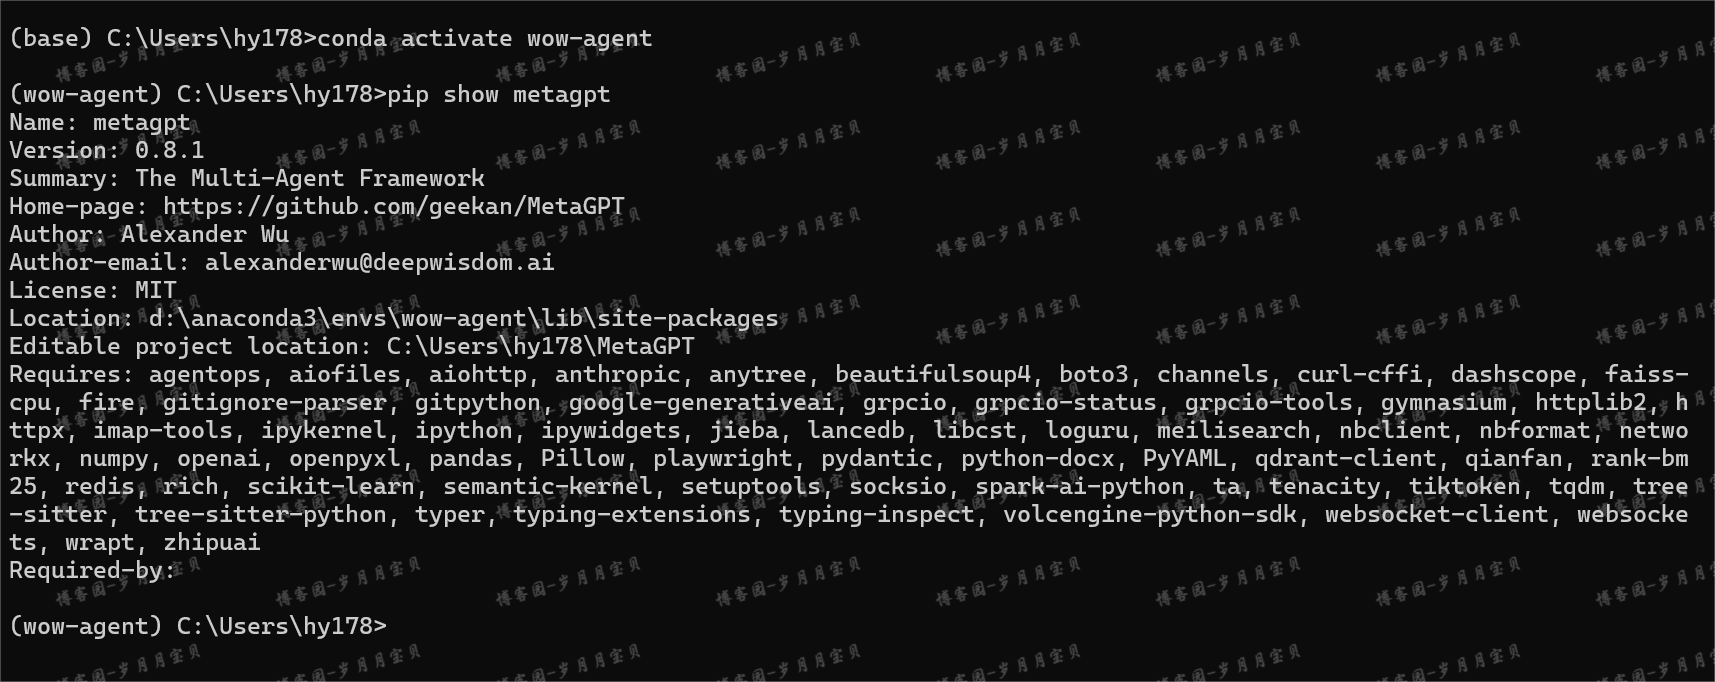
另外,如果还报一些依赖错误,可以①更新pippython -m pip install --upgrade pip(因为较新版本的 pip 通常具有更强大的依赖解析能力,所以更不容易出现依赖错误)②运行代码如果显示有的包不存在,建议kexue上网看官网的fork里面给出的pip下载正确命令。
💛最终狼人杀没有运行成功(鼠鼠还为它新开了一个环境,重装了一遍源码metagpt),可能因为最新的metagpt不稳定,与llama-index有太多的依赖冲突。经历放出来希望大家学到东西~
metaGPT-多动作多智能体实例-虚拟小镇
项目理论参照(实践——岁月月宝贝!):
斯坦福小镇中构建了一个虚拟的RPG世界,AI在其中可以自由探索、相互合作、发展友情、举办活动、构建家庭。本节将用Metagpt提供的模块展现斯坦福小镇的互动环境。

快速开始
📌 需要注意,由于本项目使用到了Embedding服务,因此只能使用OpenAI的Key进行模拟
大模型 API 配置 - 飞书云文档
斯坦福小镇demo的入口在 examples/stanford_town/run_st_game.py 中,在命令行输入如下命令即可开始模拟
cd examples/stanford_town
python run_st_game.py "Host a open lunch party at 13:00 pm" "base_the_ville_isabella_maria_klaus" "test_sim" --temp_storage_path "temp_storage"

目前主要有如下几个重要参数,可以输入 python run_st_game.py --help 查看:
- idea:将传给小镇中的第一位居民,并以此开始模拟
- fork_sim_code:可以沿用过去的模拟结果,相当于一套居民状况模板,存放在
examples/stanford_town/storage中。也可以使用原版斯坦福小镇中的其他模板。 - sim_code:当前模拟结果保存的文件夹命名,模拟中会不断更新该文件夹
- temp_storage_path:存储模拟的step,推荐用
--temp_storage_path "temp_storage"
!!!这节push我申请了一个OpenAI的API和一张美国信用卡!
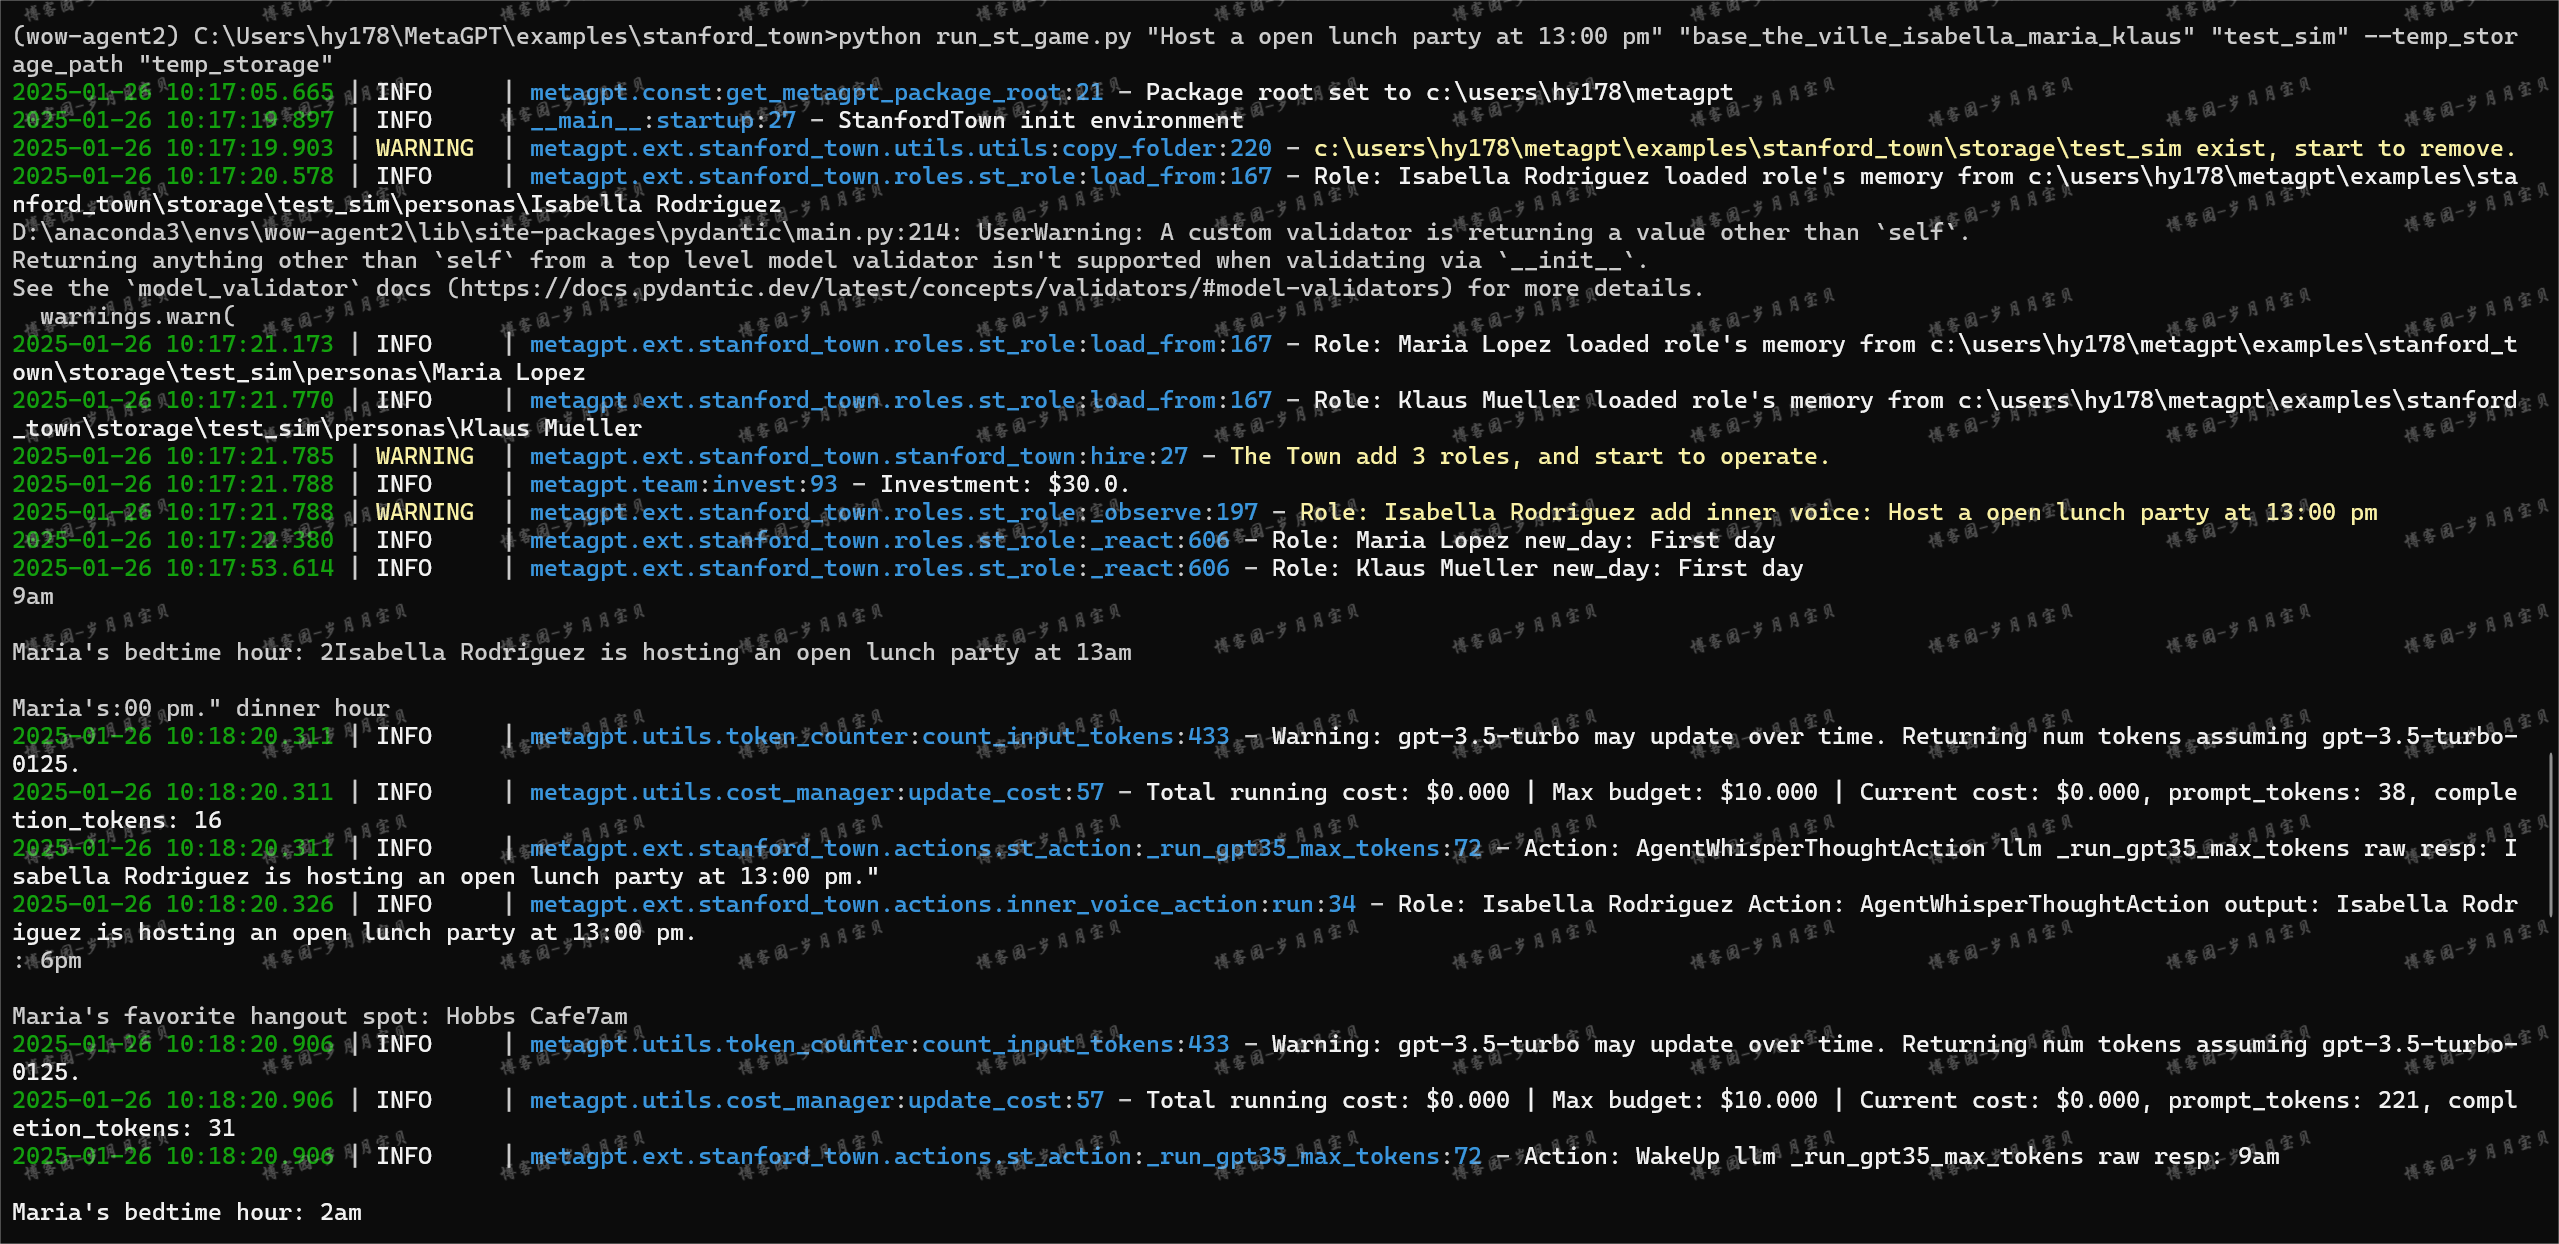
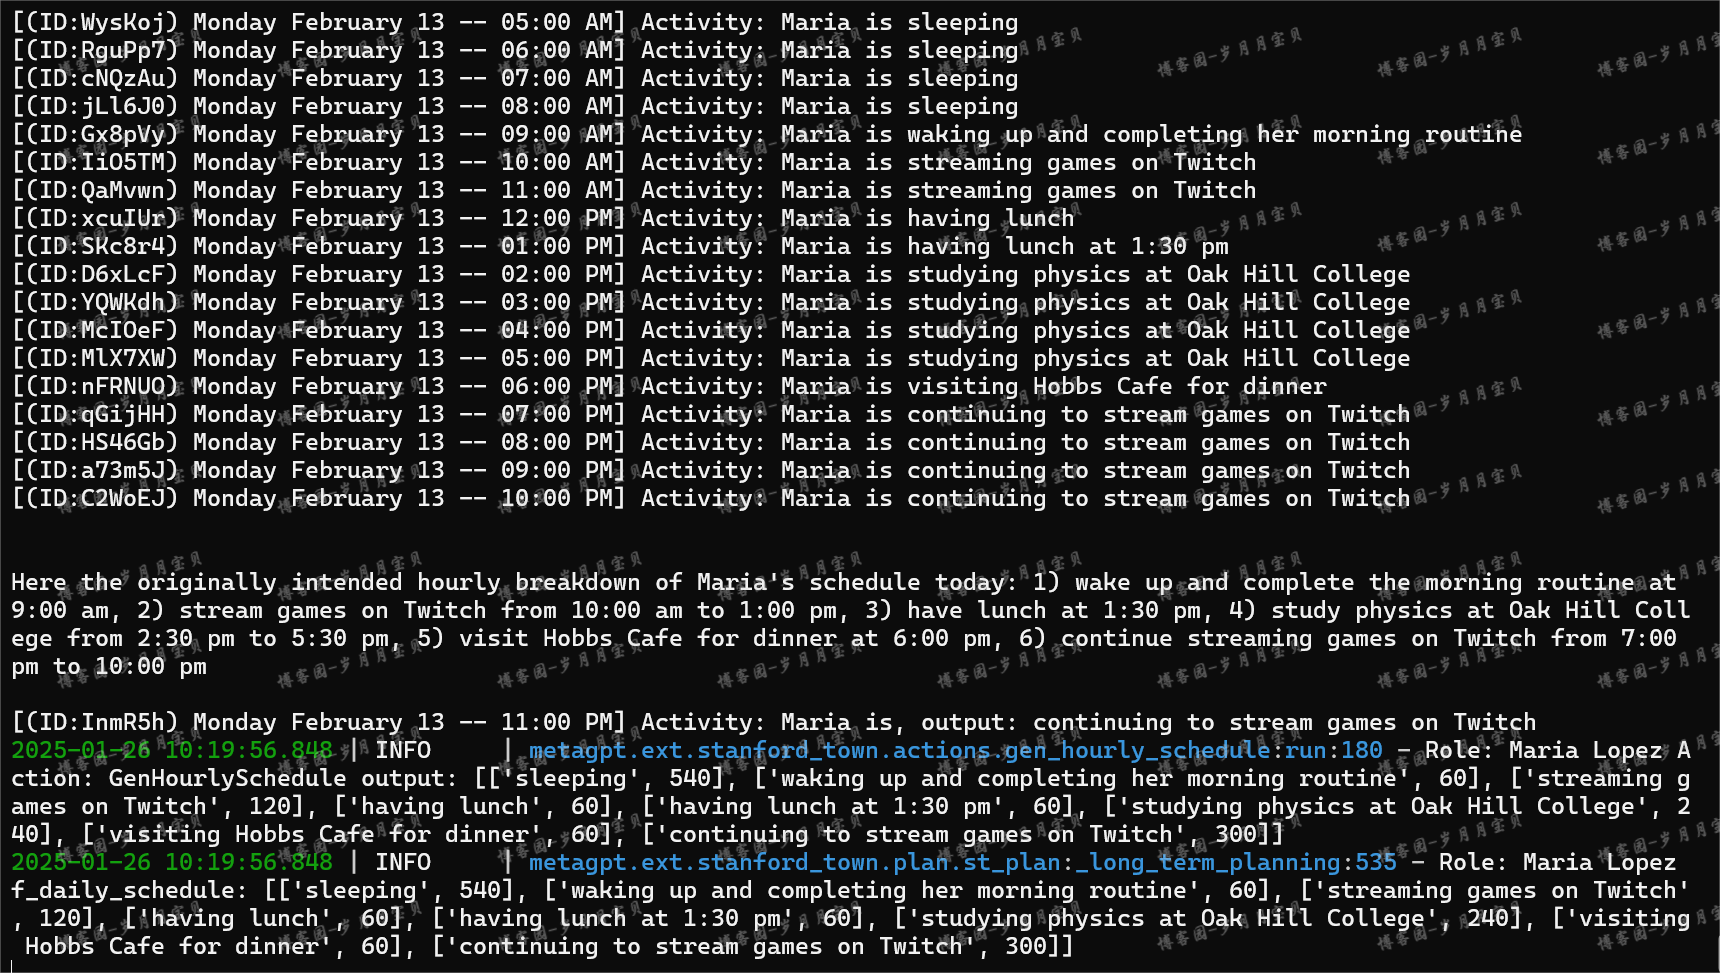
(成功了成功了成功了!!!你们不知道我办卡试了多少家的api和办卡花了多久QwQ;另外,注意这个程序要自己中断,不然会花很多很多💴)
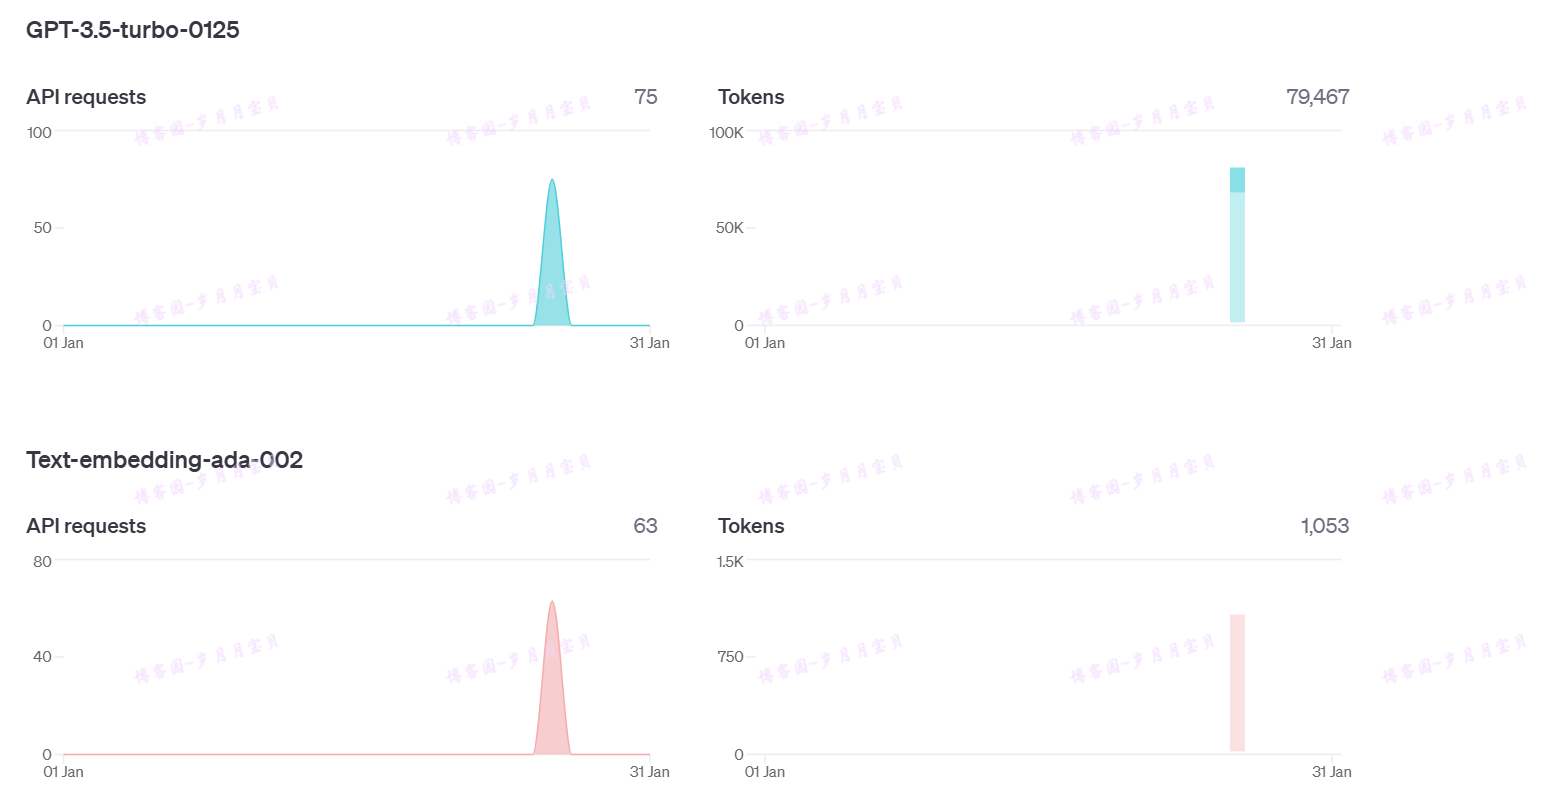
(上面是我用的两个模型★,°:.☆( ̄▽ ̄)/$:.°★ 。)
小镇环境讲解
小镇用Metagpt的环境模块来实现交互逻辑,让每个角色可以与环境交互,获取观察并更新状态。具体代码
1. 导入环境相关的类并初始化环境
这里选取了斯坦福小镇自带的Maze
from metagpt.environment.stanford_town.stanford_town_ext_env import StanfordTownExtEnv
from metagpt.environment.stanford_town.env_space import (
    EnvAction,
    EnvActionType,
    EnvObsParams,
    EnvObsType,
)
from metagpt.ext.stanford_town.utils.const import MAZE_ASSET_PATH

env = StanfordTownExtEnv(maze_asset_path=MAZE_ASSET_PATH)
2. 观察环境
这里我们选取了小镇地图坐标的 (72,14),即设定的伊莎贝拉初始位置作为案例,可以通过传给环境观察类型来获取需要的信息,例如:
a. 当前坐标地址,可以发现伊莎贝拉初始在自己公寓的主卧床上:
env.observe(EnvObsParams(obs_type=EnvObsType.TILE_PATH, coord=(72, 14)))#记得print
# 输出如下
"the Ville:Isabella Rodriguez's apartment:main room:bed"

b. 当前坐标的详细信息,其中collision代表当前位置是否不可通行(如墙、障碍等)
env.observe(EnvObsParams(obs_type=EnvObsType.GET_TITLE, coord=(72, 14)))#记得print
# 输出如下
{
    'world': 'the Ville',  # 当前所属地图
    'sector': "Isabella Rodriguez's apartment",  # 当前区域、如广场、公寓……
    'arena': 'main room',  # 当前活动场所,如浴室、厨房……
    'game_object': 'bed',  # 当前位置的物品,如床、门、桌子等
    'spawning_location': 'sp-A',
    'collision': False,  # 是否不可通行
    'events': {("the Ville:Isabella Rodriguez's apartment:main room:bed", None, None, None)}
}

可以传递动作给环境来获取完整的观察:
# 删除在(72,14)位置,由伊莎贝拉产生的事件
action = EnvAction(action_type=EnvActionType.RM_TITLE_SUB_EVENT, coord=(72, 14), subject="Isabella Rodriguez")
# 执行动作并得到新的完整观察
observation, *_ = env.step(action)
print(observation, *_)
(开心♥★,°:.☆( ̄▽ ̄)/$:.°★ 。)
这里的观测值是一个字典,总共有三个键,分别如下:
| 字段 | 说明 | 取值 |
|---|---|---|
| collision_maze | 描述地图不可通过区域的二维矩阵 | (地图高度,地图长度),0为可通过,32125为不可通过 |
| address_tiles | 存放地址所在格点范围的字典,例如:{"正方形区域":{(0,0),(0,1),(1,0),(1,1)}} |
(地图高度,地图长度) |
| tiles | 存放每个格点的详细信息,例如 obs['tiles'][14][72] 可以获得和该输出一致的结果 |
(地图高度,地图长度) |
3.执行动作
角色接受到观察值后,会结合其他信息传入大模型并获取动作(具体函数定义),其中一个动作的字段如下:
| 字段 | 说明 | 取值 |
|---|---|---|
| action_type | 动作类型 | 不同动作对应不同IntEnum值,依次None、ADD_TILE_EVENT、RM_TILE_EVENT、TURN_TILE_EVENT_IDLE、RM_TITLE_SUB_EVENT |
| coord | 地图上的坐标,尺寸为(2,)的ndarray | 第一个数值最小值为0,最大值为地图宽度。第二个数值最小值为0,最大值为地图高度。 |
| subject | 事件的主题,文本类型 | 最大长度256 |
| event | 事件,包含4个文本的元组类型 | 每个元素最大长度256 |
例如,若伊莎贝拉在(72,14)处睡觉,
action = EnvAction(action_type=1, coord=(72, 14), subject='Isabella Rodriguez',
event=["the Ville:Isabella Rodriguez's apartment:main room:bed",
"Isabella Rodriguez",
"is",
"sleep"])

print(action)
则action为:

EnvAction(action_type=1, coord=array([72, 14]), subject='Isabella Rodriguez',
event=["the Ville:Isabella Rodriguez's apartment:main room:bed",
"Isabella Rodriguez",
"is",
"sleep"])
★,°:.☆( ̄▽ ̄)/$:.°★ 。🎉🎉🎉成功完结!

(就是有点烧钱😋)
总结
本节中,我们学习了如何使用MetaGPT版本的斯坦福小镇,并了解了斯坦福小镇环境的基本使用,例如从环境中获取观察,使用动作更新环境等。
What's Next?
- 目前MetaGPT的斯坦福小镇仍存在一定的版本适配问题(如前端服务、Embedding适配其他模型等),欢迎想参与开发的朋友们多提issue、PR,让MetaGPT的小镇更加热闹 👏 贡献者指南
- 本案例主要依照原版斯坦福小镇复现,尝试更改地图和人物模板,创造一个自己的小镇👍
ALL Task心得
- 多个项目大大提高了我的DeBug能力!学会了搜最新官方文档得到最准确解决方案,学会了修改源码中的类(注意重新导入项目时又会消失)😆
- 包的多个包版本产生冲突时,学会了使用piptree查找控制~
- 学会了git下载项目源码!但是注意这样下载的包不稳定,很容易和其他包产生冲突,且会占C盘哦~
- 学会了灵活修改环境变量,比如把Ollama的模型包迁到D盘,以及修改模型Host,让它整个局域网使用我电脑的地址都OK
- 提高了检索全球知识实践的能力,独立解决问题能力UPUPUP!!!
- 对类的继承和改写有了更深入的理解,metaGPT里面加入action/role常用到~
- 对OS里面文件的导入与输出有了亲手实践,发现一些地址都是可以设置的!
- 大家注意很多便宜的平台表示的平替一用到OpenAI的embeding模型就可分辨真伪(只要base_url不是'https://api.openai.com/v1',都不是OpenAI的API);但是其实如果是自己写代码embeding模型还可以用https://jina.ai/embeddings/ ,其他模型还可以用智谱(尊都很棒)、上网搜索可以用博查~它们都有免费额度!
- 注册OpenAI号码的教程可以在微信上搜,有积极解决问题的客服一般是可靠的👍(大家注意春节快放假了,要操作赶紧办)
其他学到的记不起来了的东西大概都内化成了我的能力——谢谢Datawhale wow-agent教程创作者黎伟老师和群里的助教老师以及热情的同学们~谢谢被引用到的每一个组织/个人!希望开源的实践经验可以帮到后人披荆斩棘!
🎊🎊🎊🎊2025春节将至,各位蛇年大吉🎊🎊🎊🎊
🎉🎉🎉🎉博客园的各位哥哥姐姐辛苦啦🎉🎉🎉🎉
🎀🎀🎀🎀岁月月宝贝——优秀有趣执行力强的我也辛苦啦!🎀🎀🎀🎀
💋💋💋💋看到这里的推荐关注的粉丝宝宝们也辛苦啦😘~💋💋💋💋


 浙公网安备 33010602011771号