SpringBoot02
练习员工后台管理
-
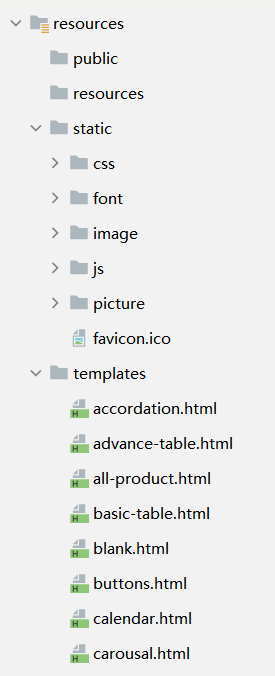
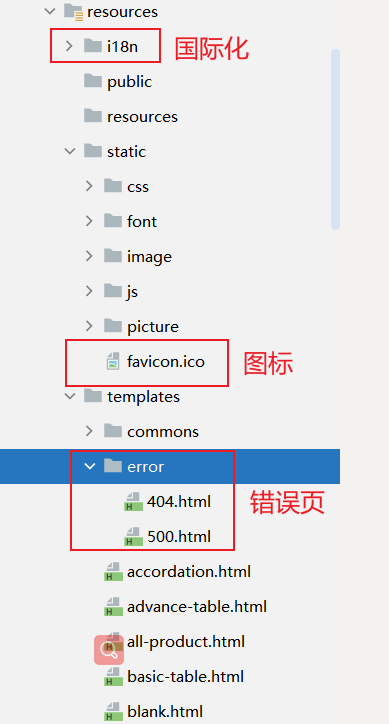
引入静态资源文件
资源文件放入static下
模板文件放入templates下
-
创建实体类pojo
//部门
@Data
@NoArgsConstructor
@AllArgsConstructor
public class Department {
    private Integer item;
    private String name;

}
//员工 @Data @NoArgsConstructor public class Employee { private String name; private int sex;//1男 0女 private int age; private Date birth; private Department department; public Employee(String name, int sex, int age, Department department) { this.name = name; this.sex = sex; this.age = age; this.birth = new Date();//自动生成时间 模拟触发器 this.department = department; } } -
创建dao层查询数据(这里是用Map模拟数据库数据)
//EmployeeDao模拟数据库数据和数据查询
public class EmployeeDao {
    //模拟数据库数据
    private static Map<Integer, Employee> employees=null;
    private static DepartmentDao departmentDao;
    static {
        //创建五个部门
        employees = new HashMap<Integer,Employee>();
        employees.put(1,new Employee("小明",1,12,departmentDao.getDepartmentsById(1)));
        employees.put(2,new Employee("小红",0,14,departmentDao.getDepartmentsById(2)));
        employees.put(3,new Employee("小芳",0,16,departmentDao.getDepartmentsById(3)));
        employees.put(4,new Employee("小火",1,14,departmentDao.getDepartmentsById(4)));
        employees.put(5,new Employee("麦克",1,17,departmentDao.getDepartmentsById(4)));
        employees.put(6,new Employee("lucy",0,20,departmentDao.getDepartmentsById(2)));

    }

    //获取所有部门
    public Collection<Employee> getDepartments(){
        return employees.values();
    }

    //根据ID获取其中一个部门
    public Employee getDepartmentsById(int id){
        return employees.get(id);
    }
}
//模拟部门信息和数据库查询 public class DepartmentDao { //模拟数据库数据 private static Map<Integer,Department> departmentMaps=null; static { //创建五个部门 departmentMaps = new HashMap<Integer,Department>(); departmentMaps.put(1,new Department(1,"运营部")); departmentMaps.put(2,new Department(2,"开发部")); departmentMaps.put(3,new Department(3,"营销部")); departmentMaps.put(4,new Department(4,"业务部")); } //获取所有部门 public Collection<Department> getDepartments(){ return departmentMaps.values(); } //根据ID获取其中一个部门 public Department getDepartmentsById(int id){ return departmentMaps.get(id); } } -
将数据显示在前端页面
-
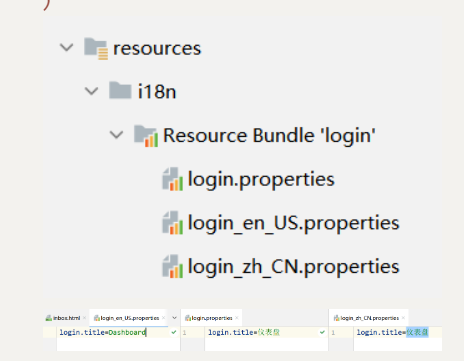
页面国际化
- 在resources中编写配置文件,三个文件会自动合并
-
application.yaml配置编写的国际化文件login.properties
spring.messages.basename=i18n.login这里的路径是类路径下 -
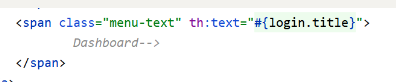
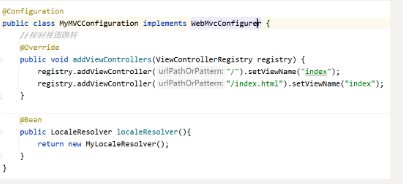
前端页面获取配置文件中的内容,使用thymeleaf需要引入声明,用#获取Message信息
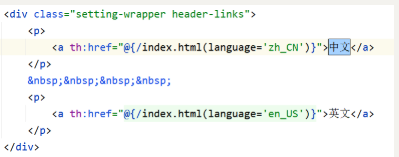
- 设置中英文请求,同样使用thymeleaf语法,language为参数名,=后面为参数,@为url语法标记
- 自定义地区解析器,如果请求参数不包含地区语言信息则使用默认配置,包含则使用自定义配置

- 设置为@Bean加载到容器中
- 国际化配置完成
-
登录
- 前端登录页面设置name属性,设置请求地址
- 编写controller层代码,响应请求
- 若登录成功,重定向到一个地址
- 设置地址解析器将重定向的地址,设置响应页面为order.html
- 若登录不成功,返回错误信息在前端页面显
-
登录权限控制
-
登录成功将user存入session
-
自定义拦截器(HandlerInterceptor)接管springboot实现功能扩展
public class LoginHandlerInterceptor implements HandlerInterceptor { @Override public boolean preHandle(HttpServletRequest request, HttpServletResponse response, Object handler) throws Exception { HttpSession session = request.getSession(); Object userLogin = session.getAttribute("userLogin"); if (userLogin!=null){ //登录成功 return true; }else { //登录不成功 request.setAttribute("msg","没有登录,请先登录!"); request.getRequestDispatcher("/login.html").forward(request,response); return false; } } } -
配置到MVC配置类中
//配置访问权限控制
    @Override
    public void addInterceptors(InterceptorRegistry registry) {
        registry.addInterceptor(new LoginHandlerInterceptor())
                .addPathPatterns("/**")
                .excludePathPatterns("/login.html","/user/login","/login","/css/**","/font/**","/image/**","/js/**","/picture/**");
    }
-
-
查询所有员工
-
编写controller接口
-
编写service接口
-
编写service接口实现类
-
编写dao层数据库查询
-
前端页面form action请求设置
-
将侧边栏与顶部导航栏抽取为thymeleaf的插槽形式,通过th:fragment的形式抽取为插槽,通过th:insert进行插入,th:replace进行替换

-
在所有的页面中进行调用
-
-
thymeleaf获取后台响应数据进行显示
<tbody>
                                                <tr th:each="emp:${list}">
                                                    <td th:text="${emp.getName()}"></td>
                                                    <td th:text="${emp.getSex()==1?'男':'女'}"></td>
                                                    <td th:text="${emp.getAge()}"></td>
                                                    <td th:text="${#dates.format(emp.getBirth(),'yyyy-MM-dd')}"></td>
                                                    <td th:text="${emp.getDepartment.getName()}"></td>
													<td>
														<a class="btn btn-sm btn-primary">编辑</a>
														<a class="btn btn-sm btn-danger">删除</a>
													</td>
                                                </tr>
                                            </tbody>
-
-
增删改查员工
-
前端部分
- thymeleaf三元运算符默认选中,th:each遍历
<select class="form-control" name="department.item" id="exampleInputDepartment"> <option th:selected="${dep.getItem()==emp.getDepartment().getItem()}" th:each="dep:${departments}" th:text="${dep.getName()}" th:value="${dep.getItem()}"></option> </select>-
restful风格传递参数
<a class="btn btn-sm btn-primary" th:href="@{/empEdit/}+${emp.getId()}">编辑</a>
														<a class="btn btn-sm btn-danger" th:href="@{/empDelete/}+${emp.getId()}">删除</a>
-
后端业务逻辑部分
@Controller
public class CustomersController {

    @Autowired//要标注这个类为Spring的组件才可以自动注入
    public EmployeeDao employeeDao;
    @Autowired
    public DepartmentDao departmentDao;

    @RequestMapping("/emps")
    public String emps(Model model){
        Collection<Employee> departments = employeeDao.getEmployees();
        model.addAttribute("list",departments);
        return "customers.html";
    }

    //添加员工
    @GetMapping("/empAdd")
    public String empAdd(Model model){
        Collection<Department> departments = departmentDao.getDepartments();
        model.addAttribute("departments",departments);
        return "customers-add.html";
    }

    @PostMapping("/empAdd")
    public String empAdd2(Employee employee){
        System.out.println(employee);
        employee.getDepartment().setName(departmentDao.getDepartmentsById(employee.getDepartment().getItem()).getName());
        employeeDao.addEmployee(employee);
        return "redirect:/emps";
    }

    //修改员工
    @RequestMapping("/empEdit/{id}")
    public String empEdit(@PathVariable("id") int id,Model model){
        Employee employeesById = employeeDao.getEmployeesById(id);
        model.addAttribute("emp",employeesById);
        Collection<Department> departments = departmentDao.getDepartments();
        model.addAttribute("departments",departments);
        return "customers-edit.html";
    }
    @PostMapping("/empEdit")
    public String empEdit2(Employee employee){
        employee.getDepartment().setName(departmentDao.getDepartmentsById(employee.getDepartment().getItem()).getName());
        employeeDao.editEmployee(employee);
        return "redirect:/emps";
    }

    //删除员工
    @GetMapping("/empDelete/{id}")
    public String empDelete(@PathVariable("id") int id){
        employeeDao.deleteEmployee(id);
        return "redirect:/emps";
    }
}
-
-
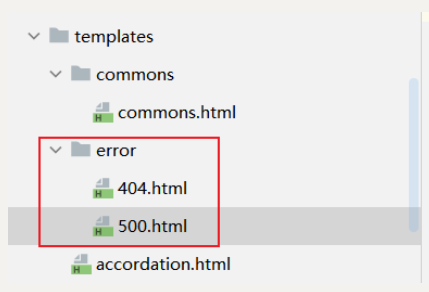
springboot自定义错误信息显示
-
总结:
- thymeleaf语法的具体使用
- 前端页面的搭建:使用模板,框架
- 后端业务的编写,建立在spring的基础之上,大致相似,只是简化了许多的配置,
- springboot的核心:自动装配
-
如何开发一个网站
- 前端页面 是什么样子的 数据的来源
- 数据库设计
- 前端能够独立自主的运行,独立化工程
- 数据接口如何对接:json
- 前后端联合调试
后台管理模板
- x-admin
- bootstrap
- layui
- elementUI
SpringBoot01-SpringBoot02学了写什么
-
springboot是什么?简化web开发的框架
-
微服务:单体应用的合理拆分
-
HelloWorld:第一个springboot应用
-
springboot源码初探:核心自动装配
-
配置yaml:yaml语法,属性赋值
-
多文档环境切换:application-dev.yaml与application-pro.yaml,在application.yaml中选择激活
-
静态资源映射:resources下的static,public,templates
-
Thymeleaf:基础语法的使用
-
springboot如果扩展MVC:@Configuration 自定义类实现WebMvcConfigurer
-
修改springboot的默认配置:在yaml中只要configProperties中有的属性都可以设置
-
练习:员工管理CRUD,restful风格,thymeleaf语法
-
国际化:login.properties login_zh_CN.properties login_en_US.properties,实现LocaleResolver,然后在yaml中配置,前端thymeleaf读取数据
# 配置设置好的国际化文件 messages: basename: i18n.login -
拦截器:实现HandlerInterceptor
-
定制首页,错误页:

 浙公网安备 33010602011771号