基于asyncio+pyppeteer的增量式微博网页版爬虫(二)爬虫构建篇
安装数据库
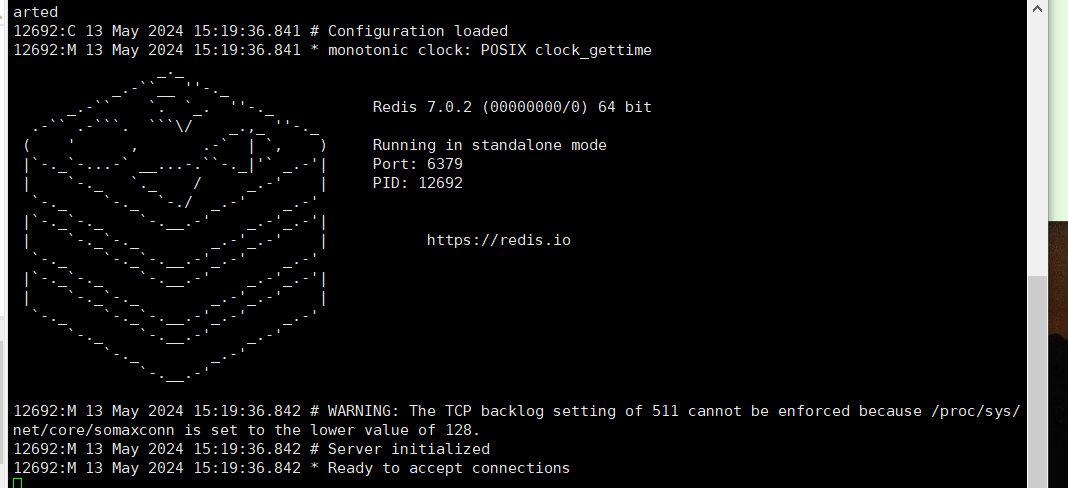
安装Redis
该步骤实现在CentOS7.9的服务器上搭建redis
- 使用wget获取redis官网的tar包,在tools中安装压缩包
cd /usr
mkdir tools
cd tools
wget https://download.redis.io/releases/redis-7.0.2.tar.gz
- 解压
tar -zxf redis-7.0.2.tar.gz
- 编译
cd redis-7.0.2
make
- 安装
make install PREFIX=/usr/tools/redis
- 配置环境变量
vim ~/.bash_profile
REDIS_HOME=/usr/tools/redis/
PATH=$PATH:<PATH1>:$REDIS_HOME/bin
执行配置
source ~/.bash_profile
- 启动和停止redis
cd /usr/tools/redis
redis-server redis.conf或redis-server
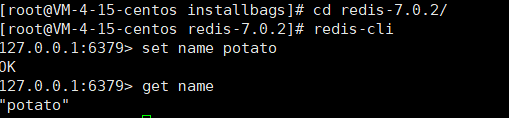
- 测试
新建一个ssh窗口,转到redis安装目录下
redis-cli
set name potato
get name
8. 配置redis.conf
// 将解压路径里的redis.conf复制到安装路径redis中,并在redis中创建新文件夹conf
[root@VM-4-15-centos redis-7.0.2]# cp redis.conf /usr/tools/conf
# 设置后台启动
deamonize yes
# 设置端口号(默认6379)
port 6379
- 设置开机自启动
cd /usr/lib/systemd/system
touch redis.service
vi redis.service
[Unit]
Description=redis-server
After=network.target

[Service]
Type=forking

ExecStart=/usr/tools/redis/bin/redis-server /usr/tools/redis/conf/redis.conf
PrivateTmp=true

[Install]
WantedBy=multi-user.target
#重载系统服务
systemctl daemon-reload
#设置开机自启
systemctl enable redis.service
#取消开机自启
systemctl disable redis.service
#启动服务
systemctl start redis.service
#停止服务
systemctl stop redis.service
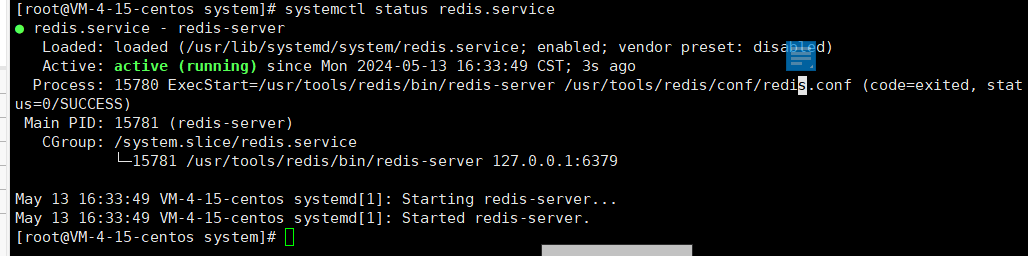
#查看服务状态
systemctl status redis.service
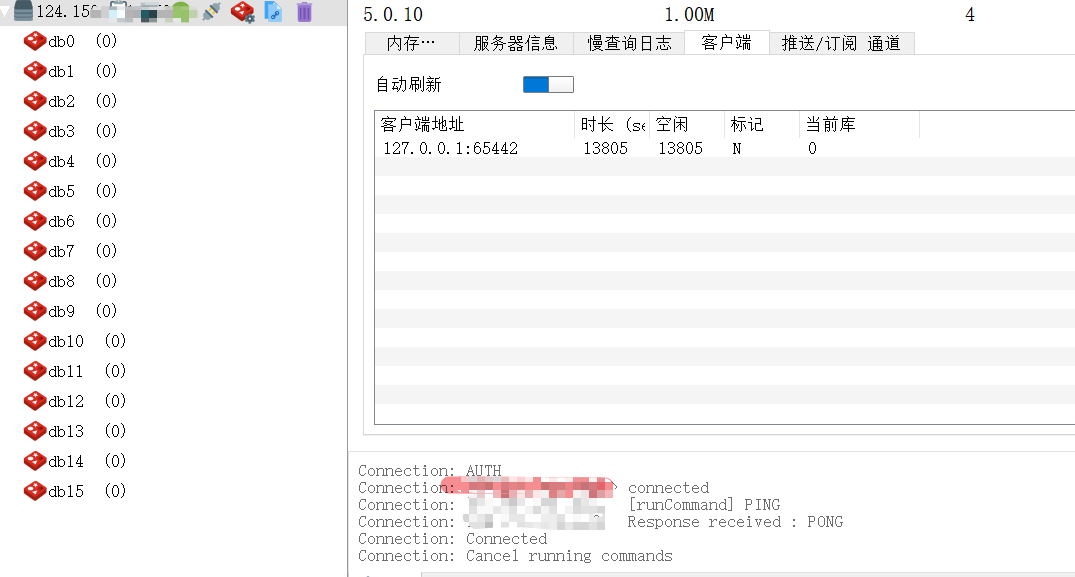
10. 连接云服务器的redis
使用python测试
import redis
client=redis.Redis(host='ip', port=6379, db=0)
print(client.lpush("book","a"))
使用rmd连接
安装PostGreSQL
推荐15-版本,使用navicat15连接pg15会出现如下错误:
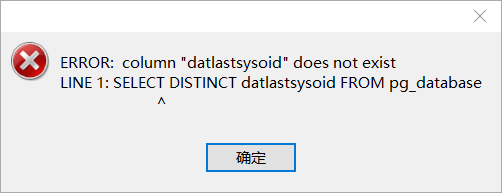
参考教程: https://blog.csdn.net/qq_32596527/article/details/83624470?spm=1001.2014.3001.5506
- 安装PostGreSQL
// 下载PG15
yum install -y https://download.postgresql.org/pub/repos/yum/reporpms/EL-7-x86_64/pgdg-redhat-repo-latest.noarch.rpm
//下载PG11
yum -y install https://download.postgresql.org/pub/repos/yum/11/redhat/rhel-7-x86_64/pgdg-centos11-11-2.noarch.rpm
// 安装
yum -y install postgresql11
yum -y install postgresql11-server
yum install -y postgresql15-server
// 初始化
sudo /usr/pgsql-11/bin/postgresql-11-setup initdb
// 设置开机启动
sudo systemctl enable postgresql-11
//启动pg (若没有设置开机启动,则需要执行此步骤)
systemctl start postgresql-15
- 修改密码
// 切换到postgres用户
su postgres
// 切换SQL模式
psql
// 修改密码
alter user postgres with password 'postgres123';
// 创建test用户
create user test with password 'test';
// 退出
\q
或
[root@CentOS-1804-MySQL-4 ~]# su - postgres
-bash-4.2$ psql -U postgres
psql (11.0)
Type "help" for help.

postgres=# ALTER USER postgres with encrypted password 'postgres';
ALTER ROLE
postgres=# \q
-bash-4.2$ exit
logout
- 开放端口
firewall-cmd --zone=public --add-port=5432/tcp --permanent
firewall-cmd --reload
firewall-cmd --list-ports
- 配置文件
修改postgresql.conf文件
// 打开配置文件
vim /var/lib/pgsql/15/data/postgresql.conf
// 打开监听注释,监听地址改为*
listen_addresses = '*'
修改pg_hba.conf文件
// 打开配置文件
vim /var/lib/pgsql/15/data/pg_hba.conf
// 新增一行,若连接不上则将 scram-sha-256修改为trust 信任模式
host  all  all 0.0.0.0/0 scram-sha-256
// 重启服务
sudo systemctl restart postgresql-15
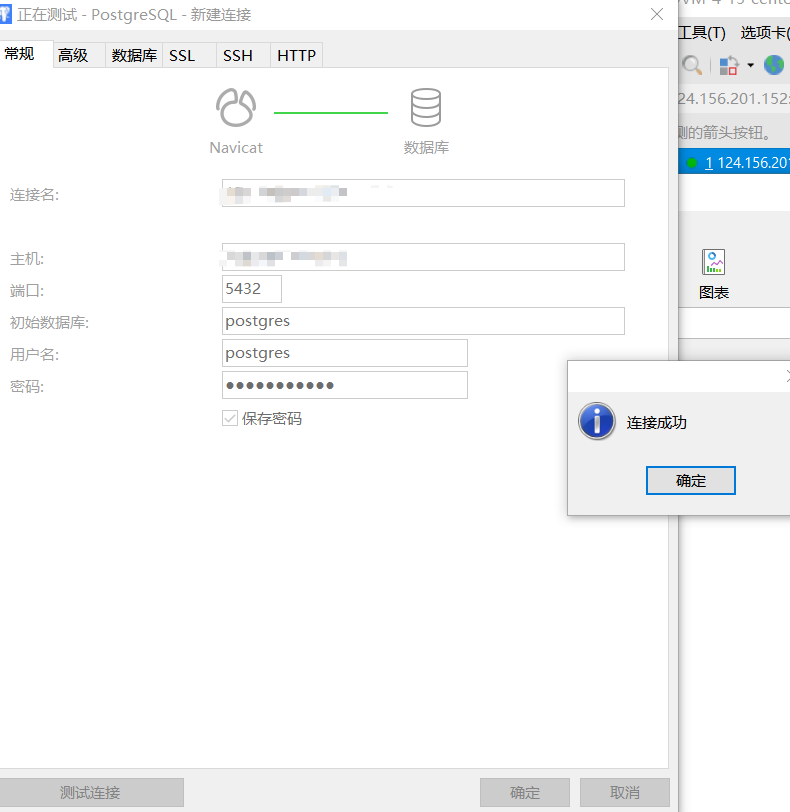
- 连接测试
先在云服务器控制台设置规则,将5432端口添加到规则中
再确保pg是否有启动
然后在 https://tcp.ping.pe/ 查看端口是否请求成功
可以使用navicat进行测试
实现步骤
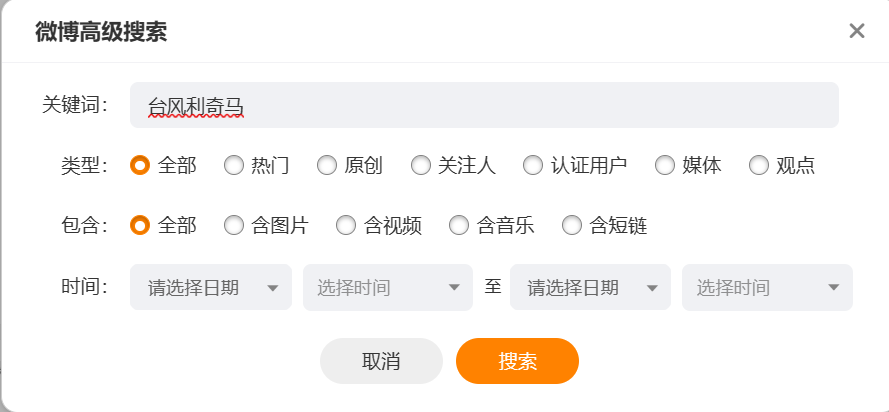
微博站点分析
不同架构的站点分析见https://www.cnblogs.com/Gimm/p/18190005
考虑API采集数量有限,请求次数有限,移动端数据较少,而网页端具有高级搜索功能,虽然限制最大页数为50页,但可以细化时间粒度采集更多数据。
由于采集转发类型的博文会存在重复数据,故仅考虑采集原创博文。
asyncio获取cookie
几种获取cookie的方式见
https://www.cnblogs.com/Gimm/p/18190013
最终采用的是使用异步asycio这一第三方库来获取。
aiohttp+redis构造待爬取URL
该步骤主要构造两种URL,第一种有确定的爬取时间段:https://s.weibo.com/weibo?q={搜索关键词}&scope=ori ×cope=custom:{起始时间}:{终止时间}&page={页数},第二种没有确定的爬取时间段,默认为按实时搜索f"https://s.weibo.com/realtime?q={搜索关键词}&rd=realtime&tw=realtime&Refer=Srealtime_box&page=1",如下图所示,
并将上述URL存储在Redis set中。

- 初始化参数
keyword='台风'  # 关键词
start_time='2019-08-14-02'  #起始时间
end_time='2019-08-14-02' #终止时间
interval=1 #时间粒度
cookie=[{'name':....}] #cookie
# 浏览器存放位置
executable_path =  r'C:\Users\txmmy\AppData\Local\Google\Chrome\Application\chrome.exe'
# 请求头
user_agent = "Mozilla/5.0 (Windows NT 10.0; Win64; x64) AppleWebKit/537.36 (KHTML, like Gecko) Chrome/94.0.4606.71 Safari/537.36"
- 转换参数数据类型
在构造URL前,需将输入的参数数据类型转换成适合构造URL的类型。
| 参数名 | 输入示例 | 允许为空 | 原始dt | dt转换方法 | 转换后dt |
|---|---|---|---|---|---|
| 搜索关键词 | / | N | str | parse.quote | str |
| 起始时间 | '2021-01-01-01' | Y | str | datetime.strptime | datetime.datetime |
| 终止时间 | '2021-01-01-23' | Y | str | datetime.strptime | datetime.datetime |
| 时间粒度 | 1 | N | int | / | / |
- 构建时间段URL
判断起始时间和终止时间是否为空,若为空,则URL为实时类型;
若都不为空,则判断起始时间与终止时间的大小,若起始时间大于终止时间,则停止运行,否则构造该时间段的所有URL。
实时URL:
https://s.weibo.com/realtime?q=%E5%8F%B0%E9%A3%8E&rd=realtime&tw=realtime&Refer=Srealtime_box&page=1
时间段URL:
https://s.weibo.com/weibo?q=%E5%8F%B0%E9%A3%8E&scope=ori&suball=1×cope=custom:2019-08-14-21:2019-08-14-22&page=1
https://s.weibo.com/weibo?q=%E5%8F%B0%E9%A3%8E&scope=ori&suball=1×cope=custom:2019-08-14-22:2019-08-14-23&page=1
https://s.weibo.com/weibo?q=%E5%8F%B0%E9%A3%8E&scope=ori&suball=1×cope=custom:2019-08-14-23:2019-08-15-00&page=1
https://s.weibo.com/weibo?q=%E5%8F%B0%E9%A3%8E&scope=ori&suball=1×cope=custom:2019-08-15-00:2019-08-15-01&page=1
https://s.weibo.com/weibo?q=%E5%8F%B0%E9%A3%8E&scope=ori&suball=1×cope=custom:2019-08-15-01:2019-08-15-02&page=1
- 将构造的URL存在redis集合中

完整代码如下:
keyword='台风'  # 关键词
start_time='2019-08-14-02'  #起始时间
end_time='2019-08-14-02' #终止时间
interval=1 #时间粒度
cookie=[{'name':....}] #cookie
# 浏览器存放位置
executable_path =  r'C:\Users\txmmy\AppData\Local\Google\Chrome\Application\chrome.exe'
# 请求头
user_agent = "Mozilla/5.0 (Windows NT 10.0; Win64; x64) AppleWebKit/537.36 (KHTML, like Gecko) Chrome/94.0.4606.71 Safari/537.36"
def get_first_url(start_time=None,end_time=None):
    if start_time==None and end_time==None:
        url=f"https://s.weibo.com/realtime?q={keyword}&rd=realtime&tw=realtime&Refer=Srealtime_box&page=1"
        print(url)
        client.sadd(f'{parse.unquote(keyword)}_first_url', url)
    else:
        if start_time>end_time:
            sys.exit("时间配置有误")

        # 构造时间段URL
        while start_time<end_time:

            dis=(end_time-start_time).total_seconds()/3600 #一小时3600s 将秒换算为时  #假设间隔6小时,interval=1
            if dis<interval:
                url= f"https://s.weibo.com/weibo?q={keyword}&scope=ori&suball=1&" \
                    f"timescope=custom:{start_time.strftime('%Y-%m-%d-%H')}:" \
                    f"{(start_time + timedelta(hours=dis)).strftime('%Y-%m-%d-%H')}&page=1"
                start_time=start_time+timedelta(hours=dis)
            else:
                url = f"https://s.weibo.com/weibo?q={keyword}&scope=ori&suball=1&" \
                           f"timescope=custom:{start_time.strftime('%Y-%m-%d-%H')}:" \
                           f"{(start_time + timedelta(hours=interval)).strftime('%Y-%m-%d-%H')}&page=1"

                start_time = start_time + timedelta(hours=interval)
            client.sadd(f'{parse.unquote(keyword)}_first_url',url)

get_first_url(start_time,end_time)
client.close()
- 特殊情况
如果初始时间粒度不为1,则进一步读取上述爬取存储在redis中的url,使用aiohttp获取每页的页数,如果页数==50,则进一步细化该URL,更新替换到redis中。
if interval != 1:
    loop.run_until_complete(get_sub_page())
定义一个方法get_sub_page,用于读取url列表,实例化aiohttp.session对象进行持久化访问,避免访问频繁;循环遍历每个url,将url处理任务加入url,最后调用asyncio.gather进行并发运行处理。最后关闭redis的pipline管道。
    async def get_sub_page():
        urls = client.smembers(f'{parse.unquote(self.keyword)}_hour_urls')
        async with aiohttp.ClientSession() as session:
            pipe = self.client.pipeline()
            tasks = []
            for url in urls:
                task = asyncio.ensure_future(fetch(session, url))
                task.add_done_callback(partial(callback, pipe))
                tasks.append(task)
            await asyncio.gather(*tasks)
            pipe.execute()
定义一个fetch方法用于获取页数;将get_sub_page中的sesssion对象、url传入fetch中获取页数,返回[页数,URL];
    async def fetch(session, url):
        header = {
            'user-agent': .header['user-agent'],
            'cookie': util.convert_cookies_to_str(header['cookie'])
        }
        async with session.get(url, headers=header, timeout=10) as response:
            source = html.fromstring(await response.text())
            page = len(source.xpath('//ul[@class="s-scroll"]/li'))
            page = 1 if page == 0 else page
        return [page, url]
定义回调方法callback判断页数并更新URL,接收fetch的返回值进行判断,若URL=50,则移除redis中当前的url,并调用get_first_url重构该条URL。
    # 页数回调判断
    def callback(pipe, task):
        page, url = task.result()
        print(page, url)
        if page == 50:
            time = re.findall("custom:(.*?)&", url)[0].split(":")
            new_start_time = datetime.strptime(time[0], '%Y-%m-%d-%H')
            new_end_time = datetime.strptime(time[1], '%Y-%m-%d-%H')
            new_interval = 1
            pipe.srem(f'{parse.unquote(self.keyword)}_hour_urls', url)
            get_first_url(new_start_time, new_end_time, new_interval, pipe)
pyppeteer构建爬虫
- 导入异步爬虫库pyppeteer
实例化pyppeteer
设置请求头、cookie
调用goto()打开网页
from pyppeteer import launch
browser = await launch(headless=True, executable_path=executable_path,handleSIGINT=False,                           handleSIGTERM=False,handleSIGHUP=False)
page = await browser.newPage()
await page.setUserAgent(user_agent)
await page.setCookie(*cookie)
await page.goto(url)

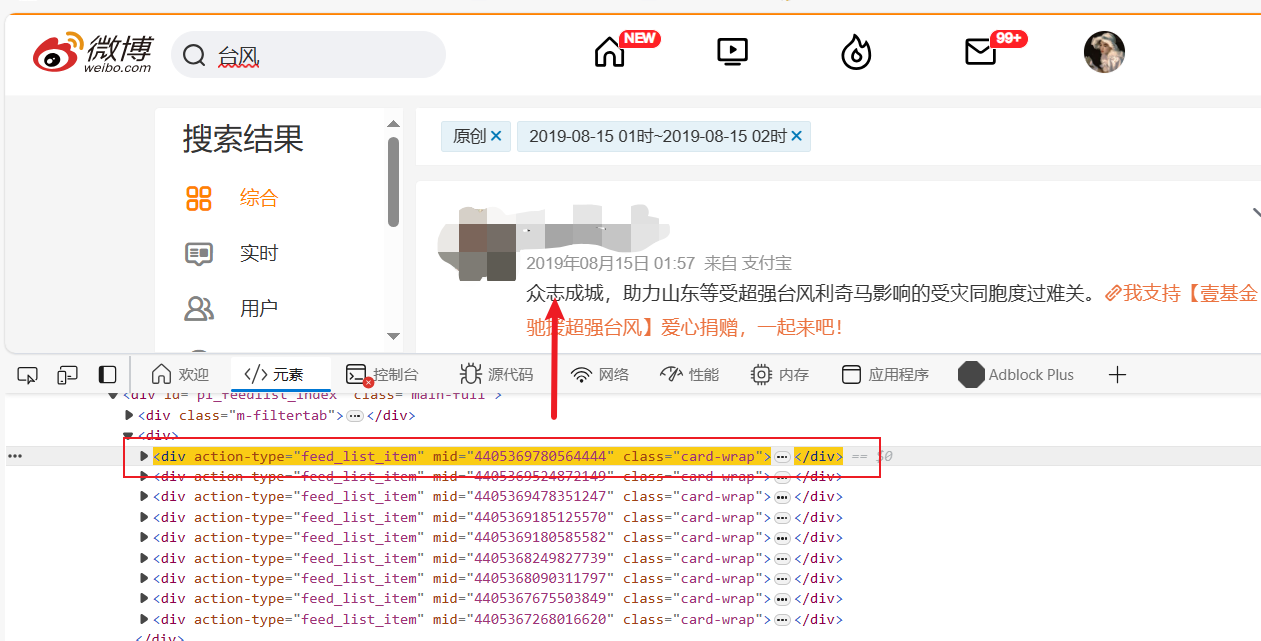
- 在一级页面获取当页所有节点
- 遍历节点,进一步获取用户主页(二级页面)
获取本条微博id、用户名、用户主页URL、用户id、文章链接、发布时间
mid = await page.evaluate('(element)=>element.getAttribute("mid")', nodes[i])
# 用户名
element1 = await nodes[i].J('div.content>div.info>div:nth-child(2)>a')
screen_name = await page.evaluate('(element)=>element.textContent', element1)
# 用户主页
user_url = await (await element1.getProperty('href')).jsonValue()
# 用户id
uid = re.sub('[?]refer_flag=1001030103[_]', "", re.sub(r'^(https://weibo.com/)', "", user_url))
# 文章链接 eg:https://weibo.com/2872214074/M5G1niegN
mid_str = base62.mid_to_url(mid)
airticle_url = f"https://weibo.com/{uid}/{mid_str}"
# 发布时间
element2 = await nodes[i].J('div.content>p.from>a:nth-child(1)')
create_at = await (await element2.getProperty('textContent')).jsonValue()
create_at = util.standardize_date(create_at.strip().replace(" ", ""))
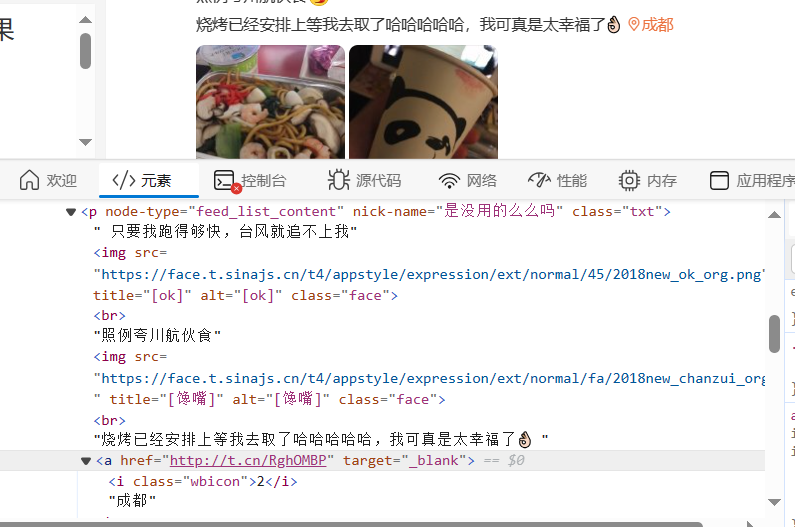
- 获取发布内容,判断内容是否为需要展开的长文,并获取内容中的文本、微博表情和定位
先判断是否为长文,即判断是否存在“p[nodetype="feed_list_content_full"]”


# 发布内容
is_long_content = await nodes[i].J('p[node-type="feed_list_content_full"]')
# 展开全文判断
if is_long_content:
content = await (await is_long_content.getProperty('textContent')).jsonValue()
emoji_ele = await is_long_content.JJ('img.face')
emoji = "".join([await (await ele.getProperty('title')).jsonValue()
for ele in emoji_ele])
# 获取定位节点
is_pos = await is_long_content.xpath("a[last()]/i[starts-with(text(),'2')]")
else:
content_ele = await nodes[i].J('p.txt')
content = await (await content_ele.getProperty('textContent')).jsonValue()
# 获取表情文本
emoji_ele = await content_ele.JJ('img.face')
emoji = "".join([await (await ele.getProperty('title')).jsonValue()
for ele in emoji_ele])
is_pos = await content_ele.xpath("a[last()]/i[starts-with(text(),'2')]")
# 初步清洗发布内容
content = content.replace('收起全文d', "").replace("O网页链接", "")
content = re.sub(" O(.*?)$", "", content)
content = re.sub('L.*?的微博视频', "", content)
content = (content + emoji).strip().replace(" ", "")
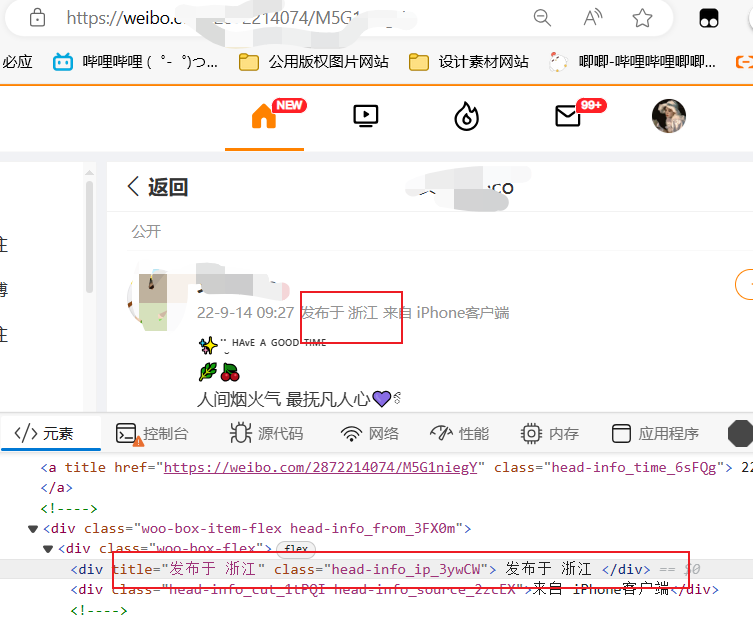
根据定位节点判断是否有定位,若存在节点,则获取位置文本,由于定位图标节点中存在"2",需将其去除;若不存在定位,则跳转到文章链接,获取"发布于xx"这一元素。
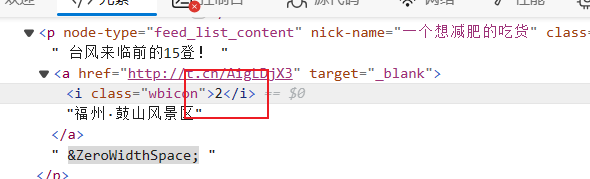
if is_pos:
    # pos_ele=await content_ele.xpath("//p/a[last()]/i[starts-with(text(),'2')]/parent::a")
    pos_ele = await (is_pos[0]).xpath('parent::a')
    pos = await page.evaluate('(element)=>element.textContent', pos_ele[0])
    content = re.sub(pos, "", content)
    pos = pos.replace("2", "").replace('\u200b', "")
else:
	pos_page = await browser.newPage()
	await pos_page.goto(airticle_url)
	await pos_page.reload()
	await pos_page.waitFor(
		'div[class="woo-box-flex woo-box-alignCenter woo-box-justifyCenter head-info_info_2AspQ"]')
	await asyncio.sleep(1)
	tmp_ele = await pos_page.J(
		'div[class="woo-box-flex woo-box-alignCenter woo-box-justifyCenter head-info_info_2AspQ"]')
	tmp_info = await pos_page.evaluate('(element)=>element.innerText', tmp_ele)
	pos = "".join(re.findall('发布于 (.*?)\n', tmp_info))
	await pos_page.close()

#进一步去掉隐形字符\u200b
content = content.replace("\u200b", "")
- 获取转发数、评论、评论数、点赞数、图片链接、视频链接
#转发数
report_counts = await page.evaluate('(element)=>element.textContent',
                                    await nodes[i].J('div.card-act>ul>li:nth-child(2)'))
report_counts = report_counts.replace("转发", "").strip()
report_counts = int(report_counts) if report_counts != "" else 0
# 评论数
comment_ele = await nodes[i].J('div.card-act>ul>li:nth-child(3)')
comment_counts = await page.evaluate('(element)=>element.textContent', comment_ele)
comment_counts = comment_counts.replace("评论", "").strip()
comment_counts = int(comment_counts) if comment_counts != "" else 0
if comment_counts != 0:
    await comment_ele.click()
    await asyncio.sleep(1)
    comments_ele = await nodes[i].JJ('div[node-type="feed_list_commentList"]>div>div:nth-child(2)>div.txt')

    comments_list = [
        (await (await ele.getProperty('textContent')).jsonValue()).strip().replace('\n', "").replace(" ",
                                                                                                     "") +
        "".join([await (await e.getProperty('title')).jsonValue() for e in await ele.JJ('img')])
        for ele in comments_ele]
else:
    comments_list = None

attitude_counts = await page.evaluate('(element)=>element.textContent',
                                              await nodes[i].J('div.card-act>ul>li:nth-child(4)'))
attitude_counts = attitude_counts.strip()
attitude_counts = int(attitude_counts) if attitude_counts != "" else 0
# 图片
is_exist_pic = await nodes[i].JJ("div[class='media media-piclist']>ul>li>img")
if is_exist_pic:
    pics_url = []
    for j in range(len(is_exist_pic)):
        pid = await page.evaluate('(element)=>element.src', is_exist_pic[j])
        pid = re.findall('([^/]+)?.jpg$', pid, re.S)[0]
        pic_url = f"https://photo.weibo.com/{uid}/wbphotos/large/mid/{mid}/pid/{pid}?Refer=weibofeedv5"
        pics_url.append(pic_url)
else:
    pics_url = None
# #视频
is_exist_video = await nodes[i].J('div.thumbnail>a>div>div>video')
if is_exist_video:
    video_url = await (await is_exist_video.getProperty('src')).jsonValue()
    video_url = video_url.replace("", "")
else:
    video_url = ""
- 打开用户主页,获取IP属地、粉丝数、关注数
此处需注意部分用户主页没有IP属地选项,如下图所示,因此,需要点击按钮展开
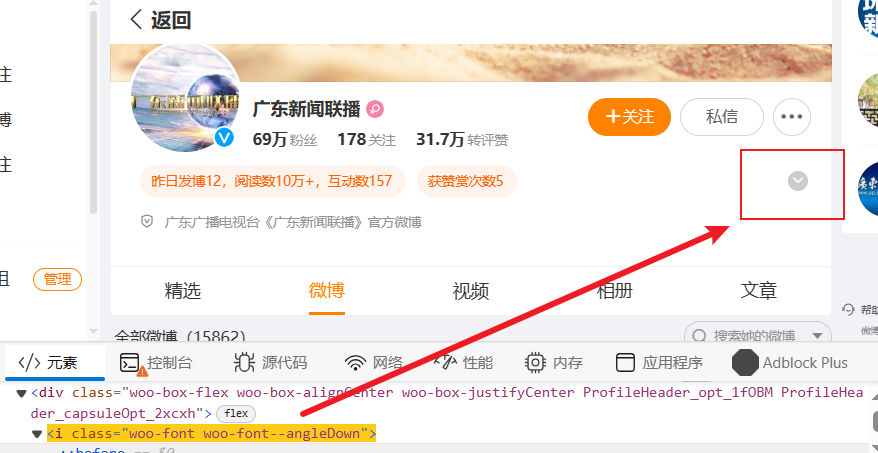
展开如下所示:

        page2 = await browser.newPage()
        await page2.goto(user_url)
        # IP属地
        await page2.reload()
        await page2.waitFor('div[class="woo-box-flex woo-box-alignStart ProfileHeader_box1_1qC-g"]+div')
        time.sleep(2)
        ip_ele = await page2.J(
            'div[class="woo-box-flex woo-box-alignStart ProfileHeader_box1_1qC-g"]+div>div:nth-child(1)>div>div>div:nth-last-child(1)')
        ip = await (await ip_ele.getProperty('textContent')).jsonValue()
        ip = ip.strip().replace("IP属地:", "")
        if not ip:
            await page2.click('i[class="woo-font woo-font--angleDown"]')
            await asyncio.sleep(0.2)
            ip = await page2.Jx(
                '//i[@class="woo-font woo-font--proPlace"]/parent::div[1]/following-sibling::div[1]')
            ip = (await (await ip[0].getProperty('textContent')).jsonValue()).strip()
        info = await page2.J('div[class="woo-box-item-flex"]>div:nth-child(2)')
        info = await (await info.getProperty('textContent')).jsonValue()
        fans = re.findall('粉丝(.*?) ', info)[0]
        follow = re.findall('关注(.*?)$', info, re.S)[0]
        await page2.close()
执行爬虫
def run():
	while True:
		if len(client.smembers(f'{parse.unquote(self.keyword)}_hour_urls')) != 0:
			#从集合中取出一个url,并删除
			url = self.client.spop(f'{parse.unquote(self.keyword)}_hour_urls')
			#调用协程
			loop = asyncio.get_event_loop()
			loop.run_until_complete(get_nodes(url))
		else:
			break
async def get_nodes(url):
    executable_path = r'C:\Users\txmmy\AppData\Local\Google\Chrome\Application\chrome.exe'
    browser = await launch(headless=False, executable_path=executable_path, handleSIGINT=False,
                           handleSIGTERM=False, handleSIGHUP=False, args=['--window-size=1368,768'],
                           defaultViewport=None)
    page = await browser.newPage()
    await page.setViewport({'width': 1366, 'height': 768})
    await page.setUserAgent(header['user-agent'])
    await page.setCookie(*header['cookie'])
    await page.goto(url)
    while True:
        try:
            logger.info(f"当前爬取的URL为:{page.url}")
            # 判断当前页面是否有内容
            is_empty = await page.xpath('//div[@class="card card-no-result s-pt20b40"]')
            if is_empty:
                print("当前页面搜索结果为空")
                break
            # 获取节点列表
            nodes = await page.JJ('div[action-type="feed_list_item"]')
            # 解析页面
            await crawl(nodes, browser, page)
            # 判断是否有下一页
            next_page = await page.J('a.next')
            if next_page:
                await next_page.click()
                await asyncio.sleep(2)
            else:
                break
        except Exception as e:
            logger.error("程序出现错误:",e.args,"\n异常URL:",page.url)
    # 关闭页面
    logger.info("爬取结束,关闭页面")
    await browser.close()
性能优化
到这里已经可以运行整个爬虫程序了,但可以再进一步引入多线程,提高爬虫效率。
thread构建线程
其中线程锁要在run()中补充如下代码:
lock_.acquire() #共享资源锁
url = client.spop(f'{parse.unquote(keyword)}_first_url')
lock_.release() #释放锁
构建线程示例代码:
import threading
# 实例化一个线程锁,用于控制多个线程对redi的URL队列的访问。
lock=threading.Lock()
# 新建线程1
thread=threaing.Thread(target=run())
# 启动线程
thread.start()
# 当完成io密集型任务时,使用join阻塞线程,然后关闭数据库
task=[thread]
for t in task:
	t.join()
if thread.is_alive()==False:
	client.close()
redis Pipline
由于前期构造URL会频繁读写redis,会导致redis崩溃,因此再引入redis.pipline(),即一次性将所有url写入redis中。
爬取异常处理
在爬虫中难免会有爬取失败的时候,当因为某些因素爬取失败时,引入异常处理机制:在redis新增一个set用于存储爬取异常的URL,在run()方法中当hous_url集合爬取完毕时,再读取异常的URL。
def run():
    while True:
        if len(client.smembers(f'{parse.unquote(keyword)}_first_url'))!=0:
            print("1")
            lock_.acquire() #共享资源锁
            url = client.spop(f'{parse.unquote(keyword)}_first_url')
            lock_.release() #释放锁
            print(url)
            # loop = asyncio.new_event_loop()
            # asyncio.set_event_loop(loop)
            loop = asyncio.get_event_loop()
            task = asyncio.ensure_future(get_nodes(url))
            loop.run_until_complete(asyncio.wait([task]))
        elif  len(client.smembers(f'{parse.unquote(keyword)}_excep_url')) != 0:
            lock_.acquire()
            url = client.spop(f'{parse.unquote(keyword)}_excep_url')
            lock_.release()
            # loop = asyncio.new_event_loop()
            # asyncio.set_event_loop(loop)
            loop = asyncio.get_event_loop()
            task = asyncio.ensure_future(get_nodes(url))
            loop.run_until_complete(asyncio.wait([task]))
        else:
            # logger.info("退出程序")
            print("退出程序")
            break

        time.sleep(1)
总结
项目总结
该项目改进了以往仅使用selenium
不足
- 元素获取:博文评论目前设计在一级页面中获取,但一级页面可能不会显示这些评论,需要进入文章链接才会显示。因此,可以将博文评论设计在文章链接中获取;
- 图片存储:目前爬取的图片是以文本链接形式存储在结构化数据库中,可以进一步将这些图片存储在图数据库中,以便后续的图片处理,方便开展多模态情感分析;
- 视频存储:目前爬取的视频同样以文本脸型形式存储,可以考虑存储在视频数据库中,方便开展多模态的数据挖掘;
- 可以进一步逆向解析cookie,减少获取cookie的时间,目前使用asyncio获取cookie大概需要10s,如何节省这10s呢?

 浙公网安备 33010602011771号