Qt Quick快速入门之qml布局
Qml里面布局主要有两种,锚点布局、Grid布局。
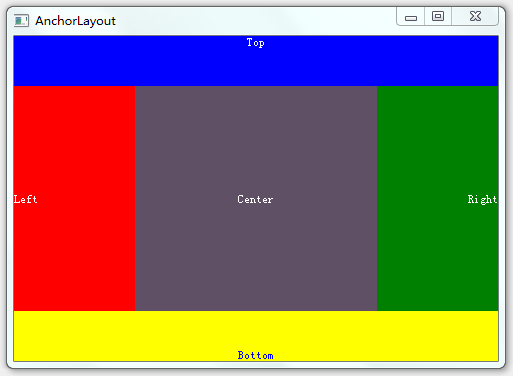
锚点布局使用anchors附件属性将一个元素的边定位到另一个元素的边,从而确定元素的位置和大小。下面是示例
 1 import QtQuick 2.3
 2 import QtQuick.Window 2.0
 3
 4 Window {
 5     id:anchorLayoutWindow;
 6     width: 480;
 7     height: 320;
 8     title: "AnchorLayout";
 9
10     Rectangle{
11         id:rect1;
12         width: parent.width;
13         height:50;
14         color:"blue";
15         anchors.top: parent.top;
16         Text{ text: "Top"; anchors.horizontalCenter: parent.horizontalCenter;anchors.top:parent.top; color:"white"; }
17     }
18
19     Rectangle{
20         id:rect2;
21         width: parent.width/4;
22         color: "red";
23         anchors.top:rect1.bottom;
24         anchors.bottom: rect4.top
25         anchors.left: parent.left;
26         Text{ text: "Left"; anchors.verticalCenter: parent.verticalCenter; anchors.left: parent.left;color:"white"; }
27     }
28
29     Rectangle{
30         id:rect3;
31         color: "green";
32         width:rect2.width;
33         anchors.top:rect1.bottom;
34         anchors.bottom: rect4.top;
35         anchors.right:parent.right;
36         Text{ text: "Right";anchors.right: parent.right;anchors.verticalCenter: parent.verticalCenter;color:"white"; }
37     }
38
39     Rectangle{
40         id:rect4;
41         width: parent.width;
42         height:50;
43         color:"yellow";
44         anchors.bottom: parent.bottom;
45         Text{ text: "Bottom"; anchors.horizontalCenter: parent.horizontalCenter;anchors.bottom: parent.bottom;color:"blue";}
46     }
47
48     Rectangle{
49         id:rect5;
50         color:"#FF605066";
51         anchors.top:rect1.bottom;
52         anchors.bottom: rect4.top;
53         anchors.left: rect2.right;
54         anchors.right: rect3.left;
55         Text{ text: "Center";anchors.centerIn: parent; color:"white";}
56     }
57
58 }
效果如下图
Grid布局有GridLayout、ColumnLayout、RowLayout、Column、Row,其中ColumnLayout、RowLayout只是GridLayout的一种特例,ColumnLayout表示只有一列,RowLayout表示只有一行。
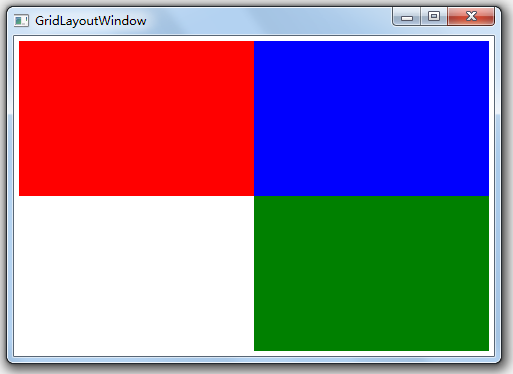
GridLayout使用columns、rows属性将空间分成若干单元格,使用columnSpacing、rowSpacing确立单元格之间的间隔。而GridLayout内部元素的大小由Layout.fillWidth、Layout.fillHeight以及Layout.preferredWidth、Layout.preferredHeight来确定,如Layout.fillWidth:true表示宽度填充整个单元格,Layout.preferredWidth则指定一个建议宽度。Layout.row、Layout.column确定内部元素处于哪个单元格。注意,不要将内部元素的宽度、高度、x、y与GridLayout进行绑定,容易导致绑定循环。
Column、Row类似于html中的float或是wpf中的StackPanel,会直接将元素一个个挨在一起,元素间的间隔使用spacing控制
下面是GridLayout布局的一个示例
 1 import QtQuick 2.3
 2 import QtQuick.Window 2.0
 3 import QtQuick.Layouts 1.1
 4
 5 Window {
 6     id:gridLayoutWindow;
 7     title:"GridLayoutWindow";
 8     width: 480;
 9     height: 320;
10     GridLayout{
11         id: gridLayout1
12         columns: 2;
13         rows:2;
14         anchors.fill: parent;
15         anchors.margins: 5;
16         columnSpacing: 0;
17         rowSpacing: 0;
18
19         Rectangle{
20             id:rect00;
21             color: "red";
22             Layout.fillWidth: true;
23             Layout.fillHeight: true;
24         }
25
26         Rectangle{
27             id:rect01;
28             color: "blue";
29             Layout.fillWidth: true;
30             Layout.fillHeight: true;
31         }
32
33         Rectangle{
34             id:rect10;
35             color: "green";
36             Layout.fillWidth: true;
37             Layout.fillHeight: true;
38             Layout.row:1;
39             Layout.column: 1;
40         }
41
42     }
43 }
效果如下所图
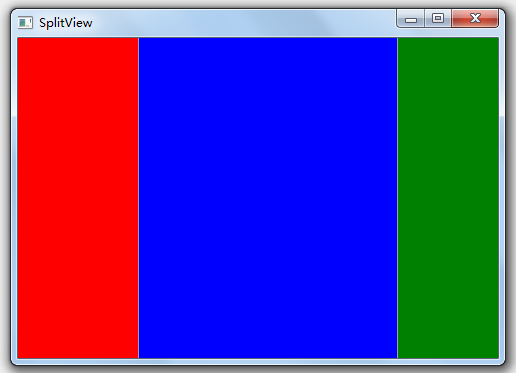
SplitView用于提供带切分条的布局,下面是示例
import QtQuick 2.3
import QtQuick.Window 2.0
import QtQuick.Layouts 1.1
import QtQuick.Controls 1.2

Window {
    width: 480;
    height: 320;
    title: "SplitView";

    SplitView{
        anchors.fill:parent;
        orientation: Qt.Horizontal;
        Rectangle{
            id:rect1;
            width:100;
            color:"red";
        }
        Rectangle{
            id:rect2;
            Layout.fillWidth: true;
            Layout.minimumWidth: 50;
            color:"blue";
        }
        Rectangle{
            id:rect3;
            width:100;
            color:"green";
        }
    }
}
下面是效果图,注意实际情况可以拖拉切分条
OK,有了以上几种布局方式,通过一定的组合相信可以应对大部分布局需求了

 浙公网安备 33010602011771号