es和kibana
1.容器启动
已经在docker中拉取了kibana和es的镜像:

创建容器交互的网络:
docker network create elastic-network
运行kibana容器:
docker run -d \
  --name kibana \
  --network elastic-network \
  -p 5601:5601 \
  -e "ELASTICSEARCH_HOSTS=http://elasticsearch:9200" \
  -e "xpack.security.enabled=false" \
  --memory="512m" \
  docker.elastic.co/kibana/kibana:7.17.26
运行es容器:
docker run -d \
  --name elasticsearch \
  --network elastic-network \
  -p 9200:9200 \
  -p 9300:9300 \
  -e "discovery.type=single-node" \
  -e "ES_JAVA_OPTS=-Xms512m -Xmx512m" \
  -e "xpack.security.enabled=false" \
  -e "xpack.ml.enabled=false" \
  --memory="1g" \
  docker.elastic.co/elasticsearch/elasticsearch:8.10.2
然后浏览器访问http://localhost:5601/app/home#/

2.环境搭建
在项目根目录创建app,在settings中注册app

1.在该目录下新建一个索引:
/Users/zhengkaize/study/es_study/es_test/models.py:
from django.db import models

# Create your models here.

from elasticsearch_dsl import Document, Text, Keyword, Date, Double
from elasticsearch_dsl import connections

# 配置 Elasticsearch 连接
connections.create_connection(
    alias='default',
    hosts=['localhost:9200'],  # 您的 ES 容器地址
)

class Book(Document):
    title = Text()
    author = Text()
    published_date = Date()
    price = Double()
    genre = Keyword()

    class Index:
        name = 'book'  # Name of the Elasticsearch index
- 创建索引管理命令
from django.core.management.base import BaseCommand
from es_test.models import Book

class Command(BaseCommand):
    help = 'Create Elasticsearch indices'

    def handle(self, *args, **options):
        # 创建索引
        Book.init()
        self.stdout.write(
            self.style.SUCCESS('Successfully created Book index in Elasticsearch')
        )
3.执行索引:
命令行执行:python manage.py create_es_index
# 提示:Successfully created Book index in Elasticsearch
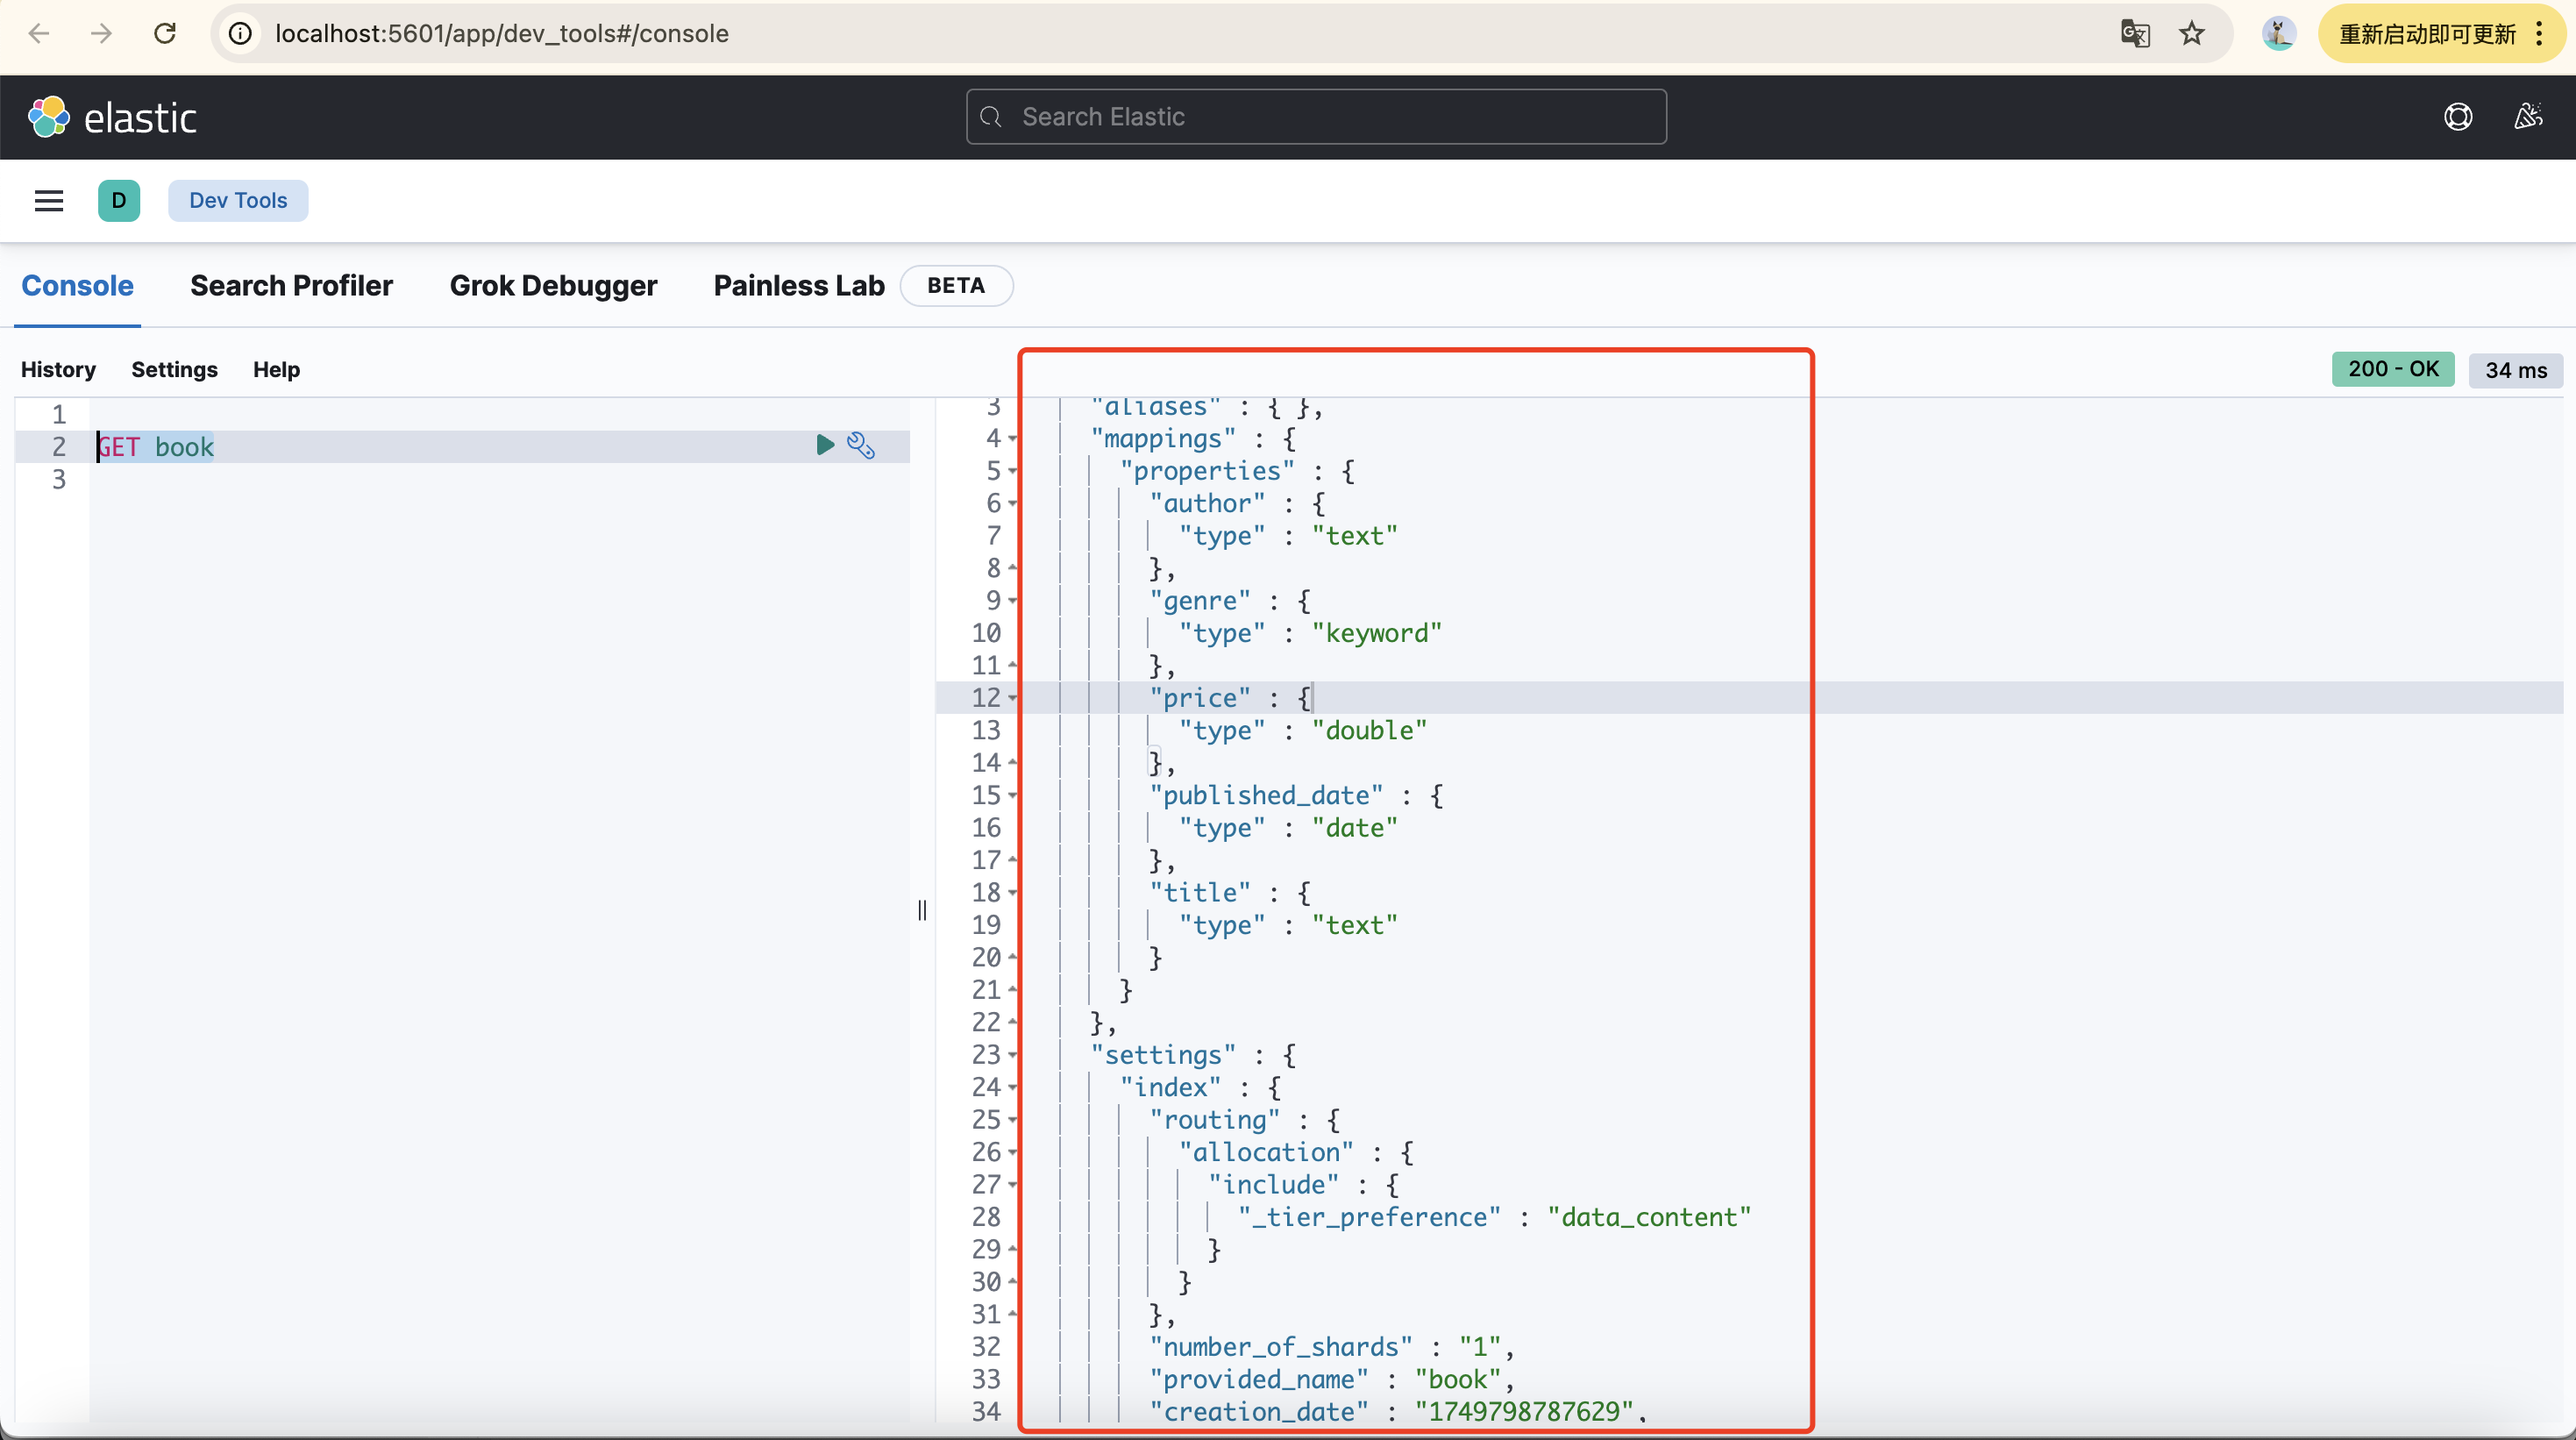
4.在kibana中检查索引是否存在:
在http://localhost:5601/app/dev_tools#/console目录下执行:GET book
3.增删改查
新增数据:
from es_test.models import Book
from datetime import datetime

book = Book()
book.title = "tittle111"
book.author = "author111"
book.published_date = datetime.strptime("2023-04-05", '%Y-%m-%d').date()
book.price = 22
book.genre = "frontend"
book.save()
查询数据:
@csrf_exempt
def book_list(request):
search = request.GET.get('search', '')
genre = request.GET.get('genre', '')
author = request.GET.get('author', '')
title = request.GET.get('title', '')
s = Book.search()
# Case 1: Search keywords in multiple fields
if search: # multi_match:多字段关键词搜索,['title', 'author']中有一个字段的值是search就匹配成功
s = s.query('multi_match', query=search, fields=['title', 'author'])
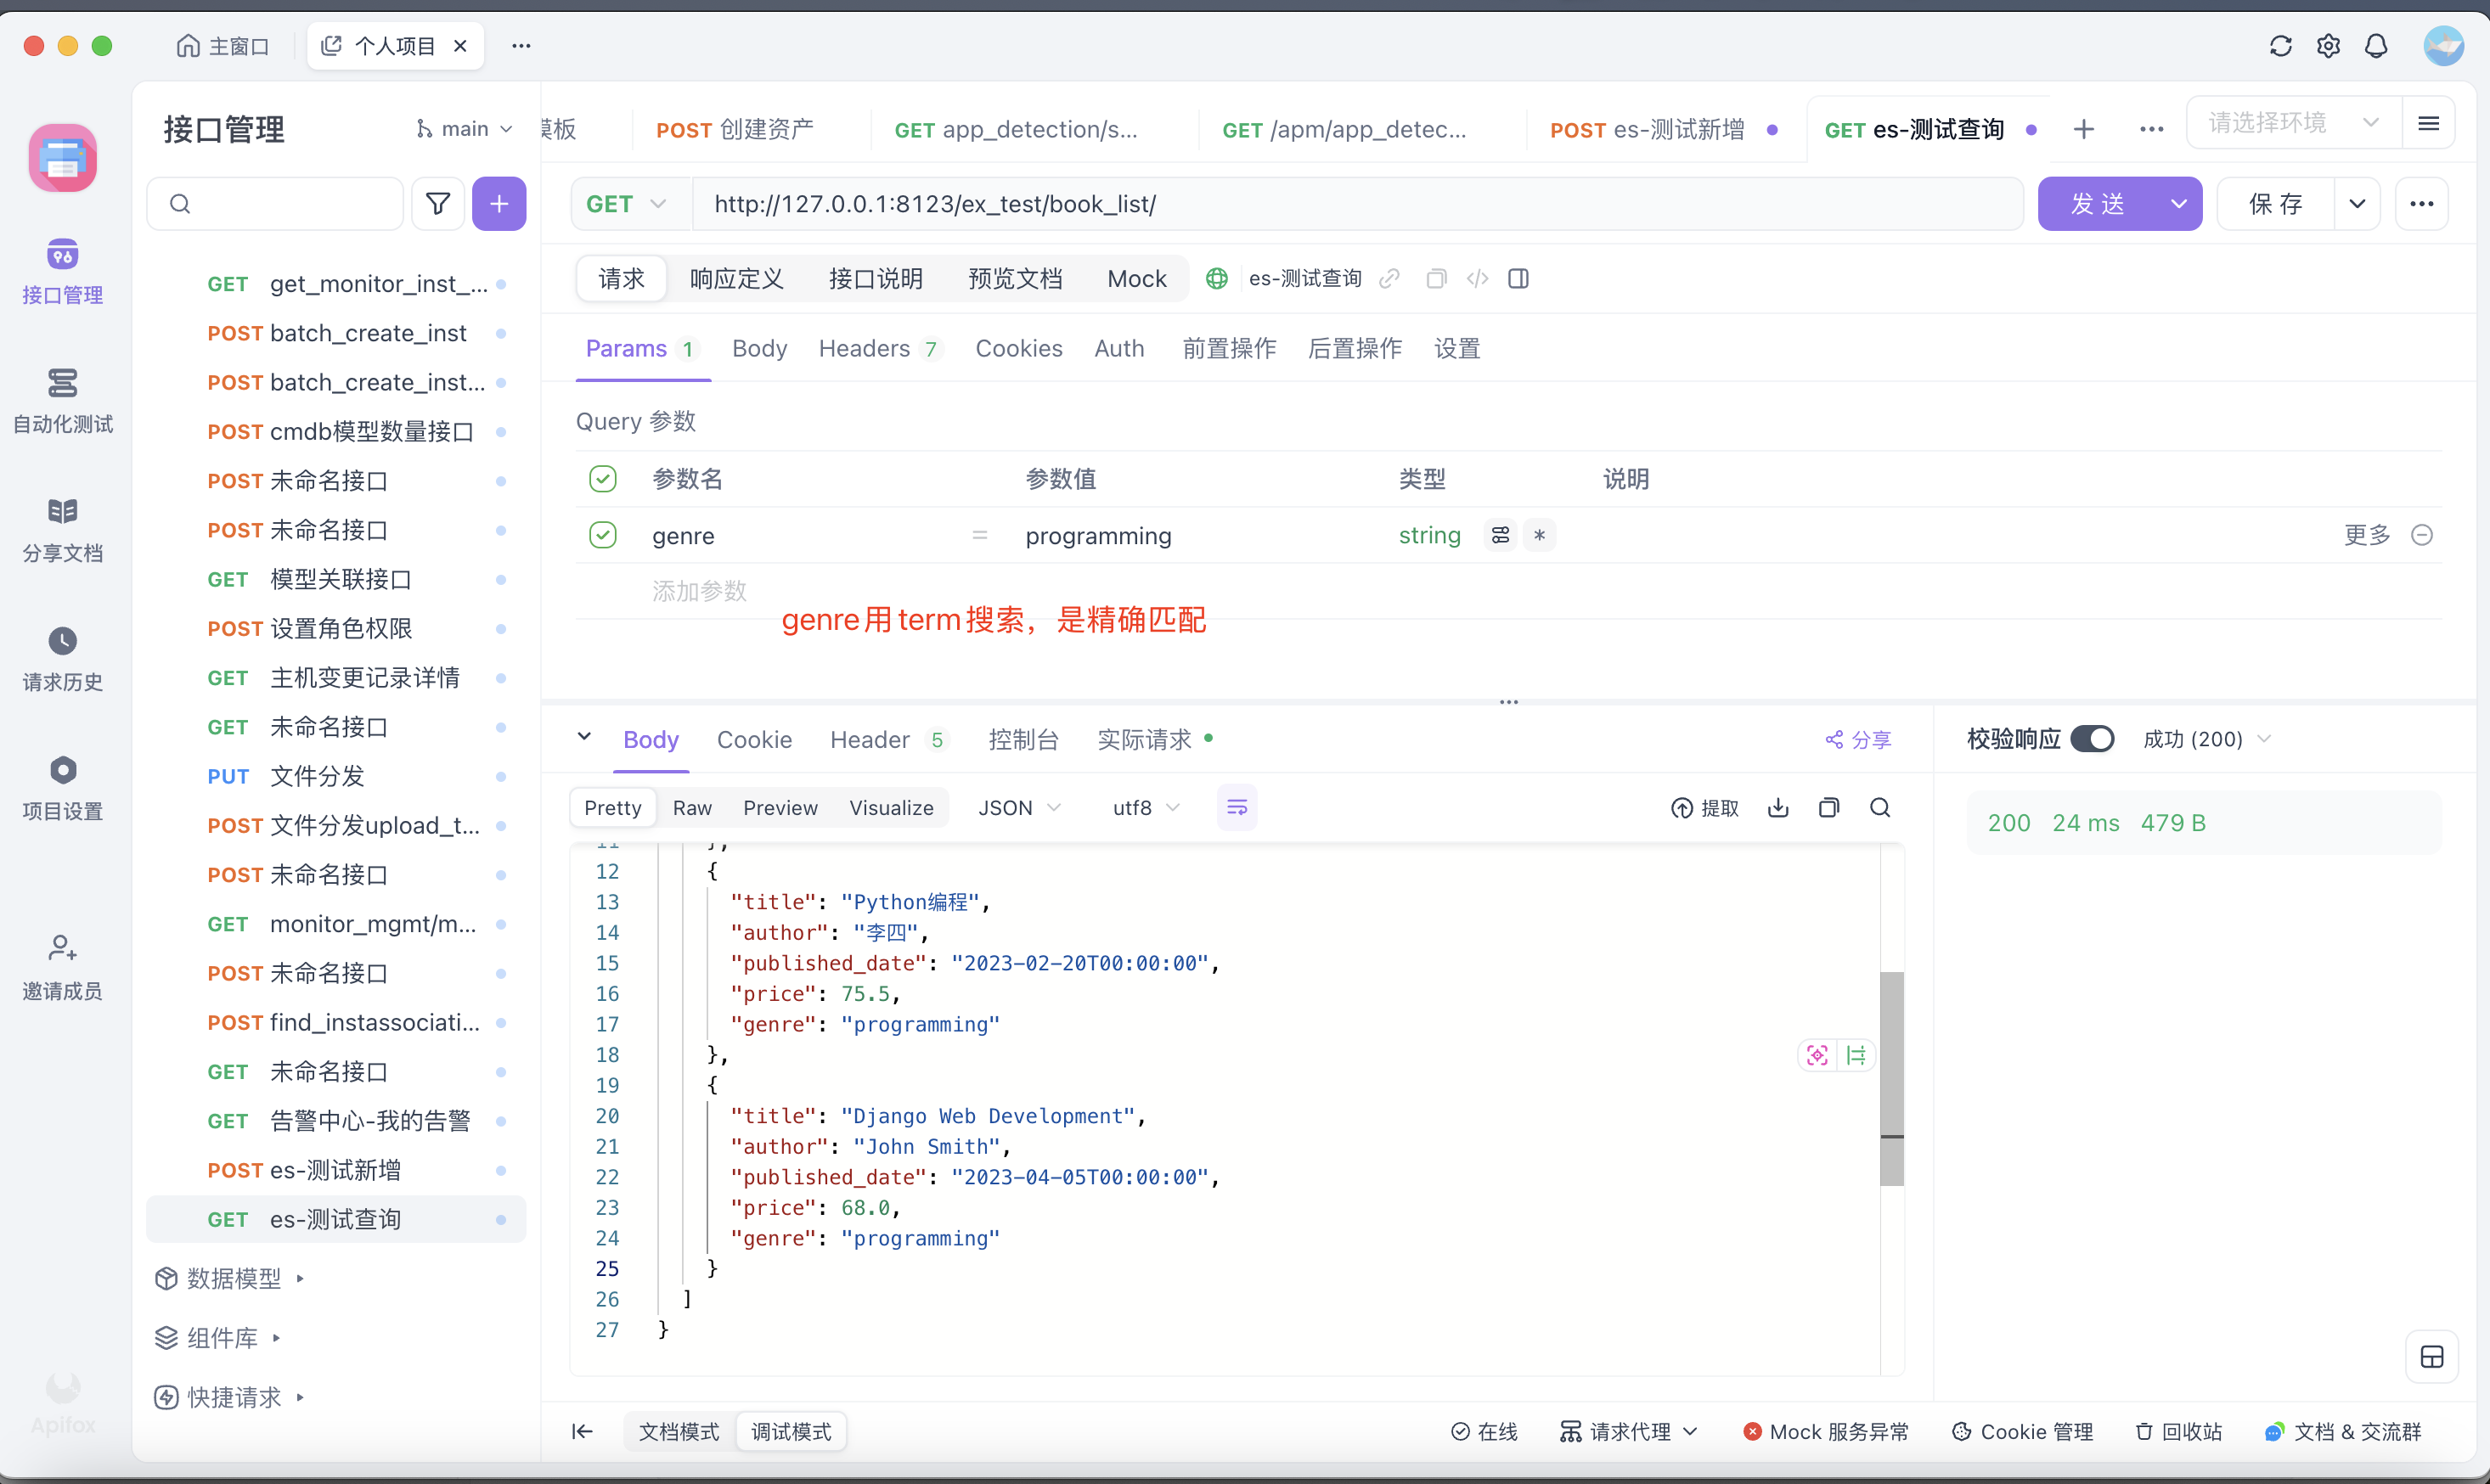
# Case 2: Exact match for genre
if genre: # 精确匹配类型(用于 keyword 字段),精确匹配:不进行任何文本分析,区分大小写,适用于 keyword 类型字段,不分词
s = s.filter('term', genre=genre)
# Case 3: Search by author
if author: # match:单字段匹配,只在author字段中查找。模糊匹配,不区分大小写,会分词
s = s.query('match', author=author)
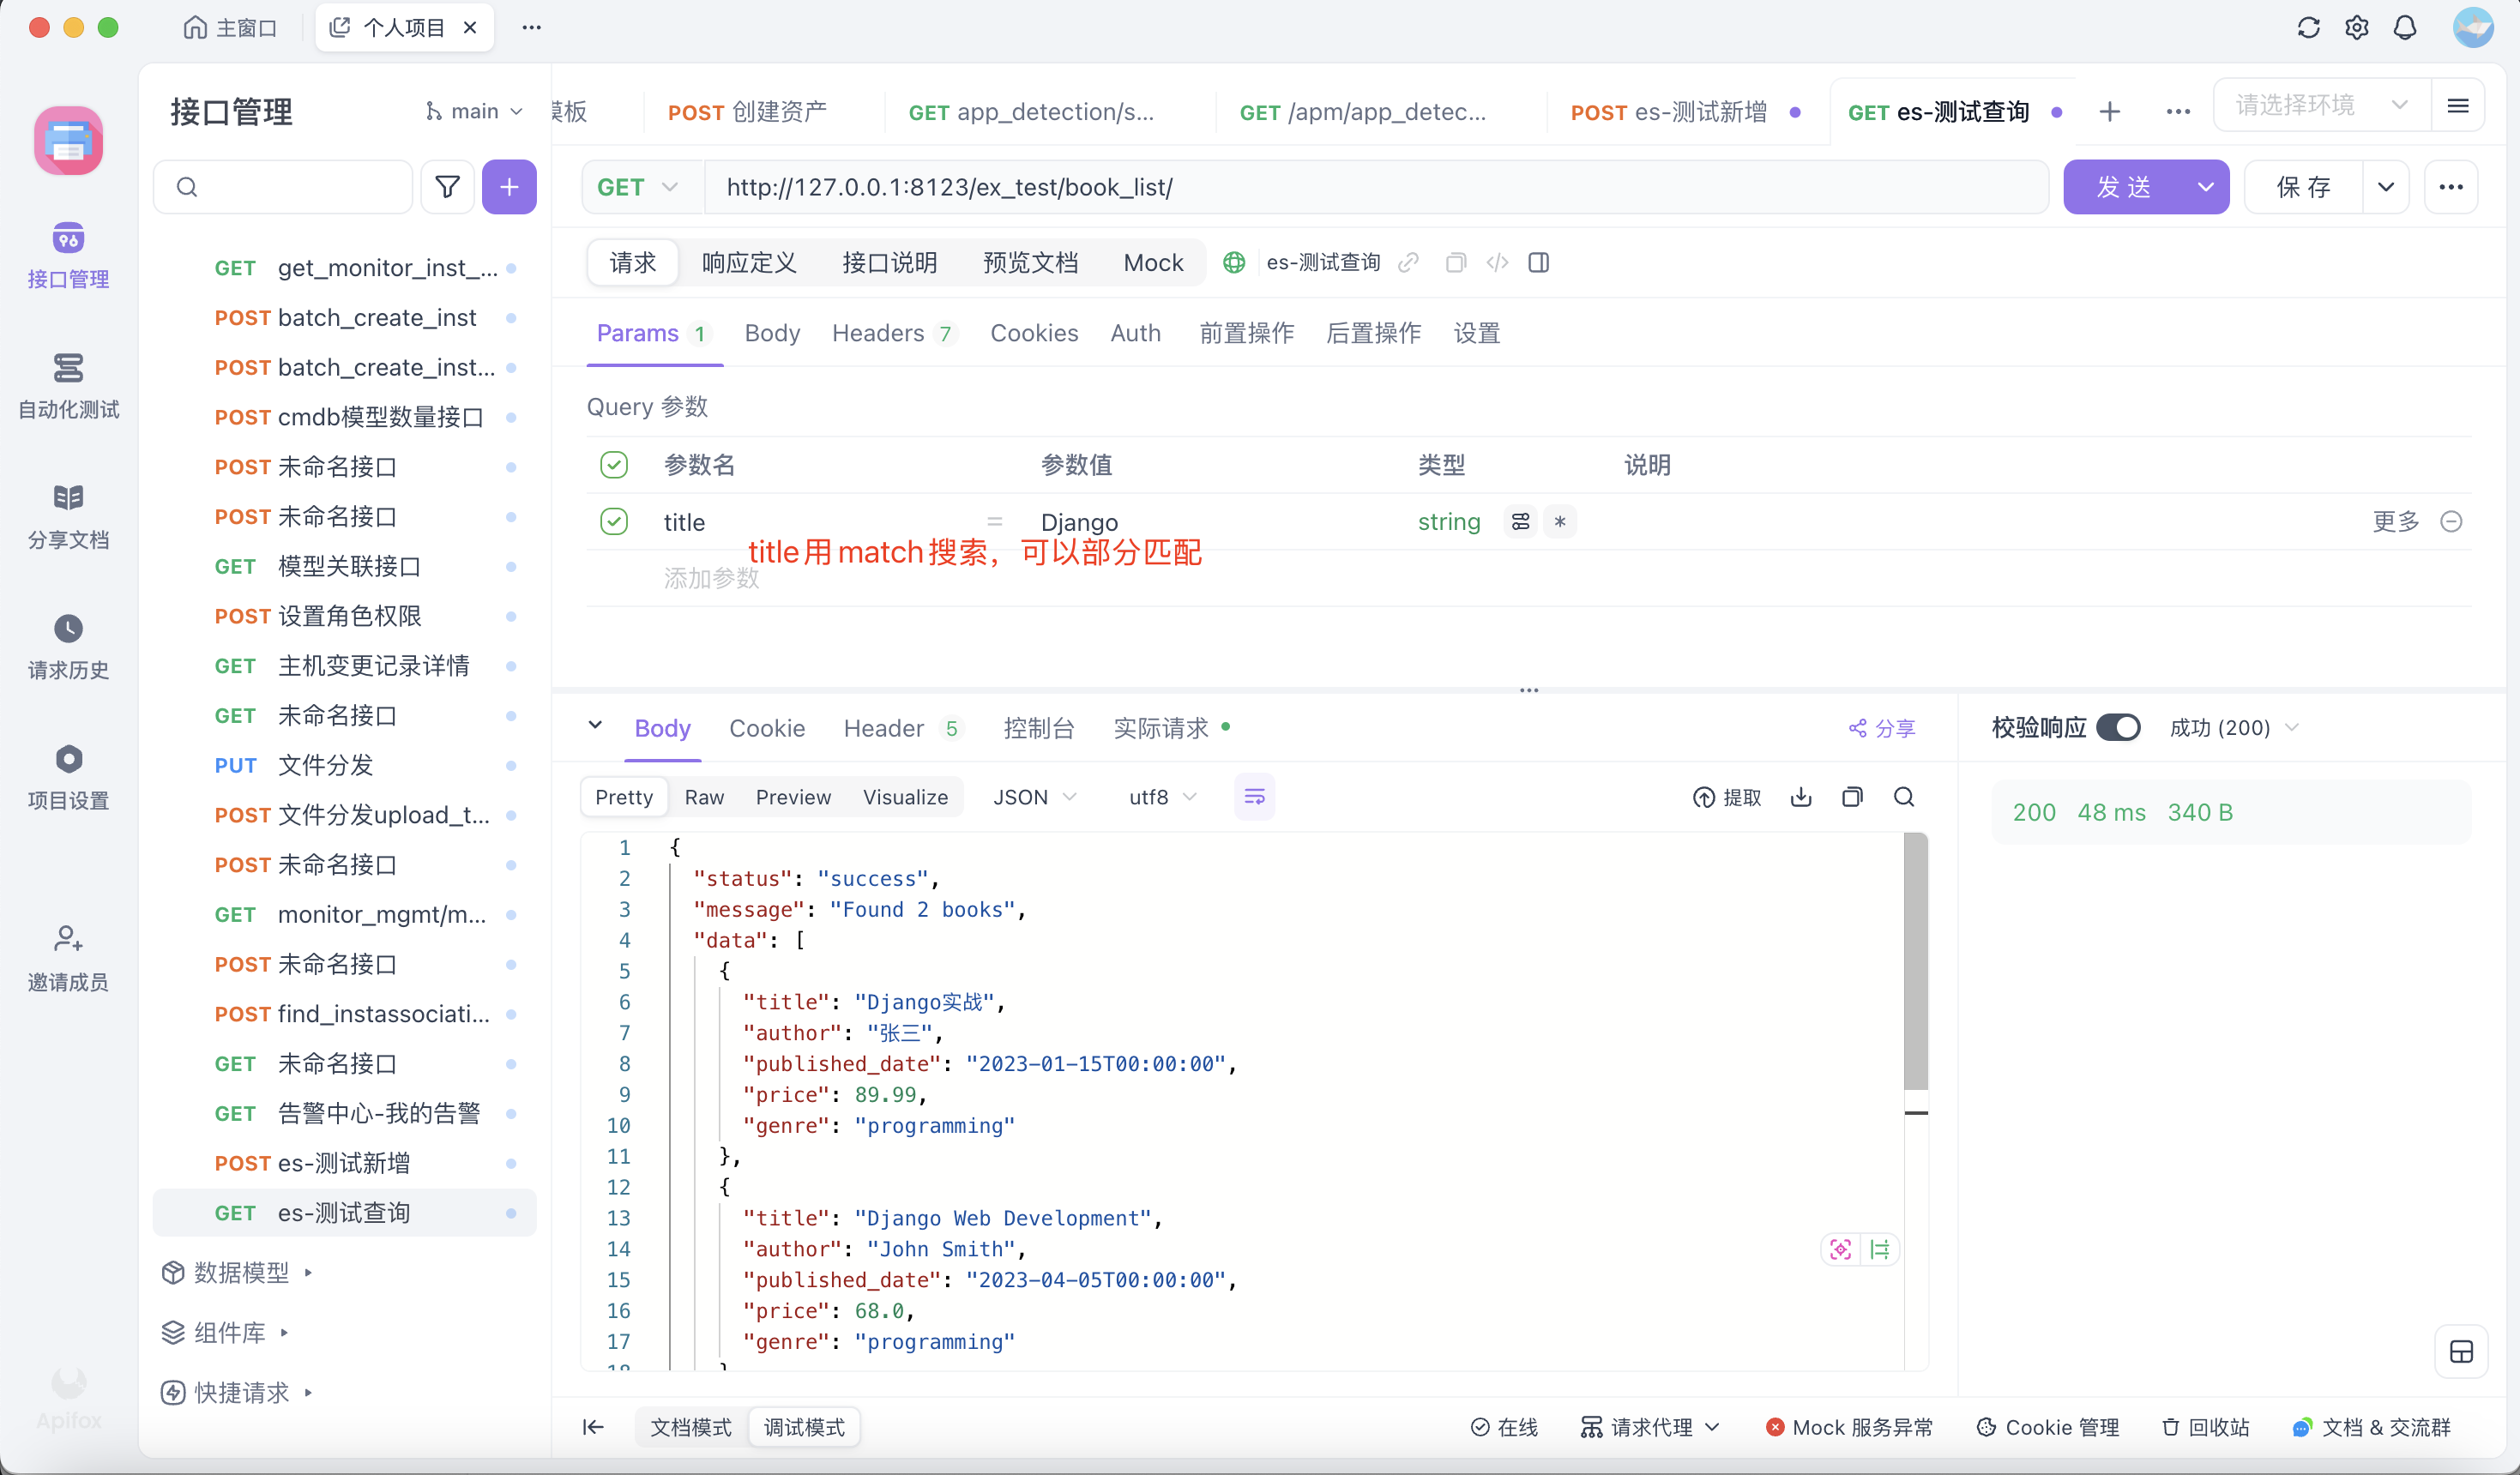
if title:
s = s.query('match', title=title)
# Case 4: Combined query
if search and genre:
s = s.query('bool', must=[
Q('multi_match', query=search, fields=['title', 'author']),
Q('term', genre=genre)
])
response = s.execute()
# Convert datetime fields to strings for JSON serialization
data = []
for hit in response:
hit_dict = hit.to_dict()
for key, value in hit_dict.items():
if isinstance(value, datetime):
hit_dict[key] = value.isoformat()
data.append(hit_dict)
return JsonResponse({
'status': 'success',
'message': f'Found {response.hits.total.value} books',
'data': data
})
4.在kibana如何查询数据?
在http://localhost:5601/app/dev_tools#/console路由查询:
查询全部数据:
GET book/_search
{
  "query": {
    "match_all": {}
  }
}
单字段匹配:可以模糊匹配,不区分大小写
GET book/_search
{
  "query": {
    "match": {
      "title": "Django"
    }
  }
}
多字段查询:
GET book/_search
{
  "query": {
    "multi_match": {
      "query": "author111",
      "fields": ["title", "author"]
    }
  }
}
精确匹配:
GET book/_search
{
  "query": {
    "term": {
      "title": "author111"
    }
  }
}
数字区间查询:
GET book/_search
{
  "query": {
    "range": {
      "price": {
        "gte": 95,
        "lte": 100
      }
    }
  }
}

5.更新字段
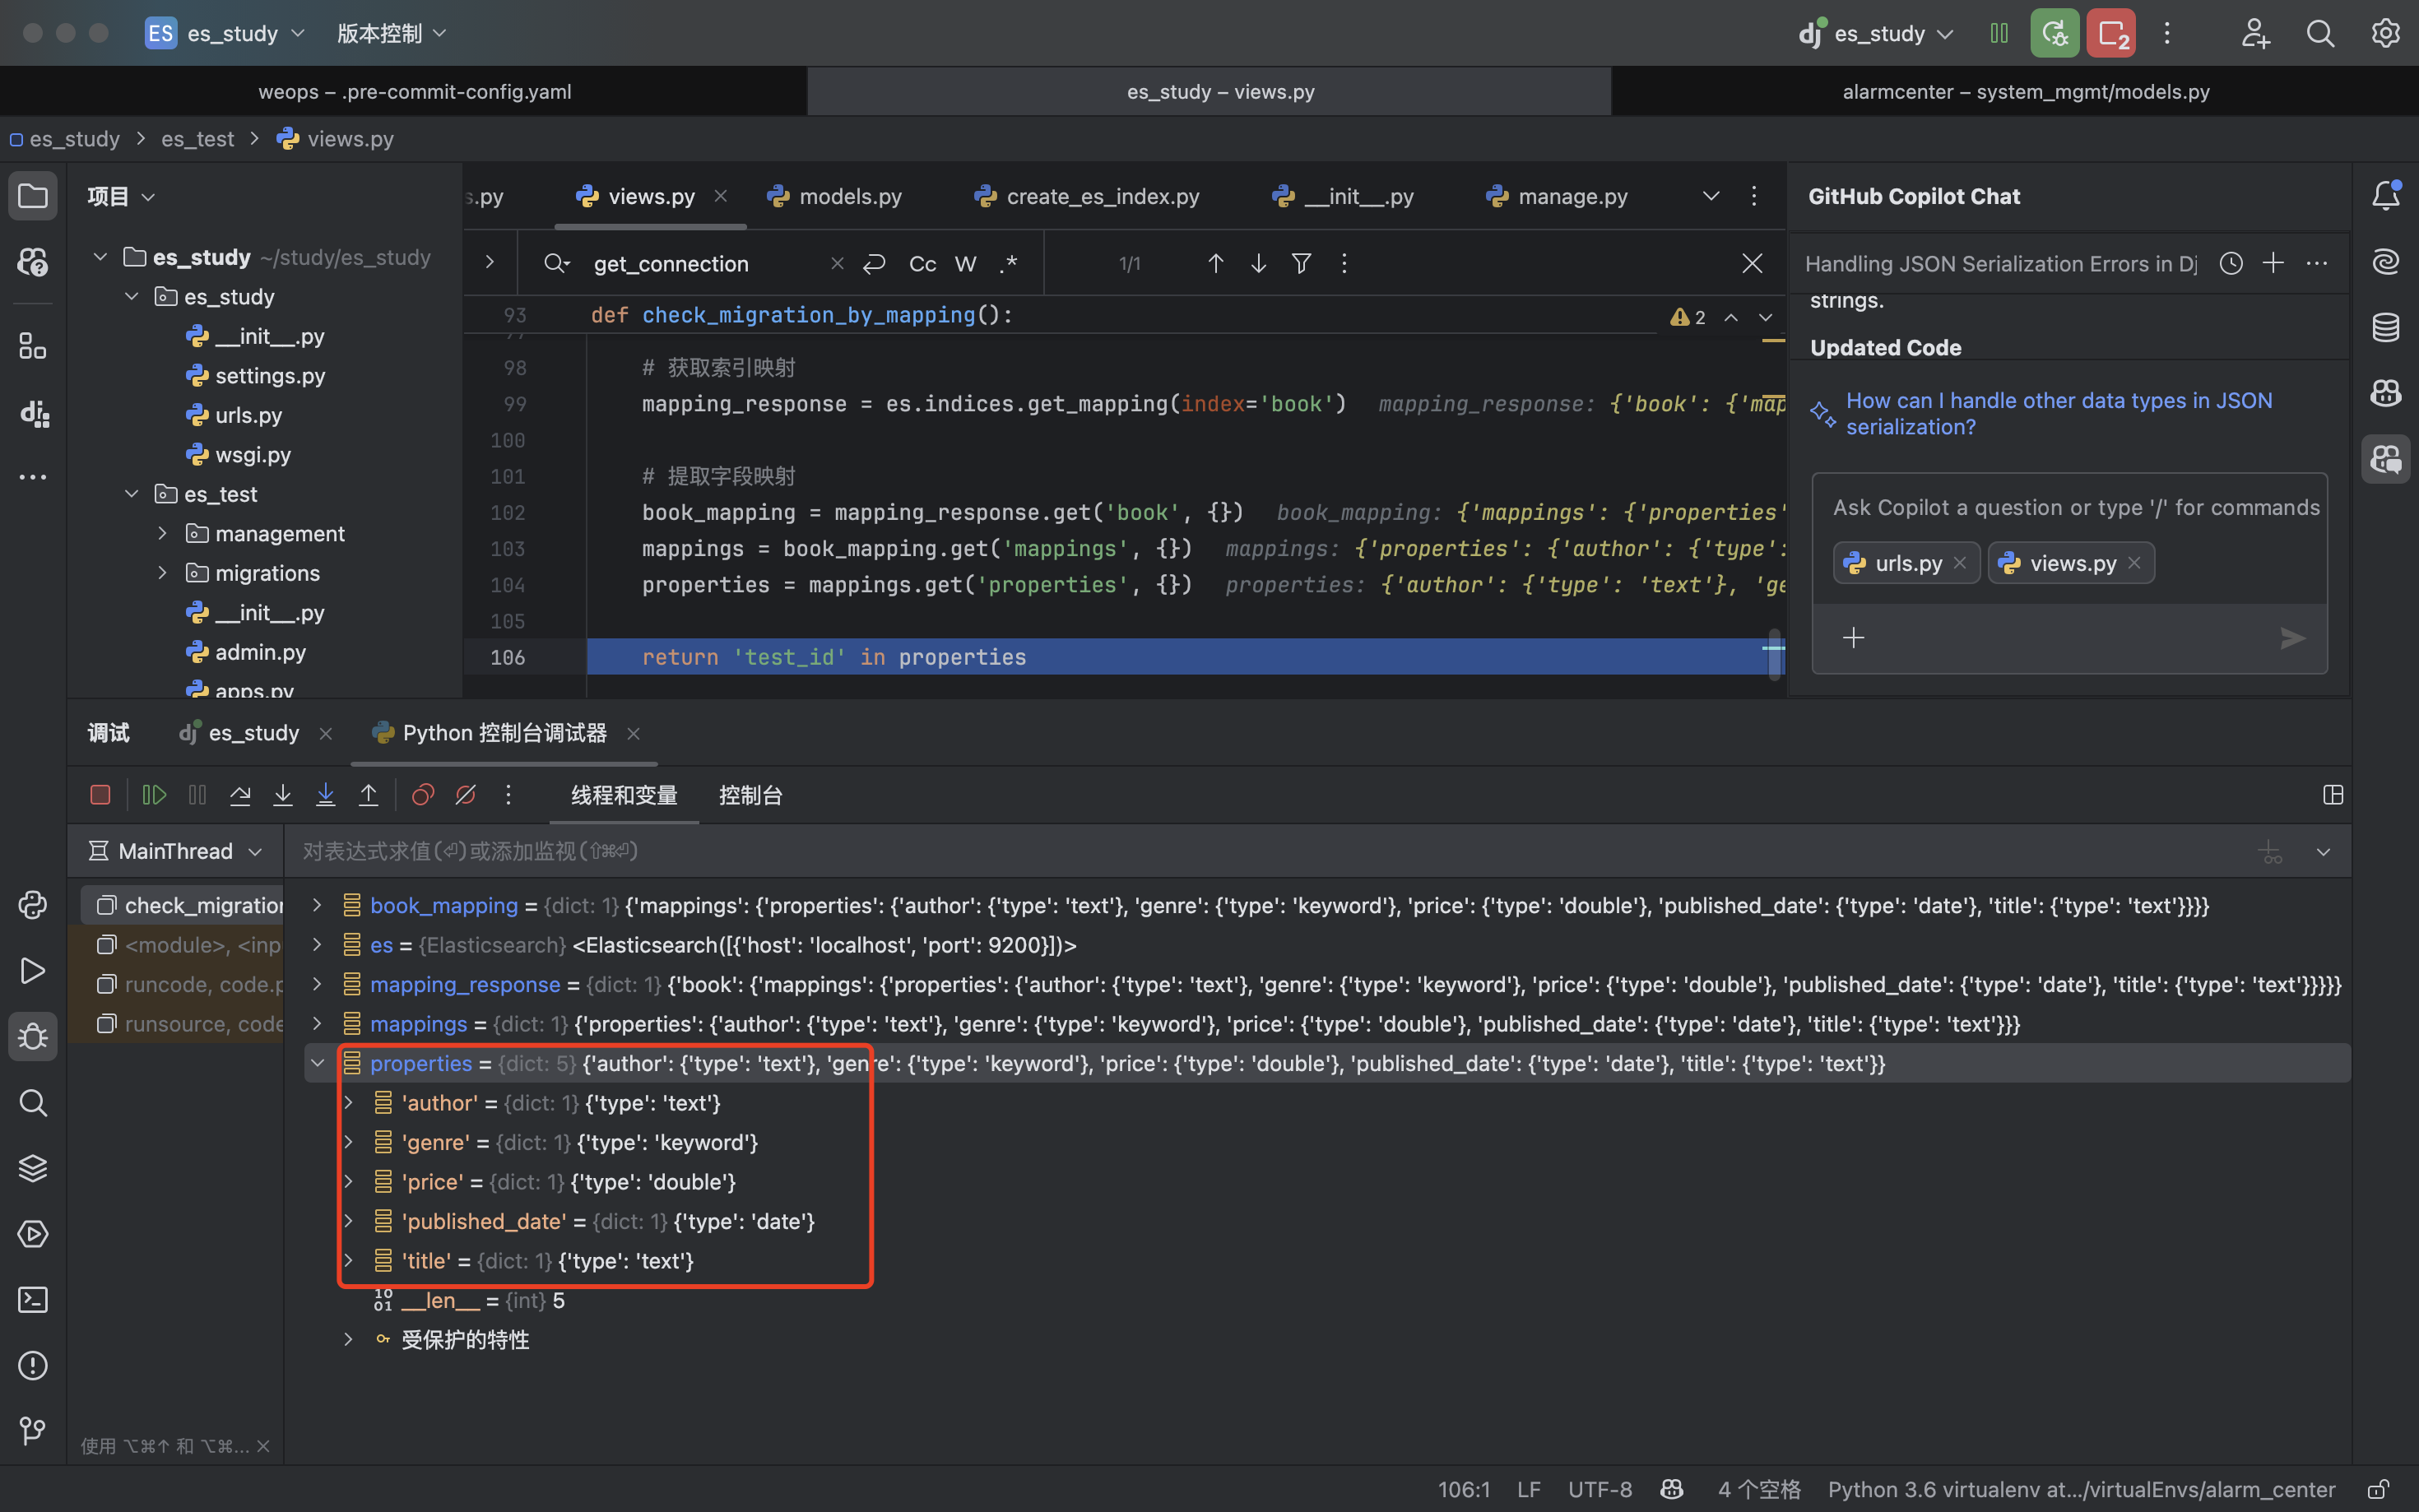
1.如何查询索引中所有的字段(确保迁移操作只执行一次用)?
from elasticsearch_dsl import connections

es = connections.get_connection()

# 获取索引映射
mapping_response = es.indices.get_mapping(index='book')

# 提取字段映射
book_mapping = mapping_response.get('book', {})
mappings = book_mapping.get('mappings', {})
properties = mappings.get('properties', {})
2.添加字段:
es = connections.get_connection()
# 添加 test_id 字段到映射
mapping = {
    "properties": {
        "test_id": {  # 只写添加的字段
            "type": "integer"
        }
    }
}

result = es.indices.put_mapping(
    index='book',
    body=mapping
)  # {'acknowledged': True}表示迁移更新成功了
这时发现再查上一步,多了一个字段test_id:

3.给所有的文档补全新增的字段值:
es = connections.get_connection()
    try:
        # 只更新没有 test_id 字段的文档
        update_query = {
            "script": {
                "source": "ctx._source.test_id = 3",
                "lang": "painless"
            },
          """
含义:要执行的脚本代码
ctx:上下文对象,代表当前正在处理的文档
ctx._source:文档的源数据(就是您存储的 JSON 数据)
ctx._source.test_id = 3:给文档添加一个 test_id 字段,值为 3
          """
            "query": {
                "bool": {
                    "must_not": {
                        "exists": {
                            "field": "test_id"
                        }
                    }
                }
            }
        }
        """

        """

        result = es.update_by_query(
            index='book',
            body=update_query,
            refresh=True  # 立即刷新以确保更新可见
        )
        print("Documents updated successfully:", result['updated'])
"""
这个查询的核心思想是:**安全地给现有数据添加新字段,而不影响已经有该字段的文档**。
"""
6.本地模拟
1.连接es:
es_client = Elasticsearch(
    ["http://localhost:9200"],
    timeout=30
)
if es_client.ping():
        print("成功连接ES集群")
else:
    print("连接ES集群失败,请检查认证信息")
# 成功连接ES集群

# 获取所有非系统索引:
normal_indices = es.cat.indices(index="*", h="index").split()
print("\n非系统索引列表:", normal_indices)  # 非系统索引列表: ['book']
2.模拟Rollover效果:
为什么需要这样操作?
- 无缝切换
- 应用程序只需使用别名
books读写,无需关心底层索引变更 - 典型场景:索引滚动更新(Rollover)时
- 应用程序只需使用别名
- 数据分层
- 旧索引(
book-v1-000001)可设为只读,用于历史查询 - 新索引(
book-v1-000002)接收新数据写入
- 旧索引(
- 维护灵活性
- 可随时修改绑定关系,不影响业务代码
index_pattern = "book-{version}-{seq:06d}"
version = "v1"
# 初始化首个索引
es_client.indices.create(index=index_pattern.format(version=version, seq=1))
# "滚动"创建新索引(模拟达到条件)
new_seq = 2
es_client.indices.create(index=index_pattern.format(version=version, seq=new_seq))
normal_indices = es_client.cat.indices(index="*", h="index").split()
print("\n非系统索引列表:", normal_indices)
# 非系统索引列表: ['book-v1-000001', 'book-v1-000002', 'book'],这时已经有三个索引了

#更新索引指向:
es.indices.update_aliases({
    "actions": [
        # 动作1:从别名"books"中移除旧索引
        {"remove": {"index": "book-v1-000001", "alias": "books"}},

        # 动作2:将别名"books"绑定到新索引,并标记为可写入
        {"add": {"index": "book-v1-000002", "alias": "books", "is_write_index": True}}
    ]
})
"""
别名(Alias)
相当于索引的"快捷方式",可以指向一个或多个索引
优点:解耦应用程序与物理索引名的依赖
is_write_index属性
当别名关联多个索引时,指定哪个索引接收写入请求
如果不设置,向别名写入数据会报错(需明确指定目标索引)
"""

# 查看别名绑定情况
print(es_client.indices.get_alias(name="books"))
# {'book-v1-000002': {'aliases': {'books': {'is_write_index': True}}}}
这时我写入的时候只需要指定book索引,数据就会自动写入到索引book-v1-000001中
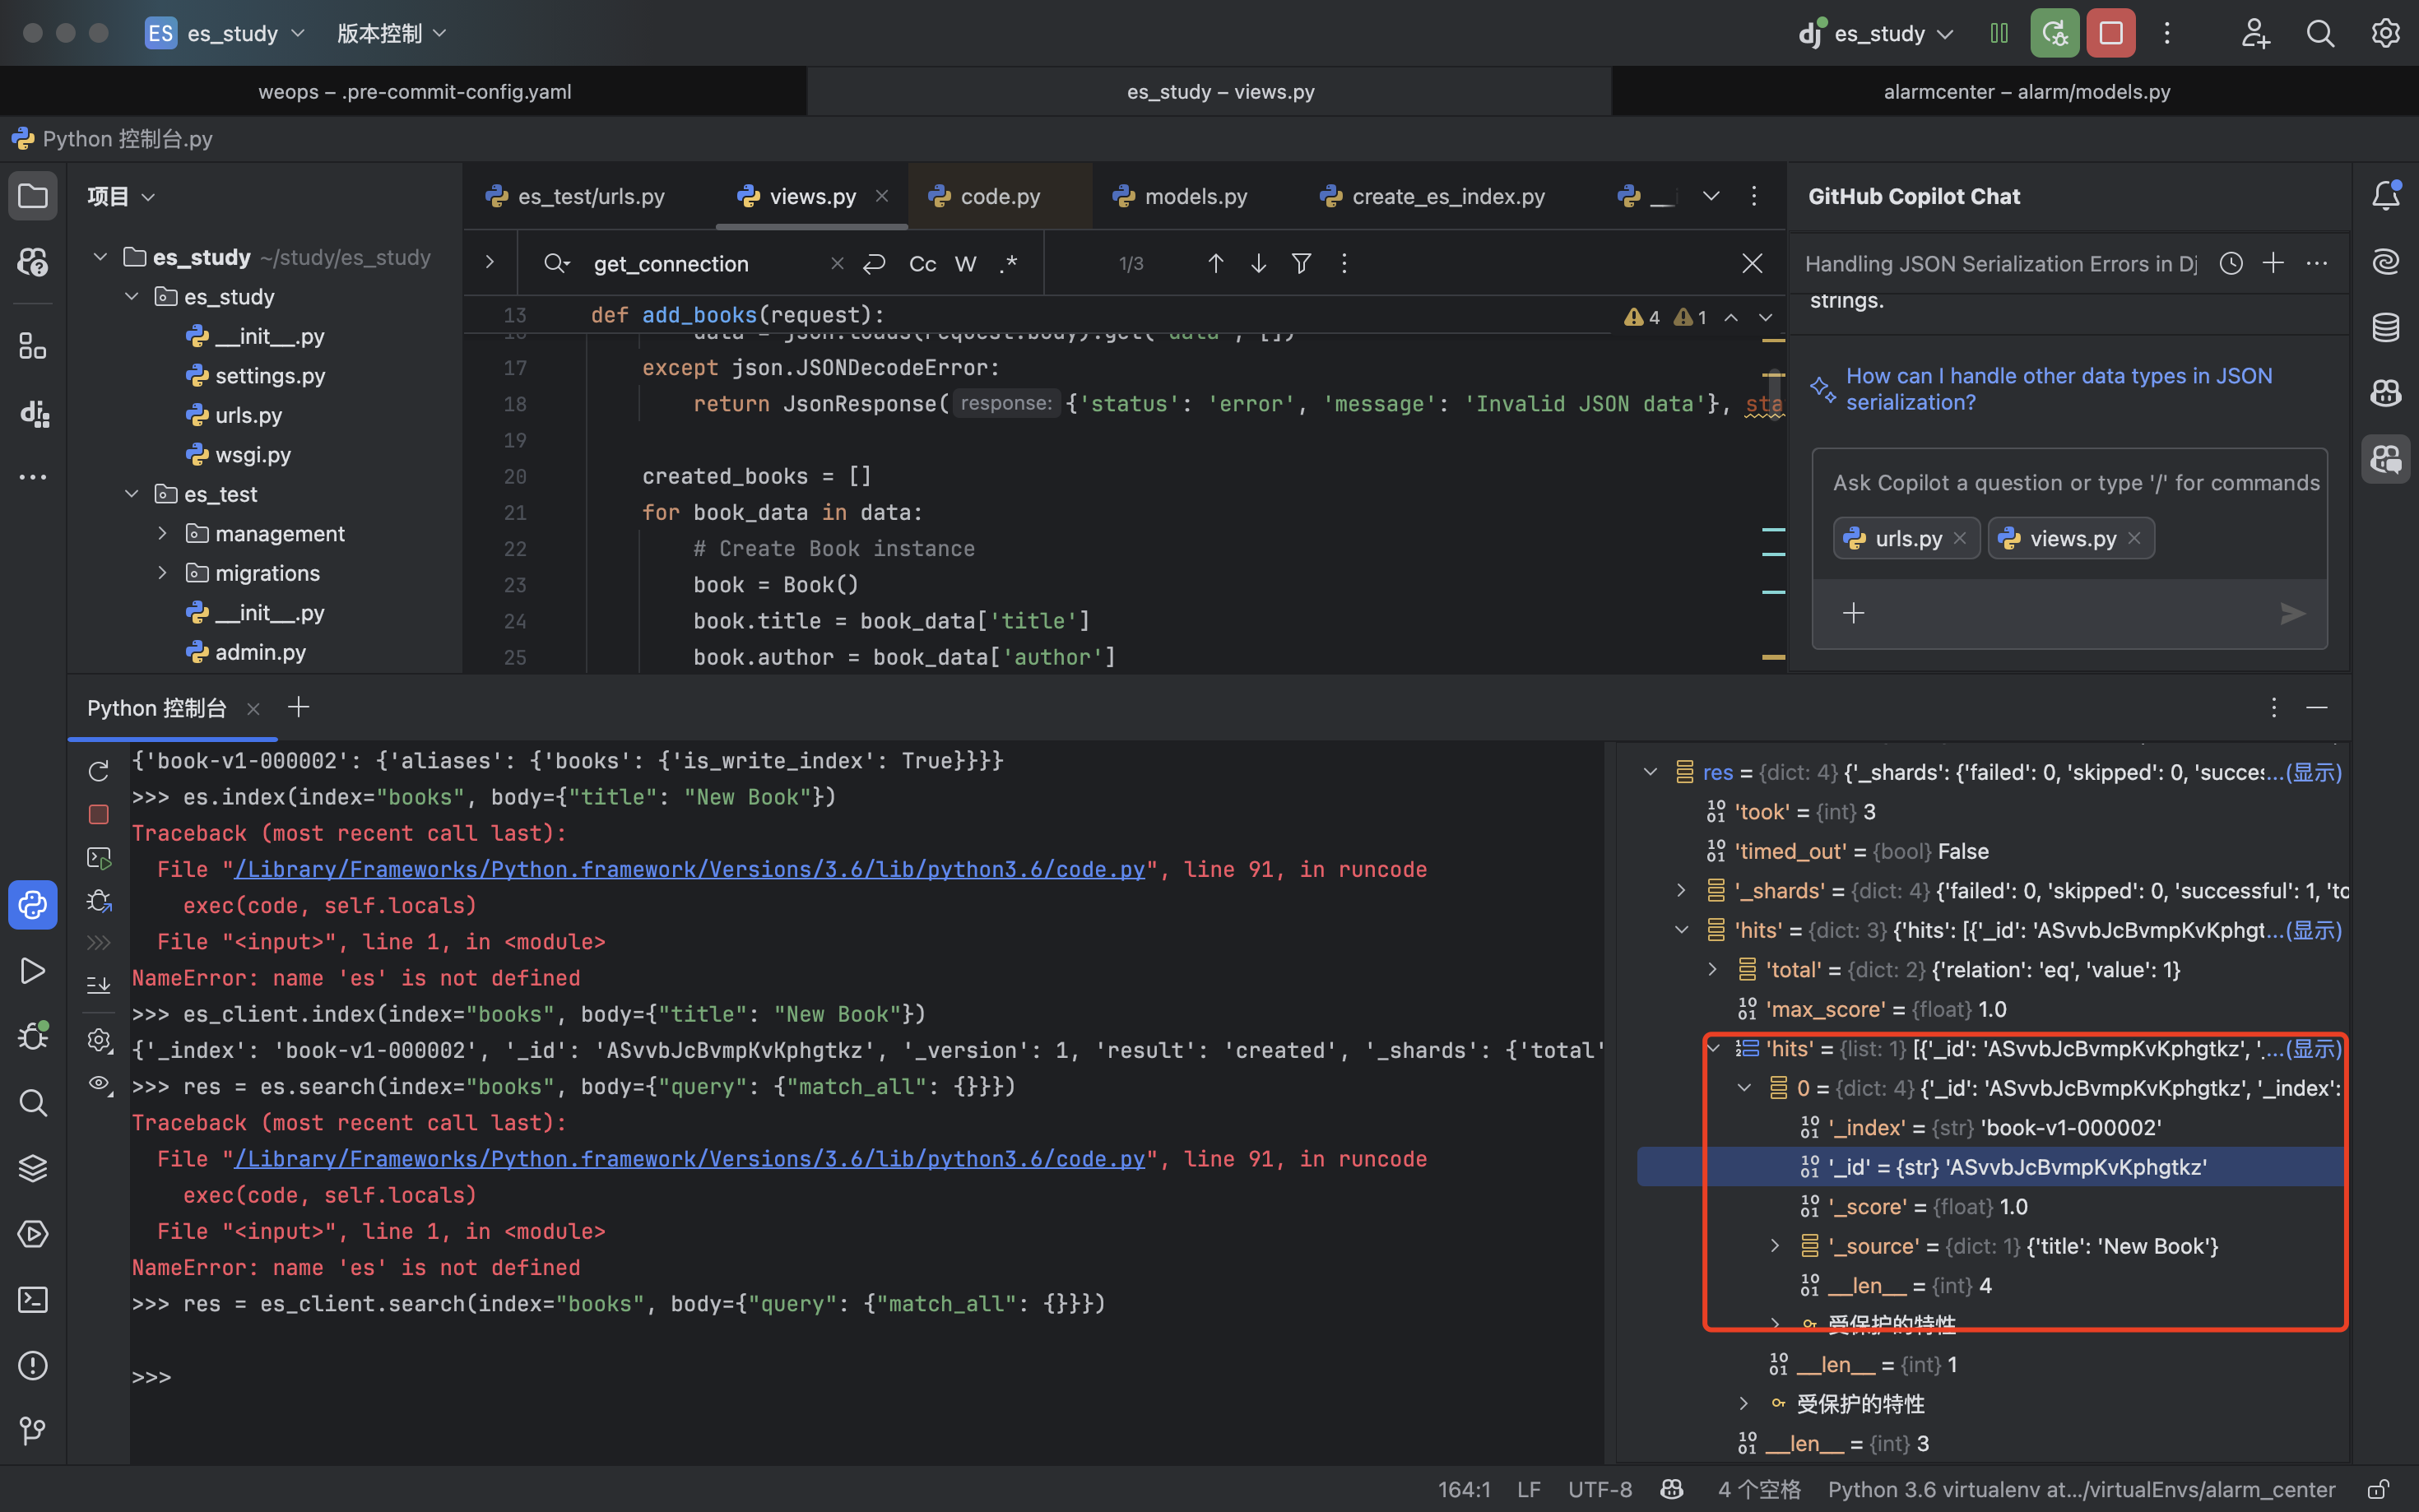
es_client.index(index="books", body={"title": "New Book"})
{'_index': 'book-v1-000002', '_id': 'ASvvbJcBvmpKvKphgtkz', '_version': 1, 'result': 'created', '_shards': {'total': 2, 'successful': 1, 'failed': 0}, '_seq_no': 0, '_primary_term': 1}
这样查询的时候只用book索引名就可以查到刚才插入的数据
res = es_client.search(index="books", body={"query": {"match_all": {}}})
创建多个索引并且关联:
es_client.indices.update_aliases({
    "actions": [
        # 清除现有所有绑定(危险操作!确保没有其他依赖)
        {"remove": {"index": "*", "alias": "books"}},
        # 重新添加需要关联的索引
        {"add": {"index": "book-v1-000001", "alias": "books"}},
        {"add": {"index": "book-v1-000002", "alias": "books", "is_write_index": True}},
        {"add": {"index": "book-v1-000003", "alias": "books"}}
    ]
})
{'acknowledged': True}
current_aliases = es_client.indices.get_alias(name="books")
# current_aliases:{'book-v1-000001': {'aliases': {'books': {}}}, 'book-v1-000002': {'aliases': {'books': {'is_write_index': True}}}, 'book-v1-000003': {'aliases': {'books': {}}}}
现在写入多条数据,发现都是在book-v1-000002索引下:
documents = [
    {"title": "Python编程入门", "author": "张三", "price": 59.9},
    {"title": "Elasticsearch实战", "author": "李四", "price": 89.0},
    {"title": "数据科学手册", "author": "王五", "price": 109.0}
]
for doc in documents:
    es_client.index(
        index="books",  # 使用别名而非具体索引名
        body=doc
    )
print("通过别名写入3条数据完成")
通过别名写入3条数据完成
# 查看各索引文档数
for idx in ["book-v1-000001", "book-v1-000002", "book-v1-000003"]:
    count = es_client.count(index=idx)["count"]
    print(f"{idx} 文档数: {count}")
book-v1-000001 文档数: 0
book-v1-000002 文档数: 4
book-v1-000003 文档数: 0
给book关联的所有索引加一个user_id字段:
# (1)获取所有的关联索引
alias_info = es_client.indices.get_alias(name="books")
associated_indices = list(alias_info.keys())
print("需处理的索引:", associated_indices)
# 需处理的索引: ['book-v1-000001', 'book-v1-000002', 'book-v1-000003']

# (2)给每个索引添加字段
mapping_body = {
    "properties": {
        "user_id": {
            "type": "integer",
            "null_value": 1  # 显式声明默认值
        }
    }
}
for index in associated_indices:
    try:
        # 检查字段是否已存在
        current_mapping = es_client.indices.get_mapping(index=index)
        if "user_id" not in current_mapping[index]["mappings"].get("properties", {}):
            es_client.indices.put_mapping(index=index, body=mapping_body)
            print(f"✅ 索引 {index} 字段添加成功")
        else:
            print(f"⏩ 索引 {index} 已存在该字段,跳过")
    except Exception as e:
        print(f"❌ 索引 {index} 映射更新失败: {str(e)}")
"""
✅ 索引 book-v1-000001 字段添加成功
✅ 索引 book-v1-000002 字段添加成功
✅ 索引 book-v1-000003 字段添加成功
"""

# (3)给之前的数据补默认值
from elasticsearch.helpers import scan, bulk
def set_default_user_id(index_name):
    try:
        # 构造批量更新请求
        update_actions = []
        for doc in scan(es_client, index=index_name, query={"query": {"match_all": {}}}):
            # 跳过已存在user_id字段的文档
            if "user_id" not in doc["_source"]:
                update_actions.append({
                    "_op_type": "update",
                    "_index": doc["_index"],
                    "_id": doc["_id"],
                    "doc": {"user_id": 1}
                })
        # 执行批量更新
        if update_actions:
            bulk(es_client, update_actions)
            print(f"✅ 索引 {index_name} 默认值设置完成(更新 {len(update_actions)} 条文档)")
        else:
            print(f"⏩ 索引 {index_name} 无文档需更新")
    except Exception as e:
        print(f"❌ 索引 {index_name} 更新失败: {str(e)}")
# 为所有索引设置默认值
for index in associated_indices:
    set_default_user_id(index)
"""
⏩ 索引 book-v1-000001 无文档需更新
✅ 索引 book-v1-000002 默认值设置完成(更新 4 条文档)
⏩ 索引 book-v1-000003 无文档需更新
"""
然后查询索引book下的所有数据,发现已经成功加上了user_id字段:

 浙公网安备 33010602011771号