IDA报错fatal error before kernel init
编写了一个IDA64插件,结果再打开IDA后报错fatal error before kernel init,然后闪退。
检查了一遍代码没发现有问题,后来发现是环境有一处配置错误,
IDA64.exe插件环境配置:
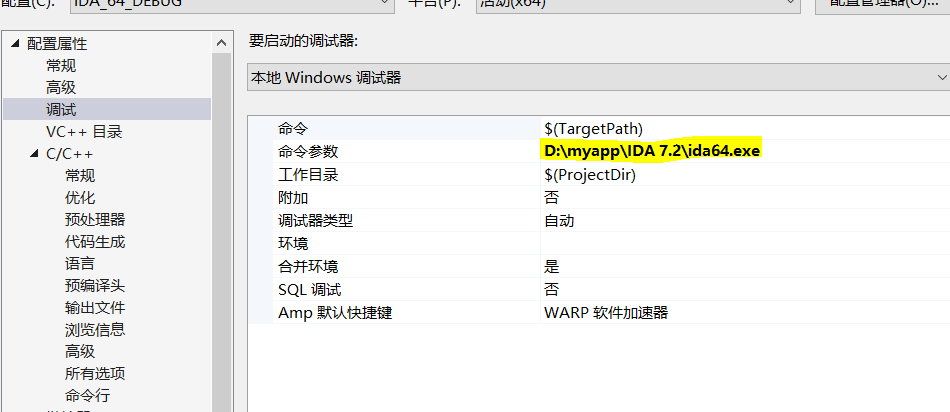
1、调试器设置,用来调试插件。
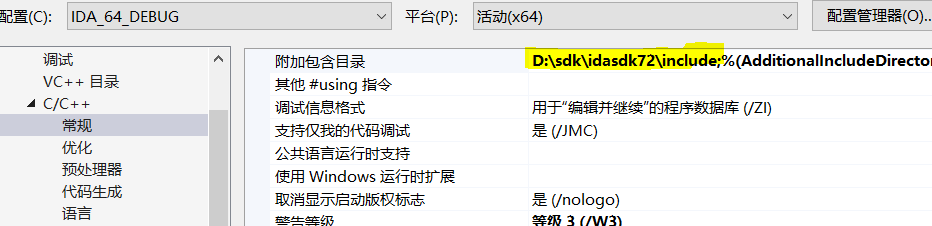
2、头文件包含
3、预处理器

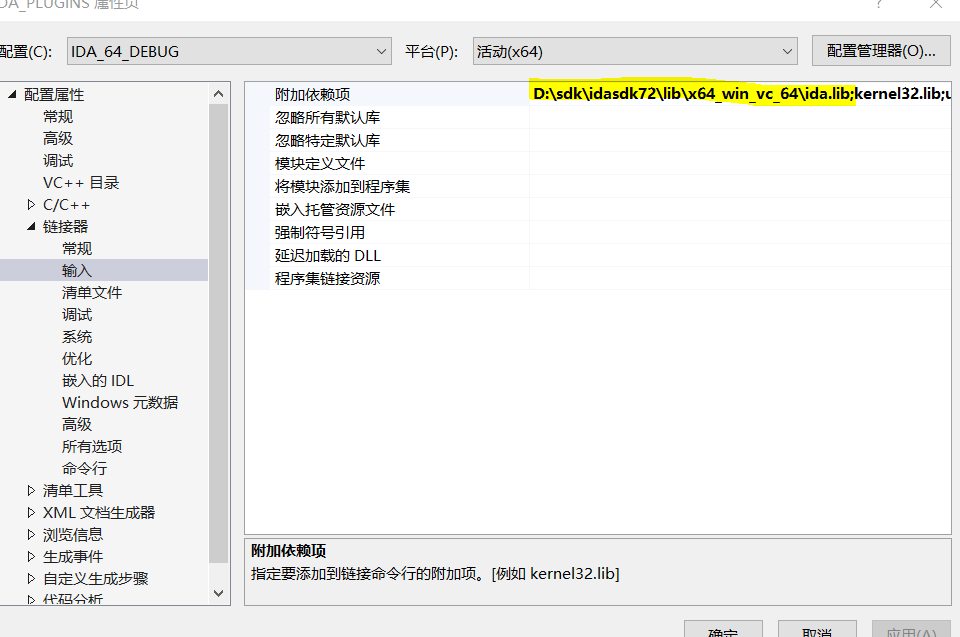
4、链接依赖库

5、

详细配置可以查看idasdk目录下的install_visual.txt文件


Please read "readme.txt" before reading this file!


How to set up Visual C++ 2017 for IDA Plugins
---------------------------------------------

This guide will help you set up a Visual C++ project that targets both ida32 and ida64 plugins.
Remember that, even though ida32 is used to work on 32-bit files, it is also an x64 application.
Therefore, both plugins (ida32 and ida64) must be built for the x64 platform.

1. File | New | Project From Existing Code...

2. What type of project would you like to create: Visual C++
   <next>

3. Project file location: <folder where you have your files>
   Project name: <your plugin's name>
   <finish>

Once the project is initialized, right-click on the project name and pick Properties.

4. Configuration Manager...
     Active solution platform: select "x64"
   <Close>

5. General | Project Defaults | Configuration Type
     Dynamic Library (.dll)
   <apply>

6. C/C++ | General | Additional Include Directories
     Enter the SDK's include folder in "Include search paths (/I)": eg. C:\idasdk\include;
   <apply>

7. C/C++ | Code Generation | Runtime library (visible only after you add one .cpp file to the project)
     Multi-threaded DLL (/MD)
   <apply>

8. Linker | Command Line | Additional options
     - for processor modules: /EXPORT:LPH
     - for plugins: /EXPORT:PLUGIN
     - for loaders: /EXPORT:LDSC
   <apply>

The steps above constituted the common configuration for both ida32 and ida64 configurations.

We will now create the separate configurations.

9. Still under "Configuration Manager..."

     - under the "Configuration" column, click on "Debug"
     - click "<Edit...>"
     - click "Rename"
     - add an "ida32" prefix to the configuration name, such as "ida32 Debug"
     - <Enter>
     - <Yes>
     - <Close>

     - under "Active solution configuration", click on "Debug"
     - click "<Edit...>"
     - click "Rename"
     - add an "ida32" prefix to the configuration name, such as "ida32 Debug"
     - <Enter>
     - <Yes>
     - <Close>

     - under "Active solution configuration", click on the new configuration name "ida32 Debug"
     - click "<New...>"
     - use a similar name, but with the "ida64" prefix, such as "ida64 Debug"
     - Copy settings from: "ida32 Debug"
     - <Ok>
     - <Close>

In the "Property Page", under "Configuration", select "ida32 Debug".

10. Debugging | Command
      - for ida32: C:\Program Files\IDA 7.2\ida.exe
      - for ida64: C:\Program Files\IDA 7.2\ida64.exe
    <apply>

11. C/C++ | Preprocessor | Preprocessor Definitions
      - for ida32: __NT__;
      - for ida64: __NT__;__EA64__;
    <apply>

12. Linker | General | Output File:
      - for ida32: $(OutDir)\$(ProjectName).dll
      - for ida64: $(OutDir)\$(ProjectName)64.dll
    <apply>

13. Linker | Input | Additional Dependencies
      - for ida32: C:\idasdk\lib\x64_win_vc_32\ida.lib
      - for ida64: C:\idasdk\lib\x64_win_vc_64\ida.lib
    <apply>

In the "Property Page", under "Configuration", select "ida64 Debug" and repeat the last three steps.


You should now be capable to easily switch between the "ida32 Debug" and "ida64 Debug" configurations and build your project.

 浙公网安备 33010602011771号