neo4j支持SSL和nginx转发(二)
修改配置以支持SSL和nginx转发
端口说明:
-
bolt(port -7687) -
https(port -7473) -
cluster(ports -5000,6000, and7000) -
backups(port -6362)
添加设置证书
切换到neo4j的证书目录:
cd /var/lib/neo4j/certificates
mkdir https bolt cluster
这里面有三个目录(文件夹),里面分别有private.key和public.crt,我们需要用/etc/letsencrypt/live/myneo4j.example.com/里面的privkey.pem和fullchain.pem来替换掉。
**记得把myneo4j.example.com换成你机器的域名**
#./https/
cat /etc/letsencrypt/live/myneo4j.example.com/fullchain.pem > https/public.crt
cat /etc/letsencrypt/live/myneo4j.example.com/privkey.pem > https/private.key
#./bolt/
cat /etc/letsencrypt/live/myneo4j.example.com/fullchain.pem > bolt/public.crt
cat /etc/letsencrypt/live/myneo4j.example.com/privkey.pem > bolt/private.key
#./cluster/
cat /etc/letsencrypt/live/myneo4j.example.com/fullchain.pem > cluster/public.crt
cat /etc/letsencrypt/live/myneo4j.example.com/privkey.pem > cluster/private.key
参考链接:https://blog.csdn.net/victorhzhao/article/details/121194947
1.修改配置neo4j.conf
/etc/neo4j/neo4j.conf
server.default_advertised_address=neo4j.pre.xingjigangwan.com
# Bolt connector
server.bolt.enabled=true
server.bolt.tls_level=REQUIRED
#server.bolt.tls_level=DISABLED
#server.bolt.listen_address=:7687
#server.bolt.advertised_address=:7687
# HTTP Connector. There can be zero or one HTTP connectors.
server.http.enabled=true
#server.http.listen_address=:7474
#server.http.advertised_address=:7474
# HTTPS Connector. There can be zero or one HTTPS connectors.
#server.https.enabled=false
server.https.enabled=true
server.https.listen_address=:7473
server.https.advertised_address=:7473
# Bolt SSL configuration
dbms.ssl.policy.bolt.enabled=true
dbms.ssl.policy.bolt.base_directory=certificates/bolt
dbms.ssl.policy.bolt.private_key=private.key
dbms.ssl.policy.bolt.public_certificate=public.crt
dbms.ssl.policy.bolt.client_auth=NONE
# Https SSL configuration
dbms.ssl.policy.https.enabled=true
dbms.ssl.policy.https.base_directory=certificates/https
dbms.ssl.policy.https.private_key=private.key
dbms.ssl.policy.https.public_certificate=public.crt
dbms.ssl.policy.https.client_auth=NONE
# Cluster SSL configuration
dbms.ssl.policy.cluster.enabled=true
dbms.ssl.policy.cluster.base_directory=certificates/cluster
dbms.ssl.policy.cluster.private_key=private.key
dbms.ssl.policy.cluster.public_certificate=public.crt
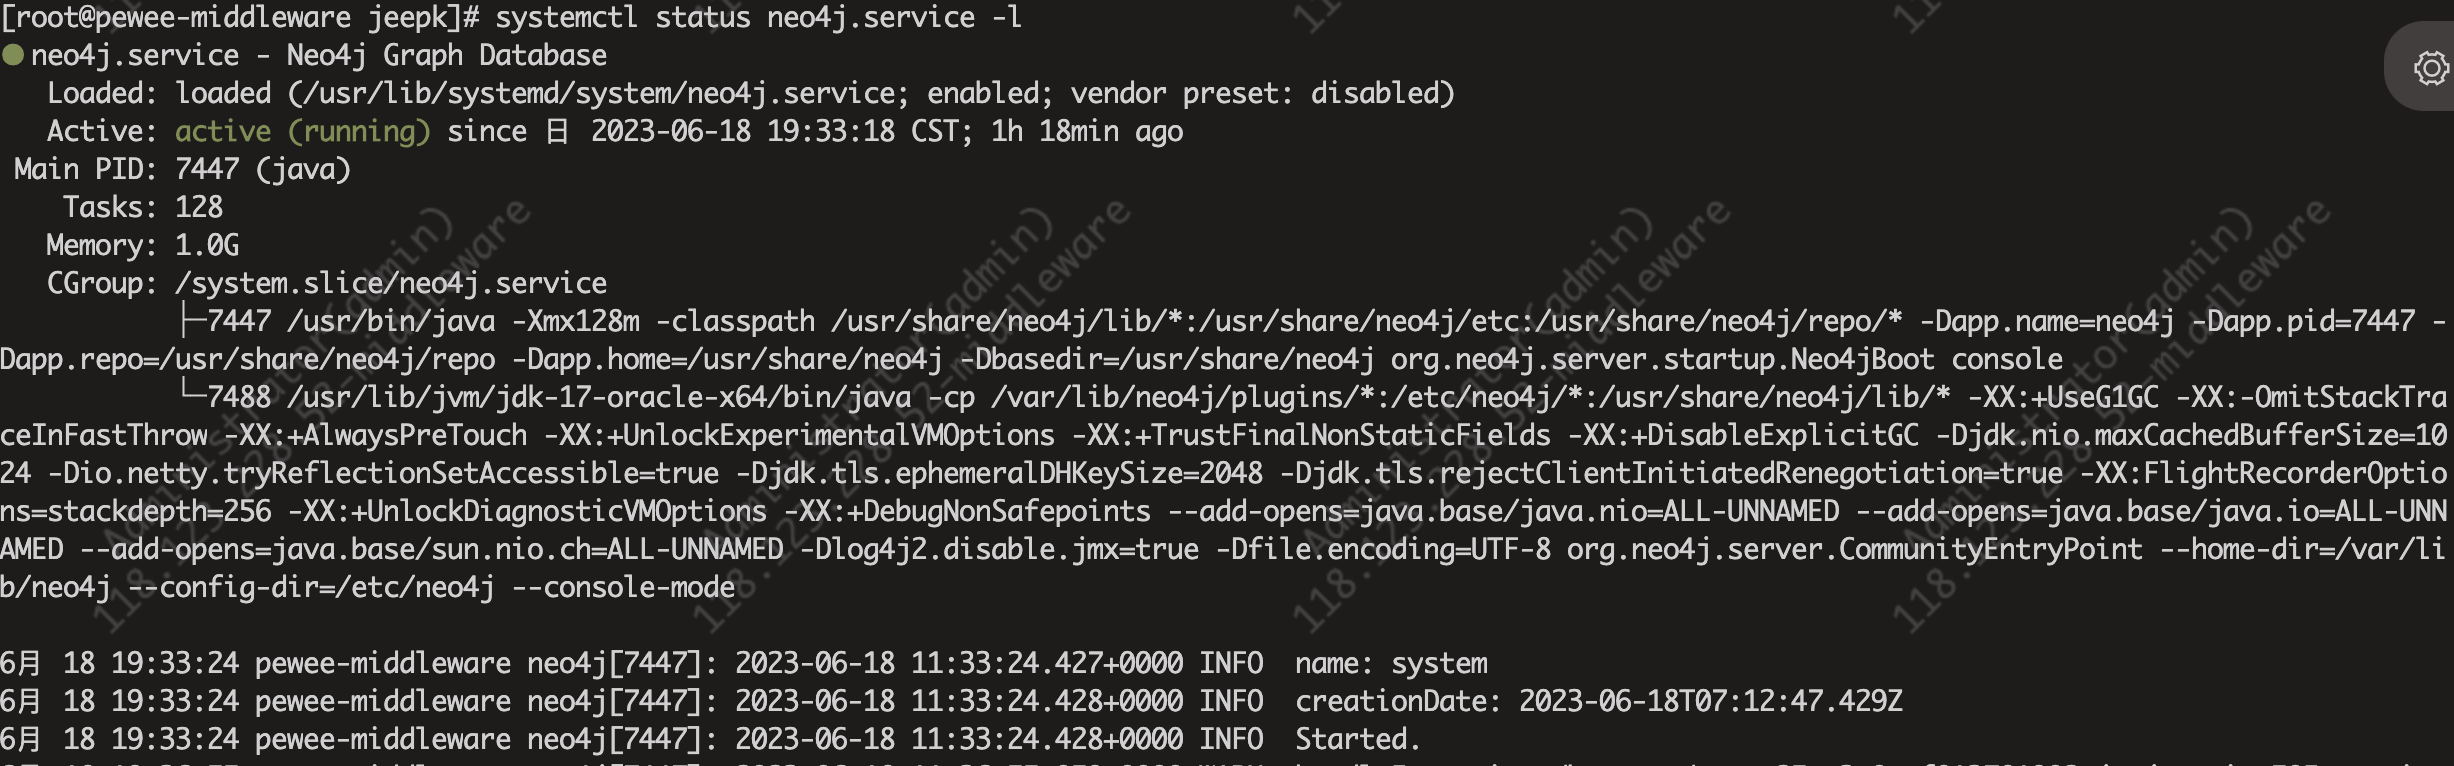
重启生效
systemctl restart neo4j.service
2.设置nginx配置(一个端口代理后台服务的两个端口)
server{
listen 443 ssl;
server_name neo4j.pre.xingjigangwan.com;
ssl_certificate /etc/letsencrypt/live/pre.xingjigangwan.com/fullchain.pem;
ssl_certificate_key /etc/letsencrypt/live/pre.xingjigangwan.com/privkey.pem;
ssl_session_cache shared:SSL:1m;
ssl_session_timeout 5m;
ssl_prefer_server_ciphers off;
ssl_protocols TLSv1.2 TLSv1.3;
ssl_ciphers ECDHE-ECDSA-AES128-GCM-SHA256:ECDHE-RSA-AES128-GCM-SHA256:ECDHE-ECDSA-AES256-GCM-SHA384:ECDHE-RSA-AES256-GCM-SHA384:ECDHE-ECDSA-CHACHA20-POLY1305:ECDHE-RSA-CHACHA20-POLY1305:DHE-RSA-AES128-GCM-SHA256:DHE-RSA-AES256-GCM-SHA384;
location / {
proxy_set_header X-Real-IP $remote_addr;
proxy_set_header X-Forwarded-For $proxy_add_x_forwarded_for;
proxy_set_header Host $http_host;
proxy_redirect off;
proxy_buffering off;
proxy_http_version 1.1;
proxy_set_header Upgrade $http_upgrade;
proxy_set_header Connection $connection_upgrade;
proxy_pass http://127.0.0.1:7687/;
}
location /neo4j/ {
proxy_set_header X-Real-IP $remote_addr;
proxy_set_header X-Forwarded-For $proxy_add_x_forwarded_for;
proxy_set_header Host $http_host;
proxy_redirect off;
proxy_buffering off;
proxy_pass https://127.0.0.1:7473/browser/;
}
location /db/data/ {
proxy_set_header X-Real-IP $remote_addr;
proxy_set_header X-Forwarded-For $proxy_add_x_forwarded_for;
proxy_set_header Host $http_host;
proxy_redirect off;
proxy_buffering off;
proxy_pass https://127.0.0.1:7473/db/data/;
}
access_log /www/wwwlogs/access-neo4j.log;
}
重启nginx生效
------------------------------------------------------------
连接neo4j的方法:
两种:
1.使用浏览器连接bolt+s连接/neo4j+s连接
2.使用cypher-shell连接
通过浏览器使用SSL连接
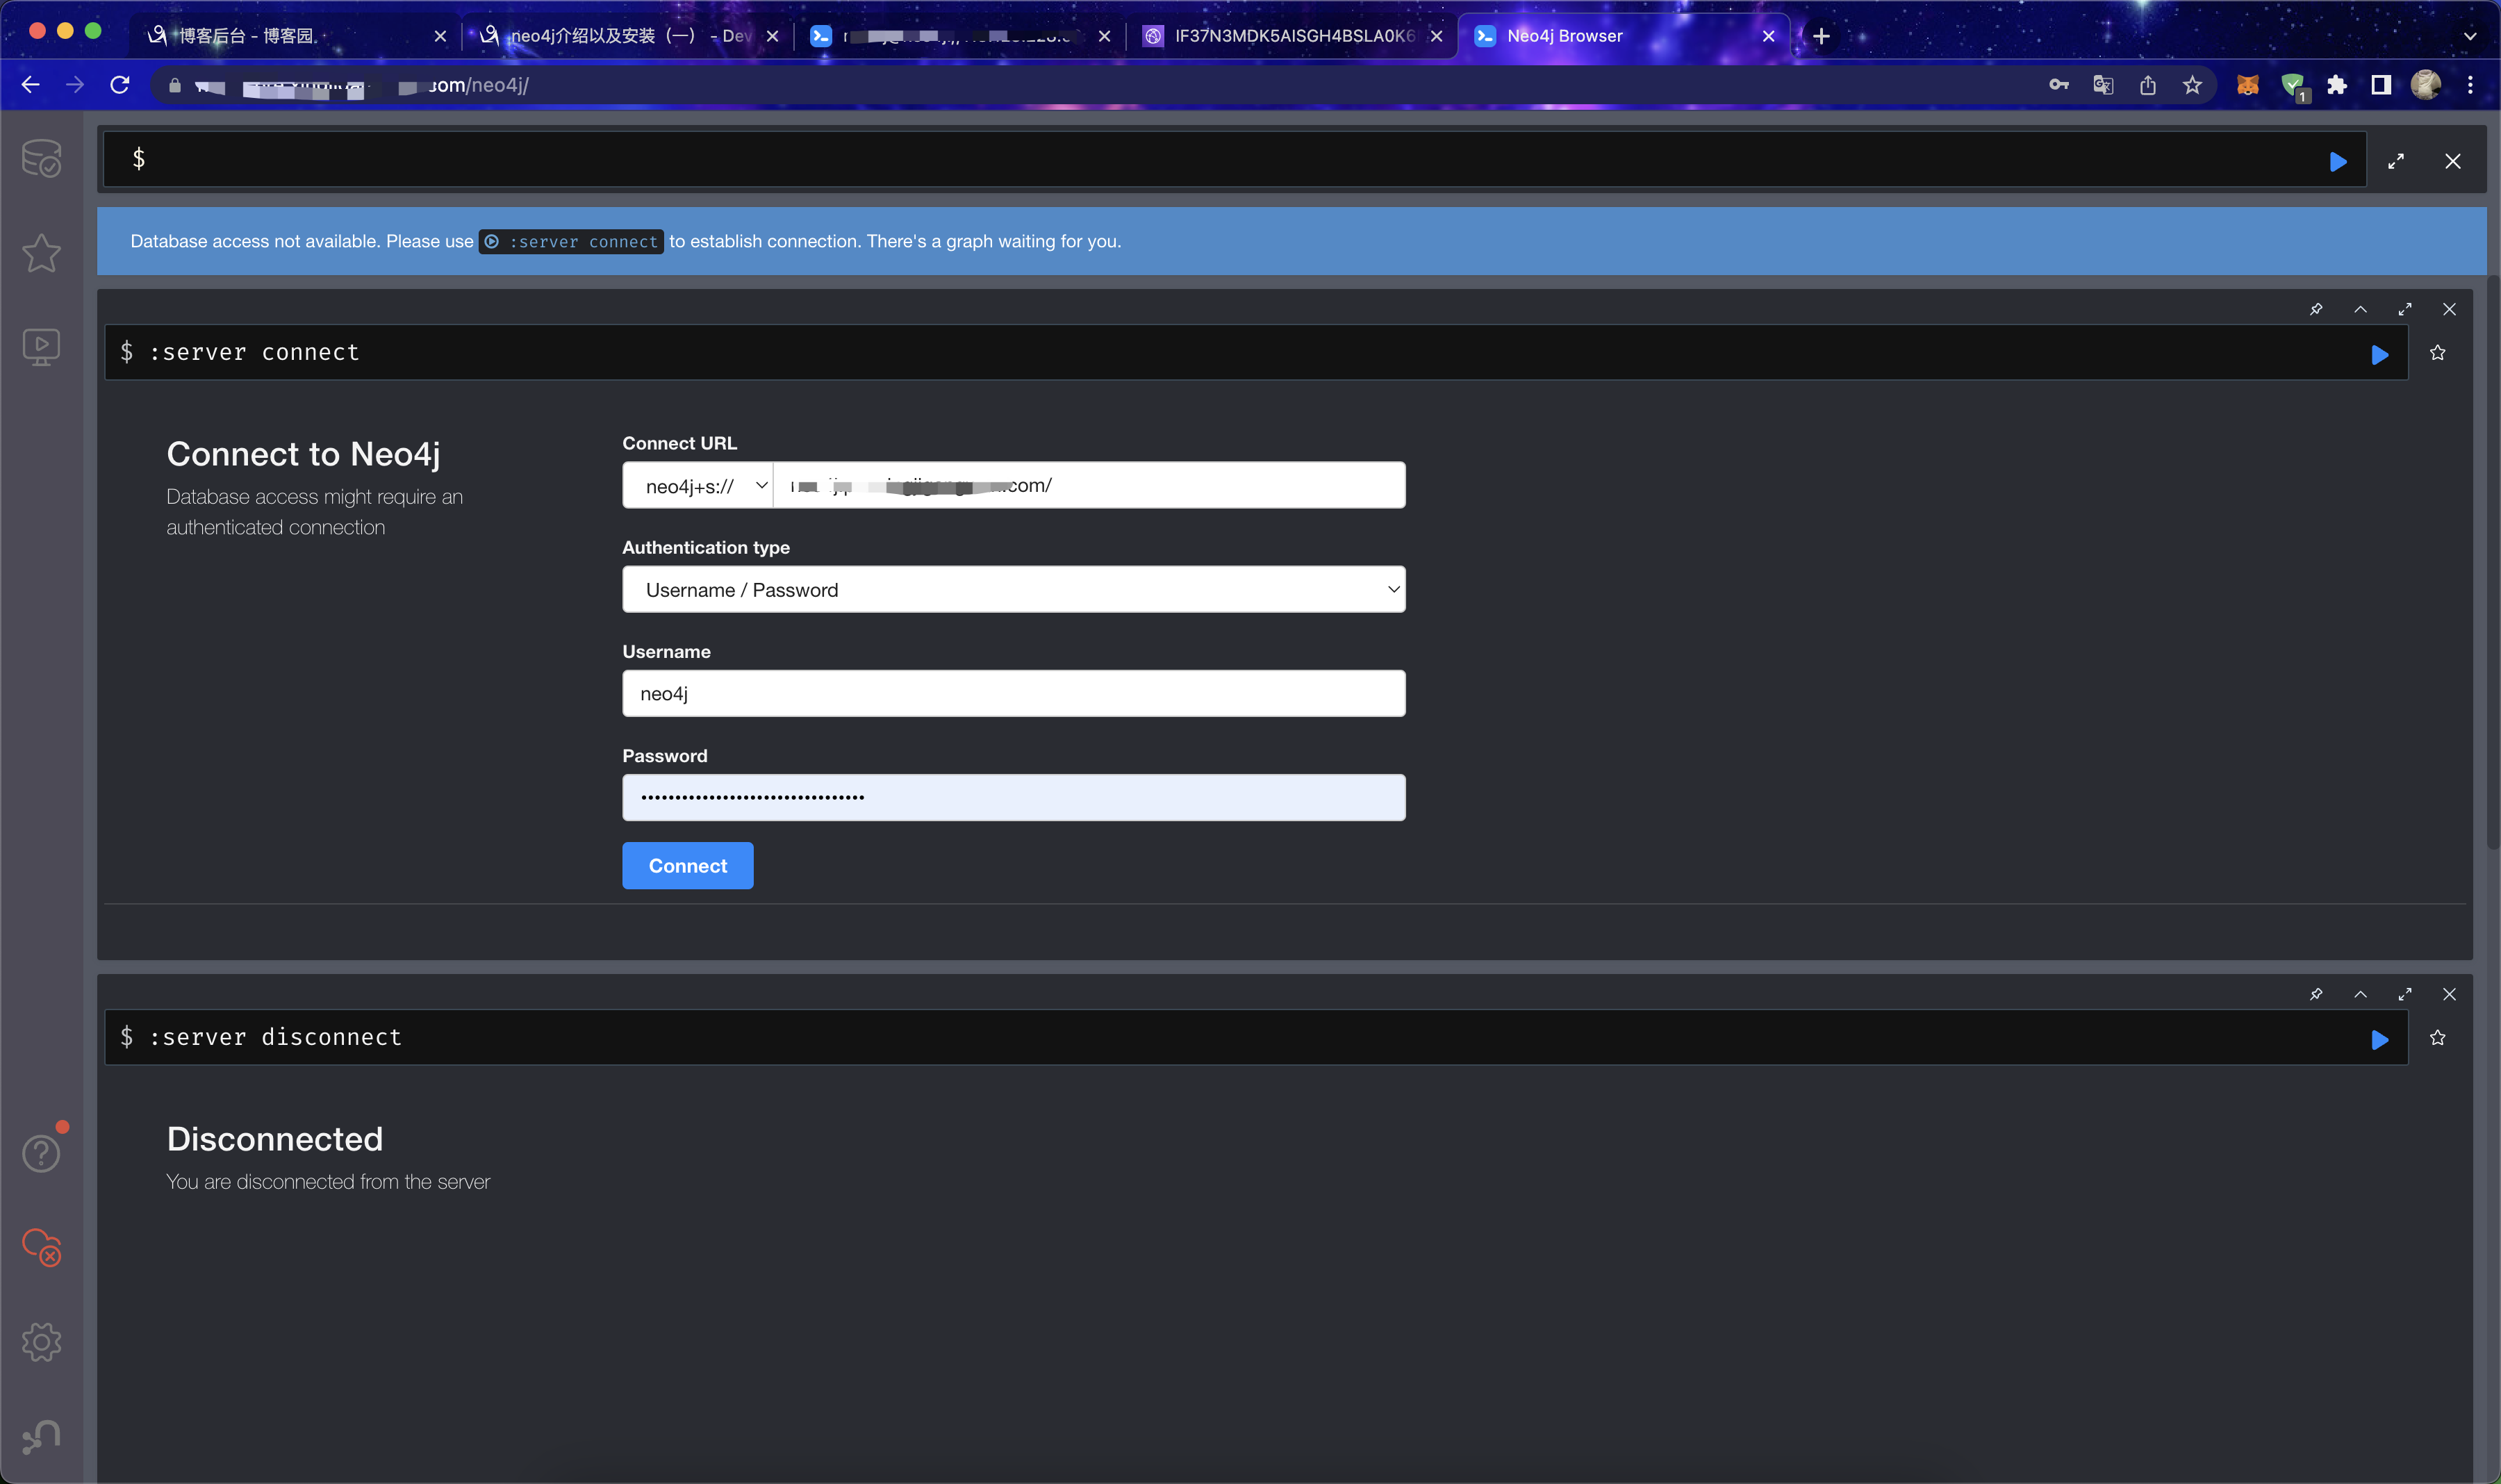
neo4j+s(有路由,连接完整的证书保护)
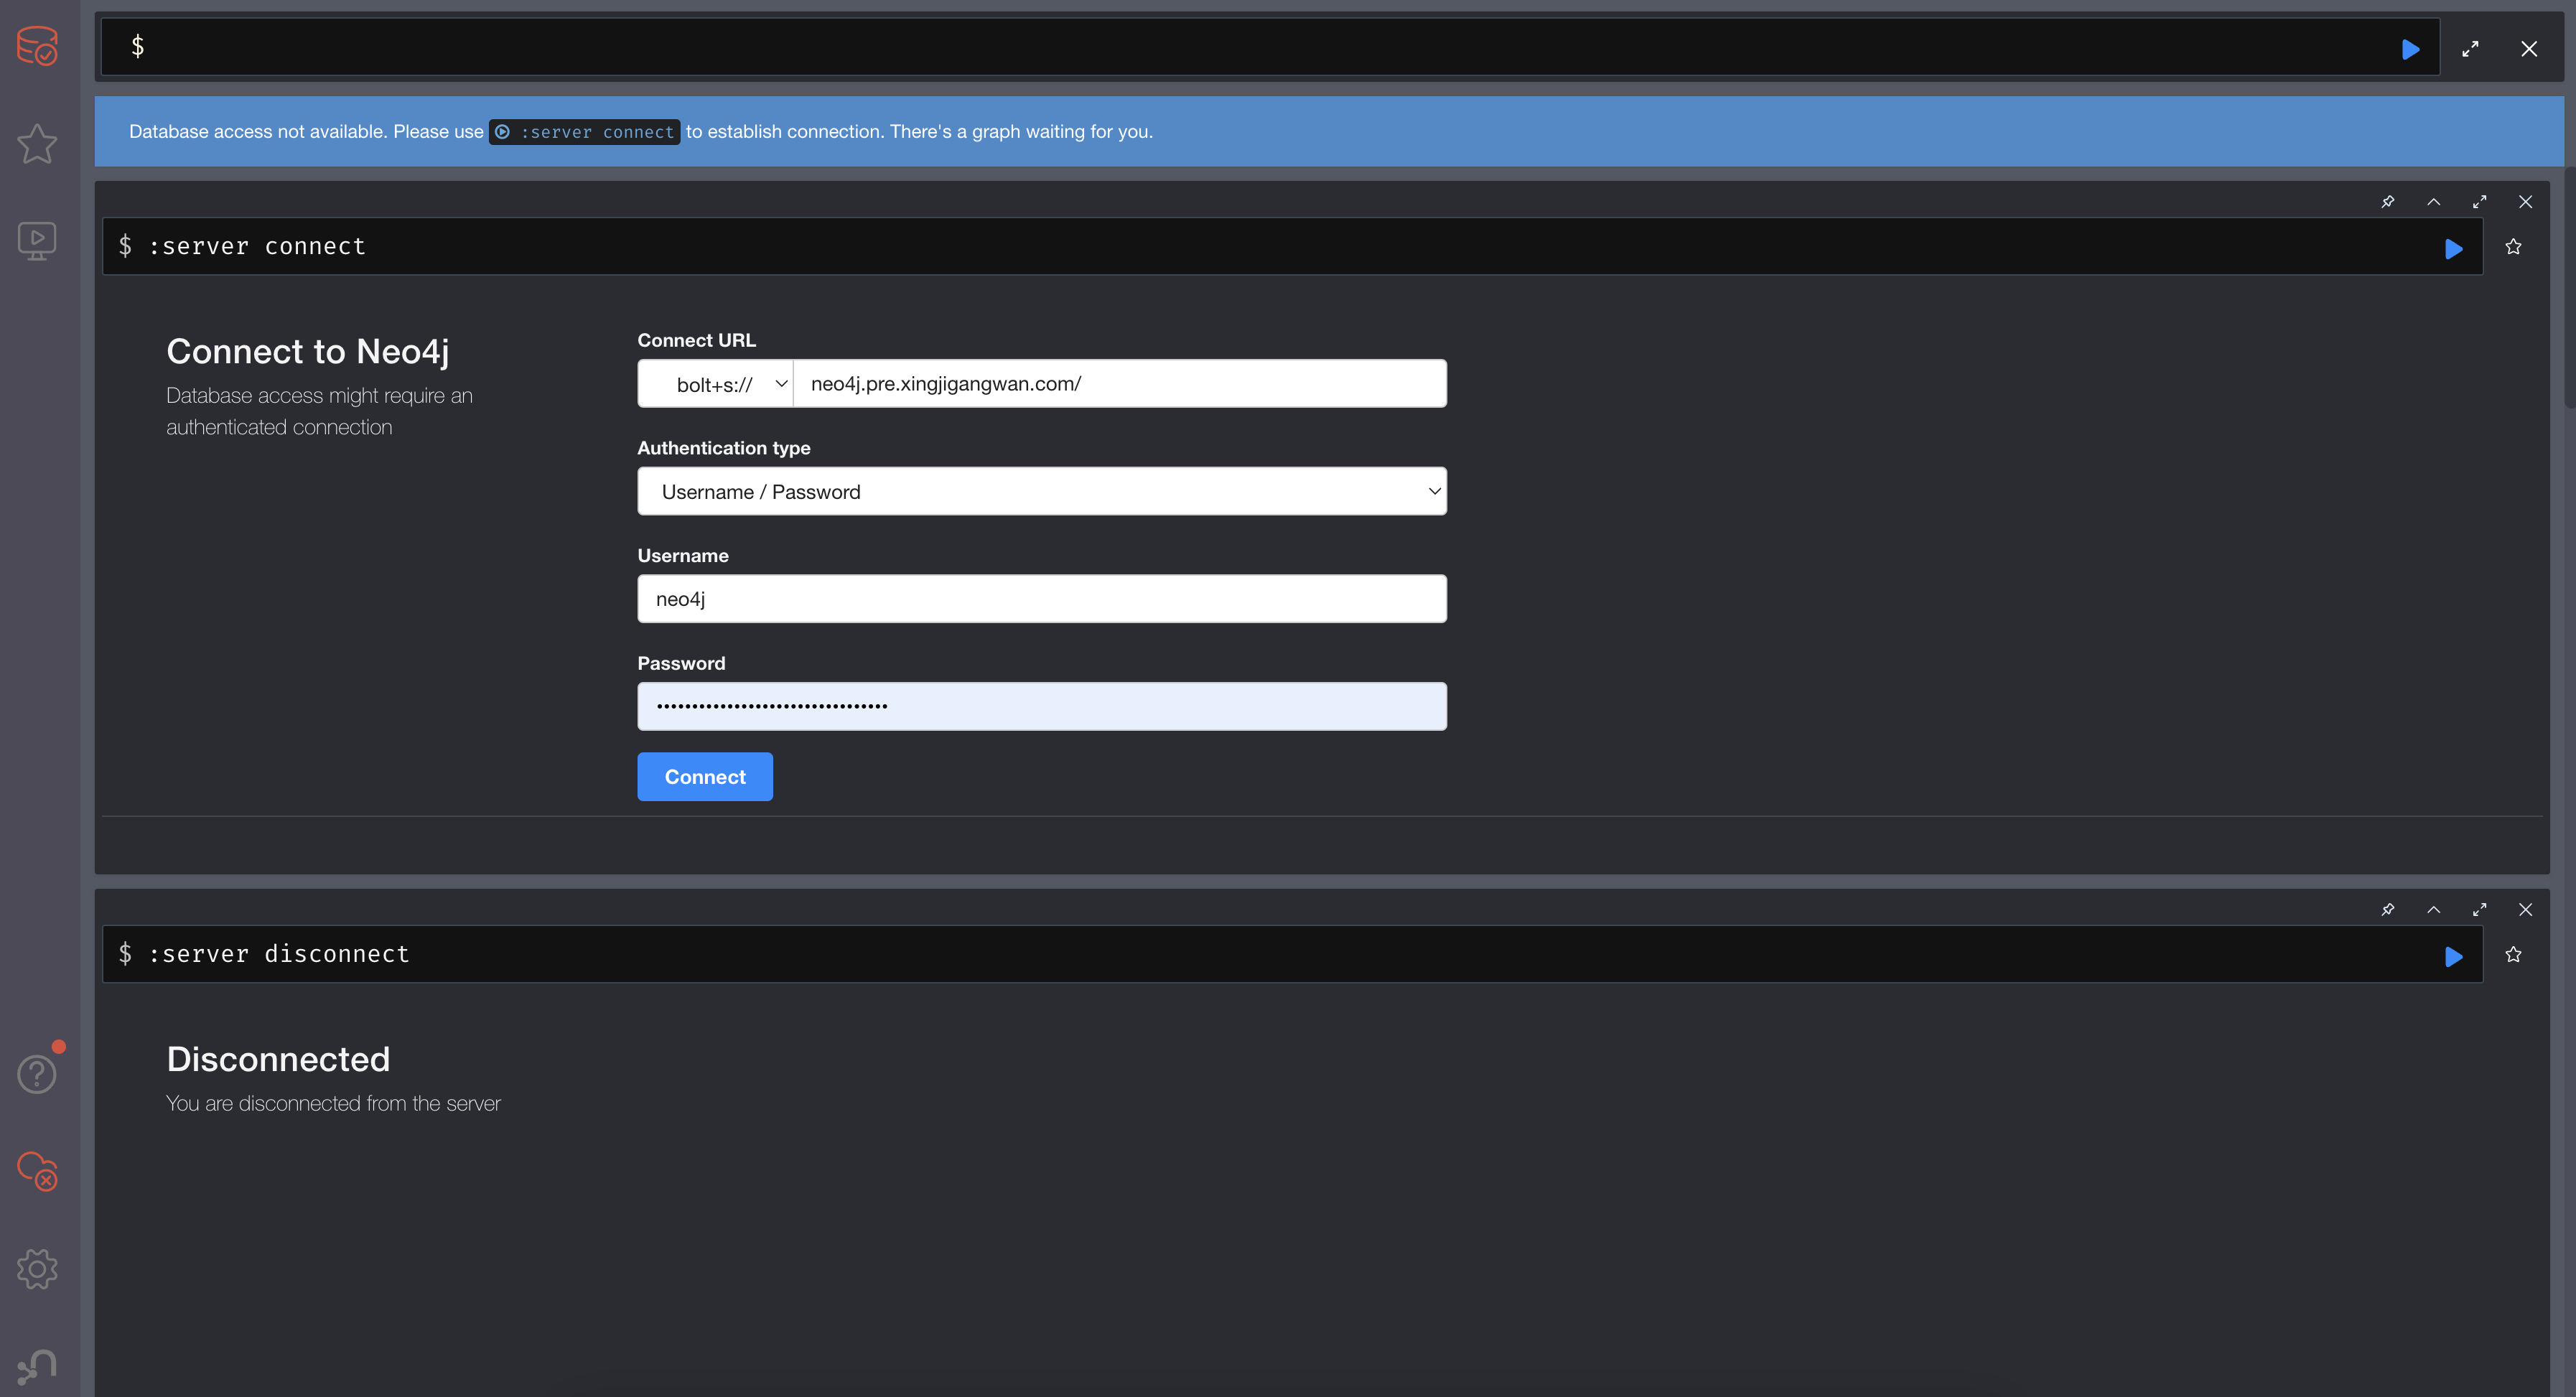
bolt+s(无路由,直连完整的证书保护)

经过测试,以上两种登陆都可以成功
通过 Bolt 使用SSL连接
每个neo4jURIbolt方案都允许包含额外加密和信任信息的变体。这些+s变体通过完整的证书检查启用加密。这些+ssc变体启用加密而无需证书检查。后一种变体专门设计用于自签名证书。
| URI Scheme | Routing | Description |
|---|---|---|
|
|
Yes |
Unsecured |
|
|
Yes |
Secured with full certificate |
|
|
Yes |
Secured with self-signed certificate |
|
|
No |
Unsecured |
|
|
No |
Secured with full certificate |
|
|
No |
Secured with self-signed certificate |
通过 Bolt 启用 SSL 后,您可以使用neo4j+s或连接到 Neo4j DBMS bolt+s
通过 cypher-shell使用SSL连接
- 另外,我们还可以使用Cypher Shell来连接,使用方法如下:
cypher-shell -a neo4j+s://<Server DNS or IP>:<Bolt port>

or

cypher-shell -a bolt+s://<Server DNS or IP>:<Bolt port>

参考链接:https://neo4j.com/docs/operations-manual/current/security/ssl-framework/本文来自博客园,作者:Devinhao,转载请注明原文链接:https://www.cnblogs.com/Devinhao/articles/17489751.html

 浙公网安备 33010602011771号